|
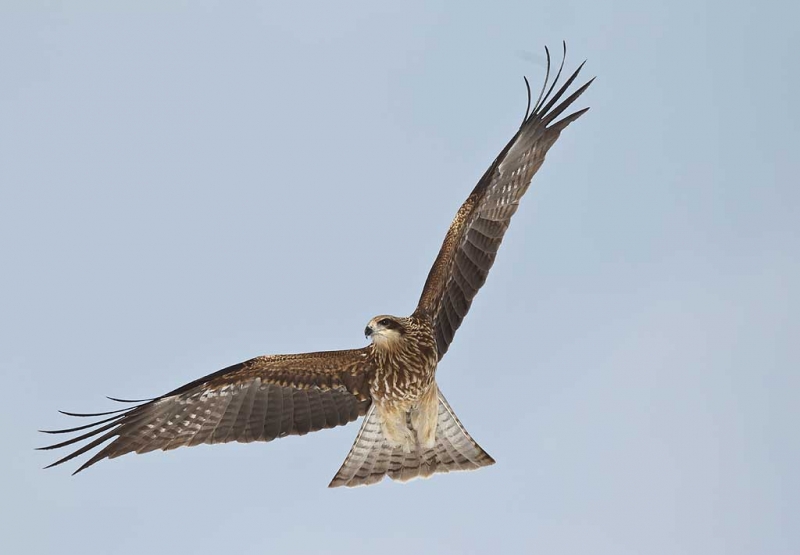
Black-eared Kite, Akan Crane Center, Hokkaido, Japan. This is the original capture made with the hand held Canon 300mm f/2.8 L IS II lens, 1.4X III TC, and the Canon EOS-1D Mark IV. ISO 400. Evaluative metering +2 stops off the sky: 1/2500 sec. at f/5 in Manual mode. Central Sensor/AI Servo Rear Focus active at the moment of exposure. Click here if you missed the Rear Focus Tutorial. |
25 Second Fix
Above is a beautifully sharp frame with the bird much too far to the left side of the frame. What to do? Control A. Control J. V for the Move Tool. Move the bird to our right, correctly back in the frame. Add a regular Layer Mask. Control B for the Brush Tool, BDX to erase. Erase the edge on the left side of the frame until the two layers blend seamlessly. 25 seconds.
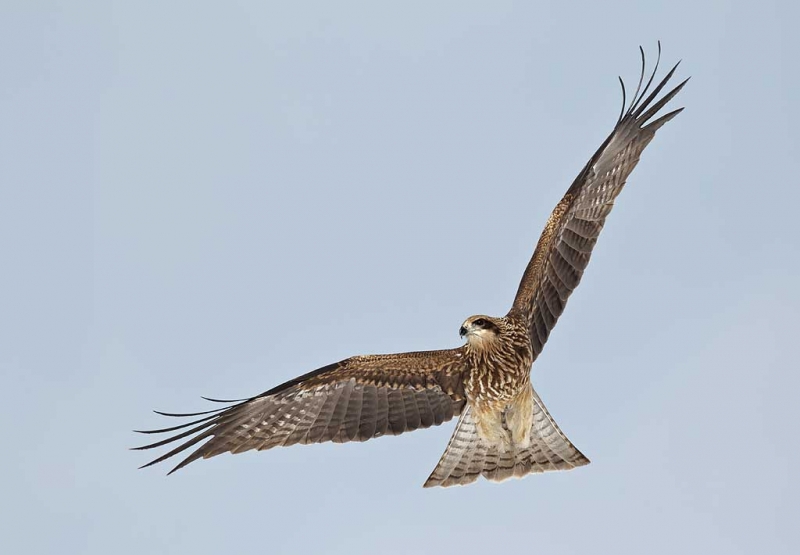
Next I used the Quick Selection Tool (W) to select the bird and ran a layer of NIK at 50%: Tonal Contrast and Detail Extractor. I finished up by sharpening the face only with a Contrast Mask: Unsharp Mask at 15/65/0.
Everything above (except for the NIK stuff) is explained in detail in Digital Basics along with my complete digital workflow and dozens of other great Photoshop Tips. Learn advanced Layer Masking techniques in APTATS II which includes instructions for creating actions that will allow you to slash your image repair times; you will learn how to move mis-placed subjects and to cover major distracting elements in mere seconds.
|
This is the optimized image file. Note also that I eliminated the unexplained smudge just inside the 2nd primary of the raised wing. I used Protect and Defend cloning, again as detailed in Digital Basics. And note how much better the bird looks after the NIK treatment. |
NIK
As regular readers know NIK’s Color Efex Pro 4 is now an integral part of my workflow. You can save 15% on all NIK products by clicking here and entering BAA in the Promo Code box at check-out. Then hit Apply to see your savings. You can download a trial copy that will work for 15 days and allow you to create full sized images.
Click here for a cool NIK tutorial.
B&H Event Space Event of Note
Denise Ippolito and I will be doing a program on Creating Pleasing Blurs at the B&H super-store in Manhattan on Tuesday, August 21, 2012 from 1:00 PM – 3:00 PM. Best news: it’s free. Worst news: only 80 folks can attend and you must register in advance. Learn more or register by clicking here.
New York City Weekend Nature Photography Seminar December 8-9, 2012; denise and artie
Details for this great weekend seminar are available here. Do consider joining Denise Ippolito and me for a great learning experience. Do click on the link to see many of Denise’s incredible tree and flower images. Camera club discounts available; see the details at the link.
Camera Club Discounts
You can save $20 per person on the seminar registration if your photo club promotes the event. If you are interested, please send an e-mail to Jim and ask him to forward the Sponsoring Club note.
5D Mark III Guide Pre-publication Version Still Discounted
Click here for details. When the guide is complete it will sell for $50. Folks who purchase now will receive the final version and any updates for no additional charge so ordering now is a win-win proposition. If you click on the link above you will see that the list of items not yet covered is continues to shrink….
I spent the better part of Tuesday and today working on the 5D III UG; when I am done, the price goes to $50. Buy now to save! The more I study this camera the more I learn how complex it is. Rudy Winston at Canon has been a huge help and so as Denise who helped me with the section on Multiple Exposures today. I still have some work to do.
Nickerson Beach/JBWR Photo-Tour August 15-17, 2012: Room only for one more!
Nickerson Beach/JBWR Photo-Tour August 15-17, 2012: $999. Co-leader: Denise Ippolito. Introductory slide program: Tuesday August 14 at 7pm.
Please call us at 863-692-0906 to register. For more info and a collection of images click here.
Shopper’s Guide
Below is a list of the gear used to create the image above. Thanks a stack to all who have used the Shopper’s Guide links to purchase their gear as a thank you for all the free information that we bring you on the Blog and in the Bulletins. Before you purchase anything be sure to check out the advice in our Shopper’s Guide.
Canon 300mm f/2.8 L IS II lens. The 300 f/2.8 L IS II with the 1.4X III TC is a killer flight combination.
1.4X III TC. The new Series III 1.4X was designed to work best with the new Series II super-telephoto lenses.
Canon EOS-1D Mark IV professional digital camera body. My two Mark IVs are my workhorse digital camera bodies.
And from the BAA On-line Store:
LensCoats. I have a LensCoat on each of my big lenses to protect them from nicks and thus increase their re-sales value. All my big lens LensCoat stuff is in Hardwood Snow pattern.
The Lens Align Mark II. I use the Lens Align Mark II pretty much religiously to micro-adjust all of my gear an average of once a month and always before a major trip. Enjoy our free comprehensive tutorial here.
Canon EOS-1D Mark IV User’s Guide. Learn to use your Mark IV the way that I use mine. Also available for the 7D and the Mark III here.
BreezeBrowser. I do not see how any digital photographer can exist without this program.


Also, in the new CS6 there is the Content-Aware-Move tool which can be used in extend mode to extend the canvas taking into account any pattern that may exist like clouds. It can be found under the spot healing brush menu and the mode setting is in the tool bar.
If you add a selection of the left side sky, copy it to a new layer and then stretch it using the transform menu, you will never have a line.
Not to criticize the master – I have learned more from you than from anyone else – period. One thing I find very advantagous about using a laptop is that, when you are done, you can tilt the screen WAY forward and look at the photo at a steep angle. That makes the above mentioned line and a smudge or two on the left and top of the photo. Still, I’d give your right arm for this photo!!! Thanks so much for all the help and inspiration!
Yes, I see it too……. but good advice and technique nevertheless.
I still see a line also, and I am not wearing glasses. I need to, but I am not! 🙂
Artie –
It must be my new prescription computer glasses – I can still see a line down the left side of the optimized image. Just needs a bit more blending, but nice image.