105
This post marks 105 straight days with a new educational blog post. With so many folks getting in the habit of using our B&H and Amazon links why quit now? To show your appreciation for my efforts here, we do ask that you use our B&H and Amazon affiliate links for all of your B&H and Amazon purchases. Please check the availability of all photographic accessories in the BIRDS AS ART Online Store. We sell only what I use and depend on. We will not sell you junk. We know what you need to make creating great images easy and fun. And we are always glad to answer your gear questions via e-mail.
You can find the following items in the store: Gitzo tripods, Mongoose M3.6 and Wimberley heads, plates, low feet, and accessories, flash brackets, , Delkin e-film Pro Compact Flash Cards, LensCoat products, and our unique line-up of educational materials including ABP I & II, Digital Basics, Site and Set-up e-Guides, Canon and Nikon Camera Users and AF e-Guides, and MP-4 Photoshop video tutorials among others.
Note: though we almost never have Mongoose M3.6 heads in stock we do have a few on the shelf right now. We are still waiting for more CR-X5 plates. As always, the best way to ensure getting one of these great heads for your intermediate or super-telephoto lens (if they are out of stock) or one of the great CR-X5 plates is to call Jim and place your order. You are then ensured of getting one from our next shipment. We will not of course bill your credit card until the item ships or drop-ships.
We would of course appreciate you using our B&H and Amazon affiliate links for all of your B&H and Amazon major gear, video, electronic, household, and personal purchases. For the photographic stuff mentioned in the paragraph above we would of course greatly appreciate your business. Here is a huge thank you to the many who have been using our links on a regular basis and visiting the BAA Online store as well.
This blog post took about 2 1/2 hours to prepare. Enjoy.
Huge Thanks!
Huge thanks to the many readers who continue to use the BAA B&H and Amazon Affiliate links for purchases large and small. March has gotten off to a great start with folks buying several Version II Super-teles, several 1D X bodies, and a 200-400. Way to go and greatly appreciated. It is wonderful to see so many folks being appreciative of the streak. Remember, every purchase helps no matter how small and getting in the habit of using the BAA links will not cost you one penny more.
|
This Great Egret head portrait was created at Gatorland, Kissimmee, FL with the Gitzo 3532 LS carbon fiber tripod, the Mongoose M3.6 head, the Canon EF 800mm f/5.6L IS USM lens, and the EOS-1D Mark IV now replaced by the Canon EOS-1D X. ISO 400. Evaluative metering as framed: 1/320 sec. at f/9 in soft light in Manual mode. Central Sensor/Rear Focus AI Servo-Expand as framed active at the moment of exposure. Click here to see the latest version of the Rear Focus Tutorial. Click on the image to see a larger version. |
Gatorland Short Notice Saturday Full-Day In-the-Field Workshop
Last Chance/Call Today
Saturday March 15, 2014. 7:15am till 10:15am & 3:30pm till dusk. Lunch, image review, and Photoshop session included. Limit 6/Openings: 4. A very small group is likely: $399.
The cost of your Gatorland Photographer’s Pass is not included.
For the past few years the Great Egrets have been nesting earlier and earlier. Head portraits of this species in full breeding plumage are very likely. Nest building and flight likely. In the field you will learn to spot good situations, to choose the best perspective, to see and understand the light, to get the right exposure every time after making a single test exposure, and to design pleasing images by mastering your camera’s AF system.
At lunch we will review my images, take a look at five of your best images from the morning session (for those who opt to bring their laptops), and process a few of my images in Photoshop after converting them in DPP. That followed by Instructor Nap Time.
Payment in full via credit card is due upon registering. Please call Jim or Jennifer at 863-692-0906 to register. Ask for me if you have any questions.
|
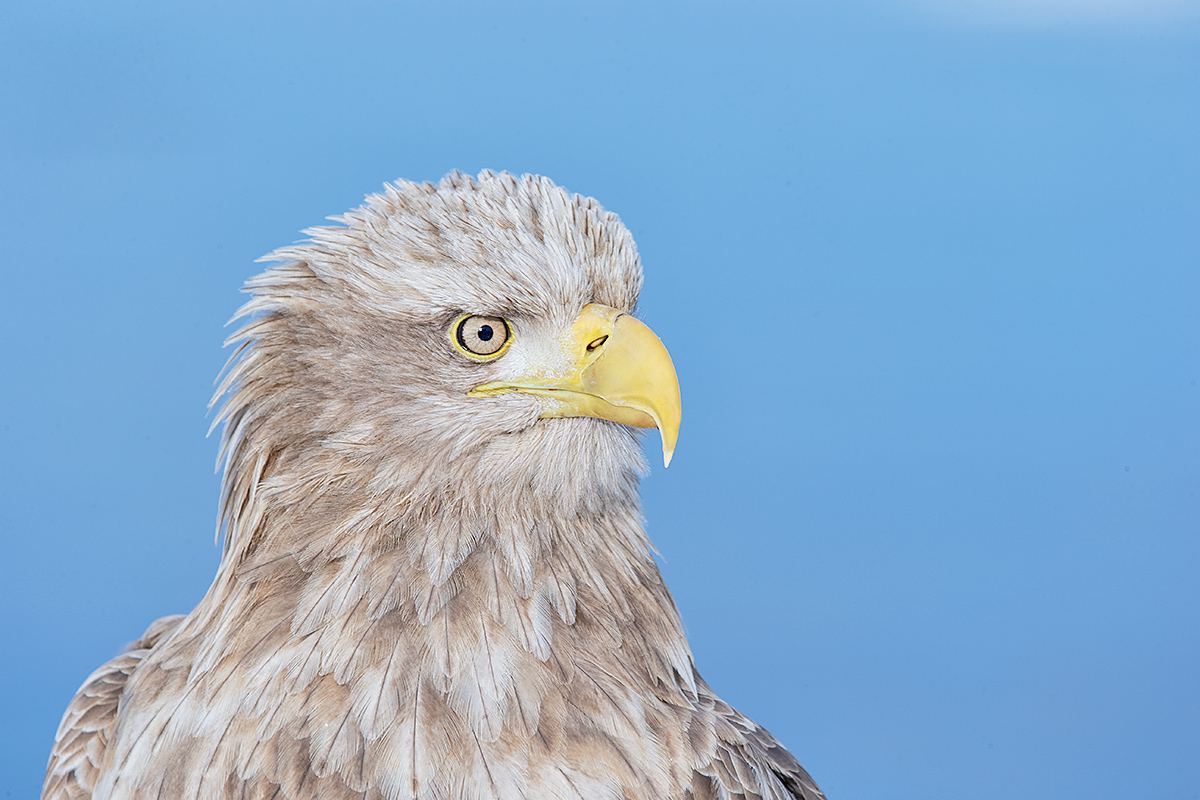
This White-tailed Sea Eagle head portrait was created on the morning of February 21, 2014 at 8:03am on the Japan in Winter IPT with the Canon EF 200-400mm f/4L IS USM Lens with Internal 1.4x Extender, an external Canon Extender EF 1.4X III (hand held at the maximum 784mm) and the Canon EOS-1D X. ISO 400. Evaluative metering +1 stop as framed: 1/400 sec. at f/10 in Av mode. AWB. Central Sensor (by necessity)/AI Servo-Surround/Rear Focus AF on the middle of the bird’s bill was active at the moment of exposure. Click here to see the latest version of the Rear Focus Tutorial. Click on the image to see a larger version.
|
White-tailed: the Under-Appreciated Sea Eagle Species…
We made 3 eagle boat trips on the Japan in Winter IPT. We did so well on those that we skipped the fourth one (sorry artie, no refunds) so that we could get back to our lodge with time to pack for our flights back to Tokyo the following day. That necessary because of the several day blizzard-in-Rausu delay. In any case, I must admit that with dozens of spectacular Steller’s Sea Eagles flying around the boat and perched nearby on the sea ice I barely paid any attention at all to the numerous White-tailed Sea Eagles. Time after time they would fly by the boat at close range and I would just stand there with my lens by my side in the rest position waiting for yet another Steller’s….
I was on hand holding for the image above having added an external 1.4X TC so that I could do tight head and shoulders portraits of the Steller’s on ice when I noticed this bird off to my left with the boat drifting slowly towards it. What can I say? I could not resist the powder-puff blue background…. This image is un-cropped.
|
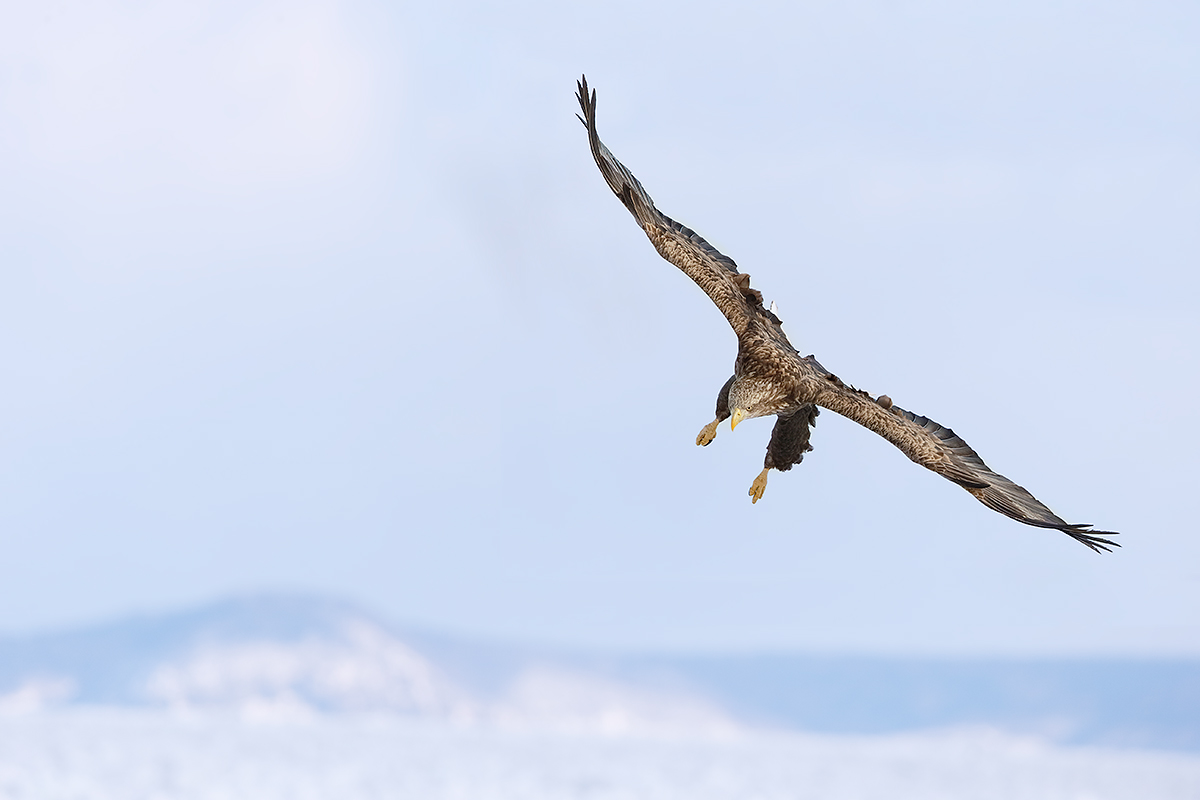
This image of a White-tailed Sea Eagle on approach was created at 2:23pm on the afternoon of February 21, 2014 on the Japan in Winter IPT with the Canon EF 200-400mm f/4L IS USM Lens with Internal 1.4x Extender (hand held with the internal extender in place at 442mm) and the Canon EOS-1D X. ISO 400. Evaluative metering +1 2/3 stops off the light toned sky in soft sunlight: 1/1250 sec. at f/6.3 in Manual mode. AWB. Central Sensor/AI Servo-Surround/Rear Focus AF on the spot where the bird’s far wing meets the body as originally framed was active at the moment of exposure. Click here to see the latest version of the Rear Focus Tutorial. Click on the image to see a larger version.
|
Add Mountains Whenever Possible
When photographing large birds in flight, be it Sandhill Cranes or flocks of geese at Bosque or Steller’s and White-tailed Sea Eagles in Rausu, Japan, it pays to keep and eye on the mountains in the distance and try to time the shutter release so as to include some peaks in the background. In general, you want the mountain ridges to occupy the bottom third of the frame with the bird above them. Or, you can create some nice images with the ridge taking up 2/3 or more of the frame and having the subject in the lower half of the frame. Worst case is having the top of the ridge bisect the bird.
|
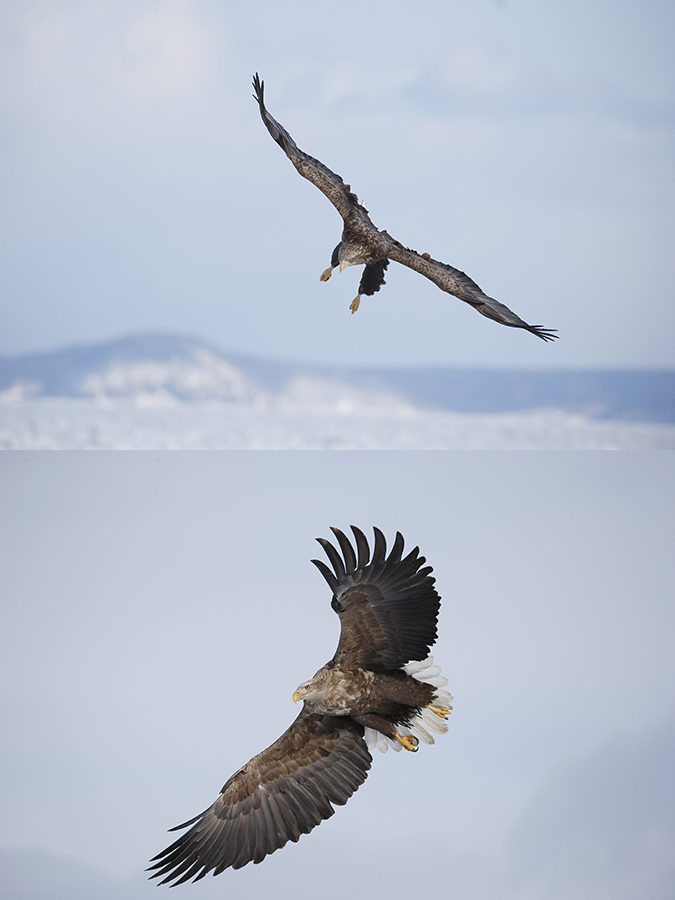
This White-tailed Sea Eagle flight image was was created at 2:40pm on the afternoon of February 21, 2014 on the Japan in Winter IPT with the Canon EF 200-400mm f/4L IS USM Lens with Internal 1.4x Extender (hand held with the internal extender in place at 442mm) and the Canon EOS-1D X. ISO 400. Evaluative metering +1 1/3 stops off the light toned sky in hazy sunlight: 1/1600 sec. at f/6.3 in Manual mode. AWB. Central Sensor/AI Servo-Surround/Rear Focus AF on the spot where the bird’s near wing meets the body as originally framed was active at the moment of exposure. Click here to see the latest version of the Rear Focus Tutorial. Click on the image to see a larger version.
|
Flight Photography Composition
Take a peek at the two original frames below. Notice that in each image the bird was too centered. Why does that happen so often? Because the central AF sensor is the most sensitive and provides the most accurate tracking. At times–depending on the size and position of the bird in the frame it is possible to create a perfectly composed image using the central senor. But as we see below, using the central sensor often results in the subject being too centered. Note: if your panning speed does not keep up with the speed of the bird in flight the bird will wind up too far forward in the frame. This presents more problems than having the bird dead centered in the frame.
In the optimized version of Image #2 note how the bird has been moved back and up in the frame with the subject on the upper right side of the frame balancing nicely with the largest mountain peak on the lower left side of the frame. In the optimized version of Image #3 note that the subject has been moved well back in the frame and moved up just a bit. This leaves the bird pleasingly on the right side of the frame with lots of room on the left for the bird to fly into.
Your Favorite?
Consider taking a moment and letting us know which of today’s 3 images is best. And as always do let us know why you made your choice.
|
Bottom: the original for Image #3 |
The Image Optimizations
All of the images here were converted in DPP. I applied my custom 50/50 (Tonal Contrast/Detail Extractor) layer to the bird only for each image reducing that about 50%. I selectively sharpened the face only in Image #1 and the whole bird in Images #2 & #3 with a Contrast Mask–Unsharp Mask 1t 15/65/0. The birds in #2 & #3 were moved in the frame using techniques detailed in APTATS I (advanced Quick Masking) and APTATS II (advanced Layer Masking).
The DPP RAW Conversion Guide
After seeing the accurate colors that I get from my DPP RAW conversions, Japan in Winter co-leader Paul McKenzie is switching to DPP conversions and Denise Ippolito is considering doing the same. Now that is amazing…. To learn why I use Canon’s Digital Photo Professional (DPP) to convert every image that I work on, click here.
Digital Basics
Are you tired of making your images look worse in Photoshop? Do you have no clue as to how I optimized the images above? Everything above plus tons more is detailed in my Digital Basics, an instructional PDF that is sent via e-mail. It includes my complete digital workflow, dozens of great Photoshop tips, the use of Contrast Masks, several different ways of expanding canvas, all of my time-saving Keyboard Shortcuts, Quick Masking, Layer Masking, and NIK Color Efex Pro basics, my killer image clean-up techniques, Digital Eye Doctor, creating time-saving actions, and lots more.
APTATS I & II
Learn the details of advanced Quick Masking techniques in APTATS I. Mention this blog post and apply a $5 discount with phone orders only. Learn advanced Layer Masking Techniques in APTATS II. Mention this blog post and apply a $5 discount with phone orders only. Buy the pair, APTATS I and APTATS II and we will be glad to apply at $15 discount with phone orders only.
IPT Info
Many of our great trips are filling up. With 5 Canadians and another couple recently signing up for our 4-DAY Bosque IPT, that workshop is filling up quickly. See also the info on the South Florida and Nickerson Beach IPTs. Two great leaders on most trips ensure that you will receive individual attention, have all of your questions answered, and learn a ton including how to think like a pro, see the situation, read the light and the wind direction, and get the right exposure every time. In addition you will have fun, and make lots of great images. Click here for IPT details and general information.
Support the BAA Blog. Support the BAA Bulletins: Shop B&H here!
We want and need to keep providing you with the latest free information, photography and Photoshop lessons, and all manner of related information. Show your appreciation by making your purchases immediately after clicking on any of our B&H or Amazon Affiliate links in this blog post. Remember, B&H ain’t just photography!


Amazon
Everyone buys something from Amazon, be it a big lens or deodorant. Support the blog by starting your search by clicking on the logo-link below. No purchase is too small to be appreciated; they all add up. Why make it a habit? Because I make it a habit of bringing you new images and information on an almost daily basis.
Typos
In all blog posts and Bulletins, feel free to e-mail or to leave a comment regarding any typos, wrong words, misspellings, omissions, or grammatical errors. Just be right. 🙂


Agree on number 3. Perfection.
Yup, have switched to DPP for raw conversions pretty much 100% of the time. The reason? With Adobe Camera Raw there were colour shifts way too often. With DPP, the colours are much truer to what I see in the raw file. Noise reduction seems better to me also. I rarely spend more than 10-15 seconds on each conversion. There are a few small minor negatives but these are all trumped by the accurate colour conversions.
Agree 100%. I need to update the Guide as I have a very few new tricks but you saw them all in Japan. artie
Image 3 — WOW!!!
The first image, the sharpness, detail, tonality and background plus of course the amazing eye contact.