What’s Up?
Despite pretty-much perfect conditions, Tuesday morning was fair at best. I kept a very few frames of Orangey Colt foraging and Marsh Rabbit. It seems that Orangey Colt’s nest-mate, Gray Colt, my have perished as I have not seen that youngster in several days. It was strange also that Orangey Colt has been foraging on its own for the past few days … Tuesday evening was fantastic despite wind-against-sun conditions. I started with many bright-sky Turkey Vulture silhouettes in a unique situation at least 90 minutes before sunset. And I finished with another gorgeous sunset. Photos soon.
The forecast for this morning — Wednesday 29 APR 2020, is excellent: sunny to partly cloudy with a gentle east/southeast breeze. My plan is to put out some salmon skins as these conditions are perfect for flight photography.
|
|
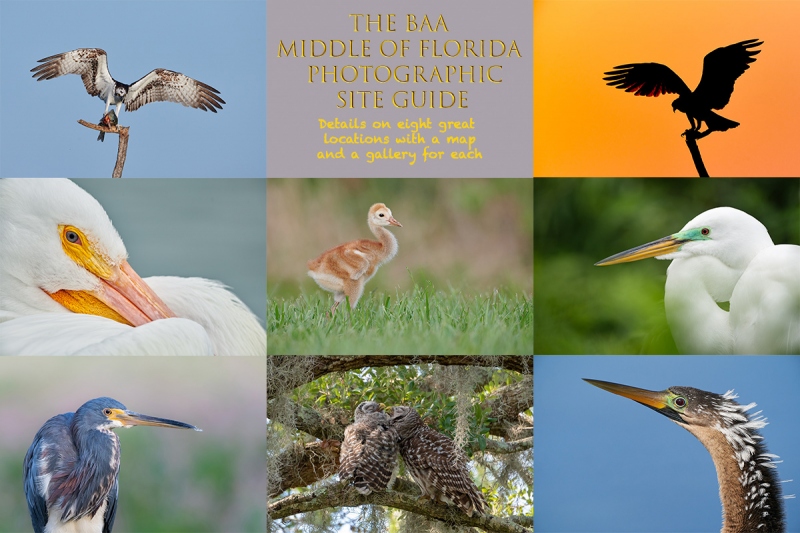
The BAA Middle of Florida Photographic Site GuideYou can purchase your copy here in the BAA Online Store. |
The BAA Middle of Florida Photographic Site Guide
126 pages, 87 photographs by Joe Przybyla and Arthur Morris.
The PDF for this e-Guide is an electronic download sent via e-mail.
Purchase your copy here in the BAA Online Store.
I had thought about doing a guide to some of the great but little-known photo hotspots around central Florida for about a decade, but those plans never came to fruition. I met Joe online in the Avian Forum at BirdPhotographer’s.Net about two years ago. Joe’s photography has improved tremendously over the past few years; he credits the BAA blog, my books and PDFs, and his participation on BPN. The one thing that I learned right from the get-go about Joe is that he is a hard and tenacious worker, always striving to improve his skills and to grow his knowledge base. As he knew of more than a few good spots in central Florida, I broached the idea of us doing a photographic site guide that covered many of the little-known photographic hotspots from Brandon to Lakeland to Joe Overstreet Road to Indian Lake Estates (my Florida home for the past 20 years or so). After more than many, many dozens of hours of effort, The BIRDS AS ART Middle of Florida Photographic Site Guide is now a reality. Thanks to Joe’s wife Dottie for her review of our writing. We all learned once again that writing is a process, a back and forth process. All thanks to the white pelicans of Lakeland. Here are the locations that are detailed in this e-Guide:
- Indian Lake Estates: Sandhills Cranes with chicks and colts, lots of vultures, and Ospreys up the kazoo!
- Gatorland, Kissimmee: Learn to make great images of wading birds in a cluttered rookery.
- The Brandon Rookery: Great for nesting Wood Storks, Great Egrets, and more.
- Circle Bar B Reserve, Lakeland: Here you will find a great variety of avian subjects in a great variety of habitats.
- Lake Morton, Lakeland: There are lots of silly tame birds here including and especially American White Pelican during the colder months.
- Lake Mirror, Lakeland: Tame Anhingas, Limpkins, and a zillion White Ibises at times.
- West Lake Parker, Lakeland: Here you will have a chance for two difficult birds, Snail Kite, and Purple Gallinule.
- Joe Overstreet Road, Kenansville: Crested Caracara, meadowlarks, Loggerhead Shrike, and much more on the fenceposts and barbed wire.
Each location includes a map, a detailed description of the best spots, best season, light and time of day instructions, the expected species, and an educational and inspirational gallery that is designed to open your eyes as to the possibilities.
You can purchase a copy here in the BAA Online Store.
|
|
|
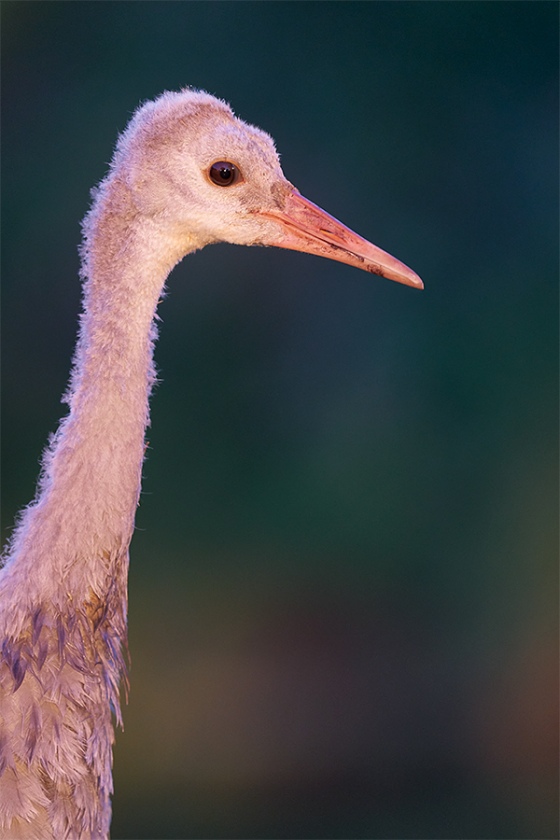
This image was created on 27 APR 2020 at Indian Lake Estates, FL. I used the handheld Sony FE 200-600mm f/5.6-6.3 G OSS lens (at 463mm) and the blazingly fast AF King, the Sony Alpha a9 II Mirrorless Digital camera body. ISO 2500. Exposure determined by Zebras with ISO on the rear wheel: 1/500 sec. at f/6.3 in Manual mode. AWB at 7:45pm on a clear early evening. Upper Center Zone AF-C was active at the moment of exposure and performed superbly. Image #1: Sandhill Crane colt head and neck portrait |
The Red-Light Colt Situation
It was very late in the day — about ten minutes before the sun would touch the western horizon. Orangey Colt was on the move walking in and out of shadows. A parked vehicle and a (human) family fishing on the bank were in the background. As the colt approached the east/west canal he turned right and the situation (and the background) improved dramatically but the light would be gone in minutes …
|
|
|
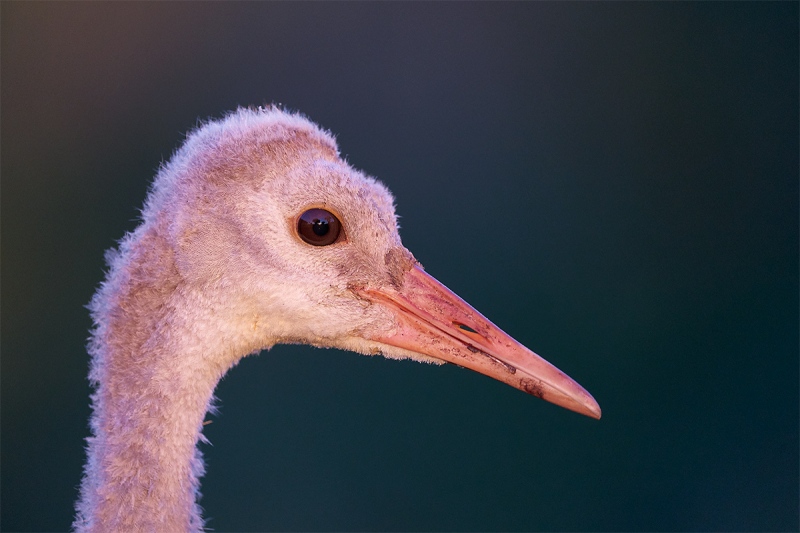
This image was created on 27 APR 2020 at Indian Lake Estates, FL. I used the handheld Sony FE 200-600mm f/5.6-6.3 G OSS lens (at 600mm) and the blazingly fast AF King, the Sony Alpha a9 II Mirrorless Digital camera body. ISO 2500. Exposure determined by Zebras with ISO on the rear wheel: 1/500 sec. at f/6.3 in Manual mode. AWB at 7:46pm on a clear early evening. Tracking Flexible Spot (M) AF-C was active at the moment of exposure and performed superbly. Image #2: Sandhill Crane colt head portrait |
Could a Slow (f/6.3) Lens Be Better Than a Fast (f/4) Lens?
Consider the situation described above. Would it be best to choose the fast 600mm f/4 GM or the slower 200-600mm f/6.3 GM? For the very few of us who can handhold a 600mm f/4 lens and create sharp images at relatively slow shutter speeds, the faster lens might be the best option in the very low light because it saves you four clicks of shutter speed. But there are many reasons that I instantly grabbed the 200-600 and left the 600 f/4 on the front passenger seat. Here they are:
1-The colt was moving rather quickly and with purpose. Had I chosen the 600 f/4 I would have needed to put the rig on a tripod. As I needed to move quickly to stay on sun angle and to get low, using a tripod would have made things very difficult (if not impossible). Can you say slow and cumbersome?
2-With the lighter, physically smaller 200-600 I knew that I would be able to quickly get in position, get lower when needed, and move rather easily to a better perspective as needed. In the course of making a series of perhaps5 images, I got up and down off the ground and moved to the west (to my right) at least six times.
3-With the very soft (red) light I knew that it would be OK to work as much as 15 degrees off sun-angle so being able to zoom in or out with the 2-6 would be a huge plus. Note the focal lengths for today’s two featured images: 463mm for the head and neck portrait, and then 600mm for the head-shot.
So for me, the slower 200-600 was a far better choice than the faster, far more expensive 600 f/4.
Exposure Note
With most systems, getting the right exposure for today’s featured images — a light-toned subject with a dark background — would be difficult at best as there was no time to create a test image and check the histogram. For those using SONY and Patrick Sprakman’s amazing Zebras technique, getting the right exposure was, as it always is, child’s play. Working wide open, I set my OK-to-handhold-at-600mm shutter speed to 1/500 sec. and simply turned the Rear Control Wheel clockwise until I noted fainted Zebras on the highlights on the colt’s chin. This method is fast, simple, easy to learn, and deadly. Most of my exposures show zero percent under or over-exposed pixels. When I screw up, they show at most 0.01 or 0.02% under or over-exposed pixels. You can learn this technique in The SONY e-Guide by Patrick Sparkman and Arthur Morris.
|
|
|
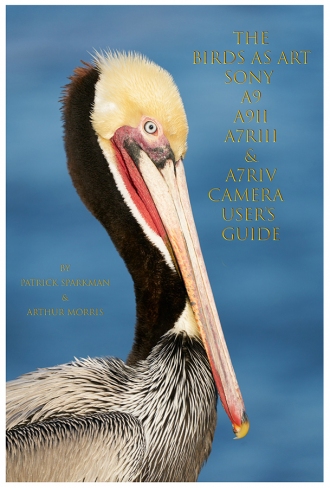
Click on the image to enjoy a larger version. The SONY e-Guide by Patrick Sparkman and Arthur Morris |
The Sony Camera Videos and Pre-publication e-Guide Costs and Discount Info
The cost of the SONY e-Guide is $100.00 US and will include one of the four (4) camera set-up videos — we offer one video each for the a7r iii, the a7r iv, the a9, and the a9 ii — and the written guide with the galleries. The guide is now 98% done and you will — of course, receive the final version when it is completed. I sent out the third draft today to those who have purchased the Guide with or without the discount.
Folks who have used my B&H links or purchased their SONY gear from Bedfords will receive said discount based exactly on how much they spent. If you spent more than $10,000 you will receive one free video and the e-Guide. Additional camera videos are $25.00 each. If you spent $2400, you will receive a 24% discount, and so on and so forth. And again, additional camera videos will be $25.00 each.
I will need time to verify your B&H purchases so folks will need to send their receipts and then be a bit patient. It is much easier to verify Bedfords’ purchases but I need those receipts as well.
If you have not used BAA links, please do so in the future. If that is the case and you would like the e-Guide now, please send a Paypal for $100 US to birdsasart@verizon.net and be sure to include the words “SONY Pre-publication Guide” in the Paypal e-mail along with the name of your camera or cameras so that you can receive the correct video or videos. Please add $25 for each additional camera video. Be sure to send a copy of the Paypal transaction to me via e-mail.
Folks who have used BAA links to purchase their SONY gear should send their receipts to me via e-mail asap and let me know which camera videos they need. I will verify their purchases as quickly as possible and send a quote to be paid via Paypal as above.
Thanks to all who have properly used my B&H links or gone through the fabulous Steve Elkins at Bedfords, and thanks to everyone for having faith in the information that I provide, knowing that it will be the best available anywhere.


I have been actively using the set up from Arts Sony e-Guide now for around four weeks. My A9ii with the 200-600 rig is just so easy to get the right exposure 99% of the time.
I could never have figured out the settings suggested on my own, so thank you Art and Patrick.
If you have Sony A9, A9ii, or one of the A7r bodies covered – get this guide today.
Barry, Australia.
I read with interest your remarks about turning zebras off when shooting against a bright sky. I have had real trouble concentrating in that situation. Before asking how you make a quick switch from zebras on to off, I experimented and ended up putting function on the C1 button Works great for me. It has helped me a great deal with flight shots against our wonderful Coastal fog.
Keep those tips coming
Hey Bill, That topic is in the guide that you own. I put Zebras on My Menu.
with love, a
In your guidance on using Zebra, you indicate we should set aperture and speed and then rotate ISO until zebra just disappears, but with an A9, could one not also rotate the exposure compensation dial?
In most situations, until Zebras just appear. Using the exposure compensation dial is terribly slow and cumbersome. You need to be in an Automatic mode (which is a big negative). Even if you are using AUTO ISO, the camera is slow to respond. In addition, knowledge as to how much + or – is required is needed and lastly, your method will not work as the background changes …
If you want to learn how to use your camera properly and get the right exposure everytime quickly and easily I’d suggest that you get the guide.
with love, artie