|
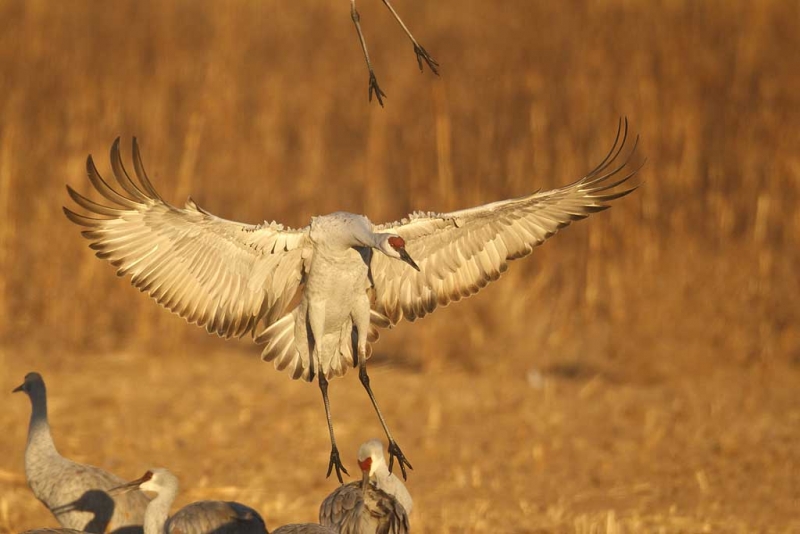
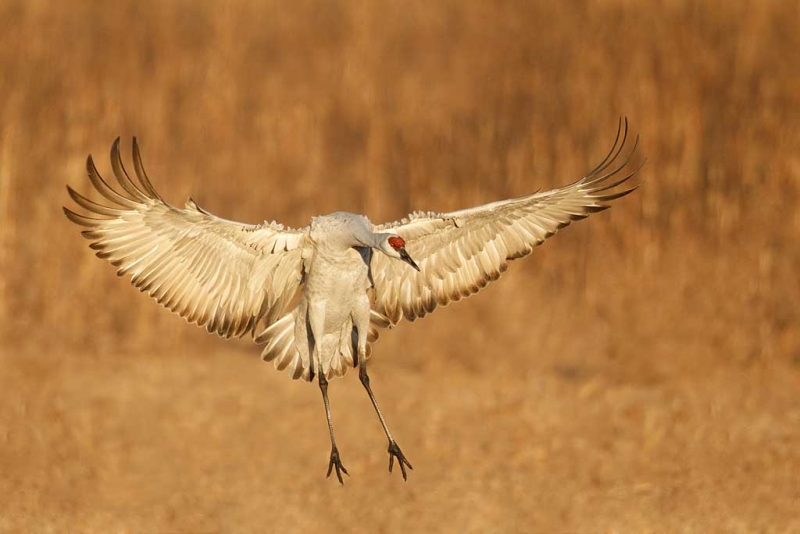
This image of an adult Sandhill Crane braking to land was created on last year’s Bosque del Apache BAA Instructional Photo-tour with the Canon EF 800mm f/5.6L IS USM Autofocus lens, Canon 1.4x EF Extender III (Teleconverter), and the unfortunately discontinued EOS-1D Mark IV. ISO 400. Evaluative metering +2/3 stop off the low blue sky: 1/1250 sec. at f/6.3. Central Sensor (by neccesity)/AI Servo Rear Focus active at the moment of exposure. Click here if you missed the Rear Focus Tutorial. Click on the image to enjoy a larger version. |
You Do Everything Right, But…
You were in the right place at the right time. The light was perfect, and so was the wind. As the birds were landing in the back of the field, you properly added the 1.4X teleconverter. You got the exposure right–data halfway into the fifth histogram box. You nailed the focus; the central sensor was right on the base of the bird’s bill. You made a series of images as the bird came in for a landing. But when you review your images you see that in the frame with the very best pose, there are five too many cranes in the frame. Three heads and a back along the lower frame edge, and a pair of feet hanging into the frame from above.
What to do?
|
What to do? Get to work in Photoshop. |
Image Clean-up
After converting the image in DPP I went to work on the background with the Patch Tool. Next I made a large Quick Mask of the lower right hand corner, flopped it, moved it to the lower left corner, added a Layer Mask, and fine-tuned as needed. Several smaller Quick Masks were used to cover the heads near the feet and the legs above the landing bird. I worked large on the various Layer Masks so that I could hide what I needed to hide and then reveal the legs and feet. The last major bit of work was to select the bird with the Quick Selection Tool in advance of running NIK Color Efex Pro on the bird only. Denise like to do the whole thing on a layer, add a Hide-All Mask, and then paint in the effect where needed, in this case, on the bird. I find it easier to select the bird, put the selection on its own layer, and then run the NIK stuff. For this image I ran Detail Extractor at about 35% and Tonal Contrast at about 25%. The selection took me about ten minutes as I needed to work large and refine the edges. Here’s a great tip for using the Quick Selection Tool: when you need to subtract something from the selection you can hold down the Alt key to turn the brush from + to -. That is a lot easier than having to click on the -brush and then again on the +brush every two seconds….
Most of what I did above is already included in Digital Basics. The rest, including and especially the NIK Stuff along with the new DPP RAW Conversion Guide (DPP RCG), will be included in the next update. Everyone who has already purchased Digital Basics will receive the next update at no additional charge.
The DPP RCG will be announced no later than this coming Tuesday, October, 16; it will sell as a stand alone eGuide for $15. That Tuesday Denise Ippolito and I head down to the Southern Ocean for the South Georgia/Falklands Cheesemans’ Expedition. I am still hoping to get the Digital Basics update sent before we leave. After the update is sent, the price of the Digital Basics PDF for new purchasers will go from $20 to $30. Those who buy it before the price goes up will receive the updated version at no charge as will all who have previously bought the guide. And again, the next update will include the DPP RCG. Stay tuned.
Click here to see the great South Georgia/Falklands itinerary and click here to learn more about Cheesemans’ Ecology Safaris.
|
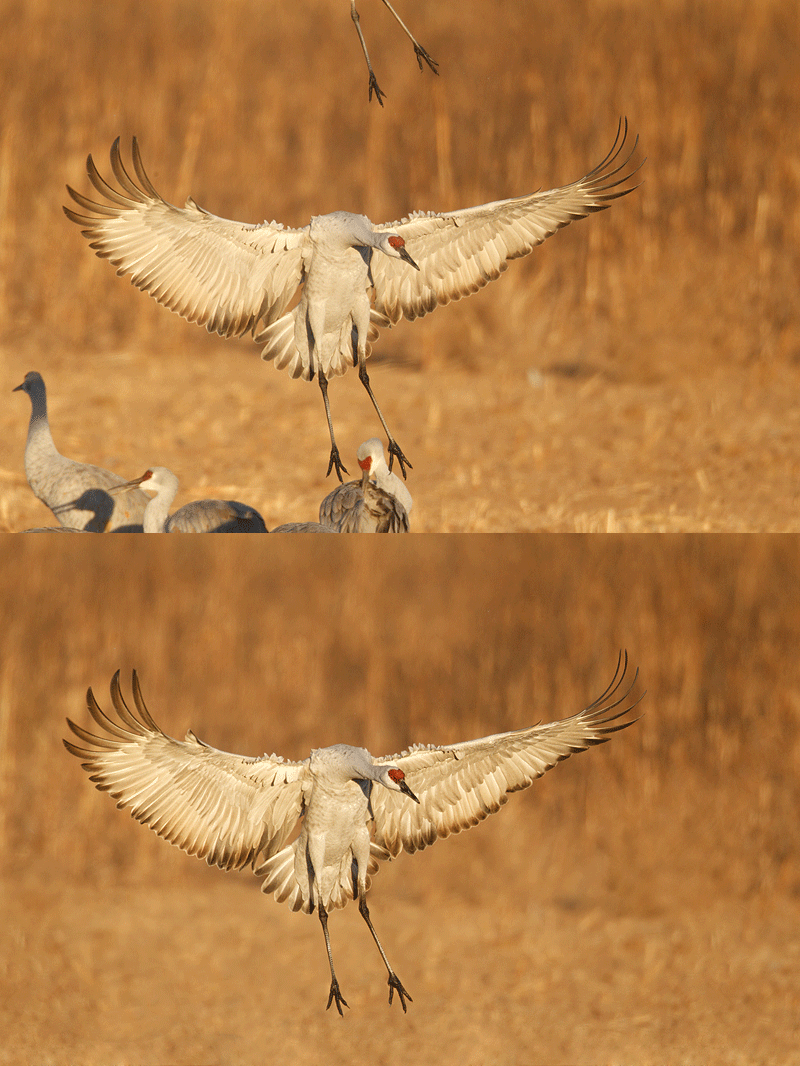
Animated GIF
If you look at the bird only in the animated GIF above you can see how much better the crane looks after NIK than before. Not to mention the background.
|
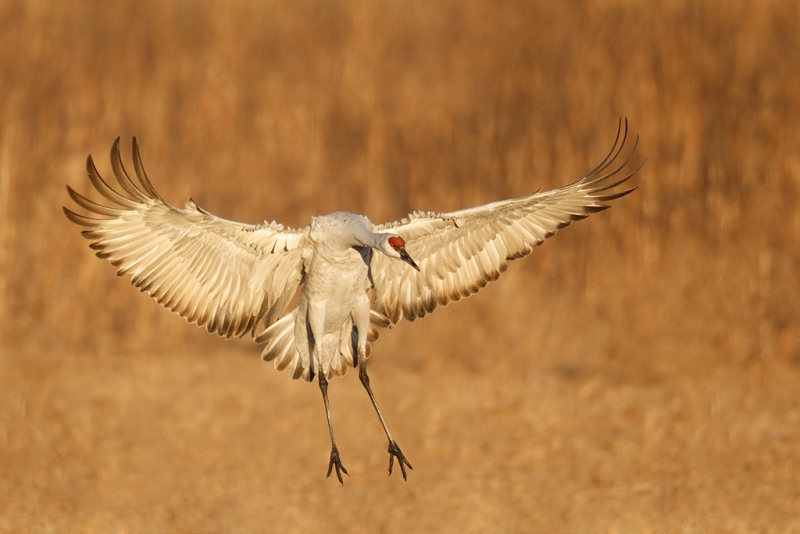
Thanks to the comment below by Ajit Huilgol I was able go back to the master file and re-work the claw on the inner left toe. |
In the first comment below, Ajit Huilgol wrote, “Very informative, as always, Artie! I noticed, however, that the bird’s talon on the left inner ‘toe’ is missing (after the processing). Is there any way to bring it back?”
I responded, ” Thanks Ajit. You have a good eye. The claw on that toe was actually there in the JPEG and on the TIFF but was very faint at best. I have made note of your comment above and added a repaired image at the bottom. When I write that I have a poor eye for fine detail now maybe folks will start to believe me. BTW, I went back to the converted RAW file, brought the area around the toe in on a layer, added a Layer Mask, and painted away all but the claw. Then I selected the toe with the Magnetic Lasso, cloned black into the selection, and then softened the edges with the Clone Stamp Tool….
BOSQUE del APACHE 2012 IPT: “The Complete Bosque Experience.” NOV 21-27, 2012. 7-FULL DAYS: $3399. Co-leader: Denise Ippolito. Introductory Slide program: 6:30 pm on 11/20. Limit: 12/Openings 4.
If you have been thinking about joining us at Bosque, now is the time to act as there are only four slots left….
Tens of thousand of Snow Geese, 10,000 Sandhill Cranes, ducks including point-blank American Wigeon and Wood Duck, amazing sunrises, sunsets, and blast-offs. Live, eat, and breathe photography with one of (if not the) world’s premier photographic educators at one of his very favorite locations on the planet. Top-notch Photoshop instruction. This will make 18 consecutive Novembers at Bosque for me. Nobody knows the place better than I do. Join us to learn to think like a pro, to recognize situations and to anticipate them based on the weather, especially the light and the wind direction. Every time we make a move we will let you know why. When you head home applying what you learned will prove to be invaluable. The cast of co-leaders includes Denise Ippolito, Jim Heupel, and Mike Hannisian.
The Bosque Site Guide
I have heard some knowledgeable folks say, “You don’t need to go on the Bosque IPT to get good images at Bosque. You don’t even need the site guide.” Funny that both of those statements are both true and at the same time, ludicrous. Why true? You can go to Bosque and make some great images by stumbling around and following the crowd. Why ludicrous? This will be my 18th consecutive year at Bosque at the Thanksgiving holiday season. I know the place better than anyone alive or dead. There are mornings when we make four or more moves before 9am. And often, we are rewarded with incredible photographic situations.
For example, there is roughly an hour on many mornings when the wind from the north switches to the south. If you are not in the right spot, you will simply never have a chance to make an image like the one above. And the same goes for single geese landing. And for crane silhouettes. And on and on and on. If you cannot make or afford the IPT, the Bosque Site Guide is the next best thing. I share everything that I know and have learned about the refuge over the past two decades. Nothing is held back. To head to New Mexico without the Site Guide on your laptop is simply foolish. Your choice. 🙂 To learn more or to purchase, click here.
NIK 15% Discount
As regular readers here know, NIK Color Efex Pro has drastically changed my digital workflow. You can save 15% on all NIK products by clicking here and entering BAA in the Promo Code box at check-out. Then hit Apply to see your savings. You can download a trial copy that will work for 15 days and allow you to create full sized images.
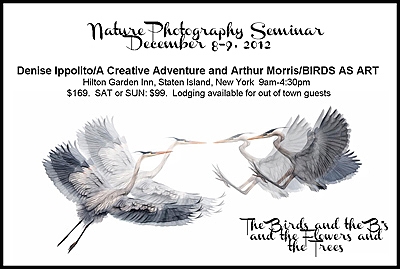
NYC Weekend Nature Photography Seminar
Presented by Denise Ippolito/A Creative Adventure and Arthur Morris/BIRDS AS ART
Hilton Garden Inn, Staten Island, New York. December 8-9, 2012 from 9am-4:30pm.
Weekend: $169. SAT or SUN: $99. Lodging available for out of town guests.
Saturday: Image Capture Sunday: Image Evaluation and Processing
Hilton Garden Inn, Staten Island, New York. December 8-9, 2012 from 9am-4:30pm.
Weekend: $169. SAT or SUN: $99. Lodging available for out of town guests.
Saturday: Image Capture Sunday: Image Evaluation and Processing
Click here for complete details including the Saturday and Sunday schedules, club and group discount info, and registration incentives and for more info on the In-the-Field Seminar Follow-up Workshop.
Artie, the grizzled veteran, is widely noted as one of the premier bird photographers, tour leaders, and educators on the planet. Denise, who specializes in flowers, is the mega-creative up-and-comer, a popular lecturer, a skilled field instructor, and an amazing Photoshop wizard who will share her tips and tricks with you. Both artie and denise are full time professional nature photographers.
BIRDS AS ART Instructional Photo-Tours
Click here for complete IPT information including the current schedule and links to general IPT info, deposit and cancellation policies. and the required registration and release forms.
Shop B&H




Thank you for the trouble taken in going back to the image and reworking on it, and to share the steps needed to restore the claw. You are, indeed, humility personified!
Thanks and you are most welcome Ajit! That may be the first time that anyone used my name and the word humility in the same sentence. :). However, two things that I have learned over the past few years are:
#1: when you screw up the best course of action is to say, “I screwed up.”
#2: when you are wrong, the best course of action is to say, “I was wrong.”
Very informative, as always, Artie! I notice, however, that the bird’s talon on the left inner ‘toe’ is now missing, after the processing. Is there any way to bring it back?
Thanks Ajit. You have a good eye. The claw on that toe was actually there in the JPEG and on the TIFF but was very faint at best. I have made note of your comment above and added a repaired image at the bottom.
When I write that I have a poor eye for fine detail now maybe folks will start to believe me.:)
BTW, I went back to the converted RAW file, brought the area around the toe in on a layer, added a Layer Mask, and painted away all but the claw. Then I selected the toe with the Magnetic Lasso, cloned black into the selection, and then softened the edges with the Clone Stamp Tool….