|
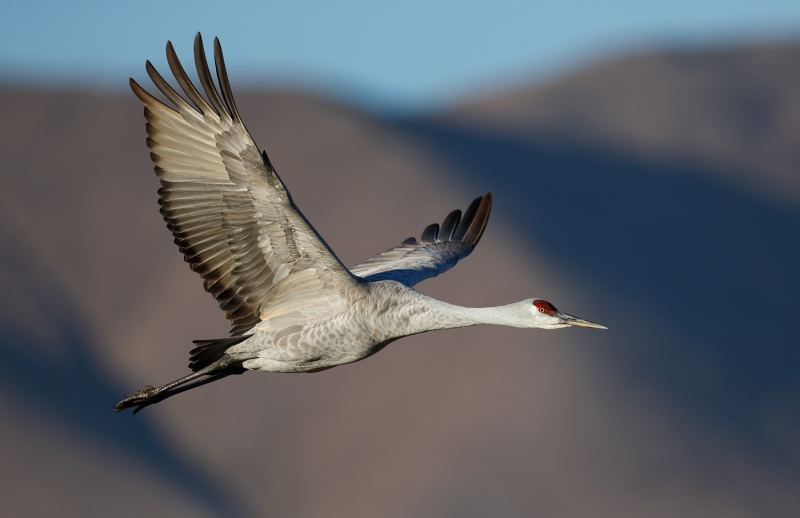
This image was created with the tripod-mounted Canon EF 800mm f/5.6L IS USM Autofocus lens and the Canon EOS-1D X digital SLR . ISO 400. Evaluative metering +2/3 stop off the sky just above the mountains: 1/1650 sec. at f/7.1 in Manual mode. Central sensor/AI Servo Surround/Rear Focus AF active at the moment of exposure. Click here if you missed the Rear Focus Tutorial. Click on the image to see a larger version. |
Top Ten Bird Photography Tips
1. Know your subjects well. Understanding bird behavior, habitat preferences, and the timing and patterns of migration make a great foundation upon which to build an interest in bird photography. Seek out areas where birds have become relatively acclimated to the human presence.
2. Move slowly. By doing so, you will often be able to approach your subjects closely while minimizing disturbance. Birds don’t mind some noise or even bright colors, but they are genetically programmed to flee when they detect quick movements or sharp sounds.
3. Stay low when attempting to photograph birds on the ground or on the beach. This way you will be able to approach your subjects much more closely than if you were standing. Kneeling is good, and sitting works well for many, but getting flat on your belly (if feasible) is even better. Images created while you are working at the bird’s eye level feature soft, out-of-focus foregrounds and backgrounds and often yield intimate images. The shorter your telephoto lens, the more important it is that you get low so that you avoid shooting down at your subject.
4. When it is difficult or impossible to get close physically, use a 1.4x teleconverter (TC) to increase the effective focal length of your lens by 40 percent. A 1.4x TC transforms a 400mm lens into a 560mm lens. You will, however, lose one stop of light and thus one stop of shutter speed; the quality of your images will be slightly degraded. If you are using a fast (i.e., wide aperture) professional quality lens and perfect sharpness techniques you can produce superb image files. Beginners are advised against using 2X teleconverters (doublers). Making sharp images with a 2X TC requires the use of a tripod and a prime lens of superb quality as well as perfect sharpness techniques.
|
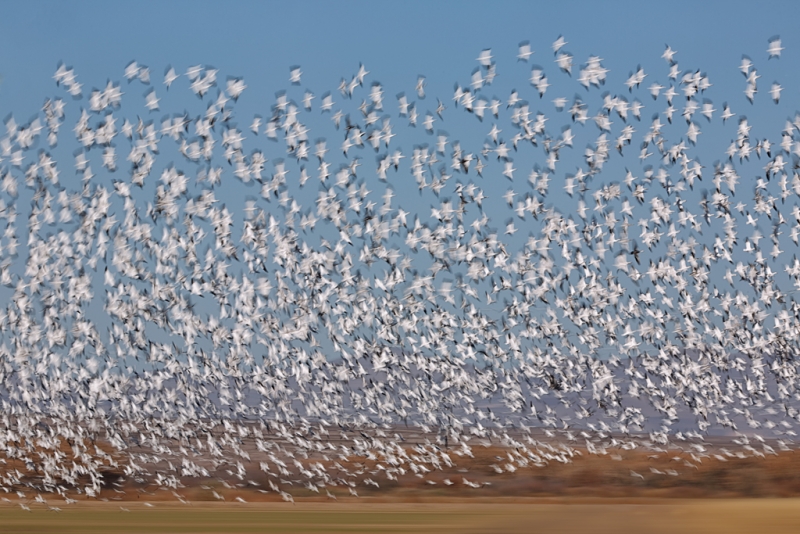
This image was created on the 2012 Bosque del Apache IPT with the Canon EF 70-200mm f/2.8L IS II USM Telephoto Zoom Lens, the Canon 2x EF Extender III (Teleconverter) (hand held at 245mm), and the Canon EOS 5D Mark III Digital Camera (Body Only) w/FREE Bonus Item – $145.83 Value! [expires soon]! ISO 50. Evaluative metering -2/3 stops as framed: 1/13 sec. at f/22 in Manual mode. Central sensor Surround/AI Servo/Rear Focus AF and re-compose. Click here if you missed the Rear Focus Tutorial. Click on the image to see the spectacular larger version. I achieved the slow shutter speed by having the Hoya 77mm Warming Circular Polarizer Glass Filter set to dark and screwed onto the front of my 70-200 II. See below for details on “set to dark.” With correct exposure for the WHITEs set manually I did not need to worry about changing the compensation when the birds flew in front of the dark distant mountain. |
5. Buy the best autofocus equipment that you can afford. Autofocus is invaluable for most types of bird and wildlife photography. Quality equipment will last for many years and generally hold its resale value quite well. Be sure to purchase accessories (such as teleconverters) that are produced by the manufacturer of your system.
6. If you prefer a light, hand hold-able lens, consider either the Canon 100-400mm image stabilized lens or the newest version of the Nikon 80-400mm vibration reduction lens. These innovative lenses reduce the effects of equipment shake when hand holding and are capable of yielding sharp images at relatively slow shutter speeds. Digital cameras with 1.5x or 1.6x multiplier effects (crop factors) team up perfectly with such lenses.
7. In most cases choose a longer, slower lens over a shorter, faster one. For most serious bird photography quality 500mm or 600mm f/4 telephoto lenses are ideal. The 500s are lighter than the 600s, cost less, focus closer, and are easier to travel with. But the 600s offer the greatest reach. All super-telephoto lenses should be used on a Gitzo tripod (the 3532 LS is ideal for all but the tallest folks) with a Mongoose M3.6 action head. Some prefer the heavier Wimberley V2 head. Both are specialized, gimbal-type tripod heads that make handling big telephoto lenses a snap.
|
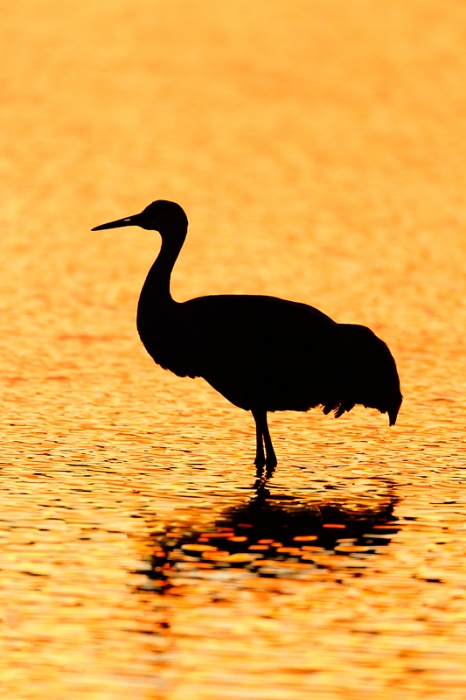
This Sandhill Crane silhouette image was also created at Bosque del Apache NWR, San Antonio, NM with the tripod-mounted Canon EF 800mm f/5.6L IS USM Autofocus lens, the Canon 1.4x EF Extender III (teleconverter), and the Canon EOS-1D X digital SLR . ISO 1600. Evaluative metering +1 stop: 1/200 sec. at f/8 in Av Mode. Central sensor (by necessity)/AI Servo Expand/Rear Focus AF and re-compose. Click here if you missed the Rear Focus Tutorial. Click on the image to see a larger version. |
8. Before pressing the shutter button, consider the background elements in your image. Unusually light or dark areas in the background tend to distract the viewer; cluttered backgrounds can be even more problematic. If your backgrounds are a good distance from the subject, they will be rendered soft and pleasing no matter their appearance.
9. Photograph gulls as often as possible; they make great practice subjects and are just about everywhere, especially in coastal areas. They are large and easy to photograph, and when you point a camera at one it generally does something interesting in less than a minute.
10. Read everything you can about bird photography. A good place to start is by ordering a signed copy of the soft cover edition of the how-to classic, “The Art of Bird Photography,” and a copy of the all-new digital follow-up, “The Art of Bird Photography II” (916 pages on CD or by download only). Save $10 by purchasing the two-book combo here. Follow those up with a copy of Digital Basics and you will own a lifetime’s worth of bird and nature photography education. Digital Basics is an instructional PDF that is sent via e-mail; it includes my complete digital workflow, dozens of great Photoshop tips including Digital Eye Doctor techniques, several different ways to expand canvas, all of my time-saving Keyboard Shortcuts, and Quick Masking, Layer Masking, and NIK Color Efex Pro basics.
All are invited to visit the BIRDS AS ART Blog. It’s free and packed with great info and images on an almost daily basis.
Traveling
Please know that artie will be traveling to and from the Galapagos until July 19th. He will not have any internet access while aboard the Samba from July 3-16th. He will be home briefly July 19-20 before flying to Long Island for the sold out Nickerson Beach Baby Birds IPT. Jim will be in the office every weekday to help you with your mail order purchases and Jen will be here handling IPT registrations. The blog will continue to be active as he has prepared more than a few posts for you in advance for you to enjoy during his absence.
If you have a gear or an image processing question please e-mail me after July 19th.
|
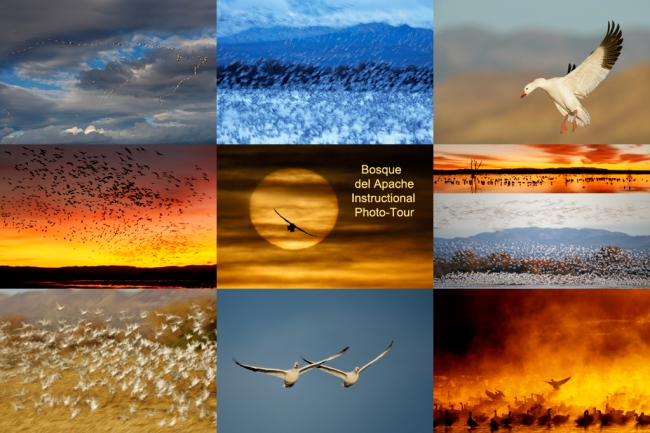
Snow Geese composite, Bosque del Apache NWR, San Antonio, NM. Click on the image for a larger version. |
Bosque del Apache 2013 IPT: “The Complete Bosque Experience.” NOV 26-DEC 2, 2013. 7-FULL DAYS: $3399. Co-leader: Denise Ippolito. Introductory Slide program: 6:30 pm on 11/25. Limit: 12.
Tens of thousand of Snow Geese, 10,000 Sandhill Cranes, ducks including point-blank American Wigeon and Wood Duck, amazing sunrises, sunsets, and blast-offs. Live, eat, and breathe photography with one of (if not the) world’s premier photographic educators at one of his very favorite locations on the planet. Top-notch Photoshop instruction. This will make 19 consecutive Novembers at Bosque for me. Nobody knows the place better than I do. Join us to learn to think like a pro, to recognize situations and to anticipate them based on the weather, especially the sky conditions, the light, and the wind direction. Every time we make a move we will let you know why. When you head home applying what you learned will prove to be invaluable. Includes all lunches and the Thanksgiving Buffet at the Crowne Plaza in Albuquerque. I hope that you can join me for what will be an unparalleled learning experience.
A $500 non-refundable deposit is required to hold your slot for this IPT. Your balance is due 4 months before the date of the IPT and is also non-refundable. If the trip fills, we will be glad to apply a credit applicable to a future IPT for the full amount less a $100 processing fee. If we do not receive your check for the balance on or before the due date we will try to fill your spot from the waiting list. If your spot is filled, you will lose your deposit. If not, you can secure your spot by paying your balance.
Please print, complete, and sign the form that is linked to here and shoot it to us along with your deposit check (made out to “Arthur Morris.”) You can also leave your deposit with a credit card by calling the office at 863-692-0906. If you register by phone, please print, complete and sign the form as noted above and either mail it to us or e-mail the scan. If you have any questions, please feel free to contact me via e-mail.


Thanks for this, Artie. It includes one of my pieces of advice to beginning bird photographers: “Get closer.” I love and often quote your gull advice, and it’s so true…