120
This post marks 120 straight days with a new educational blog post. With so many folks getting in the habit of using our B&H and Amazon links why quit now? To show your appreciation for my efforts here, we do ask that you use our the B&H and Amazon affiliate links on the right side of the blog for all of your purchases. Please check the availability of all photographic accessories in the BIRDS AS ART Online Store. We sell only what I use and depend on. We will not sell you junk. We know what you need to make creating great images easy and fun. And we are always glad to answer your gear questions via e-mail.
You can find the following items in the store: Gitzo tripods, Mongoose M3.6 and Wimberley heads, plates, low feet, and accessories, flash brackets, , Delkin e-film Pro Compact Flash Cards, LensCoat products, and our unique line-up of educational materials including ABP I & II, Digital Basics, Site and Set-up e-Guides, Canon and Nikon Camera Users and AF e-Guides, and MP-4 Photoshop video tutorials among others.
I would of course appreciate your using our B&H affiliate links for all of your major gear, video, and electronic purchases. For the photographic stuff mentioned in the paragraph above we, meaning BAA, would of course greatly appreciate your business. Here is a huge thank you to the many who have been using our links on a regular basis and visiting the BAA Online store as well.
This blog post took 2 hours to assemble. Enjoy!
ps: I am publishing this at 4:47am on Saturday. I will be off to Gatorland on my own in 58 minutes.
|
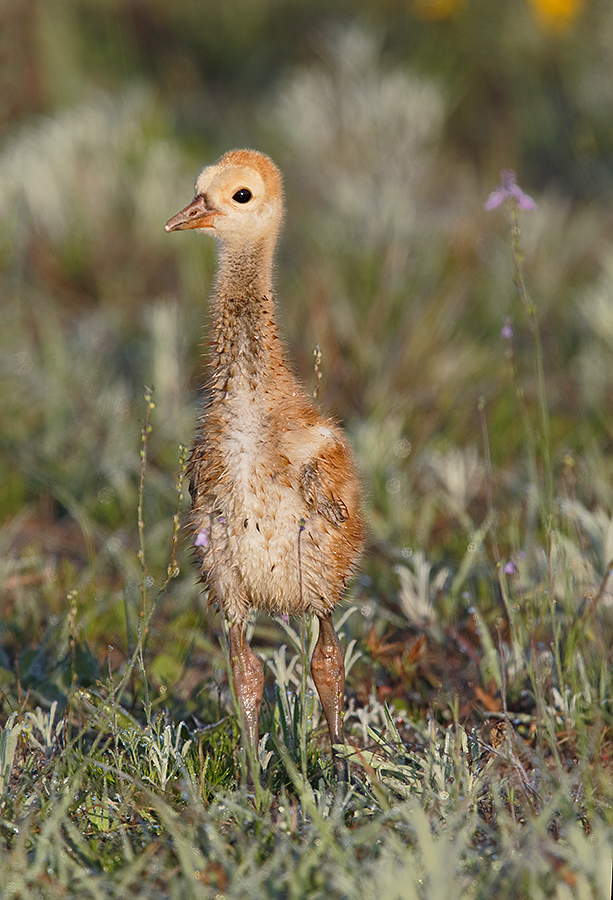
This Sandhill Crane chick was photographed on March 9, 2014 with the Gitzo 3532 LS carbon fiber tripod, the Mongoose M3.6 head, the Canon EF 600mm f/4L IS II USM lens, the Canon Extender EF 2X III, and the Canon EOS-1D X Digital SLR camera. ISO 800. Evaluative metering at zero (should have been at least +1/3 stop): 1/800 sec. at f/11 in Av mode. Color Temperature: AWB. Central sensor (by necessity) Expand/AI Servo/Rear Focus on the chick’s eye and re-compose. Click here if you missed the Rear Focus Tutorial. Be sure to click on the chick to see a larger version.
|
Image Design Questions
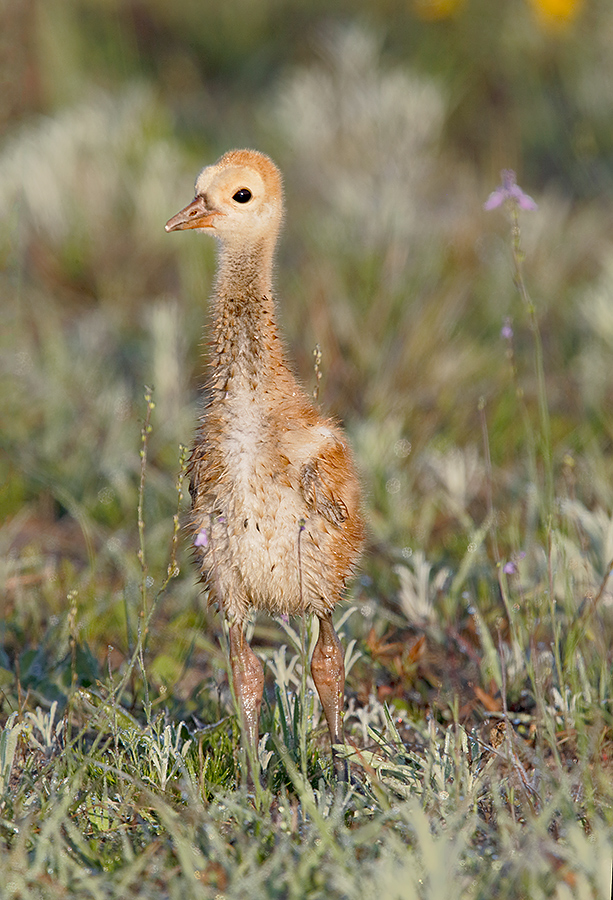
In the image above (and below, the same image actually), why did I place the crane chick on the left side looking out of the frame?
Why should I have stepped back one foot and pointed the lens one inch higher?
|
The image that opens this blog post was lightened with a Levels Adjustment Layer. The image here was lighted with a Gamma adjustment in the Exposure Adjustment Layer. See more below. |
A New Toy: The Exposure Adjustment Layer
The first time that I ever even realized that there was an Exposure Adjustment Layer was when I read Pane 13 of my BPN White-tailed Sea Eagle post here. After reading the comment by Regional Moderator Bill Jobes I decided to play around a bit with the new toy.
The image that opens this blog post was lightened with a Levels Adjustment Layer. The image here was lighted with a Gamma adjustment in the Exposure Adjustment Layer. They are very close. By a small margin I like the somewhat softer look of image 2. I have done some experimenting comparing results with a Levels Adjustment to those with a Curves Adjustment to those with a Gamma adjustment. I can only say that in each case the results are somewhat different from each other and somewhat different from what you might expect.
If you open an Exposure Adjustment Layer you will see 3 sliders, Exposure, Offset, and Gamma Correction. Moving the Exposure slider is fairly straightforward: to the right lightens the image, to the left darkens it. Note: though there are some strange incremental values you can type in any number that you would like. The third slider, the Gamma Correction slider is the opposite. Move it to the right to darken and to the left to lighten. I have been looking at the changes to the histogram when you move the Exposure slider as compared to what happens when you move the Gamma Correction slider. Again, the results are different but I cannot describe or quantify those differences. I can say that whatever the Gamma Correction slider is doing I like it. And I prefer results with the Gamma slider to a similar Curves adjustment. See below for my comments on the Offset slider.
|
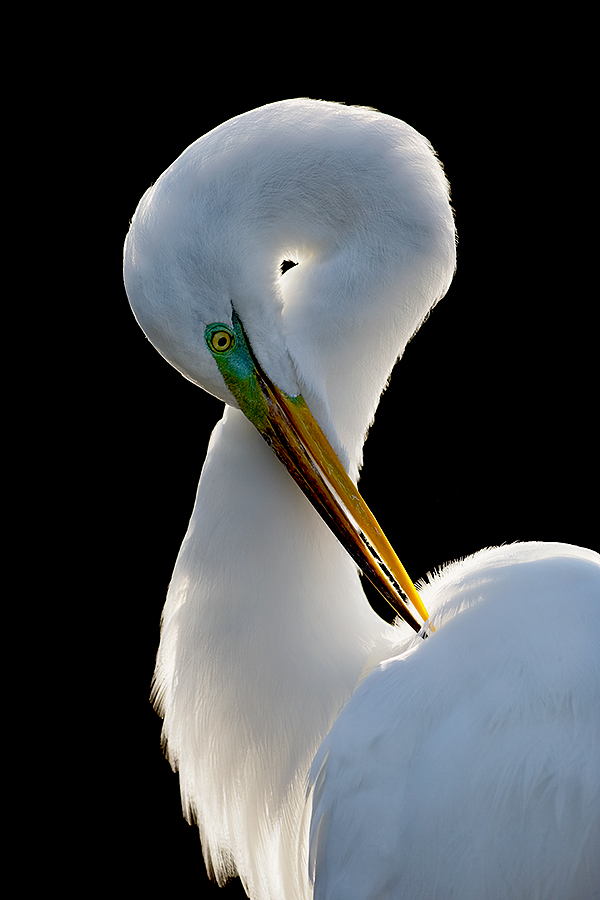
This backlit Great Egret was created at Gatorland with the Canon EF 200-400mm f/4L IS USM Lens with Internal 1.4x Extender (hand held with the internal extender in place at 467mm) and the Canon EOS-1D X. ISO 400. Evaluative metering -1 2/3 stops as framed: 1/1000 sec. at f/7.1 in Manual mode. AWB. Two sensors up from the central Sensor/AI Servo-Surround/Rear Focus AF on the bird’s neck active at the moment of exposure. Click here to see the latest version of the Rear Focus Tutorial. Click on the image to see a larger version.
|
The Offset Slider
This is a more extreme version of the similar image that was posted here. This image was created from that version by moving the Offset slider one click to the left to -0.0048. This slider moves in 0.0048 increments but again, you can type in whatever value you like. With this image that small change dramatically blackened the background while not doing much to the tonality of the bird. Denise Ippolito, who was helping me fine-tune the look of this image by phone after I sent her a JPEG, came up with the idea of using the Offset slider to darken the background. Again, I find it impossible to describe the changes with this slider.
My Advice for Using the Exposure Adjustment Layer
My advice for using the exposure adjustment layer is to try it, experiment by creating several versions of each image, and compare. In time I suspect that you and I will be able to come up with some concrete preferences.
If anyone can point us to an online tutorial that details the effects of the three sliders in the Exposure Adjustment Layer please do post a comment with the link here.
|
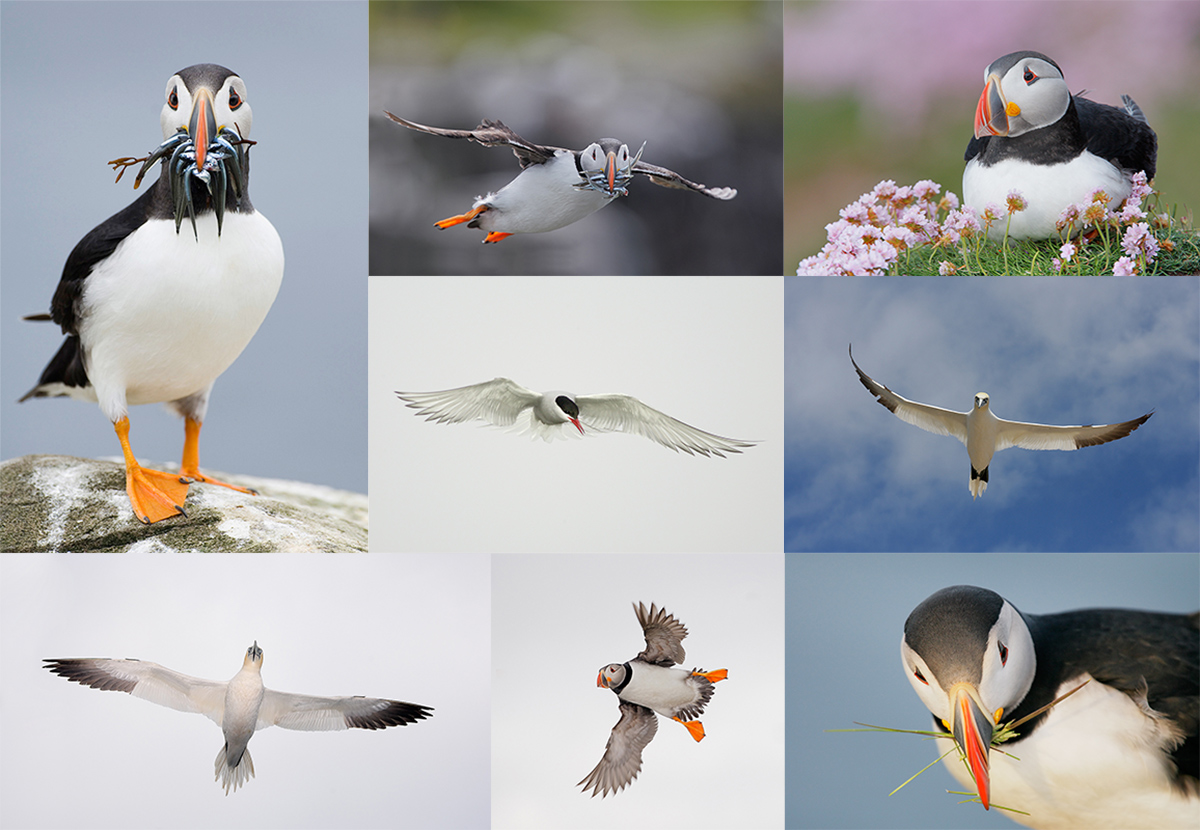
I hope that you can join us on this great trip. The vertical puffin image was created by David Tipling. The rest–almost all from the UK, are mine :). |
UK Puffins and Gannets IPT July 2-9, 2014. 5 full days of puffins and two half-days of gannet boat photography: $4,999 USD. Limit 10 + the 2 leaders.
Desperately needed: 1 female roommate & 1 male roommate.
Just learned of a killer non-stop flight: Newark to Edinburgh on United.
Fly to Edinburgh (say “ED-in-BUR-row”), Scotland on a red eye flight on July 1st arriving on the early morning of July 2 or certainly before 10am. UK folks who plan on driving please contact me via e-mail immediately.
There are direct flights to Edinburgh from both Philadelphia and Toronto. If you learn of any others please advise via e-mail so that I may share with all the interested folks. Fly home mid-morning on July 9. UK locals and our many European friends are of course welcome.
With the needed 5 deposits in hand, this trip is a go; you can buy your flights now :).
What’s included:
5 full DAYS on the best UK puffin boat; trips to 2 different islands–all dependent on decent weather, i.e, no major storms. Seabirds including scads of Atlantic Puffin both in flight and perched, Razorbill, Great Cormorant, Shag, and others likely. The trip is timed to maximize the opportunities for photographing the puffins bringing fish back to the nests. All boat fares and landing fees are included. The boat leaves at 9:30am. We have two hours on the first island. We are then picked up and head to the 2nd island for a 2+ hour session. The weather is typically cloudy bright.
One late-afternoon (2 July) and one early morning (probably 8 July) trip on a gannet photography boat where the birds are fed and dive very close to the boat. Both are dependent on good weather but we do have some flexibility. Boat fares and the cost of the fish are covered. Each will consist of a one hour outbound ride, two hours of diving Northern Gannet photography (with 6 boxes of fish) and the one hour return trip.
The tentative, weather-dependent itinerary:
July 2: airport pick-up no later than 10am UK time. Lunch on your dime. Drive to hotel. Afternoon gannet boat trip/time TBD.
July 3, 4, 5, 6, & 7: Full Day Puffin Boat trips as noted above.
July 8: early morning Gannet Boat trip. Afternoon: Small group Image review and Photoshop sessions. Pack for the trip home.
July 9: early morning departure for Edinburgh Airport (EDI).
The itinerary is subject to change to ensure the best possible photographic opportunities.
A super-telephoto lens is not required on this trip. The 300mm f/2.8s are ideal. I will be bringing one along with my 200-400mm with Internal Extender, my 70-200 f/2.8L IS II, and a shorter zoom lenses. Plus three 1.4X and two 2X TCs, a Gitzo 3532 LS Carbon Fiber tripod, and my Mongoose M3.6. I may go tripod-less on the puffin trips at times…. Or not…. All photography on the gannet boat will be hand held. It is likely that the 70-200s will be ideal for the gannets.
7 nights lodging in an older but excellent hotel just a few minutes from the puffin boat dock with about a 70 minute ride to the gannet boat. Double occupancy will be the rule though we might be able to offer a single supplement at an exorbitant price. See the hotel info here.
All breakfasts and dinner (at the hotel) from dinner on July 2 through dinner on July 8. And breakfast on our get-away day unless we need to leave earlier than they serve to make our flights home…
Airport pick-up until 10am on July 2–this should not be a problem as there are lots of red-eye flights from the US to Edinburgh.
All ground transportation. Airport return on the early morning of July 9. We may be getting up very early on July 9th.
Two great leaders; Denise Ippolito and yours truly will provide personalized and small group in-the-field instruction. As usual, the closer you stay to us and the more questions that you ask the more you will learn. We will of course point out the best situations. You will learn to see these great situations for yourself, to get the right exposure every time after making a single test exposure, to work in Manual mode, and to design pleasing images by mastering your camera’s AF system. You will learn the basics of photographing birds in flight and how the relationship between light direction and wind direction impacts the photography of both birds in flight and perched puffins. And tons more.
We will be conducting informal, small group image review and Photoshop sessions after dinner. All are invited to bring their laptops. Image critiques of your five best images will be done after the trip upon request.
Early morning castle photography right near the hotel is an option for the early risers. In the event of inclement weather or stormy seas there is the possibility of bird photography along the coast. Early evening bird photography along the coast is also optional.
Not included: all lunches–for the most part we will need to pack lunches for the puffin trips, or you may opt to skip lunch. Your round trip airfare from home to Scotland. Booze, wine, and any other beverages other than coffee and tea at breakfast.
A non-refundable deposit of $2,000 USD is required to hold your spot so please check on flights and your schedule before committing. The balance will be due on 15 May so you may wish to pay the whole thing at once. Overseas folks may e-mail for wire transfer info. Our $15 wire transfer fee will be added to your balance.
Trip insurance is highly recommended as your deposit (less a $200 cancellation fee) will not be refunded unless the trip fills completely. I, and my family, use Travel Insurance Services.
After letting us know via e-mail that you will be coming, please send your deposit check made out to “Arthur Morris” to us as follows:
Arthur Morris/BIRDS AS ART
PO Box 7245 (US mail) or 4041 Granada Drive (if by courier).
Indian Lake Estates, FL 33855
My friend David Tipling, with multiple BBC honored images and the author of dozens of photo illustrated books, helped with the planning and arrangements for this trip.
If you have any questions, please contact me via e-mail.
|
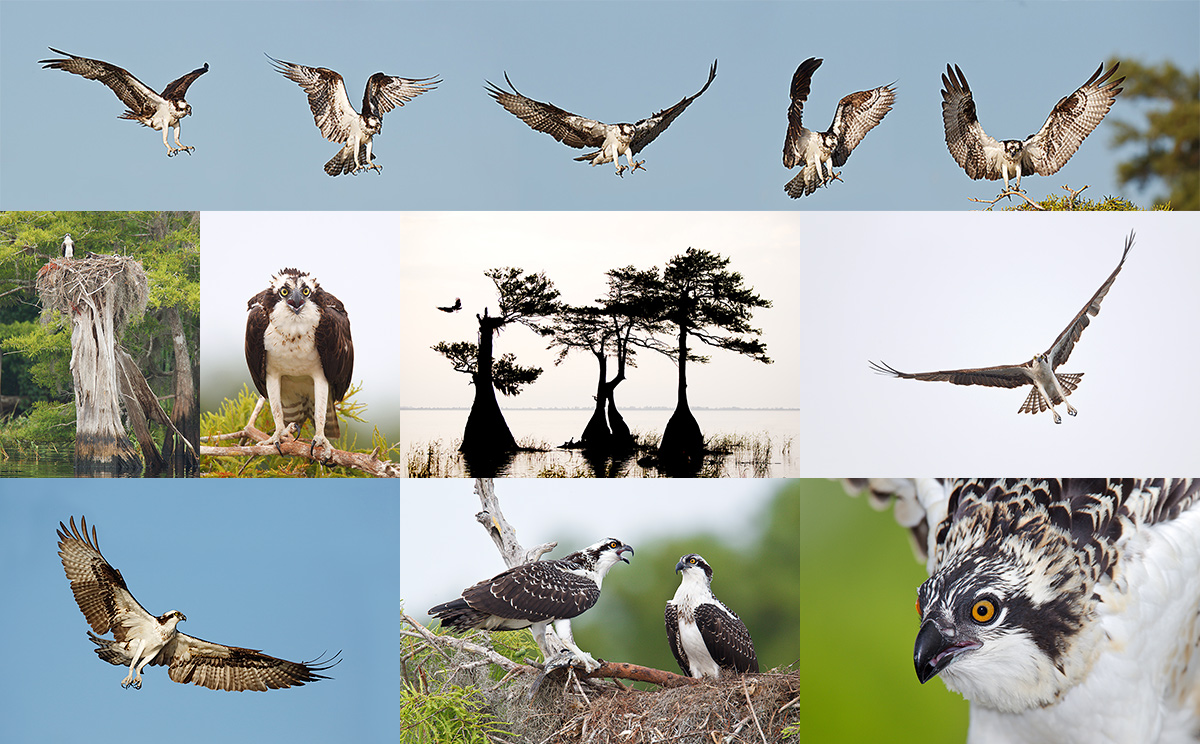
All images created on Lake Blue Cypress. Copyright Arthur Morris/BIRDS AS ART. Click on the composite to enjoy a larger version. |
Lake Blue Cypress Osprey Heaven Full-Day In-the-Field Hand Holding Workshops via Customized Pontoon Boat
Two 3+ hour shooting sessions on a beautiful cypress lake teeming with Osprey; Barred Owl almost guaranteed. Red-shouldered Hawk and Pileated Woodpecker likely. Be sure to follow the link to Jim’s gallery below.
2 great leaders: Captain Jim Neiger and Arthur Morris.
Available dates: April 8, 9, 11 & 12, 2014.
Here are the Full Day rates:
1 photographer: $650.
2 photographers: $500 each.
3 photographers: $450 each.
4 photographers: $400.
Each full day booking includes a delicious healthy lunch at my home. Overnight lodging at my home is available cheap on a limited basis for folks who would like to do more than one day. Please inquire via e-mail.
So far one photographer signed up for Saturday, April 12; join us and enjoy a $150 savings.
One or two photographers may hire the boat on a private basis by paying the full day rate for 4: $1600.
Because of the late date payment in full by personal check is due now. Please e-mail for additional details of info.
Check out Jim Neiger’s Osprey Heaven/Lake Blue Cypress Gallery here and you will be amazed as to the quality of the flight and action images and the possibilities.
Here’s what BPN member David Salem had to say about a day on the lake with Jim Neiger in Pane 1 here:
“We met our friend Jim Neiger on his boat at Lake Blue Cypress and had a blast shooting hundreds of Osprey and many other species including some great shots of Barred owls. I highly suggest booking a trip with Jim on the lake as he knows the lake real well and the birds even better. It was a trip that I will never forget with literally hundreds of Osprey flying around starting their nesting season. A sight to see!! I will be posting some pics from the lake soon. ”
Support the BAA Blog. Support the BAA Bulletins: Shop B&H here!
We want and need to keep providing you with the latest free information, photography and Photoshop lessons, and all manner of related information. Show your appreciation by making your purchases immediately after clicking on any of our B&H or Amazon Affiliate links in this blog post. Remember, B&H ain’t just photography!


Amazon
Everyone buys something from Amazon, be it a big lens or deodorant. Support the blog by starting your search by clicking on the logo-link below. No purchase is too small to be appreciated; they all add up. Why make it a habit? Because I make it a habit of bringing you new images and information on an almost daily basis.
Typos
In all blog posts and Bulletins, feel free to e-mail or to leave a comment regarding any typos, wrong words, misspellings, omissions, or grammatical errors. Just be right. 🙂





Colt left: to use the purple flower on right for balance.
Step back and point up: to include the two upper right yellow flowers without chopping the colt’s feet.
Joel is correct – for more
Go to Photoshop Help/Adjust HDR exposure and toning – under 2. In the Adjustments panel . . .
http://helpx.adobe.com/photoshop/using/adjusting-hdr-exposure-toning.html
for the answer to Exposure, Offset and Gamma
Jim
I remember reading somewhere (I will try to find a linK) that the exposure slider adjusts the highlights, the offset adjusts mid tones and the gamma adjusts the dark tones.
I feel that while the chick’s beak is pointing to the left, the eye (the most important focus point) is where it should be in the frame. The eye is just enough off center to make it a strong composition, in my opinion.
Here’s a straightforward tutorial on the Exposure correction. It’s old but probably still works the same — I can’t be sure because I prefer to use Curves for the same purpose.
However, it contains one of the worst pieces of advice in Photoshop — don’t do it from the Image > Adjustments menu. Do it as an adjustment layer. And don’t flatten it later — leave it editable. Adjustment layers are completely non-destructive.
http://www.earthboundlight.com/phototips/photoshop-cs2-exposure-adjustments.html
If you want to look into the full meaning of Gamma, here’s some good information. But the term as commonly used in Photoshop is a much simpler meaning of midtone contrast.
http://www.cambridgeincolour.com/tutorials/gamma-correction.htm
Thanks a stack Diane. I found that Earthbound Light tutorial made a lot more sense and was easier to follow than the Photoshop Help item… Looks as if at least I figured out the offset correctly.
why did I place the crane chick on the left side looking out of the frame? to balance the chick with the tall purple iris on the right?
Why should I have stepped back one foot and pointed the lens one inch higher? Since now the space is almost equal above and below the chick, did you want to subtract space under the chicks feet to put more space above the chick’s head (and to get the whole yellow flowers)? Or maybe it would be even better w/o the bright yellow flowers in upper right corner, taking the eye away from the chick?
Did you want to include those 2 out of focus yellow flowers?
PERSPECTIVE … To bring the Bird more ” alive ” … To make the Image ” POP ”
… by use of The Golden Mean ( placing the aspect of the Image you wish to emphasize at .68 of the distance horizontally as well as vertically ).