The Streak Continues: 231
This post was published at 5:45am from my Mom’s home in Holbrook, NY.
This post, which took me about 1 1/2 hours to prepare, marks 231 consecutive days with a new educational blog post. With so many folks getting in the habit of using our B&H links and our Amazon logo-links, why quit now? April, May, June, and July have been fantastic as lots of folks are getting the message; using my affiliate links does not cost you a penny and helps support my efforts here. To show your appreciation, I do ask that you use our B&H and Amazon affiliate links on the right side of the blog for all of your purchases. Please check the availability of all photographic accessories in the BIRDS AS ART Online Store, especially Gitzo tripods, Wimberley tripod heads, and the like. We sell only what I have used and tested, and know that you can depend on. We will not sell you junk. We know the tools that you need to make creating great images easy and fun. And we are always glad to answer your gear questions via e-mail.
You can find the following items in the store: Gitzo tripods, Mongoose M3.6 and Wimberley heads, plates, low feet, and accessories, flash brackets, , Delkin e-film Pro Compact Flash Cards, LensCoat products, and our unique line-up of educational materials including ABP I & II, Digital Basics, Site and Set-up e-Guides, Canon and Nikon Camera Users and AF e-Guides, and MP-4 Photoshop video tutorials among others.
I would of course appreciate your using our B&H affiliate links for all of your major gear, video, and electronic purchases. For the photographic stuff mentioned in the paragraph above we, meaning BAA, would of course greatly appreciate your business. Here is a huge thank you to the many who have been using our links on a regular basis and visiting the BAA Online store as well.
|
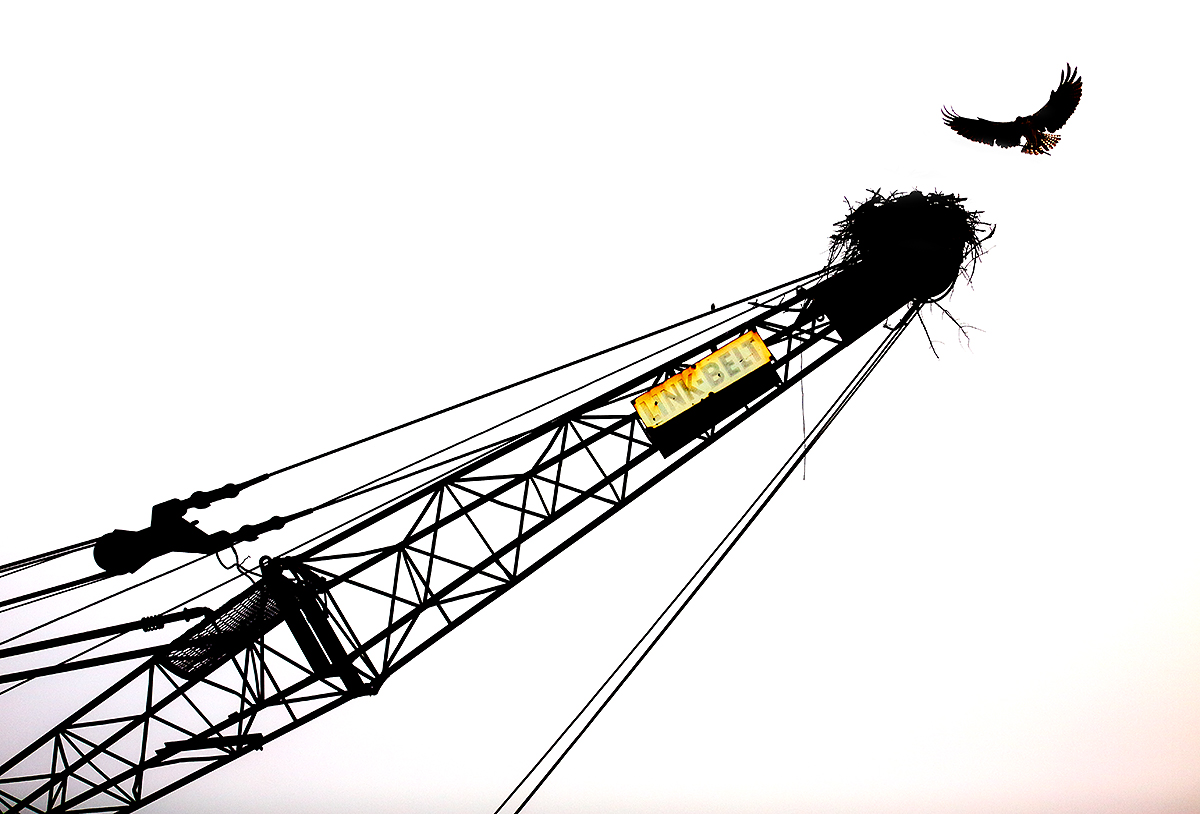
This image was created Nickerson Baby Beach Nesting Birds IPT with the hand held Canon EF 70-200mm f/2.8L IS II lens (at 70mm) and the Canon EOS-1D X. ISO 800. Evaluative metering + 2 2/3 stops as framed: 1/2000 sec. at f/2.8 in Av mode. Central sensor/AI Servo Surround/Rear Focus AF on the center of the crane as originally framed was active at the moment of exposure. Click here if you missed the Rear Focus Tutorial. Be sure to click on the image to see a larger version. |
Foggy Link Belt Crane…
We were just minutes from turning into the Nickerson Beach parking lot at about 6am on a very foggy morning when Denise asked, “Did you see the Osprey nest on the crane?” “Nope” I replied. “Was it nice? Was there a bird on the nest?” “Yes and yes,” she said.
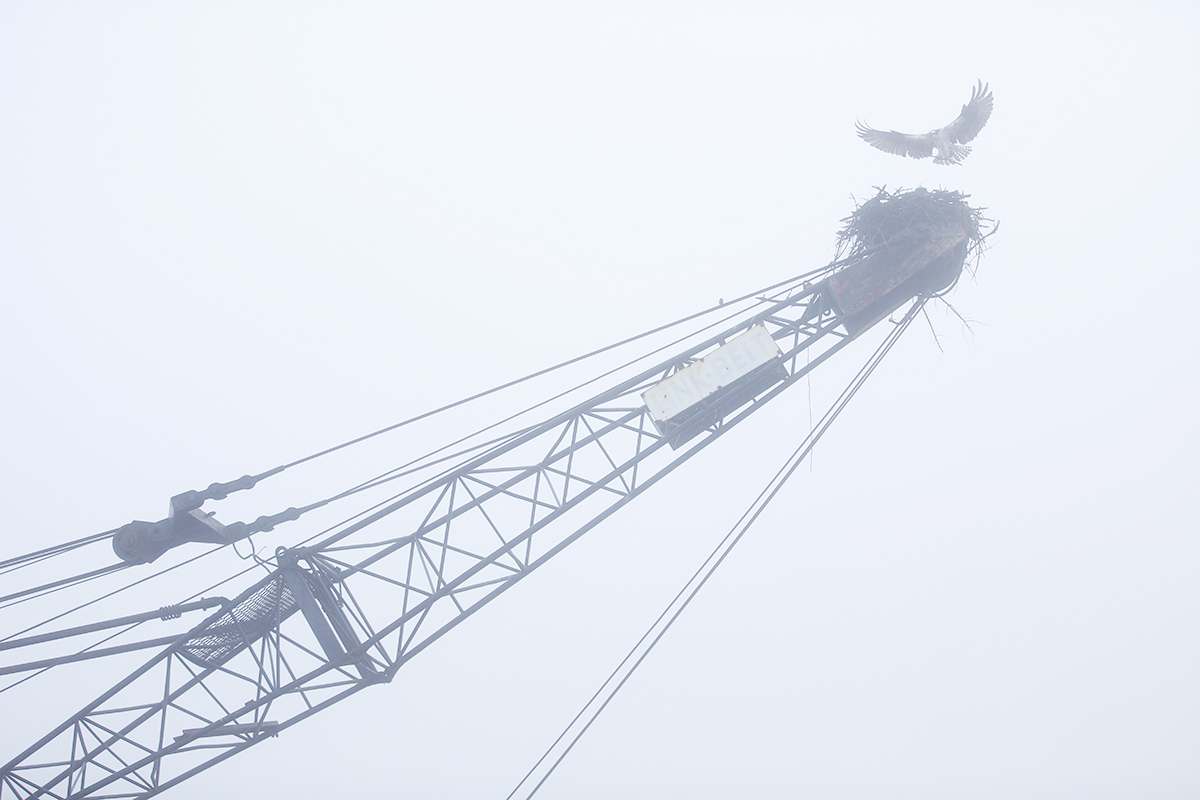
Thinking of the raven nest on a derelict gold dredge that I had photographed more than a decade ago in Nome, AK, I slowed and indicated to the other cars in our caravan that we would be making a detour. Though one of those Nome Common Raven images had been published in National Geographic, the group members then were also dubious despite my excitement: “How can you make a good image in such heavy fog?”. As it was our first morning I knew that working in the fog would be a great vehicle for teaching the group to expose to the right; please see the original image below. It took us a while to get the right lenses in our hands and to find a good perspective. The Osprey cooperated nicely by flying around and landing several times. In fifteen short minutes we were back in the cars headed for a great morning at the beach.
The Link Belt Crane
The crane in the photo is actually fully operational but once the Ospreys began building their nest a local ordinance prevented the owners from using it. My understanding is that they complied gladly. Click here to learn about Link Belt Cranes. For some really neat, incredibly interesting stuff on the development of this company first click on the “About” tab and the click on the “History” link.
The All Purpose 70-200mm f/2.8L IS II Lens
As regular readers know full well, the Canon 70-200mm f/2.8L IS II USM lens is one of my very favorite lenses. It is often the only other lens that I take into the field with my tripod-mounted Canon EF 600mm f/4L IS II USM lens. As above, I use it often to create small-in-the-frame or habitat images. I use it for flocks in flight at Bosque with either TC. I use it often to photograph family groups of birds or birds interacting at close range. I use it a ton for scenic images as I did with great success in the Palouse. And I use it either alone (see here) or with either TC to photograph birds in flight at close range. In short, the 70-200 II is an incredibly versatile hand holdable intermediate telephoto lens that offers me a focal length range of from 70 to 400mm.
A used 70-200mm f/2.8L IS II Lens For You
Dale Lorenzen is offering a used Canon 70-200mm f/2.8L IS II USM Lens in nearly mint condition for $1850. It is like new with a small scratch on the hood. The sale includes the original box, the software CD, the carrying case, the tripod ring, and the front and rear caps. The seller will pay insured UPS shipping within continental US. The lens will ship after the check clears.
Please contact Dale via e-mail. At this give-away price, this lens should sell instantly.
A 300 II Heads Up
There is a brand new listing here for a near mint 300 II for $1,000 less than the current B&H price and the sale includes a CRX-3.5 plate. I expect that this one will also sell instantly….
Selling Your Used Photo Gear Through BIRDS AS ART
Selling your used (or like-new) photo gear through the BAA Blog or via a BAA Online Bulletin is a great idea. We charge only a 5% commission. One of the more popular used gear for sale sites charges a minimum of 20% plus assorted fees! Yikes. The minimum item price here is $500 (or less for a $25 fee). If you are interested please e-mail with the words Items for Sale Info Request cut and pasted into the Subject line :). Stuff that is priced fairly–I offer free pricing advise, usually sells in no time flat.
|
This JPEG was created from the large JPEG that is embedded in all RAW files at the moment of capture. It is an accurate representation of the original RAW capture. |
Exposing to the Right
Exposing to the right while avoiding significant blinkies produces high quality images while minimizing noise. Be sure to have at least some data in the right-most histogram box, the 5th box on Canon camera bodies, the 4th box on Nikon bodies.
Image Optimization Questions
1-What is the simplest way to get the from the foggy look of the original capture to the high key/high contrast look of the optimized image?
2-How would you move the bird to the right as I did?
3-How did I juice up the Link Belt sign?
Digital Basics
Most everything I did to optimize today’s image is detailed in my Digital Basics File–written in my easy-to-follow, easy-to-understand style. Are you tired of making your images look worse in Photoshop? Have you no clue as to how I optimized the image above? The Photoshop techniques that I used plus tons more are covered in my Digital Basics File, an instructional PDF that is sent via e-mail. It includes my complete digital workflow, dozens of great Photoshop tips, the use of Contrast Masks, several different ways of expanding and filling in canvas, all of my time-saving Keyboard Shortcuts, Quick Masking, Layer Masking, and NIK Color Efex Pro basics, my killer image clean-up techniques, Digital Eye Doctor, creating time-saving actions, and lots more.
The DPP RAW Conversion Guide
To learn why I use Canon’s Digital Photo Professional (DPP) to convert every image that I work on, click here.
APTATS I & II
Learn the details of advanced Quick Masking techniques in APTATS I. Learn Advanced Layer Masking Techniques in APTATS I. Mention this blog post and apply a $5 discount to either with phone orders only. Buy both APTATS I and APTATS II and we will be glad to apply at $15 discount with phone orders only.
Be sure to like and follow BAA on Facebook by clicking on the logo link upper right. Tanks a stack!
|
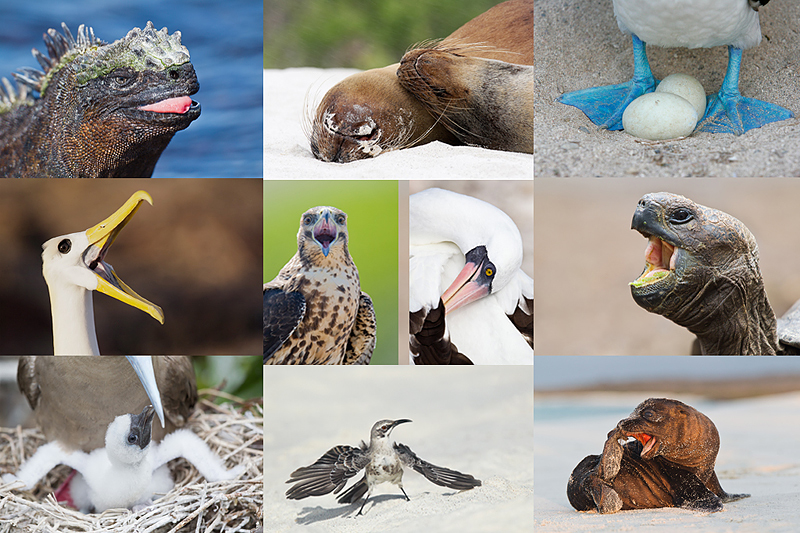
Do consider joining me for a once in a lifetime trip to the Galapagos archipelago in July, 2015. |
GALAPAGOS Photo Cruise of a Lifetime IPT/The Complete Galapagos Photographic Experience. July 14-28, 2015 on the boat. 13 FULL and two half-days of photography: $12,499. Limit 14 including the leader(s)/Openings: 7.
My two-week Galapagos Photo-Cruises are without equal. The world’s best guide, a killer itinerary, a great boat (the Samba), and the best leader with eight Galapagos cruises under his belt. Pre-trip and pre-landing location-specific gear advice. In-the-field photo instruction and guidance. Jeez, I almost forgot: fine dining at sea!
The great spots that we will visit include Tower Island (including Prince Phillips Steps and Darwin Bay), Hood Island (including Punta Suarez, the world’s only nesting site of Waved Albatross, and Gardner Bay)—each of the preceding are world class wildlife photography designations that rank right up there with Antarctica, Africa, and Midway. We will also visit Fernandina, Puerto Ayora for the tortoises, Puerto Egas—James Bay, North Seymour and Isla Lobos for nesting Blue-footed Booby (most years), South Plaza, Floreana, and Urbina Bay, all spectacular in their own right. We visit every great spot on a single trip. Plus tons more. And there will he lots of opportunities to snorkel on sunny mid-days for those like me who wish to partake.
We will be the first boat on each island in the morning and the last boat to leave each island every afternoon. If we are blessed with overcast weather, we will often spend 5-6 hours at the best sites. And as noted above, mid-day snorkeling is an option on most sunny days depending on location. Note: some of the walks are a bit strenuous. Great images are possible on all landings with a hand held 70-200mm lens and a 1.4X teleconverter. I bring a longer lens ashore on most landings as that fits my style. I generally work with either the Canon 300mm f/2.8L IS or the Canon 200-400mm f/4 L IS with Internal Extender.
Do know that there is a NatureScapes Galapagos trip: one week for $8495. Thus, my trip represents a tremendous value; why go all that way and miss half of the great photographic locations?
The Logistics
Fly to Guayacil, Ecuador on July 12, 2015. Travel insurance/rest day: July 13 (We may or may not offer a photo outing on the 13th). Fly to the archipelago on July 14 and board the Samba. Get off the boat on July 28. Fly to Guayacil that afternoon. Fly home on the early morning of July 29 unless you are staying on or going elsewhere (or catching a red-eye flight on the evening of the 28th).
$12,499 includes just about everything: all transfers, guide and park fees, all food on the boat, transfers and ground transportation, your flights to the archipelago, and three nights (double occupancy) in a top notch hotel in Guayacil. If you are good to go, a non-refundable deposit of $5,000 per person is due immediately. The second payment of $4,000 is not due until 11/1/14. The final payment of $3749 per person will be due on 2/1/15. A $200 discount will be applied to each of the balances for couples or friends who register at the same time.
Purchasing travel insurance within 2 weeks of our cashing your deposit check is strongly recommended. On my past two cruises a total of 5 folks were forced to cancel less than one week prior to the trip. My family and I use Travel Insurance Services and strongly recommend that you do the same.
Not included: your round trip airfare from your home to and from Guayaquil, beverages on the boat, phone calls, your meals in Guayacil, personal items, and a $600/person cash tip for the crew and the guide—this works out to roughly $40/day to be shared by the 7 folks who will be waiting on us hand and foot every day for two weeks. The service is so wonderful that many folks choose to tip extra.
Please e-mail for the complete itinerary and for additional info and images. Please cut and paste “Galapagos 2015 Info Please) into the Subject line.
Support the BAA Blog. Support the BAA Bulletins: Shop B&H here!
We want and need to keep providing you with the latest free information, photography and Photoshop lessons, and all manner of related information. Show your appreciation by making your purchases immediately after clicking on any of our B&H or Amazon Affiliate links in this blog post. Remember, B&H ain’t just photography!
Amazon Canada
Many kind folks from north of the border, ay, have e-mailed stating that they would love to help us out by using one of our affiliate links but that living in Canada and doing so presents numerous problems. Now, they can help us out by using our Amazon Canada affiliate link by starting their searches by clicking here. Many thanks to those who have written.
Typos
In all blog posts and Bulletins, feel free to e-mail or to leave a comment regarding any typos, wrong words, misspellings, omissions, or grammatical errors. Just be right. 🙂


To get the color on the sign and the osprey I would create a new layer, make it color burn, pick your color, using the brush tool or the lasso paint it on the sign and the osprey, adjust for opacity and saturnation.
I used a Threshold adjustment layer to get the silhouette but can’t get any color into the sign yet.
Hmm, hours gone by without a comment about post-processing the image…OK, I’ll go out on a limb:
1. I made a screen capture of the osprey/crane image, getting a crappy, very low res JPEG with some posterization
2. Opened JPEG in Photoshop & duplicated the background layer, named it working layer
3. In working layer, moved osprey to right with patch tool and got rid of original osprey the same way
4. Created a Levels adjustment layer above working layer
5. Using the eyedroppers, set the white & black points appropriately
You said “simple” so I quit right there, two minutes worth or work. I got a sharp image with no fog and very detailed crane. The osprey had good tonal range, showing the light and dark feathers in body and head and nest plus metal at the tip of crane also showed a range of tones. Got hardly any color in the Linkbelt sign, though.
How did you do it? 🙂
I’d love to see the Raven nest shot if you could dig it up.
Me too. They are not on the new laptop. I will see if I can have Jim dig up a few on Monday.
See BAA Bulletin 204
Thanks Gary!