The Streak Continues
This post marks 131 straight days with a new educational blog post. With so many folks getting in the habit of using our B&H and Amazon links why quit now? To show your appreciation for my efforts here, we do ask that you use our the B&H and Amazon affiliate links on the right side of the blog for all of your purchases. Please check the availability of all photographic accessories in the BIRDS AS ART Online Store. We sell only what I use and depend on. We will not sell you junk. We know what you need to make creating great images easy and fun. And we are always glad to answer your gear questions via e-mail.
You can find the following items in the store: Gitzo tripods, Mongoose M3.6 and Wimberley heads, plates, low feet, and accessories, flash brackets, , Delkin e-film Pro Compact Flash Cards, LensCoat products, and our unique line-up of educational materials including ABP I & II, Digital Basics, Site and Set-up e-Guides, Canon and Nikon Camera Users and AF e-Guides, and MP-4 Photoshop video tutorials among others.
I would of course appreciate your using our B&H affiliate links for all of your major gear, video, and electronic purchases. For the photographic stuff mentioned in the paragraph above we, meaning BAA, would of course greatly appreciate your business. Here is a huge thank you to the many who have been using our links on a regular basis and visiting the BAA Online store as well.
This blog post took about 3 hours to assemble. Enjoy!
“The Different Tools, Different Light, Flash Off, Flash On…” Blog Post Why ISO 200 Answer….
Scroll down to Bill Richardson’s comment here to learn how I wound up at ISO 200 for Image 1. Remember, my one-size fits all ISO in all bright situations is 400.
|
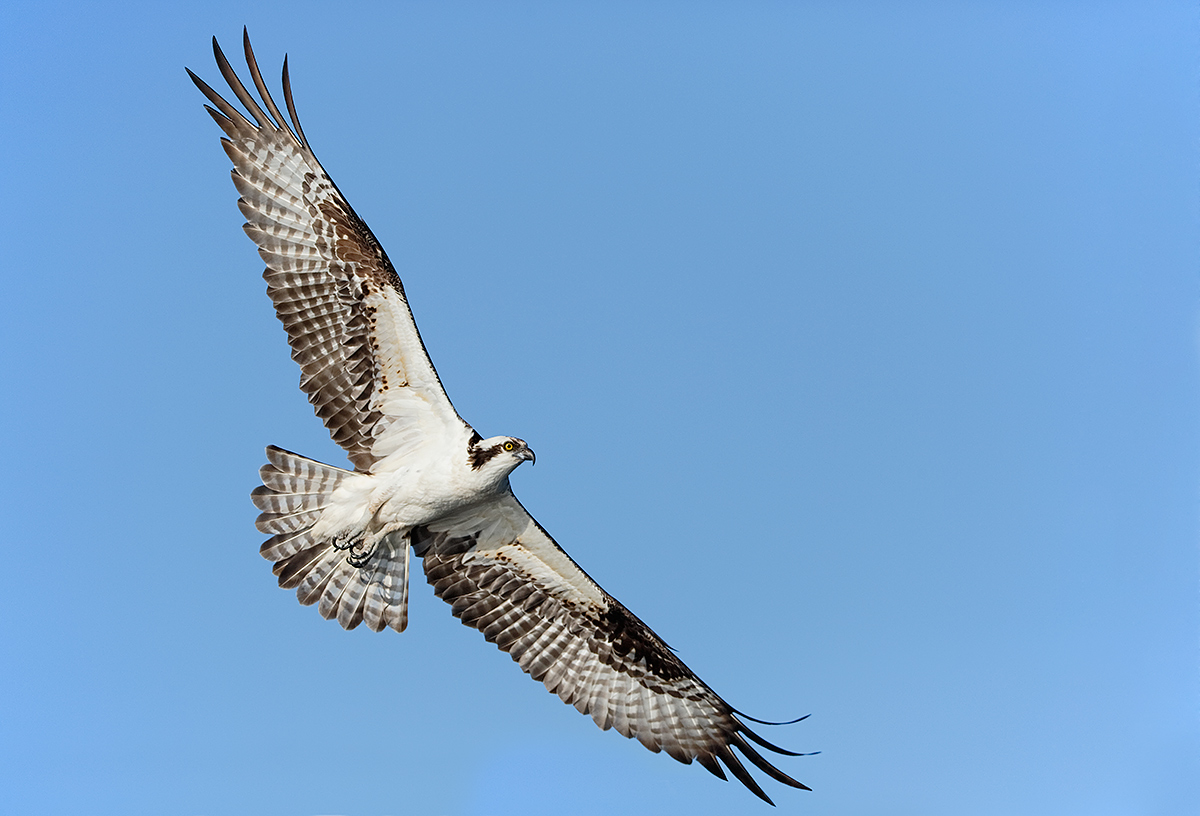
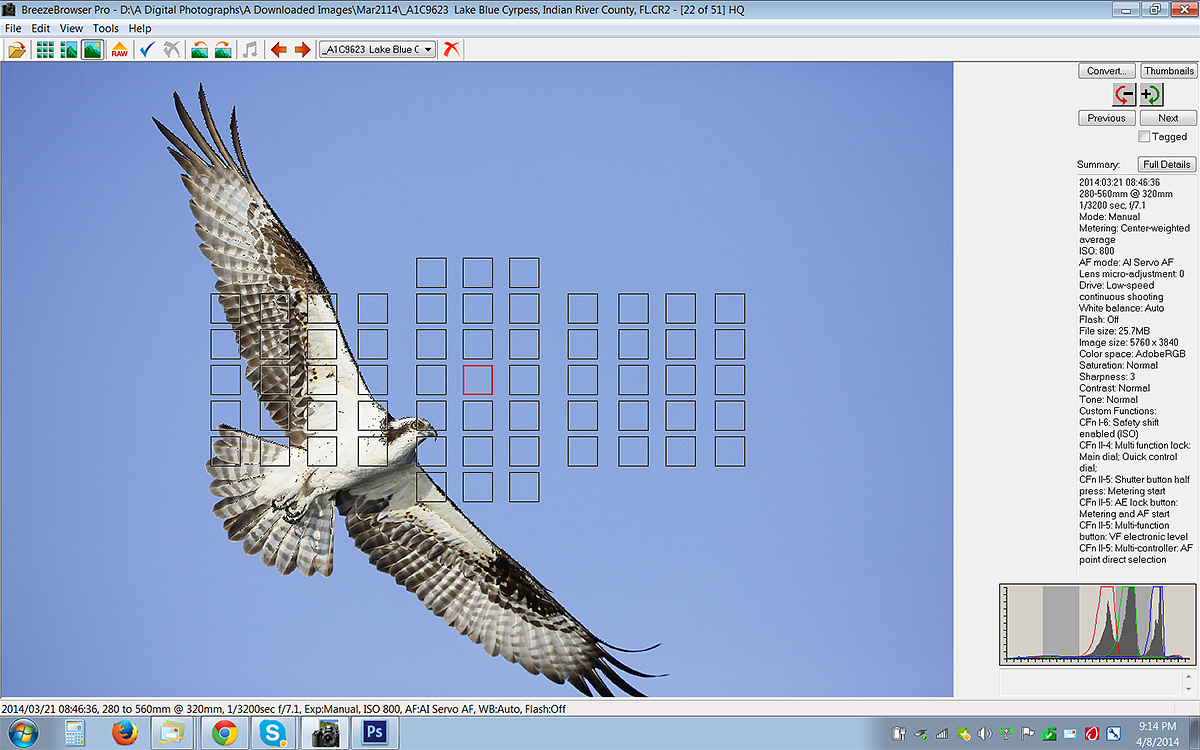
This image was created on Lake Blue Cypress on March 21, 2014 at 8:46am on a clear morning right down sun angle with the hand held the Canon EF 200-400mm f/4L IS USM Lens with Internal 1.4x Extender (with the internal TC engaged at 320mm) and the Canon EOS-1D X. ISO 800. Evaluative metering +1/3 stop as framed: 1/3200 sec. at f/7.1 in Manual mode. AWB. Central Sensor/AI Servo-Surround/Rear Focus AF active at the moment of exposure just caught the top of the bird’s head; see the BreezeBrowser screen capture below. Click here to see the latest version of the Rear Focus Tutorial. Click on the image to see a larger version. .
|
Lake Blue Cypress
Lake Blue Cypress is an incredibly beautiful location with hundreds of pairs of Osprey all using natural nest sites. If you spend a morning and afternoon aboard Jim Neiger’s customized pontoon boat it is possible to create a wonderful Osprey portfolio in a single day. This Saturday’s trip is sold out but there is a single opening on Friday, April 11. Scroll down for details.
Update
Friday is now sold out.
|
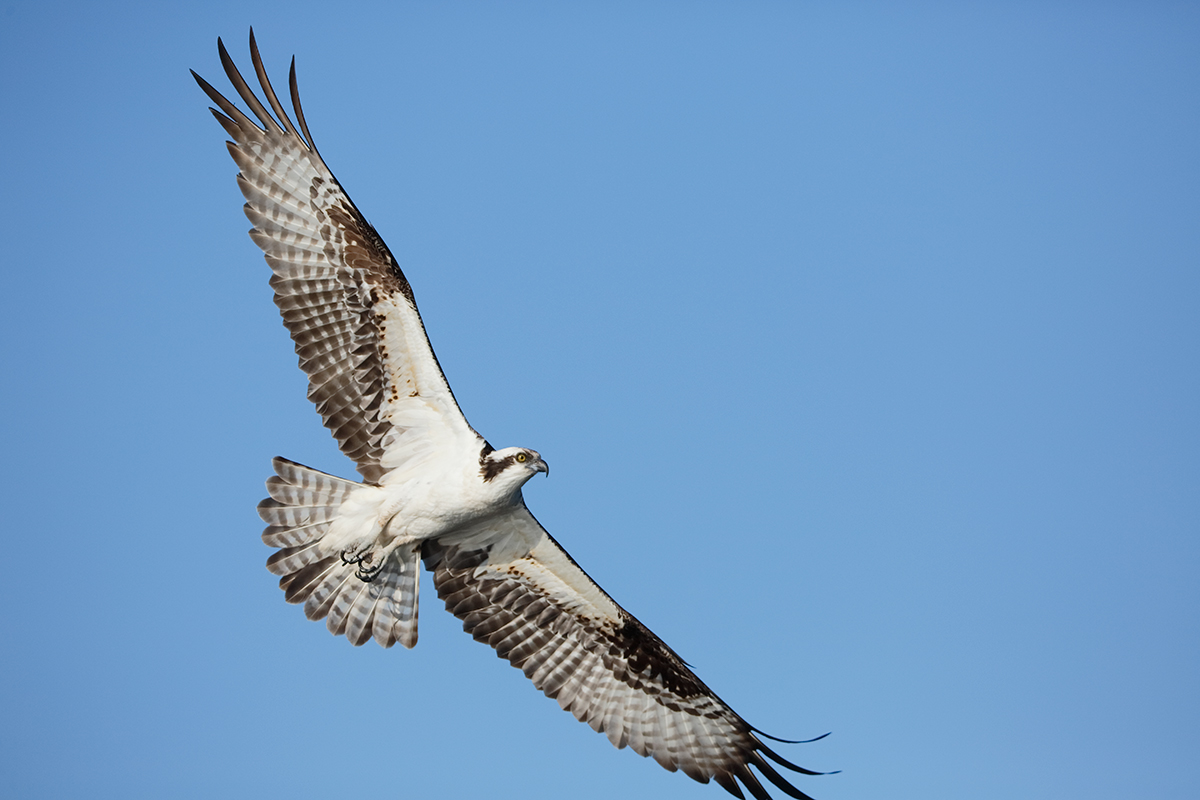
This is the original capture. |
Greedy, Greedy, Greedy
Even having zoomed out to 320mm, I clipped the three of the bird’s left wingtips, those of the 3rd, 4th, and 5th primaries. I love the nearly perfect lighting on the underwings, the diagonal, and the placement of the bird well back in the frame so the choice to repair the missing wingtips was an obvious one. After converting the image in DPP, I expanded canvas below, grabbed the corresponding wingtips from the right wing–each on a separate layer, repositioned, transformed, and warped each of them, and then added a Regular Layer Mask to fine-tune things.
APTATS I to the Rescue
Using the techniques detailed in the 4th tutorial in APTATS I, “Clipped Feather Tip Repair,” it took me only fifteen minutes to salvage this image and replace tips of the 3 clipped primaries. I used the tip of the 5th primary to replace the missing tip of the 4th primary. And I used the tip of the first primary to replace the missing tips of the 2nd and 3rd primaries. I did work both large and carefully. The advanced knowledge of Layer Masking that I picked up from APTATS II was of course quite helpful in fine-tuning the various wingtip layers.
APTATS I & II
Learn the details of advanced Quick Masking techniques in APTATS I. Mention this blog post and apply a $5 discount with phone orders only. Learn advanced Layer Masking Techniques in APTATS II. Mention this blog post and apply a $5 discount with phone orders only. Buy the pair, APTATS I and APTATS II and we will be glad to apply at $15 discount with phone orders only.
Eye Doctor Work
Be sure to enlarge the optimized and the original versions and check out the Eye Doctor work. See more in Digital Basics immediately below.
Digital Basics
Are you tired of making your images look worse in Photoshop? Do you have no clue as to how I optimized the images above? The Photoshop stuff mentioned above plus tons more is detailed in my Digital Basics File, an instructional PDF that is sent via e-mail. It includes my complete digital workflow, dozens of great Photoshop tips, the use of Contrast Masks, several different ways of expanding canvas, all of my time-saving Keyboard Shortcuts, Quick Masking, Layer Masking, and NIK Color Efex Pro basics, my killer image clean-up techniques, Digital Eye Doctor, creating time-saving actions, and lots more.
The DPP RAW Conversion Guide
After seeing the accurate colors that I get from my DPP RAW conversions, Japan in Winter co-leader Paul McKenzie switched to DPP conversions and Denise Ippolito is considering doing the same. Now that is amazing…. To learn why I use Canon’s Digital Photo Professional (DPP) to convert every image that I work on, click here.
|
Our efforts to create flight images with large-in-the-frame subjects often results in clipped wingtips. Above is the Breezebrowser Main View screen capture for today’s image. |
A Flight Photography Tip That You Have Never Read Anywhere Else….
Note in the BreezeBrowser screen capture above that the lower left corner of the lower left Surround AF point just barely caught the top of the bird’s head. Note: the 8 AF points surrounding the central sensor here were active; it would be nice if the sensor that was active at the moment of exposure were lit up rather than the selected sensor.
What I try to do with images like this where I want the original image file to feature the flying bird well back in the frame is to increase the speed of my panning motion just as I depress the shutter button even if that results in the active AF sensor falling on the sky. As doing this goes against instinct it requires a conscious effort to pull it off. In some cases you need to let go of the focus button (either rear or shutter) and then push the button again in order to re-acquire focus.
The heavy vignetting was corrected in Photoshop using Filter/Lens Correction/Custom on a separate layer as described in Digital Basics File.
The Breezebrowser Main View Screen Capture
Above is the BreezeBrowser Main View screen capture for today’s image. Note that the illuminated red square shows the AF point that was selected. Note: in Breezebrowser you need to check “Show Focus Points” under View to activate this feature. To see the focus points in DPP check “AF Point” under View or hit Alt L. Hit Alt M to see Highlight Alert. To learn how and why I use DPP (Canon Digital Photo Professional) to convert my RAW files, see the info on our DPP RAW Conversion Guide here.
Note the perfect histogram the WHITEs well into the rightmost histogram box. Regular readers know that I use and depend on BreezeBrowser every day of the year. It allows me to sort my keepers and delete the rejects faster than any other Windows browsing program. We use it on the main computer in the home office to catalog our images file-drawer style. And the companion program, Downloader Pro allows me to download my images quickly and conveniently. It automatically adds my IPTC data and the shooting location. I have it set up to create a folder named by the Month/date/year. The Breezebrowser/Downloader Pro combo saves me many hours each week. To learn more or to purchase this great PC only program, click here. As far as the BreezeBrowser/Downloader Pro Combo goes, if you are using a Windows platform and are not using these two great programs you are at best, wasting your valuable time. My understanding is that Photo Mechanic is best for Mac-users who do not opt to run Parallels or VM Ware fusion on their Macs so that they can enjoy the many advantages of BreezeBrowser. See BreezeBrowswer on a Mac for details.
|
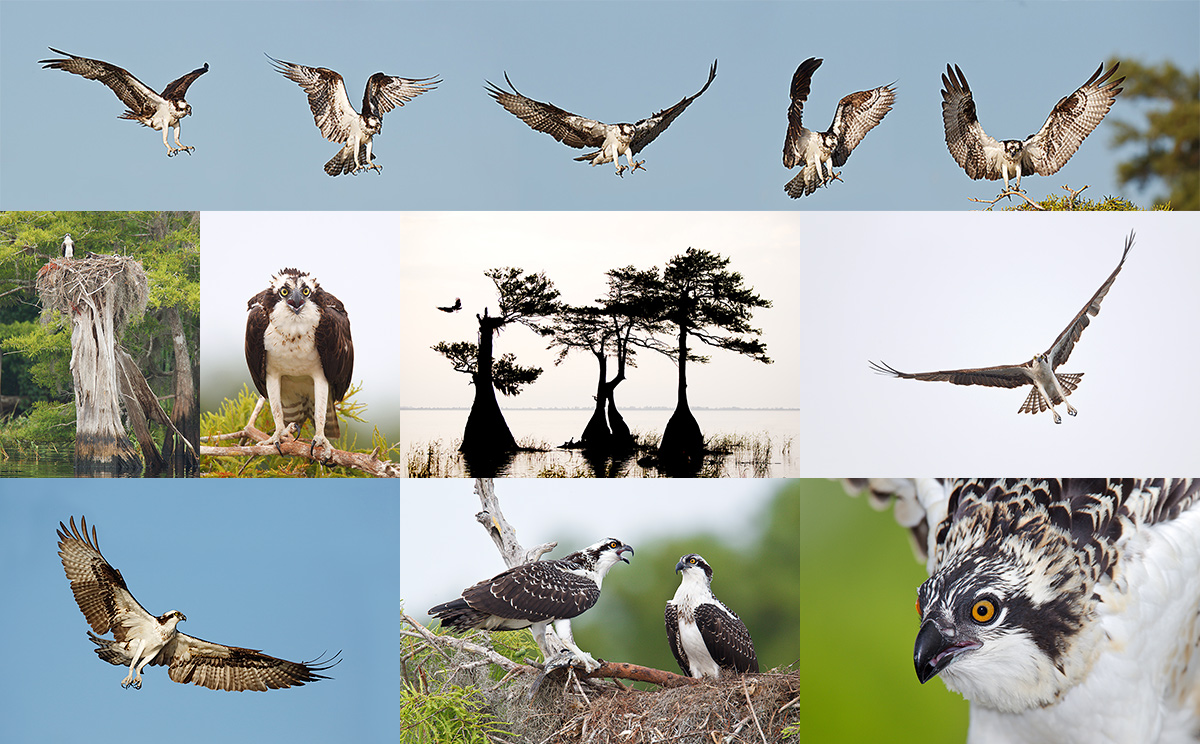
All images created on Lake Blue Cypress. Copyright Arthur Morris/BIRDS AS ART. Click on the composite to enjoy a larger version. |
Lake Blue Cypress Osprey Heaven Full-Day In-the-Field Hand Holding Workshops via Customized Pontoon Boat
Two 3+ hour shooting sessions on a beautiful cypress lake teeming with Osprey; Barred Owl almost guaranteed. Red-shouldered Hawk and Pileated Woodpecker likely. Be sure to follow the link to Jim’s gallery below.
2 great leaders: Captain Jim Neiger and Arthur Morris.
Update
Friday and Saturday are now sold out.
Each full day booking includes a delicious healthy lunch at my home. Overnight lodging at my home is available cheap on a limited basis for folks who would like to do more than one day. Please inquire via e-mail.
Because of the late date payment in full by credit card is due now. Please e-mail for additional details of info or call Jim or Jennifer at 863-692-0906 to register.
Check out Jim Neiger’s Osprey Heaven/Lake Blue Cypress Gallery here and you will be amazed as to the quality of the flight and action images and the possibilities.
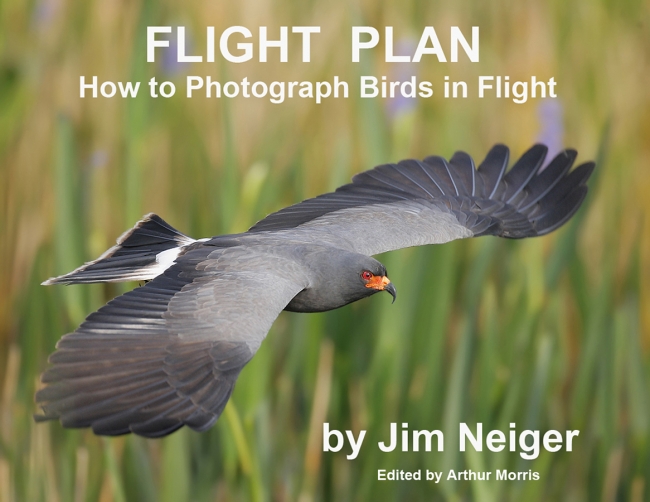
Flight Plan
If you want to learn to be a better flight photographer, check out Jim Neiger’s great e-Guide here.
Support the BAA Blog. Support the BAA Bulletins: Shop B&H here!
We want and need to keep providing you with the latest free information, photography and Photoshop lessons, and all manner of related information. Show your appreciation by making your purchases immediately after clicking on any of our B&H or Amazon Affiliate links in this blog post. Remember, B&H ain’t just photography!


Amazon
Everyone buys something from Amazon, be it a big lens or deodorant. Support the blog by starting your search by clicking on the logo-link below. No purchase is too small to be appreciated; they all add up. Why make it a habit? Because I make it a habit of bringing you new images and information on an almost daily basis.
Typos
In all blog posts and Bulletins, feel free to e-mail or to leave a comment regarding any typos, wrong words, misspellings, omissions, or grammatical errors. Just be right. 🙂



Think you have a typo.
For the image data in the first file, you say you were in AV mode. But the BreezeBrowswer shot shows you were in manual.One question…why ISO 800 and not 400?
Doug
Yes a cut and paste typo. Will fix it in a moment. ISO 800 for additional shutter speed and or d-o-f. No concern about noise wnen properly exposing to the right.
artie