Used Gear Caution
Though I am not in a position to post images of gear for sale here or elsewhere, prospective buyers are encouraged to request for photos of the gear that they are interested in purchasing via e-mail. Doing so will help to avoid any misunderstandings as to the condition of the gear.
The Streak Continues: 186
This post marks 186 consecutive days with a new educational blog post. With so many folks getting in the habit of using our B&H links and our Amazon logo-links why quit now? To show your appreciation for my efforts here, I do ask that you use our the B&H and Amazon affiliate links on the right side of the blog for all of your purchases. Please check the availability of all photographic accessories in the BIRDS AS ART Online Store, especially Gitzo tripods, Wimberley tripod heads, and the like. We sell only what I have used and tested, and know that you can depend on. We will not sell you junk. We know the tools that you need to make creating great images easy and fun. And we are always glad to answer your gear questions via e-mail.
You can find the following items in the store: Gitzo tripods, Mongoose M3.6 and Wimberley heads, plates, low feet, and accessories, flash brackets, , Delkin e-film Pro Compact Flash Cards, LensCoat products, and our unique line-up of educational materials including ABP I & II, Digital Basics, Site and Set-up e-Guides, Canon and Nikon Camera Users and AF e-Guides, and MP-4 Photoshop video tutorials among others.
I would of course appreciate your using our B&H affiliate links for all of your major gear, video, and electronic purchases. For the photographic stuff mentioned in the paragraph above we, meaning BAA, would of course greatly appreciate your business. Here is a huge thank you to the many who have been using our links on a regular basis and visiting the BAA Online store as well.
This post took 2 hours to prepare. Enjoy!
|
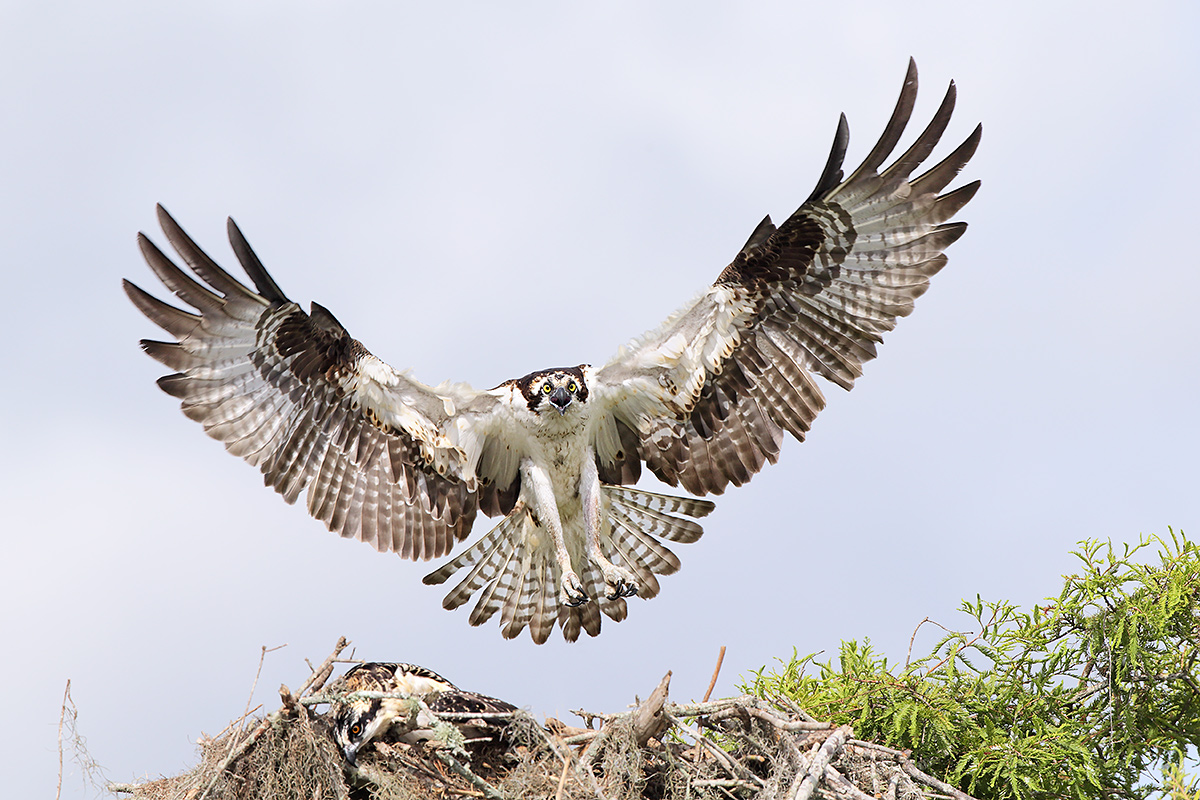
This image was created at 9:44am on Saturday past on a partly cloudy very bright morning at Lake Blue Cypress with the hand held Canon EF 300mm f/2.8L IS II USM lens, the Canon Extender EF 1.4X III, and the Canon EOS-1D X. ISO 640. Evaluative metering +1 stop of the light sky: 1/2000 sec. at f/6.3 in Manual mode. AWB. Central sensor/AI Servo-Surround/Rear Focus AF squarely on the bird’s left eye as originally framed active at the moment of exposure. (This is a very small crop from the left and above.) Click here to see the latest version of the Rear Focus Tutorial. Click on the image to see a larger version. |
The 300 II Strikes Again: 1245 Images/One Favorite
In the “The 300 II Strikes Again: 1245 Images/One Favorite” blog post here, I asked, “If I were going to remove a single stick from the osprey nest, which one would it be? Why?
As you can see above, the answer was the very light toned vertical stick right below the bird. Why? As I have intoned here before, “strong vertical lines in the center of horizontal compositions are often image killers. Though the stick that I removed was neither a strong vertical nor an image killer, it was distracting and the fact that is was the lightest toned stick in nest made things worse.
In his comment, David Bose stated, “‘Ya know, I looked at that one too and immediately said to myself “that stick looks like it’s going to impale the incoming bird” but it didn’t look out of place to me. Duh! I guess that says it was distracting me too but I didn’t realize it”.
See how the folks on BPN helped me make this image better in my post here. In addition, they inspired me to find a solution to adjusting the brightness level on my new ASUS G750JX-DB71 17.3-Inch Laptop (Black)
The DPP RAW Conversion Guide
To learn why the RAW file for every image in this blog post was converted in Canon’s Digital Photo Professional (DPP), click here.
Digital Basics
To remove the stick without a trace I used the Protective Cloning on a Layer technique taught to me by Denise Ippolito. That, and pretty much everything that do while optimizing my images is detailed in my Digital Basics File–written in my easy-to-follow, easy-to-understand style. Are you tired of making your images look worse in Photoshop? Digital Basics File is an instructional PDF that is sent via e-mail. It includes my complete digital workflow, dozens of great Photoshop tips, the use of Contrast Masks, several different ways of expanding and filling in canvas, all of my time-saving Keyboard Shortcuts, Quick Masking, Layer Masking, and NIK Color Efex Pro basics, my killer image clean-up techniques, Digital Eye Doctor, creating time-saving actions, and lots more.
My New ASUS Laptop
Transitioning from a favorite laptop to a new machine is always challenging but that process is nearly complete. I am very happy that Jennifer scrubbed Windows 8 and installed Windows 7. The machine is fast and the monitor and resolution are superb. Now that I have straightened out the brightness issues I am good to go. I will be bringing the new laptop on a scouting trip to the Palouse in eastern Washington state. I fly all day on Thursday. Lots more on that soon.
Some may prefer the version with 24 gb of memory:
Everyone needs to remember that all of my favorite images are processed by me on a laptop. I have been doing that for close to a decade. And will continue doing just that till they nail the box shut. If Apple had not discontinued offering 17 inch laptops I would have switched to Mac…. As far as I can tell, that decision was a dumb one. I would have run BreezeBrowswer on the Mac on a Windows platform as described here.
Those wishing to support BAA can purchase the same laptop from B&H by starting their search with the B&H Photo Gear and More logo link on the right side of the blog. If you are ever in doubt, use that one :). Many thanks of course.
|
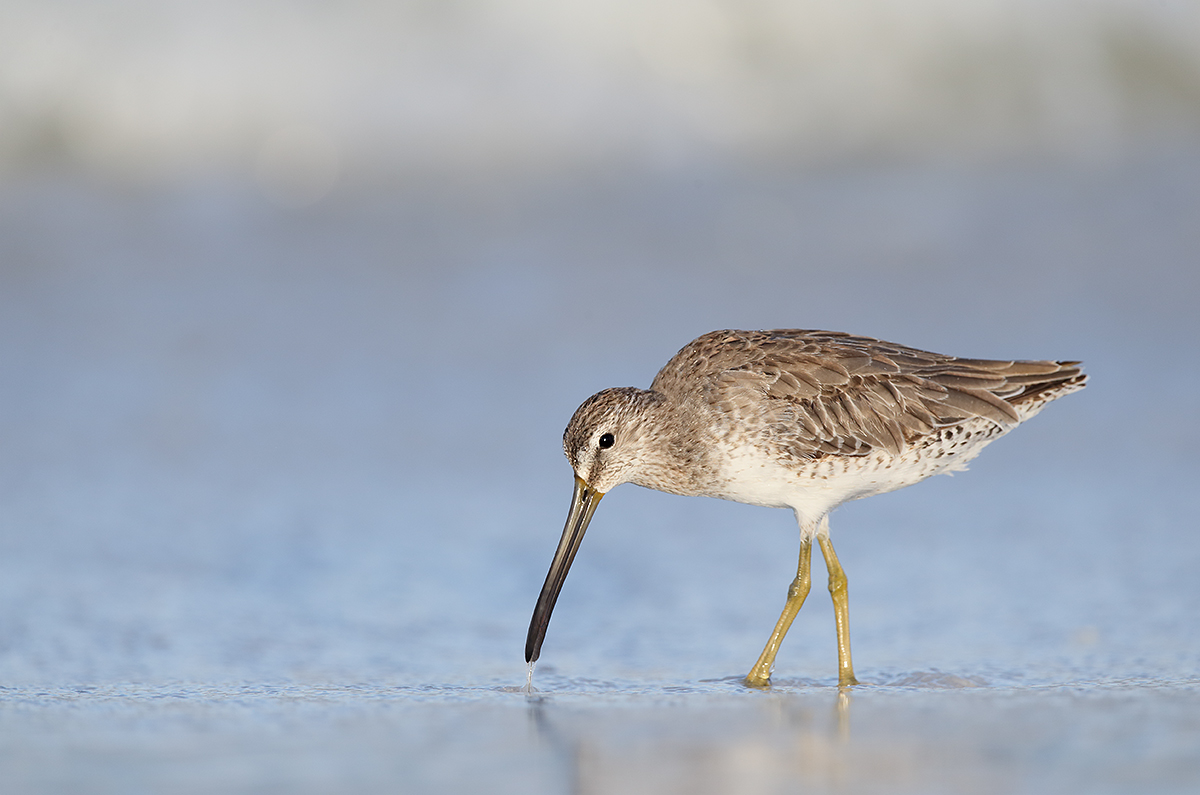
This image was created at 7:38am with the hand held Canon EF 300mm f/2.8L IS II USM lens, the Canon Extender EF 2X III, and the Canon EOS-1D X. ISO 800. Evaluative metering +1 stop as framed: 1/1600 sec. at f/5.6 in Manual mode. AWB. One sensor below the central Sensor/AI Servo-Surround/Rear Focus AF right on the bird’s eye as framed was active at the moment of exposure. Click here to see the latest version of the Rear Focus Tutorial. Click on the image to see a larger version. It’s great having all 61 AF sensors available with the 300 II/2X III TC combo. Image #2: Short-billed Dowitcher beginning molt to breeding feeding on the edge of the surf |
The Amazing Canon 300mm F/2.8L IS USM Lens/Part II of a Series: The Revelation
In the “The Amazing Canon 300mm F/2.8L IS USM Lens/Part II of a Series: The Revelation” blog post here, it be hard for me to pick a favorite. If you twisted my arm, I’d have to go with the dowitcher image. Note the position of the breaking waves (or the lack there-of) in images #1, 2, 5, & 6. Folks need to be aware of the position of the breaking waves both in the field and when editing their image, i.e., choosing their keepers. No breaking waves at all, as in the Laughing Gull image, can lead to a very peaceful mood. Otherwise, strive to avoid having the line of a breaking wave through the bird’s head or body. Having the breaking wave or a cresting wave completely above the bird, as in the dowitcher image, can work very well.
|
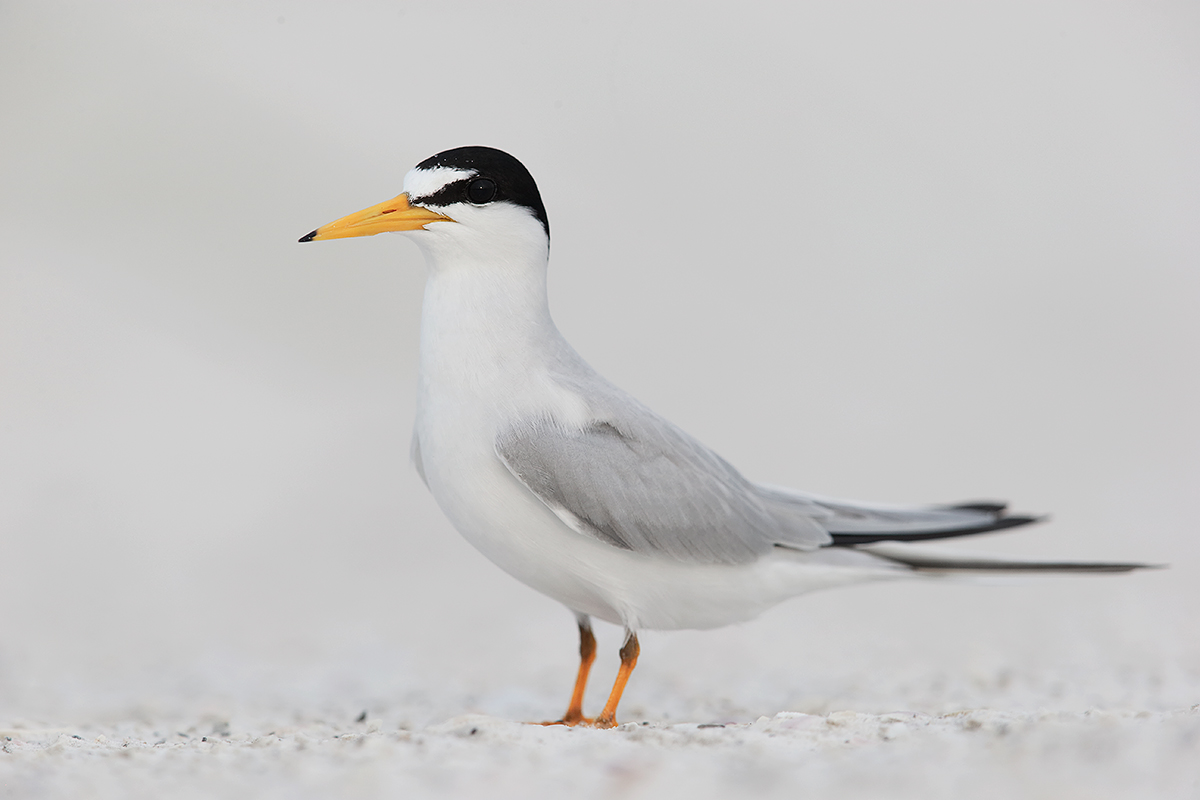
This image of an adult Least Tern was created at Fort DeSoto on May 11 at 7:45am on a cloudy bright morning while seated behind my lowered Gitzo 3532 LS carbon fiber tripod with the Mongoose M3.6 head and the Canon EF 600mm f/4L IS II USM lens, Canon Extender EF 1.4X III, and the Canon EOS-1D X. ISO 800 (should have been ISO 100 or so). Evaluative metering +1 1/3 stops as framed: 1/40 sec. at f/14 in Tv mode. AWB. Central Sensor/AI Servo-Surround/Rear Focus AF as framed active at the moment of exposure. Click here to see the latest version of the Rear Focus Tutorial. Click on the image to see a larger version. . Adult Least Tern near nest |
“Manipulated” & “Photoshopped” Two Nasty Words That Can Help You Create Beautiful Images
In the “Manipulated” & “Photoshopped” Two Nasty Words That Can Help You Create Beautiful Images” blog post here, I wrote, “Has today’s image (here, above,) been excessively manipulated? Was the tail clipped and repaired? Has the head been replaced? If you see any evidence of hanky panky, please let us know by leaving a comment, and please be specific. ps: I can guarantee that when you see the original you will be totally amazed….
One person, who shall remain unnamed here, wrote, “Very well done as usual but I reckon there’s a bit of head replacement here. I think I can see a line from the base of the bill going up and around the bird ending at the nape of the neck. Seems like a small part of the underside of the bill has evidence of tampering.” Another agreed stating, “Now that you mention it, there seems to be a little indentation on the lower side of the bill, just in front of where the bill joins the neck. Good eye.”
Just for the record books, note the narrow depth-of-field at f/14 by looking at the sand….
The Truth Revealed
The Least Tern image in question is pretty much identical to the RAW file. I did not change a single pixel. The indentation on the lower mandible was totally as it was in nature.
ps: I had hoped to catch a few more folks with my baited trap :).
|
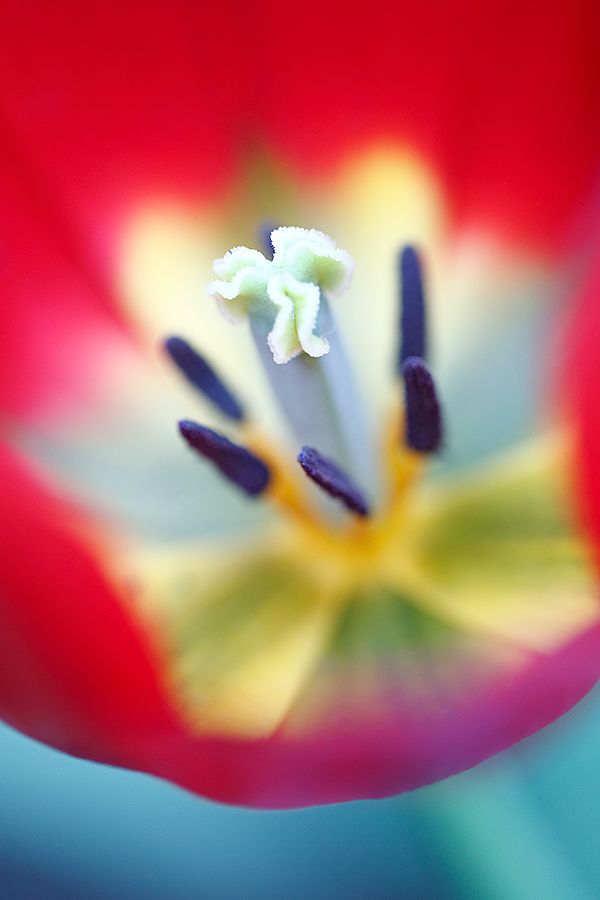
My favorite of the 3 by a country mile. Image #3: Red/Rainbow Tulip Center |
Color Combination and Image Design Lessons Through Questions
From the Color Combination and Image Design Lessons Through Questions blog post with my answers:
Image Design Questions
Which image design do you like best? I liked the image design of all three images.
Why? Because I designed each of them!
Which image design do you think is the most traditional?
With it’s off-centered design, I’d say that Image #2: Purple and White Tulip Center features the most traditional image design.
Which image design is the most interesting?
For me it is Image #3: Red/Rainbow Tulip Center because, with that strip of blue along the bottom, it is different; most folks would have gotten in tighter. as I did in Image #1: Red-orange Tulip Center which featured a more traditional approach.
Color Combination Questions
Which image has a combination of colors that you find most pleasing, soothing, and relaxing?
For soothing and relaxing it would be Image #2: Purple and White Tulip Center with its whites and purples.
Which image has a combination of colors that you find most exciting?
Image #3: Red/Rainbow Tulip Center by a mile.
In which image do you feel that the colors work best together, that is, most harmoniously?
Image #3: Red/Rainbow Tulip Center, again by a mile.
Your Favorite
Image #3: Red/Rainbow Tulip Center, again by a mile, for the reasons stated by friend and multiple-IPT veteran Patrick Sparkman who wrote, “My favorite is the last one. I like the contrast of the first one and red is my favorite color. But the last one is more unusual with that wonderful blue color on the bottom. It really sets it off and makes the shot more compelling to me. Go Spurs!”
Well done but for the Spurs comment…. Go Heat!
|
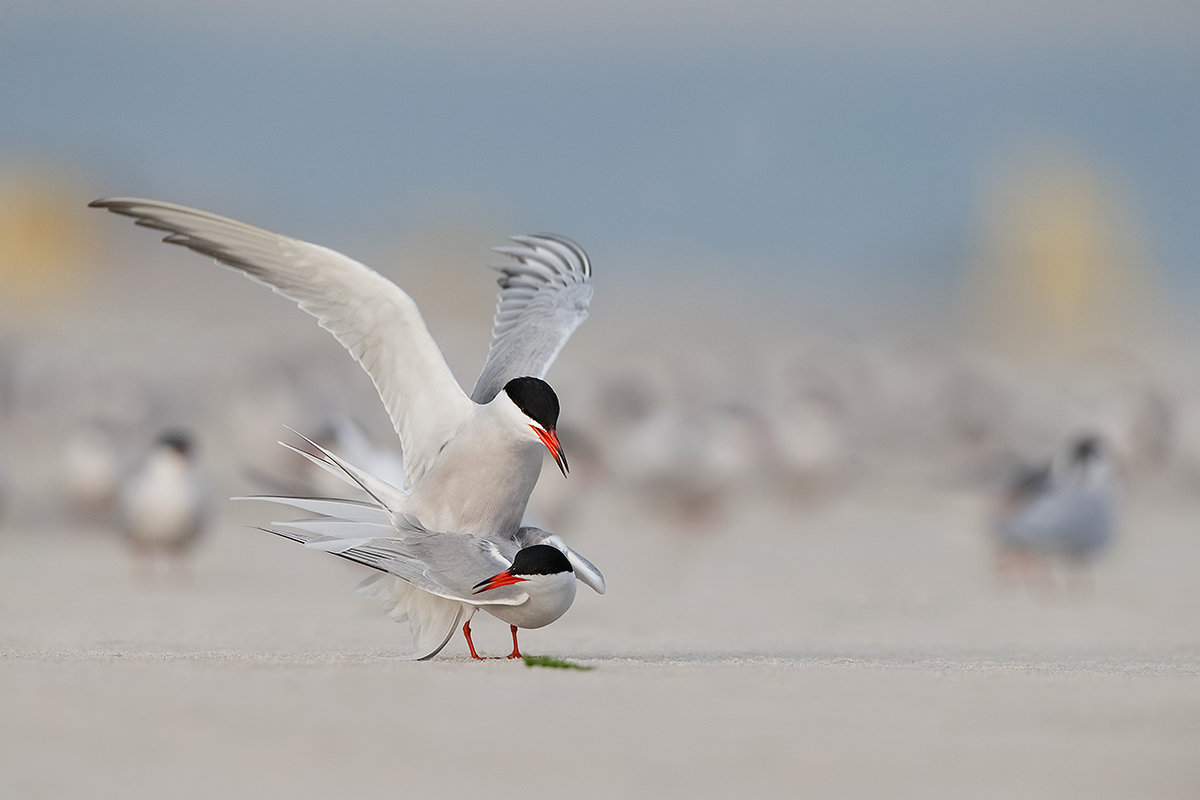
My favorite of the 4. Common Terns Copulating #4 |
A Beyond Memorable Afternoon: Was It Worth It?
In A Beyond Memorable Afternoon: Was It Worth It? my favorite was Common Terns Copulating #4, again by a mile.
Why? There are two main reasons that most folks missed:
1- The two terns that were in sight behind and to the left of the copulating terns in images 1-3 were mostly hidden behind the copulating pair when I moved a bit to my right. They are much less obtrusive in image #4.
2-The yellow, out-of-focus lifeguard towers in the BKGR framed the image nicely in image #4. In the first three images they were much more distracting….
|
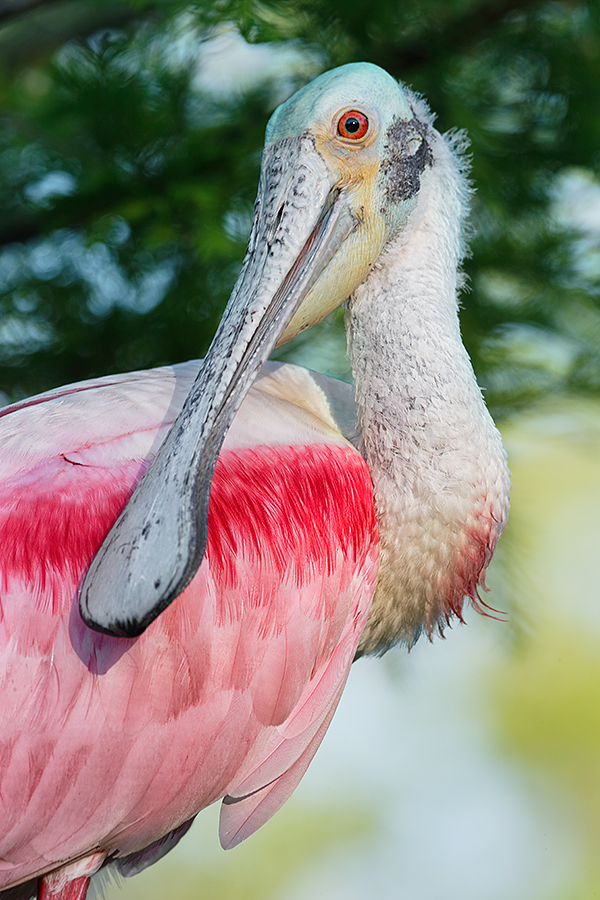
This image was created on the St. Augustine Alligator Farm IPT on a mostly sunny early morning with the Canon EF 200-400mm f/4L IS USM Lens with Internal 1.4x Extender (hand held with the internal TC in place at 560mm) and the Canon EOS-1D X. ISO 400. Evaluative metering +1/3 stop as framed: 1/160 sec. at f/10 in Av mode. AWB. 61-Point/AI Servo/Rear Focus AF active at the moment of exposure performed perfectly selecting a tight cluster of sensors on the bird’s upper bill. Learning which AF Area Selection mode to use in different situations helps you maximize the efficiency of the great AF systems of the 1D X and 5D III. Learn everything that I know about the various AF Area Selection Modes, when to use which one, several ways to move the AF sensor, and tons more in the 1D X AF Guide and the 5D Mark III User’s Guide. Click here to see the latest version of the Rear Focus Tutorial. Click on the image to see a larger version. Roseate Spoonbill vertical front-end portrait |
The One That Nobody Came Close On
In the blog post here, “Image Problems and an Important Lesson to Come,” I asked in short, “What 3 things bug me about the image above?” Lots of folks let me know what bugged them about the image. Many were grasping at straws. And a few tiptoed around one of the my answers. In order of importance, here they are:
1-The number one problem that I have with the image is the dark above/light below theme. Most folks understand that a viewer’s eye is drawn to unusually light (or dark) areas in the frame. And even little kids know that the sky is up and that the ground is down. I believe that when we create images with dark above/light below layouts, that our brain perceives things as upside down. I have yet to come across a dark above/light below image that I really like.
2-If you check out the BrezeeBroswer Main View of this image in the original blog post, you will note a sickly green color cast. I worked long and hard on getting the color balanced on this image. But I could not get it right.
3-My angle of elevation to the subject here is quite steep. I was relatively close to the bird and the spoonbill was well above me. In general, I do not like having to having to pointing my lens up too steeply.
|
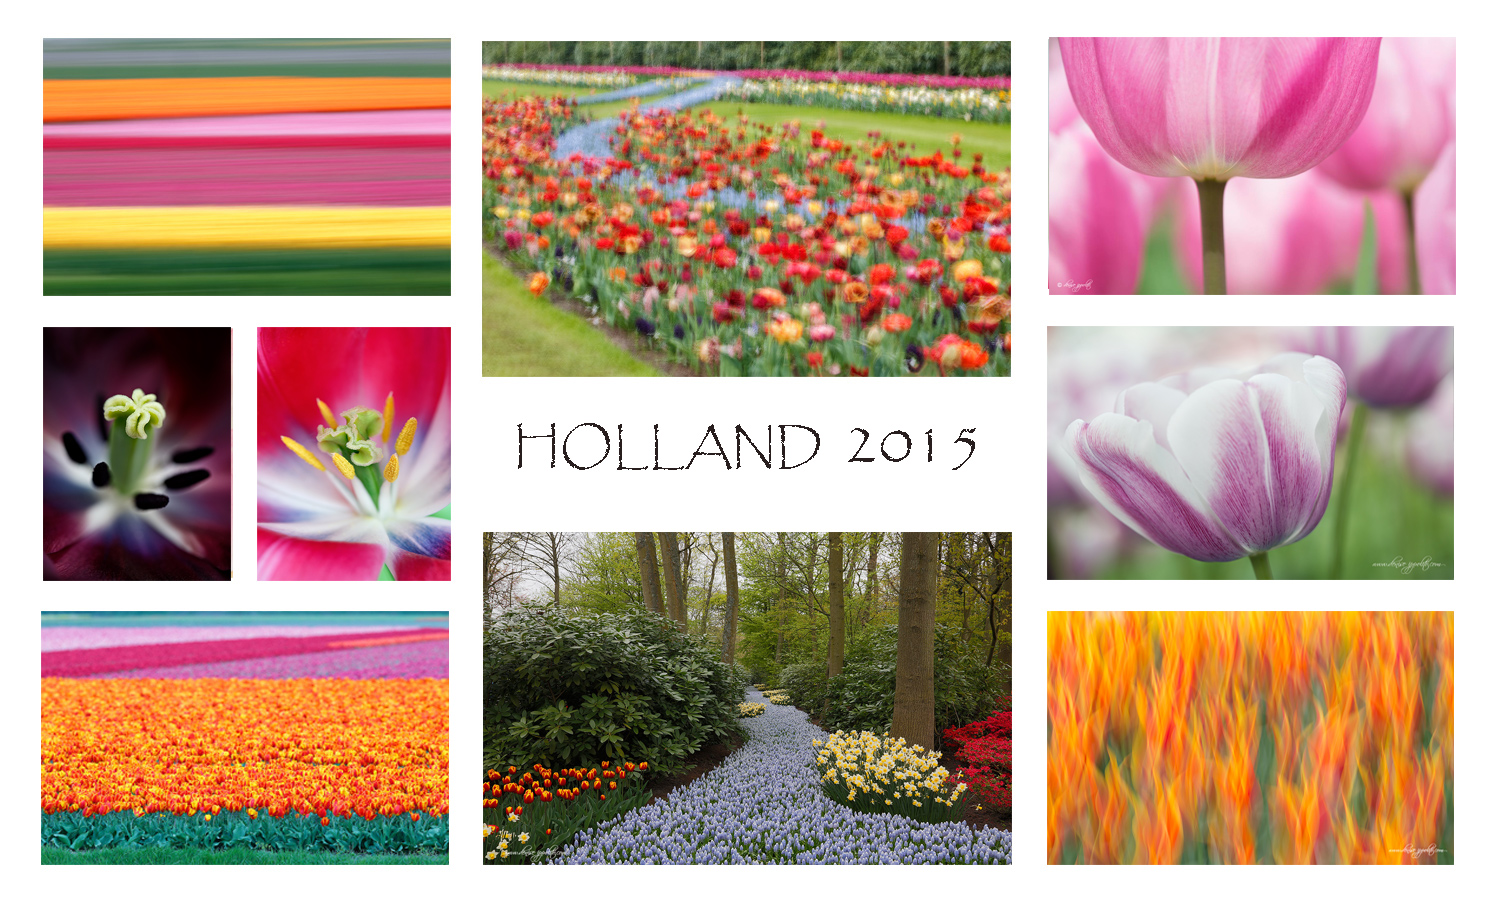
Denise and artie hope that you can join us next spring in Holland and learn to improve both the technical and creative aspects of your flower (and street) photography. |
7 1/2-Day/8-Night: A Creative Adventure/BIRDS AS ART/Tulips & A Touch of Holland Instructional Photo-Tour (IPT)
Keukenhof—Delft—Amsterdam–Flower Fields—Kinderdijk
April 9 -April 16, 2015: $4995. Limit: 12 photographers
This trip needs 6 registrants to run so please do not purchase your plane tickets until you hear from us that the trip is a go.
Join Denise Ippolito, the author of “Bloomin’ Ideas,” and Arthur Morris, Canon Explorer of Light Emeritus, for a great trip to Holland in mid-April 2015. Day 1 of the IPT will be April 9, 2015. We will have a short afternoon get-together and then our first photographic session at the justly-famed Keukenhof. Our last day, Day 8, April 16 will be a full day of photography.
The primary subjects will be tulips and orchids at Keukenhof and the spectacularly amazing tulip, hyacinth, and daffodil bulb fields around Lisse and points north. We will spend one full day in Amsterdam. There will be optional visits to the Van Gogh Museum, the Anne Frank House and/or the Rijk’s Museum. Street photography and sightseeing will be other options. We will spend a half day at Kinderdijk where we will be photographing the windmills and doing some creative photography. We will spend an afternoon in the lovely Dutch town of Delft where we will do some street photography and shopping. There is an optional church tower tour/climb. We will also enjoy a superb fine dining experience in a traditional restaurant.
Other than the arrival date: April 9, Day 1, and the date of our last day of photography on April 16, Day 8, there is no set itinerary. We will check the weather and play everything by ear to maximize the photographic opportunities. We will try to do Amsterdam, Delft, and especially Kinderdijik, on cloudy days.
There are several huge pluses to this trip. First off, denise is an amazingly skilled and caring instructor. Both her creativity and her willingness to share and to help beginning and intermediate photographers are unmatched. And though artie has learned a ton about flower photography from denise, their styles and techniques do vary considerably. You will have a chance to be counseled by and to learn from both of them. While denise will hunt you down to help you, artie’s teaching style is more “the closer you stay to me, the more you will learn.” Both leaders consistently inspire the participants. And each other. The sky, of course, is the limit.
You will learn to create tight abstracts, how best to use depth-of-field (or the lack thereof) to improve your flower photography, how to get the right exposure and make sharp images every time, how to see the best shot, and how to choose the best perspective for a given situation. And you will of course learn to create a variety of pleasingly blurred flower images. If you bring a long lens, you will learn to use it effectively for flower photography. Denise’s two favorite flower lenses are the Canon EF 100mm f/2.8L Macro IS USM lens and the Canon EF 24-105mm f/4L IS USM lens. Mine are the Canon 100mm f/2.8L IS macro , the Canon EF 180mm f/3.5L Macro USM lens ,and the Canon EF 300mm f/2.8L IS II USM lens, all almost always on a tripod. Often with extension tubes and/or either the 1.4X or the 2X (with the 300 II) teleconverters. Denise hand holds a great deal of the time. For flower field blurs denise uses the same lenses mentioned above along with her new 70-200mm f/2.8L IS III lens. Artie’s favorite is that same 70-200 often with a 1.4X TC but he uses both the new Canon EF 24-70mm f/2.8L II USM lens and the 300 II as well. Both of us use and love the Canon EOS 5D Mark IIIfor all of our flower photography. The in-camera HDR and Multiple Exposure features are a blast.
One of the great advantages of our trip is that we will be staying in a single, strategically located hotel that is quite excellent. Do note that all ground transfers to and from Schipol Airport will be via the free hotel shuttle bus.
What’s included: Eight hotel nights. All ground transportation except for airport transfers as noted above. In-the-field instruction and small group image review and Photoshop sessions. All meals from dinner on Day 1 through dinner on Day 8. There is good food at the hotel and we will be dining there on occasion; whenever you order off the menu be it at the hotel or at another restaurant only the cost of your main course is included. On these occasions the cost of soups, appetizers, salads, sodas and other beverages, alcoholic drinks and wine, bottled water, and desserts are not included. Snacks, personal items, phone calls, etc. are also not included. The cost of bus or train transportation to and from Amsterdam (about $20 US), museum entry, and tower and church entry fees (optional) are likewise not included.
Beware of seemingly longer, slightly less expensive tours that include travel days and days sitting in the hotel doing nothing as part of the tour. In addition, other similar trips have you changing hotels often and needlessly. One final note on other similar trips: the instructors on this trip actually instruct. On other similar trips the instructors, though usually imminently qualified, serve for the most part as van drivers and van door openers.
A non-refundable deposit of $1,000 per person is required to hold your spot. The second payment of $2,000 due by October 30, 2014. The balance is due on January 15, 2015. Payments in full are of course welcome at any time. All payments including the deposit must be by check made out to “Arthur Morris.” As life has a way of throwing an occasional curve ball our way, you are urged to purchase travel insurance within 15 days of our cashing your check. Artie uses and recommends Travel Insurance Services. All payments are non-refundable unless the trip fills to capacity. In that case, all payments but your deposit will be refunded. If the trip does not run every penny will of course be refunded. Again, please do not purchase your air tickets until you hear from us that the trip is a go. We are very confident that it will.
All checks should be made out to “Arthur Morris” and sent to: Arthur Morris, PO Box 7245, Indian Lake Estates, FL 33855. Call Jim or Jen in the BAA office with any additional registration questions: 863-692-0906.
For couples or friends signing up at the same time for the tulip trip, a $200/duo discount will be applied to the final payment.
When you send your deposit check, please print, sign, and include the paperwork here.
If you have any questions on the trip please contact artie by e-mail or denise by e-mail.
Selling Your Used Photo Gear Through BIRDS AS ART
Selling your used (or like-new) photo gear through the BAA Blog or via a BAA Online Bulletin is a great idea. We charge only a 5% commission. One of the more popular used gear for sale sites charges a minimum of 20% plus assorted fees! Yikes. The minimum item price here is $500 (or less for a $25 fee). If you are interested please e-mail with the words Items for Sale Info Request cut and pasted into the Subject line :). Stuff that is priced fairly–I offer free pricing advise, usually sells in no time flat as did Dennis Cassidy’s 500 II recently on the blog. Larry Master’s 400 DO and his 800 f/5.6 sold within a week. From Larry via e-mail: Thanks for helping me sell the lenses so quickly!
A Creative Adventure/BIRDS AS ART friend Kitto Kono sold her Nikon 500 to a Blog subscriber in less than a week. Janet Horton’s 7D sold this week after a $100 price reduction. Denise Ippolito’s 100-400 and her 100 macro sold in one day. Peter Kes sold his 70-200 f/2.8L IS II and his 400 DO through BAA in ten days. In the past two months we have sold a Canon 800, a Canon 500 II, 3 400 DO lenses, a Nikon 500mm, and lots more. If you are interested in using our services, please e-mail.
Used Photography Gear Page
Eagle-eyed readers may have noticed that there is a link to the Used Photography Gear page on the yellow tool bar at the top of each blog page. Folks looking to buy (or to sell) can click on that tab or here. I will on occasion continue to list new gear and great buys in blog posts and in Bulletins and may on rare occasion share all the listings with you on the blog. I will strive to keep the listings current. Great news for Kitty Kono and her Nikon 400mm f/2.8: it sold recently! That made her 2 for 2 on selling her older Nikon super-telephotos with BAA.
Support the BAA Blog. Support the BAA Bulletins: Shop B&H here!
We want and need to keep providing you with the latest free information, photography and Photoshop lessons, and all manner of related information. Show your appreciation by making your purchases immediately after clicking on any of our B&H or Amazon Affiliate links in this blog post. Remember, B&H ain’t just photography!
Amazon Canada
Many kind folks from north of the border, ay, have e-mailed stating that they would love to help us out by using one of our affiliate links but that living in Canada and doing so presents numerous problems. Now, they can help us out by using our Amazon Canada affiliate link by starting their searches by clicking here. Many thanks to those who have written.
Typos
In all blog posts and Bulletins, feel free to e-mail or to leave a comment regarding any typos, wrong words, misspellings, omissions, or grammatical errors. Just be right. 🙂

