Stuff
Slept 9 hours with one pit stop; you gotta love those ice baths. Today I had a great swim and an ice bath. Learn more about my day below. This educational blog post, the 97th in a row, took about 2 hours to prepare and was published at one minute after midnight on Wednesday.
|
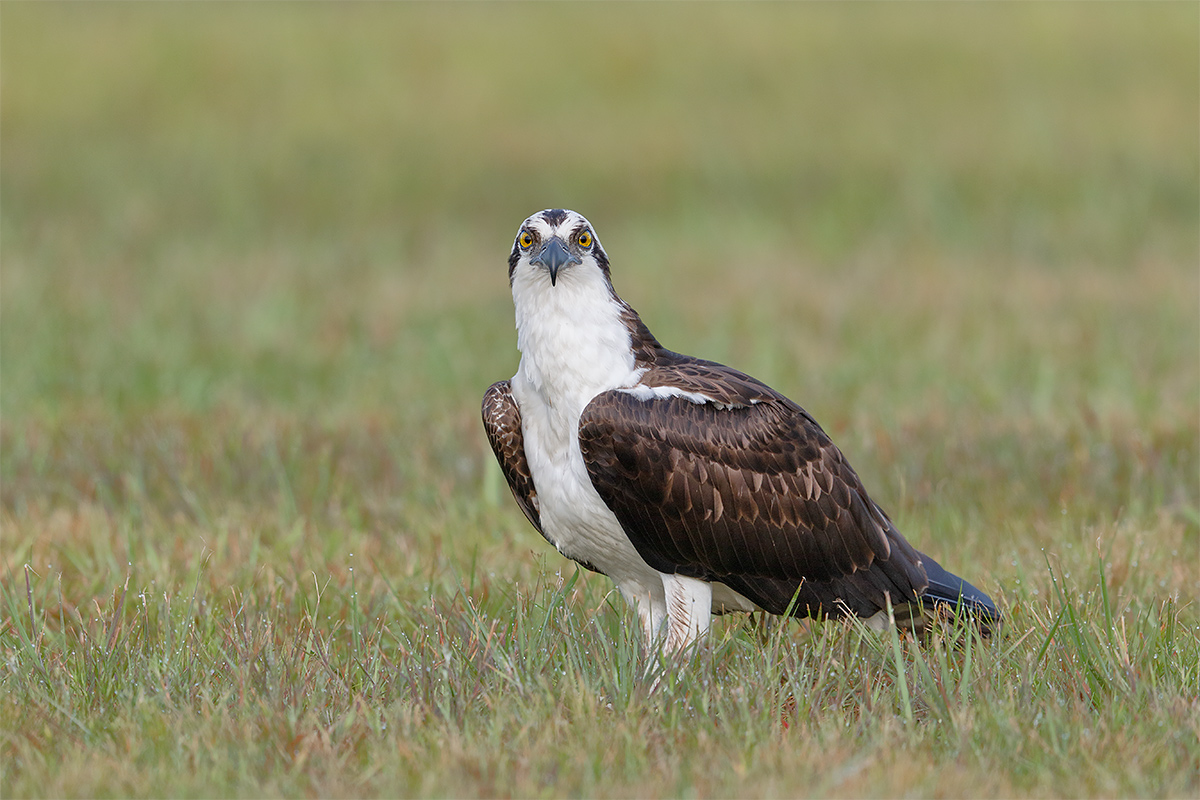
This image was created down by the lake at ILE on Monday morning from my SUV with the BLUBB-supported Canon EF 600mm f/4L IS II USM lens, the Canon Extender EF 1.4X III, and which camera body? ISO 400. Evaluative metering +2/3 stop as framed 1/640 sec. at f/5.6 in Manual mode. AWB. Center AF point/AI Servo Expand/Rear Focus AF as framed was active at the moment of exposure (as is always best if possible when working off the BLUBB). The active AF point was just inside the bend of the far wing, right on the same plane as the bird’s staring eyes. Click here to see the latest version of the Rear Focus Tutorial. Click on the image to see a larger version. |
GrassPREY/On the Spot #2: 1D X or 7D II?
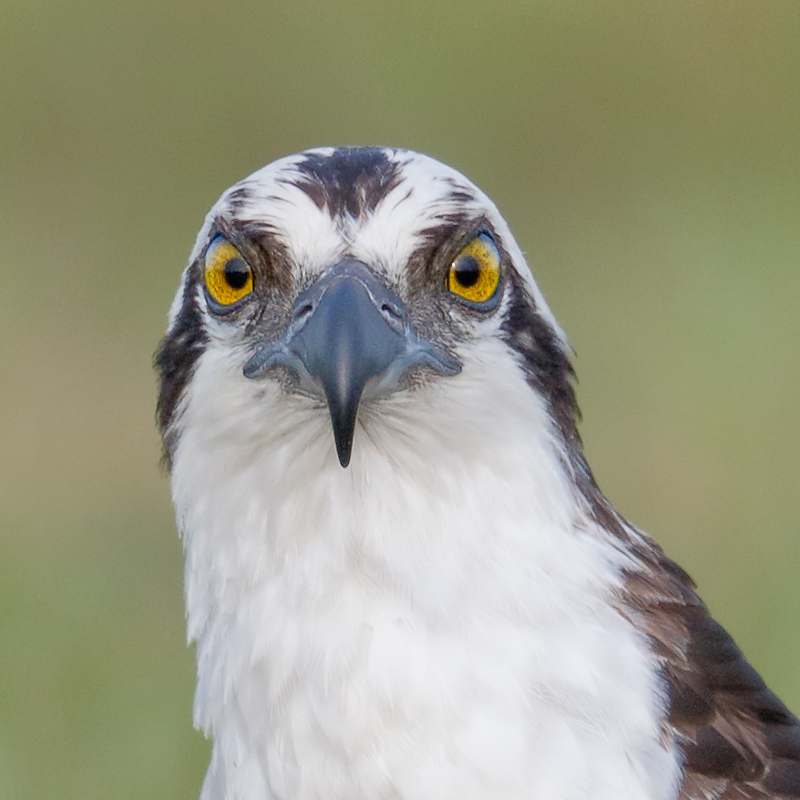
There is something quite beautiful about an Osprey in the grass…. Can you tell if this image was made with the 1D X or the 7D II? Checking out the 100% crop of the head below might help you decide. Do let us know why you made your choice.
I have not forgotten about letting y’all know which camera made which image in this blog post: “Now You Are On the Spot: Image Quality/Which Camera Quiz: the first of many…” Thanks to John Giatropoulos and Steve Soderling for humoring me by playing along. It may take a while but all will be revealed here in a bit. But you will need to be patient 🙂
|
This is a 1:1 or 100% crop (I think…) of the optimized image above. |
100% Crop Lesson Learned. I Think…
Michael Tapes came over to do some early morning photography down by the lake and teach me a bit about a lot, mainly about some exciting LensAlign news coming in June. We micro-adjusted my 300 II with one of my two 7D Mark II bodies with the LensAlign II and his amazing FocusTune Software. You can learn more about LensAlign Mark II/including Fusion here. The best micro-adjustment turned out to be +3.
I mentioned and explained how I came up with the “200% crop” that I referred to in the blog post here. Actually, I was spurred to do so after reading Steve Soderling’s comment which read in part: Actually, I can hardly believe that image 1 is really a 200% crop. I didn’t think it was possible to get a 200% image (which means to me that there are 4 screen pixels for every camera pixel) that looks this sharp!!
As Michael explained to me, the percentage view has zero to do with the crop. He showed me that if I simply crop the head of the optimized Osprey image as an 800 pixel square that I will be showing a 1:1 or 100% view crop. That is what I did above. He further explained to me that going bigger would indeed “mess with the pixels” as Steve noted.
So it turns out that I was wrong in that post and have been wrong in many others as far as the “100 and 200% crops” are concerned. Apologies. But I have learned the lesson now and a good lesson it is. Many thanks to both Michael and to Steve for opening my eyes.
DPP RAW Conversion Lessons
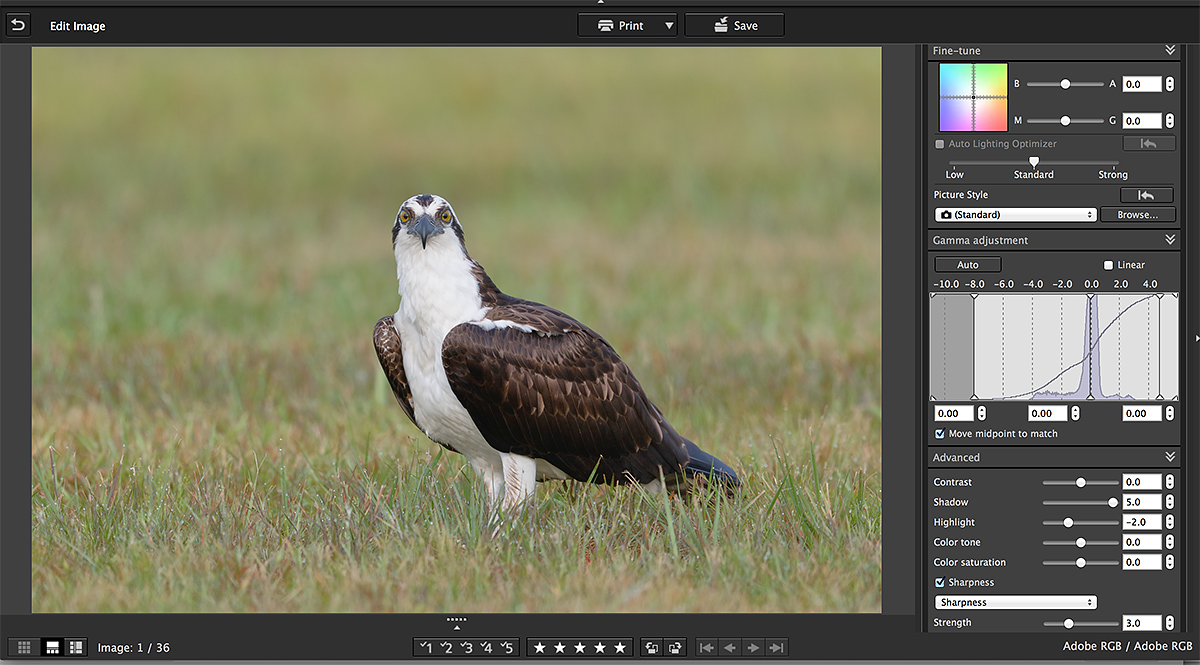
Of special note in the DPP 4 screen capture above is that the Shadow slider is set to +5. This really helped with the dark tones on the bird without introducing any noise at all. I exposed well to the right with some WHITE RGB values in the 240s; that is why I moved the brightness slider to -0.17 and the Highlight slider to -1. Sharpness at 3 is standard for every image. I wish that it could be set as the default as it prevents the destruction of fine feather detail that comes with the default settings for Unsharp Mask.
|
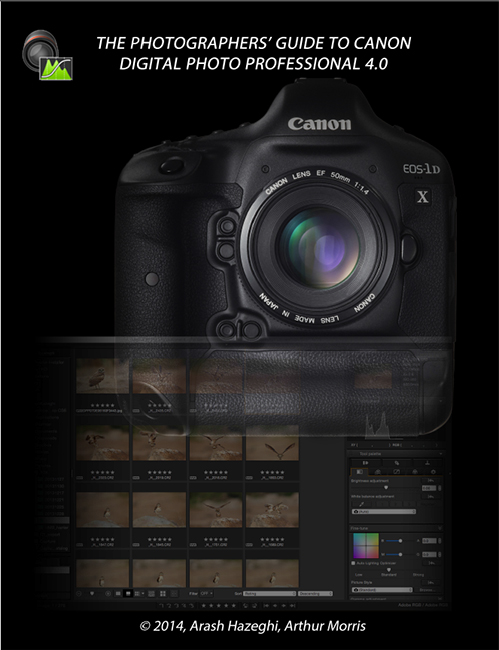
You can order your copy of “The Photographers’ Guide to Canon Digital Photo Professional 4.0” (aka the DPP 4 Raw Conversion eGuide) by Arash Hazeghi and Arthur Morris by clicking here. |
The DPP 4 eGuide (PDF)
The Ideal Companion to the 7D Mark II User’s Guide
Learn how and why I and many other discerning photographers choose and use only DPP 4 to convert their Canon RAW files in the DPP 4 RAW Conversion Guide by Arash Hazeghi and yours truly. The latest version supports all of the newer Canon camera bodies and several older models including the EOS-7D and the EOS-1D Mark IV. A free update that will cover most of the newly added cameras will be sent in a week or two. See upcoming blog posts for exact details.
|
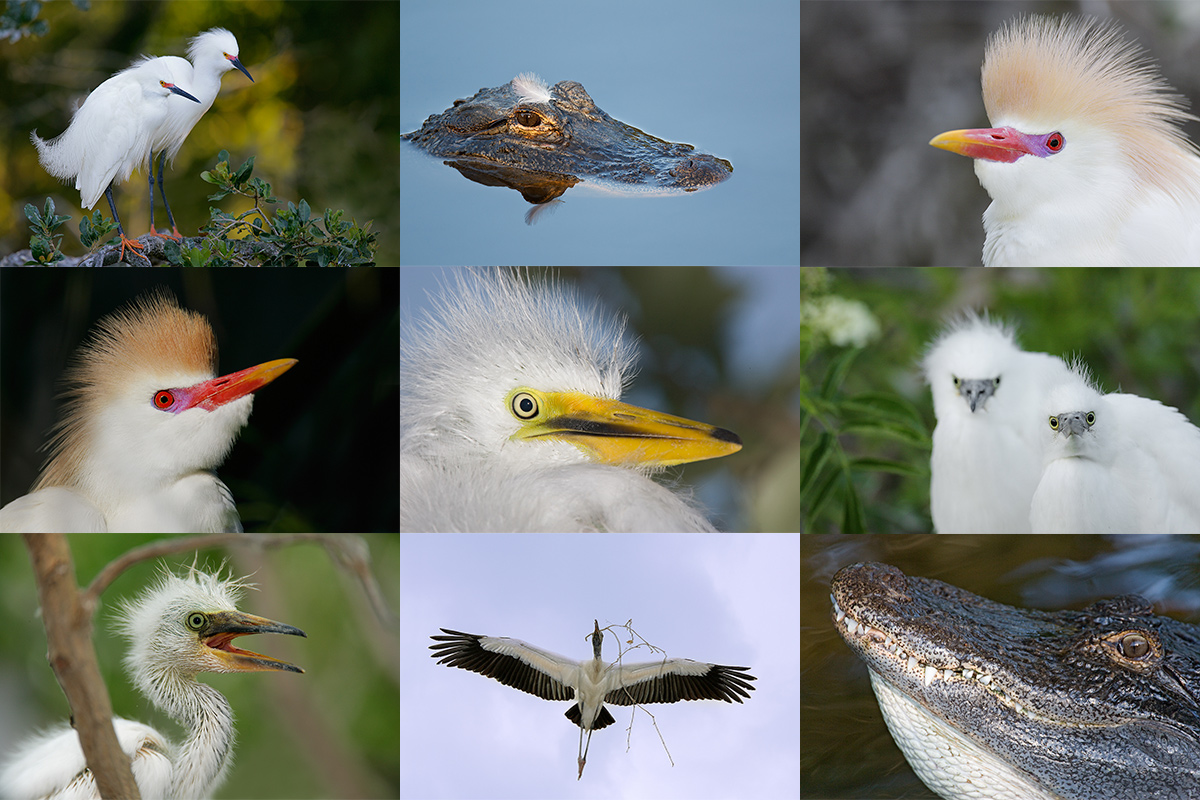
Clockwise from upper left to center: Snowy Egrets/breeding plumage pair, American Alligator with egret feather on head, Cattle Egret in breeding plumage (with fill flash), large Snowy Egret chicks, displaying gator, Wood Stork in flight carrying nesting material (fill flash), begging Snowy Egret chick, another Cattle Egret in breeding plumage (with fill flash), and Great Egret chick. |
Date Change: St. Augustine Alligator Farm Short-Notice Spoonbill and Wading Bird Chicks IPT: May 4-6, 2015.
St. Augustine Alligator Farm Short-Notice Spoonbill and Wading Bird Chicks IPT: May 4-6, 2015. TWO FULL and TWO 1/2 DAYS: $1099. Limit 8/Openings 5.
St. Augustine in early May is a bird photographer’s paradise. With any luck we should have chicks of all sizes in the nests ranging from newly hatched Snowy Egrets and Tricolored Herons to nearly fledged Great Egrets. More than a few pairs of Roseate Spoonbills have nested at the Alligator Farm for the past several years. Photographing the spoonbill chicks in the nest is a huge challenge…. With any luck we will encounter a few Snowy and Cattle Egrets in stunning breeding plumage. We should have lots of flight photography ops especially late in the day. We will enjoy extra early entry on our three mornigs. Folks who will need a photographer’s pass ($89.95 includes full season early entry and late stay and submission fees for up to 5 photos in their annual contest; this works out to cheaper than four separate entry tickets). We will have those ready for pick-up on the first afternoon.
|
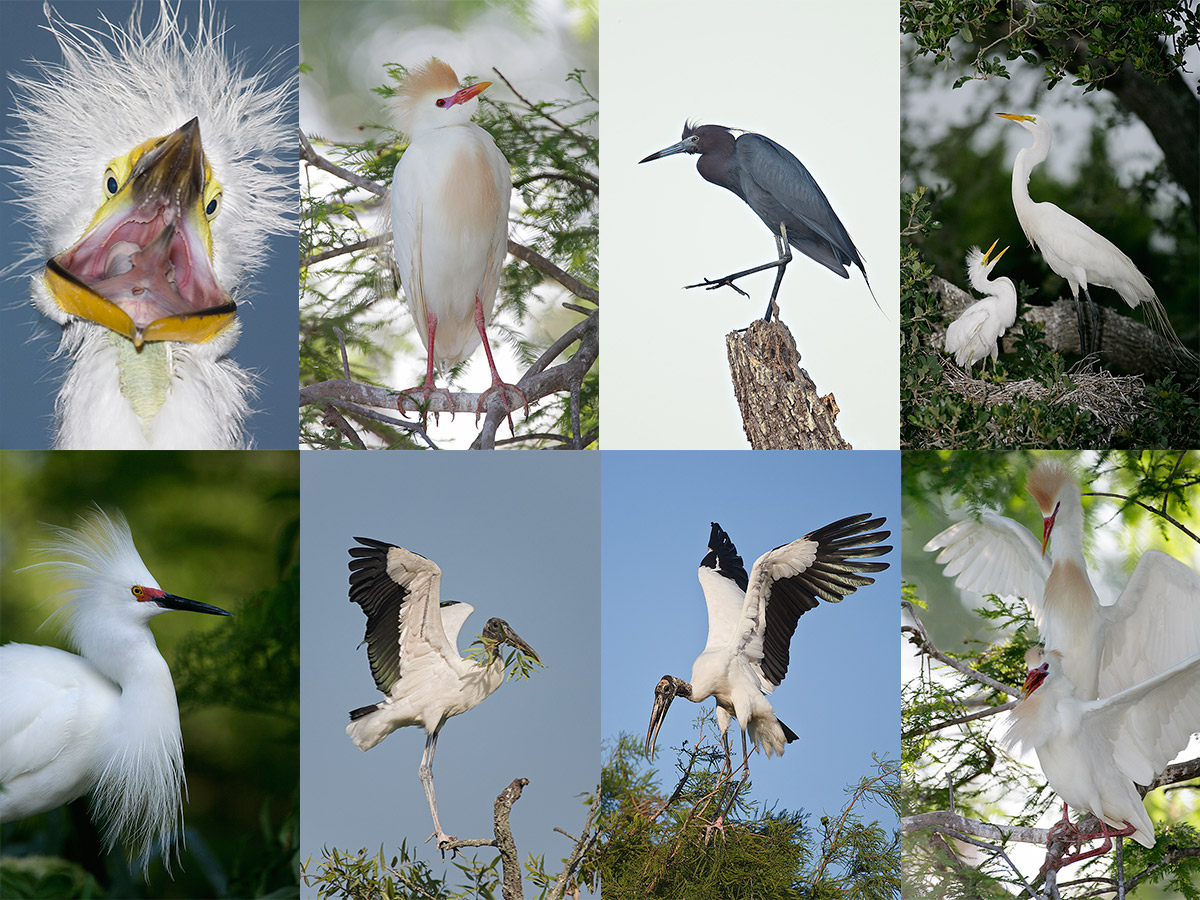
Clockwise from upper left: flash-as-main light Great Egret chick begging, breeding plumage Cattle Egret w/fill flash, Little Blue Heron, Great Egret chick in nest begging, Cattle Egrets copulating, Wood Stork with nesting material, another Wood Stork with nesting material, and breeding plumage Snowy Egret displaying. |
What You Will Learn
On this IPT you will the learn the basics and fine points of digital exposure and how to get the right exposure every time after making a single test exposure. You will learn to understand and predict bird behavior and to see and understand the light. You will learn to design pleasing images by mastering your camera’s AF system and how and why to work in Manual mode (even if you’re scared of it). Most importantly, you will learn to spot the good situations, to choose the best perspective. Rookeries are crowded, cluttered, white-washed places. Most folks who visit have no clue as to the difference of an image with tons of distractions and one with a clean line of sight and the best possible distant background. Join me and I will teach you to see like a pro.
I will be bringing my flash to the Alligator Farm (gasp!) I have not used flash for at least a year. I will be teaching you how to use flash as fill and how to use flash as main light. In addition, I will be reviewing the flash flight techniques that I developed at St. Augustine more than a few years ago.
|
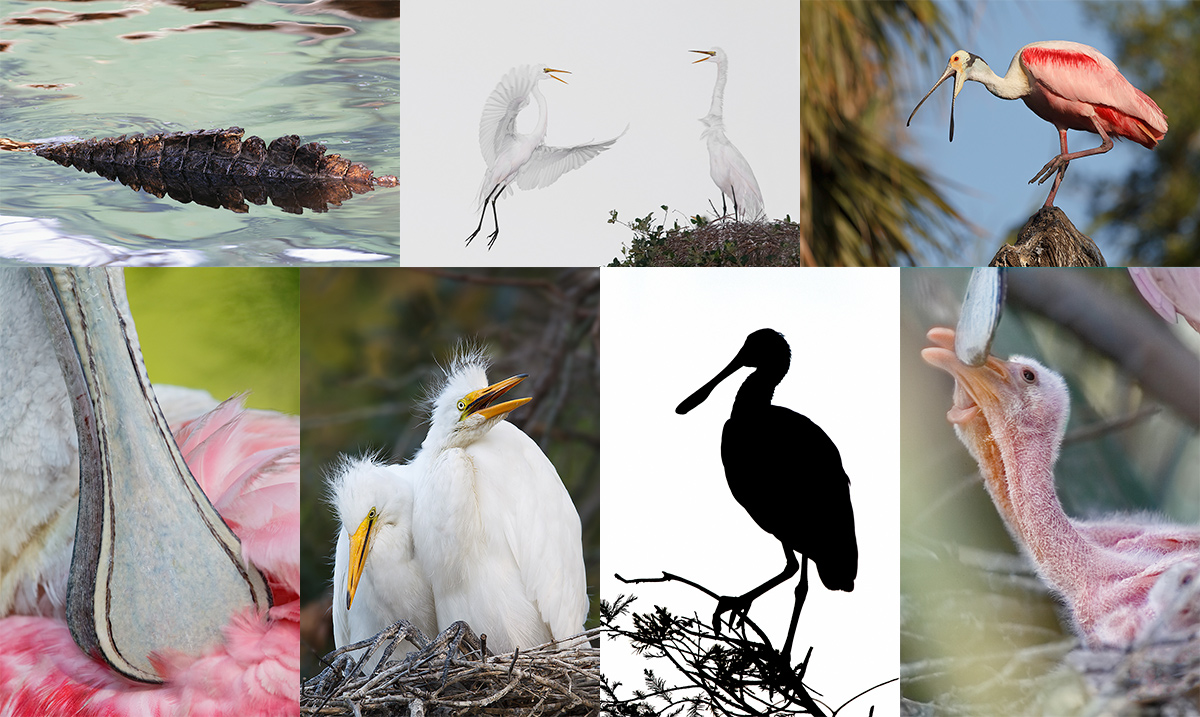
Clockwise from upper left: gator back, Great Egret returning to mate (with fill flash), Roseate Spoonbill with bill open, Roseate Spoonbill chick begging, Roseate Spoonbill 11am silhouette, large Great Egret chicks in nest, and bill of Roseate Spoonbill. |
Whats the Rest of the Deal?
Afternoon session on Monday, May 4. Then two full days with a morning and afternoon session each day, May 5 & 6. Then our last morning on May 7. At lunch on Tuesday and Wednesday (included) we will review my images; folks learn a ton watching me edit–why keep this one and delete that one? If you opt to bring your laptop, we can take a look at five of your best images from the morning or another session. We will process a few of my images in Photoshop after converting them in DPP. That followed by Instructor Nap Time.
A $499 non-refundable deposit is required to hold your spot. Your balance–$600, payable only by check, is due immediately. Please include a separate check for $89.95 so that we can purchase your pass in advance. Please click here to read our cancellation policy before committing. Then please print, read, and sign the necessary paperwork linked to here and get it to us. You can register by calling Jim or Jen at the office at 863-692-0906 and arranging for your deposit of $499. Balances are payable only by check. I hope to see you there.
From Pat and Stokes Fishburne
The Alligator Farm is quite good right now. Good spoonbill nests and lots of spoonbills. Also, Snowy Egrets, Tricolored Herons, and a few Cattle Egrets along with more than a few Great Egret nests with chicks.
Be sure to like and follow BAA on Facebook by clicking on the logo link upper right. Tanks a stack!
Support the BAA Blog. Support the BAA Bulletins: Shop B&H here!
We want and need to keep providing you with the latest free information, photography and Photoshop lessons, and all manner of related information. Show your appreciation by making your purchases immediately after clicking on any of our B&H or Amazon Affiliate links in this blog post. Remember, B&H ain’t just photography!
Amazon.com
Those who prefer to support BAA by shopping with Amazon may use this link:
Amazon Canada
Many kind folks from north of the border, eh, have e-mailed stating that they would love to help us out by using one of our affiliate links but that living in Canada and doing so presents numerous problems. Now, they can help us out by using our Amazon Canada affiliate link by starting their searches by clicking here. Many thanks to those who have written.
Typos
In all blog posts and Bulletins, feel free to e-mail or to leave a comment regarding any typos or errors. Just be right :).



OK.. I’m giving this a go.. For the learning experience…
7Dll
Because of Depth of Field (DOF)…
I knew the cameras, the focal length and the aperture/fstop…
What I didn’t know was the distance to the subject…
I used the Osprey as a unit of measure…
I made a bunch of “educated” assumptions…
(I am being generous with the word educated…)
I believe this Osprey, with its all white chest to be male, which is a bit smaller than the female, about 21″-23″… but let’s say 24″..
and that dimension is from head to tail… So from feet, in the grass, to top of head, ..I went with 18″…
Based on that the photo is showing 30″ of height..
And I am estimating that 3′ is in focus..
If the bird was 175’… The DOF for the 7Dll is about 3′ and the 1DX is almost 5′..
What da ya tink??
I think that it might make sense if the distance is correct. But I think that I was a lot closer than 175 feet…. No way to tell though….
later and love a
Artie,
Looking at the 100% or 1:1 view. I think this is 7DII. All of the detail looks a little soft including the eyes and beak as well as the feathers. There is no feather detail visible at all on the neck and I would expect to see good detail here considering how well the bird fills the frame in the original image (which I like, by the way).
If I compare this image to the Brown Pelican images you have posted in the last few months that were taken with the 1DX, there is no contest when is comes to detail and sharpness. I would love to see some 1:1 and even 2:1 images from the Pelican shots you posted.
Even though the pixel resolution of the 7DII is about 2.4X better than the 1DX, I am betting we will see sharper detail with the 1DX.
Steve
PS. On the 100% crop issue. When I click the 1:1 zoom on either Lightroom or DPP I believe I am looking at essentially a 1-to-1 correspondence in screen pixels to camera sensor pixels. I think this is what Mike confirmed for you, right?
Hey Steve, I am not saying right or wrong yet. Remember that in soft light there is never much detail in WHITEs…..
Yes, I now know how to crop correctly for a 1:1 or 100%. Thanks to Michael. So yes. I do not think that a 200% crop is possible without messing up the pixels….
More soon.
a
I’m going to say 7D2 for the osprey. Love the eyes in this image. My reasoning is after looking at the crop, the white feather details where they overlap the brown on the neck/shoulder don’t show the kind of micro-contrast and fine edge detail I see on the 1DX compared to my 7D2. But really it is still mostly just a guess. Could be either. I shoot between the two bodies fairly regularly and I’m happy with the 7D2 images and detail but the 1DX still beats it for moving subjects and fine micro-contrast IMHO.
This one was definitely taken with a 7D MkII. (I think 🙂 )
Why would you think that Doug? artie
Artie, Great Osprey shot. Likely you used 7DII for the extra reach.
Kind regards,
Wilfred
Hey Wilfred, Is there anything about the image quality that points to 7D II? artie
I’ll go out on a limb here but I thought I saw some low level noise in the greens. And having just read that 7DII shows a bit more noise than 1DX I answered in favor of. But what do I know (-: Overall, I have difficulty clearly distinguishing pictures taken with 7DII or 1DX. I can only hope I am right…?
Nick, I think we sing from a very similar sheet – as I use Auto ISO my settings will be the same…I think the luminance may be slightly different that’s all.
Jon, It sounds as if you do not have our DPP RAW Conversion Guide; the luminance and chrominance NR values that Arash has developed are vastly different in most cases from the values recommended by the program. artie
Artie,
Maybe you can pass on to the rest of us what Michael Tapes told you about creating 100% crops. I find it a very confusing
concept. Thanks in advance.
Have a great day. Glen
Me too. He is working on a clear explanation.
a
Just for the record Artie, That image “Osprey in the grass” is an absolute cracker.
Later
David.
Thanks David. 🙂 I agree.
Artie I agree it is a pain in the but that certain default settings cannot be made. My simple way to minimise inconvenience is to firstly short list, then “select all” images then “Read and paste from file” a recipe. My “standard” recipe is the default 3 sharpening, standard chrominance setting and I set luminance to 0. I of course leave all exposure settings to default.
Artie, I do a similar thing to Jon except I have a recipe for each ISO setting, so when I open a recipe it gives the correct chrominance and luminance setting for any ISO as recommended by your DPP guide.
Hey Nick,
I need to do that 🙂
a
ps: how do you name the files?
I have named them DPP Recipe 400 ISO, DPP Recipe 800 ISO etc. I currently only have 1 model of camera where the settings are available in the DPP guide. If like yourself you have more than 1 model of camera where you want to use the recipe you would need to include the camera model e.g. DPP Recipe 7DII 400 ISO or DPP Recipe 1D X 800 ISO etc. I hope this all makes sense 🙂
Hi! I echo all of David’s comments from Victoria in Australia.
Hi Artie,
I would be surprised if anyone can tell just by looking at the images. My guess ? 7d.mk2. Reason? I think you are loving that body so much that the 1Dx is sulking in you camera bag.
Kind regards
David
PS: I think the other boys and girls are asleep mostly when you post at midnight. It’s about 4 pm in NZ so I get to see it soon after work.
Thanks for all your generosity.