Be Honest!
Like it or hate it, share your thoughts on today’s featured image.
What’s Up?
After getting to bed very early on Friday evening, I was up at 3:00am in plenty of time to catch the 4:30 am shuttle. My six-hour five minute flight to Seattle was blessedly uneventful. After my five-hour layover, I flew to Anchorage. With the really long travel day, and having been up since 11:00am Anchorage time, I slept for 3 solid hours on the final three-hour 48-minute leg. IPT veteran Carolyn Johnson and I arrived on time in Anchorage at 6:45pm and soon met up with blog regular Bob Eastman. We grabbed our SUV and headed to the Lakefront Hotel where we had a nice dinner. We celebrated Carolyn’s 79th birthday a day early with a shared Crème Brûlée.
In yesterday’s blog post, I liked all four images a lot, but the first image, the mega-breeding plumage white morph Reddish Egret was my pick of the litter.
Today is Sunday 19 February 2023. Carolyn, Bob Eastman, and I will be driving down Highway 1 from Anchorage to Homer in a big SUV. Wish us luck, (i.e., no blizzard).
If you have some cold weather gear and are free from about 23 or 24 February through March 3 or 4 and would like to join the second Homer IPT, please get in touch via e-mail ASAP as I am practically giving away the second IPT for free.
This blog post took about 90 minutes to prepare and makes three hundred twenty-seven days in a row with a new educational post written just for you. Wherever you are and whatever you are doing, I hope that you too have a great day.
Please, please, pretty please remember to use m B&H or Bedford’s affiliate programs for all your new gear purchases. If you use B&H, please be sure to click on any B&H link in the blog to start your search. Or simply start with this link. There is always the option of e-mailing me for gear advice and for the correct links.
The plan is to continue to post every day until the streak reaches one year and one day and then posting every other day.
Please remember to use the B&H and Amazon links that are found on most blog pages and to use the BIRDSASART discount code at checkout when purchasing your new gear from Bedfords to get 3% back on your credit card and enjoy free second-day air FedEx. Please, also, consider joining a BAA IPT. You will be amazed at how much you will learn!
You can find some great photo accessories (and necessities, like surf booties!) on Amazon by clicking on the Stuff tab on the orange/yellow menu bar above. On a related note, it would be extremely helpful if blog-folks who, like me, spend too much money on Amazon, would get in the habit of clicking on the Amazon logo link on the right side of each blog post when they shop online. As you might expect, doing so will not cost you a single penny, but would be appreciated tremendously by yours truly. And doing so, works seamlessly with your Amazon Prime account.
Please remember that if an item — a Delkin flash card, or a tripod head — for example, that is available from B&H and/or Bedfords, is also available in the BAA Online Store, it would be great, and greatly appreciated, if you would opt to purchase from us. We will match any price. Please remember also to use my B&H affiliate links or to earn 3% cash back at Bedfords by using the BIRDSASART discount code at checkout for your major gear purchases. Doing either often earns you free guides and/or discounts. And always earns my great appreciation.
|
|
|
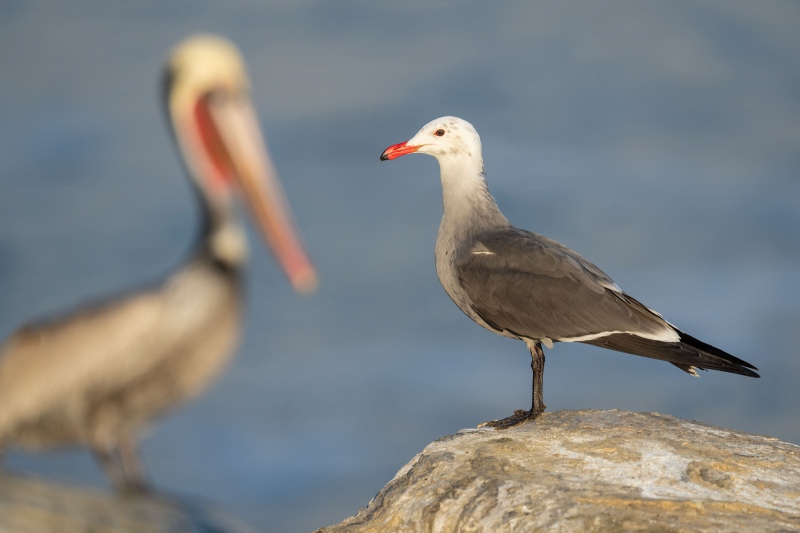
This image was created on 23 December 2022 on the first San Diego IPT. Seated on the upper cliff, I used the hand held Sony FE 200-600mm f/5.6-6.3 G OSS lens (at 518mm) and The One, the Sony Alpha 1 Mirrorless digital camera. ) The exposure was determined using Zebra technology with ISO on the Thumb Dial. ISO 1000. 1/2000 second at f/6.3 (wide-open) in Manual Mode. AWB at 7:43:34am on a sunny morning. As blow, RawDigger showed the raw file brightness to be perfect. Tracking: Zone/AF-C with Bird Face/Eye Detection performed perfectly. Be sure to click on the image to enjoy a high-res version. Image #1: Heermann’s Gull/Brown Pelican juxtaposition
|
Think Fast and Act Faster When Creating Juxtapositions
I envisioned seeing the pelican in the perfect spot in the background, but only if I leaned well to my right over the edge of the cliff. So, I saw the shot, zoomed out, leaned to my right (without putting myself in any danger), acquired focus on the gull’s eye, and created seven images as the gull turned its head away. I was happy to have two virtually identical frames with a good head angle.
Many times in nature photography, a second, out of focus subject in the background can wreck an image. But, if it is offset perfectly from the subject and is nicely out of focus, it can add rather than detract. I love looking for and creating them, but good ones are few and far between.
|
The Image Clean-up
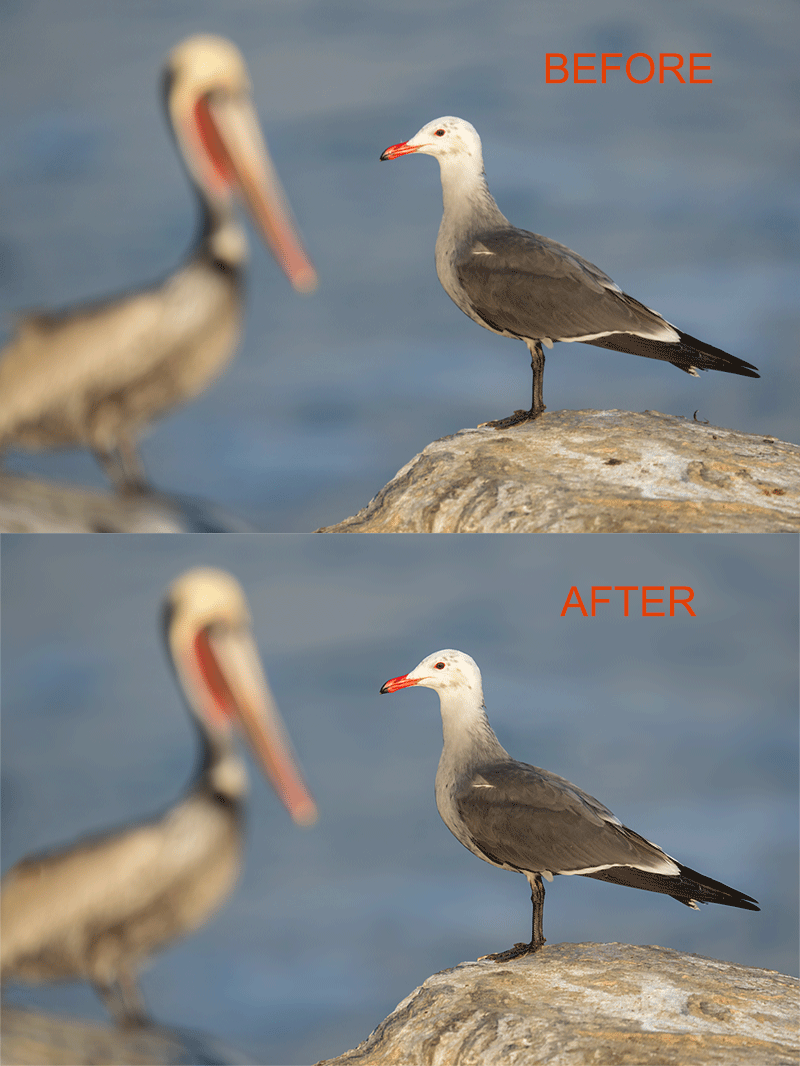
Though the image clean-up looks relatively insignificant, I put in a solid 30 minutes of work on this image while working on the plane on my flight to Seattle. I use the Patch Tool, the Spot Healing Brush, the Clone Stamp Tool (!), and Content Aware-Fill for the clean-up work. Most but not all of that was done on the rock the gull is standing on. I did some work on the specular highlights on the bill and in addition, did just a bit of Eye Doctor Work. Last was a Gaussian Blur on the background, refined with an Inverse (Black, or Hide-All) Mask.
|
|
The BIRDS AS ART Current Workflow e-Guide (Digital Basics II).You can order your copy from the BAA Online Store here, by sending a PayPal for $40 here, or by calling Jim or Jennifer weekdays at 863-692-0906 with your credit card in hand. Be sure to specify Digital Basics II. |
The BIRDS AS ART Current Workflow e-Guide (Digital Basics II)
The techniques mentioned above and tons more great Photoshop tips and techniques — along with my complete digital workflow, Digital Eye Doctor techniques, and all my personalized Keyboard Shortcuts — are covered in detail in the BIRDS AS ART Current Workflow e-Guide (Digital Basics II), an instructional PDF that is sent via e-mail. Note: folks working on a PC and/or those who do not want to miss anything Photoshop may wish to purchase the original Digital Basics along with DB II while saving $15 by clicking here to buy the DB Bundle.
Folks who learn well by following along rather than by reading can check out the collection of MP 4 Photoshop Tutorial Videos by clicking here. Note: most of the videos are now priced at an amazingly low $5.00 each.
You can learn how and why I converted all of my Canon digital RAW files in DPP 4 in the DPP 4 RAW Conversion Guide here. More recently, I became proficient at converting my Nikon RAW (NEF) files in Adobe Camera Raw. About three years ago I began converting my Nikon and Sony RAW files in Capture One and did that for two years. You can learn more about Capture One in the Capture One Pro 12 Simplified MP4 Video here. The next step would be to get a copy of Arash Hazeghi’s “The Nikon Photographers’ Guide to Phase One Capture One Pro e-Guide” in the blog post here. Today, I convert my Sony raw files in Photoshop with Adobe Camera Raw.
You can learn advanced Quick Masking and advanced Layer Masking techniques in APTATS I & II. You can save $15 by purchasing the pair.
|
|
Image #1A: The RawDigger screen capture for the Heermann’s Gull/Brown Pelican juxtaposition image
|
Ho Hum, Another Perfect Exposure
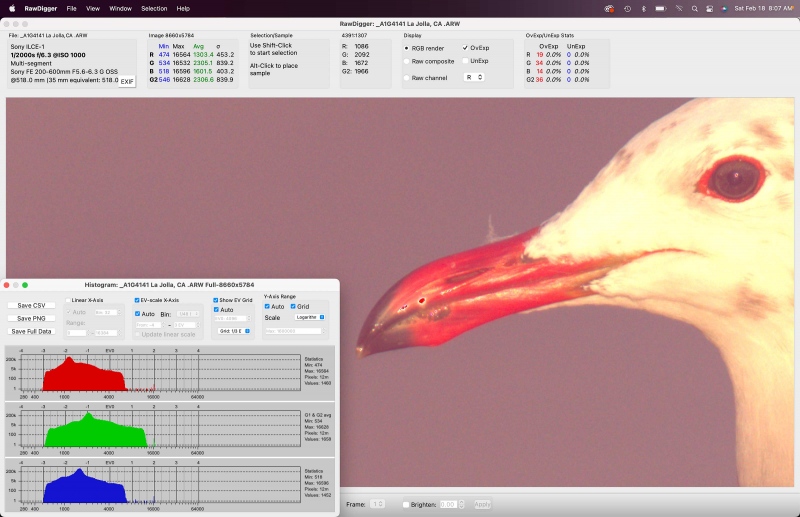
What can I say? The combination of Zebras live in the viewfinder (with your camera set up properly) and post-capture study of the raw files in RawDigger makes it pretty much child’s play to come up with perfect exposure after perfect exposure. It would be impossible to overstate how much I have learned by studying RawDigger and how much better my exposures have become since I started with the program almost two years ago. The raw file brightness for today’s featured image is perfect with the G channel just past the 8000 & 2/3rds line. Most of the 103 OvExp pixels are in the specular highlights on the bill. The rest are in the specular highlights in the eye’s catchlight.
RawDigger — not for the faint of heart …
Nothing has ever helped me learn to create perfect exposures to the degree that RawDigger has. I think that many folks are reluctant to learn that most of their images are underexposed by one or more full stops and that highlight warnings in Photoshop, Lightroom, Capture One, and your in-camera histogram are bogus as they are based on the embedded JPEGs. Only your raw files tell the truth all the time. Heck, I resisted RawDigger for several years … Once you get over that feeling, RawDigger can become your very best exposure friend no matter what system you are using. On the recent IPTs and In-the-Field sessions, we have demonstrated that fact. Convincingly.
The RawDigger Adapted (pink) Histogram
In the RawDigger e-Guide, you will learn exactly how to set up the Adapted “pink” RawDigger Histogram and how to use it to quickly and easily evaluate the exposure or raw file brightness of images from all digital cameras currently in use. RawDigger was especially helpful to me as I have struggled with R5 exposures and learned my new camera body, the Sony Alpha a1.
|
|
RawDigger e-Guide with Two Videos |
The RawDigger e-Guide with Two Videos
by Arthur Morris with Patrick Sparkman
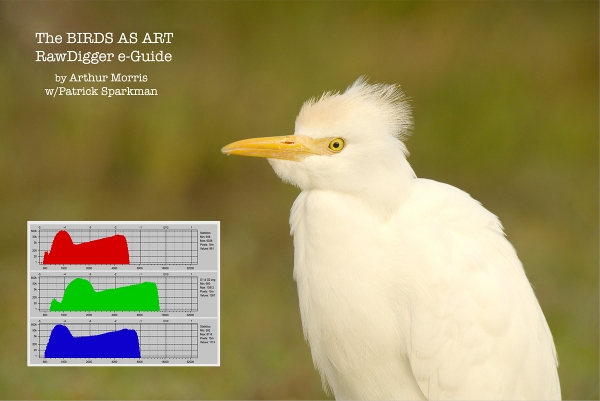
The RawDigger e-Guide was created only for serious photographers who wish to get the absolute most out of their raw files.
Patrick and I began work on the guide in July 2020. At first, we struggled. We asked questions. We learned about Max-G values. We puzzled as to why the Max G values for different cameras were different. IPT veteran Bart Deamer asked lots of questions that we could not answer. We got help from RawDigger creator Iliah Borg. We learned. In December, Patrick came up with an Adapted Histogram that allows us to evaluate the exposures and raw file brightness for all images created with all digital camera bodies from the last two decades. What we learned each time prompted three complete beginning to end re-writes.
The point of the guide is to teach you to truly expose to the mega-Expose-to-the-Right so that you will minimize noise, maximize image quality, best utilize your camera’s dynamic range, and attain the highest possible level of shadow detail in your RAW files in every situation. In addition, your properly exposed RAW files will contain more tonal information and feature the smoothest possible transitions between tones. And your optimized images will feature rich, accurate color.
We teach you why the GREEN channel is almost always the first to over-expose. We save you money by advising you which version of RawDigger you need. We teach you how to interpret the Max G values for your Canon, Nikon, and SONY camera bodies. It is very likely that the Shock-your-World section will shock you. And lastly — thanks to the technical and practical brilliance of Patrick Sparkman — we teach you a simple way to evaluate your exposures and the raw file brightness quickly and easily the Adapted RawDigger histogram.
The flower video takes you through a session where artie edits a folder of images in Capture One while checking the exposures and Max-G values in RawDigger. The Adapted Histogram video examines a series of recent images with the pink histograms and covers lots of fine points including and especially how to deal with specular highlights. The directions for setting up the Adapted Histogram are in the text.
If we priced this guide based on how much effort we put into it, it would sell it for $999.00. But as this guide will be purchased only by a limited number of serious photographers, we have priced it at $51.00. You can order yours here in the BAA Online Store.
Typos
With all blog posts, feel free to e-mail or to leave a comment regarding any typos or errors.




Truly, all the images are beautiful. Today, my favorite is Image #4: Bald Eagle adult — regal eagle, because I prefer the dark background in this case, I love the color of the eagles eye, but mostly, I love the feather detail.
Sorry, posted my comment re the eagle photos on the wrong day. l copy it to today’s blog.
Occasionally, I like to see subjects juxtapositioned in a photo. Generally, my preference is for the out of focus subject to not have the some prominence in the photo as the in focus subject. However, in this case the (easily identifiable) pelican adds interest to the shot, for something different. Frankly, the gull as a subject in this photo by itself, doesn’t pass muster; unless you got in close, showing off his beautiful red eye ring and bill.
A few months ago, I took a shot of a couple of shorebirds of the same species. One subject was in focus and one out of focus. I almost deleted it, and then realized that I really liked that aspect of the shot.
Thanks for commenting. As for the gull not passing muster, I disagree but only 100%. Herrmann’s Gull for me is one of North America’s handsomest gulls (even when it is not quite in breeding plumage).
a
I am not an expert but since you asked us to be honest… I think the out-of-focus Pelican is a distraction and I would have removed it.
Thanks, Jordan. There is no accounting for taste. And sometimes you might need to ask yourself, “What the heck does he know?”
As you might have surmised, I love this one.
a