Worse Comes to Worse, I’ll Get Along
No matter how tough the conditions or strong the NW winds are, I’ll get along. This song reminds me of traveling by motor home in 1994 with my beloved late wife Elaine Belsky Morris. Especially as we drove across the seemingly endless I-10 in East Texas. (I-10 runs east from Anthony, at the border with New Mexico, through El Paso, San Antonio, and Houston to the border with Louisiana in Orange. At just under 880 miles, the Texas segment of I-10, maintained by the Texas Department of Transportation, is the longest continuous un-tolled freeway in North America that is operated by a single authority!) It is difficult to believe that on 20 November Elaine will have been gone for 31 years.
What’s Up?/The End is in Sight
For two weeks winds from the south and the east had been predicted for this week. I was thrilled for Jim Miller who is arriving tonight and David Pugsley and wife Michelle who show up for three days on Thursday evening. Yesterday, the forecast changed and they are now calling for light winds from the NE, N, NW, W, and SW. “Worse Comes to Worst,” from the 1973 Billy Joel album Piano Man.
Sunday morning was decent early on and I came up with a new, tide-dependent strategy for dealing with the NW winds. Monday morning was probably the worst overall morning of the trip with a light breeze from the west. I made some decent images in the pre-dawn, worked a handsome Wood Stork in the shade of the bridge for a while, and ended the morning with a halfway decent image of a perched male Belted Kingfisher — see Images 2 and 2A below.
Today is Tuesday 18 November and we will be headed out early. The forecast is for yet another day with the wind from the NW 🙁 As always, I am hoping to make one very good image. Whatever you opt to do, I hope that you too choose to have a wonderful and productive day. I head home on Monday 24 November and will be flying to Long Island to for Thanksgiving to visit my two daughters and their families. It will be a short trip filled with family, food and football.
If an item — a Delkin flash card or reader, a Levered-clamp FlexShooter Pro, or a Wimberley lens plate or low foot — for example, that is available from B&H and/or Bedfords, is also available in the BAA Online Store, it would be great, and greatly appreciated, if you would opt to purchase from us. We will match or beat any price. Please remember also to use my B&H affiliate links or to earn 3% cash back at Bedford by using the BIRDSASART discount code at checkout for your major gear purchases. Doing either often earns you free guides and/or discounts. And always earns my great appreciation.
Gear Questions and Advice
Too many folks attending BAA IPTs and dozens of photographers whom I see in the field and on BirdPhotographer’s.Net, are — out of ignorance — using the wrong gear, especially when it comes to tripods and more especially, tripod heads. And the same is true in spades when ordering new camera bodies or lenses. My advice will often save you some serious money and may help you avoid making a seriously bad choice. Please know that I am always glad to answer your gear questions via e-mail. If you are desperate, you can try me on my cell at 863-221-2372. Please leave a message and shoot me a text if I do not pick up.
|
|
|
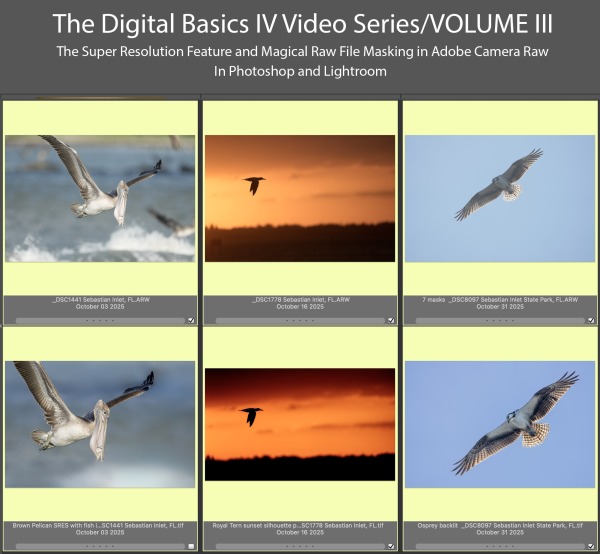
Learn how and when to utilize the new, quite tricky Super Resolution feature in the latest versions of Photoshop and Lightroom. And learn how to use the masking features while converting an image in Adobe Camera Raw. This one hour video features six complete image optimizations. The Digital Basics IV Video Series/Volume III by Arthur Morris/BIRDS AS ARTYou can purchase Volume III alone (59 minutes, 13 seconds) for $49.00 by clicking here. Or save $50.00 by purchasing the entire 5 volumes series by clicking here. |
Digital Basics IV Video Series/Volume III
The two main thrusts of Volume III of the Digital Basics IV Video Series explains in detail how to handle when and how to use the new Super Resolution feature in Adobe Camera Raw to upsize your cropped .TIF files and how to use a variety of masks in ACR. Those include the automatic selections like Sky, Subject, and Background as well as Linear and Radial Gradients and how to create your own masked area using the Brush Tool. This feature has transformed my workflow and I am now routinely using as many as six or seven masks on a single raw file. I am even using painted masks to effectively do my Eye Doctor work.
Each of the six image optimizations takes you through my complete basic workflow that remains much the same as is detailed in both DB II and in the DB III Video Series. The steps include:
1- Setting the Color Temperature (when and if needed).
2- Setting the White and Black Points and adjusting the Highlights and Shadows sliders.
3- Setting the Clarity and Dehaze sliders.
4- Fine-tuning color using the Hue/Saturation/Luminance Targeted Adjustment Tool, a huge step up from the Color Mixer Tool.
5- My 2-step noise reduction technique (now only with higher ISO images).
Once I have the .TIF file in Photoshop, I still use my usual cadre of clean-up tools and techniques including the Remove Tool, the Clone Stamp (only rarely), Divide and Conquer, Quick Masking, Layer Masking, Gaussian Blurs, an expanded array of personalized keyboard shortcuts, and tons of other image optimization strategies and methods adapted from previous versions of Digital Basics. I also demonstrate the selective use of Topaz Sharpen AI utilizing the masking feature. And last but not least, I share my JPEG creation methodology.
You can purchase Volume III alone (59 minutes, 41 seconds) for $49.00 by clicking here. Or save $50.00 by purchasing the entire 5 volumes series by clicking here.
Volume IV, coming in early December, will detail the use of the use of the much improved Remove Tool for an amazing variety of tasks. Along with he complete image optmization of the kingfisher image below.
|
|
|
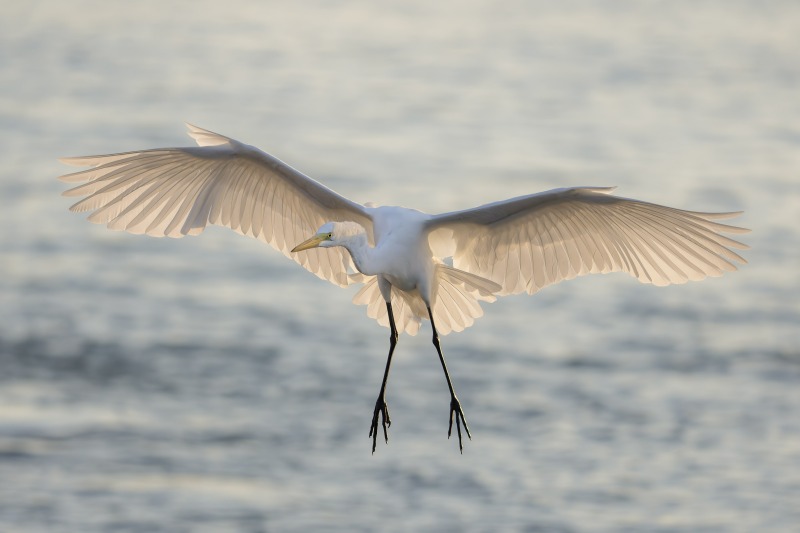
This image was created on 17 November 2025 by yours truly at Sebastian Inlet State Park. Standing at full height I used the a Wide/AF-C with Bird-Eye/Face Detection performed perfectly. Click on the image to enjoy the larger, inexplicably sharper high-res version. Image #1: Great Egret backlit, braking to land |
Pressed For Time and Coming Up Roses
I had just switched from shutter priority to manual mode when I saw this Great Egret flying in to land. I raised the shutter speed a bunch of clicks and — press for time, acquired focus and fired off a burst. I did not have time to properly work the aperture as detailed in the 400-800 Lens Guide. So, I wound up at f/6.3 when I zoomed out. As fate would have it, less than perfect technique left me with a dead solid perfect exposure in a very difficult situation.
Lightening the Bird’s Head and Breast
With the sun in the east, the top of the bird’s head, the bottom of its neck, and its breast and belly were in the shadow of the bird’s outstretched wings as it landed into a light NW breeze. During the raw conversion in Adobe Camera Raw (ACR), I painted a mask of the shaded areas and pulled up the exposure on the masked area.
Use the masking feature in ACR to lighten a selected area on a raw file is far easier and far more efficient than doing the same thing on a .TIF file in Photoshop. Learn how in Volume III of the Digital Basics III Video Series. It covers the use of the new Super Resolution features in ACR 17.5 and introduces and details the use of the masking features both during and after the raw conversions in ACR 17.5 (in both Photoshop and Lightroom). Volume III was sent to all series subscribers on Monday afternoon. Purchase the series now by clicking here and you will receive the first three volumes.
|
|
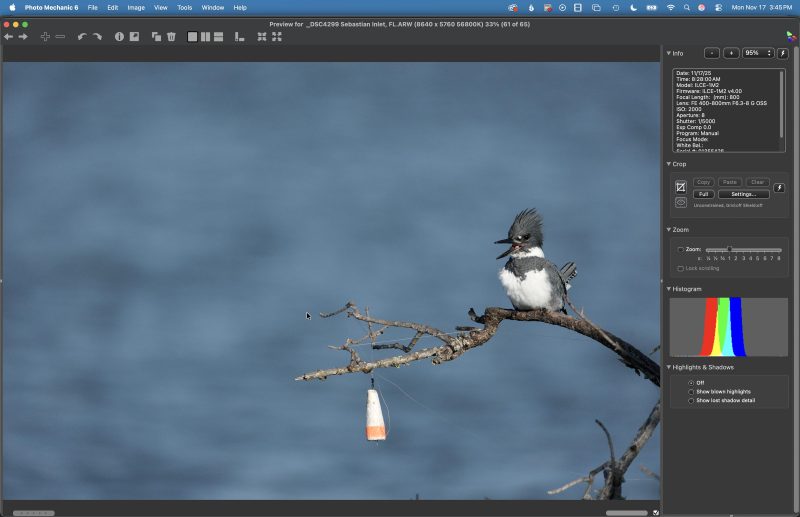
Image #2: The Photo Mechanic screen capture for the Belted Kingfisher male on perch calling image. |
Pushing the Envelope With Aggressive Clean-up and Super Resolution
By any standard, the kingfisher situation was far less than ideal. The terribly cluttered perch, the tangled monofilament, and the fishing bobber are mega distracting. And the bird is relatively small in the frame (at best).
On the other hand, a super-sharp, perfectly exposed 51 MP a-1 ii raw file and some basic Photoshop clean-up skills combined with a large crop and upsized using the new Super Resolution feature in ACR 17.5, and you just might come up with something very nice. Scroll down please.
|
|
|
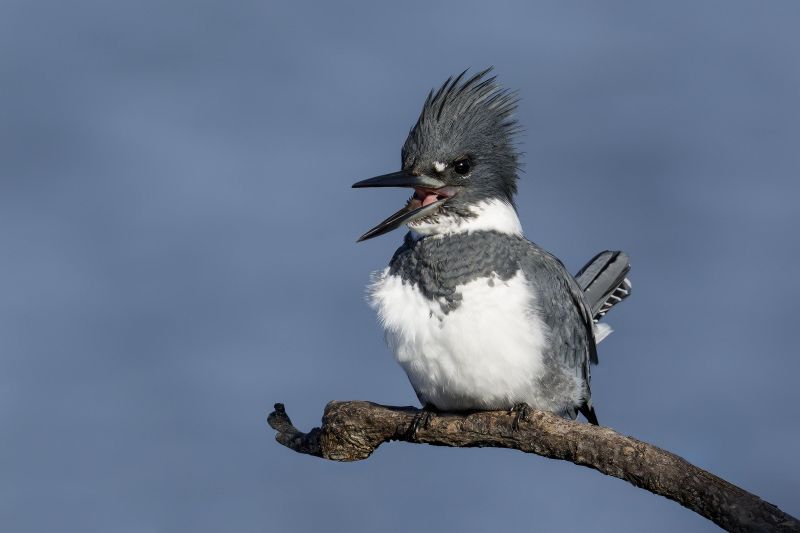
This image was also created on 17 November 2025 by yours truly at Sebastian Inlet State Park. Seated in the driver’s seat of my SUV I used the BLUBB-supported Sony FE 400-800mm f/6.3-8 G OSS lens (Sony E) (at 443m) and The Latest Greatest Sony Flagship Body, the a1 II Mirrorless Camera. The exposure was determined via Zebras with ISO on the Thumb Wheel; ISO: 2000. 1/5000 sec. at f/8 (wide open) in Manual mode.RawDigger showed that the exposure was dead solid perfect. AWB at 8:28:00am on a sunny morning. Wide/AF-C with Bird-Eye/Face Detection performed perfectly. Click on the image to enjoy the larger, inexplicably sharper high-res version. Image #2A: Belted Kingfisher male on perch calling |
Amazing? or Amazing!
After applying Super Resolution, the result was an incredibly sharp and detailed portrait of a male Belted Kingfisher. The flattened 8-bit file tips the scales at 75.4 megabytes. As recommended in Volume III of the DB IV Video Series, Super Resolution should only be applied to files that are tack sharp at the pixel level.
Using the Super Resolution feature is tricky. You can learn all the secrets in Volume III of the Digital Basics III Video Series. It covers the use of the new Super Resolution features in ACR 17.5 and introduces and details the use of the masking features both during and after the raw conversions in ACR 17.5 (in both Photoshop and Lightroom). Volume III was sent to all series subscribers on Monday afternoon. Purchase the series now by clicking here and you will receive the first three volumes.
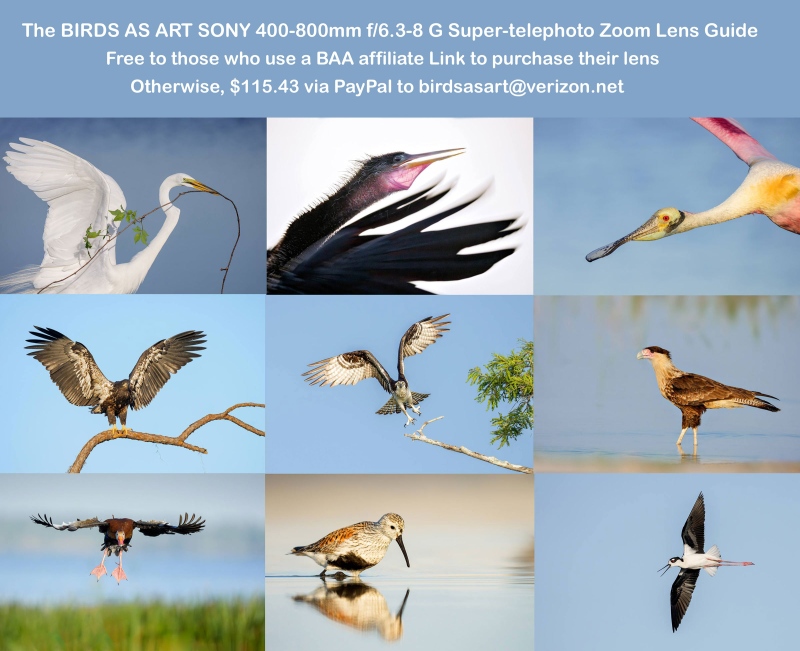
The BIRDS AS ART SONY 400-800mm f/6.3-9 G Super-telephoto Zoom Lens Guide
Using the 400-800 on a tripod topped by a Levered-clamp FlexShooter Pro has opened opened up new worlds for me at Sebastian. I love the reach when doing pre-dawn blurs and cloud-scapes and the ability to zoom out to 400mm when needed enables me to create a wide variety of images. The 400 to 800mm focal length range makes this lens incredibly versatile for bird photography.
When I borrowed it from Sony, I assumed that at 5.45 pounds it was too heavy to handhold for long and that at f/8 at the long end (800mm,) it was too slow for most bird photography applications. In short, I did not want to like the lens. After a month of using it, I cannot live without it. After returning the loaner, I was miraculously able to get my own from Bedfords on 16 April 2025. In this guide I share everything that I have learned about using the 400-800. For best results, you need to know exactly what you are doing to get the most out of this zoom lens. It would be best, therefore, to consider and study the material in the guide so that you can begin making great images with your new lens.
You will learn how to deal with the relatively show apertures: f/6.3, f/7.1, and f/8 when working in Manual mode.
You will learn how to ensure that you are working at the widest aperture by working in Shutter Priority mode with AUTO ISO.
If you are able to hand hold the lens, you will learn proper hand holding techniques.
If you can’t, you will learn when, why, and how to employ other options. Those include:
1- The knee-pod, heel-pod, and toe-pod techniques
2- Using the lens on a monopod.
3- The best lens plate and low foot for your 4-8.
4- The best tripod and head for the 4-8 and how best to utilize them.
5- How to use the lens from your vehicle while supporting it on a BLUBB (or not and why not).
6- Detailed instructions on how to set and use the lens controls and buttons:
a- AF/MF
b- DMF Switch
c- Limit Range Switch
d- OSS (Optical Steady Shot) Switch
e- OSS Mode Switch
f- Focus Hold Buttons
The guide also includes a Hand Holding Shutter Speed Primer and an illustrative, educational, and inspiring 67-image gallery.
Free to folks who use one of my two affiliate links to purchase their Sony 400-800 G lens. Otherwise, please send a PayPal for $115.43 to birdsasart@verizon.net and include the words “400-800 Lens Guide” in your e-mail.
Typos
With all blog posts, feel free to e-mail or to leave a comment regarding any typos or errors.



Artie,
Really like the optimized kingfisher image.
Thanks, Monte. Great to hear from you.
much love, artie
Making 2A from A is pretty remarkable. I only have one decent kingfisher image from probably 15 years ago. I’d be thrilled with 2A.
:-). Agree on pretty remarkable. Here is the best news: this guy is pretty remarkable. Yesterday morning, we had him for four minutes on a perfect perch much closer. I am almost guarantee that you will have a few good chances with the very same bird. See you at Sebastian tonight!
with love, artie