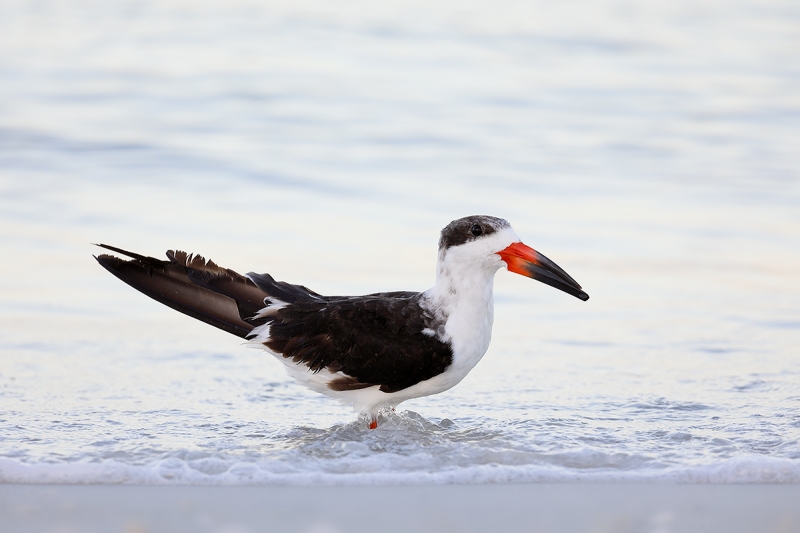
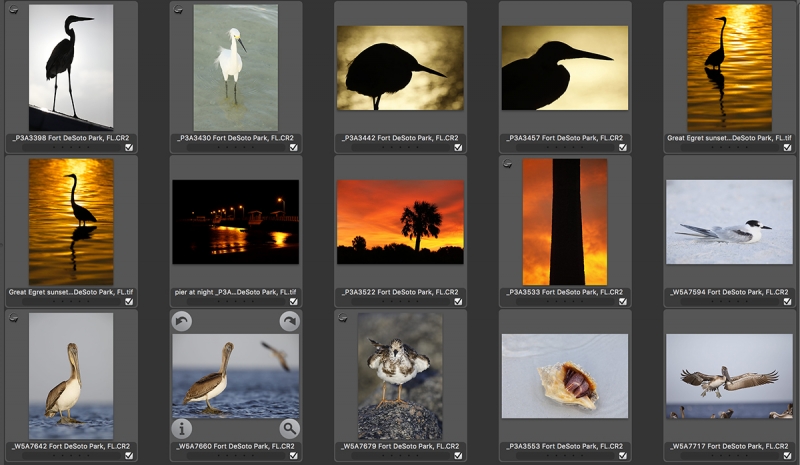
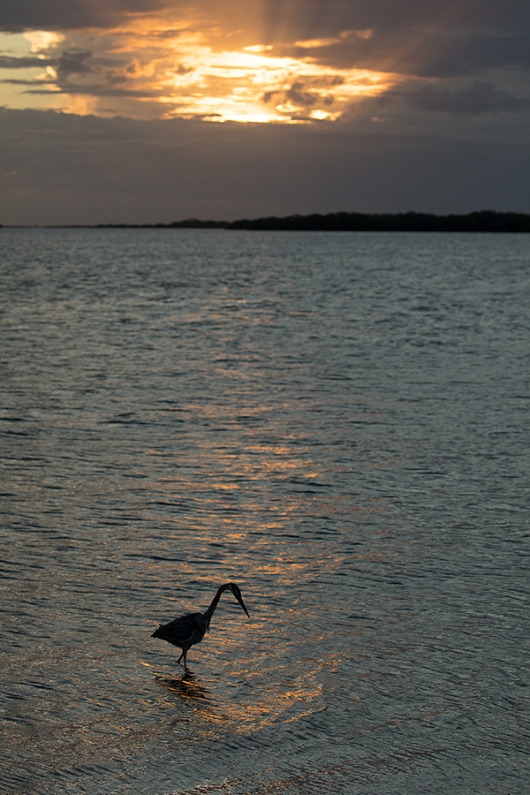
October 29th, 2017 Stuff
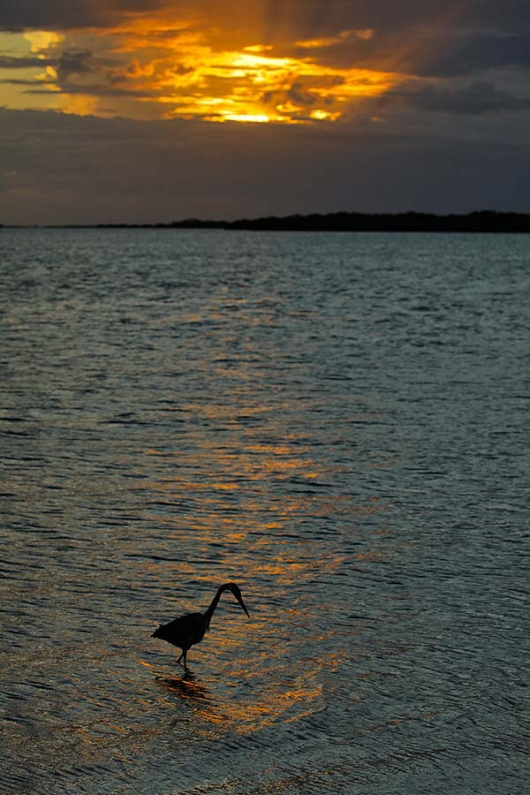
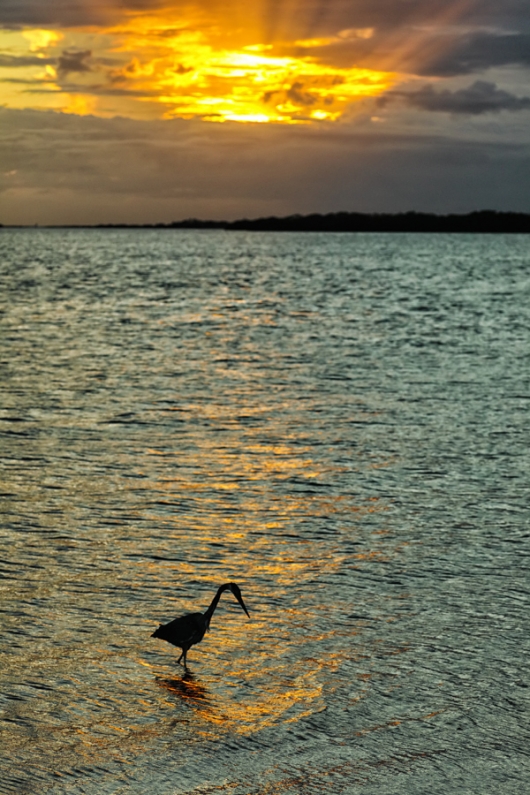
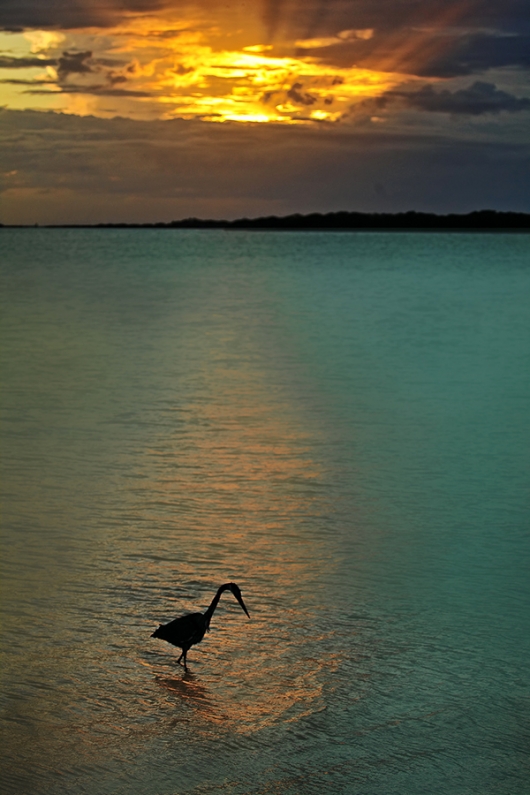
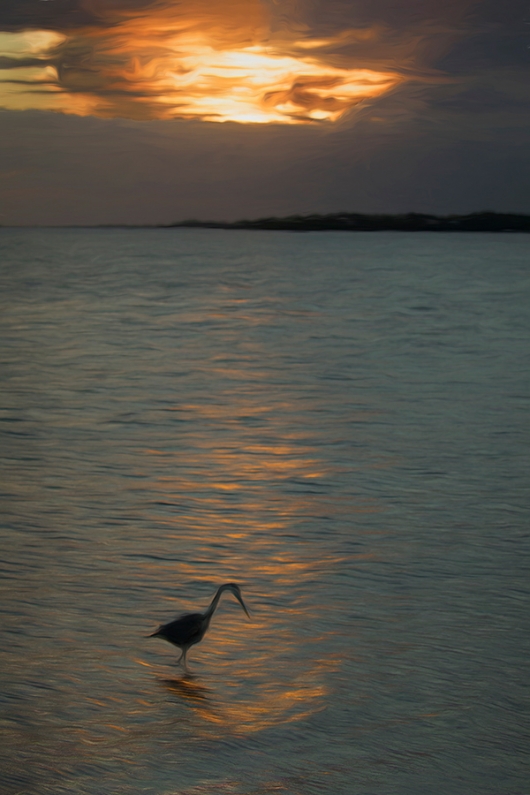
On Saturday morning I met my group of four at DeSoto in the dark. Once we were all set up the group enjoyed and introductory slide show with my Macbook Pro on the front hood of my Sequoia. Things were not looking too great as there was not much bait around and there were lots of pleasure boats in the backgrounds of our landing pelican images. But things improved rapidly both before and after the sun made it over a really large cloud above the eastern horizon. We did well with young pelicans and Sandwich Terns in flight, some Double-Crested Cormorants, and the first of the season Marbled Godwit that was shy at first but quickly grew to love us. The cherry on top was the the mystery egret flew in and landed right in from of us with a perfect distant blue water background.
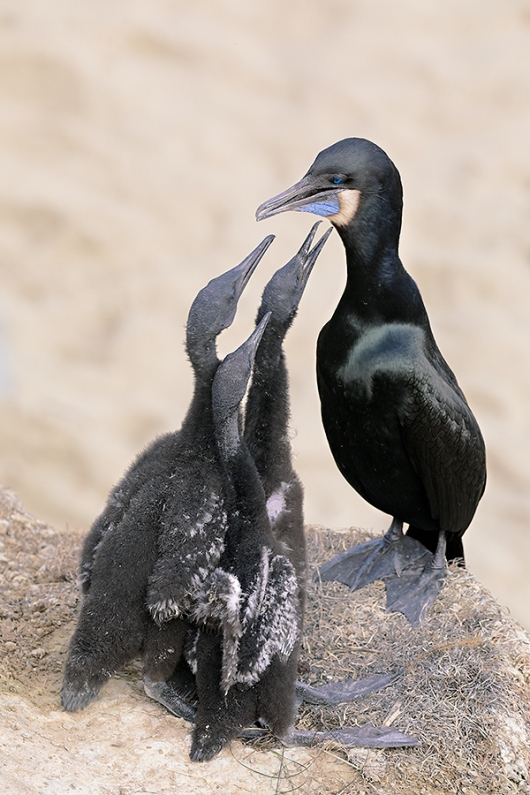
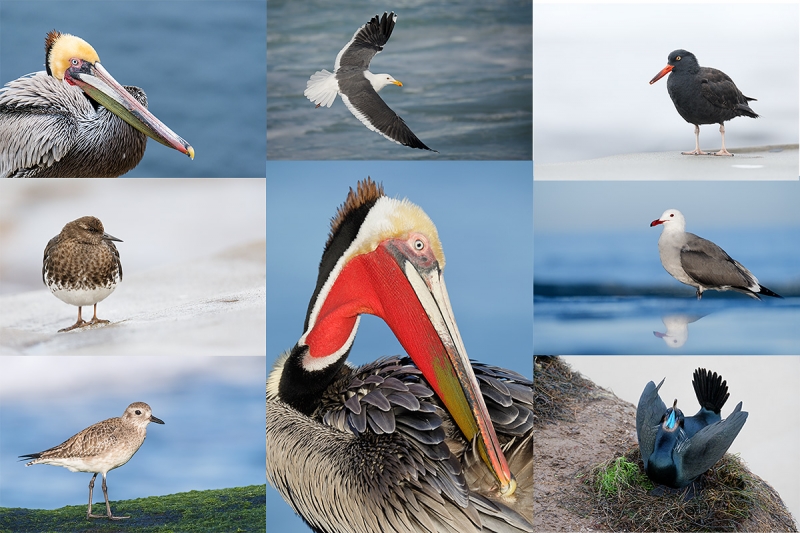
In addition to pointing out the need to expose to the right with all of your digital captures, the title for today’s blog post, Exposing 3000 Miles to the Right, reflects the fact that Brandt’s Cormorants are a western species, found only along the Pacific coast. 🙂
The Streak
Today makes ninety-four days in a row with a new educational blog post! This one took about an hour to prepare. With all of my upcoming free time (or not …), the plan right now is to break the current record streak of 480 … Good health and good internet connections willing.
Booking.Com
Booking.Com came through for me twice again recently with both the DeSoto Fall IPT and next July’s UK Puffins, Gannets, and Bempton Pre-trip room reservations. And all the rates were great. If you’d like to give Booking.Com a shot, click here and you will earn a $25 reward. Thanks to the many who have already tried and used this great service.


Gear Questions and Advice
Too many folks attending BAA IPTs and dozens of folks whom I see in the field, and on BPN, are–out of ignorance–using the wrong gear especially when it comes to tripods and more especially, tripod heads… Please know that I am always glad to answer your gear questions via e-mail.
Nesting Brandt’s Cormorants
While you will almost surely not get to photograph chicks of this species on either San Diego IPT, we will enjoy even better photographic opportunities with courting adults in full breeding plumage with their silver head plumes and richly colored turquoise gular sacks with purple flecking. The color is surreal. And so are the heads back/wings down displays.
|
|
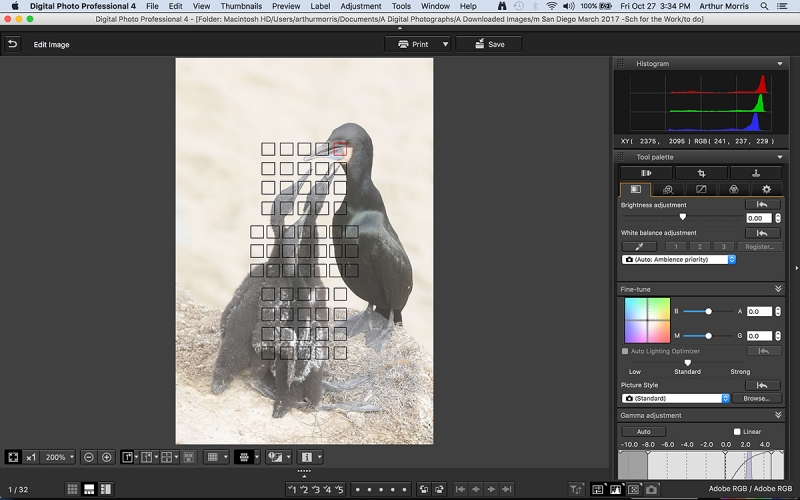
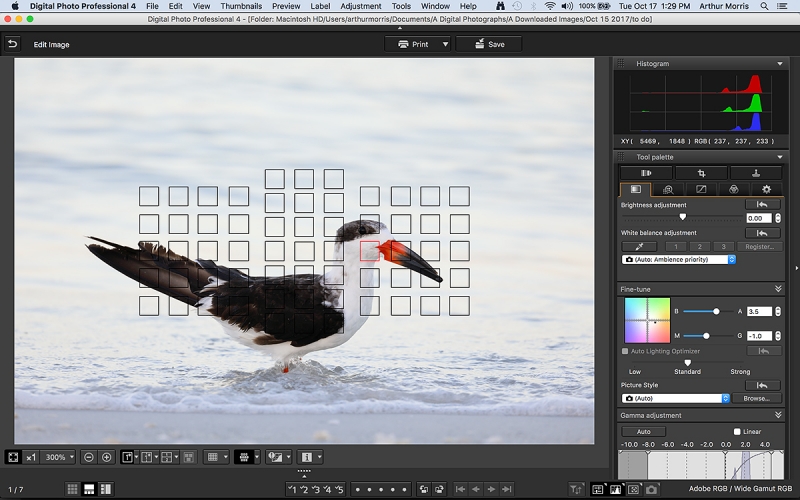
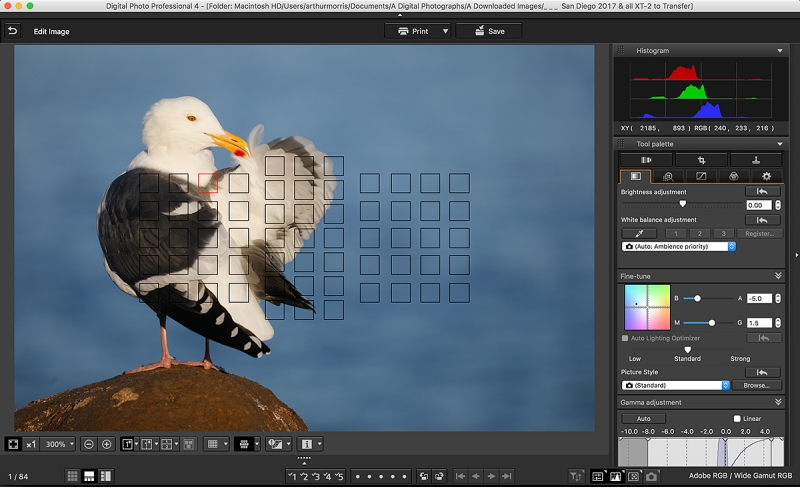
A DPP 4 Screen Capture for today’s featured image
|
Upper Large Zone AF kills again for verticals!
Notice that the system activated a single AF point that fell squarely on the bird’s eye. The trick is to watch the AF point or points as they dance around the array and to press the shutter button when they are on or near the right spot, i.e., somewhere that is on the same plane as the bird’s eye.
Exposing 3000 Miles to the Right …
Note that the histogram is pushed all the way to the right. Note how light the RAW file looks as it came out of the camera. I often say,”If your RAW files look good on the back of your camera and on your laptop, they are under-exposed. Your properly exposed RAW files should look washed out, especially those made in low light and those that average to lighter than a middle tone.”
Properly exposing to the right reduces noise in the dark tones and produces larger, higher quality image files. But only 100% of the time.
The Image Optimization
Knowing that a simple Levels adjustment would bring this image to life, I did not do much in DPP 4 after loading my EOS 5D Mark IV/ISO 400 recipe. The first thing that that I did in Photoshop was the simple Levels adjustment that I mentioned above, being sure to hold down the Alt key as I set both the white and the black points — back off a bit once you see the first speckles. That alone greatly improved the image. Next I ran the RGB Curves Color Balancing Trick on its own layer but still the background dirt and the sand on the beach below needed a lot more color and punch. To that end, I opened a new layer for the whole image and then went Image > Adjustments > Selective Color. I picked the WHIITe channel, added 90 points of black and five points of yellow. Voila.
Then I saved the master TIF file, cropped the image to 900 pixels high, sharpened it with Unsharp Mask at 80/.3/0 and save the JPEG, making sure to hit “D” for Don’t Save when asked if I wanted to save the changes made to _W5A7642. (If you hit save, you replace your master TIF file with a tiny JPEG …)
|
|
|
The BIRDS AS ART Current Workflow e-Guide (Digital Basics II) will teach you an efficient Mac/Photo Mechanic/Photoshop workflow that will make it easy for you to make your images better in Photoshop (rather than worse). That true whether you convert your images in DPP 4 or ACR. See the blog post here to learn lots more and to read a free excerpt.
You can order your copy from the BAA Online Store here, by sending a Paypal for $40 here, or by calling Jim or Jennifer weekdays at 863-692-0906 with your credit card in hand.
|
The BIRDS AS ART Current Workflow e-Guide (Digital Basics II)
Everything mentioned above is covered in detail in the BIRDS AS ART Current Workflow e-Guide (Digital Basics II), an instructional PDF that is sent via e-mail. Learn more and check out the free excerpt in the blog post here. The new e-Guide reflects my Macbook Pro/Photo Mechanic/DPP 4/Photoshop workflow. Do note that you will find the RGB Curves Adjustment Color Balancing tutorial only in the new e-guide. Note: folks working on a PC and/or those who do not want to miss anything Photoshop may wish to purchase the original Digital Basics along with DB II while saving $15 by clicking here to buy the DB Bundle.
The two most recent and many of the older MP4 Photoshop Tutorial videos releases go hand and hand with the information in DB II):
- The Wingtip Repairs MP4 Video here.
- The MP4 Crow Cleanup Video here.
Folks who learn well by following along rather than by reading can check out the complete collection of MP 4 Photoshop Tutorial Videos by clicking here.
You can learn how and why I and other discerning Canon shooters convert nearly all of their Canon digital RAW files in DPP 4 using Canon Digital Photo Professional in the DPP 4 RAW conversion Guide here. And you can learn advanced Quick Masking and advanced Layer Masking techniques in APTATS I & II. You can save $15 by purchasing the pair. Folks can learn sophisticated sharpening and (NeatImage) Noise Reduction techniques in the The Professional Post Processing Guide by Arash Hazeghi and yours truly.
If In Doubt …
If in doubt about using the BAA B&H affiliate link correctly, you can always start your search by clicking here. Please note that the tracking is invisible. Web orders only. Please, however, remember to shoot me your receipt via e-mail.


Please Remember to use my Affiliate Links and to Visit the New BAA Online Store 🙂
To show your appreciation for my continuing efforts here, we ask, as always, that you get in the habit of using my B&H affiliate links on the right side of the blog for all of your photo and electronics purchases. Please check the availability of all photographic accessories in the New BIRDS AS ART Online Store, especially the Mongoose M3.6 tripod head, Wimberley lens plates, Delkin flash cards and accessories, and LensCoat stuff.
As always, we sell only what I have used, have tested, and can depend on. We will not sell you junk. We know what you need to make creating great images easy and fun. And please remember that I am always glad to answer your gear questions via e-mail.
I would of course appreciate your using our B&H affiliate links for all of your major gear, video, and electronic purchases. For the photographic stuff mentioned in the paragraph above, and for everything else in the new store, we, meaning BAA, would of course greatly appreciate your business. Here is a huge thank you to the many who have been using our links on a regular basis and those who will be visiting the New BIRDS AS ART Online Store as well.
Amazon.com
Those who prefer to support BAA by shopping with Amazon may use the logo link above.
Amazon Canada
Many kind folks from north of the border, eh, have e-mailed stating that they would love to help us out by using one of our affiliate links but that living in Canada and doing so presents numerous problems. Now, they can help us out by using our Amazon Canada affiliate link by starting their searches by clicking here.
Facebook
Be sure to like and follow BAA on Facebook by clicking on the logo link upper right. Tanks a stack.
Typos
In all blog posts and Bulletins, feel free to e-mail or to leave a comment regarding any typos or errors. Just be right :).
October 28th, 2017 Stuff
I drove over to Fort DeSoto on Friday afternoon and met up with two good friends, many multiple IPT veteran John Dupps and multiple IPT veteran Lee Sommie. I was glad to see that though the wind was from the east southeast it was not very strong. We did great on my favorite afternoon beach with the usual cast of shorebirds, Willet, Black-bellied, Semipalmated, and Wilson’s Plovers, Sanderling, Ruddy Turnstone, and Least Sandpiper. We wiggled over to my new favorite DeSoto location and had great fun with the Snowy Egrets photographing at first with the sun behind us and then, at K7500, shooting into the sun and the blasting highlights.
Dinner at Goodtimes on Tiera Verde as excellent as usual. Conditions for Saturday morning are looking perfect 🙂
The Streak
Today makes ninety-three days in a row with a new educational blog post! This one took about an hour to prepare. With all of my upcoming free time (or not …), the plan right now is to break the current record streak of 480 … Good health and good internet connections willing.
Booking.Com
Booking.Com came through for me twice again recently with both the DeSoto Fall IPT and next July’s UK Puffins, Gannets, and Bempton Pre-trip room reservations. And all the rates were great. If you’d like to give Booking.Com a shot, click here and you will earn a $25 reward. Thanks to the many who have already tried and used this great service.


Gear Questions and Advice
Too many folks attending BAA IPTs and dozens of folks whom I see in the field, and on BPN, are–out of ignorance–using the wrong gear especially when it comes to tripods and more especially, tripod heads… Please know that I am always glad to answer your gear questions via e-mail.
|
|
|
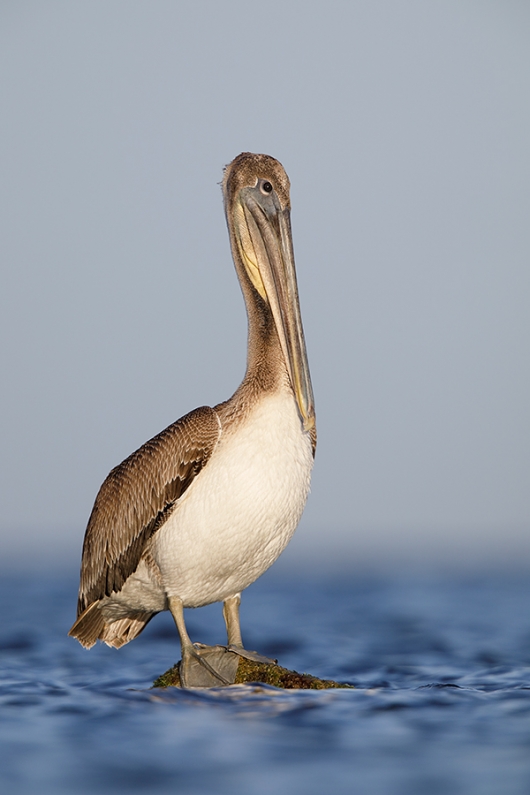
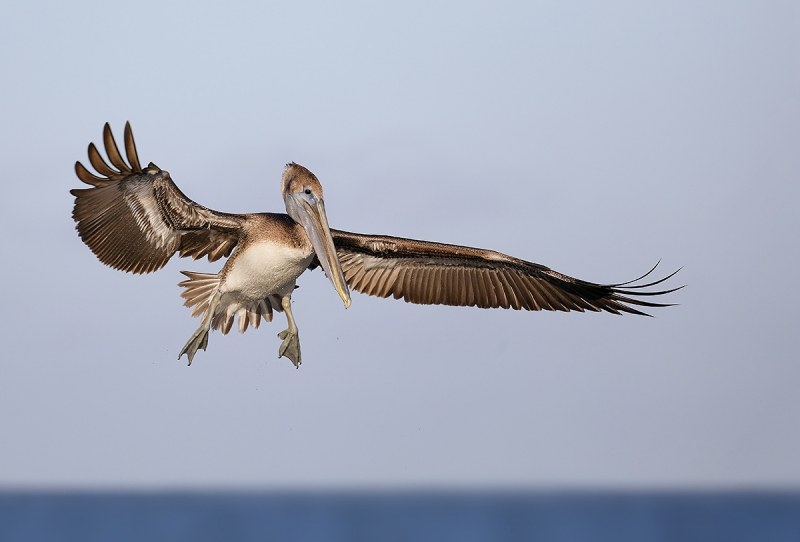
This image was created at Fort DeSoto with Canon EF 500mm f/4L IS II USM lens, the Canon Extender EF 2X III, and my favorite pelican photography camera body, the Canon EOS 5D Mark IV. ISO 800. Evaluative metering +1 stop: 1/640 sec. at f/9 in Manual mode. AWB. Early morning light.
Though my big lens was not mounted on the Induro GIT304L Grand Series 3 Stealth Carbon Fiber Tripod and the Mongoose M3.6, both were involved in the creation of the image. See below for details.
LensAlign/FocusTune micro-adjustment: -5.
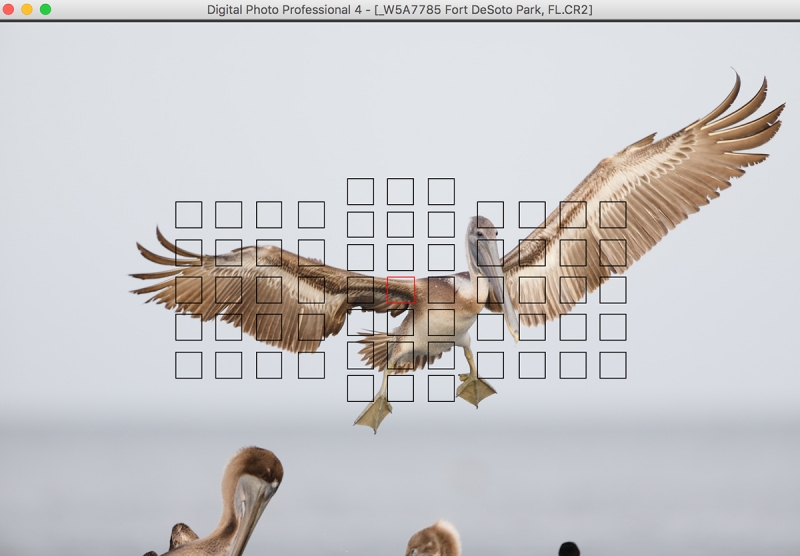
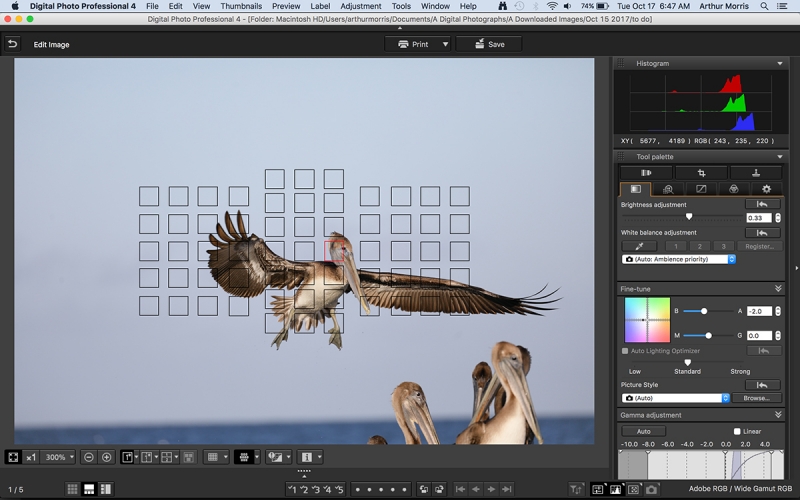
Upper large Zone/AI Servo/Shutter Button AF was active at the moment of exposure and performed to perfection. See the DPP 4 screen capture below to learn the location of the activated AF points.
Brown Pelican juvenile, low perspective
|
How Low Can You Get?
The young pelican above was perched on a rock that protruded just above the water at high tide. I noted the bird even before the sun came over the dunes behind us. I knew from the get-go that the best images would be there for the taking if I got flat down on the ground. But the sand was wet, the beach sloped downhill towards the Gulf, and I was feeling a bit lazy and was enjoying being dry … I tried sitting behind my lowered tripod; the horizon cut through the top of the bird’s head. So I bit the bullet by splaying the legs of my Induro GIT304L Grand Series 3 Stealth Carbon Fiber Tripod — they do great around saltwater and sand — and got down flat on the beach. Still no good as now the horizon cut the bird neatly in half.
So, even though I was working at 1000mm, I unclamped the lens from the Mongoose and rotated the whole tripod so that one of the legs pointed squarely my left. Then I rested the barrel of the lens on that single splayed tripod leg; the bottom of the lens barrel was about an inch above the sand. I was effectively hand holding with a bit of support.
I faced several problems. My rig was so low that it was very difficult to get my eye to the viewfinder while working vertically. But it was imperative that I do just that so I could get a good look at the in-viewfinder electronic level. When you are lying on the ground your head is naturally skewed while looking through the viewfinder so the in-viewfinder level is a must. As I strained to get my eye to the viewfinder I felt at times as if my left eyeball was gonna pop right out of its socket. And I received the gift of an instant headache every time that I got to make a few frames. I could not take the pain for long so I quit as soon as I felt that I had made a few good ones.
I had thought of using Live View but concluded that without the lens securely mounted on the tripod that that would be a losing effort.
Was it worth it for me? Yes, I absolutely love going super low even when it involves great effort and some pain.
Note that the FocusTune micro-adjustment of -5 fits into the fairly significant category.
|
|
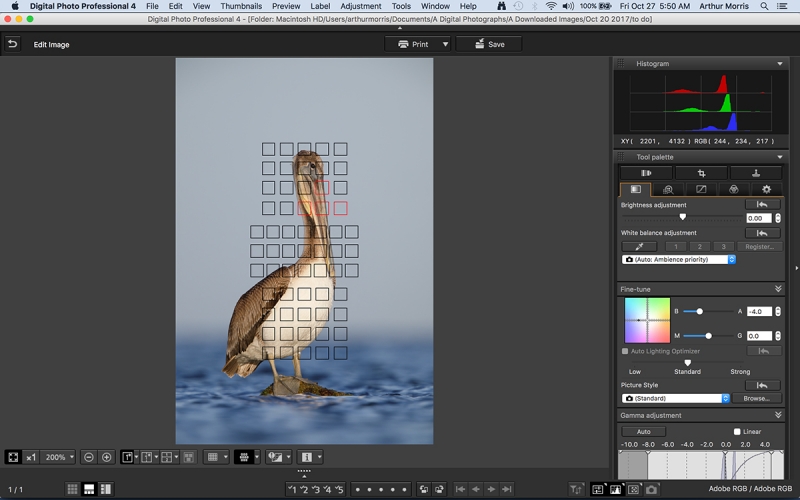
A DPP 4 Screen Capture for today’s featured image
|
A DPP 4 Screen Capture for today’s featured image
Upper Large Zone AF Rocks Verticals!
Check out the three AF points that were activated and note the perfect job done by Upper Large Zone AF. If you own a camera that offers Manual Selection Large Zone AF and are not using it for verticals, you are making your life more difficult than it needs to be. Upper Large Zone offers almost unlimited compositional freedom.
The RAW Conversion
After bringing the image into DPP 4, I entered my 5D Mark IV/ISO 400 basic recipe and then checked the RGB values for the WHITEs for this early morning light image. Since the RGB values noted lots of RED I moved the Color fine tune point toward BLUE. This lined up the R, G, and B histograms quite a bit but still left the image looking like rich early morning light. With less RED than I had started with the RGB values read 244, 234, 217. Note as pointed out in the Understanding the Color of Light/Part II blog post here, it is not necessary to work towards images with a perfect neutral white balances (unless that is what you want). For this image, the warm light was a big plus for me. As was the low perspective 🙂 (Next time I might dig a big hole so that I can get even lower …) Adjusting the Color fine tune dot was the only thing that I did in DPP 4 (other than entering my basic recipe). So then I hit Command + D to convert the CR2 file to a TIF.
The Image Optimization
The image optimization in Photoshop was about as simple as the RAW conversion had been. I used the 2X3 crop preset and cropped a bit from above and from the left to tighten up the composition. Then I selected the bird using the Quick Selection Tool (my keyboard shortcut W), placed the selection on its own layer, and applied my NIK Color Efex Pro 30-30 recipe mainly to bring up some of the detail in the bird’s white breast. Then I saved the master TIF file, cropped the image to 900 pixels high, sharpened it with Unsharp Mask at 80/.3/0 and save the JPEG, making sure to hit “D” for Don’t Save when asked if I wanted to save the changes made to _W5A7642. (If you hit save, you replace your master TIF file with a tiny JPEG …)
|
|
|
The BIRDS AS ART Current Workflow e-Guide (Digital Basics II) will teach you an efficient Mac/Photo Mechanic/Photoshop workflow that will make it easy for you to make your images better in Photoshop (rather than worse). That true whether you convert your images in DPP 4 or ACR. See the blog post here to learn lots more and to read a free excerpt.
You can order your copy from the BAA Online Store here, by sending a Paypal for $40 here, or by calling Jim or Jennifer weekdays at 863-692-0906 with your credit card in hand.
|
The BIRDS AS ART Current Workflow e-Guide (Digital Basics II)
Everything mentioned above is covered in detail in the BIRDS AS ART Current Workflow e-Guide (Digital Basics II), an instructional PDF that is sent via e-mail. Learn more and check out the free excerpt in the blog post here. The new e-Guide reflects my Macbook Pro/Photo Mechanic/DPP 4/Photoshop workflow. Do note that you will find the RGB Curves Adjustment Color Balancing tutorial only in the new e-guide. Note: folks working on a PC and/or those who do not want to miss anything Photoshop may wish to purchase the original Digital Basics along with DB II while saving $15 by clicking here to buy the DB Bundle.
The two most recent and many of the older MP4 Photoshop Tutorial videos releases go hand and hand with the information in DB II):
- The Wingtip Repairs MP4 Video here.
- The MP4 Crow Cleanup Video here.
Folks who learn well by following along rather than by reading can check out the complete collection of MP 4 Photoshop Tutorial Videos by clicking here.
You can learn how and why I and other discerning Canon shooters convert nearly all of their Canon digital RAW files in DPP 4 using Canon Digital Photo Professional in the DPP 4 RAW conversion Guide here. And you can learn advanced Quick Masking and advanced Layer Masking techniques in APTATS I & II. You can save $15 by purchasing the pair. Folks can learn sophisticated sharpening and (NeatImage) Noise Reduction techniques in the The Professional Post Processing Guide by Arash Hazeghi and yours truly.
If In Doubt …
If in doubt about using the BAA B&H affiliate link correctly, you can always start your search by clicking here. Please note that the tracking is invisible. Web orders only. Please, however, remember to shoot me your receipt via e-mail.


Please Remember to use my Affiliate Links and to Visit the New BAA Online Store 🙂
To show your appreciation for my continuing efforts here, we ask, as always, that you get in the habit of using my B&H affiliate links on the right side of the blog for all of your photo and electronics purchases. Please check the availability of all photographic accessories in the New BIRDS AS ART Online Store, especially the Mongoose M3.6 tripod head, Wimberley lens plates, Delkin flash cards and accessories, and LensCoat stuff.
As always, we sell only what I have used, have tested, and can depend on. We will not sell you junk. We know what you need to make creating great images easy and fun. And please remember that I am always glad to answer your gear questions via e-mail.
I would of course appreciate your using our B&H affiliate links for all of your major gear, video, and electronic purchases. For the photographic stuff mentioned in the paragraph above, and for everything else in the new store, we, meaning BAA, would of course greatly appreciate your business. Here is a huge thank you to the many who have been using our links on a regular basis and those who will be visiting the New BIRDS AS ART Online Store as well.
Amazon.com
Those who prefer to support BAA by shopping with Amazon may use the logo link above.
Amazon Canada
Many kind folks from north of the border, eh, have e-mailed stating that they would love to help us out by using one of our affiliate links but that living in Canada and doing so presents numerous problems. Now, they can help us out by using our Amazon Canada affiliate link by starting their searches by clicking here.
Facebook
Be sure to like and follow BAA on Facebook by clicking on the logo link upper right. Tanks a stack.
Typos
In all blog posts and Bulletins, feel free to e-mail or to leave a comment regarding any typos or errors. Just be right :).
October 27th, 2017 Stuff
On Thursday morning I got some serious work done on the 5D Mark IV User’s Guide. Then it was off to TJ McKeon’s office in Lake Wales for some Active Release Technique Chiropractic work on my shoulders, hips, and back. Next was a routine visit to Dr. Holmes; my blood work last week came in with my lowest-ever A1C, a three month measure of blood sugar levels: a very excellent 5.0. For the past few days I have been enjoying an overwhelming feeling of mental and physical peace and well-being.
Be sure to read the whole e-mail exchange below as Swamp Thing posed several commonly asked questions and my informative responses contain some good solid advice (and lots of subliminal advertising) based on my thirty-four years behind telephoto lenses. And to think that I started late!
I head over to Fort DeSoto this afternoon to meet a not-so-small group for a weekend of in-the-field instruction BIRDS AS ART style.
Thanks to the many who left comments on yesterday’s Major or Minor Screw-Up by Yours Truly? blog post while answering the question, What do you do with your images??? Click here to chime in if you like.
The Streak
Today makes ninety-two days in a row with a new educational blog post! This one took about 90 minutes to prepare over two days. With all of my upcoming free time (or not …), the plan right now is to break the current record streak of 480 … Good health and good internet connections willing.
Booking.Com
Booking.Com came through for me twice again recently with both the DeSoto Fall IPT and next July’s UK Puffins, Gannets, and Bempton Pre-trip room reservations. And all the rates were great. If you’d like to give Booking.Com a shot, click here and you will earn a $25 reward. Thanks to the many who have already tried and used this great service.


Gear Questions and Advice
Too many folks attending BAA IPTs and dozens of folks whom I see in the field, and on BPN, are–out of ignorance–using the wrong gear especially when it comes to tripods and more especially, tripod heads… Please know that I am always glad to answer your gear questions via e-mail.
The Daily Work …
I write often that I spend lot of time answering e-mails. Do know that I enjoy doing so. Here is a typical conversation with Mark Malina whose e-mails show up in my Inbox as being from Swamp Thing:
am: Hey Mark, How are things in the swamp??? Thanks for getting in touch; where do you live?
re:
MM: First, I want to say thanks.
am: You are most welcome.
MM: I only discovered your blog a few months ago by chance as I was undertaking an effort to get more serious about wildlife photography (and frankly
had thought little about bird photography specifically). In the last month, I have become increasingly hooked on your incredibly informative and fun posts.
am; Thank you for appreciating the blog 🙂 Like bird photography, the blog is one of the great passions in my life. I put a lot of effort into and get a lot out of it in terms of joy and happiness (not to mention appreciable income).
MM: Of course, seeing the beauty of your bird shots also made me want to take some myself.
am: Thank you kindly. That’s how it happens. Then you are hooked. I did not start photographing till I was 37 and it quickly became the overwhelming passion in my life.
MM: I also recently bought your and Arash’s DPP4 RAW Conversion Guide and will inevitably be purchasing others, which leads to the following question.
am: Thank you and good plan.
MM: Regarding the Art of Bird Photography II, it says on the site somewhere that it comes only as a CD. My current laptop doe not have a CD ROM drive and I don’t have a separate plug-in one. Do you also offer it simply as a downloadable pdf? If so, how do I indicate that when purchasing on-line?
am: Excellent questions. 🙂 You can get a downloadable version by clicking here.
MM: Third, virtually every time I open the blog page, I notice your ever-present statement about folks out of ignorance using the wrong tripod and head.
am: Yes sir. I try to make sure that that invitation is there every day. And yet zillions of folks are still out there using the wrong tripods and the wrong tripod heads with their expensive gear …
MM: I have been wanting to take you up on your offer in that post to answer questions on the topic for a long while but didn’t want to trouble you.
am: No trouble at all; it’s my job.
MM: Now that I am writing you for other reasons, I can ask about those two items. I have a nice older Gitzo carbon fiber tripod and a Gitzo ball head.
am: If I may be frank, ballheads are for landscape photography not for telephoto lenses. And while I have only seen a few of the Gitzo ballheads, they all had two things in common: they are poorly designed and difficult to work with.
MM: I love the tripod, not so much the head. Also, the tripod is a medium-weight model and I suspect you may tell me it’s not solid enough.
am: That plus all Gitzo tripods are all over-priced and under-performing. The leg locks anodize whenever they come within 100 yards of saltwater. Using a Gitzo tripod outside of your living room pretty much voids the lifetime guarantee … And when (not if) your tripod needs repair, you are screwed. Things were bad enough when the distributor handled the service but about three years ago the repair department got farmed out …
MM: I know you always reference the Induro GIT304L Grand Series 3 Stealth Carbon Fiber Tripod and the Mongoose M3.6. Are those pretty much a universal recommendation or is it more situation specific?
am: As for the tripod, it depends on your height. For most folks six foot or under the GIT 304L is pretty much one-size-fits-all; if it is right for you, please use only this link: Induro GIT304L Grand Series 3 Stealth Carbon Fiber Tripod.
If you are about 6 foot tall and like a tall tripod or if you are taller than 6 foot or really tall, the slightly heavier GIT 404XL is best for you. Again, please use this link: Induro GIT404XL Grand Series 4 Stealth Carbon Fiber Tripod. In addition to being taller the 404XL is quite a bit sturdier (and heavier). That is why I use it with a Wimberley head for all of my LensAlign/FocusTune micro-adjusting.
As for the Mongoose M3.6 I have been using mine for more than 12 years with all of my super-telephoto lenses, from both 400 DO lenses, to both 500 lenses, to both 600 lens (all of those often with both the 1.4X and 2X TCs) and even to the 800mm f/5.6L IS. And making consistently sharp images at shutter speeds down to 1/60 second (as long as the bird is still). In addition, it is great for my 100-400 II when I need to be on a tripod. I do still recommend the Wimberley for folks who want just a bit more stiffness in their heads and are using 600mm lenses.
We will are getting one perfect Mongoose m3.6 on Monday. Best to call Jim at 863-692-0906 to ensure getting that one. However, do consider this, we are also going to get a few heads with insignificant blemishes on the frame; they will work perfectly. You can save $50 by specifying that you would like a blemished model one (on phone orders only). I am copying Jim here to make him aware.
MM: Do you use or recommend the Mongoose with the side mount or do you add the Low Mount Arm?
am: I do NOT use or recommend the Low Mount Arm except for folks who cannot hold up their big lens with their left hand and arm for ten seconds while mounting it. And even in those cases I do not like the low mount as it screws up the balance with big glass. But it is is better to use the Low Mount Arm than dropping your lens while mounting it … That said, Denise Ippolito loves the Low Mount Arm with her 600mm f/4L IS II.
MM: I currently use nothing bigger than the original 100-400 but am working up to a purchase of a longer lens (probably the 400 DO II because I really want something I can walk around with easily as I spend a lot of time in the woods and on canoes and such). Any thoughts would be appreciated.
am: The 400 DO II is an amazing and wonderful lens; it is the world’s best super-telephoto for folks who do not like carrying around lenses that weigh more than 5 pounds. My beloved 500 II weighs just over 7 pounds, and the 600 II weighs 8.65 pounds. The great news is that most folks using the 400 DO II can easily learn to make sharp images with both teleconverters, even the 2X III. Many folks have problems when using the 2X III with either the 500mm or the 600mm f/4 lenses.
If you do go for the 400 DO II, please use my B&H affiliate link: it is the best way to thank me for the blog and for the time spent answering e-mails like yours. Web orders only and it will not cost you one penny more.
Here you go: Canon EF 400mm f/4 DO IS II USM Lens.
Please shoot me your B&H receipt(s) via e-mail after you purchase.
thanks and later and love, artie
|
|
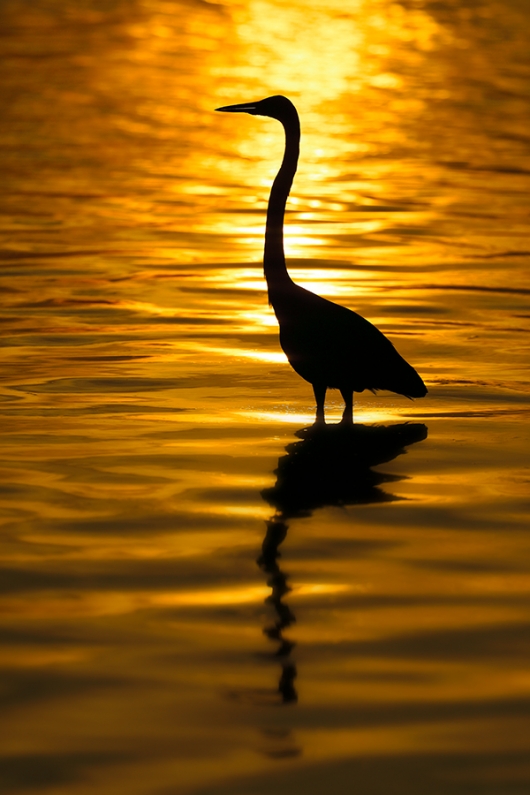
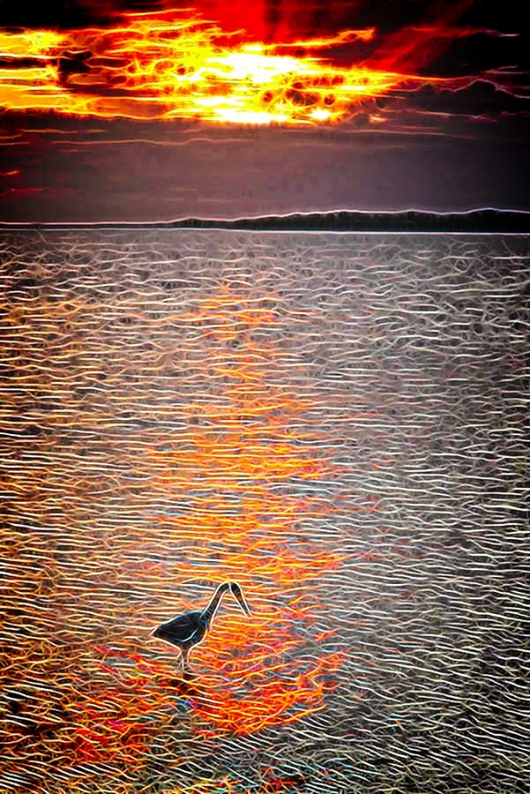
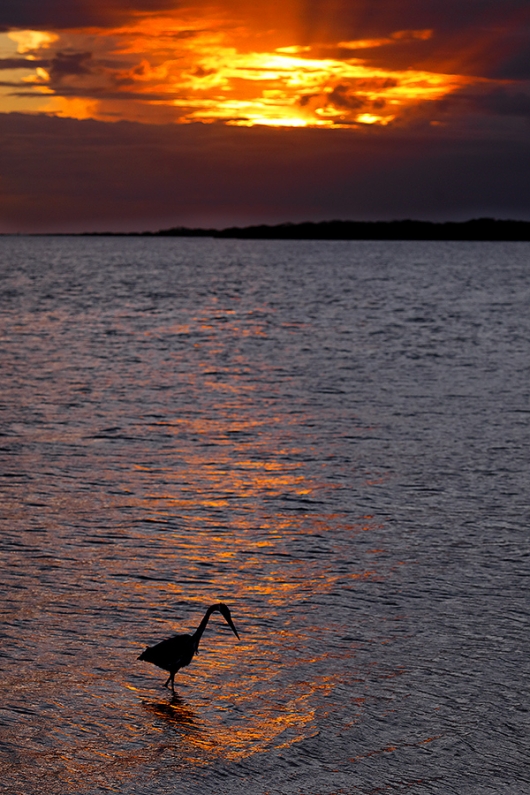
Image #1: Great Egret sunset silhouette
|
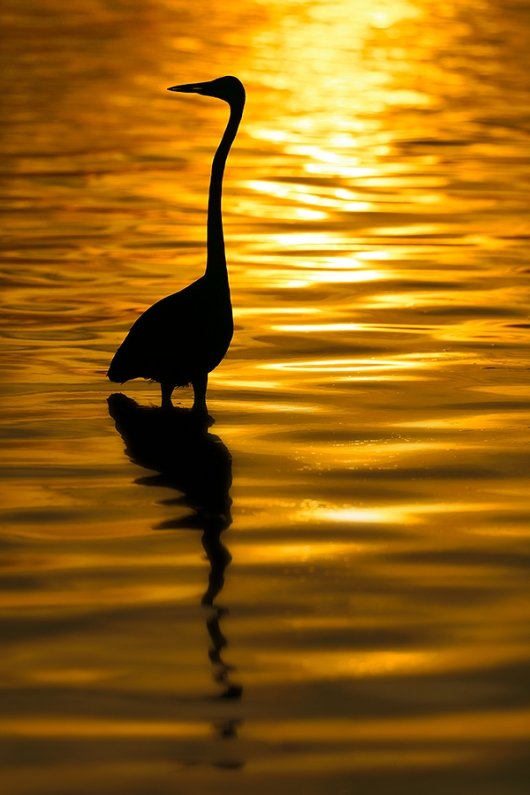
As seen in the A Loverly Sunset and Making Hue/Saturation/Luminance Adjustments in DPP 4 and ACR (in Photoshop or Lightroom) blog post here, the images above and below were created at Fort DeSoto on the late afternoon of Friday, October 20 with the hand held Canon EF 100-400mm f/4.5-5.6L IS II USM lens, the Canon Extender EF 1.4X III and my favorite bird photography camera body, the Canon EOS 5D Mark IV. There, I posted, Which of today’s two featured images is the strongest? Please let us know why you made your choice. I feel that one of the images is far stronger than the other … Stay tuned.
|
|
Image #2: Great Egret sunset silhouette, looking back
|
Your Favorites
The first six folks who commented, Elinor Osborne, Jerry Fenwick, David Policansky, Barrett Pierce, Adam, and Jake Levin, were unanimous in choosing Image #1 as the stronger of the two images. Then Anthony Ardito posted this:
The first image is “classically” the better image, however I like #2, the the “looking back” image, as my favorite. Who knows why, it just appeals to me. Maybe I’ll try to explain … It’s more off center visually than the first because of the turned-back head, and the neck is very straight and parallel to the sides of the photograph. It’s just better for me. I don’t care about the crud in the water, in fact it kind of adds to the picture’s realism. Time out: after a few minutes I got my daughter to look to see which one she liked better, and she said the first. I asked why, and she said because the bird was in the path of the sun. Wow! am I an idiot? Why didn’t I see that first off!
My Clear Favorite
Don’t get me wrong, both of the featured images are very strong photographs, and I said in the original post, I did a much better job of cleaning up the foreground crud in the water in Image #1 than I did in Image #2. For me, the first is much too much of a cliché. The second image, with the head turned back and looking out of the frame is my clear favorite mainly because it is different. But as I have said here before, different is not enough. So why else do I prefer Image #2? With apologies to Anthony’s daughter, I like that the bird is slightly offset from the swath of sunlit water. And I love the tension created by the bird looking back out of the frame. For me it brings in an aura of mystery, why is that bird looking over there?
So, am I right and the six folks in the Image #1 fan club wrong? Not at all. As I said both are strong images and artistic preferences are strictly personal. Here, I am just sharing my thoughts.
If In Doubt …
If in doubt about using the BAA B&H affiliate link correctly, you can always start your search by clicking here. Please note that the tracking is invisible. Web orders only. Please, however, remember to shoot me your receipt via e-mail.


Please Remember to use my Affiliate Links and to Visit the New BAA Online Store 🙂
To show your appreciation for my continuing efforts here, we ask, as always, that you get in the habit of using my B&H affiliate links on the right side of the blog for all of your photo and electronics purchases. Please check the availability of all photographic accessories in the New BIRDS AS ART Online Store, especially the Mongoose M3.6 tripod head, Wimberley lens plates, Delkin flash cards and accessories, and LensCoat stuff.
As always, we sell only what I have used, have tested, and can depend on. We will not sell you junk. We know what you need to make creating great images easy and fun. And please remember that I am always glad to answer your gear questions via e-mail.
I would of course appreciate your using our B&H affiliate links for all of your major gear, video, and electronic purchases. For the photographic stuff mentioned in the paragraph above, and for everything else in the new store, we, meaning BAA, would of course greatly appreciate your business. Here is a huge thank you to the many who have been using our links on a regular basis and those who will be visiting the New BIRDS AS ART Online Store as well.
Amazon.com
Those who prefer to support BAA by shopping with Amazon may use the logo link above.
Amazon Canada
Many kind folks from north of the border, eh, have e-mailed stating that they would love to help us out by using one of our affiliate links but that living in Canada and doing so presents numerous problems. Now, they can help us out by using our Amazon Canada affiliate link by starting their searches by clicking here.
Facebook
Be sure to like and follow BAA on Facebook by clicking on the logo link upper right. Tanks a stack.
Typos
In all blog posts and Bulletins, feel free to e-mail or to leave a comment regarding any typos or errors. Just be right :).
October 26th, 2017 Stuff
Wednesday was one of those Roseanne Roseannadanna “It’s always something” days. It began when I could not turn off the pool’s underwater lights. I had turned them on for my very late swim on Tuesday. Then several electrical outlets in my office (in the new rooms in the back of the house) went dead. We tried all the circuit breakers in the garage with no luck. Then, just as I was about to dial Fletcher Electric Jim somehow remembered that the electrical panel for the addition were under a large canvas print of a Sandhill Crane with two chicks on the nest. It was the breaker.
Then when I went to work on this partially prepared blog I learned that the server that hosts both my blog and BPM was down. I tried getting in touch with Peter Kes for hours but he had gone to bed early (in Switzerland).
Things are looking better for Thursday as when I awoke both the BAA blog and BPN were back up and running.
I did get a fair amount of work done on the 5D Mark IV User’s Guide and will do more on it today. Still, the woods are lovely, dark and deep.
but I have promises to keep, and miles to go before I sleep. Robert Frost. BTW, it is a chilly 53 degrees here at Indian Lake Estates, FL this morning.
The Streak
Today makes ninety-one days in a row with a new educational blog post! This one took about 90 minutes to prepare over two days. With all of my upcoming free time (or not …), the plan right now is to break the current record streak of 480 … Good health and good internet connections willing.
|
|
2017 in San Diego was a very good year ….
|
2018 San Diego 3 1/2-DAY BIRDS AS ART IPT #2: Sunday, JAN 28 thru and including a morning session on Wednesday, JAN 31, 2018: 3 1/2 days: $1699. Limit: 8: Openings: 6
Meet and Greet at 6:30pm on the evening before the IPT begins; Saturday, Jan 27, 2018.
San Diego IPT #2: Shorter and Less Expensive!
I am offering a free morning session on SAT 27 JAN for all who register.
Click here for details.
Booking.Com
Booking.Com came through for me twice again recently with both the DeSoto Fall IPT and next July’s UK Puffins, Gannets, and Bempton Pre-trip room reservations. And all the rates were great. If you’d like to give Booking.Com a shot, click here and you will earn a $25 reward. Thanks to the many who have already tried and used this great service.


Gear Questions and Advice
Too many folks attending BAA IPTs and dozens of folks whom I see in the field, and on BPN, are–out of ignorance–using the wrong gear especially when it comes to tripods and more especially, tripod heads… Please know that I am always glad to answer your gear questions via e-mail.
|
|
|
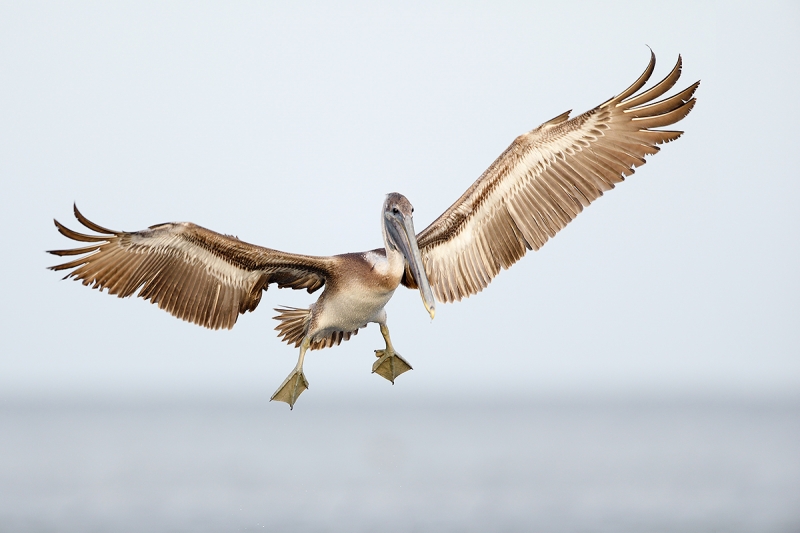
This image was created on Sunday morning, October 22 with the Induro GIT304L Grand Series 3 Stealth Carbon Fiber Tripod/Mongoose M3.6-mounted Canon EF 600mm f/4L IS II USM lens and my favorite bird photography camera, the Canon EOS 5D Mark IV. ISO 800. Evaluative metering +2 1/3 stops of the light grey sky: 1/1600 sec. at f/4 in Manual mode. AWB.
The center AF point/AI Servo/Manual selection/Shutter Button AF as originally framed (see below) was active at the moment of exposure. The selected AF point was placed squarely on the leading edge of the base of the bird’s right wing and thus was slightly beyond the plane of the bird’s eye. None-the-less, the image is acceptably sharp. The selected AF point should have been squarely placed on the bird’s face or upper breast (at worst). Chalk it up to the ravages of age 🙂
FocusTune/LensAlign Micro Adjustment: +2.
Brown Pelican, immature braking to land
|
Major or Minor Screw-Up by Yours Truly?
I thought that I had had a pretty darned good morning last Sunday at Desoto, but when I went to edit my images in Photo Mechanic, I noted the none of the photos that I made with my 600II appeared to be in sharp focus. In fact, they all looked like garbage. I wondered if my 600II had somehow been damaged. I did notice also that all of the image files were RAW + JPEG. I never set RAW plus JPEG: .CR2+jpg in Photo Mechanic, and R+J in DPP 4. That’s when I realized that the AFA settings for my 600 II had disappeared from my #1 5D IV body. That probably courtesy of Canon repairs.
After getting a perfect (but mostly insignificant) +2 with the 600 alone I realized that the lens was sharp and performing perfectly. Next I viewed the images enlarged in DPP 4 and they looked fine and sharp … So, anyhooo, I went back to Photo Mechanic and tried viewing the images smaller by changing the zoom from 1 to 2. I do not quite understand how or why that worked, but presented smaller, the images looked fine and I was able to judge the sharpness as I usually do. If I zoomed in on the image in PM, it was back to garbage time. Small RAW produces junk files as compared to the superb image quality of a sharp 5D IV large RAW file …
As the image above looks great as presented, I consider the Small RAW debacle a minor screw-up at worse. Scroll down to see more on this topic in the What do you do with your images ??? item below.
Notice
Notice with the soft light in the white sky image above that underwing detail of the fully and perfectly outspread wings of the braking pelican is perfectly and evenly lit. On sunny days, 99% of similar images will show at least some unpleasing shadows on the underwings. That is one reason that I love soft light for flight.
|
|
This is a DPP 4 Screen Capture showing the full frame original and the selected AF point.
|
A DPP 4 Show Focus Point Screen Capture
In the DPP 4 Show Focus Point screen capture for today’s featured image we can see that because of declining strength, hand-eye coordination, and fine motor skills, I failed to get the selected AF point on the “bird’s face, neck, or upper breast” (as I always advise). 🙂 If I had nailed this bird with the AF point right between its eyeballs the pelican would have been perfectly framed and I would have eliminated most if not all of the pelican heads at the bottom. That’s why God invented Photoshop. After converting the Small RAW file in DPP 4 I moved the bird in the frame using techniques from APTATS I and then eliminated the extraneous heads using the Patch Tool, Content Aware Fill, and the Clone Stamp Tool. Lastly I sharpened the bird’s face with a Contrast Mask.
What do you do with your images ???
In nature photography today, the income derived from leasing one-time (and other) rights to publish images in books, calendars, and on the web has declined more than 90% as compared to what it was 15 years ago. It has gotten to the point that the potential value of having a large, sharp, high quality image file has dropped to pennies. Over the past decade, the income produced by my favorite two hundred images is negligible at best. At least for BIRDS AS ART, the best images that I produce are used almost exclusively here on the blog where their direct value is pretty much zero. But their indirect value is as advertising. If I were not consistently producing good numbers of excellent images on a weekly basis then fewer folks would be attracted to the blog; my Instructional Photo-Tours would not be nearly as successful as they are (despite the fact that everyone who owns a camera is now running photo tours); the Used Gear page would not be the huge success that it is; the sale of merchandise in the BIRDS AS ART Online Store would be a fraction of what it is today — thanks so much for your patronage there; and the sale of educational books, PDFs, and videos would drop precipitously.
My point is that a good 1200 pixel wide JPEG is far more valuable to me than a 70mb perfectly optimized TIF file. So aside from being what is, the Small RAW file episode did not bother me one bit. In fact, doing The Work on “I shouldn’t have screwed up” would lead to these turnarounds: “I should have screwed up.” How is that more true than the original stressful thought? Because I did screw up. That is the reality. In addition, if I had not “screwed up” you would never have been reading this Small RAW blog post 🙂 Peace of mind is a wonderful thing.
Learn about The Work of Byron Katie here.
So what do you do with your images? Do you really need super-sharp thirty to fifty megabyte RAW files? What is the end product of your photographic efforts? Please feel free to share what you do with your images by leaving a comment below. And do feel free to leave a link to an online gallery of your best work.
with love, artie
|
|
|
The BIRDS AS ART Current Workflow e-Guide (Digital Basics II) will teach you an efficient Mac/Photo Mechanic/Photoshop workflow that will make it easy for you to make your images better in Photoshop (rather than worse). That true whether you convert your images in DPP 4 or ACR. See the blog post here to learn lots more and to read a free excerpt.
You can order your copy from the BAA Online Store here, by sending a Paypal for $40 here, or by calling Jim or Jennifer weekdays at 863-692-0906 with your credit card in hand.
|
The BIRDS AS ART Current Workflow e-Guide (Digital Basics II)
Everything mentioned above is covered in detail in the BIRDS AS ART Current Workflow e-Guide (Digital Basics II), an instructional PDF that is sent via e-mail. Learn more and check out the free excerpt in the blog post here. The new e-Guide reflects my Macbook Pro/Photo Mechanic/DPP 4/Photoshop workflow. Do note that you will find the RGB Curves Adjustment Color Balancing tutorial only in the new e-guide. Note: folks working on a PC and/or those who do not want to miss anything Photoshop may wish to purchase the original Digital Basics along with DB II while saving $15 by clicking here to buy the DB Bundle.
The two most recent and many of the older MP4 Photoshop Tutorial videos releases go hand and hand with the information in DB II):
- The Wingtip Repairs MP4 Video here.
- The MP4 Crow Cleanup Video here.
Folks who learn well by following along rather than by reading can check out the complete collection of MP 4 Photoshop Tutorial Videos by clicking here.
You can learn how and why I and other discerning Canon shooters convert nearly all of their Canon digital RAW files in DPP 4 using Canon Digital Photo Professional in the DPP 4 RAW conversion Guide here. And you can learn advanced Quick Masking and advanced Layer Masking techniques in APTATS I & II. You can save $15 by purchasing the pair. Folks can learn sophisticated sharpening and (NeatImage) Noise Reduction techniques in the The Professional Post Processing Guide by Arash Hazeghi and yours truly.
If In Doubt …
If in doubt about using the BAA B&H affiliate link correctly, you can always start your search by clicking here. Please note that the tracking is invisible. Web orders only. Please, however, remember to shoot me your receipt via e-mail.


Please Remember to use my Affiliate Links and to Visit the New BAA Online Store 🙂
To show your appreciation for my continuing efforts here, we ask, as always, that you get in the habit of using my B&H affiliate links on the right side of the blog for all of your photo and electronics purchases. Please check the availability of all photographic accessories in the New BIRDS AS ART Online Store, especially the Mongoose M3.6 tripod head, Wimberley lens plates, Delkin flash cards and accessories, and LensCoat stuff.
As always, we sell only what I have used, have tested, and can depend on. We will not sell you junk. We know what you need to make creating great images easy and fun. And please remember that I am always glad to answer your gear questions via e-mail.
I would of course appreciate your using our B&H affiliate links for all of your major gear, video, and electronic purchases. For the photographic stuff mentioned in the paragraph above, and for everything else in the new store, we, meaning BAA, would of course greatly appreciate your business. Here is a huge thank you to the many who have been using our links on a regular basis and those who will be visiting the New BIRDS AS ART Online Store as well.
Amazon.com
Those who prefer to support BAA by shopping with Amazon may use the logo link above.
Amazon Canada
Many kind folks from north of the border, eh, have e-mailed stating that they would love to help us out by using one of our affiliate links but that living in Canada and doing so presents numerous problems. Now, they can help us out by using our Amazon Canada affiliate link by starting their searches by clicking here.
Facebook
Be sure to like and follow BAA on Facebook by clicking on the logo link upper right. Tanks a stack.
Typos
In all blog posts and Bulletins, feel free to e-mail or to leave a comment regarding any typos or errors. Just be right :).
October 25th, 2017 Stuff
Late on Monday I micro-adjusted my 600 II naked indoor with the lights: +2.
On Tuesday I micro-adjusted the 600 II with my 1.4X III i TC in the morning: -1, outdoors with the lights (as the distance is too great for indoors even with my bowling alley hallway). Then it got too sunny. In the afternoon it clouded up again so I did the 600 II with my 2X III i TC. That turned out to be a hoot First I screwed up the distance. Then I was getting weird results with the graphs. I finally thought that I had everything perfect but Jen opened the door of the house as she was leaving for home. Her big dog Olivia spotted an Anole and charged after it dislodging the tripod with the LensAligh unit on it; I had to start over from scratch. It turned out to be the best thing that could have happened as I realized that when I was lining up the target in Live View that I was not using the dead centered Flexi-zone single box! Once I fixed that I was done in ten minutes: -10.
I am still looking for a few more folks for San Diego #2. If you are considering this trip and might be interested in adding on a free morning of instruction before the IPT begins please shoot me an e-mail.
Please see yesterday’s blog post if you are interested in joining us at DeSoto this weekend for some cheap instruction.
The Streak
Today makes ninety days in a row with a new educational blog post! This blog post took more than two hours to prepare. With all of my upcoming free time (or not …), the plan right now is to break the current record streak of 480 … Good health and good internet connections willing.
|
|
2017 in San Diego was a very good year ….
|
2018 San Diego 3 1/2-DAY BIRDS AS ART IPT #2: Sunday, JAN 28 thru and including a morning session on Wednesday, JAN 31, 2018: 3 1/2 days: $1699. Limit: 8: Openings: 6
Meet and Greet at 6:30pm on the evening before the IPT begins; Saturday, Jan 27, 2018.
San Diego IPT #2: Shorter and Less Expensive!
I am offering a free morning session on SAT 27 JAN for all who register.
Click here for details.
Booking.Com
Booking.Com came through for me twice again recently with both the DeSoto Fall IPT and next July’s UK Puffins, Gannets, and Bempton Pre-trip room reservations. And all the rates were great. If you’d like to give Booking.Com a shot, click here and you will earn a $25 reward. Thanks to the many who have already tried and used this great service.


Gear Questions and Advice
Too many folks attending BAA IPTs and dozens of folks whom I see in the field, and on BPN, are–out of ignorance–using the wrong gear especially when it comes to tripods and more especially, tripod heads… Please know that I am always glad to answer your gear questions via e-mail.
|
|
|
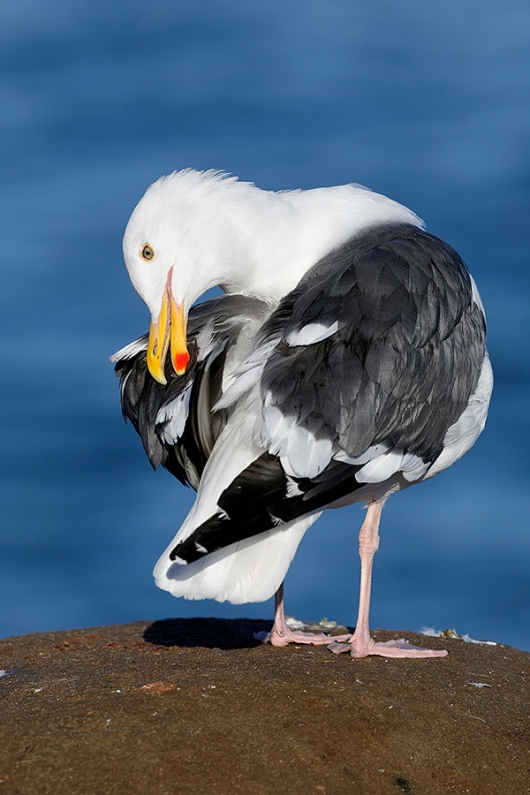
This image was created at 8:25am on the 2017 San Diego IPT with the hand held Canon EF 100-400mm f/4.5-5.6L IS II USM lens (at 360mm) and my favorite bird photography camera, the Canon EOS 5D Mark IV. ISO 400. Evaluative metering probably at zero as famed: 1/2000 sec. at f/6.3 in Manual mode. AWB.
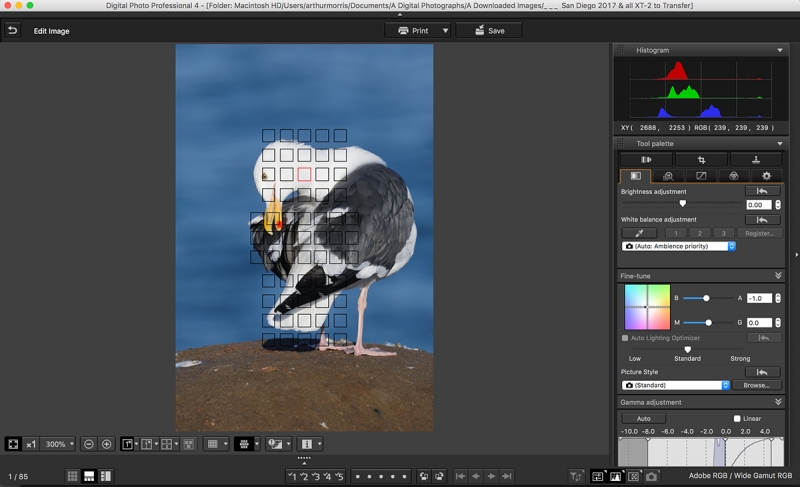
One AF point that was two and one-half rows up from and three columns to the right of the center AF point/AI Servo/Manual selection/Shutter Button AF as framed was active at the moment of exposure. See the DPP 4 screen capture below to see the exact placement of the single (selected) AF point.
FocusTune/LensAlign Micro Adjustment: 0.
Image #1: Western Gull, adult breeding plumage preening
|
Understanding the Color of Light/Part II
In the Understanding the Color of Light/Part I blog post here, I posted an image of this same bird (see that image just below) that was created about one hour earlier in richer light. Scroll down to understand why the light in the two images looks so different.
Helpful Bird Photography Principles Re-visited and Adapted for Today’s Image…
- 1- When photographing a preening bird strive to press the shutter button when the bird’s head is square or close to square to the imaging sensor, aka, the back of the camera.
- 2- When photographing a bird from behind be sure to focus on or very near the head.
- 3- When working in vertical format with the subject large in the frame it is fine to center the bird both from side to side and from top to bottom.
- 4- Learn to work competently in Manual mode so that the amount of black or white in the frame at a given moment will not affect the exposure. That involves making an exposure check image, checking or blinkies, and evaluating the histogram to make sure that you have exposed well to the right (with at least some data halfway into the rightmost histogram box).
- 5- When photographing a bird from behind there is no need to use additional depth of field as long as the distance to the subject provides you will enough depth of field to cover the subject (as with today’s featured image).
- 6- Working with backgrounds that are separated from the subject and relatively distant while using wide apertures will yield pleasingly out of focus canvases for your avian images.
From Chapter Seven, Designing the Image (page 108), of the original The Art of Bird Photography (Amphoto, NY: 1998)
If the subject is positioned against an uncluttered background or if there is a cluttered background well behind the subject, telephoto lenses 00 with their narrow angles of view — and the shallow depth of field that comes with the use of wide apertures, will produce lovely soft, out-of-focus backgrounds. I’ll take still blue water or well lit green foliage every time.
Shooting wide open (at your lens’ widest aperture heightens this effect; with subject size constant, it is the aperture rather than the length of the lens that determines the depth of field. Large apertures such as f/2.8, f/4, and f/5.6, minimize depth of field and reduce background detail. Conversely, small apertures, such as f/22 and f/11, and even f/11 maximize depth of field and increase background detail.
|
|
|
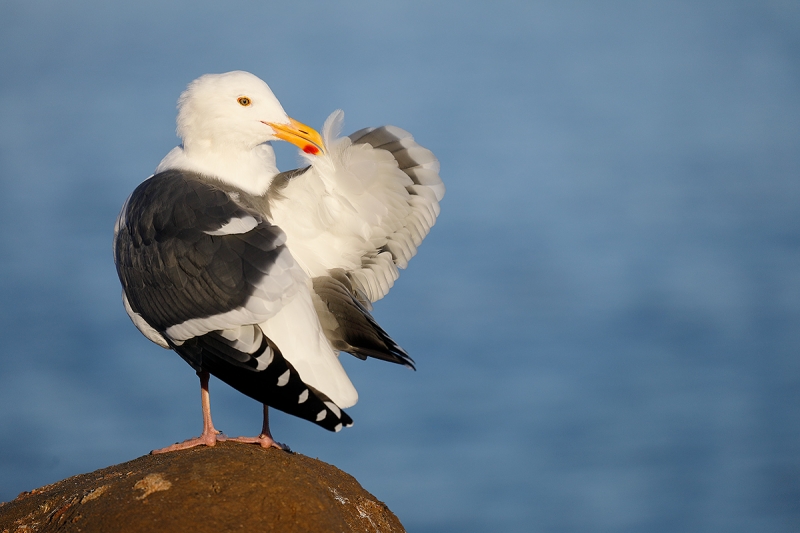
This is the same bird photographed at 7:39am on the same day in early morning light that is richer in the warm tones than it is in images made later on a clear day (as seen in the image that opens this blog post).
Image #2: Western Gull, adult breeding plumage preening
|
Which Light Do You Prefer?
Do you prefer the perfectly neutral light (see below) in Image #1, or the warmer, richer light in Image #2? Either way, take a crack at why you prefer one over the other.
Which is the Stronger Image?
Which image do you think is the better photograph? Why?
|
|
The DPP 4 Screen Capture for today’s featured image
|
Understanding the Color of Light/Part II
Note the RGB values for the brightest WHITEs in Image #1, the image made later on in the morning: R=239, G=239, B=239. These values indicate perfectly neutral WHITEs. Compare them to the BGR values for the brightest WHITEs in Image #2: R=240, G = 233, B = 216. Note the high value for RED and the low value for B. Note also that that image was created 45 minutes earlier at 7:39am. On clear mornings not long after sunrise the light is rich in REDs and YELLOWs; much of the BLUE is filtered out as the light travels obliquely a long way through the earth’s atmosphere. The result is what we call “early” or “sweet” light (as opposed to the colder light later on in the day when the sun is much more directly overhead as in Image #1.).
When working with richer (and therefore softer) light, I am more inclined to work a bit off of sun angle if need be. In colder (bluer), stronger light, I will do my very best to stay right on sun angle with the light coming right over the top of my head and my shadow pointed right at the subject.
If In Doubt …
If in doubt about using the BAA B&H affiliate link correctly, you can always start your search by clicking here. Please note that the tracking is invisible. Web orders only. Please, however, remember to shoot me your receipt via e-mail.


Please Remember to use my Affiliate Links and to Visit the New BAA Online Store 🙂
To show your appreciation for my continuing efforts here, we ask, as always, that you get in the habit of using my B&H affiliate links on the right side of the blog for all of your photo and electronics purchases. Please check the availability of all photographic accessories in the New BIRDS AS ART Online Store, especially the Mongoose M3.6 tripod head, Wimberley lens plates, Delkin flash cards and accessories, and LensCoat stuff.
As always, we sell only what I have used, have tested, and can depend on. We will not sell you junk. We know what you need to make creating great images easy and fun. And please remember that I am always glad to answer your gear questions via e-mail.
I would of course appreciate your using our B&H affiliate links for all of your major gear, video, and electronic purchases. For the photographic stuff mentioned in the paragraph above, and for everything else in the new store, we, meaning BAA, would of course greatly appreciate your business. Here is a huge thank you to the many who have been using our links on a regular basis and those who will be visiting the New BIRDS AS ART Online Store as well.
Amazon.com
Those who prefer to support BAA by shopping with Amazon may use the logo link above.
Amazon Canada
Many kind folks from north of the border, eh, have e-mailed stating that they would love to help us out by using one of our affiliate links but that living in Canada and doing so presents numerous problems. Now, they can help us out by using our Amazon Canada affiliate link by starting their searches by clicking here.
Facebook
Be sure to like and follow BAA on Facebook by clicking on the logo link upper right. Tanks a stack.
Typos
In all blog posts and Bulletins, feel free to e-mail or to leave a comment regarding any typos or errors. Just be right :).
October 24th, 2017 Stuff
On Monday I began re-micro-adjusting my 600 II with both my 1.4X III i and my 2X III i teleconverters. I am not sure how but my AFA values disappeared both from my #1 5D Mark IV and from my Excel file 🙂 In addition, I answered lots of e-mails, prepared this blog post, and swam twice totaling one mile.
The LensAlign/FocusTune Micro-Adjusting Tutorial e-Guide
If you missed the announcement of the The LensAlign/FocusTune Micro-Adjusting Tutorial e-Guide, click here.
Below are ome MA/FT e-Guide follow-ups.
Via e-mail from Richard Gollar:
First off I want to say thank you for the great detailed guide you did on Focus Tune. I tried it a year ago when I purchased it and could never get it to work. After going thru you guide and following along carefully it worked perfectly. Before, I didn’t have all the settings in the camera right but after reading your guide and doing it step by step it worked great. To be honest with you Focus Tune should be including this guide away with each sale!
I attached my final adjustment could you look at it and tell me if you think its dialed in close enough. The only thing I really need to get now is the lighting you suggest because outdoors the lighting was variable but it worked with no problem. One important thing I did learn from the guide was that I had been working too close. Now I set everything up, take one shot, load it into Focus Tune, and verify the distance is right before I go through all the steps. FocusTune gave me consistent values every time I ran it. That was great. Before I had been using FoCal and could never get consistent results; they were different each time. Thanks again for the tutorial.I will be recommending LensAlign/FocusTune to my photography friends only if they plan on buying your guide because with out it, I do not think they will be able to figure it out.
Best, Richard
A Note on the MA/FT Lighting
LED Light Panel for Micro-adjusting
I use the Fancierstudio 500 LED light Panel With Dimmer Switch Led Video lighting Led Lite Panel by Fancierstudio VL500 for all of my micro-adjusting. Even when working outdoors. As is stated clearly in the guide, many factors including the quality and strength of the light will affect AFA settings; using this daylight balanced LED light will ensure your getting consistent and accurate results.
The Streak
Today makes eighty-nine days in a row with a new educational blog post! This blog post took less than an hour to prepare. With all of my upcoming free time (or not…), the plan right now is to break the current record streak of exactly four hundred eighty … Good health and good internet connections willing.,
Booking.Com
Booking.Com came through for me twice again recently with both the DeSoto Fall IPT and next July’s UK Puffins, Gannets, and Bempton Pre-trip room reservations. And all the rates were great. If you’d like to give Booking.Com a shot, click here and you will earn a $25 reward. Thanks to the many who have already tried and used this great service.


Gear Questions and Advice
Too many folks attending BAA IPTs and dozens of folks whom I see in the field, and on BPN, are–out of ignorance–using the wrong gear especially when it comes to tripods and more especially, tripod heads… Please know that I am always glad to answer your gear questions via e-mail.
|
|
Very Recent Fort DeSoto Images
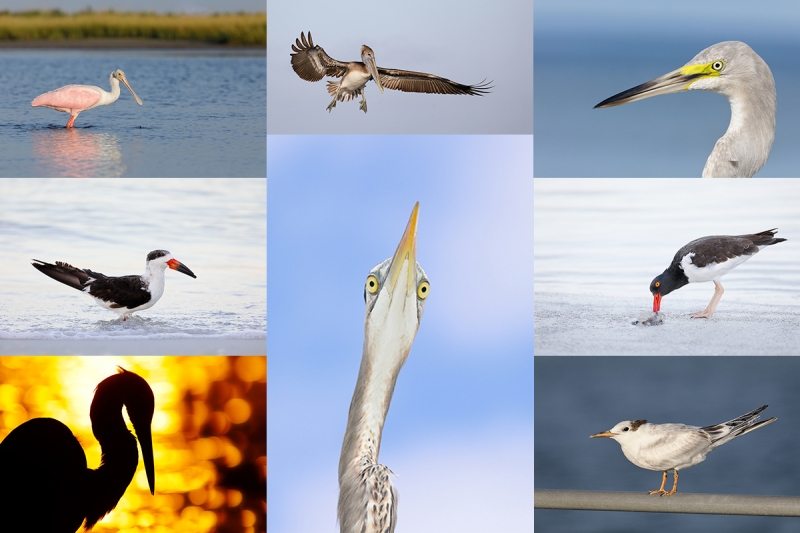
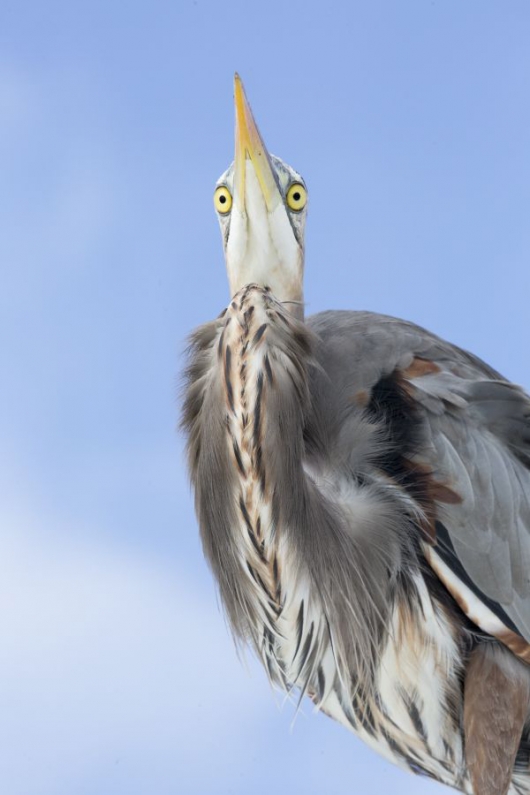
From bottom left clockwise back to center: Great Egret, blasting sunrise highlights; Black Skimmer, winter plumage in pre-dawn light; Roseate Spoonbill foraging; Brown Pelican, juvenile landing; hybrid heron X egret; American Oystercatcher feeding; Royal Tern, worn juvenile; Great Blue Heron from below.
|
Cheap Weekend Fort DeSoto In-the-Field Instruction
Saturday, October 28, 2017: Morning session — 6:45am for 3 1/2 hours: $149. Add lunch, image review, and Photoshop session: $249 (total).
Saturday, October 28, 2017: Afternoon session — 4:00pm for 3 1/2 hours: $99.
Saturday October 28, 2017, both sessions including lunch: $329.
Sunday, October 29, 2017: Morning session — 6:45am for 3 1/2 hours: $149.
Learn to see the great situations, get the right exposure every time (even when photographing into the blasting highlights!), to approach free and wild (and often tame!) birds, and to design pleasing images. Learn the location of my new Fort DeSoto hotspot and my favorite sunset spot. To register call Jim or Jen at 863-692-0906.
Canon lens rentals are available on a limited basis. Cheap but great instruction.
|
|
|
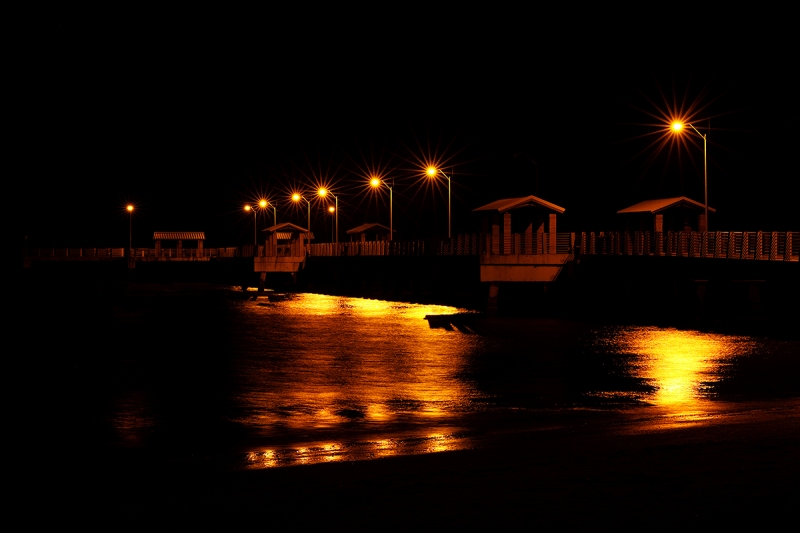
This image was created at Fort DeSoto in the pitch dark of early morning on Saturday, October 27 with the Induro GIT304L Grand Series 3 Stealth Carbon Fiber Tripod/Mongoose M3.6-mounted Canon EF 100-400mm f/4.5-5.6L IS II USM lens (at 100mm), and my favorite pier photography camera body, the Canon EOS 5D Mark IV. ISO 400. Evaluative metering ??? 2 1/2 seconds at f/22 in Av mode. WB: 5500.
I used my still flower technique: Live View (for mirror lock) and 2-second timer. Flexi-Sone Single rear focus AF. I selected a point 1/3 of the way out onto the pier. LensAlign/FocusTune micro-adjustment: zero (extrapolated). Please click on the image to see the spectacular larger version.
Pier at night, Fort DeSoto Park, Pinellas County, FL
|
Why Stand Around Doing Nothing When It Is Too Dark To Shoot?
Because the park roads were going to be closed from 7am to 9am (9:30am as it turned out) I arrived at DeSoto way early at about 6:30. Rather than stand around doing nothing I decided to experiment. I began by mounting the lens foot with a Wimberley P-10 plate on it. When I am hand holding I remove it to save a bit of weight. Then I grabbed the tripod and went to work. I started by framing too tight so I zoomed out to 100mm and got more of the near-end of the pier. Then it was a matter of experimenting with both the apertures and the White Balance. When I was going through the images in Photo Mechanic I gasped when this one opened up to full frame. From the color to the blurred waves to the amazing starbursts atop each light pole everything was beyond perfect.
Starburst Aperture Basics
Some lenses, in some lighting conditions, may produce starbursts of pinpoint (or larger as here) light sources if you choose an aperture of f/22 or smaller. I would caution you to beware of diffraction at tiny apertures if I knew what it was and had ever seen it … But alas, I have not.
Exposure Question
What exposure compensation do you think that I set to come up with the perfect exposure?
Technique Question
Why were both Live View and the 2-second timer both unnecessary precautions?
The Image Optimization
After converting the RAW file pretty much straight up in DPP 4 the image optimization too was fairly straightforward. I used the Patch Tool, the Clone Stamp Tool, and some Content Aware Fill to eliminate some specular highlights, some unwanted reflections,n and about a half dozen early-arriving fishermen.
To learn how and why I and other discerning Canon shooters convert nearly all of their Canon digital RAW files in DPP 4 using Canon Digital Photo Professional in the DPP 4 RAW conversion Guide, click here. You can learn everything about my workflow and exactly how I optimize my images in The BIRDS AS ART Current Workflow e-Guide (Digital Basics II), an instructional PDF that is sent via e-mail.
If In Doubt …
If in doubt about using the BAA B&H affiliate link correctly, you can always start your search by clicking here. Please note that the tracking is invisible. Web orders only. Please, however, remember to shoot me your receipt via e-mail.


Please Remember to use my Affiliate Links and to Visit the New BAA Online Store 🙂
To show your appreciation for my continuing efforts here, we ask, as always, that you get in the habit of using my B&H affiliate links on the right side of the blog for all of your photo and electronics purchases. Please check the availability of all photographic accessories in the New BIRDS AS ART Online Store, especially the Mongoose M3.6 tripod head, Wimberley lens plates, Delkin flash cards and accessories, and LensCoat stuff.
As always, we sell only what I have used, have tested, and can depend on. We will not sell you junk. We know what you need to make creating great images easy and fun. And please remember that I am always glad to answer your gear questions via e-mail.
I would of course appreciate your using our B&H affiliate links for all of your major gear, video, and electronic purchases. For the photographic stuff mentioned in the paragraph above, and for everything else in the new store, we, meaning BAA, would of course greatly appreciate your business. Here is a huge thank you to the many who have been using our links on a regular basis and those who will be visiting the New BIRDS AS ART Online Store as well.
Amazon.com
Those who prefer to support BAA by shopping with Amazon may use the logo link above.
Amazon Canada
Many kind folks from north of the border, eh, have e-mailed stating that they would love to help us out by using one of our affiliate links but that living in Canada and doing so presents numerous problems. Now, they can help us out by using our Amazon Canada affiliate link by starting their searches by clicking here.
Facebook
Be sure to like and follow BAA on Facebook by clicking on the logo link upper right. Tanks a stack.
Typos
In all blog posts and Bulletins, feel free to e-mail or to leave a comment regarding any typos or errors. Just be right :).
October 23rd, 2017 Stuff
I enjoyed an excellent cloudy Sunday morning on my my recent Fort DeSoto busman’s holiday, left early, and made it home for all the NFL games and my 48 length swim. Today I will be working on some BPN stuff and getting back to work on the 5D Mark IV User’s Guide. Lots more tomorrow on the The LensAlign/FocusTune Micro-Adjusting Tutorial e-Guide.
For Billy Joel/Beatles Fans
Want goose pimples, and maybe a few tears of joy and happiness? Click here to learn the backstory of Paul McCartney making it to Billy Joel’s Last Play at Shea concert at the last minute.
The Streak
Today makes eighty-eight days in a row with a new educational blog post! This blog post took less than an hour to prepare. With all of my upcoming free time (or not…), the plan right now is to break the current record streak of (I think) four hundred eighty something … Good health and good internet connections willing.,
Booking.Com
Booking.Com came through for me twice again recently with both the DeSoto Fall IPT and next July’s UK Puffins, Gannets, and Bempton Pre-trip room reservations. And all the rates were great. If you’d like to give Booking.Com a shot, click here and you will earn a $25 reward. Thanks to the many who have already tried and used this great service.


Gear Questions and Advice
Too many folks attending BAA IPTs and dozens of folks whom I see in the field, and on BPN, are–out of ignorance–using the wrong gear especially when it comes to tripods and more especially, tripod heads… Please know that I am always glad to answer your gear questions via e-mail.
The LensAlign/FocusTune Micro-Adjusting Tutorial e-Guide
If you missed the announcement of the The LensAlign/FocusTune Micro-Adjusting Tutorial e-Guide, click here.
|
|
Very Recent Fort DeSoto Images
From bottom left clockwise back to center: Great Egret, blasting sunrise highlights; Black Skimmer, winter plumage in pre-dawn light; Roseate Spoonbill foraging; Brown Pelican, juvenile landing; hybrid heron X egret; American Oystercatcher feeding; Royal Tern, worn juvenile; Great Blue Heron from below.
|
Cheap Weekend Fort DeSoto In-the-Field Instruction
Saturday, October 28, 2017: Morning session — 6:45am for 3 1/2 hours: $149. Add lunch, image review, and Photoshop session: $249 (total).
Saturday, October 28, 2017: Afternoon session — 4:00pm for 3 1/2 hours: $99.
Saturday October 28, 2017, both sessions including lunch: $329.
Sunday, October 29, 2017: Morning session — 6:45am for 3 1/2 hours: $149.
Learn to see the great situations, get the right exposure every time (even when photographing into the blasting highlights!), to approach free and wild (and often tame!) birds, and to design pleasing images. Learn the location of my new Fort DeSoto hotspot and my favorite sunset spot. To register call Jim or Jen at 863-692-0906.
Canon lens rentals are available on a limited basis. Cheap but great instruction.
|
|
|
This image was created at Fort DeSoto on the late afternoon of Friday, October 20 with the hand held Canon EF 100-400mm f/4.5-5.6L IS II USM lens, the Canon Extender EF 1.4X III (at 401mm), and my favorite bird photography camera body, the Canon EOS 5D Mark IV. ISO 200. Evaluative metering -3 stops: 1/8000 sec. at f/7.1 in Manual mode. WB: K8000.
LensAlign/FocusTune micro-adjustment: -1.
Upper Large Zone AF/AI Servo/Shutter Button AF was active at the moment of exposure. The system selected a single AF point two rows up from the center AF point that caught the edge of the bird’s upper breast (as originally framed).
Image #1: Great Egret sunset silhouette
|
The Silhouette Situation
As I pulled into my favorite and secret sunset spot at DeSoto I was thrilled to see a Great Egret fishing in the still water in an opening between the mangroves. I drove past the bird, hung a quick U-ie, and re-positioned my SUV. I did an exposure check, went darker, and framed up a lovely image. Just as I went to push the shutter button after acquiring focus, the battery died. All of my spares were in the back of the car so I backed up behind the mangroves to avoid scaring the bird, got a fresh battery, drove back to the opening, and got back to work. After a bit I felt that the bird was tame enough for me to get out of the vehicle and enjoy some additional freedom. I was right. My two favorites, shared with you here today, were made while I was on foot. Note again how effective Upper Large Zone can be for verticals.
|
|
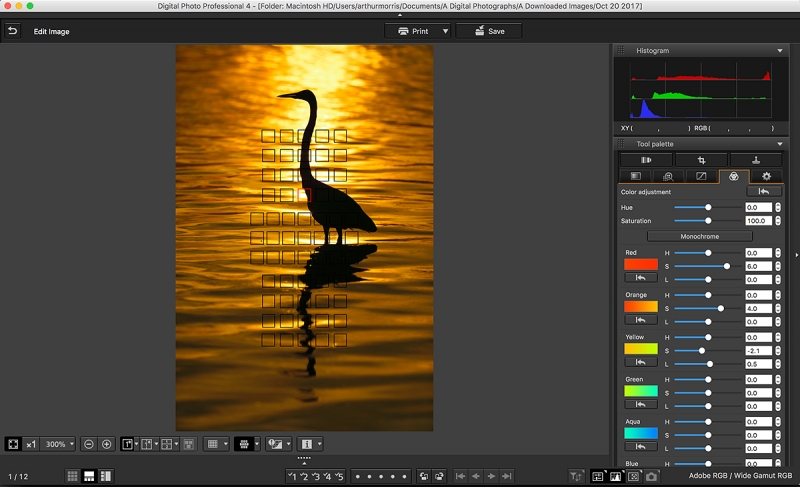
DPP 4 Adjust image colors tab
|
A Rarely Used DPP 4 Tab
It is not often that I open the Adjust image colors tab in DPP 4. The problem was that brightest WHITE highlights in the swath behind the bird’s head and neck were all at 255, 255, 255. This is not a deal breaker in situations like this but I wanted to see if I could tone them down a bit. First I dragged the Color fine tune dot a bit toward BLUE but that did not help much. Nor did moving the Highlight slider to -2. So I tried the rarely used Adjust image colors tab; it took quite a bit of experimenting. The key move was to move the YELLOW saturation slider to -2.1. This really muted the colors. Though I am not sure why, this moved the RED histogram well to the left and away from the highlight axis. Once I did that I was able to boost the saturation in the REDs and ORANGEs and still keep the RED histogram just off of the axis. Success.
I copied the DPP 4 recipe from Image #1, pasted it into Image #2, and executed the second RAW conversion. Learn how and why I and other discerning Canon shooters convert nearly all of their Canon digital RAW files in DPP 4 using Canon Digital Photo Professional in the DPP 4 RAW conversion Guide here
Doing it in ACR
Folks using ACR (either in Photoshop or Lightroom) can make the same adjustments during (best) or after a RAW conversion. Click on the fourth tab from the left to open HSL/greyscale. The layout is a bit different as there are tabs for Hue, Saturation, and Luminance with the sliders for all the colors below.
|
|
|
This image was created at Fort DeSoto on the late afternoon of Friday, October 20 with the hand held Canon EF 100-400mm f/4.5-5.6L IS II USM lens, the Canon Extender EF 1.4X III (at 437mm), and my favorite bird photography camera body, the Canon EOS 5D Mark IV. ISO 200. Evaluative metering -2 1/3 stops: 1/8000 sec. at f/8 in Manual mode. WB: K8000.
LensAlign/FocusTune micro-adjustment: -1.
Upper Large Zone AF/AI Servo/Shutter Button AF was active at the moment of exposure. The system selected a single AF point that was two rows up ad two to the left of the center AF point that was squarely on the bird’s torso (as originally framed).
Image #2: Great Egret sunset silhouette, looking back
|
Both Image Optimizations
With each image, I spent a lot of time cleaning up the crud and specular highlights in the foreground. To cover my tracks, I first applied a 55 pixel Gaussian blur to the whole image and added an Inverse (Black or Hide-all) Layer Mask. Then I painted in the effect (B, D) in the top half of the image with a soft 100% opacity brush. Last I painted in half the effect (B, D) on the bottom half of the image with a soft 50% opacity brush. I did a much better job with the foreground in Image #1 than I did in Image #2. You can learn everything about my workflow and exactly how I optimize my images in The BIRDS AS ART Current Workflow e-Guide (Digital Basics II), an instructional PDF that is sent via e-mail.
The Stronger Image?
Which of today’s two featured images is the strongest? Please let us know why you made your choice. I feel that one of the images is far stronger than the other … Stay tuned.
If In Doubt …
If in doubt about using the BAA B&H affiliate link correctly, you can always start your search by clicking here. Please note that the tracking is invisible. Web orders only. Please, however, remember to shoot me your receipt via e-mail.


Please Remember to use my Affiliate Links and to Visit the New BAA Online Store 🙂
To show your appreciation for my continuing efforts here, we ask, as always, that you get in the habit of using my B&H affiliate links on the right side of the blog for all of your photo and electronics purchases. Please check the availability of all photographic accessories in the New BIRDS AS ART Online Store, especially the Mongoose M3.6 tripod head, Wimberley lens plates, Delkin flash cards and accessories, and LensCoat stuff.
As always, we sell only what I have used, have tested, and can depend on. We will not sell you junk. We know what you need to make creating great images easy and fun. And please remember that I am always glad to answer your gear questions via e-mail.
I would of course appreciate your using our B&H affiliate links for all of your major gear, video, and electronic purchases. For the photographic stuff mentioned in the paragraph above, and for everything else in the new store, we, meaning BAA, would of course greatly appreciate your business. Here is a huge thank you to the many who have been using our links on a regular basis and those who will be visiting the New BIRDS AS ART Online Store as well.
Amazon.com
Those who prefer to support BAA by shopping with Amazon may use the logo link above.
Amazon Canada
Many kind folks from north of the border, eh, have e-mailed stating that they would love to help us out by using one of our affiliate links but that living in Canada and doing so presents numerous problems. Now, they can help us out by using our Amazon Canada affiliate link by starting their searches by clicking here.
Facebook
Be sure to like and follow BAA on Facebook by clicking on the logo link upper right. Tanks a stack.
Typos
In all blog posts and Bulletins, feel free to e-mail or to leave a comment regarding any typos or errors. Just be right :).
October 22nd, 2017 Stuff
Friday afternoon was wind against sun so I went out late and found some excellent backlit and silhouette situations. The east wind persisted on Saturday morning when IPT veteran Winn Krafton joined me in the pre-dawn darkness. After a very nice sunrise we had some good chances with flying pelicans, Common and Sandwich Terns, Snowy Egret, and Ruddy Turnstone. See some of the exciting keepers from those two sessions here.
The Streak
Today makes eighty-seven days in a row with a new educational blog post! This blog post took less than an hour to prepare. With all of my upcoming free time (or not…), the plan right now is to break the current record streak of (I think) four hundred eighty something … Good health and good internet connections willing.
Booking.Com
Booking.Com came through for me twice again recently with both the DeSoto Fall IPT and next July’s UK Puffins, Gannets, and Bempton Pre-trip room reservations. And all the rates were great. If you’d like to give Booking.Com a shot, click here and you will earn a $25 reward. Thanks to the many who have already tried and used this great service.


Gear Questions and Advice
Too many folks attending BAA IPTs and dozens of folks whom I see in the field, and on BPN, are–out of ignorance–using the wrong gear especially when it comes to tripods and more especially, tripod heads… Please know that I am always glad to answer your gear questions via e-mail.
|
|
|
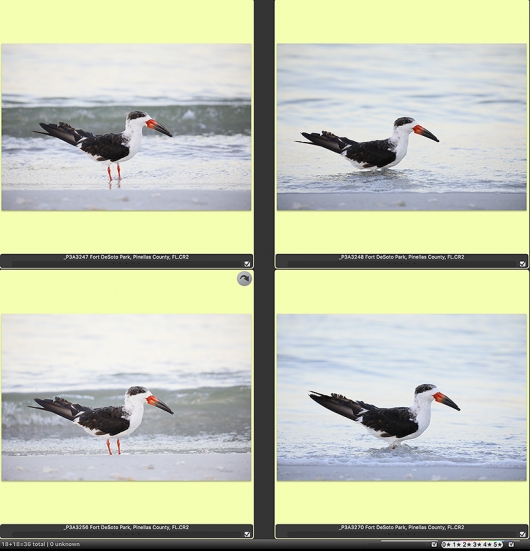
All four of these images were created on the early morning of Sunday, October 15 well before the sun came onto the birds. I used the hand held Canon EF 100-400mm f/4.5-5.6L IS II USM lens (at 400mm) and my favorite skimmer photography camera, the Canon EOS 5D Mark IV. The ISOs ranged from 800 to 1250. All at Evaluative metering +2 stops: 1/320 sec. at f/6.3 (except for the last image at f/7.1) in Tv mode. AWB. ‘s
One AF point to the right of the center AF point/AI Servo/Expand/Shutter Button AF was active at the moment of exposure. The selected AF point fell somewhere on the bird face below the eye in each image. Please click on the image to enlarge it.
FocusTune/LensAlign Micro Adjustment: -5.
Black Skimmer at water’s edge (four ways)
|
Following Up; My Best Skimmer …
In the Black Skimmer Editing Practice blog post here, I posted two items:
Item #1: Black Skimmer Editing Practice
Click on the composite above to view the images larger. Which is the strongest image? Why? Which is the weakest image? Why? What do you think of the two images with the breaking wave included?
For those not blessed with eagle eyes here are the file numbers from left to right, top row first, then the bottom row.
- _P3A3247 (at 7:50am)
- _P3A3248 (five seconds after 3247)
- _P3A3256 (40 seconds after 3248)
- _P3A3270 (4 1/2 minutes after 3256)
My Favorite Skimmer Image
For the most part I do not like breaking waves in images of single birds along the shore. I will admit that 3247 is stronger than 3256, but I kept those two only for educational purposes. That left me with 3248 and 3270 with the latter image being the clear winner. Why? The bird is larger in the frame and super sharp. Ans I like the bubbles left over from a breaking wave near the bird’s feet. You can see my optimized version below.
Item #2: High Level Exposure Question
Considering that the exposure compensation for each image was +2 stops, why is _P3A3270 considerably brighter than _P3A3256? Please note that it has nothing to do with the fact that the light has increased; remember that I was in an automatic exposure mode, Tv …
The Exposure Answer
This was actually a very basic question and I was surprised that nobody came up with the right answer. For 3270, I had gotten closer to the bird and as a result the bird is larger in the frame. With more dark (feathers) in the frame, the meter opened up. Thus the lighter background. This principle goes all the way back to the crude exposure diagrams in the chapter on Exposure in the original The Art of Bird Photography. A second factor might have been that the light have gotten a bit stronger; that possibly brought the following principle into play: in soft light situations the meter begins to get smarter when the light begins to get brighter …
|
|
|
This image was created on the early morning of Sunday, October 15 with the hand held Canon EF 100-400mm f/4.5-5.6L IS II USM lens (at 371mm) and my favorite pelicans in flight photography camera, the Canon EOS 5D Mark IV. ISO 800. Evaluative metering +2 stops: 1/320 sec. at f/6.3 in Tv mode. AWB.
Center AF point/AI Servo/Expand/Shutter Button AF was active at the moment of exposure. As originally framed, the selected AF point fell on the bird’s face just behind and below the eye (as seen in the DPP 4 screen capture below). Please click on the image to enlarge it.
FocusTune/LensAlign Micro Adjustment: -4 (extrapolated).
Black Skimmer, winter adult on the edge of the surf
Be sure to click on the image to see the larger version and the excellent sharpness.
|
My Favorite Optimized
Both Jake Levin and Greg agreed that 3270 was their favorite. Keith Swinndell liked 3247 best because the wave framed rather than cut the top of the bird’s head as it does in 3256.
The only two things of note during the otherwise straightforward image optimization was the RGB Curves Color Balance adjustment that did more to brighten the image than to correct any color casts and a bit of Gaussian Blur to the near shoreline. (I applied it to the whole image on a layer, added and Inverse (Black or Hide-all) Layer Mask, and then painted the effect in as needed. Learn exactly how I optimize my images in The BIRDS AS ART Current Workflow e-Guide (Digital Basics II), an instructional PDF that is sent via e-mail.
|
|
The DPP 4 Screen Capture for today’s featured image
|
The DPP 4 Screen Capture for today’s featured image
Note the perfect placement of the selected AF point. Note the excellent exposure. Note the almost perfect RGB values for the brightest WHITEs: 237, 237, 233. Lastly, note that I moved the Color fine tune dot away from BLUE to reduce the BLUE color cast. Learn how and why I and other discerning Canon shooters convert nearly all of their Canon digital RAW files in DPP 4 using Canon Digital Photo Professional in the DPP 4 RAW conversion Guide here
If In Doubt …
If in doubt about using the BAA B&H affiliate link correctly, you can always start your search by clicking here. Please note that the tracking is invisible. Web orders only. Please, however, remember to shoot me your receipt via e-mail.


Please Remember to use my Affiliate Links and to Visit the New BAA Online Store 🙂
To show your appreciation for my continuing efforts here, we ask, as always, that you get in the habit of using my B&H affiliate links on the right side of the blog for all of your photo and electronics purchases. Please check the availability of all photographic accessories in the New BIRDS AS ART Online Store, especially the Mongoose M3.6 tripod head, Wimberley lens plates, Delkin flash cards and accessories, and LensCoat stuff.
As always, we sell only what I have used, have tested, and can depend on. We will not sell you junk. We know what you need to make creating great images easy and fun. And please remember that I am always glad to answer your gear questions via e-mail.
I would of course appreciate your using our B&H affiliate links for all of your major gear, video, and electronic purchases. For the photographic stuff mentioned in the paragraph above, and for everything else in the new store, we, meaning BAA, would of course greatly appreciate your business. Here is a huge thank you to the many who have been using our links on a regular basis and those who will be visiting the New BIRDS AS ART Online Store as well.
Amazon.com
Those who prefer to support BAA by shopping with Amazon may use the logo link above.
Amazon Canada
Many kind folks from north of the border, eh, have e-mailed stating that they would love to help us out by using one of our affiliate links but that living in Canada and doing so presents numerous problems. Now, they can help us out by using our Amazon Canada affiliate link by starting their searches by clicking here.
Facebook
Be sure to like and follow BAA on Facebook by clicking on the logo link upper right. Tanks a stack.
Typos
In all blog posts and Bulletins, feel free to e-mail or to leave a comment regarding any typos or errors. Just be right :).
October 21st, 2017
|
|
Lousy Afternoon/Not a Bad Morning …
Click to see a larger version.
|
Lousy Afternoon/Not a Bad Morning …
Friday afternoon was pretty bad but I made some magic by knowing where to be when and knowing how to create blasting highlights silhouettes on a bad wind. IPT veteran Winn Krafton joined me early on Saturday morning. We had fun and enjoyed some good opportunities. I is not too late for Saturday afternoon or Sunday morning. Or next weekend.
Cheap Weekend Fort DeSoto In-the-Field Instruction
Saturday, October 21, 2017: Afternoon session — 4:00pm for 3 1/2 hours: $99.
Saturday October 21, 2017, both sessions including lunch: $329.
Sunday, October 22, 2017: Morning session — 6:45am for 3 1/2 hours: $149.
Saturday, October 28, 2017: Morning session — 6:45am for 3 1/2 hours: $149. Add lunch, image review, and Photoshop session: $249 (total).
Saturday, October 28, 2017: Afternoon session — 4:00pm for 3 1/2 hours: $99.
Saturday October 28, 2017, both sessions including lunch: $329.
Sunday, October 29, 2017: Morning session — 6:45am for 3 1/2 hours: $149.
Learn to get the right exposure every time, to approach free and wild (and often tame!) birds, and to design a pleasing image. And learn the location of my new Fort DeSoto hotspot. To register shoot me an e-mail or call or text me at 863-221-2372.
Canon lens rentals are available on a limited basis: 600 II, 500 II, 400 DO II, 200-400 f/4 with Internal TC, and 100-400 II.
Cheap but great instruction.
October 21st, 2017 Stuff
On Friday afternoon I will drive to Brandon to get my almost brand new i-Phone 8+ replaced. I somehow managed to drop it out of my car at 35 mph last week 🙂 I did purchase the Apple Care insurance. Then I continue on to Fort DeSoto for another busman’s holiday, in hopes of running into the mystery heron/egret again.
The Streak
Today makes eighty-six days in a row with a new educational blog post! This blog post took less than an hour to prepare. With all of my upcoming free time (or not…), the plan right now is to break the current record streak of (I think) four hundred eighty something … Good health and good internet connections willing.
Booking.Com
Booking.Com came through for me twice again recently with both the DeSoto Fall IPT and next July’s UK Puffins, Gannets, and Bempton Pre-trip room reservations. And all the rates were great. If you’d like to give Booking.Com a shot, click here and you will earn a $25 reward. Thanks to the many who have already tried and used this great service.


Gear Questions and Advice
Too many folks attending BAA IPTs and dozens of folks whom I see in the field, and on BPN, are–out of ignorance–using the wrong gear especially when it comes to tripods and more especially, tripod heads… Please know that I am always glad to answer your gear questions via e-mail.
|
|
|
This image was created on the late afternoon of Friday, October 13 with the hand held Canon EF 100-400mm f/4.5-5.6L IS II USM lens (at 112mm) and my favorite bird photography camera, the Canon EOS 5D Mark IV. ISO 800. Evaluative metering -2/3 stop: 1/2,000 sec. at f/6.3 in Av mode. AWB.
Center AF point/AI Servo/Expand/Rear Button AF and recompose.
FocusTune/LensAlign Micro Adjustment: -2.
Great Blue Heron sunrise scenic with god-rays.
|
Please Note
Please note that by any standard the colors and contrast in the image above are boring!
The First-Ever RAW File/Image Optimization Challenge
I posted the following in the The First-Ever RAW File/Image Optimization Challenge blog post here:
If you would like to take a crack at this image please click here to download the RAW file. Save the image to your hard drive, convert it in the program of your choice, and then optimize it with the program of your choice. save the TIF. Then create a sharpened 900 pixel tall JPEG and shoot it to me via e-mail.
Assuming that I receive at least a few decent images, I will publish at least the best one here on Friday along with my optimized version.
If at least a few folks give it a try, we can play this game again. If not — well, you can figure it out. Those who try will wind up learning a ton. And who knows, they may create an image that is stronger than mine 🙂
The Reaction
About 20 folks responded by sending their version of the posted image. I responded to each by commenting on their version at times, offering suggestions for improvement. Many folks did a decent job but left to image too dark overall (for reasons noted immediately below). The way to deal with these situations is to do a Curves adjustment that includes pinning the light tones (in this case, the sky), and then pulling the rest of the curve up. Thanks to all who participated. Though it involves a lot of work for me, we will be doing this exercise again.
My Critique
The JPEG above represents the RAW file converted straight up in ACR (with no adjustments). The image overall is way too dark because of the underexposure that was needed to hold back the bright sections of the sky … As both the bird and the god rays are a bit too centered, I wish that I had moved two steps to my right so that the bird would have been closer to the lower left corner and the god rays closer to the upper right corner. I created the image at K-7600 to juice up the colors but the underexposure muted those quite a bit. I converted the image in DPP 4 and optimized it in Photoshop. I will share it with you here in a few days.
|
|
Great Blue Heron sunrise scenic with god-rays.
Conversion and optimization by Nick Clayton.
|
Middle of the Road …
Nick Clayton’s version was well done — he did a nice job of boosting the colors — but is too middle of the road for me. In part, because he failed to deal with the tonality. Again, the way to deal with these situations is to do a Curves adjustment that includes pinning the light tones (in this case, the sky), and then pulling the rest of the curve up.
|
|
Great Blue Heron sunrise scenic with god-rays.
Conversion and optimization by Anthony Ardito.
|
Brighter
Anthony Ardito’s version was a brighter than the boring ACR-converted version that I posted. Please note that I cast no aspersions at ACR — had I wanted to, I could have just as easily boosted the colors and dealt with the tonality in ACR as I did in DPP 4.
|
|
Great Blue Heron sunrise scenic with god-rays.
Conversion and optimization by Jerry Turner.
|
Getting Creative
Jerry Turner opted to soften up the wavelets by applying a fairly strong layer of Surface Blur and then reducing the opacity until a bit of wave detail showed. HIs first version had an unnatural glow around the brighter tones in the water; he eliminated that on his second try. I just noticed that he somehow introduced what looks like a large dust spot in the sky above the trees on the right. I am not a big fan of the CYAN water …
|
|
Great Blue Heron sunrise scenic with god-rays.
Conversion and optimization by Michael Eckstein.
|
More Creativity
Michael Eckstein used Topaz Impressions to come up with his version. I love the effect but he could have done a lot more with the color and contrast.
|
|
Great Blue Heron sunrise scenic with god-rays.
Conversion and optimization by Pat Dunnuck.
|
Over the Top?
Pat Dunnuck used Topaz Studio with a radiance adjustment to come up with her wild version. She sent many versions. Some were too light without much contrast. Though her last version, the one presented here, is way over the top, I do like her creativity. I am pretty sure that there is a less out of the box version that might be more pleasing while still being dramatic.
|
|
Great Blue Heron sunrise scenic with god-rays.
Conversion and optimization by Arthur Morris.
|
artie’s version
Above is my version, converted in DPP 4 and optimized in Photoshop. I will detail the image optimization in a future blog post. How did I move the god rays to the right hand corner of the image?
Comments Welcome
Please feel free to comment on any of all of the images above. What did you like and why? Which is your favorite. Do you have any suggestions for improvement for any of the photos?
If In Doubt …
If in doubt about using the BAA B&H affiliate link correctly, you can always start your search by clicking here. Please note that the tracking is invisible. Web orders only. Please, however, remember to shoot me your receipt via e-mail.


Please Remember to use my Affiliate Links and to Visit the New BAA Online Store 🙂
To show your appreciation for my continuing efforts here, we ask, as always, that you get in the habit of using my B&H affiliate links on the right side of the blog for all of your photo and electronics purchases. Please check the availability of all photographic accessories in the New BIRDS AS ART Online Store, especially the Mongoose M3.6 tripod head, Wimberley lens plates, Delkin flash cards and accessories, and LensCoat stuff.
As always, we sell only what I have used, have tested, and can depend on. We will not sell you junk. We know what you need to make creating great images easy and fun. And please remember that I am always glad to answer your gear questions via e-mail.
I would of course appreciate your using our B&H affiliate links for all of your major gear, video, and electronic purchases. For the photographic stuff mentioned in the paragraph above, and for everything else in the new store, we, meaning BAA, would of course greatly appreciate your business. Here is a huge thank you to the many who have been using our links on a regular basis and those who will be visiting the New BIRDS AS ART Online Store as well.
Amazon.com
Those who prefer to support BAA by shopping with Amazon may use the logo link above.
Amazon Canada
Many kind folks from north of the border, eh, have e-mailed stating that they would love to help us out by using one of our affiliate links but that living in Canada and doing so presents numerous problems. Now, they can help us out by using our Amazon Canada affiliate link by starting their searches by clicking here.
Facebook
Be sure to like and follow BAA on Facebook by clicking on the logo link upper right. Tanks a stack.
Typos
In all blog posts and Bulletins, feel free to e-mail or to leave a comment regarding any typos or errors. Just be right :).
October 20th, 2017 Stuff
Thursday was another mile in the pool and lots of exercise. My plan is to share some of the images that I received as part of the The First-Ever RAW File/Image Optimization Challenge with you here on Saturday. Along with my version. And on Sunday to will chime in on the recent Black Skimmer images from the blog post here. Very few folks participated in that editing exercise but it is not too late for you to go back and take a crack at it.
If you missed the announcement of the The LensAlign/FocusTune Micro-Adjusting Tutorial e-Guide, click here. San Diego IPT #1 is now sold out. See the info on San Diego #2 below.
|
|
Very Recent Fort DeSoto Images
From bottom left clockwise back to center: Great Egret, blasting sunrise highlights; Black Skimmer, winter plumage in pre-dawn light; Roseate Spoonbill foraging; Brown Pelican, juvenile landing; hybrid heron X egret; American Oystercatcher feeding; Royal Tern, worn juvenile; Great Blue Heron from below.
|
Cheap Weekend Fort DeSoto In-the-Field Instruction
Saturday, October 21, 2017: Morning session — 6:45am for 3 1/2 hours: $149. Add lunch, image review, and Photoshop session: $249 (total).
Saturday, October 21, 2017: Afternoon session — 4:00pm for 3 1/2 hours: $99.
Saturday October 21, 2017, both sessions including lunch: $329.
Sunday, October 22, 2017: Morning session — 6:45am for 3 1/2 hours: $149.
Learn to get the right exposure every time, to approach free and wild (and often tame!) birds, and to design a pleasing image. And learn the location of my new Fort DeSoto hotspot. To register on Friday call Jim at 863-692-0906 before noon. After that, shoot me an e-mail or call or text me at 863-221-2372.
Canon lens rentals are available on a limited basis: 600 II, 500 II, 400 DO II, 200-400 f/4 with Internal TC, and 100-400 II.
Cheap but great instruction.
The Streak
Today makes eighty-five days in a row with a new educational blog post! This blog post took more than two hours to prepare. With all of my upcoming free time (or not…), the plan right now is to break the current record streak of (I think) four hundred eighty something … Good health and good internet connections willing.
New Listing
Xtrahand Vest
BAA friend Jim Roetzel is offering an Xtrahand Vest, green — size XL — for $275. The vest is in like-new condition with the thick shoulder pads, two large and two small front pockets, the large rear pocket, the rear tripod pocket, and 2 extra side pockets. Jim is including a slightly used BLUBB along with the vest. Full disclosure: a mouse ate a dime-sized hole in the BLUBB to get at the birdseed inside so you will need some sewing skills or sticky heavy-duty tape to it fully functional. The price includes insured ground shipping via UPS to U.S. addresses only. Check or Paypal OK. If by check, the kit will ship when your check clears. Please contact Jim via e-mail or by phone at 1-330-687-4073 (Eastern time). Photos available upon request.
Price Reduction
Canon 500mm f/4L IS USM Lens
Price Reduced $115 AUD/Australia and New Zealand Sale Only
IPT veteran Barry Barfield from Down Under is offering a used Canon 500mm f/4L IS USM lens (the “old five”) in excellent condition for $4900 AUD ($3825 USD) was $5015 AUD ($4050 USD). The sale includes the lens trunk with keys, the front leather cover, the rear lens cap, a Max 4 LensCoat, a Forest Green Hoodie, and insured ground shipping to Australia and New Zealand. Your item will not ship until your check clears unless other arrangements are made. Photos are available upon request.
Please contact Barry via e-mail or by cell phone at +61.418780575.
The 500 f/4s have been the world’s most popular telephoto lenses for birds, nature, wildlife, and sports for many decades. I owned and used and loved my “old five” for many years. If you live Down Under and don’t have the cash for the 500 II and can handle the additional 1 1/2 pounds (exactly), then this is your next best option. artie
Booking.Com
Booking.Com came through for me twice again recently with both the DeSoto Fall IPT and next July’s UK Puffins, Gannets, and Bempton Pre-trip room reservations. And all the rates were great. If you’d like to give Booking.Com a shot, click here and you will earn a $25 reward. Thanks to the many who have already tried and used this great service.


Gear Questions and Advice
Too many folks attending BAA IPTs and dozens of folks whom I see in the field, and on BPN, are–out of ignorance–using the wrong gear especially when it comes to tripods and more especially, tripod heads… Please know that I am always glad to answer your gear questions via e-mail.
|
|
|
This image was created on the last morning of the 2017 Fort DeSoto Fall IPT by participant Jim Miller with the hand held Canon EF 100-400mm f/4.5-5.6L IS II USM lens (at 400mm) and the EOS 5D Mark II( (now replaced by and my favorite heron eyeball photography camera body, the Canon EOS 5D Mark IV. ISO 400. Evaluative metering +1/3 stop: 1/320 sec. at f/16 in Av mode. Daylight WB.
Great Blue Heron from below
Image courtesy of and copyright 2017: Fall DeSoto IPT participant Jim Miller.
|
A Unique Concept
Here is a unique concept that you can use to learn to create great images:
1-Stay close to the leader.
2-Listen carefully.
3-Follow the simple directions.
4-Ask questions if you get confused.
5-Make lots of great images!
Thanks to Jim for the use of his wonderful image. He stayed close to me for the whole IPT as did most of the group. Most everyone went home with many wonderful images. He made his while standing right next to me as I made the image featured in the Here’s Looking Down at You! And another depth-of-field lesson … blog post here and on the DeSoto composite image card above. You know, come to think of it I just might like Jim’s image better than mine …
|
|
2017 in San Diego was a very good year ….
|
2018 San Diego 3 1/2-DAY BIRDS AS ART IPT #2: Sunday, JAN 28 thru and including a morning session on Wednesday, JAN 31, 2018: 3 1/2 days: $1699.
Limit: 8: Openings: 7
Meet and Greet at 6:30pm on the evening before the IPT begins; Saturday, Jan 27, 2018.
San Diego IPT #2: Shorter and Less Expensive!
Please remember: I go with one.
Join me in San Diego near the end of January to photograph the spectacular breeding plumage Brown Pelicans with their fire-engine red and olive green bill pouches; Brandt’s (usually nesting and displaying) and Double-crested Cormorants; breeding plumage Ring-necked Duck; other duck species possible including Lesser Scaup, Redhead, Wood Duck and Surf Scoter; a variety of gulls including Western, California, and the gorgeous Heerman’s, all in full breeding plumage; shorebirds including Marbled Godwit, Whimbrel, Willet, Sanderling and Black-bellied Plover; many others possible including Least, Western, and Spotted Sandpiper, Black and Ruddy Turnstone, Semipalmated Plover, and Surfbird; Harbor Seal (depending on the current regulations) and California Sea Lion; and Bird of Paradise flowers. And as you can see by studying the two IPT cards there are some nice bird-scape and landscape opportunities as well. Please note: formerly dependable, both Wood Duck and Marbled Godwit have been declining at their usual locations for the past two years …
|
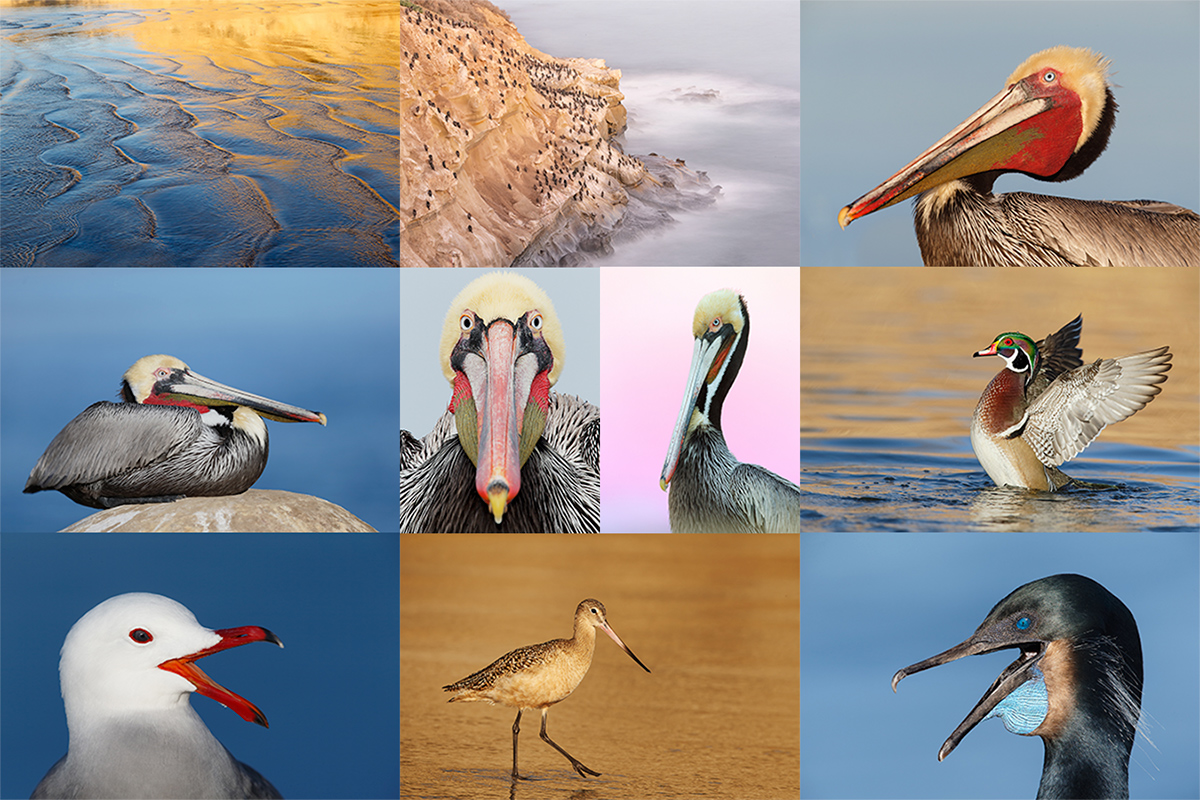
|
|
San Diego offers a wealth of very attractive natural history subjects. With annual visits spanning more than three decades I have lot of experience there….
|
With gorgeous subjects just sitting there waiting to have their pictures taken, photographing the pelicans on the cliffs is about as easy as nature photography gets. With the winds from the east almost every morning there is usually some excellent flight photography. And the pelicans are almost always doing something interesting: preening, scratching, bill pouch cleaning, or squabbling. And then there are those crazy head throws that are thought to be a form of intra-flock communication. You can do most of your photography with an 80- or 100-400 lens …
Did I mention that there are wealth of great birds and natural history subjects in San Diego in winter?
|
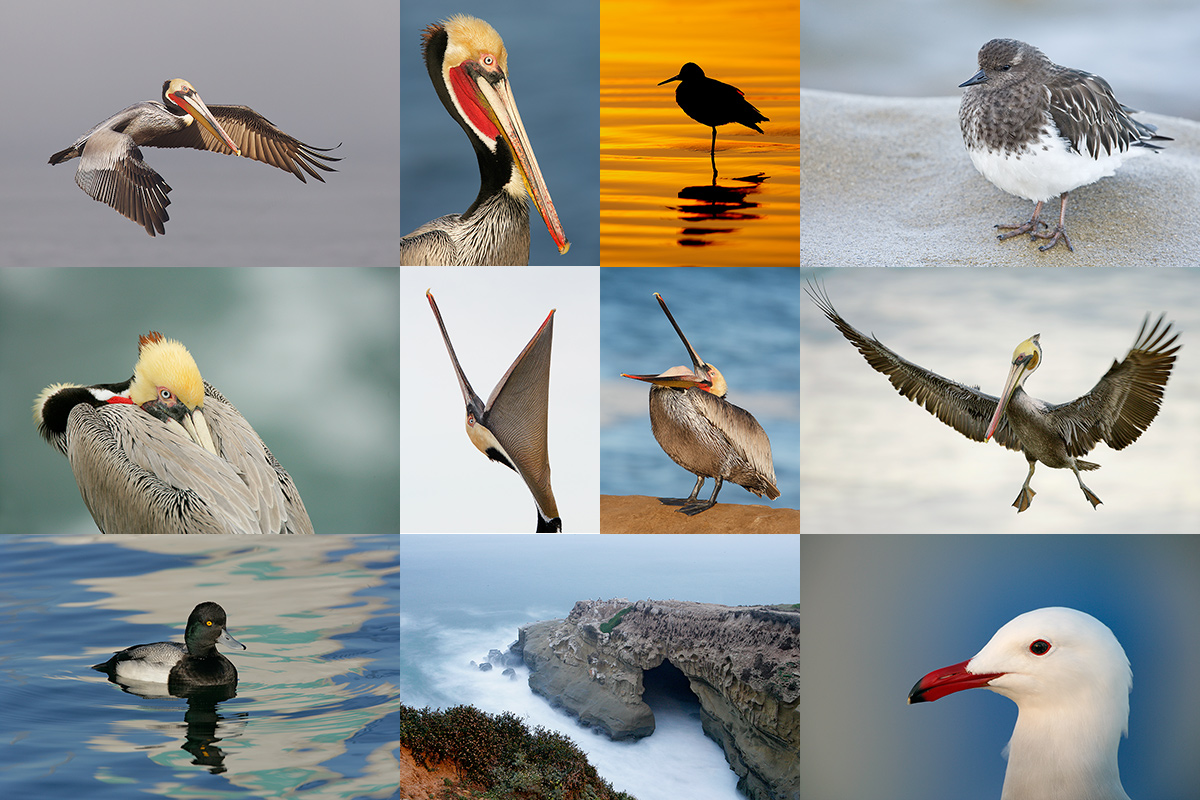
|
|
Though the pelicans will be the stars of the show on this IPT there will be many other handsome and captivating subjects in wonderful settings.
|
The San Diego Details
This IPT will include four 3 1/2 hour morning photo sessions, three 2 1/2 hour afternoon photo sessions, three lunches, and after-lunch image review and Photoshop sessions. To ensure early starts, breakfasts will be your responsibility. Dinners are on your own so that we can get some sleep.
A $599 non-refundable deposit is required to hold your slot for this IPT. You can send a check (made out to “Arthur Morris) to us at BIRDS AS ART, PO Box 7245, Indian Lake Estates, FL, 33855. Or call Jim or Jennifer at the office with a credit card at 863-692-0906. Your balance, payable only by check, will be due on 11/1/2016. If we do not receive your check for the balance on or before the due date we will try to fill your spot from the waiting list. Please print, complete, and sign the form that is linked to here and shoot it to us along with your deposit check. If you register by phone, please print, complete and sign the form as noted above and either mail it to us or e-mail the scan. If you have any questions, please feel free to contact me via e-mail.
If In Doubt …
If in doubt about using the BAA B&H affiliate link correctly, you can always start your search by clicking here. Please note that the tracking is invisible. Web orders only. Please, however, remember to shoot me your receipt via e-mail.


Please Remember to use my Affiliate Links and to Visit the New BAA Online Store 🙂
To show your appreciation for my continuing efforts here, we ask, as always, that you get in the habit of using my B&H affiliate links on the right side of the blog for all of your photo and electronics purchases. Please check the availability of all photographic accessories in the New BIRDS AS ART Online Store, especially the Mongoose M3.6 tripod head, Wimberley lens plates, Delkin flash cards and accessories, and LensCoat stuff.
As always, we sell only what I have used, have tested, and can depend on. We will not sell you junk. We know what you need to make creating great images easy and fun. And please remember that I am always glad to answer your gear questions via e-mail.
I would of course appreciate your using our B&H affiliate links for all of your major gear, video, and electronic purchases. For the photographic stuff mentioned in the paragraph above, and for everything else in the new store, we, meaning BAA, would of course greatly appreciate your business. Here is a huge thank you to the many who have been using our links on a regular basis and those who will be visiting the New BIRDS AS ART Online Store as well.
Amazon.com
Those who prefer to support BAA by shopping with Amazon may use the logo link above.
Amazon Canada
Many kind folks from north of the border, eh, have e-mailed stating that they would love to help us out by using one of our affiliate links but that living in Canada and doing so presents numerous problems. Now, they can help us out by using our Amazon Canada affiliate link by starting their searches by clicking here.
Facebook
Be sure to like and follow BAA on Facebook by clicking on the logo link upper right. Tanks a stack.
Typos
In all blog posts and Bulletins, feel free to e-mail or to leave a comment regarding any typos or errors. Just be right :).
October 19th, 2017 Stuff
With lots of phone and e-mail help from Michael Tapes over the past few days I finally put the finishing touches on the LensAlign/FocusTune Micro-Adjusting Tutorial e-Guide late on Wednesday. Jim got it into the BIRDS AS ART Online Store after dinner. Learn more below.
I was glad to learn that Dave Williams of Santa Barbara, CA signed up for his first IPT: San Diego IPT #1. That trip is now sold out. There is, however, still lots of room on San Diego #2. If you are considering this trip and might be interested in adding on a free day of instruction before the IPT begins please shoot me an e-mail.
I got back in the pool twice on Wednesday: 48 lengths and 40 lengths made an even mile, with lots of exercise during the day as well. It all felt good.
The Streak
Today makes eighty-four days in a row with a new educational blog post! This blog post took more than two hours to prepare. With all of my upcoming free time (or not …), the plan right now is to break the current record streak of (I think) four hundred eighty something … Good health and good internet connections willing.
|
|
2017 in San Diego was a very good year ….
|
2018 San Diego 3 1/2-DAY BIRDS AS ART IPT #2: Sunday, JAN 28 thru and including a morning session on Wednesday, JAN 31, 2018: 3 1/2 days: $1699. Limit: 8: Openings: 7
Meet and Greet at 6:30pm on the evening before the IPT begins; Saturday, Jan 27, 2018.
San Diego IPT #2: Shorter and Less Expensive!
Please remember: I go with one.
Click here for details.
Booking.Com
Booking.Com came through for me twice again recently with both the DeSoto Fall IPT and next July’s UK Puffins, Gannets, and Bempton Pre-trip room reservations. And all the rates were great. If you’d like to give Booking.Com a shot, click here and you will earn a $25 reward. Thanks to the many who have already tried and used this great service.


Gear Questions and Advice
Too many folks attending BAA IPTs and dozens of folks whom I see in the field, and on BPN, are–out of ignorance–using the wrong gear especially when it comes to tripods and more especially, tripod heads… Please know that I am always glad to answer your gear questions via e-mail.
|
|
White-breasted Plover chick, Namibia IPT
|
The Poster Child for the the LensAlign/FocusTune Micro-Adjusting Tutorial e-Guide
I consider the White-fronted Plover chick image above to be the poster child for micro-adjusting; it shows just what can happen when you opt to work with gear that has not been micro-adjusted. I made it to Namibia at great expense both financially and time-wise. This baby plover presented the best avian opportunity of the trip. It was late afternoon and the light was gorgeous. And I got relatively close to this tiny gem of a subject. When I viewed the image on my laptop I quickly realized that sharp focus was on the bird’s legs, not on the eye where I had carefully focused.
In error, I used my back-up 5DS R body with a 2X III TC and the 600 II lens. This combination had not been micro-adjusted. Though the image above might look OK as a small JPEG, it is unusable, i.e., worthless junk: the chick’s eyes are nowhere near sharp. Except as great advertising for this guide. When we got back to the hotel I did a quickie micro-adjustment on this set-up in the hallway of the hotel (near a large window) and obviously without my lighting set-up. The AFA turned out to be -19 … Many times when micro-adjusting you wind up at zero or +1 or -2 and think, “No big deal there.” And you would be correct; tiny AFA values like those will not make a great difference in the final image. But when you wind up at -7 or +11 as frequently happens, the difference in the sharpness of your images can be huge. Not to mention minus 19 … With properly micro-adjusted big lenses folks can begin to routinely create sharp images, even when working with working with 2X teleconverters.
Ordering Info
To purchase the LensAlign/FocusTune package ($124.90) please click here.
Click here to order your copy of the LensAlign/FocusTune Micro-Adjusting Tutorial e-Guide: $50.
The LensAlign/FocusTune Back-story by Michael Tapes (October 2017)
LensAlign was developed as a reliable and repeatable way to test and analyze problems in DSLR autofocus systems, among the bodies, firmware and lenses.
The original LensAlign hardware target was introduced in 2007. It provided a tool that helped photographers to assess the degree of front or back focus with various combinations of their camera bodies and lenses, a problem that was becoming more prevalent. Before then, determining AF accuracy and reliability was hit or miss. The forums were bursting with allegations claiming that photographers did not know how to use their gear, and that front, or back, focus issues were a matter of illusion.
However, with the increases in sensor resolution, and the growing number of photographers shooting DSLR cameras, the complexity and prevalence of AF inaccuracy issues grew.
At the time I invented LensAlign, there was no camera with a user-based provision to adjust for such issues. We needed a reliable tool that could test for, and measure the degree of the AF issues, along with the ability to document them in a repeatable fashion so that the camera makers could acknowledge the problems and fix them. Equally important, when the gear came back from the repair station, the photographers needed a method to verify the repair. In truth, fixes in most cases were not done, or they were inadequate.
Sometime between the LensAlign concept, and the subsequent product release more than a year later, Canon did, in fact, introduce what they called AF Micro-adjustment in the EOS 1D Mark III. I had been in consultation with Canon during my development of LensAlign, but I had no idea if my work influenced the development of this feature or not. However, I was clearly glad they did, since photographers could now “fix” the problem on their own. Of course, this would be a catalyst for LensAlign sales. Although Nikon made no mention of such a feature in their D3 product release, they quickly copied the Canon feature (precisely) and added it to the Nikon D3 calling it AF Fine-Tune. Since that time virtually every mid/high end DSLR camera from all manufacturers have included a provision for AF adjustment, requiring a LensAlign or lesser method to do the actual testing and analysis.
The first LensAlign hardware system (called the Pro Version) sold for $179. It was extremely labor intensive to build and required individual laser calibration (for each unit). I soon discovered that this business model could not be sustained. The price was too high, and the time-and-labor made it impractical to build.
Enter LensAlign MkII, a about 2 years later; it overcame many obstacles:
• It was easier to manufacture (although it required expensive solid steel blanking dies.)
• It could be shipped in a Priority Mail envelope, reducing shipping costs.
• It could be disassembled for travel.
• It was more accurate than the original, and no longer required individual calibration.
• It provided a sensible, and profitable, business model for me and a lower retail price for the end user (then $79.95 and now $84.95)]
With the MkII design established, we concentrated on a companion software solution to couple it with. FocusTune Calibration Software would raise the bar by facilitating the precision (and objectivity) of computer analysis of the test photos, thus eliminating the subjective nature of human analysis. Further, the new software made the AF adjustment task considerably easier and quicker. FocusTune software was designed so that it could be used in conjunction (together with) with any LensAlign hardware (system) or even without LensAlign with a wall mounted target.
Moreover, the FocusTune application actually promoted our development effort that led to additional improvements in both the LensAlign hardware and the FocusTune software! In order for these developments to stretch the envelope of possibilities, we optimized the LensAlign MkII’s Target and Ruler in a series of revisions culminating in the current Generation 4.
The downside was that in order to gain the greatly increased accuracy and speed that the new FocusTune made possible, its utilization necessarily was tied to LensAlign MkII with its new Target and Ruler. This ended FocusTune’s use as a standalone product or its use with older LensAlign designs (the Pro and Lite)
The good news is that we finally have what we wanted were striving for — a unique and phenomenal Hardware + Software solution that aids, enhances, accelerates and improves the task of analyzing and correcting troublesome AF front / back focusing inaccuracies that plague all DSLR cameras. No other commercial system available today is able to explore these issues and offer AF adjustment setting recommendations based on a precision 3-dimensional target that is crucial for accurate calibration. This is what makes the LensAlign/FocusTune system so powerful.
|
|
The LensAlign/Micro-Adjusting Tutorial e-Guide: $50
Don’t need to read the sales pitch? Click here to order your copy.
|
The LensAlign/FocusTune Micro-Adjusting Tutorial e-Guide: $50
For serious photographers using telephoto lenses including the Canon 100-400 II.
Don’t faint. The LensAlign/FocusTune Micro-Adjusting Tutorial e-Guide is finally finished and available for purchase. Before I begin to (briefly) sing its praises — I have to send huge thanks to my brilliant friend Michael Tapes. For the following:
1- Conceiving of, developing, and marketing first the LensAlign hardware and then doing the same with the amazing FocusTune software.
2- Driving down from Orlando to my home at Indian Lake Estates three times over the years to educate me on the use of LensAlign and then finally, FocusTune.
3- Spending many hours on the phone with me over the past few years answering my micro-adjusting questions. And then doing the same thing all over again for the past few months. And the past few days!
4- Skillfully reviewing the final draft of the manuscript and then graciously spending several more hours on the phone with me ironing out the final details.
Thank you Micheal.
Thanks also to dear friend Patrick Sparkman who helped me a lot along the micro-adjusting trail and provided a careful review of the final text.
Note however that any errors in the text are all on me.
The purpose of this guide is to teach you how to use the LensAlign hardware and the FocusTune software to determine an accurate AFA (autofocus adjustment) value for a given gear combination. It is written for users of current Canon camera bodies; folks who use the older Canon bodies and users of Nikon bodies that offer the ability to fine-tune focus will also benefit tremendously.
What can I say about the guide other than “It’s great!” It was about eight months in development. I spent dozens of hours writing it and many hundreds of hours testing and re-testing all of my lenses, teleconverters, and camera bodies, while at the same time fine-tuning the text. I even did some micro-adjusting on IPTs, some of those with the light setup! Most of the many improvements that I made in my techniques over the years were a result of finally listening to and implementing what Michael Tapes had told me in the first place. I can be stubborn, but then again, Michael and I are very much alike in that regard. The problem is that he is smarter than me.
Apologies to the many who were supposed to receive early drafts of this guide but did not. I only sent one to a very few folks as I was never completely comfortable with the contents and the flow and the clarity of the work. I am now. Very much so. I did get a copy to Bill Hill who wrote, “Thanks a ton. As in the past, I rely on you to interpret what the geeks write. Even though the version of the e-guide that you sent was far from complete, I found it much more helpful than anything that I had read online.”
Michael Tapes had this to say about the new guide: “I especially like the second half of the document where you show all of the examples.” He was referring to the many sample graphs in the guide that are accompanied by my illustrative comments:”Here is what I saw. This is what I thought. Here is what I did. And this is why I did it.”
Over the years many have come to value my simple, easy-to-follow instructions, my conversational style, and the clarity of my writing. Many find micro-adjusting to be complicated, time-consuming, and as I did often (and still do on occasion), frustrating. In the new guide, I have worked very hard to take you by the hand and lead through the process step by step. The guide includes camera and lens set-up lists, precise instructions on setting up, positioning, and aiming the gear, and detailed instructions on the testing, the strategies I developed and used, and interpreting the FocusTune graphs (that many find mystifying). Instructions for micro-adjusting zoom lenses at the T (tight or telephoto) end and the W (wide or zoomed out) setting are of course included. Plus dozens of practical tips to make your micro-adjusting experience a lot less frustrating than mine was 🙂
For years many folks have marveled at my ability to create sharp images with Canon 2X teleconverters and long f/4 super-telephoto lenses. Now the secret for much of that success is out of the bag. There is not a single sharp image in the guide; to see those simply surf the blog for the past two years. You will find hundreds of super-sharp images each accompanied by the AFA (autofocus micro-adjustment) that was in play.
Note that micro-adjusting is not for the faint-of-heart. Only serious photographers interested in creating the sharpest possible RAW files with their telephoto lenses (and teleconverters) should apply …
Nuff said.
Ordering Info
To purchase the LensAlign/FocusTune package ($124.90) please click here.
Click here to order your copy of the LensAlign/FocusTune Micro-Adjusting Tutorial e-Guide: $50.
If In Doubt …
If in doubt about using the BAA B&H affiliate link correctly, you can always start your search by clicking here. Please note that the tracking is invisible. Web orders only. Please, however, remember to shoot me your receipt via e-mail.


Please Remember to use my Affiliate Links and to Visit the New BAA Online Store 🙂
To show your appreciation for my continuing efforts here, we ask, as always, that you get in the habit of using my B&H affiliate links on the right side of the blog for all of your photo and electronics purchases. Please check the availability of all photographic accessories in the New BIRDS AS ART Online Store, especially the Mongoose M3.6 tripod head, Wimberley lens plates, Delkin flash cards and accessories, and LensCoat stuff.
As always, we sell only what I have used, have tested, and can depend on. We will not sell you junk. We know what you need to make creating great images easy and fun. And please remember that I am always glad to answer your gear questions via e-mail.
I would of course appreciate your using our B&H affiliate links for all of your major gear, video, and electronic purchases. For the photographic stuff mentioned in the paragraph above, and for everything else in the new store, we, meaning BAA, would of course greatly appreciate your business. Here is a huge thank you to the many who have been using our links on a regular basis and those who will be visiting the New BIRDS AS ART Online Store as well.
Amazon.com
Those who prefer to support BAA by shopping with Amazon may use the logo link above.
Amazon Canada
Many kind folks from north of the border, eh, have e-mailed stating that they would love to help us out by using one of our affiliate links but that living in Canada and doing so presents numerous problems. Now, they can help us out by using our Amazon Canada affiliate link by starting their searches by clicking here.
Facebook
Be sure to like and follow BAA on Facebook by clicking on the logo link upper right. Tanks a stack.
Typos
In all blog posts and Bulletins, feel free to e-mail or to leave a comment regarding any typos or errors. Just be right :).
October 18th, 2017 Stuff
On Monday, before, during, and after our travels, I worked extensively on finishing up the LensAlign/Micro-adjusting e-Guide. I still have a few things to clear up on Tuesday with Michael Tapes and hope to have the guide published by tomorrow, or by Thursday at the latest. No swimming and no exercising till Tuesday.
The LensAlign/FocusTune Micro-adjusting e-Guide will be published and announced tomorrow accompanied by an interesting back-story piece on the development of the hardware, LensAlign, and the software, FoucsTune, by the brilliant Michael Tapes, inventor of both. To purchase the LensAlign Mark II/FocusTune package, click please click here.
I am still looking for a few more folks for San Diego #2. If you are considering this trip and might be interested in adding on a free day of instruction before the IPT begins please shoot me an e-mail.
Great Response
After downloading the RAW file, lots of folks have been sending me JPEgs of their version of Monday’s featured image. If you would like to take a crack at it, see the blog post here. I will publish my version on Friday.
The Streak
Today makes eighty-three days in a row with a new educational blog post! This blog post took more than two hours to prepare. With all of my upcoming free time (or not …), the plan right now is to break the current record streak of (I think) four hundred eighty something … Good health and good internet connections willing.
|
|
2017 in San Diego was a very good year ….
|
2018 San Diego 3 1/2-DAY BIRDS AS ART IPT #2: Sunday, JAN 28 thru and including a morning session on Wednesday, JAN 31, 2018: 3 1/2 days: $1699. Limit: 8: Openings: 7
Meet and Greet at 6:30pm on the evening before the IPT begins; Saturday, Jan 27, 2018.
San Diego IPT #2: Shorter and Less Expensive!
Please remember: I go with one.
Click here for details.
Booking.Com
Booking.Com came through for me twice again recently with both the DeSoto Fall IPT and next July’s UK Puffins, Gannets, and Bempton Pre-trip room reservations. And all the rates were great. If you’d like to give Booking.Com a shot, click here and you will earn a $25 reward. Thanks to the many who have already tried and used this great service.


Gear Questions and Advice
Too many folks attending BAA IPTs and dozens of folks whom I see in the field, and on BPN, are–out of ignorance–using the wrong gear especially when it comes to tripods and more especially, tripod heads… Please know that I am always glad to answer your gear questions via e-mail.
|
|
|
This image was created on the early morning of Sunday, October 15 with the hand held Canon EF 100-400mm f/4.5-5.6L IS II USM lens (at 371mm) and my favorite pelicans in flight photography camera, the Canon EOS 5D Mark IV. ISO 400. Evaluative metering +1 stop off the sky in early morning light: 1/2500 sec. at f/6.3. (Should have been +1 2/3 stops off the sky). AWB.
Center AF point/AI Servo/Expand/Shutter Button AF was active at the moment of exposure. As originally framed, the selected AF point fell on the bird’s face just behind and below the eye (as seen in the DPP 4 screen capture below). Please click on the image to enlarge it.
FocusTune/LensAlign Micro Adjustment: -4 (extrapolated).
Brown Pelican, landing juvenile
|
Brown Pelican landing juvenile
Thanks to a suggestion from DeSoto Fall IPT participant Jim Miller, the group tried a new spot in the park, a spot that I had only rarely (if ever …) been to. It turned out to be fantastic. On my visit last weekend I photographed there on Saturday afternoon and Sunday morning in an effort to learn more about the location. I was successful. On clear mornings with any winds with an easterly component the landing pelican photography will likely turn out to be spectacularly consistent.
Canon EOS 5D Mark IV Cropped Image Quality
Note how well image quality held up to a relatively large crop. AF performs better when you work wider; doing that allows you to aggressively crop a sharp image to your taste. Please understand that I am not advising you to crop away 90% of the pixels in a given image 🙂 With a sharp RAW file you can easily get away with cropping away 30 to 40% of the pixels.
More 100-400 II Versatility
On both Saturday afternoon and Sunday morning past I never took the 500 f/4L IS II out of my Sequoia. What fun it was to walk around with a lightweight lens that is great for flight photography; being able to zoom out on close-flying pelicans and gulls can be a huge plus; with today’s image, I might have zoomed in a bit more … But by zooming out a bit I was able to keep the selected AF point on the bird’s head. Once the sun came over the dunes I added the 1.4X III TC for additional reach while photographing birds on the beach. While I do have some sharp flight images with the 100-400 II/1.4X III combo, my preference is to do flight with the lens alone; AF is faster and more accurate. We have seen this week that the 1-4 can be used at the wide end to create scenic-type images (without having to run back to the car for a shorter lens). It’s focal length range (with or without the Canon Extender EF 1.4X III) is fantastic. And its amazing close focus (down to less than one meter) make this the most versatile lens you will ever own. Lastly, as we saw the other day, you can add a few extension tubes and use the 1-4II to photograph very small flowers.
|
|
The DPP 4 Screen Capture for today’s featured image
|
The DPP 4 Screen Capture for Today’s Featured Image
Note the illuminated red square that shows the placement of the activated AF point at the moment of exposure. See that I added 1/3 stop of light by moving the Brightness slider to +.33. And that I moved the Color fine tune dot a bit towards blue to counteract the rich, red, early morning light just a bit. Note that the BLUE channel dominates the histogram because of the blue sky and the blue water.With the cursor on the brightest WHITEs we do see the early morning light: R = 243, G = 235, B = 220. Again, there is no need to neutralize the WHITEs or to strive for a neutral white balance when working in early morning light …
The Image Optimization
- 1-Convert the RAW file in DPP 4.
- 2-Bring the image into Photoshop.
- 3-Level the image using the Ruler Tool (R) and Image > Rotate > Arbitrary (my keyboard shortcut Command + /).
- 4-Starting in the lower right corner crop the image (C) hard from the left and above using the 2X3 preset flopped to 3X2.
- 5-Select the skinny triangles using the Magic Wand Tool (M).
- 6-Use the minus Lasso Tool (L) to deselect areas of the bird that got picked up ….
- 7-Expand the selection 6 pixels using Select > Modify > Expand.
- 8-Fill in the Canvas with John Haedo Content Aware Fill (Shift + Delete).
- 9-Eliminate the pelicans below the subject using the Patch Tool (my keyboard shortcut P). It is amazing how easy that was and how amazing the Patch Tool is.
- 10-Add some canvas above and in front of the bird and then filling in the new canvas with John Haedo Content Aware Fill (Shift + Delete).
- 11-Lighten the shadowed area of the right underwing primaries using Tim Grey Dodge and Burn; be sure to compare the optimized image with the original …
- 12-Put the whole thing on a new layer and run cheap and dirty NeatImage noise reduction at 80% on the whole image. This completely eliminated the noise in the dark blue water without affecting the sharpness of the subject. To learn everything that there is to know about noise reduction using NeatImage (and lots more!) see the Professional Post Processing Guide by clicking here
- 13-Select the head and bill with the Quick Selection Tool (W), place it on its own layer, and quasi-sharpen it with a Contrast Mask (15/65/0).
- 14-Flatten the image and then duplicate it.
- 15-Apply a 65-pixel Gaussian Blur to the whole thing.
- 16-Add a Regular Layer Mask and erase the blur from the sky and the bird leaving it in place only on the blue water of the Gulf. Be sure to use a large, soft brush for the erasing.
- 17-Name and save the TIFF file.
- 18-Create a 1200 pixel wide JPEG, sharpen it with Unsharp Mask at 90/.3/0.
- 19-Save the JPEG and close the image.
Note: it took longer to type the section above than it did to optimize the image in Photoshop … The latter took less than eight minutes.
|
|
|
The BIRDS AS ART Current Workflow e-Guide (Digital Basics II) will teach you an efficient Mac/Photo Mechanic/Photoshop workflow that will make it easy for you to make your images better in Photoshop (rather than worse). That true whether you convert your images in DPP 4 or ACR. See the blog post here to learn lots more and to read a free excerpt.
You can order your copy from the BAA Online Store here, by sending a Paypal for $40 here, or by calling Jim or Jennifer weekdays at 863-692-0906 with your credit card in hand.
|
The BIRDS AS ART Current Workflow e-Guide (Digital Basics II)
Everything mentioned above is covered in detail in the BIRDS AS ART Current Workflow e-Guide (Digital Basics II), an instructional PDF that is sent via e-mail. Learn more and check out the free excerpt in the blog post here. The new e-Guide reflects my Macbook Pro/Photo Mechanic/DPP 4/Photoshop workflow. Do note that you will find the RGB Curves Adjustment Color Balancing tutorial only in the new e-guide. Note: folks working on a PC and/or those who do not want to miss anything Photoshop may wish to purchase the original Digital Basics along with DB II while saving $15 by clicking here to buy the DB Bundle.
The two most recent and many of the older MP4 Photoshop Tutorial videos releases go hand and hand with the information in DB II):
- The Wingtip Repairs MP4 Video here.
- The MP4 Crow Cleanup Video here.
Folks who learn well by following along rather than by reading can check out the complete collection of MP 4 Photoshop Tutorial Videos by clicking here.
You can learn how and why I and other discerning Canon shooters convert nearly all of their Canon digital RAW files in DPP 4 using Canon Digital Photo Professional in the DPP 4 RAW conversion Guide here. And you can learn advanced Quick Masking and advanced Layer Masking techniques in APTATS I & II. You can save $15 by purchasing the pair. Folks can learn sophisticated sharpening and (NeatImage) Noise Reduction techniques in the The Professional Post Processing Guide by Arash Hazeghi and yours truly.
If In Doubt …
If in doubt about using the BAA B&H affiliate link correctly, you can always start your search by clicking here. Please note that the tracking is invisible. Web orders only. Please, however, remember to shoot me your receipt via e-mail.


Please Remember to use my Affiliate Links and to Visit the New BAA Online Store 🙂
To show your appreciation for my continuing efforts here, we ask, as always, that you get in the habit of using my B&H affiliate links on the right side of the blog for all of your photo and electronics purchases. Please check the availability of all photographic accessories in the New BIRDS AS ART Online Store, especially the Mongoose M3.6 tripod head, Wimberley lens plates, Delkin flash cards and accessories, and LensCoat stuff.
As always, we sell only what I have used, have tested, and can depend on. We will not sell you junk. We know what you need to make creating great images easy and fun. And please remember that I am always glad to answer your gear questions via e-mail.
I would of course appreciate your using our B&H affiliate links for all of your major gear, video, and electronic purchases. For the photographic stuff mentioned in the paragraph above, and for everything else in the new store, we, meaning BAA, would of course greatly appreciate your business. Here is a huge thank you to the many who have been using our links on a regular basis and those who will be visiting the New BIRDS AS ART Online Store as well.
Amazon.com
Those who prefer to support BAA by shopping with Amazon may use the logo link above.
Amazon Canada
Many kind folks from north of the border, eh, have e-mailed stating that they would love to help us out by using one of our affiliate links but that living in Canada and doing so presents numerous problems. Now, they can help us out by using our Amazon Canada affiliate link by starting their searches by clicking here.
Facebook
Be sure to like and follow BAA on Facebook by clicking on the logo link upper right. Tanks a stack.
Typos
In all blog posts and Bulletins, feel free to e-mail or to leave a comment regarding any typos or errors. Just be right :).
October 17th, 2017 Really Important Stuff, All Unsolicited
Via e-mail from Jim Miller
I can’t stop thinking about how much fun the DeSoto Fall IPT was, and how much I learned. There were so many things that suddenly made perfect sense after I had been confused for so long. Thank you very much for the wonderful trip, and for being a great teacher. As I worked through the raw files last week, I realized what a fantastic lens the 600 IS is. Thanks for the rental! Maybe some day I will be able to afford one. Some images for critique are attached.
By the way, the plant we were looking at along the sidewalk in Gulfport is Blue Porterweed. It is worth a few minutes on the internet to read about it: native of Florida and the Caribbean, used for medicine in The Bahamas, etc. We have it in a large pot in the front yard and it takes a lot of water, but it blooms Spring through Fall. Thank you again, Artie. It was really wonderful to be with you and learn from you.
Via e-mail from Lee Sommie
I want to thank you for making the Fall 2017 Ft. DeSoto IPT such a fun and educational experience for me. I truly did not want the adventure to end. I now look through the viewfinder with an artist’s mindset. And the real bonus was making new friends with fellow students. Thank you for sharing your knowledge and enthusiasm for wildlife photography. I had a great time with you and look forward to more adventures on future IPTs.
Followed by this one
BTW. I downloaded Photo Mechanic and started using it in my workflow. Since I like using Lightroom for my adjustments, I found a way to incorporate Photo Mechanic and Lightroom together. Lightroom was driving me crazy with how slow it is to import and preview photos. I was impressed with how fast you could preview photos and start editing your photos on the DeSoto Fall IPT. Life is too short to wait for applications to import and preview photos and Photo Mechanic solves that problem.
Thanks again for everything Artie. Your knowledge keeps on giving well after the IPT!
Via e-mail from Muhammad Arif
I had a great time at Fort De Soto. Thank you for all the instruction, for your help and pointers; my photography has already improved tremendously and I’ve never made such good bird photos before. I wish I could’ve joined you on Monday and Tuesday morning as well but work got in the way. It was also nice to meet everyone on the IPT; sorry that I missed you Ray. Thanks again for everything and I hope to join you at a future IPT sometime again.
Stuff
I visited the Social Security office in Winter Haven to start collecting on my money. I had been drawing my SS on my late-wife Elaine’s money. Next was a visit with my chiropractor friend Dr. Scott Pancake for an Atlas Orthogonal treatment. Too soon to tell but you will hear from me soon. Scott advised two days of rest, i.e., no swimming, no exercises.
I am still looking for a few more folks for San Diego #2. If you are considering this trip and might be interested in adding on a free day of instruction before the IPT begins please shoot me an e-mail.
Great Response
After downloading the RAW file, lots of folks have been sending me JPEgs of their version of yesterday’s featured image. If you would like to take a crack at it, see yesterday’s blog post here. I will publish my version on Friday.
The Streak
Today makes eighty-two days in a row with a new educational blog post! This blog post took less than an hour to prepare. With all of my upcoming free time (or not …), the plan right now is to break the current record streak of (I think) four hundred eighty something … Good health and good internet connections willing.
|
|
2017 in San Diego was a very good year ….
|
2018 San Diego 3 1/2-DAY BIRDS AS ART IPT #2: Sunday, JAN 28 thru and including a morning session on Wednesday, JAN 31, 2018: 3 1/2 days: $1699. Limit: 8: Openings: 7
Meet and Greet at 6:30pm on the evening before the IPT begins; Saturday, Jan 27, 2018.
San Diego IPT #2: Shorter and Less Expensive!
Please remember: I go with one.
Click here for details.
Booking.Com
Booking.Com came through for me twice again recently with both the DeSoto Fall IPT and next July’s UK Puffins, Gannets, and Bempton Pre-trip room reservations. And all the rates were great. If you’d like to give Booking.Com a shot, click here and you will earn a $25 reward. Thanks to the many who have already tried and used this great service.


Gear Questions and Advice
Too many folks attending BAA IPTs and dozens of folks whom I see in the field, and on BPN, are–out of ignorance–using the wrong gear especially when it comes to tripods and more especially, tripod heads… Please know that I am always glad to answer your gear questions via e-mail.
|
|
|
All four of these images were created on the early morning of Sunday, October 15 well before the sun came onto the birds. I used the hand held Canon EF 100-400mm f/4.5-5.6L IS II USM lens (at 400mm) and my favorite skimmer photography camera, the Canon EOS 5D Mark IV. The ISOs ranged from 800 to 1250. All at Evaluative metering +2 stops: 1/320 sec. at f/6.3 (except for the last image at f/7.1) in Tv mode. AWB.
One AF point to the right of the center AF point/AI Servo/Expand/Shutter Button AF was active at the moment of exposure. The selected AF point fell somewhere on the bird face below the eye in each image. Please click on the image to enlarge it.
FocusTune/LensAlign Micro Adjustment: -5.
Black Skimmer at water’s edge (four ways)
|
Black Skimmer Editing Practice
Click on the composite above to view the images larger. Which is the strongest image? Why? Which is the weakest image? Why? What do you think of the two images with the breaking wave included?
For those not blessed with eagle eyes here are the file numbers from left to right, top row first, then the bottom row.
- _P3A3247 (at 7:50am)
- _P3A3248 (five seconds after 3247)
- _P3A3256 (40 seconds after 3248)
- _P3A3270 (4 1/2 minutes after 3256)
Note: I have a 100% best by far choice; I will share it with you here soon.
High Level Exposure Question
Considering that the exposure compensation for each image was +2 stops, why is _P3A3270 considerably brighter than _P3A3256? Please note that it has nothing to do with the fact that the light has increased; remember that I was in an automatic exposure mode, Tv …
More 100-400 II Versatility
On both Saturday afternoon and Sunday morning I never took the 500 f/4L IS II out of my Sequoia. What fun to walk around with a lightweight lens that is great for flight photography; being able to zoom out on close-flying pelicans and gulls can be a huge plus. Once the sun came over the dunes I added the 1.4X III TC for additional reach. We saw yesterday that the 1-4 can be used at the wide end to create scenic-type images (without having to run back to the car for a shorter lens). It’s focal length range (with or without the Canon Extender EF 1.4X III) is fantastic. And its amazing close focus (down to less than one meter) make this the most versatile lens you will ever own. Lastly, as we saw the other day, you can add a few extension tubes and use the 1-4II to photograph very small flowers.
If In Doubt …
If in doubt about using the BAA B&H affiliate link correctly, you can always start your search by clicking here. Please note that the tracking is invisible. Web orders only. Please, however, remember to shoot me your receipt via e-mail.


Please Remember to use my Affiliate Links and to Visit the New BAA Online Store 🙂
To show your appreciation for my continuing efforts here, we ask, as always, that you get in the habit of using my B&H affiliate links on the right side of the blog for all of your photo and electronics purchases. Please check the availability of all photographic accessories in the New BIRDS AS ART Online Store, especially the Mongoose M3.6 tripod head, Wimberley lens plates, Delkin flash cards and accessories, and LensCoat stuff.
As always, we sell only what I have used, have tested, and can depend on. We will not sell you junk. We know what you need to make creating great images easy and fun. And please remember that I am always glad to answer your gear questions via e-mail.
I would of course appreciate your using our B&H affiliate links for all of your major gear, video, and electronic purchases. For the photographic stuff mentioned in the paragraph above, and for everything else in the new store, we, meaning BAA, would of course greatly appreciate your business. Here is a huge thank you to the many who have been using our links on a regular basis and those who will be visiting the New BIRDS AS ART Online Store as well.
Amazon.com
Those who prefer to support BAA by shopping with Amazon may use the logo link above.
Amazon Canada
Many kind folks from north of the border, eh, have e-mailed stating that they would love to help us out by using one of our affiliate links but that living in Canada and doing so presents numerous problems. Now, they can help us out by using our Amazon Canada affiliate link by starting their searches by clicking here.
Facebook
Be sure to like and follow BAA on Facebook by clicking on the logo link upper right. Tanks a stack.
Typos
In all blog posts and Bulletins, feel free to e-mail or to leave a comment regarding any typos or errors. Just be right :).
October 16th, 2017 Stuff
I did enjoy a morning swim on Saturday and then made it over to DeSoto for the afternoon. I searched for the mystery heron/egret but did not find it. With a strong east wind and mostly clear skies, conditions were tough for bird photography; can you say “wind against sun?” But I really do love Desoto. And I did get to photograph a pretty neat rainbow. I ended the day at my favorite secret sunset spot and found a cooperative juvie Great Blue Heron. You can learn about my secret sunset spot in the DeSoto Site Guide. Scroll down for more info on the guide. I did stay over and photograph on Sunday morning. More on that session soon.
I am still looking for a few more folks for San Diego #2. If you are considering this trip and might be interested in adding on a free day of instruction before the IPT begins please shoot me an e-mail.
The Streak
Today makes eighty-one days in a row with a new educational blog post! This blog post took less than an hour to prepare. With all of my upcoming free time (or not …), the plan right now is to break the current record streak of (I think) four hundred eighty something … Good health and good internet connections willing.
Fort DeSoto Site Guide
Fort DeSoto is about the only bird photography hotspot that I know of that has the potential to offer great opportunities every day of the year. The big attractions are shorebirds, all the large wading birds (including Wood Stork and Roseate Spoonbill at various seasons), and many species of terns and gulls. In the spring you can usually photograph the breeding behaviors of Royal & Sandwich Terns and Laughing Gull. Flight photography can be great when a feeding spree occurs just off of the beach. These feature terns and gulls and Brown Pelican. Spring and fall migration can be excellent for all manner of warblers, vireos, gnatcatchers, tanagers, grosbeaks, and orioles in some of the wooded areas. By purchasing the guide you will know exactly where to be on what tide and what wind. Why waste your time searching for the birds when you can just show up and act like a DeSoto veteran?
Get yourself a copy of the Fort DeSoto Site Guide. Learn the best spots, where to be when in what season in what weather. Learn the best wind directions for the various locations. BAA Site Guides are the next best thing to being on an IPT. You can see all of them here.
|
|
2017 in San Diego was a very good year ….
|
2018 San Diego 3 1/2-DAY BIRDS AS ART IPT #2: Sunday, JAN 28 thru and including a morning session on Wednesday, JAN 31, 2018: 3 1/2 days: $1699. Limit: 8: Openings: 7
Meet and Greet at 6:30pm on the evening before the IPT begins; Saturday, Jan 27, 2018.
San Diego IPT #2: Shorter and Less Expensive!
Please remember: I go with one.
Click here for details.
Booking.Com
Booking.Com came through for me twice again recently with both the DeSoto Fall IPT and next July’s UK Puffins, Gannets, and Bempton Pre-trip room reservations. And all the rates were great. If you’d like to give Booking.Com a shot, click here and you will earn a $25 reward. Thanks to the many who have already tried and used this great service.


Gear Questions and Advice
Too many folks attending BAA IPTs and dozens of folks whom I see in the field, and on BPN, are–out of ignorance–using the wrong gear especially when it comes to tripods and more especially, tripod heads… Please know that I am always glad to answer your gear questions via e-mail.
|
|
|
This image was created on the late afternoon of Friday, October 13 with the hand held Canon EF 100-400mm f/4.5-5.6L IS II USM lens (at 112mm) and my favorite bird photography camera, the Canon EOS 5D Mark IV. ISO 800. Evaluative metering -2/3 stop: 1/2,000 sec. at f/6.3 in Av mode. AWB.
Center AF point/AI Servo/Expand/Rear Button AF and recompose.
FocusTune/LensAlign Micro Adjustment: -2.
Great Blue Heron sunrise scenic with god-rays.
|
My Critique
The JPEG above represents the RAW file converted straight up in ACR (with no adjustments). The image overall is way too dark because of the underexposure that was needed to hold back the bright sections of the sky … As both the bird and the god rays are a bit too centered, I wish that I had moved two steps to my right so that the bird would have been closer to the lower left corner and the god rays closer to the upper right corner. I created the image at K-7600 to juice up the colors but the underexposure muted those quite a bit. I converted the image in DPP 4 and optimized it in Photoshop. I will share it with you here in a few days.
The First-Ever RAW File/Image Optimization Challenge
If you would like to take a crack at this image please click here to download the RAW file. Save the image to your hard drive, convert it in the program of your choice, and then optimize it with the program of your choice. save the TIF. Then create a sharpened 900 pixel tall JPEG and shoot it to me via e-mail.
Assuming that I receive at least a few decent images, I will publish at least the best one here on Friday along with my optimized version.
If at least a few folks give it a try, we can play this game again. If not — well, you can figure it out. Those who try will wind up learning a ton. And who knows, they may create an image that is stronger than mine 🙂
More 100-400 II Versatility
Note here that I used the hand held Canon EF 100-400mm f/4.5-5.6L IS II USM lens at the wide end to create a scenic (without having to run back to the car for a shorter lens). The focal length range (with or without the Canon Extender EF 1.4X III), its relatively light weight, and its amazing close focus (down to less than one meter) make this the most versatile lens you will ever own. In addition, it is quite an excellent flight lens; being able to zoom out on close-flying pelicans and gulls can be a huge plus. Lastly, as we saw the other day, you can add a few extension tubes and use the 1-4II to photograph very small flowers.
If In Doubt …
If in doubt about using the BAA B&H affiliate link correctly, you can always start your search by clicking here. Please note that the tracking is invisible. Web orders only. Please, however, remember to shoot me your receipt via e-mail.


Please Remember to use my Affiliate Links and to Visit the New BAA Online Store 🙂
To show your appreciation for my continuing efforts here, we ask, as always, that you get in the habit of using my B&H affiliate links on the right side of the blog for all of your photo and electronics purchases. Please check the availability of all photographic accessories in the New BIRDS AS ART Online Store, especially the Mongoose M3.6 tripod head, Wimberley lens plates, Delkin flash cards and accessories, and LensCoat stuff.
As always, we sell only what I have used, have tested, and can depend on. We will not sell you junk. We know what you need to make creating great images easy and fun. And please remember that I am always glad to answer your gear questions via e-mail.
I would of course appreciate your using our B&H affiliate links for all of your major gear, video, and electronic purchases. For the photographic stuff mentioned in the paragraph above, and for everything else in the new store, we, meaning BAA, would of course greatly appreciate your business. Here is a huge thank you to the many who have been using our links on a regular basis and those who will be visiting the New BIRDS AS ART Online Store as well.
Amazon.com
Those who prefer to support BAA by shopping with Amazon may use the logo link above.
Amazon Canada
Many kind folks from north of the border, eh, have e-mailed stating that they would love to help us out by using one of our affiliate links but that living in Canada and doing so presents numerous problems. Now, they can help us out by using our Amazon Canada affiliate link by starting their searches by clicking here.
Facebook
Be sure to like and follow BAA on Facebook by clicking on the logo link upper right. Tanks a stack.
Typos
In all blog posts and Bulletins, feel free to e-mail or to leave a comment regarding any typos or errors. Just be right :).
October 15th, 2017 Stuff
It was 8:12am on Saturday morning as I put the finishing touches on this blog post. I am toying with the idea of heading over to Fort DeSoto this afternoon to look for the mystery heron/egret. I would stay over on Saturday night. I will need to swim early today and start driving at about lunch time …
I am still looking for a few more folks for San Diego #2. If you are considering this trip and might be interested in adding on a free day of instruction before the IPT begins please shoot me an e-mail.
The Streak
Today makes eighty days in a row with a new educational blog post! This blog post took less than an hour to prepare. With all of my upcoming free time (or not …), the plan right now is to break the current record streak of (I think) four hundred eighty something … Good health and good internet connections willing.
|
|
2017 in San Diego was a very good year ….
|
2018 San Diego 3 1/2-DAY BIRDS AS ART IPT #2: Sunday, JAN 28 thru and including a morning session on Wednesday, JAN 31, 2018: 3 1/2 days: $1699. Limit: 8: Openings: 7
Meet and Greet at 6:30pm on the evening before the IPT begins; Saturday, Jan 27, 2018.
San Diego IPT #2: Shorter and Less Expensive!
Please remember: I go with one.
Click here for details.
Booking.Com
Booking.Com came through for me twice again recently with both the DeSoto Fall IPT and next July’s UK Puffins, Gannets, and Bempton Pre-trip room reservations. And all the rates were great. If you’d like to give Booking.Com a shot, click here and you will earn a $25 reward. Thanks to the many who have already tried and used this great service.


Gear Questions and Advice
Too many folks attending BAA IPTs and dozens of folks whom I see in the field, and on BPN, are–out of ignorance–using the wrong gear especially when it comes to tripods and more especially, tripod heads… Please know that I am always glad to answer your gear questions via e-mail.
|
|
|
This image was created on the 2017 San Diego IPT with the hand held Canon EF 100-400mm f/4.5-5.6L IS II USM lens (at 360mm) and my favorite bird photography camera, the Canon EOS 5D Mark IV. ISO 400. Evaluative metering probably at zero as famed: 1/2000 sec. at f/6.3 in Manual mode. AWB.
One AF point that was two and one-half rows up from and three columns to the right of the center AF point/AI Servo/Manual selection/Shutter Button AF as framed was active at the moment of exposure. See the DPP 4 screen capture below to see the exact placement of the single (selected) AF point.
FocusTune/LensAlign Micro Adjustment: 0.
Western Gull, adult breeding plumage preening
|
Helpful Bird Photography Principles …
- 1- When photographing a bird from behind the best head angle will generally be very close to a perfect 90 degrees with the bird’s head square or close to square to the imaging sensor.
- 2- When photographing a bird from behind be sure to focus on or very near the head.
- 3- When working in horizontal format be sure to select your AF point carefully so as to keep the bird out of the center of the frame (unless you can verbalize a very good reason for putting the subject dead center …)
- 4- Learn to work competently in Manual mode so that the amount of black or white in the frame at a given moment will not affect the exposure. That involves making an exposure check image, checking or blinkies, and evaluating the histogram to make sure that you have exposed well to the right (with at least some data halfway into the rightmost histogram box).
- 5- Even when photographing a bird from behind there is no need to use additional depth of field as long as the distance to the subject provides you will enough depth of field to cover the subject (as with today’s featured image).
- 6- Working with backgrounds that are separated from the subject and relatively distant while using wide apertures will yield pleasingly out of focus canvases for your avian images.
From Chapter Seven, Designing the Image (page 108), of the original The Art of Bird Photography (Amphoto, NY: 1998)
If the subject is positioned against an uncluttered background or if there is a cluttered background well behind the subject, telephoto lenses — with their narrow angles of view — and the shallow depth of field that comes with the use of wide apertures, will produce lovely soft, out-of-focus backgrounds. I’ll take still blue water or well lit green foliage every time.
Shooting wide open (at your lens’ widest aperture heightens this effect; with subject size constant, it is the aperture rather than the length of the lens that determines the depth of field. Large apertures such as f/2.8, f/4, and f/5.6, minimize depth of field and reduce background detail. Conversely, small apertures, such as f/16 and f/22, maximize depth of field and increase background detail.
Note: I changed a single word in the second paragraph above to improve the clarity of the writing.
More 100-400 II Versatility
The hand held Canon EF 100-400mm f/4.5-5.6L IS II USM lens is deadly on the cliffs of La Jolla with or without the Canon Extender EF 1.4X III. Its focal length range, its relatively light weight, and its amazing close focus (down to less than one meter) make it my most valuable lens when visiting San Diego. In addition, it is quite an excellent flight lens and being able to zoom out on close-flying pelicans and gulls can save the day.
|
|
The DPP 4 Screen Capture for today’s featured image
|
Understanding the Color of Light/Part I
Note the RGB values for the brightest WHITEs: R=240, G = 233, B = 216. Not the high value for RED and the low value for B despite the fact that I moved the Color fine tune dot toward BLUE. Note also that this image was created at 7:39am. On clear mornings not long after sunrise the light is rich in REDs and YELLOWs; much of the BLUE is filtered out as the light travels obliquely a long way through the earth’s atmosphere. The result is what we call “early” or “sweet” light (as opposed to the colder light later on in the day when the sun is much more directly overhead. As a guideline folks often state that the really “sweet” light occurs on clear days when your shadow is three time longer than your height. I am generally fine with twice my height. Note that the lower the sun in the sky the more comfortable I am working a bit off sun angle.
As I like the look of the rich, warm light in this image I was not at all concerned with having the WHITEs completely neutral, say 235, 235, 235. I could have worked toward that end if I wanted to either during the RAW conversion in DPP 4 or during the image optimization in Photoshop. But I am a firm believer in “if it ain’t broke, don’t fix it.”
The Lesson
There is no need to work towards having perfectly neutral WHITEs or a perfectly neutral White Balance if you are happy with the colors in an image.
High-Level AF Point Selection Question
Why did I abandon my usual AF Expand for this particular situation and go with Manual selection (i.e., with a single AF point)?
If In Doubt …
If in doubt about using the BAA B&H affiliate link correctly, you can always start your search by clicking here. Please note that the tracking is invisible. Web orders only. Please, however, remember to shoot me your receipt via e-mail.


Please Remember to use my Affiliate Links and to Visit the New BAA Online Store 🙂
To show your appreciation for my continuing efforts here, we ask, as always, that you get in the habit of using my B&H affiliate links on the right side of the blog for all of your photo and electronics purchases. Please check the availability of all photographic accessories in the New BIRDS AS ART Online Store, especially the Mongoose M3.6 tripod head, Wimberley lens plates, Delkin flash cards and accessories, and LensCoat stuff.
As always, we sell only what I have used, have tested, and can depend on. We will not sell you junk. We know what you need to make creating great images easy and fun. And please remember that I am always glad to answer your gear questions via e-mail.
I would of course appreciate your using our B&H affiliate links for all of your major gear, video, and electronic purchases. For the photographic stuff mentioned in the paragraph above, and for everything else in the new store, we, meaning BAA, would of course greatly appreciate your business. Here is a huge thank you to the many who have been using our links on a regular basis and those who will be visiting the New BIRDS AS ART Online Store as well.
Amazon.com
Those who prefer to support BAA by shopping with Amazon may use the logo link above.
Amazon Canada
Many kind folks from north of the border, eh, have e-mailed stating that they would love to help us out by using one of our affiliate links but that living in Canada and doing so presents numerous problems. Now, they can help us out by using our Amazon Canada affiliate link by starting their searches by clicking here.
Facebook
Be sure to like and follow BAA on Facebook by clicking on the logo link upper right. Tanks a stack.
Typos
In all blog posts and Bulletins, feel free to e-mail or to leave a comment regarding any typos or errors. Just be right :).
October 14th, 2017 Stuff
I finished watching both Thursday games on Tivo on Friday the morning. The Cubs beat the still hapless Nats in a crazy game in which an umpiring error led directly to several Cubs runs and the loss of the game. The Panthers had many chances to beat the Eagles but simply did not come through. I worked on several blog posts and began reviewing a book for a friend. I swam a full mile in one sitting at midday; I started in a full downpour and ended in bright sun.
I am still looking for a few more folks for San Diego #2. If you are considering this trip and might be interested in adding on a free day of instruction before the IPT begins please shoot me an e-mail.
The Streak
Today makes seventy-nine days in a row with a new educational blog post! This blog post took less than an hour to prepare. With all of my upcoming free time (or not …), the plan right now is to break the current record streak of (I think) four hundred eighty something … Good health and good internet connections willing.
|
|
2017 in San Diego was a very good year ….
|
2018 San Diego 3 1/2-DAY BIRDS AS ART IPT #2: Sunday, JAN 28 thru and including a morning session on Wednesday, JAN 31, 2018: 3 1/2 days: $1699. Limit: 8: Openings: 7
Meet and Greet at 6:30pm on the evening before the IPT begins; Saturday, Jan 27, 2018.
San Diego IPT #2: Shorter and Less Expensive!
Please remember: I go with one.
Click here for details.
Booking.Com
Booking.Com came through for me twice again recently with both the DeSoto Fall IPT and next July’s UK Puffins, Gannets, and Bempton Pre-trip room reservations. And all the rates were great. If you’d like to give Booking.Com a shot, click here and you will earn a $25 reward. Thanks to the many who have already tried and used this great service.


Gear Questions and Advice
Too many folks attending BAA IPTs and dozens of folks whom I see in the field, and on BPN, are–out of ignorance–using the wrong gear especially when it comes to tripods and more especially, tripod heads… Please know that I am always glad to answer your gear questions via e-mail.
Kenko Extension Tube Set DG for Canon EOS Lenses
In the What Lens and Accessories? blog post here two weeks ago I posted:
You Tell Me …
Take a close look at the image caption above and then make an educated guess and let me know what lens, what focal length, and what accessory or accessories you think I used to create today’s featured image of a relatively small (3/4 inch) flower. Trust me, there is a clue, at least to the lens used. After that, you might be able to figure the rest out. But it won’t be easy.
The Somewhat Strange Answer …
While there were some good guesses, nobody came up with my work-around. Two folks got the lens right; I used the obviously amazingly versatile Canon EF 100-400mm f/4.5-5.6L IS II USM lens with the Canon Extender EF 1.4X III. The clue to the lens/TC combo was the f/9 aperture. As noted above, the rest of the rig consisted of all three extension tubes in the Kenko Auto Extension Tube Set DG for Canon EOS lenses,, and my favorite flower photography body, the Canon EOS 5D Mark IV.
Extension Tube Basics
Extension tubes are primarily used so that you can get closer to the subject than the minimum focusing distance of the lens normally allows. They are often used with various macro lenses. I began using them with telephoto lenses more than thirty years ago with my Canon FD 400mm f/4.5 (manual focus) lens. Once I started crawling in the mud to get close to shorebirds I found that it was easy to get within nine or ten feet of the birds using the super low approach. The problem was that the lens only focused down to 12 feet. Once I added an FD 25mm extension tube, I was able to focus to less than ten feet and easily fill 3/4 of the frame with a Least Sandpiper. Do understand that once you add an extension tube to the mix that you will not be able to focus on relatively distant subjects. I almost forgot to mention that if you are outside of the lens’s MFD, an extension tube can be used to increase the size of the subject in the frame; they can actually serve as mini-teleconverters.
As the decades progressed, I wound up using both the EF 12mm and the EF 25mm Canon Extension tubes with all of my telephoto lenses up to and including the old 800mm f/5.6L IS. Over the past few years I have not often needed to add an extension tube as the newer telephoto lenses have such remarkable minimum focusing distances; the 600 II focuses down to less than 15 feet, the 500 II to 12.14 feet, and the 100-400 II down to an amazing 3.2 feet. The latter MFD gives the 100-400 the greatest magnification of any Canon telephoto lens: .31X.
Today, I always travel with two EF 12mm Extension Tubes. While I use them on occasion for closer focusing, their main function is to serve as a spacer so that I can stack my 1.4X III TCs with my 2X III TCs. I usually travel with at least two of each TC.
Canon or Kenko Extension Tubes?
The Canon EF 12mm Extension Tube sells for $82.00. The Canon EF 25mm Extension Tube sells for $139.95. The Kenko Auto Extension Tube Set DG for Canon EOS lenses consists of three extension tubes, a 12mm, a 20mm, and a 36mm. All autofocus and metering functions remain functional. When you first use the Kenko tubes you will likely find the fit snugger than with the Canon tubes. This takes a bit of getting used to but is actually a plus as the Canon lens mounts often get sloppy over time. Oh, the good news, the Kenko set costs $109.00.
Which are sharper, the Canon tubes or the Kenko tubes? Neither. Extension tubes are hollow and do not affect sharpness in any way. Do remember to stop down some when using extension tubes to prevent vignetting.
Nikon Extension Tubes
For decades Nikon did not offer any extension tubes. I knew several Nikon pros who were so frustrated by this that they ripped the guts out of their Nikon TCE 14 teleconverters so that they could use them as extension tubes. Nikon now offers three extension tubes as follows:
Nikon 8mm AI Extension Tube PK-11A
Nikon 14mm AI Extension Tube PK-12
Nikon PK-13 27.5mm AI Extension Tube
Amazingly, none of the Nikon tubes support autofocus …
The Kenko Auto Extension Tube Set DG (12, 20 & 36mm Tubes) for Nikon Digital and Film Cameras
Amazingly, the Kenko Auto Extension Tube Set DG (12, 20 & 36mm Tubes) for Nikon Digital and Film Cameras offers both functional metering and functional autofocus as noted here:
The Kenko Auto Extension Tube Set DG is compatible with Nikon DSLR cameras and F mount lenses and is optimized to work with Autofocus lenses. Kenko’s Auto Focus extension tubes are designed with all the circuitry and mechanical coupling to maintain auto focus and TTL auto exposure with most Nikon lenses given there is enough light (at f/5.6 or brighter) to activate the cameras AF system properly.
Owning a set of these completely Nikon compatible extension tubes would be a huge plus for all Nikon folks.
Extension Tube Questions …
If you have a question about extension tubes you are invited to leave a comment to that effect.
If In Doubt …
If in doubt about using the BAA B&H affiliate link correctly, you can always start your search by clicking here. Please note that the tracking is invisible. Web orders only. Please, however, remember to shoot me your receipt via e-mail.


Please Remember to use my Affiliate Links and to Visit the New BAA Online Store 🙂
To show your appreciation for my continuing efforts here, we ask, as always, that you get in the habit of using my B&H affiliate links on the right side of the blog for all of your photo and electronics purchases. Please check the availability of all photographic accessories in the New BIRDS AS ART Online Store, especially the Mongoose M3.6 tripod head, Wimberley lens plates, Delkin flash cards and accessories, and LensCoat stuff.
As always, we sell only what I have used, have tested, and can depend on. We will not sell you junk. We know what you need to make creating great images easy and fun. And please remember that I am always glad to answer your gear questions via e-mail.
I would of course appreciate your using our B&H affiliate links for all of your major gear, video, and electronic purchases. For the photographic stuff mentioned in the paragraph above, and for everything else in the new store, we, meaning BAA, would of course greatly appreciate your business. Here is a huge thank you to the many who have been using our links on a regular basis and those who will be visiting the New BIRDS AS ART Online Store as well.
Amazon.com
Those who prefer to support BAA by shopping with Amazon may use the logo link above.
Amazon Canada
Many kind folks from north of the border, eh, have e-mailed stating that they would love to help us out by using one of our affiliate links but that living in Canada and doing so presents numerous problems. Now, they can help us out by using our Amazon Canada affiliate link by starting their searches by clicking here.
Facebook
Be sure to like and follow BAA on Facebook by clicking on the logo link upper right. Tanks a stack.
Typos
In all blog posts and Bulletins, feel free to e-mail or to leave a comment regarding any typos or errors. Just be right :).
October 13th, 2017 Stuff
I started off Thursday watching the Yankees complete their amazing comeback on Tivo. The plan for Thursday night is to Tivo both the MLB playoff game — the Cubs v.s the Nats, and the NFL Thursday Night game — Philly vs. Carolina, and then watch first one then the other toggling back and forth. I am slightly pulling for the Nationals in the baseball game as they too were down 2 games to nothing and have never won a post-season series. And the Cubs did OK last year. On the NFL channel I will be rooting hard for the Panthers. Again I enjoyed a midday and an early evening swim totaling an even mile, 88 lengths. And lots of exercising and stretching.
With only a single slot open on the San Diego IPT, I added a second San Diego IPT — shorter and less expensive. I was glad to learn that Fort DeSoto Fall IPT participant Lee Sommie was the first to sign up for San Diego #2. See the announcement in the blog post here.
New Listing
Canon EF 400mm f/4 DO IS w/free 1.4X II TC!
Francois Botha is offering a Canon EF 400mm f/4 DO IS (with Canon 1.4 extender in excellent condition) for the BAA record low price (for the lens alone!) of $2098. The sale includes the rear lens cap, the front lens cover, both teleconverter caps, LensCoats for both the lens and the TC, the original product box, and insured ground shipping via UPS to US addresses only. Photos are available via email or DropBox.
Your item will not ship until your check clears unless other arrangements are made.
Please contact Francois via e-mail or by phone at 1-859-325-1785 (Eastern time).
I used this lens for several years with great success, especially for birds in flight and while working from various type of water craft. In addition, it would make a great prime super-telephoto lens for folks with a 7D II. Gannets in Love was created with the 400 DO. You can see that one and 13 other killer images that I made with my old 400 DO here. The title of that blog post is “The Canon 400mm f/4 IS DO Lens: Fourteen Images that Prove that the Internet Experts are Idiots.” Francois’ lens is priced to sell. artie
Price Drop!
Canon EF 70-200mm f/2.8L IS II USM Zoom Lens
Price dropped $100 on October 12, 2017.
Les Greenberg is offering a used Canon EF 70-200mm f/2.8L IS II USM zoom lens in mint condition for a very low $1499 (was $1599). The sale includes a Kirkphoto LP-2 lens plate, the tripod collar, the lens case, the rear lens cap, the hood, the front lens cap, the original product box, and insured ground shipping to US addresses only. The lens was purchased new in 2010 and used less than a dozen times. Your item will not ship until your check clears unless other arrangements are made.
Please contact Les via e-mail or by phone at 1-216-571-3636 or 1-216-292-7510 after 6:00 PM (Eastern time).
The 70-200mm f/2.8L IS II lens is amazingly versatile. I still own one and have made zillions of great images with it. It works well with both the 1.4X III and the 2X III TCs, even with the 7D II! It is easily hand holdable. It is great for tame birds, landscapes, urbex, indoor stuff likes concerts and recitals, and just about anything you want to photograph. A new 70-200 II currently sells for $1,949 so you can save a cool $350 by buying Les’s mint copy asap. artie
ps: the 1.4X II TC is optically identical to the 1.4X III TC. The latter has better weather sealing and offers advance AF communication with the new Canon Series II super-telephoto lenses.
|
|
2017 in San Diego was a very good year ….
|
2018 San Diego 3 1/2-DAY BIRDS AS ART IPT #2: Sunday, JAN 28 thru and including a morning session on Wednesday, JAN 31, 2018: 3 1/2 days: $1699. Limit: 8: Openings: 7
Meet and Greet at 6:30pm on the evening before the IPT begins; Saturday, Jan 27, 2018.
San Diego IPT #2: Shorter and Less Expensive!
Please remember: I go with one.
Click here for details.
The Streak
Today makes seventy-eight days in a row with a new educational blog post! This blog post took less than an hour to prepare. With all of my upcoming free time (or not …), the plan right now is to break the current record streak of (I think) four hundred eighty something … Good health and good internet connections willing.
Booking.Com
Booking.Com came through for me twice again recently with both the DeSoto Fall IPT and next July’s UK Puffins, Gannets, and Bempton Pre-trip room reservations. And all the rates were great. If you’d like to give Booking.Com a shot, click here and you will earn a $25 reward. Thanks to the many who have already tried and used this great service.


Gear Questions and Advice
Too many folks attending BAA IPTs and dozens of folks whom I see in the field, and on BPN, are–out of ignorance–using the wrong gear especially when it comes to tripods and more especially, tripod heads… Please know that I am always glad to answer your gear questions via e-mail.
Fujifilm XT-2 Advantages
The huge advantage of using the Fujifilm 100-400//2x/XT-2 combination to get out to effective 1200mm as compared to using the Canon 600mm f/L IS II/2X III TC combo at 1200mm is that the size and weight of the Fujifilm gear is but a fraction of the weight of the Canon gear. This makes it far easier to hand hold, handle, and travel with the Fujifilm stuff. The Fujifilm XF 2x TC WR Teleconverter with the XF 100-400mm f/4.5-5.6 R LM OIS WR lens is sharp. In addition, you are able to zoom in an out from 200 to 800 mm (effective 300 to 1200mm).
So why didn’t I include the latest Nikkor 600mm f/4 lens with the latest version of the TCE 20? I do not know of any Nikon shooters who consistently use or create sharp images with this combination.
So Why Do I Stick With Canon?
So why do I continue to use my much heavier, much bulkier Canon gear? For now, at least, the image quality of my 5D Mark IV images is significantly superior to the image quality of the (smaller) XT-2 image files. In addition, I like the more natural color of the Canon images. The latter may be due to the fact that I use DPP 4 to convert my Canon RAW files and my experience with that process. Lastly, the Fujifilm stuff made flight and action photography nearly impossible. As I will be 72 next June, switching to a lighter system might be in my future. But not just yet.
Another Fujifilm X-T2 Mirrorless Digital Camera Body Image
Regular readers will likely remember that I experimented with the Fujifilm X-T2 Mirrorless Digital Camera body on my last trip to San Diego. You can learn more about that experience in the Quite Impressive: First Fujifilm XT-2 Image blog post here and in several blog posts that followed. For more on using the Fujifilm 100-400//2x/XT-2 combo handheld check out the Is the Fujifilm XT-2 Capable of Creating Sharp Images Hand Held at Effective 1200mm? blog post here.
Image Question
There is one thing that really bugs me about this image. What do you think it is? Does anything bug you?
|
|
The ACR conversion for today’s featured image
Please click on the image so that you can read the fine print.
|
The RAW Conversion in ACR
As detailed in the The BIRDS AS ART Current Workflow e-Guide (Digital Basics II), I followed these steps for converting the RAW file in Photoshop using ACR:
1: I placed the eyedropper on the brightest WHITEs.
2: I reduced the exposure to -.2 to bring down the WHITE RGB values.
3: I set the White Point at +15 and set the Black Point at +5 (both while holding down the ALT key).
4: I pulled down the Highlights slider to -55 to restore detail to the still very bright WHITEs.
5: I set the Clarity slider to +28.
6: I clicked on Open Object to convert the RAW file to a 16-bit TIF file and open that in Photoshop.
The Image Optimization
First, I cleaned up the white specks on the rocks with the Spot Healing Brush (J). Then I cleaned up a bit of the lower center frame edge in two spots with Content Aware Fill (Shift + Delete). The big job was to eliminate the BLUE cast from the dark rocks. To check for a BLUE cast go to Hue/Saturation, select the BLUE channel from the dropdown menu, and move the Saturation slider to +100. That revealed lots of BLUE in the rocks (and of course in the BLUE sky). Then I moved the Saturation slider to -100. This eliminated the BLUE cast on the dark rocks but left the sky grey. I liked the “grey” look a lot but decided to go with the original blue sky. As I was working on a layer, I simply added a Regular Layer Mask and erased the BLUE desaturation from the sky and the bird using a large, soft, 100% opacity brush.
Noise Reduction
In general, XT-2 images show more noise than 5D Mark IV images. With the basically white subject, I decided to do my NeatImage noise reduction on the whole image. Working on a layer, I wound up applying the noise reduction with the Y-value set to a rather high 85 (to smooth the noise in water and the rocks). This however, affected the fine feather detail so I added a Regular Layer Mask and — using a 50% opacity brush, painted away half the noise reduction on the bird only using a soft brush. To learn everything that there is to know about noise reduction using NeatImage (and lots more!) see the Professional Post Processing Guide by clicking here.
|
|
|
The BIRDS AS ART Current Workflow e-Guide (Digital Basics II) will teach you an efficient Mac/Photo Mechanic/Photoshop workflow that will make it easy for you to make your images better in Photoshop (rather than worse). That true whether you convert your images in DPP 4 or ACR. See the blog post here to learn lots more and to read a free excerpt.
You can order your copy from the BAA Online Store here, by sending a Paypal for $40 here, or by calling Jim or Jennifer weekdays at 863-692-0906 with your credit card in hand.
|
The BIRDS AS ART Current Workflow e-Guide (Digital Basics II)
Everything mentioned above is covered in detail in the BIRDS AS ART Current Workflow e-Guide (Digital Basics II), an instructional PDF that is sent via e-mail. Learn more and check out the free excerpt in the blog post here. The new e-Guide reflects my Macbook Pro/Photo Mechanic/DPP 4/Photoshop workflow. Do note that you will find the RGB Curves Adjustment Color Balancing tutorial only in the new e-guide. Note: folks working on a PC and/or those who do not want to miss anything Photoshop may wish to purchase the original Digital Basics along with DB II while saving $15 by clicking here to buy the DB Bundle.
The two most recent and many of the older MP4 Photoshop Tutorial videos releases go hand and hand with the information in DB II):
- The Wingtip Repairs MP4 Video here.
- The MP4 Crow Cleanup Video here.
Folks who learn well by following along rather than by reading can check out the complete collection of MP 4 Photoshop Tutorial Videos by clicking here.
You can learn how and why I and other discerning Canon shooters convert nearly all of their Canon digital RAW files in DPP 4 using Canon Digital Photo Professional in the DPP 4 RAW conversion Guide here. And you can learn advanced Quick Masking and advanced Layer Masking techniques in APTATS I & II. You can save $15 by purchasing the pair. Folks can learn sophisticated sharpening and (NeatImage) Noise Reduction techniques in the The Professional Post Processing Guide by Arash Hazeghi and yours truly.
If In Doubt …
If in doubt about using the BAA B&H affiliate link correctly, you can always start your search by clicking here. Please note that the tracking is invisible. Web orders only. Please, however, remember to shoot me your receipt via e-mail.


Please Remember to use my Affiliate Links and to Visit the New BAA Online Store 🙂
To show your appreciation for my continuing efforts here, we ask, as always, that you get in the habit of using my B&H affiliate links on the right side of the blog for all of your photo and electronics purchases. Please check the availability of all photographic accessories in the New BIRDS AS ART Online Store, especially the Mongoose M3.6 tripod head, Wimberley lens plates, Delkin flash cards and accessories, and LensCoat stuff.
As always, we sell only what I have used, have tested, and can depend on. We will not sell you junk. We know what you need to make creating great images easy and fun. And please remember that I am always glad to answer your gear questions via e-mail.
I would of course appreciate your using our B&H affiliate links for all of your major gear, video, and electronic purchases. For the photographic stuff mentioned in the paragraph above, and for everything else in the new store, we, meaning BAA, would of course greatly appreciate your business. Here is a huge thank you to the many who have been using our links on a regular basis and those who will be visiting the New BIRDS AS ART Online Store as well.
Amazon.com
Those who prefer to support BAA by shopping with Amazon may use the logo link above.
Amazon Canada
Many kind folks from north of the border, eh, have e-mailed stating that they would love to help us out by using one of our affiliate links but that living in Canada and doing so presents numerous problems. Now, they can help us out by using our Amazon Canada affiliate link by starting their searches by clicking here.
Facebook
Be sure to like and follow BAA on Facebook by clicking on the logo link upper right. Tanks a stack.
Typos
In all blog posts and Bulletins, feel free to e-mail or to leave a comment regarding any typos or errors. Just be right :).
October 12th, 2017 Stuff
Wednesday was a lazy day. I finished the second edit of my recent Fort DeSoto Fall IPT images, watched some MLB games on the tube, and enjoyed two easy swims totaling one mile.
With only a single slot open on the San Diego IPT, I decided to add a second San Diego IPT — shorter and less expensive. I was glad to learn that Fort DeSoto Fall IPT participant Lee Sommie was the first to sign up for San Diego #2. See the announcement in the blog post here.
|
|
2017 in San Diego was a very good year ….
|
2018 San Diego 3 1/2-DAY BIRDS AS ART IPT #2: Sunday, JAN 28 thru and including a morning session on Wednesday, JAN 31, 2018: 3 1/2 days: $1699. Limit: 8: Openings: 7
Meet and Greet at 6:30pm on the evening before the IPT begins; Saturday, Jan 27, 2018.
San Diego IPT #2: Shorter and Less Expensive!
Please remember: I go with one.
Click here for details.
The Streak
Today makes seventy-seven days in a row with a new educational blog post! This blog post took less than an hour to prepare. With all of my upcoming free time (or not …), the plan right now is to break the current record streak of (I think) four hundred eighty something … Good health and good internet connections willing.
Booking.Com
Booking.Com came through for me twice again recently with both the DeSoto Fall IPT and next July’s UK Puffins, Gannets, and Bempton Pre-trip room reservations. And all the rates were great. If you’d like to give Booking.Com a shot, click here and you will earn a $25 reward. Thanks to the many who have already tried and used this great service.


Gear Questions and Advice
Too many folks attending BAA IPTs and dozens of folks whom I see in the field, and on BPN, are–out of ignorance–using the wrong gear especially when it comes to tripods and more especially, tripod heads… Please know that I am always glad to answer your gear questions via e-mail.
Carpet Necks
Pacific race Brown Pelicans in non-breeding plumage have pure white hind-necks. In full breeding plumage they have rich, dark chocolate-colored hind-necks (like the bird in the pelican love affair blog post here). On molting birds like the one pictured above the hind-neck resembles a highly textured cut pile carpet. Years ago I affectionately nicknamed them carpet necks.
A High Level Subject to Sensor-Plane Orientation/Head Angle Question
The body of the bird in this image is oriented slightly away from me. Its head is turned a bit back towards me. Generally for this type of image I’d prefer that the head angle be 90 degrees, with the bird’s head perfectly parallel to the back of the camera. Why did I prefer the image with the head angled slightly away?
Another Fujifilm X-T2 Mirrorless Digital Camera Body Image
Regular readers will likely remember that I experimented with the Fujifilm X-T2 Mirrorless Digital Camera body on my last trip to San Diego. You can learn more about that experience in the Quite Impressive: First Fujifilm XT-2 Image blog post here and in several blog posts that followed.
This image caught my eye while going through the San Diego 2017 & all XT-2 Images to Transfer folder. The glow of the colors (luminosity?) made it stand out. I converted the image with my usual ACR workflow and in doing so I eliminated the glowing colors so I re-converted it with a much lighter touch and was happy with the results.
If In Doubt …
If in doubt about using the BAA B&H affiliate link correctly, you can always start your search by clicking here. Please note that the tracking is invisible. Web orders only. Please, however, remember to shoot me your receipt via e-mail.


Please Remember to use my Affiliate Links and to Visit the New BAA Online Store 🙂
To show your appreciation for my continuing efforts here, we ask, as always, that you get in the habit of using my B&H affiliate links on the right side of the blog for all of your photo and electronics purchases. Please check the availability of all photographic accessories in the New BIRDS AS ART Online Store, especially the Mongoose M3.6 tripod head, Wimberley lens plates, Delkin flash cards and accessories, and LensCoat stuff.
As always, we sell only what I have used, have tested, and can depend on. We will not sell you junk. We know what you need to make creating great images easy and fun. And please remember that I am always glad to answer your gear questions via e-mail.
I would of course appreciate your using our B&H affiliate links for all of your major gear, video, and electronic purchases. For the photographic stuff mentioned in the paragraph above, and for everything else in the new store, we, meaning BAA, would of course greatly appreciate your business. Here is a huge thank you to the many who have been using our links on a regular basis and those who will be visiting the New BIRDS AS ART Online Store as well.
Amazon.com
Those who prefer to support BAA by shopping with Amazon may use the logo link above.
Amazon Canada
Many kind folks from north of the border, eh, have e-mailed stating that they would love to help us out by using one of our affiliate links but that living in Canada and doing so presents numerous problems. Now, they can help us out by using our Amazon Canada affiliate link by starting their searches by clicking here.
Facebook
Be sure to like and follow BAA on Facebook by clicking on the logo link upper right. Tanks a stack.
Typos
In all blog posts and Bulletins, feel free to e-mail or to leave a comment regarding any typos or errors. Just be right :).
October 11th, 2017 Stuff
On Tuesday I had a lunch appointment at noon with my tax guy in Lakeland. Before and after that it was back to business as usual: answering e-mails and doing blog posts. And a swim and lots of exercise. I was glad to learn that the sale of Stephen November’s Canon EF 200-400mm f/4L IS USM Lens with Internal 1.4x Extender in near-mint condition for $8399 was finalized.
With only a single slot open on the San Diego IPT, I decided to add a second San Diego IPT — shorter and less expensive. See the announcement in yesterday’s blog post here.
|
|
birds as art: The Avian Photography of Arthur Morris/The Top 100
The companion e-book to the solo exhibit at TheNat, San Diego, California
birds as art: The Avian Photography of Arthur Morris/The Top 100
|
The e-book on CD is available for $20 on CD here or via download here. Studying great images is the best way to learn to improve your bird photography (he said modestly).
|
|
Least Tern chick with the 800 f/5.6, the 1.4X II TC, and the 1D Mark IV.
A sample page from the Top 100 e-book.
The Canon 800mm f/5.6L IS was one of my very favorite super-telephoto lenses. In the original The Art of Bird Photography I advised that it is generally better to choose a longer faster lens over a shorter, slower one …
|
Canon EF 800mm f/5.6L IS USM Lens
Steve Cashell is offering a Canon EF 800mm f/5.6L IS USM lens in near-mint condition for a very low $8399. The sale includes the rear lens cap, the E-180C front lens cover, the lens trunk with both keys, a Really Right Stuff LCF-51 lens foot, a Camo LensCoat, and insured ground shipping via major courier to US addresses only.
Your item will not ship until your check clears unless other arrangements are made.
Please contact Steve via e-mail or by phone at 1-734-693-4242 (Eastern time).
I owned and used the super-sharp 800mm f/5.6, often with a 1.4X TC, as my go-to super-telephoto lens for almost five years. If you work with birds that are tough to approach and have trouble making sharp images with the 2X III TC, this lens should have your name on it. The 800/5.6 is great from the car or from a blind. I was astounded when I counted to learn that 15 of the 67 images in my San Diego exhibit were created with my 800 … Note that the 800 and a 7D Mark II get you out to 1280mm. Add the 1.4X III TC and you wind up at 1792mm, almost 36X … They 800s sell new right now for $12,999 from B&H. B&H has a used one in similar condition for the insanely high price of $9,499.95. That gives you a choice: save $4,600 off the cost of a new one or $1,100.95 off the price of a used one … artie
|
|
2017 in San Diego was a very good year ….
|
2018 San Diego 3 1/2-DAY BIRDS AS ART IPT #2: Sunday, JAN 28 thru and including a morning session on Wednesday, JAN 31, 2018: 3 1/2 days: $1699.
Limit: 8: Openings: 8
Meet and Greet at 6:30pm on the evening before the IPT begins; Saturday, Jan 27, 2018.
San Diego IPT #2: Shorter and Less Expensive!
Please remember: I go with one.
Click here for details.
The Streak
Today makes seventy-six days in a row with a new educational blog post! This blog post took less than an hour to prepare. With all of my upcoming free time (or not …), the plan right now is to break the current record streak of (I think) four hundred eighty something … Good health and good internet connections willing.
Booking.Com
Booking.Com came through for me twice again recently with both the DeSoto Fall IPT and next July’s UK Puffins, Gannets, and Bempton Pre-trip room reservations. And all the rates were great. If you’d like to give Booking.Com a shot, click here and you will earn a $25 reward. Thanks to the many who have already tried and used this great service.


Gear Questions and Advice
Too many folks attending BAA IPTs and dozens of folks whom I see in the field, and on BPN, are–out of ignorance–using the wrong gear especially when it comes to tripods and more especially, tripod heads… Please know that I am always glad to answer your gear questions via e-mail.
Subject to Sensor-Plane Orientation Considerations
One of the first things that I consider when evaluating a situation is the subject to sensor-plane orientation. Ideal is having the bird perfectly parallel to the back of the camera. On sunny days, the subject to sensor-plane orientation will largely be determined by the wind. If the sun is in the east and the wind is from the north or south the bird will almost always be just right: 90 degrees to the light. Simply get on sun angle and the subject to sensor-plane orientation will be perfect. If the sun is out and behind you and the wind is in your face you will be shooting up the bird’s butt; i.e., not good! On cloudy days it is much easier to get the bird square to the back of your camera simply by changing your position. Understand, however, that on cloudy, somewhat bright days the light will still have direction … When both the light and the wind are behind you the subject will, to varying degrees, be facing you. Best is head-on, dead-on with the subject looking right down the lens barrel. Think getting close and making verticals in those situations. When the bird is angled toward you it is easy to create awkward compositions so be sure to consider the light and your perspective carefully when designing your images.
At times, when the light is relatively soft, a good strategy may be to to work slightly off sun angle — usually no more than 15 degrees for me, so that you can work with the bird perfectly parallel to the back of the camera.
A High Level Question on Choosing Your Perspective Carefully …
For today’s featured image the gull was angled slightly towards me; i.e., the head of the bird is a bit closer to me than the tail. Why didn’t I move a yard to my right to square the bird up perfectly?
If In Doubt …
If in doubt about using the BAA B&H affiliate link correctly, you can always start your search by clicking here. Please note that the tracking is invisible. Web orders only. Please, however, remember to shoot me your receipt via e-mail.


Please Remember to use my Affiliate Links and to Visit the New BAA Online Store 🙂
To show your appreciation for my continuing efforts here, we ask, as always, that you get in the habit of using my B&H affiliate links on the right side of the blog for all of your photo and electronics purchases. Please check the availability of all photographic accessories in the New BIRDS AS ART Online Store, especially the Mongoose M3.6 tripod head, Wimberley lens plates, Delkin flash cards and accessories, and LensCoat stuff.
As always, we sell only what I have used, have tested, and can depend on. We will not sell you junk. We know what you need to make creating great images easy and fun. And please remember that I am always glad to answer your gear questions via e-mail.
I would of course appreciate your using our B&H affiliate links for all of your major gear, video, and electronic purchases. For the photographic stuff mentioned in the paragraph above, and for everything else in the new store, we, meaning BAA, would of course greatly appreciate your business. Here is a huge thank you to the many who have been using our links on a regular basis and those who will be visiting the New BIRDS AS ART Online Store as well.
Amazon.com
Those who prefer to support BAA by shopping with Amazon may use the logo link above.
Amazon Canada
Many kind folks from north of the border, eh, have e-mailed stating that they would love to help us out by using one of our affiliate links but that living in Canada and doing so presents numerous problems. Now, they can help us out by using our Amazon Canada affiliate link by starting their searches by clicking here.
Facebook
Be sure to like and follow BAA on Facebook by clicking on the logo link upper right. Tanks a stack.
Typos
In all blog posts and Bulletins, feel free to e-mail or to leave a comment regarding any typos or errors. Just be right :).
|
|


