May 16th, 2015 Stuff
I am driving up to Charleston, SC early on Saturday morning to do some photography with Denise Ippolito who is doing additional scouting in the area for future workshops.
This blog post, the 128th in a row took about 2 hours to prepare. It was published automatically at 5:00am on Saturday morning. Enjoy denise’s great images and learn.
|
|
|
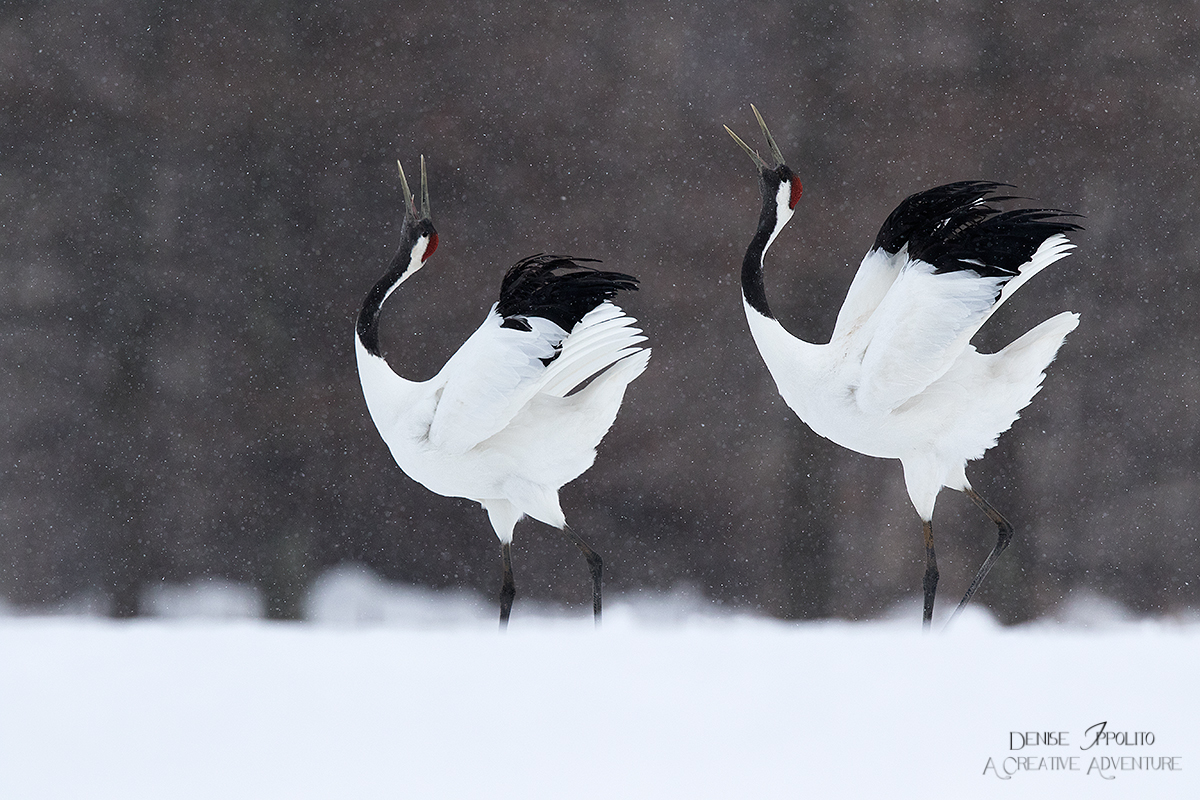
This image was created at Hokkaido, Japan this past winter by Denise Ippolito with the tripod-mounted Canon EF 600mm f/4L IS II USM lens and the Canon EOS 7D Mark II. ISO 800: 1/1600 sec. at f/6.3.
Image #1: Red-crowned Cranes, Hokkaido Japan.
Courtship calling display with woods-in-winter background.
Image courtesy of and copyright 2015 Denise Ippolito/A Creative Adventure
|
Even Denise Ippolito is Doin’ It!
Even Denise Ippolito is Doin’ What?
Even Denise Ippolito is loving her 7D Mark II whenever she needs additional reach. Can you say “bird photography?” Please remember that denise has discerning tastes when it comes to image quality and noise….
|
|
|
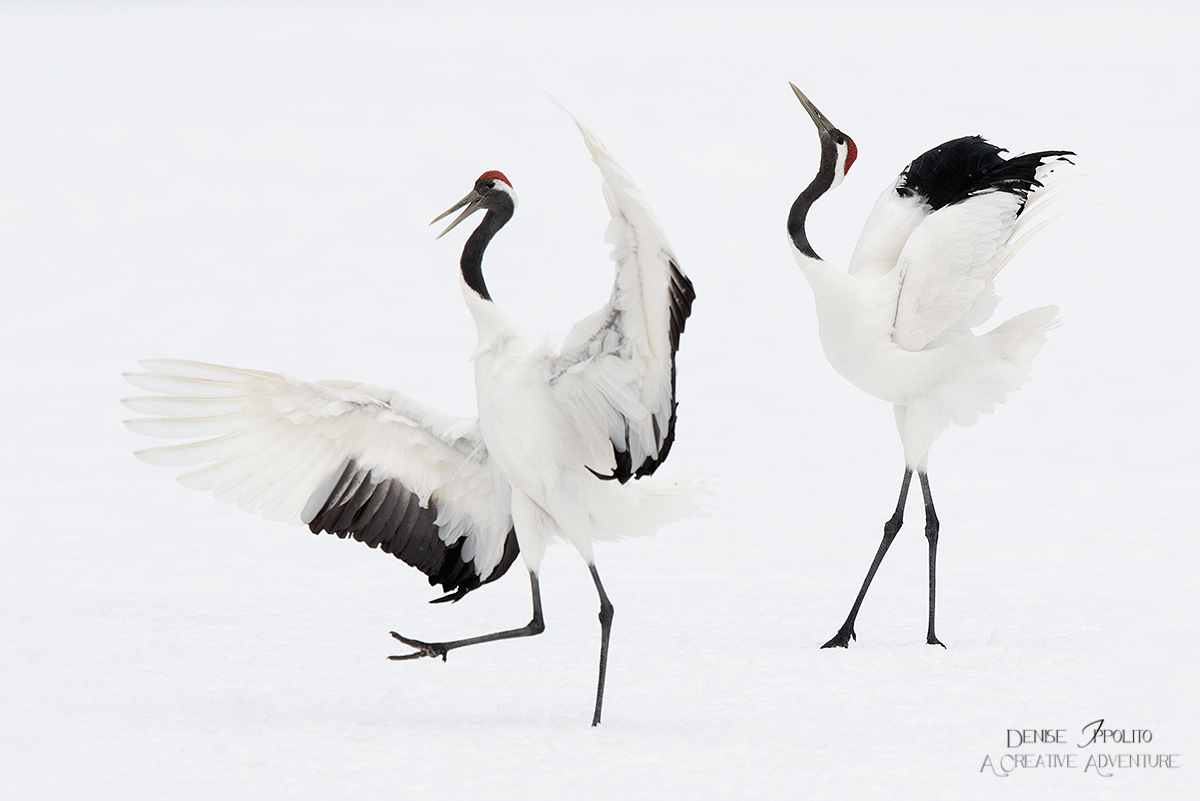
This image was created at Hokkaido, Japan this past winter by Denise Ippolito with the tripod-mounted Canon EF 600mm f/4L IS II USM lens and the Canon EOS 7D Mark II. ISO 500: 1/1250 sec. at f/7.1.
Image #2: Red-crowned Cranes, Hokkaido Japan.
Courtship Dance.
Image courtesy of and copyright 2015 Denise Ippolito/A Creative Adventure
|
Denise and the Original 7D
To put it mildly, denise did not like the original Canon 7D. She hated the small pixels and she hated the high ISO noise. I liked the camera when the sun was out and made some fine images with it, especially in San Diego where the sun is almost always shining. Except at night.
Be sure to see some of the images that top BPN Avian Forum Moderator Dan Cadieux created with his original 7D (and and the “old” 100-400) by clicking here.
BPN: Bird Photographer’s.Net: Honest critiques done gently. It ain’t just birds!
|
|
|
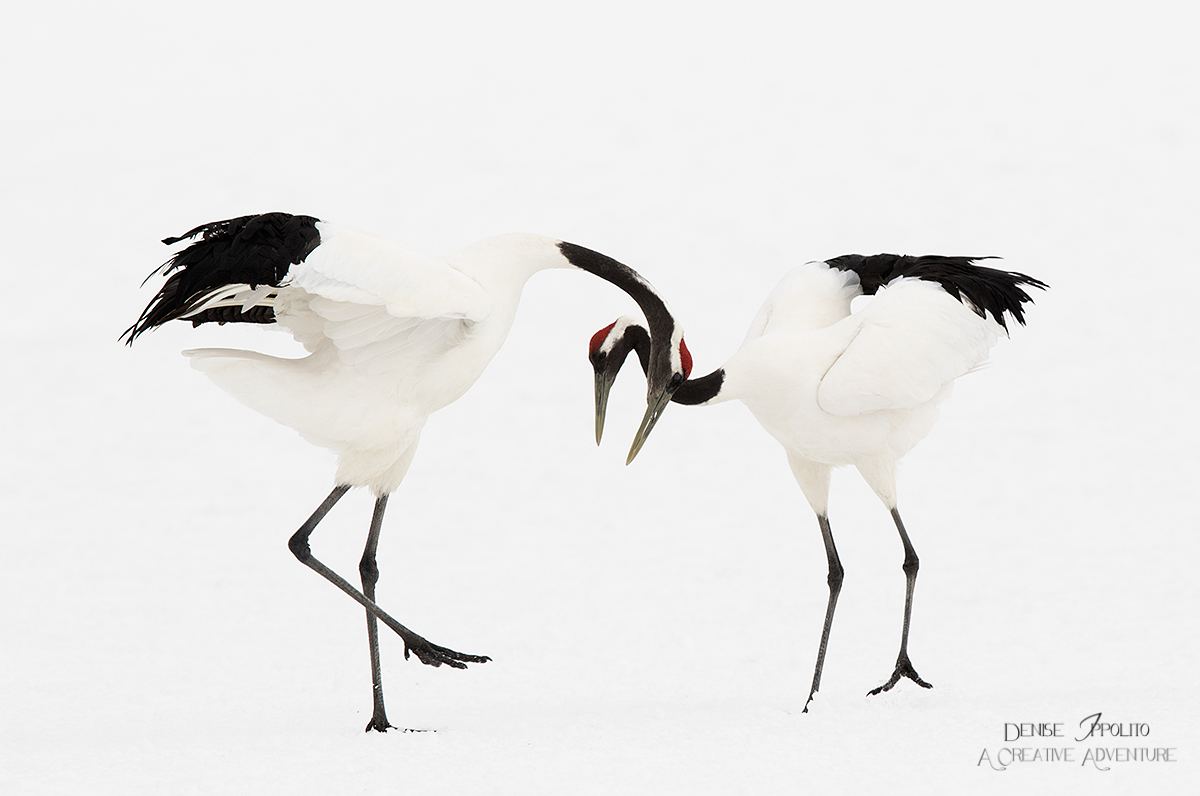
This image was created at Hokkaido, Japan this past winter by Denise Ippolito with the tripod-mounted Canon EF 600mm f/4L IS II USM lens and the Canon EOS 7D Mark II. ISO 500: 1/1250 sec. at f/8.
Image #3: Red-crowned Cranes, Hokkaido Japan.
Crossed necks courtship display.
Image courtesy of and copyright 2015 Denise Ippolito/A Creative Adventure
|
Denise on the 7D Mark II
I committed to using the 7D Mark II for nearly all of my photos in Japan this year. If I did not need the reach I opted for the Canon EOS 5D Mark III . After using my new 7D Mark II extensively on my Florida Everglades I felt 100% confident that the 7D II would perform to my standards. The sharpness and noise issues that I was initially concerned with turned out to be non-existent. The sharpness, color, noise control, and almost everything else was great.
|
|
|
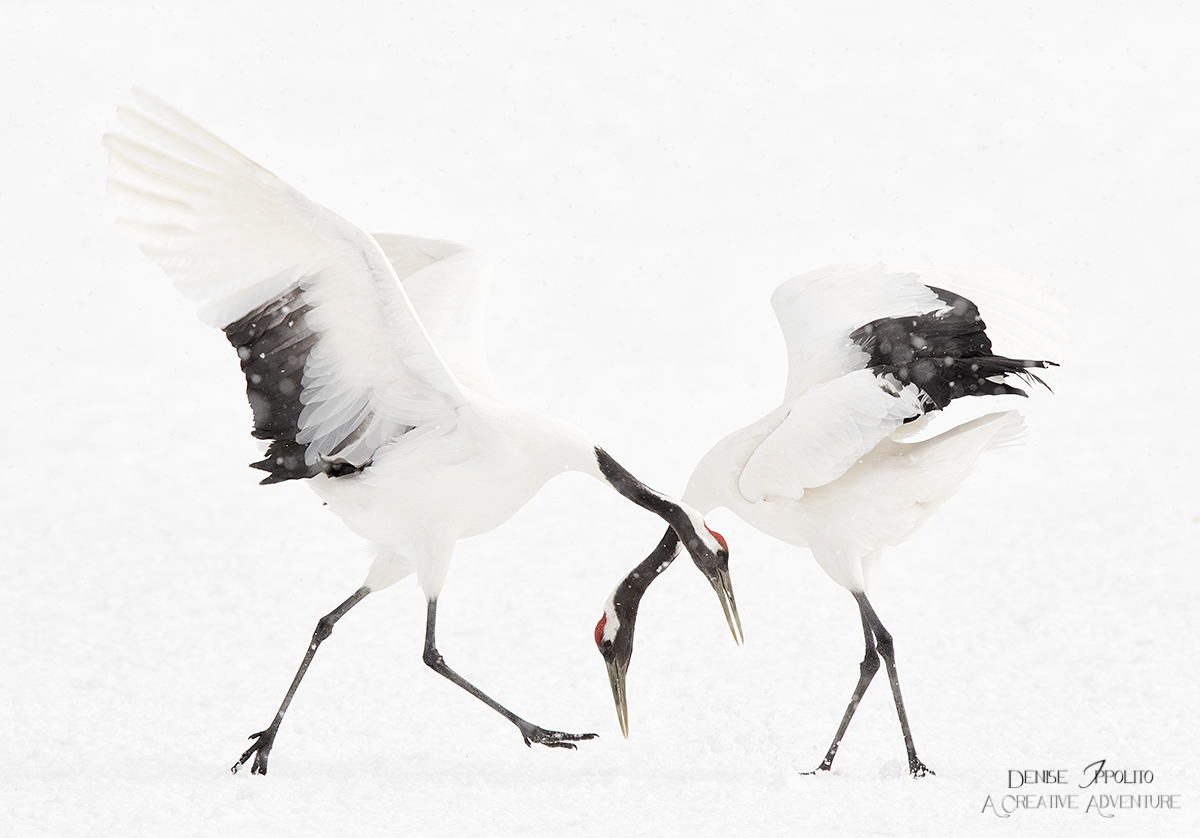
This image was created at Hokkaido, Japan this past winter by Denise Ippolito with the tripod-mounted Canon EF 600mm f/4L IS II USM lens and the Canon EOS 7D Mark II. ISO 500: 1/1250 sec. at f/8.
Image #4: Red-crowned Cranes, Hokkaido Japan.
Crossed necks courtship display/one bird with wings raised.
Image courtesy of and copyright 2015 Denise Ippolito/A Creative Adventure
|
Japan 2017 A Creative Adventure/BIRDS AS ART Instructional Photo Tour: February, 2017.
Two Great Leaders: Denise Ippolito and Arthur Morris
The Japan 2016 A Creative Adventure/BIRDS AS ART Instructional Photo Tour has been sold out with a waiting list for more than a year. We will be planning our Japan 2017 A Creative Adventure/BIRDS AS ART IPT on our visit next February. The dates will be announced upon our return. In the meantime, if you want us to save you a spot please shoot me an e-mail.


The 7D Mark II
If what you read here today and in the past has inspired you to finally purchase this great camera it would be greatly appreciated if you use my B&H logo link above.
|
|
|
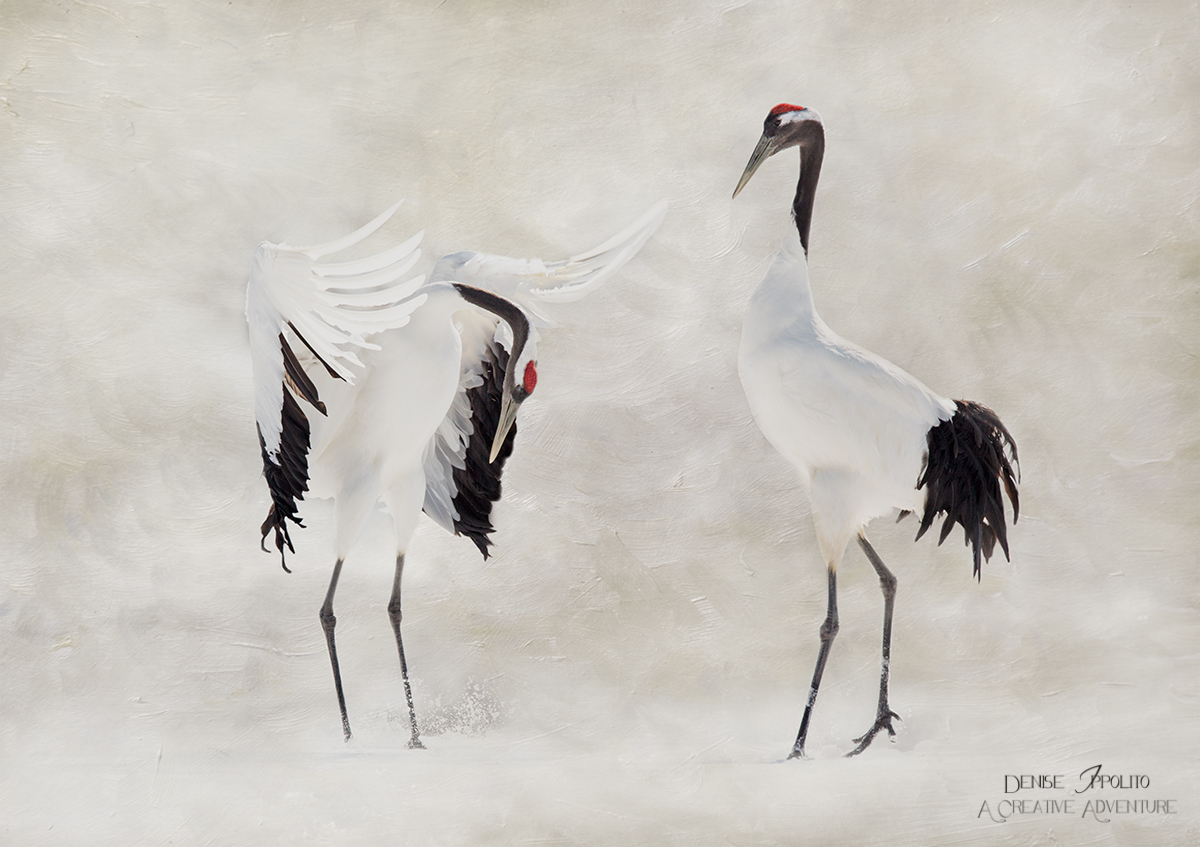
This image was created at Hokkaido, Japan this past winter by Denise Ippolito with the tripod-mounted Canon EF 600mm f/4L IS II USM lens and the Canon EOS 7D Mark II. ISO 500: 1/1600 sec. at f/6.3.
Image #5: Red-crowned Cranes.
Bowing display with Texture Overlay. Hokkaido Japan.
Image courtesy of and copyright 2015 Denise Ippolito/A Creative Adventure
|
Denise’s Photo Philosophy
I love to photograph action, flight and intimate moments. Lots of my inspiration comes from just watching my subjects as they go about their business. I look for patterns in behavior so that I can get set up and prepare for the repeats. I also look for anything out of the ordinary like a bird that is more active than the others. I also search out backgrounds; I keep my eye on those especially pleasing backgrounds and wait for my subjects to move in front of them. I am often monitoring several good situations at once so that I can switch gears at a moments notice when something materializes.
Denise’s Creativity
Simply put, denise’s creativity is unmatched.
|
|
A Guide to Creative Filters and Effects II/a new eBook by Denise Ippolito
|
New: A Guide to Creative Filters and Effects II
In her new eBook, “A Guide to Creative Filters & Effects II,” denise shares her techniques and her amazing creative vision with you. She covers the use of texture overlays, a variety of Photoshop and plug-in filters and effects, making targeted adjustments, blending modes, layer masks, inverting color, creating black and white images, the warp tool, adding borders, flipping, pinch twirls, zoom blurs, Topaz, Snap Art, and more. Denise will expand the horizon for all creative photographers.
You can order your copy here.
|

|
The Original Guide to Creative Filter’s and Effects by Denise Ippolito
|
The Original Guide to Creative Filter’s and Effects by Denise Ippolito
With the introduction of the new guide, denise’s original “A Guide to Filter’s and Effects” is on sale for $16. You can order your copy here.
Facebook
Be sure to like and follow BAA on Facebook by clicking on the logo link upper right. Tanks a stack!
Support the BAA Blog. Support the BAA Bulletins: Shop B&H here!
We want and need to keep providing you with the latest free information, photography and Photoshop lessons, and all manner of related information. Show your appreciation by making your purchases immediately after clicking on any of our B&H or Amazon Affiliate links in this blog post. Remember, B&H ain’t just photography!
…..
Amazon.com
Those who prefer to support BAA by shopping with Amazon may use this link:
Amazon Canada
Many kind folks from north of the border, eh, have e-mailed stating that they would love to help us out by using one of our affiliate links but that living in Canada and doing so presents numerous problems. Now, they can help us out by using our Amazon Canada affiliate link by starting their searches by clicking here. Many thanks to those who have written.
Typos
In all blog posts and Bulletins, feel free to e-mail or to leave a comment regarding any typos or errors. Just be right :).
May 15th, 2015 Stuff
With the shoulder healing there will be no swimming for a while but I did enjoy my ice bath. Yesterday I got five optimized hi-res files on the way to the folks at The Nat, the San Diego Natural History Museum to be used for advanced publicity for my solo exhibit. It will feature 60 of my very favorite images from the past 33 years, will be opening next January, and hang for three months. I got lots more done on Thursday including working on a few writing projects.
This blog post, the 127th in a row took about 1 1/2 hours to prepare. It was published at about 5:30am on Friday morning. Enjoy and learn.
New Used Photo Gear Listing
You can see the complete Used Photography Gear For Sale listings here.
Canon EF 100-400mm f/4.5-5.6L IS USM
Lowest-ever price on this item; this one should sell instantly!
Owen Peller is offering a used Canon EF 100-400mm f/4.5-5.6L IS USM lens excellent plus condition for $799.00. The sale includes the front and rear lenses caps, the tripod collar, the original box, the original case with strap, and insured shipping to US addresses. You can call Owen at at 954-882-1480 (eastern time) or shoot him an e-mail. Your item will not ship until your check clears unless other arrangements are made.
I owned and used this great lens for well more than a decade and created hundreds of published images with it. Denise Ippolito owned and loved hers for years.


Canon’s Huge Megapixel Bodies
Many of you have read about the two new Canon 50+ megapixel bodies, the Canon EOS 5DS DSLR and the Canon EOS 5DS R DSLR. The two cameras look, sound, and pretty much are quite similar. I have withheld commenting until now because I did not have a good–heck, I did not have any–understanding of the single difference between the two bodies, that being the Low-Pass Filter Effect Cancellation.
If you missed the hugely popular “Canon’s Two New 50+ Megapixel Camera Bodies/You Must Read This Before You Buy,” you can click here to catch up and learn a ton to boot.
Please Remember to use our Affiliate Links 🙂
To show your appreciation for my continuing efforts here, we ask, as always, that you use our the B&H and Amazon affiliate links on the right side of the blog for all of your purchases. B&H is recommended for you major photography gear purchases, Amazon for your household, entertainment, and general purpose stuff. Please check the availability of all photographic accessories in the BIRDS AS ART Online Store, especially the Mongoose M3.6 tripod heads, Gitzo tripods, Wimberley heads and plates, LensCoats and accessories, and the like. We sell only what I have used, have tested, and can depend on. We will not sell you junk. We know what you need to make creating great images easy and fun. And we are always glad to answer your gear questions via e-mail. I just learned that my account was suspended during my absence; it should be up and running by Monday at the latest.
I would of course appreciate your using our B&H affiliate links for all of your major gear, video, and electronic purchases. For the photographic stuff mentioned in the paragraph above we, meaning BAA, would of course greatly appreciate your business. Here is a huge thank you to the many who have been using our links on a regular basis and visiting the BAA Online store as well.
|
|
|
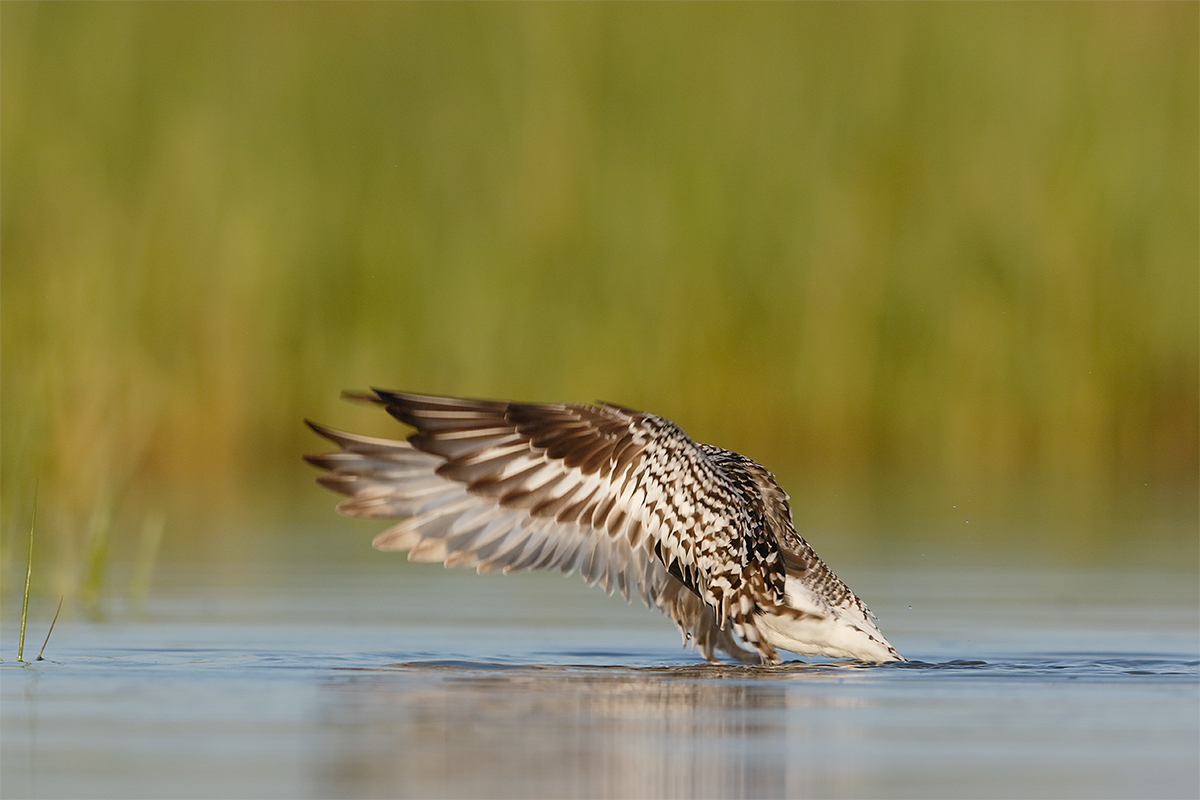
This image was created with the tripod-mounted Canon EF 600mm f/4L IS II USM lens, Canon Extender EF 1.4X III, and the Canon EOS 7D Mark II. ISO 400. Evaluative metering +1/3 stop: 1/1600 sec. at f/6.3 in Manual mode.
One AF point below the center AF point/AI Servo Surround/Rear Focus AF as originally framed was active at the moment of exposure. The selected AF point was on the lower center of the bird’s near wing. Click here to see the latest version of the Rear Focus Tutorial. Click on the image to see a larger version.
Image #1: Black-bellied Plover in breeding plumage “Look Ma, No Head”
|
Happiness Is
For me, happiness is the next breath. But when I am sitting behind my lowered tripod in a foot of water–lots more on that soon and how I fried a 1D X–on a calm morning with several shorebirds right down sun angle set against a pleasing distant, background, I am in what for me is bird photographer’s heaven. And it is exactly why I had the alarm set for 3:00am on Wednesday morning.
Bathing Bird Realizations
I am realizing more and more that when attempting to capture the after-bath flapping action that being a bit too far away is a lot better than being a bit too close. Too close and you almost always wind up clipping wings. In today’s two images we see the great advantage of being well back from the subject: you can get the whole bird in the frame on the front flap and on the overhead flap. And though I did not get it on this sequence, the same holds true for the wings-swept-all-the-way-back flap.
Exposure Fine Point Question
For the most part I was photographing Marbled Godwits and Short-billed Dowitchers in the sweet early morning light. With those two species I went with Evaluative metering +2/3 stop; that worked out to be 1/1250 sec. at 6.3. Why did I go 1/3 stop darker with the breeding plumage black-bellieds?
|
|
|
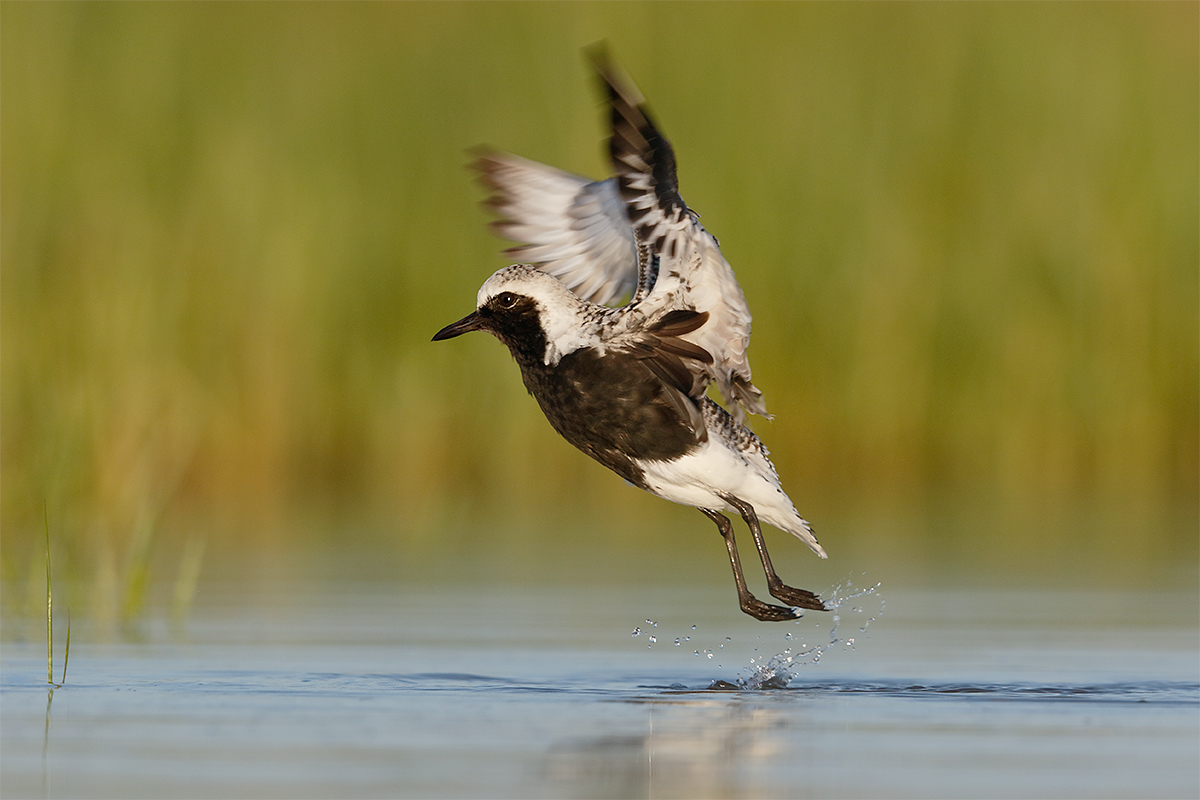
This image was created with the tripod-mounted Canon EF 600mm f/4L IS II USM lens, Canon Extender EF 1.4X III, and the Canon EOS 7D Mark II. ISO 400. Evaluative metering +1/3 stop: 1/1600 sec. at f/6.3 in Manual mode.
One AF point below the center AF point/AI Servo Surround/Rear Focus AF as originally framed was active at the moment of exposure. The selected AF point was just below the bird’s rear belly; the three assist point directly above the selected point surely helped maintain accurate focus. Click here to see the latest version of the Rear Focus Tutorial. Click on the image to see a larger version.
Image #2: Black-bellied Plover in breeding plumage “Ballet
|
Image Questions…
Which Came First?
Which image was created first in this two-frame sequence? How do you know? Please be specific.
Did I Move the Lens?
Did I move the lens when creating this two-frame sequence? How do you know? Please be specific.
The Fort DeSoto Site Guide
Though the sandbars at Fort DeSoto change every season with storms, the basics remain the same. The best spots are still the best spots and they are all covered in detail in the great Fort DeSoto Site Guide. Why spend days when visiting a new location when you can quickly learn when and where to be on what tide in what lighting conditions and on what winds? And if you are familiar with the basics at DeSoto you will find that the site guide shares lots of little tidbits that will make the purchase price well worthwhile.
You can check and see if there is a BAA Site Guide for your next photographic destination by clicking here.
Facebook
Be sure to like and follow BAA on Facebook by clicking on the logo link upper right. Tanks a stack!
Support the BAA Blog. Support the BAA Bulletins: Shop B&H here!
We want and need to keep providing you with the latest free information, photography and Photoshop lessons, and all manner of related information. Show your appreciation by making your purchases immediately after clicking on any of our B&H or Amazon Affiliate links in this blog post. Remember, B&H ain’t just photography!
…..
Amazon.com
Those who prefer to support BAA by shopping with Amazon may use this link:
Amazon Canada
Many kind folks from north of the border, eh, have e-mailed stating that they would love to help us out by using one of our affiliate links but that living in Canada and doing so presents numerous problems. Now, they can help us out by using our Amazon Canada affiliate link by starting their searches by clicking here. Many thanks to those who have written.
Typos
In all blog posts and Bulletins, feel free to e-mail or to leave a comment regarding any typos or errors. Just be right :).
May 14th, 2015 Stuff
The alarm was set for 3:00am yesterday but I woke at 2:25 and started getting things together for our Fort DeSoto/Dr. Rucker outing. Jim woke at 3:30am and we were on our way at 4:02. We arrived at North Beach at 6:30. There was not much going on at my favorite morning spot but I stuck it out. I started with some nice Marbled Godwit sunrise silhouettes. After that, the few birds that were present flew off as the tide advanced. I found a preening Wilson’s Plover and worked that for a while. Next was a single Marbled Godwit who was soon joined by a few more shorebird friends. On the way out I stumbled across two Wilson’s Plover chicks and got a few frames. Then it was off to Bradenton to get multiple injections. Those hurt a bit but overall everything went well. I did look at the images last night and was a bit disappointed; I got a new 1.4X TC and it it obvious that it needs to be micro-adjusted with the 600 II and my 7D II….
On the Way Home
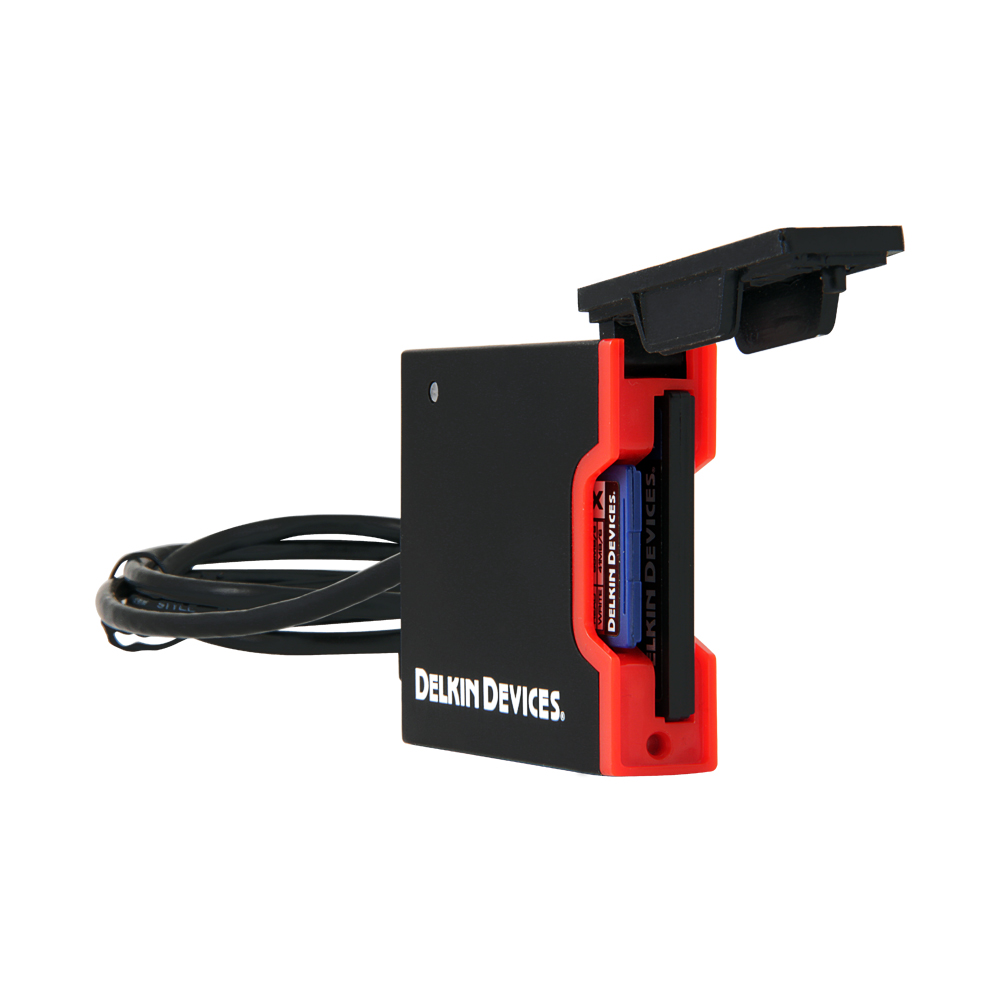
Next we stopped for some good Thai food in Bradenton. It is almost 3pm as I am typing. Jim is driving. God bless him. Having left my great new Delkin USB 3.0 High Speed Dual Slot Card Reader at home I will not get to see my images for a while. But I am sure that I got a few good ones that I will be sharing with you here soon.
This blog post, the 126th in a row, took about 1 1/2 hours to prepare. It was published automatically at 5:00am on Thursday morning.
By e-mail from Jim Robellard
Artie:
I can’t thank you enough for the great learning experience in St Augustine. As I look over the pictures from the IPT I can see the progress and increases in quality and possibilities from day to day. I wanted to really learn the camera and the flash and as I told a friend, I learned more about the 7D Mark II from you in a few days than I have in years of working with various cameras. It is one thing to read the Canon Instruction Manual, your great 7D Mark II User’s Guide, and the Canon autofocus manual, but to have you point out things to help me understand the camera to make it really sings for each scenario was and is amazing. I still love the flash-as-main light photos we did and the fill flash as well, but as someone who has gone to many a studio shoot for work, I’m thinking “This really looks like we posed Mrs. Egret in the studio.” it was truly amazing.
All the best and thanks again for sharing your knowledge with us both daily on the blog and on your IPTs. If you ever want to come down our way to shoot Tigertail or Corkscrew, Judy and I want to extend you an invitation to stay at the house here on Marco Island. I know your travel schedule is brutal and we travel as well but let’s keep in touch. PS: Judy’s a great cook and is just learning to deal with her diabetes. Good health and safe travels.
Jim
Quasi-Flash as Main Light
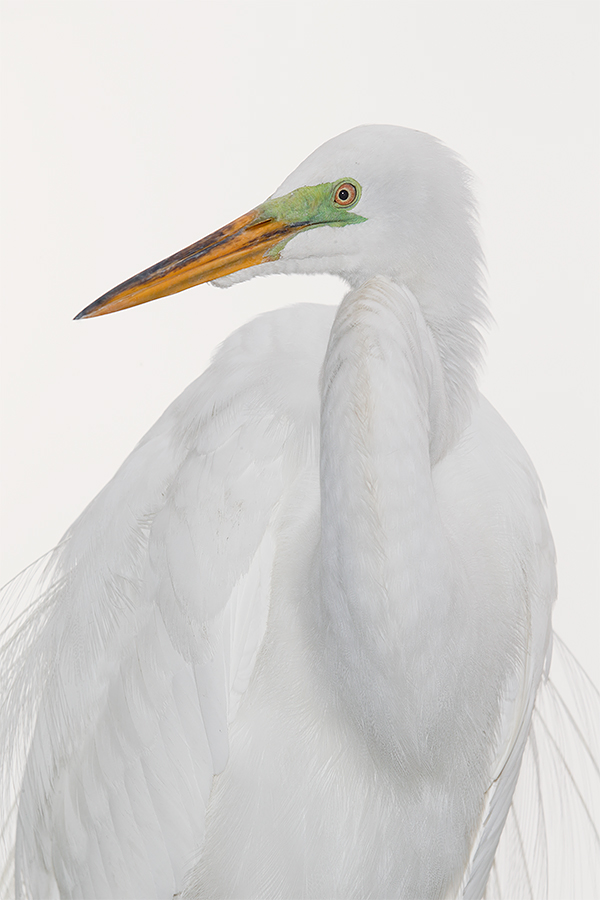
I call the technique used to create today’s featured image “quasi-flash as main light” because it combines elements of fill flash (work in Manual mode and get the ambient exposure right) with elements of flash as main light (use enough flash to completely and correctly illuminate the subject). Add a white sky background and you will wind up with a gorgeous studio look.
How did I determine the two correct exposures? For the ambient I went with +3 stops off the white sky. No surprise there. Then I simply varied the flash settings while looking at the image on the rear LCD. The only time that I want folks judging the look of an image on the rear LCD is when they need to determine the effectiveness of the flash…. For all the rest, get in the habit of using both your luminance and RGB histograms.
Coming Soon
I will be doing an illustrated blog post soon showing exactly why you need to have your flash on a flash bracket when using a super-telephoto lens. The picture will be worth a thousand words…. Check out the various flash bracket options here or shoot me an e-mail with questions. More soon on flash brackets as well.
Facebook
Be sure to like and follow BAA on Facebook by clicking on the logo link upper right. Tanks a stack!
Support the BAA Blog. Support the BAA Bulletins: Shop B&H here!
We want and need to keep providing you with the latest free information, photography and Photoshop lessons, and all manner of related information. Show your appreciation by making your purchases immediately after clicking on any of our B&H or Amazon Affiliate links in this blog post. Remember, B&H ain’t just photography!
…..
Amazon.com
Those who prefer to support BAA by shopping with Amazon may use this link:
Amazon Canada
Many kind folks from north of the border, eh, have e-mailed stating that they would love to help us out by using one of our affiliate links but that living in Canada and doing so presents numerous problems. Now, they can help us out by using our Amazon Canada affiliate link by starting their searches by clicking here. Many thanks to those who have written.
Typos
In all blog posts and Bulletins, feel free to e-mail or to leave a comment regarding any typos or errors. Just be right :).
May 13th, 2015 Stuff
I sent more than a hundred e-mails in a 24 hour period from Monday into Tuesday. Par for the course. I had a nice swim and enjoyed my ice bath. I had a phone conference with the folks at The Nat, the San Diego Natural History Museum. It is looking very much as if there will be a solo exhibit with 60 of my very favorite images from the past 33 years opening next January and hanging for three months. Nice :).
Jim and I are headed to Fort DeSoto this morning for a short busman’s holiday and then driving down to Bradenton for another series of PRP, Stem Cell, and Prolozone injections on my right shoulder and right middle (trigger finger). Two of my three existing trigger fingers were healed completely with the last set of injections and the right middle is 90% better. The shoulder was doing great for about a year until I tweaked it about 2 months ago….
This blog post, the 125th in a row took about 1 1/2 hours to prepare. It was published automatically at 5:00am on Wednesday morning.
|
|
|
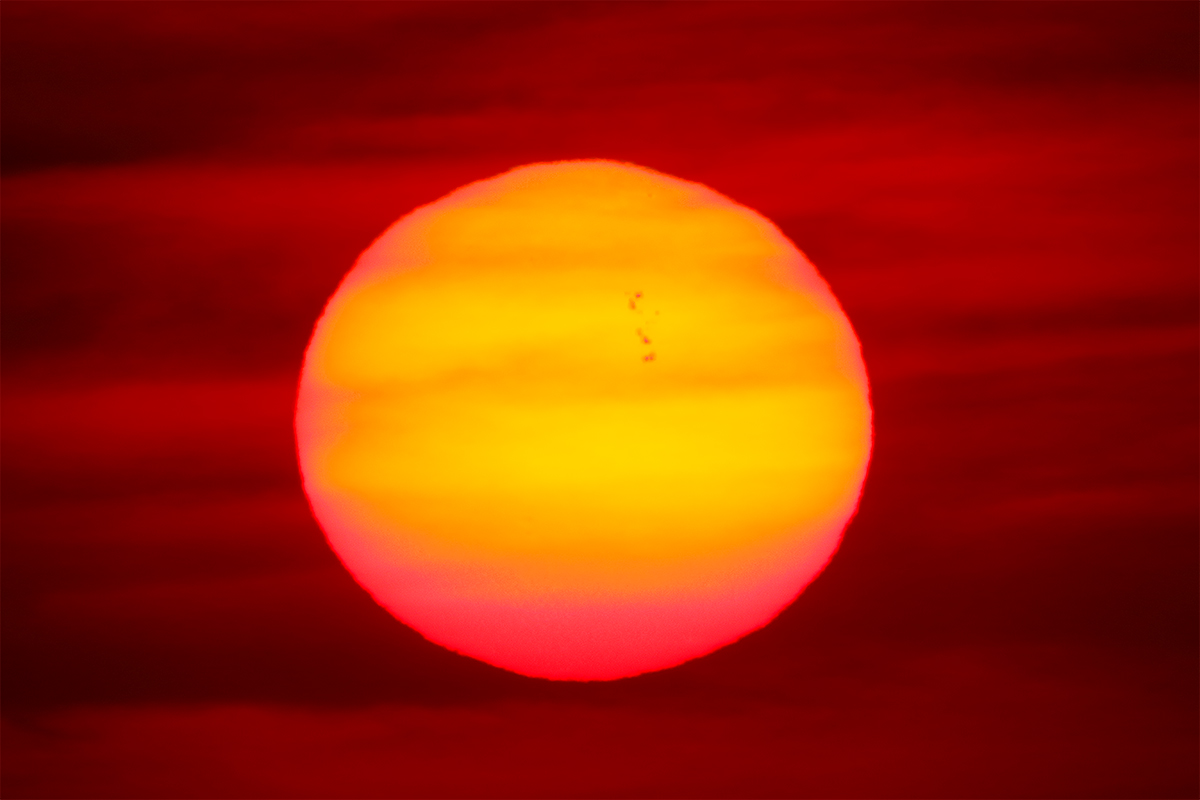
This image was created down by the lake near my home as part of my Sunset Addiction project. I used the tripod-mounted Canon EF 600mm f/4L IS II USM lens, the Canon Extender EF 2X III, and the amazing Canon EOS 7D Mark II. ISO 400. Evaluative metering at zero: 1/1250 sec. at f/11.
Center AF point (by necessity)/AI Servo Expand/Rear Focus AF on the edge of the sun and and re-compose. There are no worries on that when you are on a tripod (as opposed to when you are working from the car on a BLUBB. Click here to see the latest version of the Rear Focus Tutorial. Click on the image to see a larger version.
Sun at 7:57pm on May 9, 2015 at Indian Lake Estates, FL
|
Mega-Sun Fun
I like getting up and out very early. And I like staying in the field until well after sunset. Whenever I see a well muted sun I just cannot resist going long and created large-in-the-frame images of the orb that is our celestial light source. Every sunset is slightly different with different color tones and different skies. At times, the patterns of clouds can add drama to such images. And with the 7D II it is no longer necessary to stack extenders; a 600mm lens with a 2X III teleconverter and a 7D Mark II will produce a huge sun straight up. Remember that it is important that the sun be well muted, covered by a thin layer of clouds or fog, lest you risk damaging your retina. On clear mornings or evening the sun can damage our eyes even when it is touching the horizon.
Exposure Notes
If you need to underexpose more than a stop to prevent blinkies on a huge in the frame sun, you probably should not be looking through your lens at it. In this image the sun was so well muted that zero was fine. I could have even gone to +1/3. The big advantage in situations like this is that the sky does not go black.
Worthless or Worthwhile?
Many a stock agent has shown great interest in my huge suns. (I have been creating them for several decades even in the prehistoric days of film.) The truth however, is that I can barely recall ever selling one. Has it been worth it? For me, of course. No sales does not mean no fun: I love creating this type of image and will keep making them until I can no longer lift a big lens.
Sunspots
Are the small dark marks on the face of the sun sunspots? If not, what are they? If yes, can anyone shed some light as to what causes them? (Please pardon the sun pun.)
|
|
|
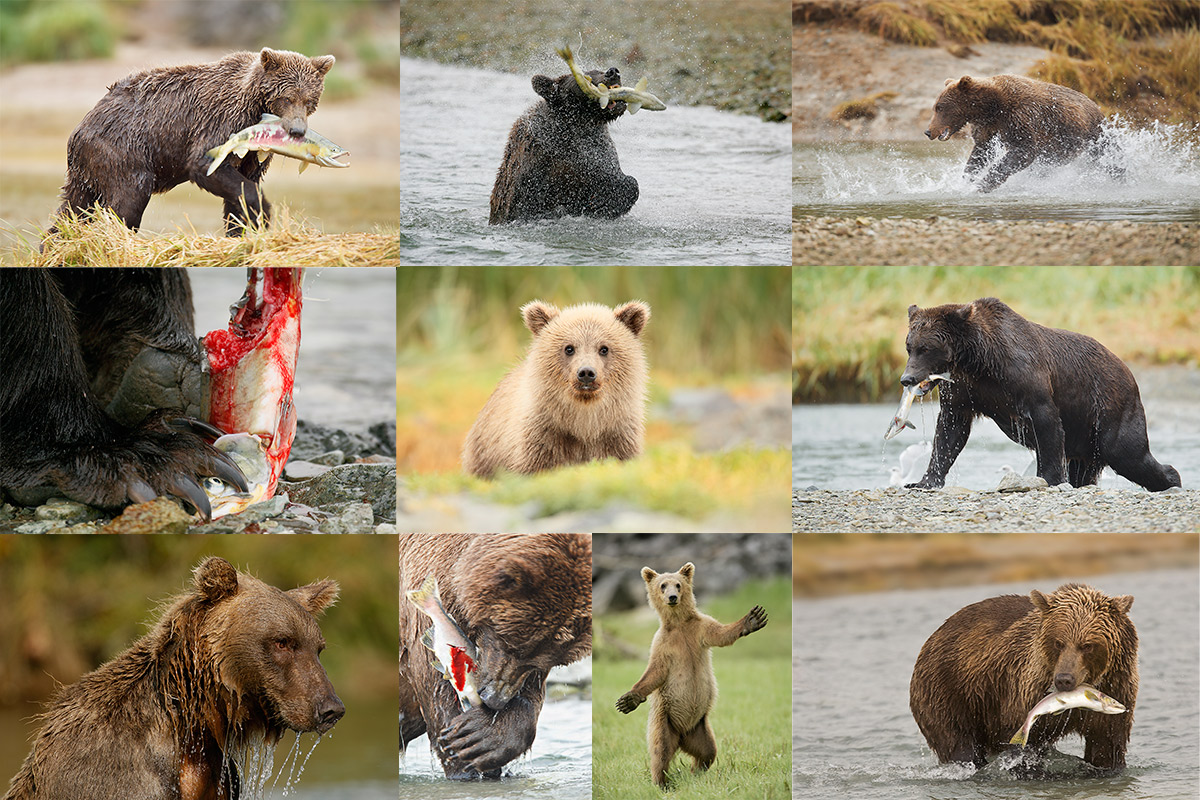
All of the images in the bear boat card above were created in Katmai National Park during the month of September.
|
Bear Boat/Bears Catching Salmon IPT: September 1-8, 2015 from Kodiak, AK/6 FULL & 2 1/2 DAYS: $6699. Happy campers only! Maximum 8/Openings: 3. Plus the leader: Arthur Morris.
This trip is a go.
Join me in Katmai National Park, AK for seven days of photographing Coastal Brown Bears (grizzlies) catching salmon, fattening up for the long winter. Other subjects will include Mew and Glaucous-winged Gulls in flight and dip-feeding on salmon roe. Did I mention that we live on a boat and that the food is great? Most of our photography will be done in a variety of famed locations: Geographic Harbor, Kinak Bay, and Kukak Bay. We once had 39 bears fishing the creek at Kukak….
It is mandatory that you be in Kodiak no later than the late afternoon of August 31, 2015 September to avoid missing the float planes to the boat on the morning of September 1. With air travel in AK being what it is, with the chance of fog or other bad weather–being on Kodiak on August 30 is an even better plan). I will be on Kodiak on August 30 to avoid any potential disaster. That said in my nearly a dozen bear boat trips I was delayed only once but since I was day early as noted above there was no harm, no foul.
We will take one or more float planes to the boat mid-morning on September 1. We will photograph bears fishing that afternoon and every day for the next six days (weather permitting of course). We should have bears catching salmon every day. In addition, we will get some nice stuff on Mew Gull and Glaucous-winged Gulls dining on roe and the remains of predated salmon. We may–depending on where the concentrations of bears are–get to photograph Harbor seals and some hauled out Steller’s Sea Lions (an endangered species). Halibut fishing (license required) is optional. On September 8, our last morning on the boat, those who would like to enjoy one last photo session will do so. The group returns to Kodiak via float plane midday. Most folks will fly to Anchorage and then continue on red-eye flights to their home cities.
The eight days will consist of six full days (Sept 2, 3, 4, 5, 6, & 7) of photography featuring lots of Coastal Brown Bears catching salmon as above plus a variety of other natural history subjects plus some nice scenic photography that I forgot to mention above. Plus the first afternoon and the last morning.
What’s included? 8 DAYS/7 NIGHTS on the boat as above. All meals on the boat. (The food is quite excellent.) National Park fees. One night’s double occupancy lodging on Kodiak; arrive: Sept 1/depart: Sept 2. The thank-you-in-advance dinner on Sept 1. In-the-field photo tips, instruction, and guidance. An insight into the mind of a top professional; I will constantly let you know what I am thinking, what I am doing, and why I am doing it. Small group image review, image sharing, and Photoshop instruction on the boat.
What’s not included: Your round trip airfare to and from Kodiak, AK (almost surely through Anchorage). All necessary lodging other than the cost of your double occupancy room on the night of August 31 should you opt to arrive early–we can arrange that in advance for you. We will let you know the cost of a single supplement for the one night if so desired. The cost of the round-trip float plane to the boat on September 2 and back to Kodiak on September 9. The cost of a round trip this year was $500. The suggested crew tip of $210.
Is this an expensive trip? Yes, of course. But with 6 full and two half days, a wealth of great subjects, and the fact that you will be walking with the bears just yards away (or less….) it will be one of the great natural history experiences of your life. Most folks who take part in a Bear Boat IPT wind up coming back for more.
A $2,000 per person non-refundable deposit by check only made out to “Arthur Morris” is required to hold your spot. Please click here to read our cancellation policy. Then please print, read, and sign the necessary paperwork here and send it to us.
Your deposit is due immediately. That will leave a balance of $4699. The next payment of $2699 will be due on February 15, 2015. The final payment of $2000 is due on May 1, 2015.
I hope that you can join us for this wondrously exciting trip.
By e-mail from Bill Keown, veteran of three bear boat trips!
Hi Artie, What a great trip! With the exception of the one bright sunny day it was just great. Very different from my first trip in June where we only had the bears clamming; the fishing bears were amazing! As always I learned a lot and enjoyed the group immensely. All the Best, Bill
Facebook
Be sure to like and follow BAA on Facebook by clicking on the logo link upper right. Tanks a stack!
Support the BAA Blog. Support the BAA Bulletins: Shop B&H here!
We want and need to keep providing you with the latest free information, photography and Photoshop lessons, and all manner of related information. Show your appreciation by making your purchases immediately after clicking on any of our B&H or Amazon Affiliate links in this blog post. Remember, B&H ain’t just photography!
…..
Amazon.com
Those who prefer to support BAA by shopping with Amazon may use this link:
Amazon Canada
Many kind folks from north of the border, eh, have e-mailed stating that they would love to help us out by using one of our affiliate links but that living in Canada and doing so presents numerous problems. Now, they can help us out by using our Amazon Canada affiliate link by starting their searches by clicking here. Many thanks to those who have written.
Typos
In all blog posts and Bulletins, feel free to e-mail or to leave a comment regarding any typos or errors. Just be right :).
May 12th, 2015 Stuff
I spent much of Monday answering e-mails and planning the January 2016 San Diego IPT (dates TBA soon). I enjoyed a nice 60-lengths of the pool swim and an ice bath. I watched Rickie Fowler’s incredible 8 under par on the last ten holes playoff victory at the Player’s Championship and the NY Rangers amazing, heart-stopping, game-seven-forcing victory over the Washington Capitals, both on Tivo. In the evening I helped Denise Ippolito edit a great Warp Tool tutorial she is posting today on her blog and caught up on some NBA playoff games; right now LeBron James and the Cavaliers are in deep trouble against the Chicago Bulls….
This blog post, the 124th in a row, took about 2 1/2 hours to prepare. It was published automatically at 4:00am on Tuesday morning.
|
|
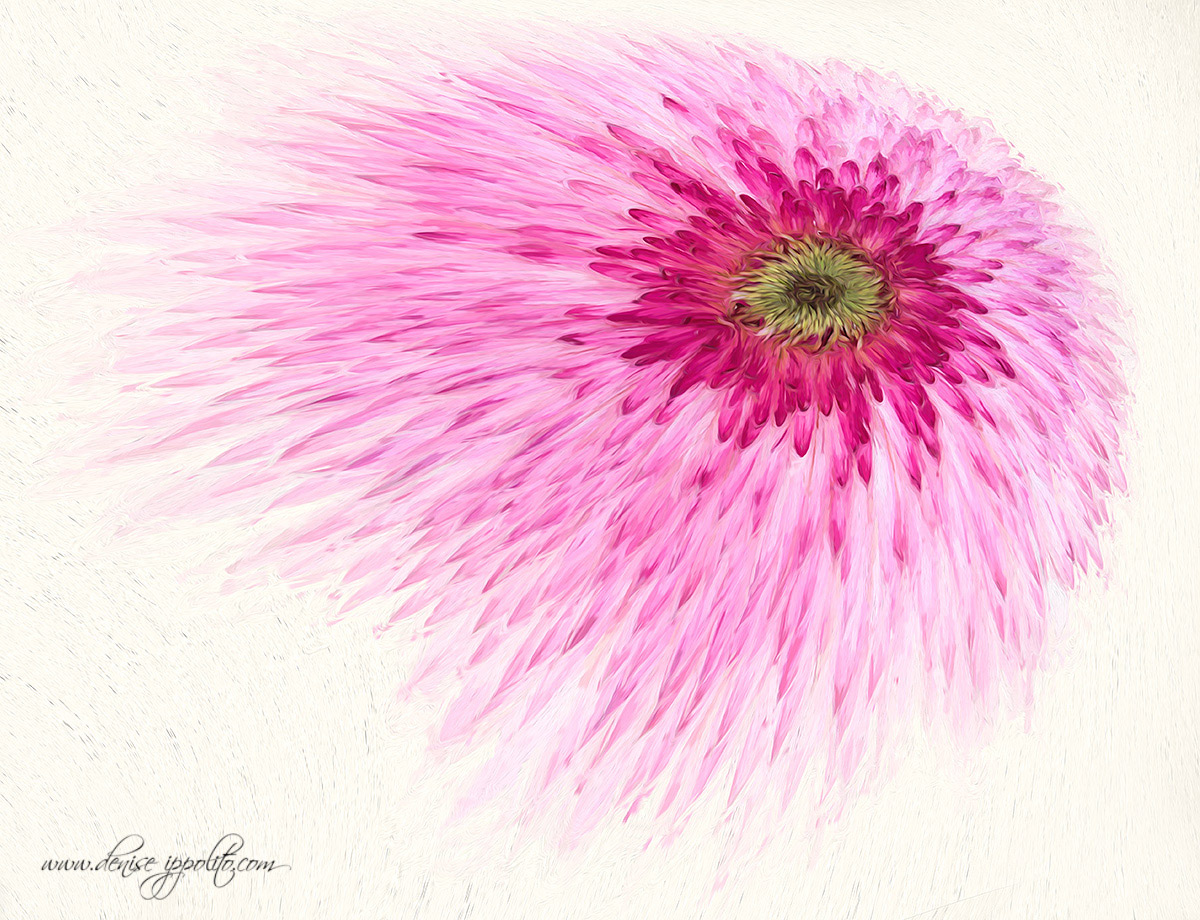
Gerbera Daisy Warp Tool Creation: Image courtesy of and copyright 2015: Denise Ippolito/A Creative Adventure
|
Warp Tool Tutorial
You can check out denise’s Warp Tool tutorial here.
Important Notes
I responded to all the comments on the Extreme Focal Length/High Contrast Chicks blog post here.
In addition, I responded to all the comments in the Flash Not Possible for the Two Chicks in the Nest Image blog post here. In answer to the question about why I chose my perspective so carefully David Peake of New Zealand nailed it when he wrote, It’s all about getting the chicks in front of that dark background.
Do understand that reading, studying, and checking back on the comments can heighten your learning experience.
New Used Photo Gear Listing
You can see the complete Used Photography Gear For Sale listings here.
Canon EF 100-400mm f/4.5-5.6L IS USM
Lowest-ever price on this item; this one should sell instantly!
Owen Peller is offering a used Canon EF 100-400mm f/4.5-5.6L IS USM lens excellent plus condition for $799.00. The sale includes the front and rear lenses caps, the tripod collar, the original box, the original case with strap, and insured shipping to US addresses. You can call Owen at at 954-882-1480 (eastern time) or shoot him an e-mail. Your item will not ship until your check clears unless other arrangements are made.
I owned and used this great lens for well more than a decade and created hundreds of published images with it. Denise Ippolito owned and loved hers for years.


Canon’s Huge Megapixel Bodies
Many of you have read about the two new Canon 50+ megapixel bodies, the Canon EOS 5DS DSLR and the Canon EOS 5DS R DSLR. The two cameras look, sound, and pretty much are quite similar. I have withheld commenting until now because I did not have a good–heck, I did not have any–understanding of the single difference between the two bodies, that being the Low-Pass Filter Effect Cancellation.
If you missed the hugely popular “Canon’s Two New 50+ Megapixel Camera Bodies/You Must Read This Before You Buy,” you can click here to catch up and learn a ton to boot.
Please Remember to use our Affiliate Links 🙂
To show your appreciation for my continuing efforts here, we ask, as always, that you use our the B&H and Amazon affiliate links on the right side of the blog for all of your purchases. B&H is recommended for you major photography gear purchases, Amazon for your household, entertainment, and general purpose stuff. Please check the availability of all photographic accessories in the BIRDS AS ART Online Store, especially the Mongoose M3.6 tripod heads, Gitzo tripods, Wimberley heads and plates, LensCoats and accessories, and the like. We sell only what I have used, have tested, and can depend on. We will not sell you junk. We know what you need to make creating great images easy and fun. And we are always glad to answer your gear questions via e-mail. I just learned that my account was suspended during my absence; it should be up and running by Monday at the latest.
I would of course appreciate your using our B&H affiliate links for all of your major gear, video, and electronic purchases. For the photographic stuff mentioned in the paragraph above we, meaning BAA, would of course greatly appreciate your business. Here is a huge thank you to the many who have been using our links on a regular basis and visiting the BAA Online store as well.
|
|
|
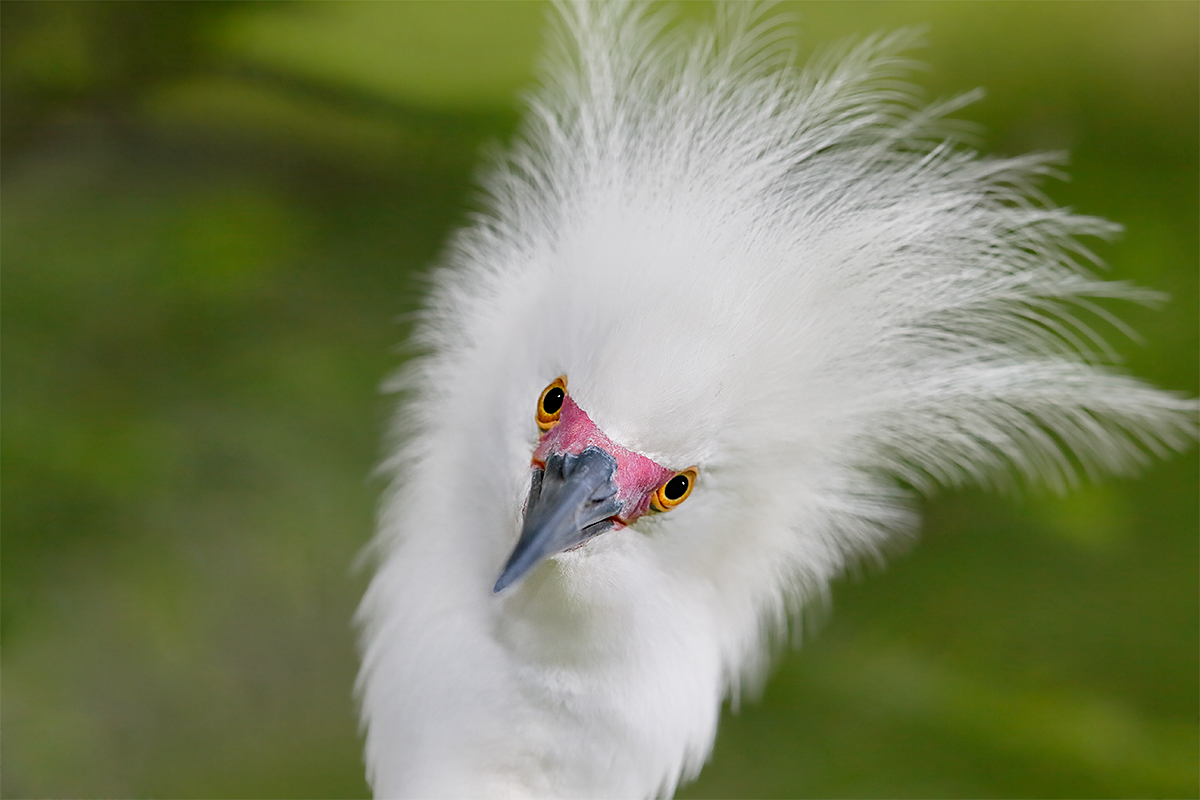
This image was created with the tripod-mounted Canon EF 600mm f/4L IS II USM lens, Canon Extender EF 1.4X III, and the Canon EOS-1D X . ISO 800: 1/160 sec. at f/8 (was more than a one stop underexposure; not sure how that happened….)
Fill flash at -3 stops with a Better Beamer on the Canon Speedlite 600EX-RT.
One AF point to the right of and one row below the center AF point/AI Servo Surround/Rear Focus AF as framed was active at the moment of exposure. The selected AF point was just above the bird’s right eye; the AF point just below that one was surely assisting as it fell squarely on the bird’s eye. Click here to see the latest version of the Rear Focus Tutorial. Click on the image to see a larger version.
Snowy Egret in full breeding plumage displaying in a shady spot
|
My #1 Tip for Photographing Birds in Bright Sun
On the recently concluded IPT there were dozens of folks (not on the IPT) who spent whole mornings photographing 90 degrees off sun angle from 8:30 to 10:30am for two reasons:
#1: They liked being close to lots of birds.
#2: They did not know any better. See my #1 tip for photographing birds in bright sun immediately below.
My #1 tip for photographing birds in bright sun is to point your shadow at the bird. That means that the sun should be coming right over the top of your head. Working no more than 15 degrees off sun angle can be effective if you are careful about how the sunlight hits the bird’s face. And that has everything to do with opening your eyes with regards to head angle.
My #2 Tip for Photographing Birds in Bright Sun
My #2 tip when facing the prospect of photographing birds in bright sun is to look for subjects in the shade.
And that is just what we were doing when we found the gorgeous male Snowy Egret that is the subject in today’s featured image.
Facebook
Be sure to like and follow BAA on Facebook by clicking on the logo link upper right. Tanks a stack!
Support the BAA Blog. Support the BAA Bulletins: Shop B&H here!
We want and need to keep providing you with the latest free information, photography and Photoshop lessons, and all manner of related information. Show your appreciation by making your purchases immediately after clicking on any of our B&H or Amazon Affiliate links in this blog post. Remember, B&H ain’t just photography!
…..
Amazon.com
Those who prefer to support BAA by shopping with Amazon may use this link:
Amazon Canada
Many kind folks from north of the border, eh, have e-mailed stating that they would love to help us out by using one of our affiliate links but that living in Canada and doing so presents numerous problems. Now, they can help us out by using our Amazon Canada affiliate link by starting their searches by clicking here. Many thanks to those who have written.
Typos
In all blog posts and Bulletins, feel free to e-mail or to leave a comment regarding any typos or errors. Just be right :).
May 11th, 2015 Stuff
I spent most of Sunday getting the images and captions for my San Diego article to Helen Longest Saccone at Nature Photographer Magazine after my Friday efforts failed: Apple Mail downsized the photo attachments 🙁
This blog post, the 123rd in a row, took about 2 1/2 hours to prepare. It was published at 6:53 am on Monday morning.
Used Photography Gear/New Listings Below
You can see the complete Used Photography Gear For Sale listings here.
Canon EF 100-400mm f/4.5-5.6L IS USM
Barbara Garmon is offering a used Canon EF 100-400mm f/4.5-5.6L IS USM lens in like-new condition for $899.00. The lens is cosmetically and operationally perfect. The sale includes the original box, the front and rear lens caps, the original box, the ET-83C lens hood, the LZ1324 lens case, and insured shipping to US addresses. You can call Barbara on her cell at 641-777-2578 (eastern time zone) or reach her via e-mail.
I owned and used this great lens for well more than a decade and created hundreds of published images with it. Denise Ippolito owned and loved hers for many years.
Canon EOS 7D DSLR Digital Camera Body (with battery grip)
Barbara Garmon is also offering a used Canon EOS 7D DSLR Digital Camera Body and the Canon BG-E7 Battery Grip in like-new condition for $579.00 (with lots of extras). There are no scratches or dings on the body that is in perfect operating condition.
The sale includes two (used) LP-E6 Rechargeable Lithium-Ion Battery Packs (7.2V, 1800mAh) and the the original box along with everything that came in it: one LC-E6 Charger, the IFC-200U USB Interface Cable – 6/9” (1.9m), the front body cap, the Stereo A/V Cable AVC-DC400S, the Wide Neck Strap EW-EOS7D, the Eyecup Eg, the Software CD-ROM, and the Instruction Manual. The sale also includes several items purchased separately: the official Canon E1 hand strap (only third party straps are available now), an OPTECH Super Pro Strap “B,” and the aforementioned Canon BG-E7 Battery Grip (with storage pouch). All that plus insured shipping to US addresses. You can call Barbara on her cell at 641-777-2578 (eastern time zone) or reach her via e-mail.
A used 7D makes a great entry level DSLR. Be sure to see the great images that Dan Cadieux created with his original 7D (and and the “old” 100-400) here.
Used Canon EF 100-400 f 4.5-5.6 L IS Lens
Price reduced $150 on 5/11/2015!
Multiple IPT veteran Jack Panzeca is offering a used Canon EF 100-400 f 4.5-5.6 L IS lens in very good + condition for $849 including insured shipping via UPS Ground to US addresses only. The tripod collar has one small scratch. The sale includes the original tough fabric case, the original box, the front and rear caps, the lens hood, and the strap. Your gear will be shipped only after your check clears.
Please contact Jack via e-mail or by phone at 817 819 1756. Central Time Zone.
The 100-400 is a versatile intermediate telephoto zoom lens with 1,000+ uses. It makes a great starter lens especially for folks who do general nature and wildlife in addition to birds. I’ve sold 100s of images made with a 1-4 and denise loved hers for many years forsaking it only recently for the Canon EF 70-200mm f/2.8L IS II USM lens. Jack’s 100-400 is priced to sell. artie
|
|
|
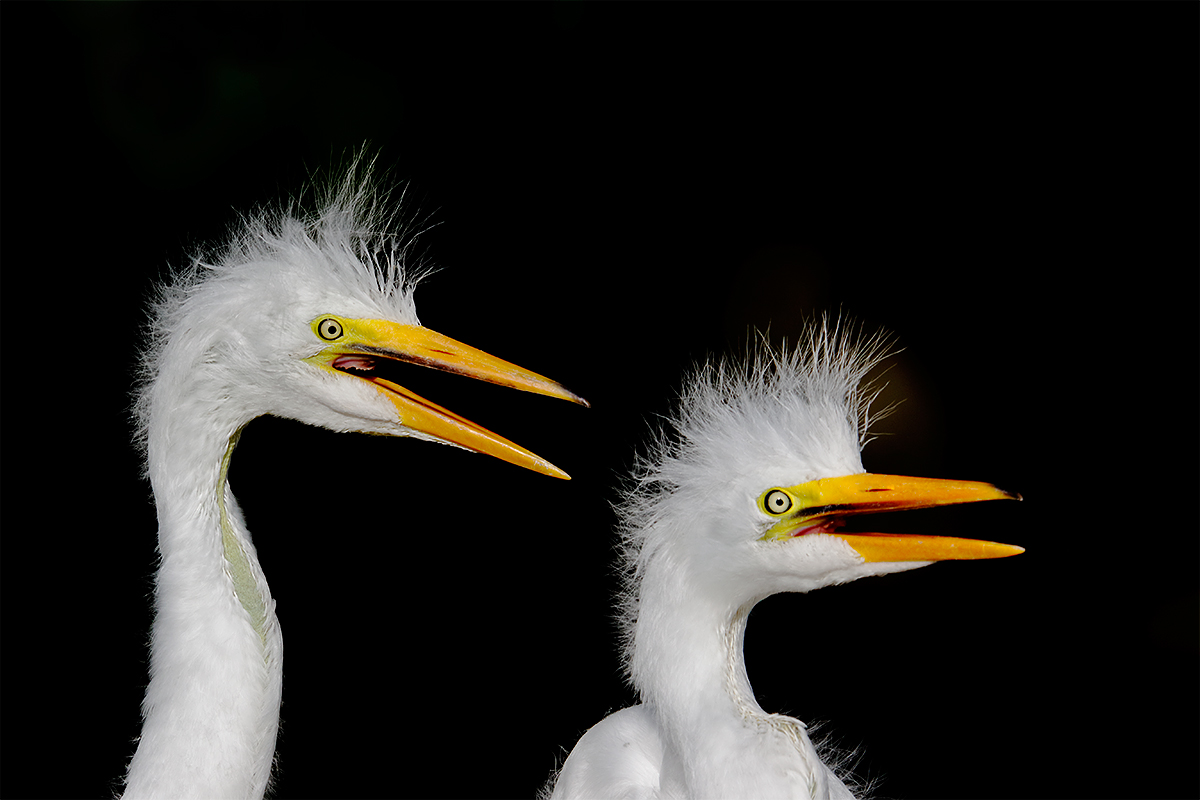
This image was created on the current IPT with the Canon EF 600mm f/4L IS II USM lens, the Canon Extender EF 2X III, and the amazing Canon EOS 7D Mark II. ISO 400. Evaluative metering -2/3 stop: 1/1000 sec. at f/11.
Center AF point (by necessity)/AI Servo Expand/Rear Focus AF as framed on the chick on the left, say a prayer, and re-compose. Click here to see the latest version of the Rear Focus Tutorial. Click on the image to see a larger version.
Great Egret chicks in the nest begging
|
Flash or No Flash?
In the “Extreme Focal Length/High Contrast Chicks” blog post here, I posted:
Image Question
Do you think that flash was used in the creation of this image? If yes, flash as main light or flash as fill? Why? If not, can you describe a situation that might have resulted in the black background?
I should have asked (more correctly): “Do you think that flash was used effectively in the creation of this image with it’s black background effect?” Read on.
No Flash, No Way!
Lots of folks left comments. About half thought that the image was created using flash-as-main-light techniques. About half thought that there was no flash used. Nearly all of those thought that the background was shaded while the chicks were in bright sun.
With a shutter speed of 1/1000 sec., it is necessary to have High Speed Synch set on the flash. The synch speed of the 7D II is 1/250 sec. When you are in High Speed Synch, the illumination provided by the flash (the guide number) drops as the shutter speed is increased. At very high shutter speeds like 1/1000 sec., the illumination from the flash is reduced greatly and thus the effective range of the flash is also reduced greatly. In addition, since the flash has to produce multiple rapid low power bursts when you are using High Speed Synch, the power of the flash is further reduced.
With an effective focal length of 1920mm, it is obvious that I was quite far from the nest–I would guess about 100 feet across the gator moat. With the flash power greatly reduced and the birds relatively far away, it would be impossible to light the chicks with the flash even if you are working with Manual Flash set to 1:1 (maximum flash power) with a Better Beamer.
Thus, no flash. Note: even fill flash would not have had any visible effect on the image in this bright sun situation. In extremely low light, the flash would have surely messed up the bird’s eyes….
The Actual Situation
Those who stated that the subjects were in the sun while the background was in deep shade were correct. I was, however, working right on sun angle; the relatively distant background behind the nest was shaded by trees that were near the nest but above it, thus shading the background well behind the nest.
There were a few lighter blotches in the background that I thought I would need to darken in Photoshop, but I tried simply moving the Shadow Slider to the left to -5. Bingo: solid black.
Image Question
For this image placing the tripod was a major factor; an inch or two either way made a big difference. Why was I so careful when choosing my perspective?
Natural Light Tips
#1: Point your shadow at (or within 15 degrees at most) the subject.
#2: For years I have been saying that subject in shade, background in sun, is one of my favorite situations. Now I can state that white or light-toned subjects in sun with the background in deep shade is another favorite.
Learning About Flash
The best way to learn about using your flash properly is to study the “Flash Simplified” section in The Art of Bird Photography II, the digital follow-up to the original classic soft cover The Art of Bird Photography. ABP II: 916 pages, 900+ images on CD only. The ABP II PDFs will synch to your i-Pad. The “Flash Simplified” section includes info on setting up for telephoto and super-telephoto photography, using a Better Beamer, using flash as fill, the principles of flash as main light, and using Manual flash as main light. Several multiple image series show the effect of varying both the ambient and flash exposures on the subject and the background.
Purchase ABP and ABP II together and save $10 here.
There will be lots more on flash here on the blog in the coming weeks.
ABP II Free Excerpts
Facebook
Be sure to like and follow BAA on Facebook by clicking on the logo link upper right. Tanks a stack!
Support the BAA Blog. Support the BAA Bulletins: Shop B&H here!
We want and need to keep providing you with the latest free information, photography and Photoshop lessons, and all manner of related information. Show your appreciation by making your purchases immediately after clicking on any of our B&H or Amazon Affiliate links in this blog post. Remember, B&H ain’t just photography!
…..
Amazon.com
Those who prefer to support BAA by shopping with Amazon may use this link:
Amazon Canada
Many kind folks from north of the border, eh, have e-mailed stating that they would love to help us out by using one of our affiliate links but that living in Canada and doing so presents numerous problems. Now, they can help us out by using our Amazon Canada affiliate link by starting their searches by clicking here. Many thanks to those who have written.
Typos
In all blog posts and Bulletins, feel free to e-mail or to leave a comment regarding any typos or errors. Just be right :).
May 10th, 2015
Happy Mother’s Day
Be sure to wish all the mom’s in your life a wonderful day today, especially the one who brought you into the world (if you are lucky enough to have her around).
Dear Mom,
Happy Mother’s Day. I love you muchly.
your son, arthur
May 9th, 2015 Stuff
I finally finished my San Diego article for Nature Photographer Magazine. I sent the text and the images with captions to Helen Longest Saccone, the editor and founder on Friday afternoon. Next I need to get my ad with a photo to her.
This blog post, the 121st in a row, took about 1 1/4 hours to prepare. It is scheduled to be published automatically at 5am on Saturday morning.
Used Photography Gear/New Listing
Canon EF 100-400mm f/4.5-5.6L IS USM
Michael Zajac is offering a used Canon EF 100-400mm f/4.5-5.6L IS USM lens excellent condition for $949.99. The sale includes the original box, the front and rear lenses caps, the original box, and free insured shipping to US addresses. You can call Michael at 732-979-6644 (eastern time zone) or shoot him an e-mail.
I owned and used this great lens for well more than a decade and created hundreds of published images with it. Denise Ippolito owned and loved hers for years. Best news? Michael takes a lot better care of his gear than I do….
Huge Price Reduction
Used EOS-1D Mark IV Digital Camera Body
Price reduced an additional $900 on 5/9/2015!
Marc Lombardi is offering a used EOS-1D Mark IV digital camera body in excellent condition with 57800 actuations for $1300. The body has one minor cosmetic scratch on top. The sale includes the charger and two batteries, a RRS plate, and insured ground shipping to US addresses only. Your camera will be shipped only after your check clears unless other arrangements are made.
Please contact Marc via e-mail or by phone at 610-585-3500 (Eastern time).
Two Mark IVs served as my workhorse bodies for more than three years. artie
You can see the complete Used Photography Gear For Sale listings here.


Canon’s Huge Megapixel Bodies
Many of you have read about the two new Canon 50+ megapixel bodies, the Canon EOS 5DS DSLR and the Canon EOS 5DS R DSLR. The two cameras look, sound, and pretty much are quite similar. I have withheld commenting until now because I did not have a good–heck, I did not have any–understanding of the single difference between the two bodies, that being the Low-Pass Filter Effect Cancellation.
If you missed the hugely popular “Canon’s Two New 50+ Megapixel Camera Bodies/You Must Read This Before You Buy,” you can click here to catch up and learn a ton to boot.
Please Remember to use our Affiliate Links 🙂
To show your appreciation for my continuing efforts here, we ask, as always, that you use our the B&H and Amazon affiliate links on the right side of the blog for all of your purchases. B&H is recommended for you major photography gear purchases, Amazon for your household, entertainment, and general purpose stuff. Please check the availability of all photographic accessories in the BIRDS AS ART Online Store, especially the Mongoose M3.6 tripod heads, Gitzo tripods, Wimberley heads and plates, LensCoats and accessories, and the like. We sell only what I have used, have tested, and can depend on. We will not sell you junk. We know what you need to make creating great images easy and fun. And we are always glad to answer your gear questions via e-mail. I just learned that my account was suspended during my absence; it should be up and running by Monday at the latest.
I would of course appreciate your using our B&H affiliate links for all of your major gear, video, and electronic purchases. For the photographic stuff mentioned in the paragraph above we, meaning BAA, would of course greatly appreciate your business. Here is a huge thank you to the many who have been using our links on a regular basis and visiting the BAA Online store as well.
|
|
|
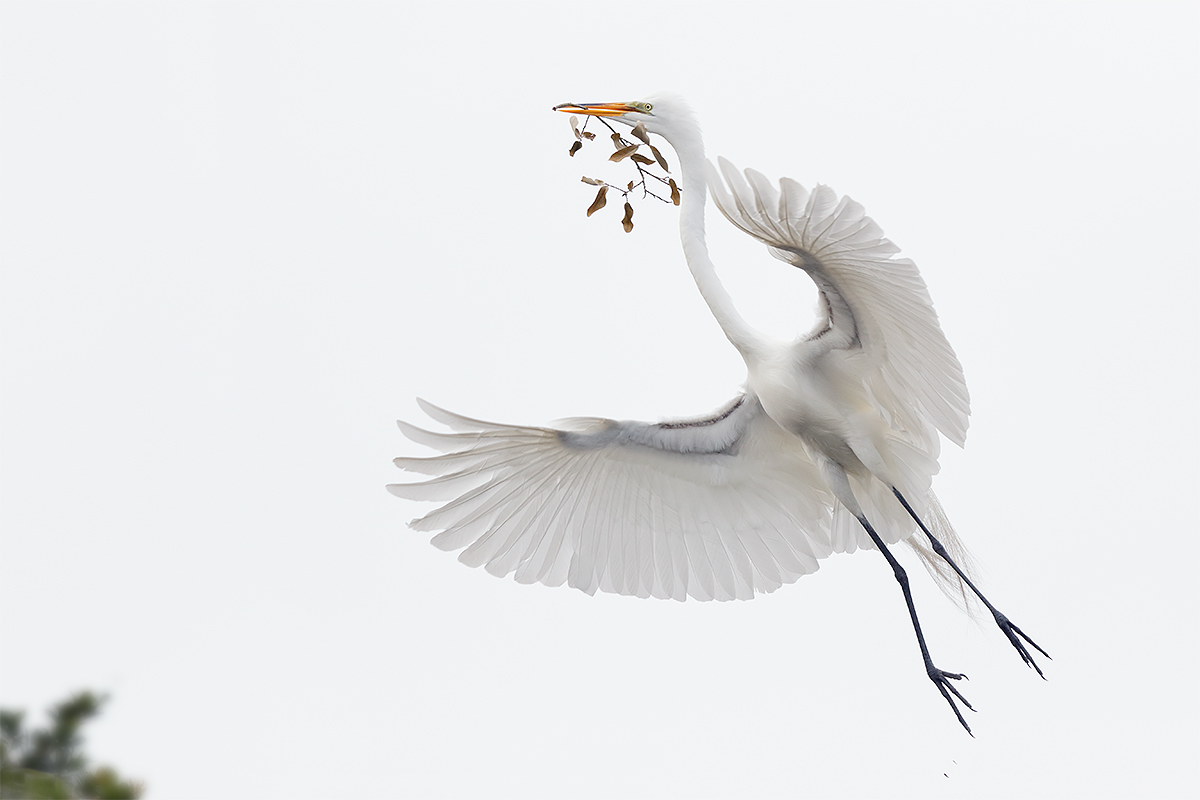
This image was created on May 5 on the recently concluded IPT with the hand held Canon EF 300mm f/2.8L IS II USM lens and the Canon EOS 7D Mark II. ISO 400. Evaluative metering +3 stops off the sky: 1/3200 sec. at f/2.8 in Manual mode. Cloudy WB.
Center AF point/AI Servo-Surround/Expand Button AF (on the bird’s neck) as originally framed was active at the moment of exposure as is always best for flight photography and is always best when hand holding. Click on the image to see a larger version.
Great Egret landing with sprig for nest
|
f/2.8 for Flight…
Working wide open when doing flight photography lets you go with a low ISO and achieve the fastest possible shutter speed while adding enough light in low light situations to come up with a perfect histogram. This image is un-cropped. Note that there was enough depth-of-field to cover the subject from wingtip to wingtip.
For complete coverage of this subject see the “An Important But Basic Bird Photography Principle: Use Wide Apertures in Low Light…” blog post here.
Exposure Question
I metered the light sky, added 3 full stops, and set that exposure (1/3200 sec. at f/2.8) manually. As framed, the meter would have indicated about +2 stops. Why?
Whaddya Think?
What is the single negative in the image above?
|
|
|
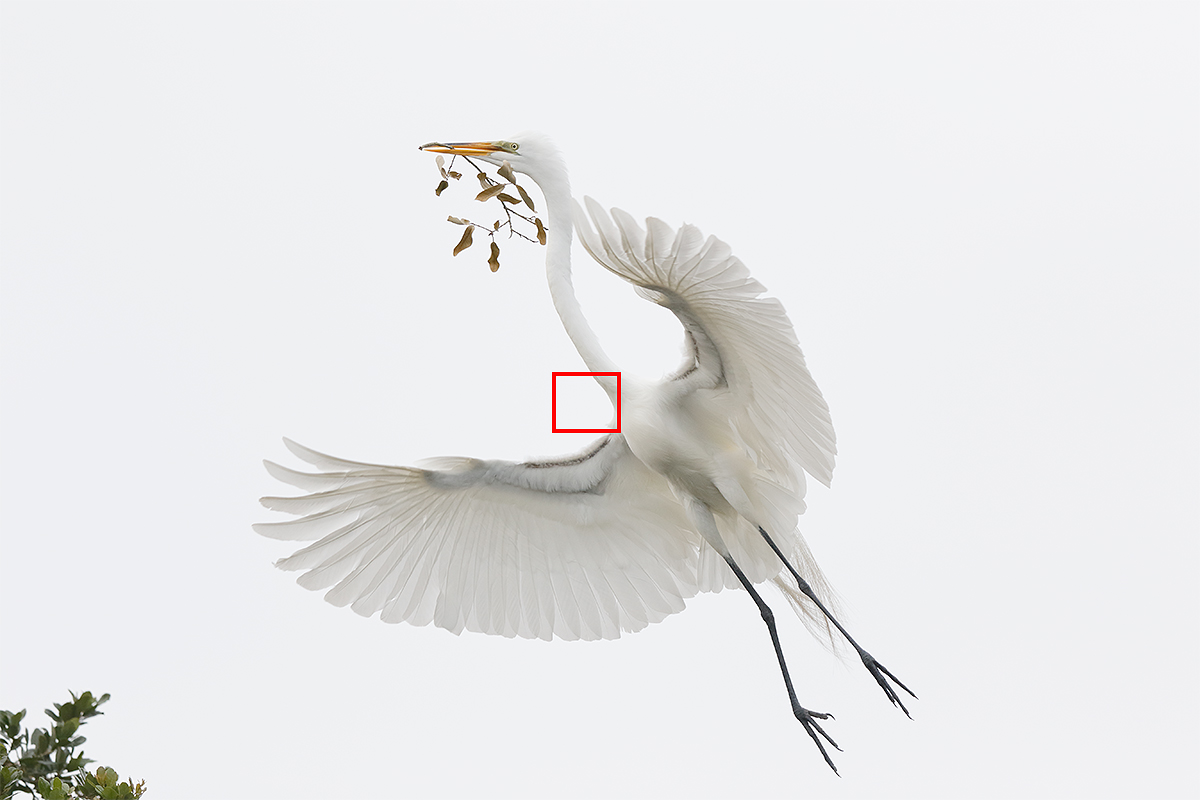
This JPEG represents the TIFF after conversion in DPP 4. I added the red square in Photoshop with the Pencil Tool. Tip: hold down the Shift key to keep your lines dead straight while creating the box.
|
The Image Optimization
After converting the image in DPP 4, I brought the image into Photoshop. First, I moved the bird up and back in the frame using techniques detailed in APTATS II. I selected the bird using the Quick Selection Tool and placed the selection on its own layer. Next I applied my NIK Color Efex Pro 50-50 recipe and reduced the opacity to 66%. Next I selected the bill, the lores, and the eye, again with the Quick Selection Tool and applied a Contrast Mask (Unsharp Mask at 15/65/0). Lastly I painted a Quick Mask of the leaves in the lower right and applied a 50 pixel Gaussian Blur to soften them up.
Digital Basics
Everything that I did to optimize today’s image is covered in detail in my Digital Basics File–written in my easy-to-follow, easy-to-understand style. Are you tired of making your images look worse in Photoshop? Digital Basics File is an instructional PDF that is sent via e-mail. It includes my complete digital workflow, dozens of great Photoshop tips, details on using all of my image clean-up tools, the use of Contrast Masks, several different ways of expanding and filling in canvas, all of my time-saving Keyboard Shortcuts, Quick Masking, Layer Masking, and NIK Color Efex Pro basics, Contrast Masks, Digital Eye Doctor techniques, using Gaussian Blurs, Tim Grey Dodge and Burn, a variety of ways to make selections, how to create time-saving actions, the Surface Blur (background noise reduction) settings, and tons more.
APTATS I & II
Learn the details of advanced Quick Masking techniques in APTATS I. Learn Advanced Layer Masking Techniques in APTATS II. Mention this blog post and apply a $5 discount to either with phone orders only. Buy both APTATS I and APTATS II and we will be glad to apply at $15 discount either with phone orders or here in the BAA Online Store. For phone orders, call Jim or Jennifer at 863-692-0906 weekdays.
|
|
|
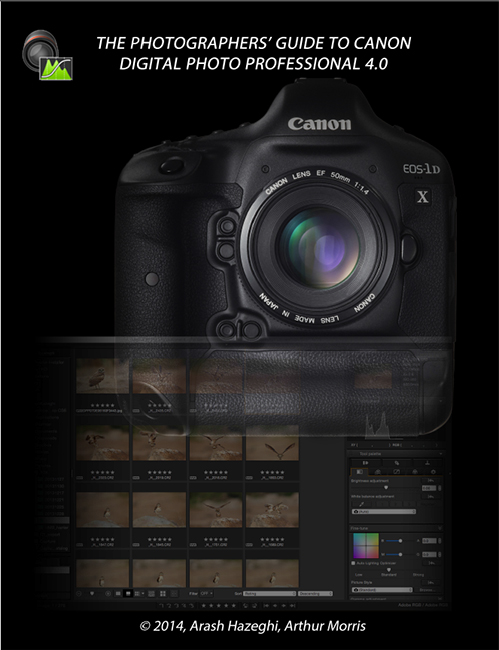
You can order your copy of “The Photographers’ Guide to Canon Digital Photo Professional 4.0” (aka the DPP 4 Raw Conversion eGuide) by Arash Hazeghi and Arthur Morris by clicking here.
|
The DPP 4 eGuide (PDF)
Learn how and why I and many other discerning photographers choose and use only DPP 4 to convert their Canon RAW files in the DPP 4 RAW Conversion Guide by Arash Hazeghi and yours truly. The latest version supports all of the newer Canon camera bodies and several older models including the EOS-7D and the EOS-1D Mark IV. A free update that will cover most of the newly added cameras will be sent as soon as I get it from Arash.
Facebook
Be sure to like and follow BAA on Facebook by clicking on the logo link upper right. Tanks a stack!
Support the BAA Blog. Support the BAA Bulletins: Shop B&H here!
We want and need to keep providing you with the latest free information, photography and Photoshop lessons, and all manner of related information. Show your appreciation by making your purchases immediately after clicking on any of our B&H or Amazon Affiliate links in this blog post. Remember, B&H ain’t just photography!
…..
Amazon.com
Those who prefer to support BAA by shopping with Amazon may use this link:
Amazon Canada
Many kind folks from north of the border, eh, have e-mailed stating that they would love to help us out by using one of our affiliate links but that living in Canada and doing so presents numerous problems. Now, they can help us out by using our Amazon Canada affiliate link by starting their searches by clicking here. Many thanks to those who have written.
Typos
In all blog posts and Bulletins, feel free to e-mail or to leave a comment regarding any typos or errors. Just be right :).
May 8th, 2015 Stuff
On Thursday morning the IPT group learned first hand that clouds were indeed way better than sun when photographing at a rookery…. While we concentrated on finding backlit and shaded subjects the vast majority of the 30 or so photographers were working 90 degrees to the bright sun…. Not good. The sun was somewhat of a blessing for me as we split at 10am due to the harsh light and I was on the road to Lake Wales and ILE by 10:30am. After a few errands I arrived home at 3:15 and enjoyed a well-deserved nap, one of the greatest human naps in the history of the planet.
This blog post, the 120th in a row, took about an hour to prepare. It is scheduled to be published automatically at 4am on Friday morning. I will be home with lots to do until I leave for the two Palouse IPTs on 27 May. That begins what will be six months of insane and wonderful travel. In other words, par for the course.
Used Photography Gear
Featured Listings
You can see the complete list of used gear here.
Canon EF 70-200mm f/2.8L IS II USM Lens
Multiple IPT veteran Carl Zanoni is offering a used Canon EF 70-200mm f/2.8L IS II USM lens in like new condition for the record low price of $1649.00. The sale includes front lens cover and rear lens cap, the ET-82 lens hood,the LZ 1324 Lens Bag, the tripod mount ring (collar), the original box, and insured shipping via UPS Ground to US addresses. Your item will not ship until your check clears unless other arrangements are made.
Please contact Carl by e-mail or by phone at 860 306 9651 (eastern time).
I have owned and used the 70-200 II since its release. It is an incredibly versatile lens. I use it (alone or with either the 1.4X III or the 2X III TCs) for both birds and for wildlife. It is a valuable tool at the gator rookeries. In addition, I use it for flower fields, flocks of birds in flight (especially geese at Bosque and skimmers at Nickerson Beach), for tree and scenic photography, and for pan blurs both hand held and on a tripod. And for tons more. As I said, “versatile.” Priced so low, this one should sell immediately.
Canon EF 180mm f/3.5L USM Macro Lens
Multiple IPT veteran Carl Zanoni is also offering a used Canon EF 180mm f/3.5 USM macro lens in like new condition for $1175. The sale includes the E-72 II 72mm (front) lens cap, the (rear) lens dust cap E, the ET-78 II lens hood, Tripod Mount Ring B (tripod collar), the LZ1324 lens case, the original box, and insured shipping via UPS Ground to US addresses. Your item will not ship until your check clears unless other arrangements are made.
Please contact Carl by e-mail or by phone at 860 306 9651 (eastern time).
I have owned and used the 180 macro for more than 10 years. It is the primo telephoto macro lens. It is sharp with and without a 1.4X TC. It offers a narrow field of view that goes a long way to eliminating back distracting background element. It is great for flowers and all sorts of bugs, butterflies, and dragonflies as well as for frogs and toads.
Canon EF 24-70 f2.8L II USM Lens
Dave Bourgaize is offering a used Canon EF 24-70 f2.8L II USM lens in excellent condition for $1499.00. The sale includes front lens cover and rear lens cap, EW-88C lens hood, original Canon bag, and insured shipping via UPS Ground to US addresses. Your item will not ship until your check clears unless other arrangements are made. Please contact Dave by e-mail or by phone at (310) 748-9547 (pacific time zone).
I own and use the 24-70II. It is much sharper edge to edge than the lighter, more versatile Canon EF 24-105mm f/4L IS USM lens. I consider the 24-70II a must for serious landscape photographers. As it sells new for $1899 Dave’s price is lower than any I have seen for this lens in excellent condition. It should sell immediately.
|
|
|
This image was created on Wednesday of the recently concluded IPT with the tripod-mounted Canon EF 600mm f/4L IS II USM lens, the Canon Extender EF 1.4X III, and the Canon EOS-1D X . ISO 400: 1/250 sec. at f/9 confirmed by histogram check.
Center AF point/AI Servo Expand/Rear Focus AF just behind the bird’s head was active at the moment of exposure. Click here to see the latest version of the Rear Focus Tutorial. Click on the image to see a larger version.
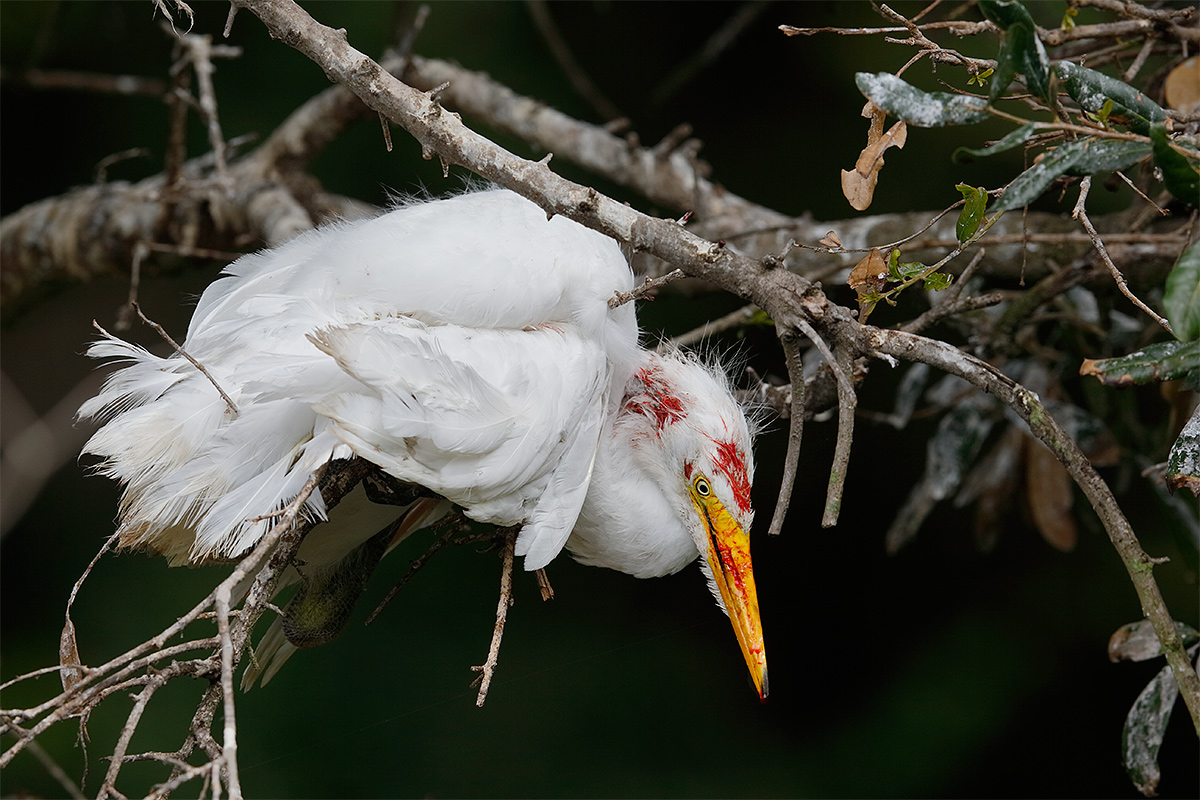
Great Egret/large chick after repeated beatings by adult
|
The Mystery
On Wednesday morning we noticed a large Great Egret chick in a nest battling with an adult. More accurately the adult was trying to kill the nearly fledged chick by stabbing it repeatedly with it powerful bill. The youngster was trying to defend itself by stabbing back but was no match at all for the powerful parent bird. Several of us tried to photograph the beating but with the youngster well obscured by vegetation we were not successful; I wound up deleting every image.
After photographing a drop dead gorgeous breeding plumage Snowy Egret in full breeding plumage for about an hour we returned to the scene of the crime to learn that the adult had beaten the large chick nearly to death and that the chick had been evicted from the nest. It was tangled rather hopelessly in the branches of a small tree, its head bloodied. At this point I created a series of images to depict the bird’s plight.
Referring to the adult, most folks used the term “murderess.”
Several asked me, “Why does stuff like that happen with a parent bird trying to kill its own chick?” I replied, “That happens only rarely. It is very possible that the large chick had been orphaned and climbed into a nest other than its own in an effort to get fed.” In fact, I had seen that exact behavior at a nest in Everglades National Park when an orphaned young Anhinga climbed into a nest with the three chicks that belonged there. The other chicks were fine with the intruder but the mother bird, to say the least, was not. It struck the interloper repeatedly with its saber-like bill and drove it into the water where it was instantly grabbed by a gator.
The next morning the mystery was unraveled when two tiny white heads peeked over the rim of the nest. The large chick had indeed been orphaned. The murderess had simply been protecting its newly hatched chicks…. Folks started referring to her as “protector.”
The large chick, perched in the same tree, was looking a lot better on Thursday morning but without getting fed it is pretty much doomed to become gator food at some point.
|
|
|
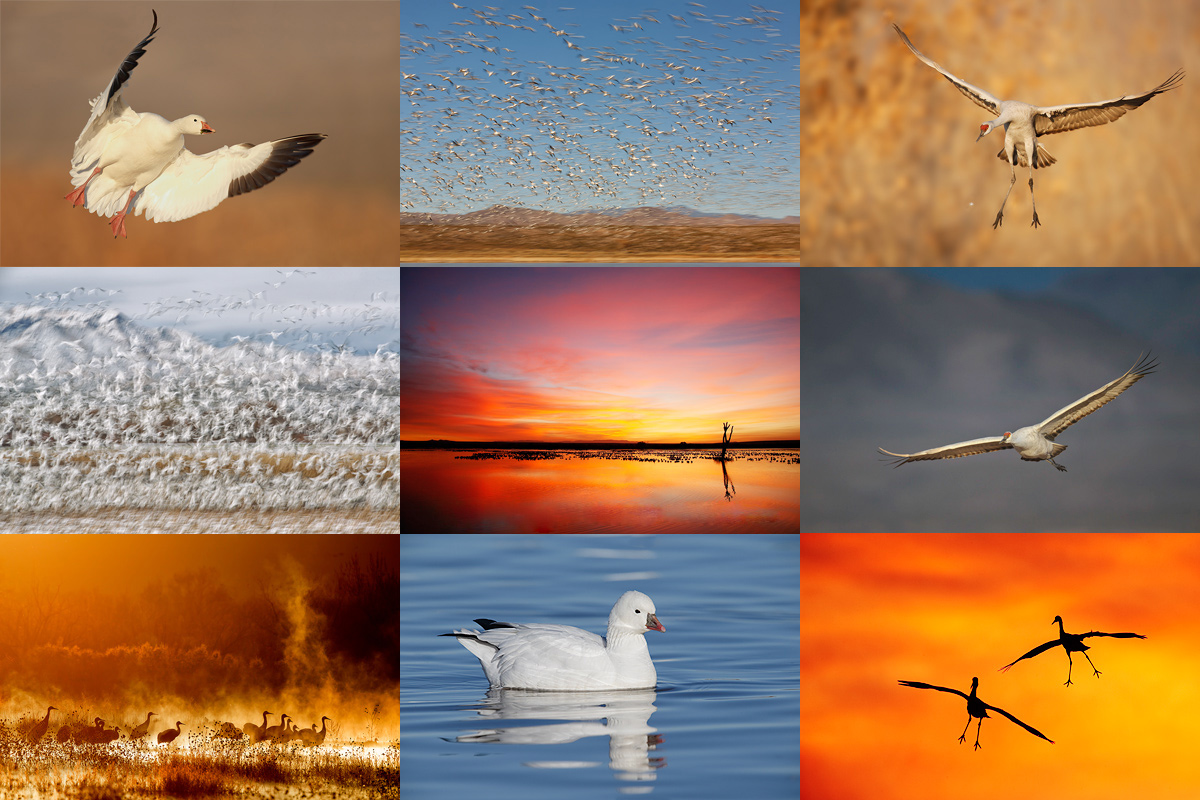
In 2015, we are offering a 3-DAY IPT before Thanksgiving and a 4-DAY IPT after the holiday. You can attend either and spend Thanksgiving Day with your family. Sign up for both and we will be glad to apply a $100 discount to your balance. We know that there are lots of less costly workshops being offered these days. Many of them are downright cheap. Please remember that you get exactly what you pay for. With us you will have two full time pros there for you every minute we are in the field. Together they have more than 28 seasons of experience at the refuge. If you want the finest in photographic instruction and want to be assured of being in the right spot at exactly the right time every day, do join us.
|
Bosque del Apache 2015 BIRDS AS ART/A Creative Adventure Instructional Photo-Tour (IPT). 3-FULL DAY IPT: NOV 22-24, 2015. $1149. Two great leaders: Denise Ippolito and Arthur Morris. Meet and greet and introductory slide program after dinner on your own at 7:00pm on SAT NOV 21.
Tens of thousands of Snow Geese, 10,000 Sandhill Cranes, ducks, amazing sunrises, sunsets, and blast-offs. Live, eat, and breathe photography with two of the world’s premier photographic educators at one of their very favorite photography locations on the planet. Top-notch in-the-field and Photoshop instruction. This will make 21 consecutive Novembers at Bosque for artie. This will be denise’s 7th workshop at the refuge. Nobody knows the place better than artie does. Join us to learn to think like a pro, to recognize situations and to anticipate them based on the weather, especially the sky conditions, the light, and the wind direction. Every time we make a move we will let you know why. When you head home being able to apply what you’ve learned on your home turf will prove to be invaluable.
This workshop includes 3 morning and 3 afternoon photography sessions, an inspirational introductory slide program after dinner on your own on Saturday, 11/21, all lunches, and after-lunch digital workflow, Photoshop, and image critiquing sessions.
There is never a strict itinerary on a Bosque IPT as each day is tailored to the local conditions at the time and to the weather. We are totally flexible in order to maximize both the photographic and learning opportunities. We are up early each day leaving the hotel by 5:30 am to be in position for sunrise. We usually photograph until about 10:30am. Then it is back to Socorro for lunch and then a classroom session with the group most days. We head back to the refuge at about 3:30pm each day and photograph until sunset. We will be photographing lots of Snow Geese and lots of Sandhill Cranes with the emphasis on expanding both your technical skills and your creativity.
A $449 non-refundable deposit is required to hold your slot for this IPT. Your balance, payable only by check, will be due on 7/25/2015. If you cancel and the trip fills, we will be glad to apply a credit applicable to a future IPT for the full amount less a $100 processing fee. If we do not receive your check for the balance on or before the due date we will try to fill your spot from the waiting list. Whether or not your spot is filled, you will lose your deposit. If not, you can secure your spot by paying your balance.
Please print, complete, and sign the form that is linked to here and shoot it to us along with your deposit check (made out to “Arthur Morris.”) You can also leave your deposit with a credit card by calling the office at 863-692-0906. If you register by phone, please print, complete and sign the form as noted above and either mail it to us or e-mail the scan. If you have any questions, please feel free to contact me via e-mail.
|
|
|
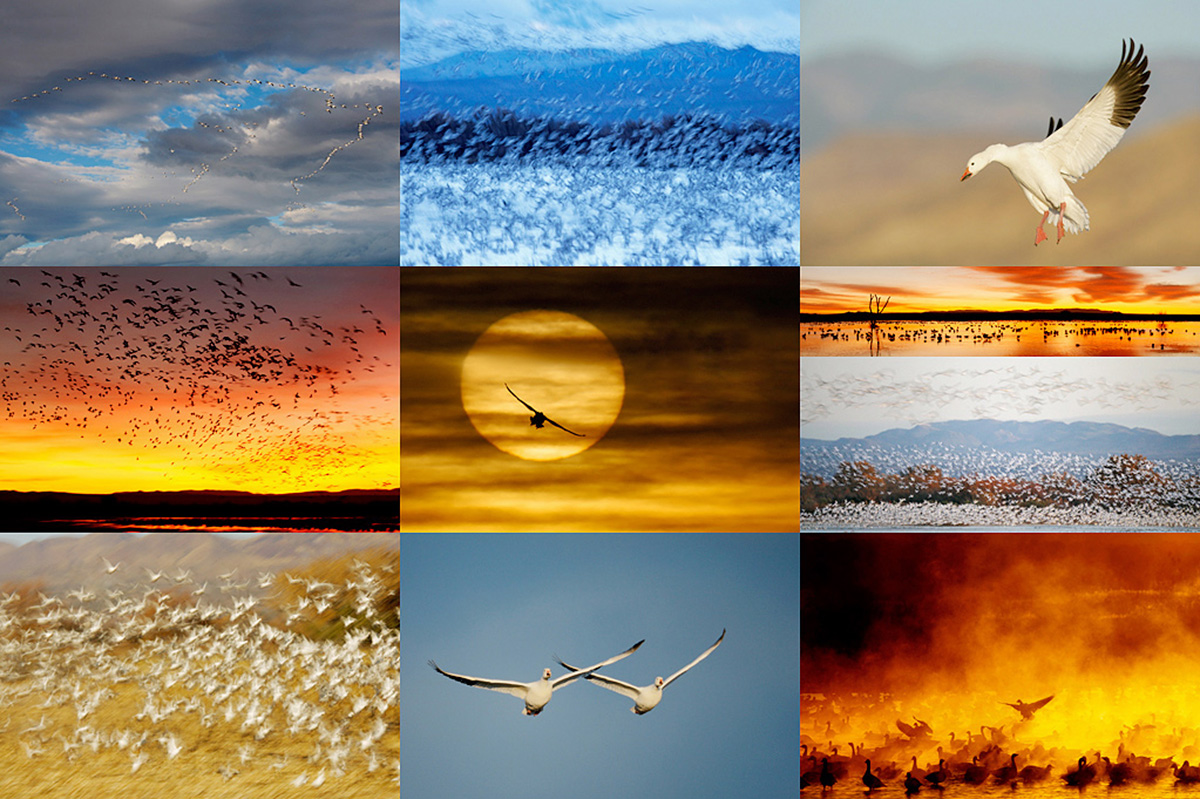
In 2015, we are offering a 3-DAY IPT before Thanksgiving and a 4-DAY IPT after the holiday. You can attend either and spend Thanksgiving Day with your family. Sign up for both and we will be glad to apply a $100 discount to your balance.
We know that there are lots of less costly workshops being offered these days. Please remember that you get exactly what you pay for. If you want the finest in photographic instruction and want to be assured of being in the right spot at exactly the right time, do join us.
|
Bosque del Apache 2015 BIRDS AS ART/A Creative Adventure Instructional Photo-Tour (IPT). 4-DAY IPT: (three full and two 1/2 DAYS) NOV 28-DEC 2, 2015. $1499. Two great leaders: Denise Ippolito and Arthur Morris. Meet and greet at 3pm on SAT NOV 28 followed by an afternoon photo session at the crane pools and the introductory slide program after dinner on your own.
Tens of thousands of Snow Geese, 10,000 Sandhill Cranes, ducks, amazing sunrises, sunsets, and blast-offs. Live, eat, and breathe photography with two of the world’s premier photographic educators at one of their very favorite photography locations on the planet. Top-notch in-the-field and Photoshop instruction. This will make 21 consecutive Novembers at Bosque for artie. This will be denise’s 7th workshop at the refuge. Nobody knows the place better than artie does. Join us to learn to think like a pro, to recognize situations and to anticipate them based on the weather, especially the sky conditions, the light, and the wind direction. Every time we make a move we will let you know why. When you head home being able to apply what you’ve learned on your home turf will prove to be invaluable.
This workshop includes 4 afternoon (11/28through 12/1), 4 morning (11/29 to 12/2) photography sessions, an inspirational introductory slide program after dinner on your own on Saturday, 11/28, all lunches, and after-lunch digital workflow, Photoshop, and image critiquing sessions.
There is never a strict itinerary on a Bosque IPT as each day is tailored to the local conditions at the time and to the weather. We are totally flexible in order to maximize both the photographic and learning opportunities. We are up early each day leaving the hotel by 5:30 am to be in position for sunrise. We usually photograph until about 10:30am. Then it is back to Socorro for lunch and then a classroom session with the group most days. We head back to the refuge at about 3:30pm each day and photograph until sunset. We will be photographing lots of Snow Geese and lots of Sandhill Cranes with the emphasis on expanding both your technical skills and your creativity.
A $599 non-refundable deposit is required to hold your slot for this IPT. Your balance, payable only by check, will be due on 7/25/2015. If you cancel and the trip fills, we will be glad to apply a credit applicable to a future IPT for the full amount less a $100 processing fee. If we do not receive your check for the balance on or before the due date we will try to fill your spot from the waiting list. Whether or not your spot is filled, you will lose your deposit. If not, you can secure your spot by paying your balance.
Please print, complete, and sign the form that is linked to here and shoot it to us along with your deposit check (made out to “Arthur Morris.”) You can also leave your deposit with a credit card by calling the office at 863-692-0906. If you register by phone, please print, complete and sign the form as noted above and either mail it to us or e-mail the scan. If you have any questions, please feel free to contact me via e-mail.
Facebook
Be sure to like and follow BAA on Facebook by clicking on the logo link upper right. Tanks a stack!
Support the BAA Blog. Support the BAA Bulletins: Shop B&H here!
We want and need to keep providing you with the latest free information, photography and Photoshop lessons, and all manner of related information. Show your appreciation by making your purchases immediately after clicking on any of our B&H or Amazon Affiliate links in this blog post. Remember, B&H ain’t just photography!
…..
Amazon.com
Those who prefer to support BAA by shopping with Amazon may use this link:
Amazon Canada
Many kind folks from north of the border, eh, have e-mailed stating that they would love to help us out by using one of our affiliate links but that living in Canada and doing so presents numerous problems. Now, they can help us out by using our Amazon Canada affiliate link by starting their searches by clicking here. Many thanks to those who have written.
Typos
In all blog posts and Bulletins, feel free to e-mail or to leave a comment regarding any typos or errors. Just be right :).
May 7th, 2015 Stuff
The second full day of the current IPT was a great one. The clouds and heavy overcast allowed us to photograph until 11:30am. everyone loved the lunch at my favorite local eatery, Gypsy Cab Company. Our afternoon session began with full sun but almost as soon as we arrived the cloud cover did the same. We spent lots of time working with flash. First-timer Jim Robbelard of Naples, FL was thrilled to learn to create high key flash-as-main-light images of Great Egrets that looked as if they were created in a studio.
This blog post, the 119th in a row, took about an hour to prepare. It is scheduled to be published automatically at 1am on Thursday morning. I head home after tomorrow morning’s session.


Canon’s Huge Megapixel Bodies
Many of you have read about the two new Canon 50+ megapixel bodies, the Canon EOS 5DS DSLR and the Canon EOS 5DS R DSLR. The two cameras look, sound, and pretty much are quite similar. I have withheld commenting until now because I did not have a good–heck, I did not have any–understanding of the single difference between the two bodies, that being the Low-Pass Filter Effect Cancellation.
If you missed the hugely popular “Canon’s Two New 50+ Megapixel Camera Bodies/You Must Read This Before You Buy,” you can click here to catch up and learn a ton to boot.
Please Remember to use our Affiliate Links 🙂
To show your appreciation for my continuing efforts here, we ask, as always, that you use our the B&H and Amazon affiliate links on the right side of the blog for all of your purchases. B&H is recommended for you major photography gear purchases, Amazon for your household, entertainment, and general purpose stuff. Please check the availability of all photographic accessories in the BIRDS AS ART Online Store, especially the Mongoose M3.6 tripod heads, Gitzo tripods, Wimberley heads and plates, LensCoats and accessories, and the like. We sell only what I have used, have tested, and can depend on. We will not sell you junk. We know what you need to make creating great images easy and fun. And we are always glad to answer your gear questions via e-mail. I just learned that my account was suspended during my absence; it should be up and running by Monday at the latest.
I would of course appreciate your using our B&H affiliate links for all of your major gear, video, and electronic purchases. For the photographic stuff mentioned in the paragraph above we, meaning BAA, would of course greatly appreciate your business. Here is a huge thank you to the many who have been using our links on a regular basis and visiting the BAA Online store as well.
|

|
|
This image was created on the current IPT with the Canon EF 600mm f/4L IS II USM lens, the Canon Extender EF 2X III, and the amazing Canon EOS 7D Mark II. ISO 400. Evaluative metering -2/3 stop: 1/1000 sec. at f/11.
Center AF point (by necessity)/AI Servo Expand/Rear Focus AF as framed on the chick on the left, say a prayer, and re-compose. Click here to see the latest version of the Rear Focus Tutorial. Click on the image to see a larger version.
Great Egret chicks in the nest begging
|
Extreme Focal Length/High Contrast Great Egret Chicks
600 II X 2X III X 1.6 crop factor of the 7D II = 1920mm or approximately 38.2 X magnification…. Best advice even at relatively high shutter speeds: be sure to hold your rig still. Note that the exposure is the equivalent of the standard ISO 400 bright WHITEs in full sun exposure of 1/2000 sec. at f/8 (for folks who are using DPP 4 with Highlight Tone Priority set). If not the latter, try 1/2500 sec. at f/8. Remember that you are always responsible for checking the histogram to see that you have at least some data in the highlight (right-most) box of the histogram and in the same vein that you are always responsible for checking for blinkies.
Image Question
Do you think that flash was used in the creation of this image? If yes, flash as main light or flash as fill? Why? If not, can you describe a situation that might have resulted in the black background?
|
|
|
The strange thing is that when I lived in New York, I never knew about this amazing and consistently productive location.
|
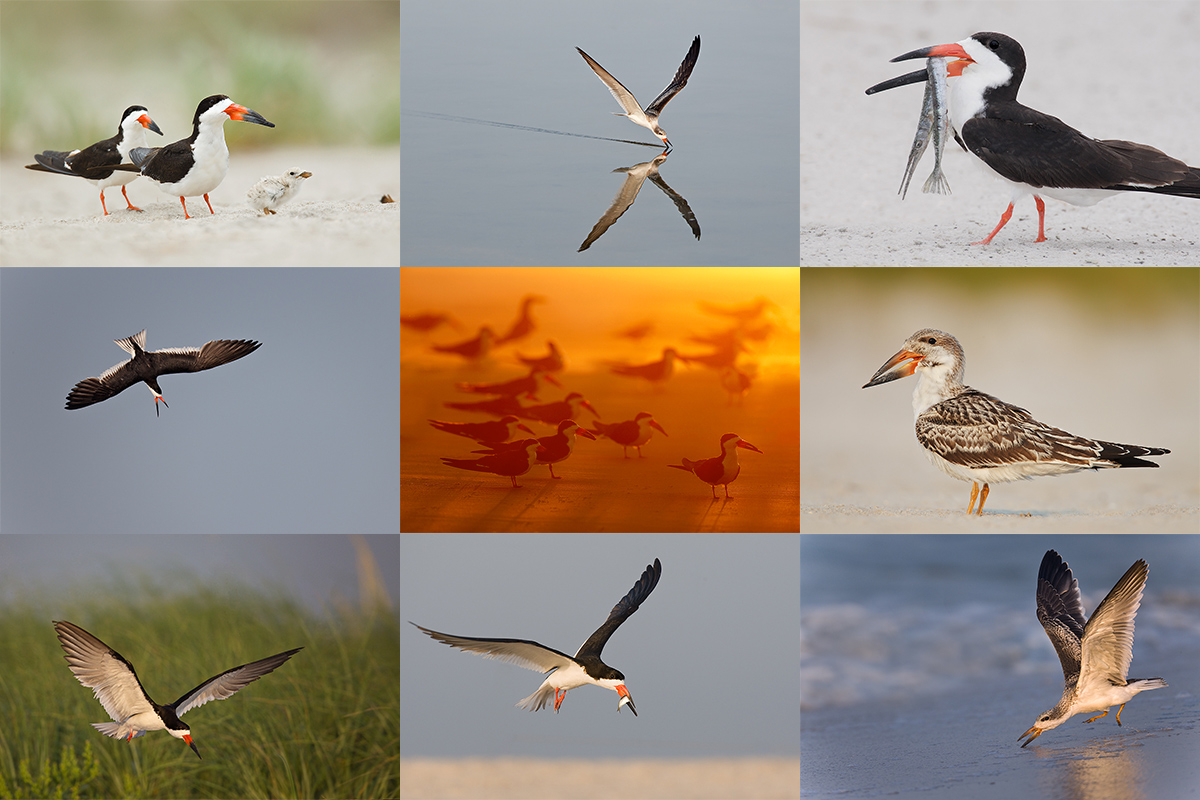
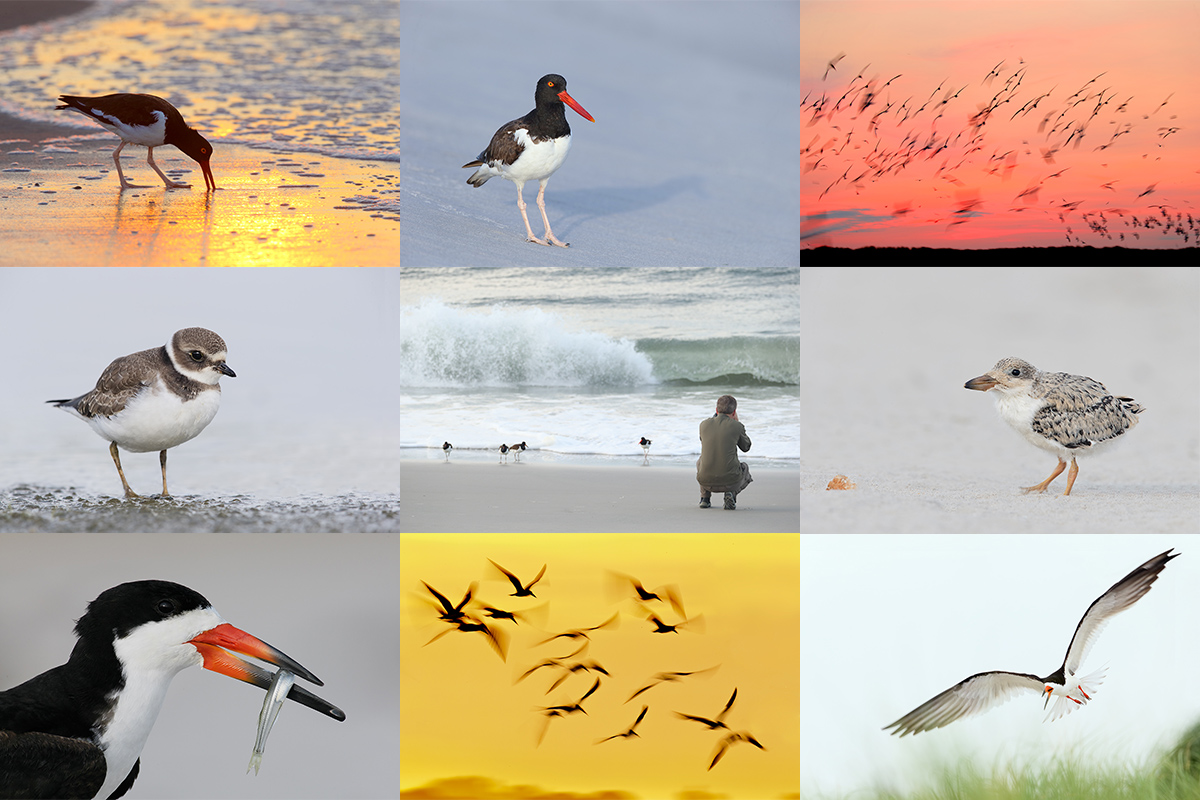
Nickerson Beach/JBWR (possibly…)/Black Skimmer/Oystercatcher/migrant shorebird IPT: August 13-16, 2015. 3 1/2 DAYS: $1399.
Meet and greet on the evening of WED August 12. Limit 10/Openings 5.
Most of our seven photo sessions will be spent at Nickerson beach photographing the nesting Black Skimmers. In flight, sometimes battling. Carrying fish. Chicks of varying sizes from a very few just-hatched to lots of fledglings. It is likely that we will get to see some Great Black-backed Gulls preying on the juvenile skimmers. They swallow them whole. There will be lots of gulls to photograph as well as some Common Terns. Locally breeding shorebird species include American Oystercatcher–pretty much guaranteed, Willet, which is likely, and Piping Plover, which is probable but we need to get lucky with those to get close….
Save a space by calling Jim or Jen at the office and arranging to leave your deposit of $499. I hope to see you there.
JBWR?
If local conditions are ideal we may visit Jamaica Bay Wildlife Refuge to photograph southbound migrant shorebirds on one or possibly two mornings. Even if we do not visit JBWR we should get some good chances with the migrant shorebirds at the beach, especially Sanderling and Semipalmated Plover. Red Knot and others are possible.
|
|
|
As you can see, the oystercatchers are quite tame at Nickerson. And we will get you up early and we will stay out late.
|
Jamaica Bay Wildlife Refuge In-the-field Instructional Photo Workshop/Scouting Session. August 12, 2015. Morning only: $250. Cheap!
The tide will be pretty good at the East Pond…. If I learn that conditions there are un-photographable we will do Nickerson Beach as a back-up. This will work either as an add-on for out of town folks coming for the IPT above or as a stand alone session. Either way, you will, as always, learn a ton. And we might even get some good images.
Facebook
Be sure to like and follow BAA on Facebook by clicking on the logo link upper right. Tanks a stack!
Support the BAA Blog. Support the BAA Bulletins: Shop B&H here!
We want and need to keep providing you with the latest free information, photography and Photoshop lessons, and all manner of related information. Show your appreciation by making your purchases immediately after clicking on any of our B&H or Amazon Affiliate links in this blog post. Remember, B&H ain’t just photography!
…..
Amazon.com
Those who prefer to support BAA by shopping with Amazon may use this link:
Amazon Canada
Many kind folks from north of the border, eh, have e-mailed stating that they would love to help us out by using one of our affiliate links but that living in Canada and doing so presents numerous problems. Now, they can help us out by using our Amazon Canada affiliate link by starting their searches by clicking here. Many thanks to those who have written.
Typos
In all blog posts and Bulletins, feel free to e-mail or to leave a comment regarding any typos or errors. Just be right :).
May 6th, 2015 Stuff
We enjoyed a cloudy, drizzly morning on the first full day of the current IPT. With occasional deluges. All in all it was a great but wet morning and I got to use my flash quite a bit. Flash images and stories coming soon.
This blog post, the 118th in a row, took about an hour to prepare. It is scheduled to be published automatically at 2am on Wednesday morning.
|
|
|
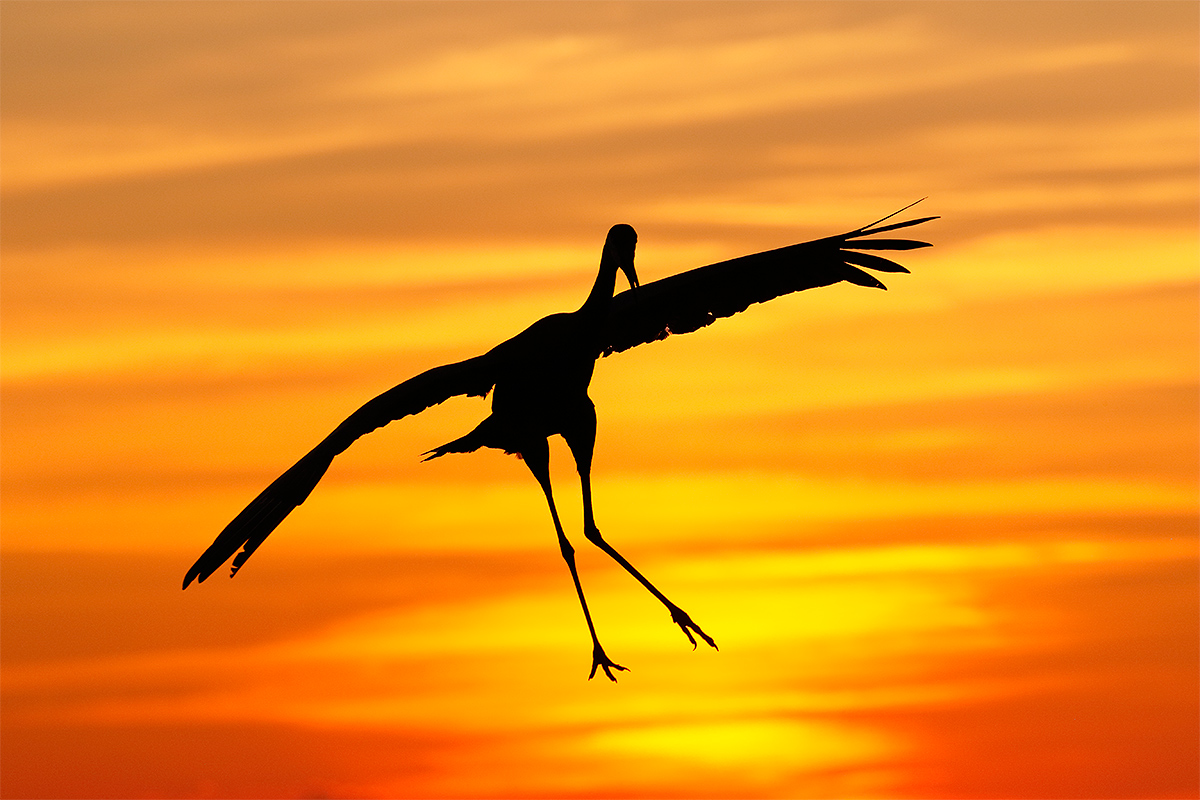
This image was created at Indian Lake Estates late on Sunday with the hand held Canon EF 100-400mm f/4.5-5.6L IS II USM lens (at 227mm) and the amazing Canon EOS 7D Mark II. ISO 400. Evaluative metering -1 stop: 1/2000 sec. at f/5.6 in Av mode. K8000.
Center AF point AI Servo/Surround/Shutter Button AF as framed was active at the moment of exposure (as is always best when hand holding and for flight photography). The AF system selected a single AF point two AF points above and one to the left of the center AF point. See the DPP 4 screen capture below to see how Zone AF performed.
Sandhill Crane turning to land
|
Never Hesitate
I was creating more head and head and shoulders crane silhouettes down by the lake on Sunday evening past when I noticed a crane flying right at me and right into the rather significant color. Rather than thinking of changing the exposure I finally learned the lesson I have been teaching for decades: shoot now, ask questions later. I had thought that -1 would be less than ideal but it turned out be prefect as the RED RGB numbers were in the high 240s. If I had taken even a half second to try to fix the exposure I would have missed the opportunity.
Exposure Question
Why do you think I was at -1 stop EC in the first place?
Image Critiquing Questions
What are the positives? What are the negatives? How do you feel about this image overall?
|

|
|
In 2015, we are offering a 3-DAY IPT before Thanksgiving and a 4-DAY IPT after the holiday. You can attend either and spend Thanksgiving Day with your family. Sign up for both and we will be glad to apply a $100 discount to your balance. We know that there are lots of less costly workshops being offered these days. Many of them are downright cheap. Please remember that you get exactly what you pay for. With us you will have two full time pros there for you every minute we are in the field. Together they have more than 28 seasons of experience at the refuge. If you want the finest in photographic instruction and want to be assured of being in the right spot at exactly the right time every day, do join us.
|
Bosque del Apache 2015 BIRDS AS ART/A Creative Adventure Instructional Photo-Tour (IPT). 3-FULL DAY IPT: NOV 22-24, 2015. $1149. Two great leaders: Denise Ippolito and Arthur Morris. Meet and greet and introductory slide program after dinner on your own at 7:00pm on SAT NOV 21.
Tens of thousands of Snow Geese, 10,000 Sandhill Cranes, ducks, amazing sunrises, sunsets, and blast-offs. Live, eat, and breathe photography with two of the world’s premier photographic educators at one of their very favorite photography locations on the planet. Top-notch in-the-field and Photoshop instruction. This will make 21 consecutive Novembers at Bosque for artie. This will be denise’s 7th workshop at the refuge. Nobody knows the place better than artie does. Join us to learn to think like a pro, to recognize situations and to anticipate them based on the weather, especially the sky conditions, the light, and the wind direction. Every time we make a move we will let you know why. When you head home being able to apply what you’ve learned on your home turf will prove to be invaluable.
This workshop includes 3 morning and 3 afternoon photography sessions, an inspirational introductory slide program after dinner on your own on Saturday, 11/21, all lunches, and after-lunch digital workflow, Photoshop, and image critiquing sessions.
There is never a strict itinerary on a Bosque IPT as each day is tailored to the local conditions at the time and to the weather. We are totally flexible in order to maximize both the photographic and learning opportunities. We are up early each day leaving the hotel by 5:30 am to be in position for sunrise. We usually photograph until about 10:30am. Then it is back to Socorro for lunch and then a classroom session with the group most days. We head back to the refuge at about 3:30pm each day and photograph until sunset. We will be photographing lots of Snow Geese and lots of Sandhill Cranes with the emphasis on expanding both your technical skills and your creativity.
A $449 non-refundable deposit is required to hold your slot for this IPT. Your balance, payable only by check, will be due on 7/25/2015. If you cancel and the trip fills, we will be glad to apply a credit applicable to a future IPT for the full amount less a $100 processing fee. If we do not receive your check for the balance on or before the due date we will try to fill your spot from the waiting list. Whether or not your spot is filled, you will lose your deposit. If not, you can secure your spot by paying your balance.
Please print, complete, and sign the form that is linked to here and shoot it to us along with your deposit check (made out to “Arthur Morris.”) You can also leave your deposit with a credit card by calling the office at 863-692-0906. If you register by phone, please print, complete and sign the form as noted above and either mail it to us or e-mail the scan. If you have any questions, please feel free to contact me via e-mail.
|

|
|
In 2015, we are offering a 3-DAY IPT before Thanksgiving and a 4-DAY IPT after the holiday. You can attend either and spend Thanksgiving Day with your family. Sign up for both and we will be glad to apply a $100 discount to your balance.
We know that there are lots of less costly workshops being offered these days. Please remember that you get exactly what you pay for. If you want the finest in photographic instruction and want to be assured of being in the right spot at exactly the right time, do join us.
|
Bosque del Apache 2015 BIRDS AS ART/A Creative Adventure Instructional Photo-Tour (IPT). 4-DAY IPT: (three full and two 1/2 DAYS) NOV 28-DEC 2, 2015. $1499. Two great leaders: Denise Ippolito and Arthur Morris. Meet and greet at 3pm on SAT NOV 28 followed by an afternoon photo session at the crane pools and the introductory slide program after dinner on your own.
Tens of thousands of Snow Geese, 10,000 Sandhill Cranes, ducks, amazing sunrises, sunsets, and blast-offs. Live, eat, and breathe photography with two of the world’s premier photographic educators at one of their very favorite photography locations on the planet. Top-notch in-the-field and Photoshop instruction. This will make 21 consecutive Novembers at Bosque for artie. This will be denise’s 7th workshop at the refuge. Nobody knows the place better than artie does. Join us to learn to think like a pro, to recognize situations and to anticipate them based on the weather, especially the sky conditions, the light, and the wind direction. Every time we make a move we will let you know why. When you head home being able to apply what you’ve learned on your home turf will prove to be invaluable.
This workshop includes 4 afternoon (11/28through 12/1), 4 morning (11/29 to 12/2) photography sessions, an inspirational introductory slide program after dinner on your own on Saturday, 11/28, all lunches, and after-lunch digital workflow, Photoshop, and image critiquing sessions.
There is never a strict itinerary on a Bosque IPT as each day is tailored to the local conditions at the time and to the weather. We are totally flexible in order to maximize both the photographic and learning opportunities. We are up early each day leaving the hotel by 5:30 am to be in position for sunrise. We usually photograph until about 10:30am. Then it is back to Socorro for lunch and then a classroom session with the group most days. We head back to the refuge at about 3:30pm each day and photograph until sunset. We will be photographing lots of Snow Geese and lots of Sandhill Cranes with the emphasis on expanding both your technical skills and your creativity.
A $599 non-refundable deposit is required to hold your slot for this IPT. Your balance, payable only by check, will be due on 7/25/2015. If you cancel and the trip fills, we will be glad to apply a credit applicable to a future IPT for the full amount less a $100 processing fee. If we do not receive your check for the balance on or before the due date we will try to fill your spot from the waiting list. Whether or not your spot is filled, you will lose your deposit. If not, you can secure your spot by paying your balance.
Please print, complete, and sign the form that is linked to here and shoot it to us along with your deposit check (made out to “Arthur Morris.”) You can also leave your deposit with a credit card by calling the office at 863-692-0906. If you register by phone, please print, complete and sign the form as noted above and either mail it to us or e-mail the scan. If you have any questions, please feel free to contact me via e-mail.
Facebook
Be sure to like and follow BAA on Facebook by clicking on the logo link upper right. Tanks a stack!
Support the BAA Blog. Support the BAA Bulletins: Shop B&H here!
We want and need to keep providing you with the latest free information, photography and Photoshop lessons, and all manner of related information. Show your appreciation by making your purchases immediately after clicking on any of our B&H or Amazon Affiliate links in this blog post. Remember, B&H ain’t just photography!
…..
Amazon.com
Those who prefer to support BAA by shopping with Amazon may use this link:
Amazon Canada
Many kind folks from north of the border, eh, have e-mailed stating that they would love to help us out by using one of our affiliate links but that living in Canada and doing so presents numerous problems. Now, they can help us out by using our Amazon Canada affiliate link by starting their searches by clicking here. Many thanks to those who have written.
Typos
In all blog posts and Bulletins, feel free to e-mail or to leave a comment regarding any typos or errors. Just be right :).
May 5th, 2015 Stuff
Monday was packing and travel day. I left before lunch and made it to the motel in St. Augustine just after 3pm. The 4 hour drive went by very quickly. I met my small group for a brief orientation and then headed to the Alligator Farm where conditions are looking quite excellent.
This blog post, the 117th in a row, took about 1 1/2 hours to prepare. It is scheduled to be published automatically at 1am on Tuesday morning. Tomorrow is the first full day of the IPT.
|
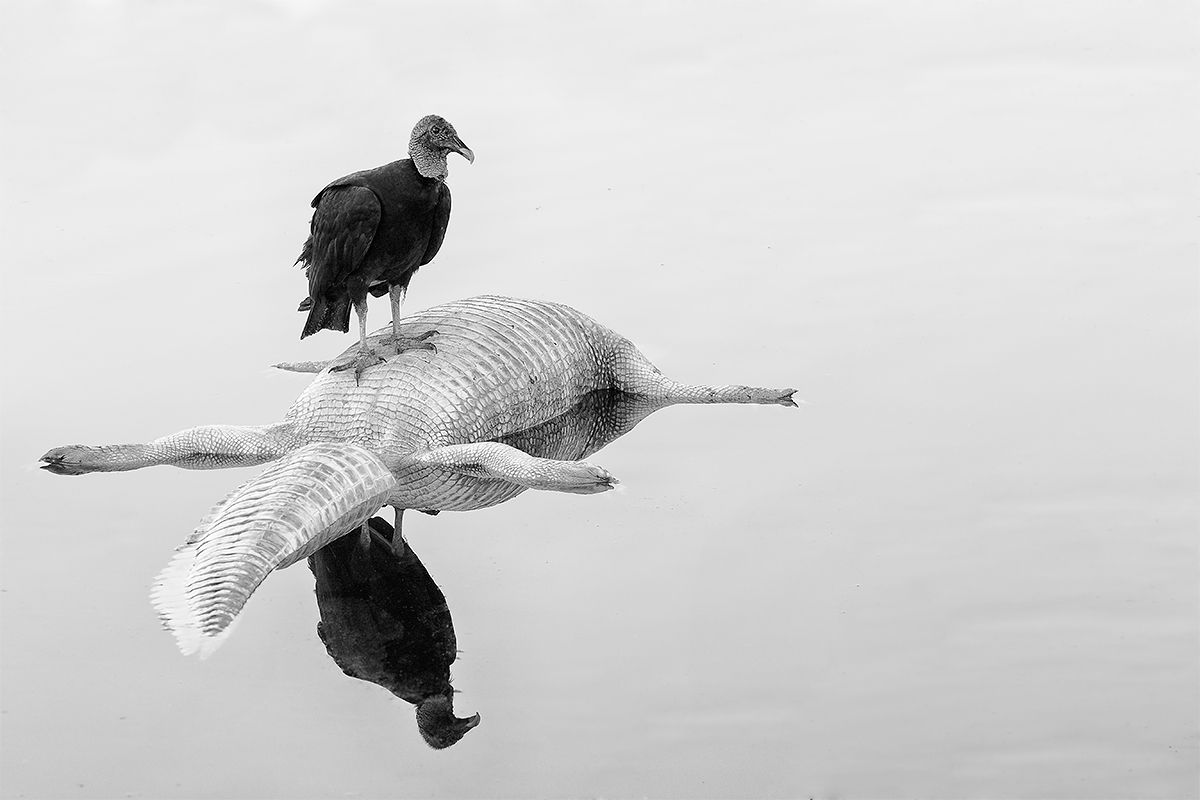
|
|
This image was created at Indian Lake Estates on Sunday morning with the hand held Canon EF 100-400mm f/4.5-5.6L IS II USM lens (at 124mm) and the amazing Canon EOS 7D Mark II. ISO 400. Evaluative metering +1 1/3 stops: 1/400 sec. at f/5.6 was still a significant underexposure of at least 1/2 stop, that despite blinkies on the water at 1/320 sec at f/5.6…. AWB. SHADE would have been a lot better.
One AF point above and two to the left of the center AF point/AI Servo Expand/Shutter Button AF as framed was active at the moment of exposure (as is always best when hand holding). The active AF point was on the vulture’s right foot conveniently on the same plane as the eye.
Black Vulture on rotting American Alligator carcass/NIK Silver Efex Pro High Structure Smooth B&W
|
I had been seeing a big group of Black Vultures every day in the same spot by the dead end corner of a canal. I drove up slowly to find out what the attraction was. I smelled it before I saw it, the bloated, rotting carcass of about a six foot gator. At first I tried working from the car but that did not work out well. When I got out, most of the vultures flew the coop. But the one on the gator was very much at peace with me and I was able to maneuver for the best backgrounds as long as I moved slowly. From the moment I started working the scene I knew that there was a really good black and white image there for the taking.
The funny thing is that when this or that vulture jumped onto the gator to join my friend the floating carcass would change position. I could not have placed the gator in a better spot myself….
After converting the image in DPP 4 at K 8200, I brought it into Photoshop and did some extensive cleanup of the surface of the water. Then my NIK 50-50 recipe at about 60% opacity. I saved a color version (below) and then went to NIK Silver Efex Pro and tried all of my favorites. High Structure Smooth was the winner by miles.
|
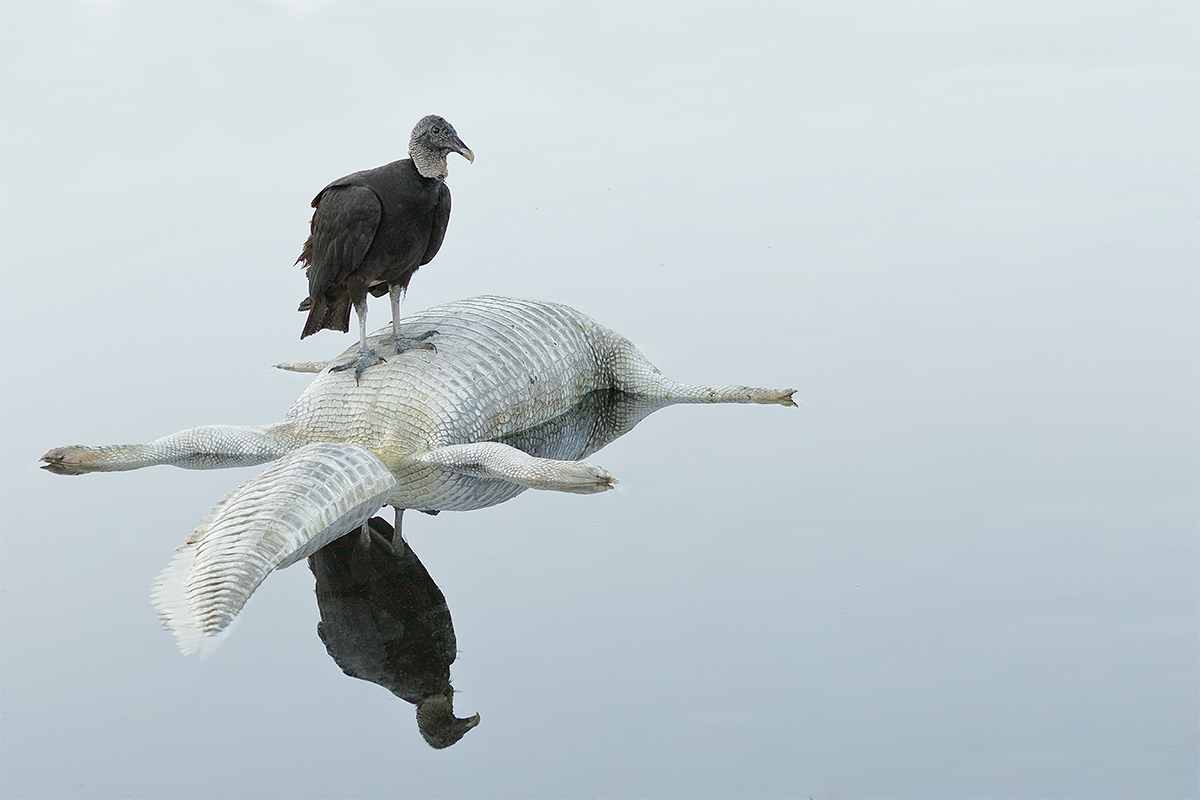
|
|
This image was created at Indian Lake Estates on Sunday morning with the hand held Canon EF 100-400mm f/4.5-5.6L IS II USM lens (at 124mm) and the amazing Canon EOS 7D Mark II. ISO 400. Evaluative metering +1 1/3 stops: 1/400 sec. at f/5.6 was still a significant underexposure of at least 1/2 stop, that despite blinkies on the water at 1/320 sec at f/5.6…. AWB should have been SHADE.
One AF point above and two to the left of the center AF point/AI Servo Expand/Shutter Button AF as framed was active at the moment of exposure (as is always best when hand holding). The active AF point was on the vulture’s right foot conveniently on the same plane as the eye.
Black Vulture on rotting American Alligator carcass
|
VULTURES AS ART?
Which version do you like best, color or B&W? Please let us know why.
Image Question
Do you see a reason to start from scratch and re-convert this image?
|

|
|
The strange thing is that when I lived in New York, I never knew about this amazing and consistently productive location.
|
Nickerson Beach/JBWR (possibly…)/Black Skimmer/Oystercatcher/migrant shorebird IPT: August 13-16, 2015. 3 1/2 DAYS: $1399.
Meet and greet on the evening of WED August 12. Limit 10/Openings 5.
Most of our seven photo sessions will be spent at Nickerson beach photographing the nesting Black Skimmers. In flight, sometimes battling. Carrying fish. Chicks of varying sizes from a very few just-hatched to lots of fledglings. It is likely that we will get to see some Great Black-backed Gulls preying on the juvenile skimmers. They swallow them whole. There will be lots of gulls to photograph as well as some Common Terns. Locally breeding shorebird species include American Oystercatcher–pretty much guaranteed, Willet, which is likely, and Piping Plover, which is probable but we need to get lucky with those to get close….
Save a space by calling Jim or Jen at the office and arranging to leave your deposit of $499. I hope to see you there.
JBWR?
If local conditions are ideal we may visit Jamaica Bay Wildlife Refuge to photograph southbound migrant shorebirds on one or possibly two mornings. Even if we do not visit JBWR we should get some good chances with the migrant shorebirds at the beach, especially Sanderling and Semipalmated Plover. Red Knot and others are possible.
|

|
|
As you can see, the oystercatchers are quite tame at Nickerson. And we will get you up early and we will stay out late.
|
Jamaica Bay Wildlife Refuge In-the-field Instructional Photo Workshop/Scouting Session. August 12, 2015. Morning only: $250. Cheap!
The tide will be pretty good at the East Pond…. If I learn that conditions there are un-photographable we will do Nickerson Beach as a back-up. This will work either as an add-on for out of town folks coming for the IPT above or as a stand alone session. Either way, you will, as always, learn a ton. And we might even get some good images.
Facebook
Be sure to like and follow BAA on Facebook by clicking on the logo link upper right. Tanks a stack!
Support the BAA Blog. Support the BAA Bulletins: Shop B&H here!
We want and need to keep providing you with the latest free information, photography and Photoshop lessons, and all manner of related information. Show your appreciation by making your purchases immediately after clicking on any of our B&H or Amazon Affiliate links in this blog post. Remember, B&H ain’t just photography!
…..
Amazon.com
Those who prefer to support BAA by shopping with Amazon may use this link:
Amazon Canada
Many kind folks from north of the border, eh, have e-mailed stating that they would love to help us out by using one of our affiliate links but that living in Canada and doing so presents numerous problems. Now, they can help us out by using our Amazon Canada affiliate link by starting their searches by clicking here. Many thanks to those who have written.
Typos
In all blog posts and Bulletins, feel free to e-mail or to leave a comment regarding any typos or errors. Just be right :).
May 4th, 2015 Stuff
Sunday was a triple-header day: swim, core exercises, and ice bath. And both a morning and afternoon sunset session. With some great results. Got some stuff done on the San Diego article for Nature Photographer Magazine. Ate well and took a nice nap. All in all a perfect day.
This blog post, the 116th in a row, took about 1 1/2 hours to prepare. It is scheduled to be published automatically at 1am on Monday morning.
|
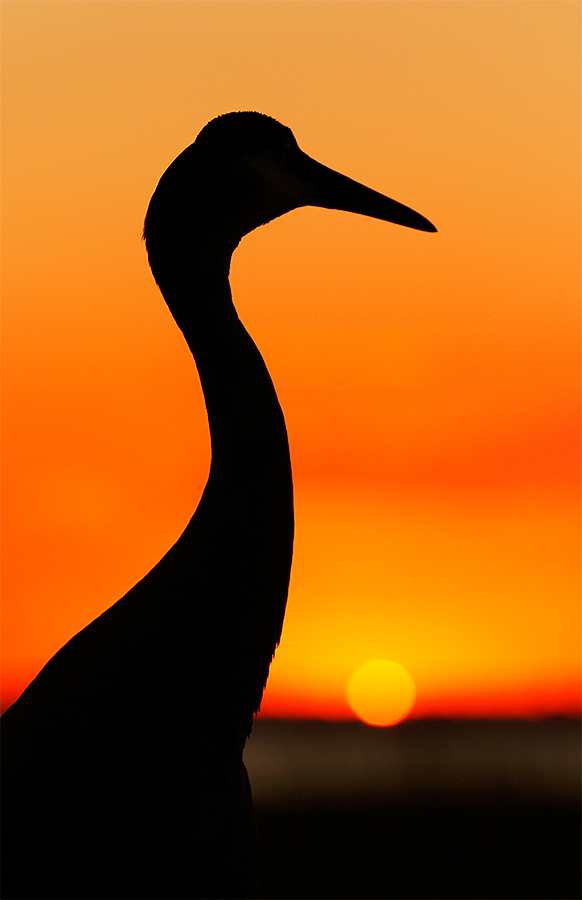
|
|
This image was created at Indian Lake Estates late on Saturday afternoon with the hand held Canon EF 100-400mm f/4.5-5.6L IS II USM lens (at 227mm) and the amazing Canon EOS 7D Mark II. ISO 400. Evaluative metering -1/3 stop: 1/1600 sec. at f/5.6. K9000.
AI Servo Zone/Shutter Button AF as framed was active at the moment of exposure (as is always best when hand holding). The AF system selected a single AF point two AF points above and one to the left of the center AF point. See the DPP 4 screen capture below to see how Zone AF performed.
Sandhill Crane head & shoulders silhouette with small in the frame sun
|
It’s All Dan Cadieux’s Fault…
Several years ago–I would not be surprised if it was actually four or five years, Dan Cadieux, BirdPhotographer’s.Net’s top Avian moderator, stopped by ILE for a night’s lodging, some good chow, and a helping of Sandhill Cranes. Dan was so hungry for cranes that he went down to the lake in the afternoon. I’d been living at ILE for well more than a decade at the time and had never been to the lake in the afternoon. Heck, Dan stayed for sunset and got some really nice crane silhouettes. I’d been thinking of that image for years and on Saturday night, for whatever reason, I head down to the lake at about 7:20pm. It was relatively easy pickings….
Now, I feel obligated, driven if you would, to get down to the lake at sunset on all but totally cloudy or rainy evenings…. It is Sunday night as I type and I just got back from the lake. I got some more amazing stuff. Sunset addiction….
|
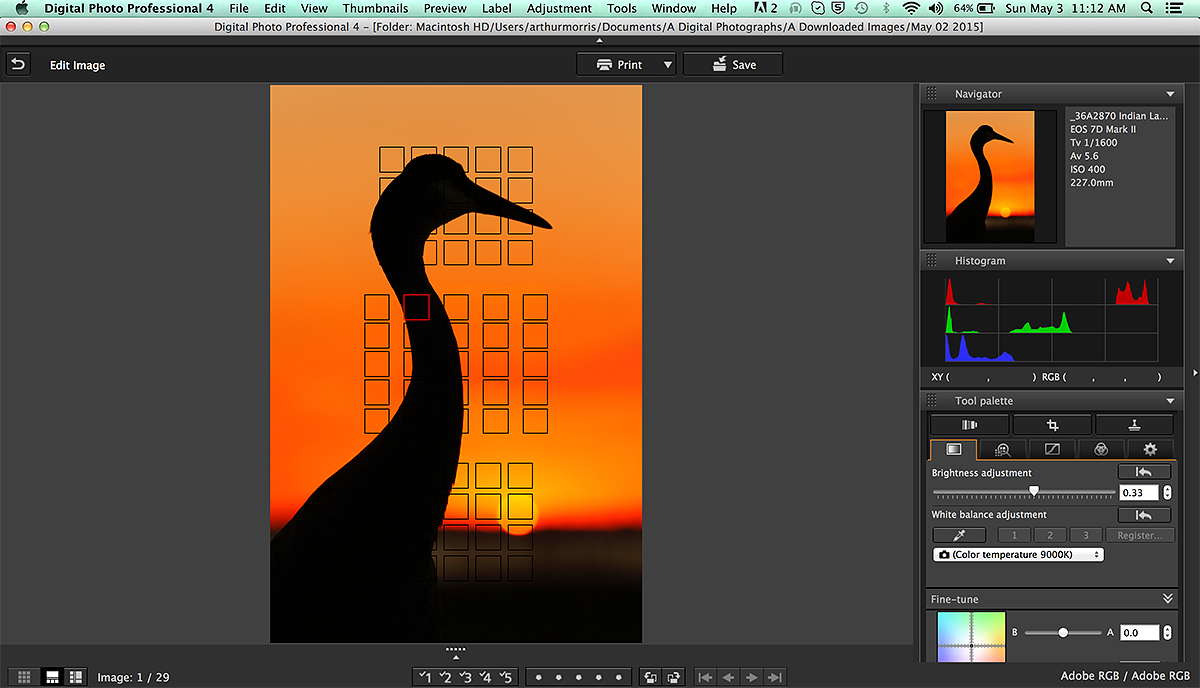
|
DPP 4 Screen Capture
|
DPP 4 Screen Capture
When the sun was a bit higher in the sky, I had set -1/3 stop to keep from burning the sun. But as it kissed the horizon it was well muted so I needed to brighten the image by 1/3 stop. That’s +0.33 on the Brightness slider. Except for a slight crop from behind the bird this one is pretty much right out of camera. As you can see above center Zone AF performed superbly and using it usually makes it easy to create the composition that you want.
100-400 II Versatility & 7D II Tip
When going with the 7D II on an intermediate telephoto I almost always use the one without the battery grip to save weight. The more I use the 100-400 II the more I get comfortable handling it and working the zoom. I’ve noticed that if I concentrate on the in-viewfinder level that things get easier and easier with practice. The level is actually a lot easier to see than the invisible exposure analog scale….
|

|
|
You can order your copy of “The Photographers’ Guide to Canon Digital Photo Professional 4.0” (aka the DPP 4 Raw Conversion eGuide) by Arash Hazeghi and Arthur Morris by clicking here.
|
The DPP 4 eGuide (PDF)
Learn how and why I and many other discerning photographers choose and use only DPP 4 to convert their Canon RAW files in the DPP 4 RAW Conversion Guide by Arash Hazeghi and yours truly. The latest version supports all of the newer Canon camera bodies and several older models including the EOS-7D and the EOS-1D Mark IV. A free update that will cover most of the newly added cameras will be sent as soon as I get it from Arash.
|
|
|
You can purchase your copy of the The 7D Mark II User’s Guide in the BAA Online Store here for $59.
|
7D Mark II User’s Guide
You can purchase your copy right now in the BAA Online Store here for $59. Or call Jim or Jennifer at 863-692-0906 and place a phone order. This is the highest priced user’s guide ever, surpassing the 5D II User’s Guide that is priced at $50. Why? I did twice as much work preparing the 7D II Guide. It required many days of writing, many dozens of hours of study and research, not to mention hundreds of hours in the field trying to figure out the best 7D II setting while doing what I love to do best, photographing birds and nature. The camera is quite complex. Many thanks to both Rudy Winston and Chuck Westfall of Canon USA for their help in getting me through the stickiest parts.
The guide contains 23,196 words in 516 paragraphs. There are 24 photos and screen captures interspersed in the main body of the text and a gallery of 23 additional 7D II images that show what the camera is capable of with a variety of lens and lens/TC combinations. We would love your feedback.
The Great Strength of the 7D Mark II User’s Guide
The very great strength of the 7D Mark II User’s Guide is the coverage of the autofocus system. I review in detail all of the items on the five pink AF Menus. Most important of these is the Custom Case setting (at AF 1) that I have developed over time and currently use for all of my bird photography. On the recently concluded Hooptie Deux Spoonbills and more IPT John Johnson of Naples, FL mentioned that he was having trouble producing sharp flight images. I set up my Custom Case on his camera, and within minutes he was amazed at the sharp results that he was getting…. While skill, strength, fine motor control, and superior hand eye coordination are all factors that will influence your success as a flight photographer, you can have all of the preceding in spades but if your camera is not set up properly much of your effort will be in vain….
What Else is in the Guide?
In the 7D Mark II User’s Guide you will learn everything that I know about the important topics listed below, and better yet, I explain the options for each along with my reasons for choosing a specific setting in a specific situation.
Handling the WHITEs
The top LCD and all camera control buttons
7D Mark II drive modes
How to manually select an AF sensor
Choosing an AF Area Selection Mode; how and why (includes extensive detail)
Moving the AF point or Zone
The creation of in-camera Multiple Exposures and in-camera HDR images (includes extensive detail)
Live View Shooting and AF choices (all new in the 7D II)
Menu Item Access
Coverage of almost all Menu Items and Custom Functions including the following: Image Quality, Auto Lighting Optimizer, Lens aberration corrections settings, Highlight Tone Priority, AF Configuration Tool (as above, this includes details on the custom setting that I use), Acceleration/deceleration tracking, Tracking sensitivity, Lens drive when AF impossible, Orientation linked AF point (I love this feature), Highlight alert, Histogram display–do you know how to access both histograms at once?, Auto rotate, Image Jump, LCD Brightness, Info button display options, Custom Shooting Modes set-up, ISO Safety shift, using the Q button, setting up rear focus, and setting up your My Menu feature (among others).
The guide is–of course–written in my informal, easy-to-follow style.
Please note: Some Menu items are not covered in this guide for one of several reasons:
They deal only with the creation of movies (not covered)
They are irrelevant to nature photography.
After spending hours studying the 7D II Instruction Manual and consulting others I have no clue as to the purpose or the reason for the existence of a given feature.
Though I recommend that the irrelevant and confusing items be left at the default settings, I do, in most cases, I refer you to the relevant page in the 7D II Instruction Manual. If you follow up, it just might turn out that you are a lot smarter than me. In those cases I would love to hear from you via e-mail. So far none of the above have prevented me from creating many spectacular images with my 7D II.
Please note that this guide does not contain a table of contents or an index. To search the document for a given topic simply hit Control F to search. When the Find box pops up, simply type the term that you are looking for into the field and hit Next. This will allow you to find what you are looking for quickly and efficiently.
If you purchase the 7D II UG and it helps you to create better images, please feel free to send no more than two 1200 pixel wide or 900 pixel tall sharpened JPEGs to me via e-mail along with your comments. I will be glad to do a short critique if so requested.
Otherwise, feedback via e-mail or blog comment is always appreciated.
Click here and scroll down for a free 7D Mark II User’s Guide AF Point Auto Switching Excerpt.
Facebook
Be sure to like and follow BAA on Facebook by clicking on the logo link upper right. Tanks a stack!
Support the BAA Blog. Support the BAA Bulletins: Shop B&H here!
We want and need to keep providing you with the latest free information, photography and Photoshop lessons, and all manner of related information. Show your appreciation by making your purchases immediately after clicking on any of our B&H or Amazon Affiliate links in this blog post. Remember, B&H ain’t just photography!
…..
Amazon.com
Those who prefer to support BAA by shopping with Amazon may use this link:
Amazon Canada
Many kind folks from north of the border, eh, have e-mailed stating that they would love to help us out by using one of our affiliate links but that living in Canada and doing so presents numerous problems. Now, they can help us out by using our Amazon Canada affiliate link by starting their searches by clicking here. Many thanks to those who have written.
Typos
In all blog posts and Bulletins, feel free to e-mail or to leave a comment regarding any typos or errors. Just be right :).
May 3rd, 2015 Stuff
Saturday was yet another typically busy day of work doing what I love. I had a great swim, my longest in some time, and enjoyed a 58 degree ice bath. Again I watched lots the NHL and NBA playoff games. The Rangers evened their series with the Capitols despite one of the sickest goals ever by Ovechkin. And mazel tov to the LA Clippers who advanced by sending the defending NBA champion San Antonio Spurs home. Talk about grit. Chis Paul played through a pulled hamstring for 29 incredible points and the game-winning basket.
I started work on my Nature Photographer magazine San Diego article. And, I will started getting my photo gear together for the upcoming St. Augustine trip.
This blog post, the 115th in a row, took about 1 1/4 hours to prepare. It is scheduled to be published automatically at 1am on Sunday morning.
LAST CHANCE: St. Augustine Alligator Farm Short-Notice Spoonbill and Wading Bird Chicks IPT: May 4-6, 2015. TWO FULL and TWO 1/2 DAYS: $1099. Limit 8/Openings 5.
Enjoy practically private instruction. Please call me Sunday at 863-692-0906 for St. Augustine IPT Late Registration Discount info. For complete details see the blog post here and scroll down.
|
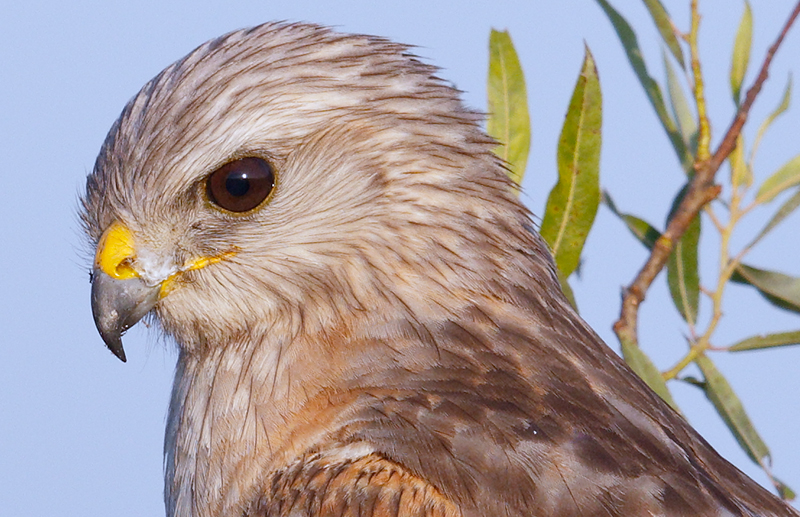
|
Image #1: Unsharpened tight crop of Red-shouldered Hawk’s head
|
Image Quality/Which Camera Quiz
In the blog post here, both John Giatropoulos and Steve Soderling left comments to the effect that they were able to distinguish 1D X and 7D II images based on image quality. I doubted that they could….
|
|
Image #2: Mottled Duck head and shoulders vertical portrait
|
Now You Are On the Spot: Image Quality/Which Camera? Quiz
In the “Now You Are On the Spot: Image Quality/Which Camera Quiz: the first of many…” blog post here I wrote: All are invited to leave a comment and let us know which of today’s images (the two images above here) were created with a 1D X and which were created by a 7D II. And they are of course welcome to let us know why they made their choices.
The consensus was that the first image was created by the 1D X, the second with the 7D II. Steve S and John G agreed, but then John decided that both images were made with the 7D II. Some folks flopped that. Doug Doornink, who said he was counting on a trick question, thought that both were created with the 7D II.
And the answer is…
Both the Red-Shouldered Hawk and the Mottled Duck images were created with the 7D Mark II, so yes, a sneaky Pierre question….
|
|
Image #3: This is a 1:1 or 100% crop of the optimized Osprey in the grass image.
|
On the Spot #2
In the “On the Spot” blog post here, the question was the same: Can you tell if this image was made with the 1D X or the 7D II?
Everyone who commented got this one right: 7D Mark II
|
|
Image #4: Sandhill Crane head and neck portrait.
|
On the Spot Again: Image Quality/Camera Body Quiz #3
In the blog post here, I asked again, Based on image quality, can you tell if today’s image was created with a 1D X or a 7D Mark II? If yes, what led you to your choice?
Steve Soderling said “1D X.” Then he said “definitely 7 DII.” Then he said, “I really can’t tell!” Nobody else played.
Steve’s last comment summed things up quite well for ISO 400 or below images. I don’t think that many folks were or are able to differentiate between 1D X and 7D II images based on image quality seen either in 1200 pixel wide JPEGs or 1:1 crops for the ISO 400 images. It would be interesting to show Arash Hazeghi 20 very sharp RAW files, half made with the 7D II and half made with the 1D X. My gut feeling is that he might do quite well.
One factor that really throws a monkey wrench into the works is the sharpness of a given image. I will admit that the Red-shouldered Hawk image was an exceptionally sharp image. That led many folks to think 1D X…. At some point in the future I might do an 8 or ten image which camera? quiz….
Facebook
Be sure to like and follow BAA on Facebook by clicking on the logo link upper right. Tanks a stack!
Support the BAA Blog. Support the BAA Bulletins: Shop B&H here!
We want and need to keep providing you with the latest free information, photography and Photoshop lessons, and all manner of related information. Show your appreciation by making your purchases immediately after clicking on any of our B&H or Amazon Affiliate links in this blog post. Remember, B&H ain’t just photography!
…..
Amazon.com
Those who prefer to support BAA by shopping with Amazon may use this link:
Amazon Canada
Many kind folks from north of the border, eh, have e-mailed stating that they would love to help us out by using one of our affiliate links but that living in Canada and doing so presents numerous problems. Now, they can help us out by using our Amazon Canada affiliate link by starting their searches by clicking here. Many thanks to those who have written.
Typos
In all blog posts and Bulletins, feel free to e-mail or to leave a comment regarding any typos or errors. Just be right :).
May 2nd, 2015 Stuff
Friday was another typically busy day of work doing what I love. I had a great swim, did my core exercises, and enjoyed a 59 degree ice bath. Watched lots of NHL and NBA playoffs on Tivo. Answered another ton of e-mails and Saturday morning I will really get started on my Nature Photographer magazine San Diego article. And, I will start packing up my photo gear for the upcoming St. Augustine trip.
This blog post, the 114th in a row, took about 2 hours to prepare. It is scheduled to be published automatically at 1am on Saturday morning.
St. Augustine Alligator Farm Short-Notice Spoonbill and Wading Bird Chicks IPT: May 4-6, 2015. TWO FULL and TWO 1/2 DAYS: $1099. Limit 8/Openings 5.
Enjoy practically private instruction. Please call me on Friday, Saturday, or Sunday at 863-692-0906 for St. Augustine IPT Late Registration Discount info. For complete details see the blog post here and scroll down.


Canon’s Huge Megapixel Bodies
Many of you have read about the two new Canon 50+ megapixel bodies, the Canon EOS 5DS DSLR and the Canon EOS 5DS R DSLR. The two cameras look, sound, and pretty much are quite similar. I have withheld commenting until now because I did not have a good–heck, I did not have any–understanding of the single difference between the two bodies, that being the Low-Pass Filter Effect Cancellation.
If you missed the hugely popular “Canon’s Two New 50+ Megapixel Camera Bodies/You Must Read This Before You Buy,” you can click here to catch up and learn a ton to boot.
Please Remember to use our Affiliate Links 🙂
To show your appreciation for my continuing efforts here, we ask, as always, that you use our the B&H and Amazon affiliate links on the right side of the blog for all of your purchases. B&H is recommended for you major photography gear purchases, Amazon for your household, entertainment, and general purpose stuff. Please check the availability of all photographic accessories in the BIRDS AS ART Online Store, especially the Mongoose M3.6 tripod heads, Gitzo tripods, Wimberley heads and plates, LensCoats and accessories, and the like. We sell only what I have used, have tested, and can depend on. We will not sell you junk. We know what you need to make creating great images easy and fun. And we are always glad to answer your gear questions via e-mail. I just learned that my account was suspended during my absence; it should be up and running by Monday at the latest.
I would of course appreciate your using our B&H affiliate links for all of your major gear, video, and electronic purchases. For the photographic stuff mentioned in the paragraph above we, meaning BAA, would of course greatly appreciate your business. Here is a huge thank you to the many who have been using our links on a regular basis and visiting the BAA Online store as well.
|
|
|
This image was created on the last (very brutal) morning of the DeSoto IPT with the hand held Canon EF 200-400mm f/4L IS USM lens with Internal 1.4x Extender (with the internal TC engaged at 560mm) and the Canon EOS 7D Mark II. ISO 400. Evaluative metering +2/3 stop: 1/1600 sec. at f/5.6 in Av mode.
AI Servo Zone/Shutter Button AF as framed was active at the moment of exposure (as is always best when hand holding). The system activated three AF points on the bird’s folded wing, slightly beyond the plane of the bird’s eye leaving the eye a bit soft. A bit of Eye Doctor work and a Contrast Mask on the face rectified that problem spectacularly.
Yellow-crowned Night-Heron striding
|
Tough Conditions
Dealing with wind against sun…
The wind was blowing in our faces, sand scouring our eyes. The light was behind us. Most every bird was facing directly away from us into the wind and away from the light. Like butt shots? It would have been a perfect morning for you.
What to do? My first choice is always to look for birds in the shade but the tide was too high for that. I instructed the group to get low, get ahead of the feeding shorebirds, wait for them to approach sun angle, and then make an image when they angled slightly towards us on the light. Foraging birds do not always feed facing directly into the wind. We were doing as well as could be expected, which was not very good when someone called out, “Yellow-crowned Night-Heron.” We followed the same strategy outlined above.
Like all the Willets, dowitchers, and turnstones, this bird was headed from our right to our left, roughly to the south. The wind was roaring from the west. On occasion, the night-heron would ignore the wind and turn slightly toward us. To get low I wound up almost on my back crunched up a bit while making a very few images. Craig Wesson’s image of me that led off yesterday blog post here was made just moments after I created today’s featured image. It is not at all easy to create level verticals while lying on your back in a quasi-sit-up position with a stiff wind in your face. Taking a peek at the in-viewfinder level helps only a bit as it is so sensitive but it will get you in the ballpark. I made only two frames. Amazingly, both were level with the subject sharp and nicely framed.
Beach Clean-up & Moving the Bird in the Frame
Click White Balance in DPP 4 worked perfectly during the RAW conversion.
With the onshore wind the beach was a mess with sea grass. About halfway through the clean-up I almost quit because it was taking me so long. But the cleaned up portion looked so good that I decided to keep on going. I went with my usual cast of cleanup tools: Protective Cloning on a Layer using the Clone Stamp Tool, the Patch Tool, the Spot Healing Brush, and a series of small Quick Masks refined with Regular Layer Masks. Once the cleanup was complete, I moved the bird up and back in the frame as you can clearly see by viewing the before and after animated GIF above. Then some Eye Doctor work followed by my NIK 50/50 recipe on the bird alone. Last was a Contrast Mask applied only to the dark and middle-toned feathers of the face.
Digital Basics
Everything that I did to optimize today’s image is covered in detail in my Digital Basics File–written in my easy-to-follow, easy-to-understand style. Are you tired of making your images look worse in Photoshop? Digital Basics File is an instructional PDF that is sent via e-mail. It includes my complete digital workflow, dozens of great Photoshop tips, details on using all of my image clean-up tools, the use of Contrast Masks, several different ways of expanding and filling in canvas, all of my time-saving Keyboard Shortcuts, Quick Masking, Layer Masking, and NIK Color Efex Pro basics, Contrast Masks, Digital Eye Doctor techniques, using Gaussian Blurs, Tim Grey Dodge and Burn, a variety of ways to make selections, how to create time-saving actions, the Surface Blur (background noise reduction) settings, and tons more.
APTATS I & II
Learn the details of advanced Quick Masking techniques in APTATS I. Learn Advanced Layer Masking Techniques in APTATS II. Mention this blog post and apply a $5 discount to either with phone orders only. Buy both APTATS I and APTATS II and we will be glad to apply at $15 discount either with phone orders or here in the BAA Online Store. For phone orders, call Jim or Jennifer at 863-692-0906 weekdays.
|

|
|
You can order your copy of “The Photographers’ Guide to Canon Digital Photo Professional 4.0” (aka the DPP 4 Raw Conversion eGuide) by Arash Hazeghi and Arthur Morris by clicking here.
|
The DPP 4 eGuide (PDF)
Learn how and why I and many other discerning photographers choose and use only DPP 4 to convert their Canon RAW files in the DPP 4 RAW Conversion Guide by Arash Hazeghi and yours truly. The latest version supports all of the newer Canon camera bodies and several older models including the EOS-7D and the EOS-1D Mark IV. A free update that will cover most of the newly added cameras will be sent as soon as I get it from Arash.
Facebook
Be sure to like and follow BAA on Facebook by clicking on the logo link upper right. Tanks a stack!
Support the BAA Blog. Support the BAA Bulletins: Shop B&H here!
We want and need to keep providing you with the latest free information, photography and Photoshop lessons, and all manner of related information. Show your appreciation by making your purchases immediately after clicking on any of our B&H or Amazon Affiliate links in this blog post. Remember, B&H ain’t just photography!
…..
Amazon.com
Those who prefer to support BAA by shopping with Amazon may use this link:
Amazon Canada
Many kind folks from north of the border, eh, have e-mailed stating that they would love to help us out by using one of our affiliate links but that living in Canada and doing so presents numerous problems. Now, they can help us out by using our Amazon Canada affiliate link by starting their searches by clicking here. Many thanks to those who have written.
Typos
In all blog posts and Bulletins, feel free to e-mail or to leave a comment regarding any typos or errors. Just be right :).
May 1st, 2015 Stuff
Thursday was another typically busy day. I had a great swim and a great ice bath sandwiched around a visit to TJ McKeon, my Active Release Technique chiropractor who worked hard on my right shoulder. Today I will be answering a ton of e-mails, getting started on an article on San Diego for Nature Photographer magazine, and do some packing for my upcoming St. Augustine trip.
St. Augustine Alligator Farm Short-Notice Spoonbill and Wading Bird Chicks IPT: May 4-6, 2015. TWO FULL and TWO 1/2 DAYS: $1099. Limit 8/Openings 5.
Enjoy practically private instruction. Please call me on Friday, Saturday, or Sunday at 863-692-0906 for St. Augustine IPT Late Registration Discount info. For complete details see the blog post here and scroll down.


Canon’s Huge Megapixel Bodies
Many of you have read about the two new Canon 50+ megapixel bodies, the Canon EOS 5DS DSLR and the Canon EOS 5DS R DSLR. The two cameras look, sound, and pretty much are quite similar. I have withheld commenting until now because I did not have a good–heck, I did not have any–understanding of the single difference between the two bodies, that being the Low-Pass Filter Effect Cancellation.
If you missed the hugely popular “Canon’s Two New 50+ Megapixel Camera Bodies/You Must Read This Before You Buy,” you can click here to catch up and learn a ton to boot.
Please Remember to use our Affiliate Links 🙂
To show your appreciation for my continuing efforts here, we ask, as always, that you use our the B&H and Amazon affiliate links on the right side of the blog for all of your purchases. B&H is recommended for you major photography gear purchases, Amazon for your household, entertainment, and general purpose stuff. Please check the availability of all photographic accessories in the BIRDS AS ART Online Store, especially the Mongoose M3.6 tripod heads, Gitzo tripods, Wimberley heads and plates, LensCoats and accessories, and the like. We sell only what I have used, have tested, and can depend on. We will not sell you junk. We know what you need to make creating great images easy and fun. And we are always glad to answer your gear questions via e-mail. I just learned that my account was suspended during my absence; it should be up and running by Monday at the latest.
I would of course appreciate your using our B&H affiliate links for all of your major gear, video, and electronic purchases. For the photographic stuff mentioned in the paragraph above we, meaning BAA, would of course greatly appreciate your business. Here is a huge thank you to the many who have been using our links on a regular basis and visiting the BAA Online store as well.
Sometimes Life is Tough
As I mentioned here previously, conditions on Sunday morning at DeSoto were viciously tough with a 25mph plus west wind scouring sand against our faces and all the birds facing away from the light. And the sun was quite harsh. Participant Craig Wesson created this image of me struggling to get in position to photograph a tame Yellow-crowned Night Heron. Many thanks Craig.
I did make a single good image of the bird with the 200-400 and then got close enough for a vertical head and shoulders portrait. As the wind was blowing the lens all over the place I had gone to Zone AF but when I attempted to focus nothing happened. I blamed it on Zone not being able to see the subject…. Pretty bad system I thought. Soon thereafter I realized that when I had switched from far focus only limit range to full that I had inadvertently switched from AF to M. M for Manual focus. Can you say operator error? In my own defense, I complained about the new placement of the limit range switch on all of the series II super-telephoto lenses when they first came out. It is a mistake that I still make frequently….
I will share the single keeper Yellow-crowned Night-Heron image with you here soon along with a lesson on photographing in severe wind-against-sun conditions.
Life is Always Wonderful
In the “Civility and Freedom of Speech on the BIRDS AS ART Blog” blog post here, Ken Wood left a comment that read in part, “I met you one time. You were in Klamath Falls, Oregon for the Winter Wings Festival a couple of years ago. I walked into the room where you were about to give a Photoshop presentation. You looked up and said “Hi”. I said “Hi” back. It was a magical moment. I enjoy your blog and check in frequently. I have learned tons of stuff (back button focus for one) and have your Digital Basics File and your DPP Raw Conversion Guide. I am continuously gleaning from both. Thank you for doing what you do and “Keep on shooting.”
I responded: Hi Ken and welcome. Why magical? later and love, artie Ken never say my question. But David Peake did via e-mail on April 17.
I share it with you below with his kind permission.
Why Magical?
Artie,
If I may have the temerity to answer this question you asked of someone on your blog. They said that your “Hi,” was magical. I feel the same and here’s why. It’s rare in this world to come across a person who can connect with people the way you do. I have watched the You Tube hour and fifty something minutes of you teaching about lenses for bird photography at least twice. The first time I watched it for the information. I learned that every lens has its merits. Just get the bird in your view finder, focus and shoot. That was inspiring enough.
But I watched a second time to absorb something else. Something less tangible but even more real. Somebody came into the room part way through your presentation and you said. “Hi”. And yes, it was magical. Such a small word. Such a large meaning. Only two letters , a single syllable, but such depth behind the greeting.
The sound of your voice says it all; here’s what I heard.
Welcome.
Please come in.
We are complete now that you are here.
We missed you.
You might be a little late but it feels right now you have arrived.
I’m glad you made it.
Thank you for coming.
I’m not sure what kept you but it’s ok.
You’re here now and you’re safe.
I love you.
Those are the word of a Father in the very best sense.
The sense of acceptance, the complete absence of any malice, irritation or judgment in your voice. It’s so rare.
And it’s no surprise that people value and love you.
Your email address says it all. You are Sam and Maya’s grandpa. You love and are loved. You are real, authentic and reachable.
For the short time I have been following your blog I recognize the depth of yourself that you share so freely with the world. I cannot tell you how much I value and appreciate this. I am facing my own journey right now as my wife is unwell with cancer. Your story gives me many reasons to hope. We desperately want her to live but we are being forced to face up to many unpleasant questions. If such a thing is possible I am terrified but calm all at the same time. The BAA blog is a quiet oasis for me as I process and try to make sense out of a troubling situation. It’s not often one comes across a person who knows why they’re on the planet as you do, understanding your reason for being. I value this and the fact you have taken the time to write me, several times on the blog, a complete unknown, on the other side of the planet, 16 hrs ahead as the day is counted… Real treasure.! It really is magical.
The moment when a father turns his face towards you and lets his countenance rest on you is one of the purest kinds of blessing I can think of.
I am gratefully and sincerely yours, with kind regards, David Peake
Blown Away
I was of course blown away by David’s kind words. And by his simple yet powerful writing style. We have corresponded several times since his first e-mail and become great online friends. I shared the story of losing my beloved wife and best friend Elaine Belsky Morris to breast cancer in 1994. It is amazing how serendipitous events can lead to so much sharing and wonderful stuff.
I value David’s thoughtful comments on the blog as well. I hope to visit him in New Zealand one day.
Used Photography Gear/New Listings
Canon EF 70-200mm f/2.8L IS II USM Lens
Multiple IPT veteran Carl Zanoni is offering a used Canon EF 70-200mm f/2.8L IS II USM lens in like new condition for the record low price of $1649.00. The sale includes front lens cover and rear lens cap, the ET-82 lens hood,the LZ 1324 Lens Bag, the tripod mount ring (collar), the original box, and insured shipping via UPS Ground to US addresses. Your item will not ship until your check clears unless other arrangements are made.
Please contact Carl by e-mail or by phone at 860 306 9651 (eastern time).
I have owned and used the 70-200 II since its release. It is an incredibly versatile lens. I use it (alone or with either the 1.4X III or the 2X III TCs) for both birds and for wildlife. It is a valuable tool at the gator rookeries. In addition, I use it for flower fields, flocks of birds in flight (especially geese at Bosque and skimmers at Nickerson Beach), for tree and scenic photography, and for pan blurs both hand held and on a tripod. And for tons more. As I said, “versatile.” Priced so low, this one should sell immediately.
Canon EF 180mm f/3.5L USM Macro Lens
Multiple IPT veteran Carl Zanoni is also offering a used Canon EF 180mm f/3.5 USM macro lens in like new condition for $1175. The sale includes the E-72 II 72mm (front) lens cap, the (rear) lens dust cap E, the ET-78 II lens hood, Tripod Mount Ring B (tripod collar), the LZ1324 lens case, the original box, and insured shipping via UPS Ground to US addresses. Your item will not ship until your check clears unless other arrangements are made.
Please contact Carl by e-mail or by phone at 860 306 9651 (eastern time).
I have owned and used the 180 macro for more than 10 years. It is the primo telephoto macro lens. It is sharp with and without a 1.4X TC. It offers a narrow field of view that goes a long way to eliminating back distracting background element. It is great for flowers and all sorts of bugs, butterflies, and dragonflies as well as for frogs and toads.
Canon EF 24-70 f2.8L II USM Lens
Dave Bourgaize is offering a used Canon EF 24-70 f2.8L II USM lens in excellent condition for $1499.00. The sale includes front lens cover and rear lens cap, EW-88C lens hood, original Canon bag, and insured shipping via UPS Ground to US addresses. Your item will not ship until your check clears unless other arrangements are made. Please contact Dave by e-mail or by phone at (310) 748-9547 (pacific time zone).
I own and use the 24-70II. It is much sharper edge to edge than the lighter, more versatile Canon EF 24-105mm f/4L IS USM lens. I consider the 24-70II a must for serious landscape photographers. As it sells new for $1899 Dave’s price is lower than any I have seen for this lens in excellent condition. It should sell immediately.
The “old” five, the Canon 500 mm f/4L IS Lens
Gregory Asnis is offering a never used Canon 500 mm f/4L IS lens in brand new condition for $4999. The sale includes the the front leather hood, the rear dust cap, the lens trunk, an AquaTech SoftHood Collapsing Hood for the 500mm f/4 (a $150 value), and insured shipping by UPS Ground to US addresses only. Your item will not ship until your check clears unless other arrangements are made.
Please contact Gregory via e-mail or by phone at 917-597-9408, Eastern Time.
The old five was at one time the world’s most popular telephoto lens. It still makes great images with both TCs. Greg’s new, never used lens is priced lower than many used ones on the web. artie
Click here for the complete listings.
Facebook
Be sure to like and follow BAA on Facebook by clicking on the logo link upper right. Tanks a stack!
Support the BAA Blog. Support the BAA Bulletins: Shop B&H here!
We want and need to keep providing you with the latest free information, photography and Photoshop lessons, and all manner of related information. Show your appreciation by making your purchases immediately after clicking on any of our B&H or Amazon Affiliate links in this blog post. Remember, B&H ain’t just photography!
…..
Amazon.com
Those who prefer to support BAA by shopping with Amazon may use this link:
Amazon Canada
Many kind folks from north of the border, eh, have e-mailed stating that they would love to help us out by using one of our affiliate links but that living in Canada and doing so presents numerous problems. Now, they can help us out by using our Amazon Canada affiliate link by starting their searches by clicking here. Many thanks to those who have written.
Typos
In all blog posts and Bulletins, feel free to e-mail or to leave a comment regarding any typos or errors. Just be right :).
April 30th, 2015 Stuff
I got lots accomplished on Wednesday but still had time for a good swim, my core exercises, and an ice bath before dinner. This blog post, the 112th in a row, took about 1 1/4 hours to prepare. It was published at 4am on Thursday morning.
6:18am Update
I awoke just before 5am to discover a first. Due to a snafu, most of this post had mysteriously disappeared… At first it seemed that I would need to start from scratch but by hitting the back button I was able to get to a preview view. From that I was able to recreate the post in about 20 minutes. Whew! Starting over would have required at least an hour’s additional work.
St. Augustine Alligator Farm Short-Notice Spoonbill and Wading Bird Chicks IPT: May 4-6, 2015. TWO FULL and TWO 1/2 DAYS: $1099. Limit 8/Openings 5.
Enjoy practically private instruction. Please call the office at 863-692-0906 for St. Augustine IPT Late Registration Discount info. For complete details see the blog post here and scroll down.


Canon’s Huge Megapixel Bodies
Many of you have read about the two new Canon 50+ megapixel bodies, the Canon EOS 5DS DSLR and the Canon EOS 5DS R DSLR. The two cameras look, sound, and pretty much are quite similar. I have withheld commenting until now because I did not have a good–heck, I did not have any–understanding of the single difference between the two bodies, that being the Low-Pass Filter Effect Cancellation.
If you missed the hugely popular “Canon’s Two New 50+ Megapixel Camera Bodies/You Must Read This Before You Buy,” you can click here to catch up and learn a ton to boot.
Please Remember to use our Affiliate Links 🙂
To show your appreciation for my continuing efforts here, we ask, as always, that you use our the B&H and Amazon affiliate links on the right side of the blog for all of your purchases. B&H is recommended for you major photography gear purchases, Amazon for your household, entertainment, and general purpose stuff. Please check the availability of all photographic accessories in the BIRDS AS ART Online Store, especially the Mongoose M3.6 tripod heads, Gitzo tripods, Wimberley heads and plates, LensCoats and accessories, and the like. We sell only what I have used, have tested, and can depend on. We will not sell you junk. We know what you need to make creating great images easy and fun. And we are always glad to answer your gear questions via e-mail. I just learned that my account was suspended during my absence; it should be up and running by Monday at the latest.
I would of course appreciate your using our B&H affiliate links for all of your major gear, video, and electronic purchases. For the photographic stuff mentioned in the paragraph above we, meaning BAA, would of course greatly appreciate your business. Here is a huge thank you to the many who have been using our links on a regular basis and visiting the BAA Online store as well.
|
|
|
This image was created on the afternoon of Day 1 of the Fort DeSoto IPT while seated with the hand held hand held Canon EF 300mm f/2.8L IS II USM lens, the Canon Extender EF 2X III, and the Canon EOS-1D X. ISO 400: 1/2000 sec. at f/8 is the standard bright WHITEs in full sun exposure. Manual mode. AWB.
Two AF points to the left and one row above the center AF Point/AI Servo Expand/Shutter Button AF (on the crease of the gape as originally framed) was active at the moment of exposure. Learn everything there is to know about the 1D X and 5D III AF systems including how to manage the various AF Area Selection Modes, when to use which one, and several ways to move the AF sensor around in my 1D X AF Guide and the 5D Mark III User’s Guide. Click on the image to see a larger version..
Image #1: Laughing Gull/head portrait
|
A Gorgeous, Under-appreciated Species
At the peak of breeding plumage, Laughing Gull, Larus atricilla, is quite a handsome bird: red eye skin, white eye crescents, wine red legs, and a blood red bill fit nicely with it gray upperparts and stark white breast and belly. To many, it is just a gull. To me it is a beautiful bird that makes a great photographic subject.
|
|
|
This image was also created on the afternoon of Day 1 of the Fort DeSoto IPT while seated with the hand held hand held Canon EF 300mm f/2.8L IS II USM lens, the Canon Extender EF 2X III, and the Canon EOS-1D X. ISO 400: 1/2000 sec. at f/8 is the standard bright WHITEs in full sun exposure. Manual mode. AWB.
Five AF points and one column to the right of the center AF Point/AI Servo Expand/Shutter Button AF (on base of the black hood as originally framed) was active at the moment of exposure. Learn everything there is to know about the 1D X and 5D III AF systems including how to manage the various AF Area Selection Modes, when to use which one, and several ways to move the AF sensor around in my 1D X AF Guide and the 5D Mark III User’s Guide..
Image #2: Laughing Gull/front end vertical portrait
|
On Composition Here
The key for successful head portraits like the one that opened this blog post is to make sure that the bird’s eye is well above the horizontal centerline of the image; do this by carefully selecting your active AF point. The way that I describe front end vertical portraits is that you should always “give ‘em an inch behind the legs.” This design works well for many mammals as well as for birds.
Learn more about composition and image design in the section on Advanced Composition and Image Design in The Art of Bird Photography II (ABP II: 916 pages, 900+ images each with my legendary educational captions: on CD only. Adapts easily to an i-Pad.) ABP II is the digital follow-up to the original classic (now in soft cover only) The Art of Bird Photography, the best place around to learn exposure theory. Buy the 2-book bundle and save $10 here. If I am home I am always glad to sign and personalize the softcover books.
Image Questions
#1: Why was it important for me to be seated rather than standing for these two images?
#2: What would have been the easiest way to make Image #2 even stronger?
The Stronger of the Two?
Which of the two images presented here is the stronger of the two/ Why?
Facebook
Be sure to like and follow BAA on Facebook by clicking on the logo link upper right. Tanks a stack!
Support the BAA Blog. Support the BAA Bulletins: Shop B&H here!
We want and need to keep providing you with the latest free information, photography and Photoshop lessons, and all manner of related information. Show your appreciation by making your purchases immediately after clicking on any of our B&H or Amazon Affiliate links in this blog post. Remember, B&H ain’t just photography!
…..
Amazon.com
Those who prefer to support BAA by shopping with Amazon may use this link:
Amazon Canada
Many kind folks from north of the border, eh, have e-mailed stating that they would love to help us out by using one of our affiliate links but that living in Canada and doing so presents numerous problems. Now, they can help us out by using our Amazon Canada affiliate link by starting their searches by clicking here. Many thanks to those who have written.
Typos
In all blog posts and Bulletins, feel free to e-mail or to leave a comment regarding any typos or errors. Just be right :).
April 29th, 2015 Stuff
Tuesday was a relaxing day. I had to head into town for some errands in the afternoon but did have time for an ice bath before dinner. This blog post, the 111th in a row, took about 2 hours to prepare. It was published just before 6am on Wednesday morning.
St. Augustine Alligator Farm Short-Notice Spoonbill and Wading Bird Chicks IPT: May 4-6, 2015. TWO FULL and TWO 1/2 DAYS: $1099. Limit 8/Openings 5.
Enjoy practically private instruction. Please call the office at 863-692-0906 for St. Augustine IPT Late Registration Discount info. For complete details see the blog post here and scroll down.


Canon’s Huge Megapixel Bodies
Many of you have read about the two new Canon 50+ megapixel bodies, the Canon EOS 5DS DSLR and the Canon EOS 5DS R DSLR. The two cameras look, sound, and pretty much are quite similar. I have withheld commenting until now because I did not have a good–heck, I did not have any–understanding of the single difference between the two bodies, that being the Low-Pass Filter Effect Cancellation.
If you missed the hugely popular “Canon’s Two New 50+ Megapixel Camera Bodies/You Must Read This Before You Buy,” you can click here to catch up and learn a ton to boot.
Please Remember to use our Affiliate Links 🙂
To show your appreciation for my continuing efforts here, we ask, as always, that you use our the B&H and Amazon affiliate links on the right side of the blog for all of your purchases. B&H is recommended for you major photography gear purchases, Amazon for your household, entertainment, and general purpose stuff. Please check the availability of all photographic accessories in the BIRDS AS ART Online Store, especially the Mongoose M3.6 tripod heads, Gitzo tripods, Wimberley heads and plates, LensCoats and accessories, and the like. We sell only what I have used, have tested, and can depend on. We will not sell you junk. We know what you need to make creating great images easy and fun. And we are always glad to answer your gear questions via e-mail. I just learned that my account was suspended during my absence; it should be up and running by Monday at the latest.
I would of course appreciate your using our B&H affiliate links for all of your major gear, video, and electronic purchases. For the photographic stuff mentioned in the paragraph above we, meaning BAA, would of course greatly appreciate your business. Here is a huge thank you to the many who have been using our links on a regular basis and visiting the BAA Online store as well.
Featured Listing
Canon EF 24-70 f2.8L II USM Lens
Dave Bourgaize is offering a used Canon EF 24-70 f2.8L II USM lens in excellent condition for $1499.00. The sale includes front lens cover and rear lens cap, EW-88C lens hood, original Canon bag, and insured shipping via UPS Ground to US addresses. Your item will not ship until your check clears unless other arrangements are made. Please contact Dave by e-mail or by phone at (310) 748-9547 (pacific time zone).
I own and use the 24-70II. It is much sharper edge to edge than the lighter, more versatile Canon EF 24-105mm f/4L IS USM lens. I consider the 24-70II a must for serious landscape photographers. As it sells new for $1899 Dave’s price is lower than any I have seen for this lens in excellent condition. It should sell quickly.
|
|
|
This image was created on the recently concluded Fort DeSoto IPT by Phil Frigon with the Canon EF 11-24mm f/4L USM lens (hand held at 11mm) and the Canon EOS-1D X. ISO 400. Evaluative metering +2 stops: 1/250 sec. at f/4.0.
Center AF point/AI Servo Expand/Rear Focus AF on the grass just in front of and to the left of the photographer. Rear Focus is where it is at for landscape images. Click here to see the latest version of the Rear Focus Tutorial. Click on the image to see a larger version.
Image #1: Fort DeSoto photographer-scape. Image courtesy of and copyright 2015: Phil Frigon.
|
Stormy Skies/Low Light
In the Spoonbill Aperture Quiz here, I wrote, “You get the picture. Conditions were borderline crappy. There was not much light. And it was late in the day.” When I saw Phil’s wonderful image, I thought, that explains the conditions perfectly. Thanks to Phil for graciously allowing me to share his skillfully seen and beautifully designed image with you here. See more on the spoonbill aperture below.
The photographer pictured in the photo above is IPT participant Warren Robb, an easy-going gentleman from Texas. It is high tide and the view is toward the Gulf.
The Canon EF 11-24mm f/4L USM Lens
I was never even aware of this lens until I saw it in Phil’s hands on the IPT. He used it quite effectively above. Heck, I am more of a super-telephoto guy. I wouldn’t mind having one in my bag at Bosque or in the Palouse….
The 11-15 is a truly versatile wide-angle zoom lens featuring an advanced optical design and constant f/4 maximum aperture, the Canon EF 11-24mm f/4L USM Lens is a member of the esteemed L-series of lenses designed for full-frame EOS DSLRs. One Super UD element and one UD element offer a significant reduction in chromatic aberrations while four aspherical elements help to minimize distortions throughout the zoom range and provide consistent edge-to-edge sharpness and illumination. Both SWC and ASC coatings have been applied to the elements in order to reduce lens flare and ghosting for increased contrast and color accuracy. Ideally suited for landscape and architectural photography, this lens covers ultra-wide to wide-angle perspectives and backs up its versatile zoom range with sophisticated optical components and intuitive handling.
In regard to focusing performance, a ring-type Ultrasonic Motor offers fast, smooth, and near-silent autofocus, which is further benefitted by full-time manual focus operation and an internal focusing design. The lens is both water and dust-resistant, and fluorine coatings have also been applied to the front and rear elements to protect against fingerprints and smudges from affecting image quality. It is compatible with full-frame EOS DSLRs, as well as with APS-C-sized sensors (like the EOS 7D Mark II) where it will provide a 17.6-38.4mm equivalent focal length range.
- Constant f/4 maximum aperture offers consistent performance and light transmission throughout the zoom range.
- One Super UD (Ultra Low Dispersion) and one UD element help to significantly reduce chromatic aberrations for improved clarity and color accuracy.
- Four aspherical elements help to minimize distortions throughout the zoom range in order to maintain edge-to-edge sharpness and illumination.
- Both a Subwavelength Coating (SWC) and an Air Sphere Coating (ASC) have been applied to lens elements to reduce backlit flaring and ghosting for maintained light transmission and high contrast in strong lighting conditions.
- A ring-type Ultrasonic Motor (USM), along with an internal focusing system, high-speed CPU, and optimized AF algorithms, are employed to deliver fast, precise, and near-silent autofocus performance.
- Full-time manual focus operation is available for fine-tuning of your focus position when working in the AF mode.
- A weather-resistant design protects the lens from dust and moisture to enable its use in inclement conditions. Additionally, fluorine coatings have also been applied to the front and rear lens elements for further protection against fingerprints and smudging.
- Nine rounded diaphragm blades contribute to a pleasing out of focus quality that benefits the use of shallow depth of field and selective focus techniques.
- The lens is designed to accept rear insert-type gelatin filters, which are cut-to-size and inserted behind the rear lens element.
|
|
|
This image was created on the last afternoon of the Fort DeSoto IPT with the hand held Canon EF 300mm f/2.8L IS II USM lens and the Canon EOS 7D Mark II. ISO 640. Evaluative metering +2 stops as framed: 1/1000 sec. at f/2.8 in Manual mode. AWB. Click on the image to see a larger version.
Center AF point/AI Servo-Surround/Shutter Button AF (right on the bird’s eye) as originally framed was active at the moment of exposure. Click on the image to see a larger version.
Roseate Spoonbill landing
|
The Spoonbill Aperture: f/2.8
It was pretty dark. There was very little light. I was fighting for shutter speed. I wanted to avoid raising the ISO. There was only one choice as far as the aperture: f/2.8. And I never worry about depth-of-field when doing flight photography…. In the blog post here, “Wide Open for Flight,” I explained why I often go “wide open for flight.” As it seems that that lesson needs to be repeated, that is what I will do here 🙂
Why Wide Open for Flight?
Most of the time when doing flight photography I will work wide open or close to it. Here, I went wide open to the max at f/2.8. To my eye, the depth-of-field is more than sufficient to cover the whole bird from wingtip to wingtip.
Here are the reasons in no particular order that I work wide open or close to it when doing flight photography:
1: The wider the aperture at a given ISO the faster the shutter speed. Fast shutter speeds are ideal for flight photography. My good friend Ned Harris, a skilled and oft-published hawks in flight photographer, once said to me, “If I could work at 1/8000 sec. all the time for flight photography I would do just that.”
2: Working at the widest aperture will always let you use the lowest ISO for a given shutter speed (always assuming that you are exposing to the right–as I did here in an extreme low-light situation–in order to come up with a good exposure).
3-In most flight photography situations the birds are far enough away to ensure sufficient depth-of-field to cover the entire bird. Remember that as camera to subject distance increases, depth-of-field increases. For me, the myth of stopping down either one full stop or always working at f/8 is pretty much bad advice. A secondary factor here that bolsters my argument is that though you would typically want more depth-of-field when working close to a lens’s minimum focusing distance, depth of field at close range is minimized…. In other words, stopping down in these situations will not help you much anyway….
Simply Put
With most bird photography, the wide apertures are usually fine. They pay off with high shutter speeds and lower ISOs. With birds in flight, you almost always have enough depth-of-field to cover the bird from wingtip to wingtip, even when working at the wide open aperture. And if you do stop down, you do not gain much. You should stop down when photographing birds at extremely close range, close to the minimum focusing distance of your lens. In those case be to sure focus on the eye or at least on the same plane as the bird’s eye.
Facebook
Be sure to like and follow BAA on Facebook by clicking on the logo link upper right. Tanks a stack!
Support the BAA Blog. Support the BAA Bulletins: Shop B&H here!
We want and need to keep providing you with the latest free information, photography and Photoshop lessons, and all manner of related information. Show your appreciation by making your purchases immediately after clicking on any of our B&H or Amazon Affiliate links in this blog post. Remember, B&H ain’t just photography!
…..
Amazon.com
Those who prefer to support BAA by shopping with Amazon may use this link:
Amazon Canada
Many kind folks from north of the border, eh, have e-mailed stating that they would love to help us out by using one of our affiliate links but that living in Canada and doing so presents numerous problems. Now, they can help us out by using our Amazon Canada affiliate link by starting their searches by clicking here. Many thanks to those who have written.
Typos
In all blog posts and Bulletins, feel free to e-mail or to leave a comment regarding any typos or errors. Just be right :).
April 28th, 2015 Stuff
Though conditions on Monday morning turned out to be much better than on Sunday morning, I decided to pack up, get everything in the car, and drive back to ILE. I was beat. The DeSoto IPT group was great and and so were the birds. As fate would have it, it is supposed to rain for 2 days…. I guess that the weather gods heard that I was out of Dodge. I enjoyed a nice swim yesterday and will be back to the full routine today.
This blog post, the 110th in a row, took about 2 1/2 hours to prepare. It was published just after 5am on Tuesday morning.
Answers to the Spoonbill Aperture Quiz tomorrow.
Featured Listing
Canon EF 24-70 f2.8L II USM Lens
Dave Bourgaize is offering a used Canon EF 24-70 f2.8L II USM lens in excellent condition for $1499.00. The sale includes front lens cover and rear lens cap, EW-88C lens hood, original Canon bag, and insured shipping via UPS Ground to US addresses. Your item will not ship until your check clears unless other arrangements are made. Please contact Dave by e-mail or by phone at (310) 748-9547 (pacific time zone).
I own and use the 24-70II. It is much sharper edge to edge than the lighter, more versatile Canon EF 24-105mm f/4L IS USM lens. I consider the 24-70II a must for serious landscape photographers. As it sells new for $1899 Dave’s price is lower than any I have seen for this lens in excellent condition. It should sell immediately.
|
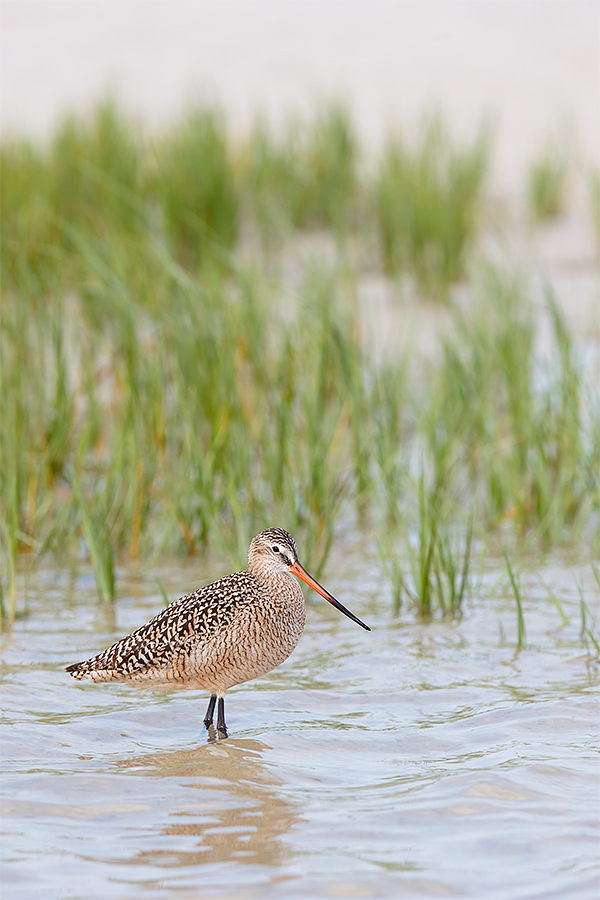
|
|
This image was created on the first day of the Fort DeSoto IPT with the hand held Canon EF 300mm f/2.8L IS II USM lens, the Canon Extender EF 1.4X III, and the Canon EOS-1D X. ISO 800. Evaluative metering +1 stop as framed: 1/1250 sec. at f/5.6 in Manual mode. AWB.
Four AF points below the center AF point/AI Servo-Surround/Shutter Button AF as framed was active at the moment of exposure and caught the center of the front of the bird’s breast. Click on the image to see a larger version.
Image #1: Marbled Godwit with marsh grasses
|
300 II/1D X in Low Light Conditions
In the “What Camera Body for the Conditions?” blog post here, I asked:
Why the 300 /f2.8L IS II (over the 200-400 or the 600 II)?
Why the (full frame) 1D X?
While many folks skirted around the right answers and few did pretty well, everyone missed the #1 answer…. Bill Eaton covered two important points succinctly when he wrote, “Both body and lens are good in low light.” Elinor Osborne did a nice job overall as well. As did David Peake as well. In fact, his 4:37am comment was quite excellent.
Here are my thoughts:
#1: Most of the birds at DeSoto are very tame (David Peake: You might have decided that you didn’t need the extra reach of the crop sensor since you had 300 , 420, and 600 covered with your lens/TC choice.)
#2: At f/2.8 the 300 II is a full stop faster than the two larger lenses. This allowed me to use lower ISOs while maintaining a fast-enough shutter speed.
#3: The 300 II is lighter and well smaller than either of the two larger lenses. This makes it easier to hand hold (Matteo Bianchi), allows you greater freedom of movement, and gives you a better chance of capturing images of flight and action.
#4: High ISO noise control is better with the 1D X than with the 7D II.
#5: It’s nice to go light with just one lens on occasion. When conditions were better I brought my beach cart with the big wheels and took the 600 II, the 200-400, the 300 II, a wide angle lens, and both TCs. And one afternoon I brought along the 70-200 f/2.8L IS lens as well.
7D II Viewfinder Level
I find the viewfinder level in the 7D II quite helpful when handholding and creating verticals, especially when using the camera without the vertical battery grip.
Free Excerpt from the 7D Mark II User’s Guide
Viewfinder Display
Here I set Viewfinder level to Show and VF grid display to Enable. In Show/hide in viewfinder I leave all the boxes checked except for the last one for Flicker detection as that deals with indoor photography.
I find the Viewfinder level incredibly useful when hand holding wide angle or fish eye lenses. I wish that all of my cameras offered this feature.
Learn more about the 7D Mark II User’s Guide or purchase your copy here.
|
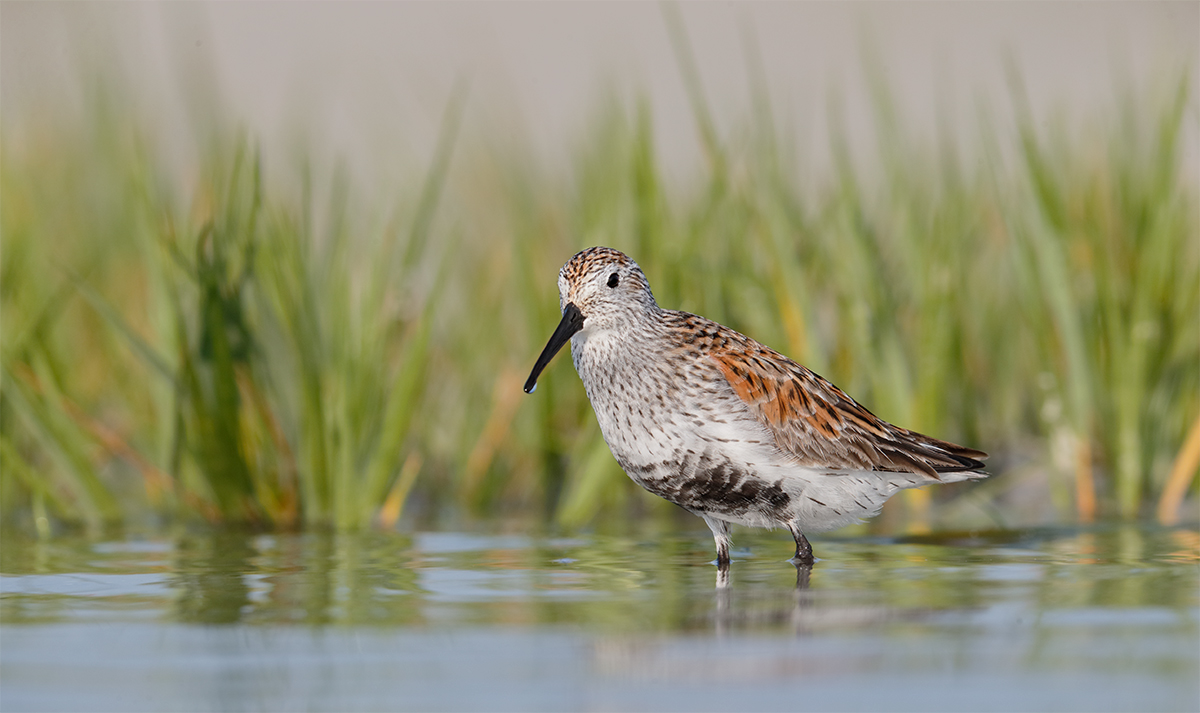
|
|
This image was created on the second morning of the Fort DeSoto IPT with the tripod-mounted Canon EF 600mm f/4L IS II USM lens, the Canon Extender EF 2X III, and the Canon EOS-1D X. ISO 400. Evaluative metering plus about 1/3 stop: 1/640 sec. at f/9. AWB.
Center AF point (by necessity)/AI Servo/Shutter Button/Expand AF as originally framed was active at the moment of exposure. The active AF point was on the center of the bird’s upper breast.
Image #2: Dunlin molting into breeding plumage.
|
Loving the Haze
On our second IPT morning we enjoyed a light haze from just after sunrise until we left the beach at about 10:30am. The haze softened up the light very nicely. In addition, without hard-edged shadows we were able to work well off light angle. I tracked this bird as it moved from our right to well to our left, about 30 degrees past sun angle. When it stopped for an instant in front of a small patch of marsh grass, I fired off two quick images. As I was working quickly the image was about 2.5 degrees off level so I needed to go with a pano crop. In addition to the low crop I re-shaped the bird’s eye with a Quick Mask: Transform > Warp.
i made this image while seated in the warm lagoon water. At times, the water was up to my chest. I will be sharing many more hazy sun morning 600 II/2X II/1D X images here with you soon.
|
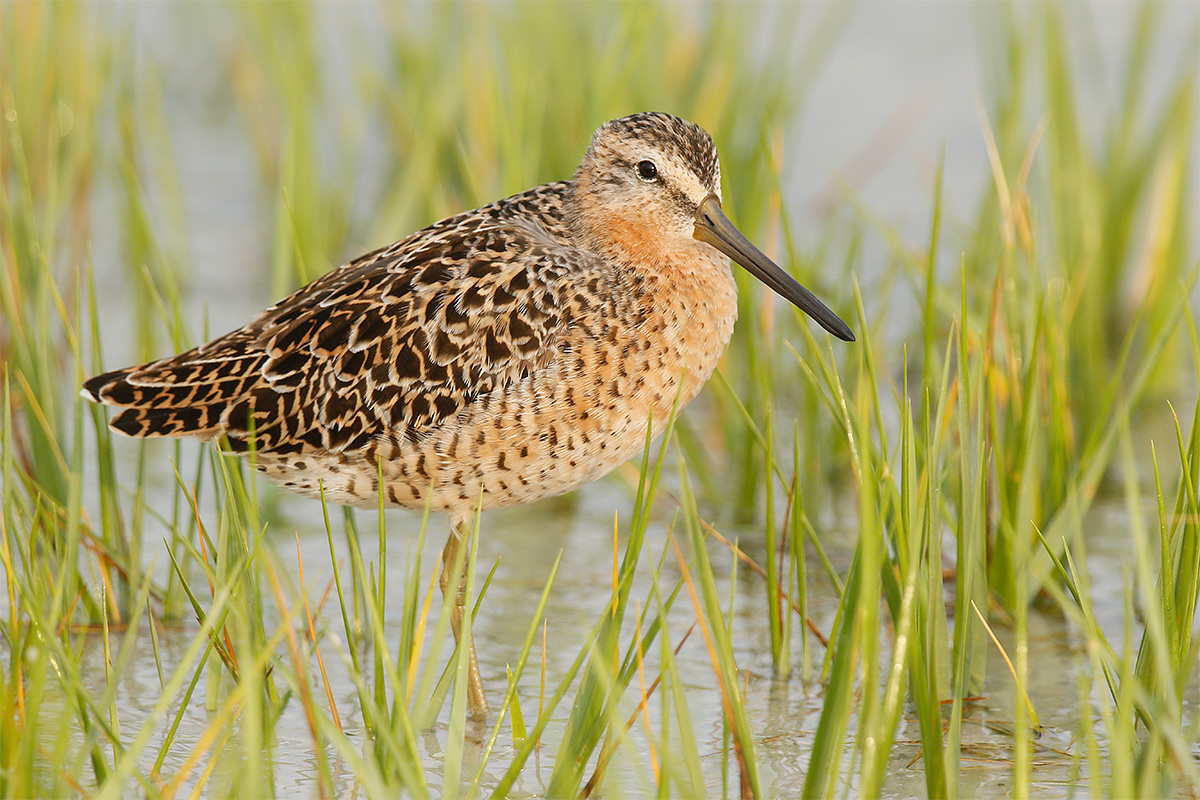
|
|
This image was created on the third afternoon of the Fort DeSoto IPT with the hand held Canon EF 300mm f/2.8L IS II USM lens, the Canon Extender EF 2X III, and the Canon EOS 7D Mark II. ISO 400. Evaluative metering plus about 1/3 stop as framed: 1/640 sec. at f/5.6 in Manual mode. AWB.
Center AF point/AI Servo-Expand/Shutter Button AF as framed was active at the moment of exposure and caught the side of the bird’s breast just behind and several inches below the bird’s eye. Click on the image to see a larger version.
Image #3: Short-billed Dowitcher in the middle of a stand of marsh grass.
|
Loving the Marsh Grasses
Participant Phil Frigon (say FREE-gone) mentioned early on that he really liked images that included at least some marsh grass. He inspired me to create more images in that vein so I did just that. Each of today’s images features the lovely green stuff. Does anyone know if it is spartina?
When I saw the bird standing right in the middle of patch of marsh grass I figured that there would be at least a few blades of grass blocking its face and eye. I approached slowly while standing and when I raised my lens I was amazed to see that the bird was well in the clear and perfectly framed by the vegetation.
Image Question
Why in this particular instance was it better to be standing than seated?
Your Fave?
Please take a moment to leave a comment and let us know which of the three images you like best and why you liked it best. Remember, leaving a comment makes the blog interactive and more interesting. And in addition, it heightens your learning experience.
|

|
|
You can purchase your copy of the The 7D Mark II User’s Guide in the BAA Online Store here for $59.
|
7D Mark II User’s Guide
You can purchase your copy right now in the BAA Online Store here for $59. Or call Jim or Jennifer at 863-692-0906 and place a phone order. This is the highest priced user’s guide ever, surpassing the 5D II User’s Guide that is priced at $50. Why? I did twice as much work preparing the 7D II Guide. It required many days of writing, many dozens of hours of study and research, not to mention hundreds of hours in the field trying to figure out the best 7D II setting while doing what I love to do best, photographing birds and nature. The camera is quite complex. Many thanks to both Rudy Winston and Chuck Westfall of Canon USA for their help in getting me through the stickiest parts.
The guide contains 23,196 words in 516 paragraphs. There are 24 photos and screen captures interspersed in the main body of the text and a gallery of 23 additional 7D II images that show what the camera is capable of with a variety of lens and lens/TC combinations. We would love your feedback.
The Great Strength of the 7D Mark II User’s Guide
The very great strength of the 7D Mark II User’s Guide is the coverage of the autofocus system. I review in detail all of the items on the five pink AF Menus. Most important of these is the Custom Case setting (at AF 1) that I have developed over time and currently use for all of my bird photography. On the recently concluded Hooptie Deux Spoonbills and more IPT John Johnson of Naples, FL mentioned that he was having trouble producing sharp flight images. I set up my Custom Case on his camera, and within minutes he was amazed at the sharp results that he was getting…. While skill, strength, fine motor control, and superior hand eye coordination are all factors that will influence your success as a flight photographer, you can have all of the preceding in spades but if your camera is not set up properly much of your effort will be in vain….
What Else is in the Guide?
In the 7D Mark II User’s Guide you will learn everything that I know about the important topics listed below, and better yet, I explain the options for each along with my reasons for choosing a specific setting in a specific situation.
Handling the WHITEs
The top LCD and all camera control buttons
7D Mark II drive modes
How to manually select an AF sensor
Choosing an AF Area Selection Mode; how and why (includes extensive detail)
Moving the AF point or Zone
The creation of in-camera Multiple Exposures and in-camera HDR images (includes extensive detail)
Live View Shooting and AF choices (all new in the 7D II)
Menu Item Access
Coverage of almost all Menu Items and Custom Functions including the following: Image Quality, Auto Lighting Optimizer, Lens aberration corrections settings, Highlight Tone Priority, AF Configuration Tool (as above, this includes details on the custom setting that I use), Acceleration/deceleration tracking, Tracking sensitivity, Lens drive when AF impossible, Orientation linked AF point (I love this feature), Highlight alert, Histogram display–do you know how to access both histograms at once?, Auto rotate, Image Jump, LCD Brightness, Info button display options, Custom Shooting Modes set-up, ISO Safety shift, using the Q button, setting up rear focus, and setting up your My Menu feature (among others).
The guide is–of course–written in my informal, easy-to-follow style.
Please note: Some Menu items are not covered in this guide for one of several reasons:
They deal only with the creation of movies (not covered)
They are irrelevant to nature photography.
After spending hours studying the 7D II Instruction Manual and consulting others I have no clue as to the purpose or the reason for the existence of a given feature.
Though I recommend that the irrelevant and confusing items be left at the default settings, I do, in most cases, I refer you to the relevant page in the 7D II Instruction Manual. If you follow up, it just might turn out that you are a lot smarter than me. In those cases I would love to hear from you via e-mail. So far none of the above have prevented me from creating many spectacular images with my 7D II.
Please note that this guide does not contain a table of contents or an index. To search the document for a given topic simply hit Control F to search. When the Find box pops up, simply type the term that you are looking for into the field and hit Next. This will allow you to find what you are looking for quickly and efficiently.
If you purchase the 7D II UG and it helps you to create better images, please feel free to send no more than two 1200 pixel wide or 900 pixel tall sharpened JPEGs to me via e-mail along with your comments. I will be glad to do a short critique if so requested.
Otherwise, feedback via e-mail or blog comment is always appreciated.
Click here and scroll down for a free 7D Mark II User’s Guide AF Point Auto Switching Excerpt.
Facebook
Be sure to like and follow BAA on Facebook by clicking on the logo link upper right. Tanks a stack!
Support the BAA Blog. Support the BAA Bulletins: Shop B&H here!
We want and need to keep providing you with the latest free information, photography and Photoshop lessons, and all manner of related information. Show your appreciation by making your purchases immediately after clicking on any of our B&H or Amazon Affiliate links in this blog post. Remember, B&H ain’t just photography!
…..
Amazon.com
Those who prefer to support BAA by shopping with Amazon may use this link:
Amazon Canada
Many kind folks from north of the border, eh, have e-mailed stating that they would love to help us out by using one of our affiliate links but that living in Canada and doing so presents numerous problems. Now, they can help us out by using our Amazon Canada affiliate link by starting their searches by clicking here. Many thanks to those who have written.
Typos
In all blog posts and Bulletins, feel free to e-mail or to leave a comment regarding any typos or errors. Just be right :).
April 27th, 2015 Stuff
We enjoyed a lousy morning of bird photography as a west/southwest at 25+ mph sandblasted our eyes and had all the birds facing away from us and the light. Our sunny/hazy afternoon turned into a cloudy early evening; we enjoyed a great session with lots of bathing godwits, three totally tame spoonbills, and lots more.
For the first time in weeks, I was too tired to finish a blog post the evening before. With the forecast for stormy conditions and more morning west winds I decided to head to bed early and stay in on Monday morning. This blog post, the 109th in a row, took about 1 1/2 hours to prepare. It was published just before 5am on Monday morning.
The Palouse
Both Palouse IPTs are once again sold out.
UK Puffins and Gannets IPT
Two great leaders. Tons of puffins and birds of the sea and lots of learning. We have one slot open but could fit in a couple at a discount rate if they forsook the full day on the gannet boat. They would receive a discount and spend an extra day with the puffins. If there are any Brits who would like to join us for a day or two of puffin photography please get in touch. Pro-rated of course. If any of the above, please let us know via e-mail.
St. Augustine Alligator Farm Short-Notice Spoonbill and Wading Bird Chicks IPT: May 4-6, 2015. TWO FULL and TWO 1/2 DAYS: $1099. Limit 8/Openings 5.
Enjoy practically private instruction. Please call the office at 863-692-0906 for St. Augustine IPT Late Registration Discount info. For complete details see the blog post here and scroll down.


Canon’s Huge Megapixel Bodies
Many of you have read about the two new Canon 50+ megapixel bodies, the Canon EOS 5DS DSLR and the Canon EOS 5DS R DSLR. The two cameras look, sound, and pretty much are quite similar. I have withheld commenting until now because I did not have a good–heck, I did not have any–understanding of the single difference between the two bodies, that being the Low-Pass Filter Effect Cancellation.
If you missed the hugely popular “Canon’s Two New 50+ Megapixel Camera Bodies/You Must Read This Before You Buy,” you can click here to catch up and learn a ton to boot.
Please Remember to use our Affiliate Links 🙂
To show your appreciation for my continuing efforts here, we ask, as always, that you use our the B&H and Amazon affiliate links on the right side of the blog for all of your purchases. B&H is recommended for you major photography gear purchases, Amazon for your household, entertainment, and general purpose stuff. Please check the availability of all photographic accessories in the BIRDS AS ART Online Store, especially the Mongoose M3.6 tripod heads, Gitzo tripods, Wimberley heads and plates, LensCoats and accessories, and the like. We sell only what I have used, have tested, and can depend on. We will not sell you junk. We know what you need to make creating great images easy and fun. And we are always glad to answer your gear questions via e-mail. I just learned that my account was suspended during my absence; it should be up and running by Monday at the latest.
I would of course appreciate your using our B&H affiliate links for all of your major gear, video, and electronic purchases. For the photographic stuff mentioned in the paragraph above we, meaning BAA, would of course greatly appreciate your business. Here is a huge thank you to the many who have been using our links on a regular basis and visiting the BAA Online store as well.
|

|
|
This image was created on the last afternoon of the Fort DeSoto IPT while with the hand held Canon EF 300mm f/2.8L IS II USM lens and the Canon EOS 7D Mark II. ISO 640. Evaluative metering +2 stops as framed: 1/1000 sec. at f/what? in Manual mode. AWB. Click on the image to see a larger version.
Center AF point/AI Servo-Surround/Shutter Button AF (right on the birds eye) as originally framed was active at the moment of exposure. Click on the image to see a larger version.
Roseate Spoonbill landing
|
Spoonbill Aperture Quiz
You get the picture. Conditions were borderline crappy. There was not much light. And it was late in the day. Take a close look at the EXIF data and let us know what aperture I set. Be sure to give us your reasoning. The evidence is there. Remember, by leaving a comment the blog becomes interactive and is more fun for all.
|
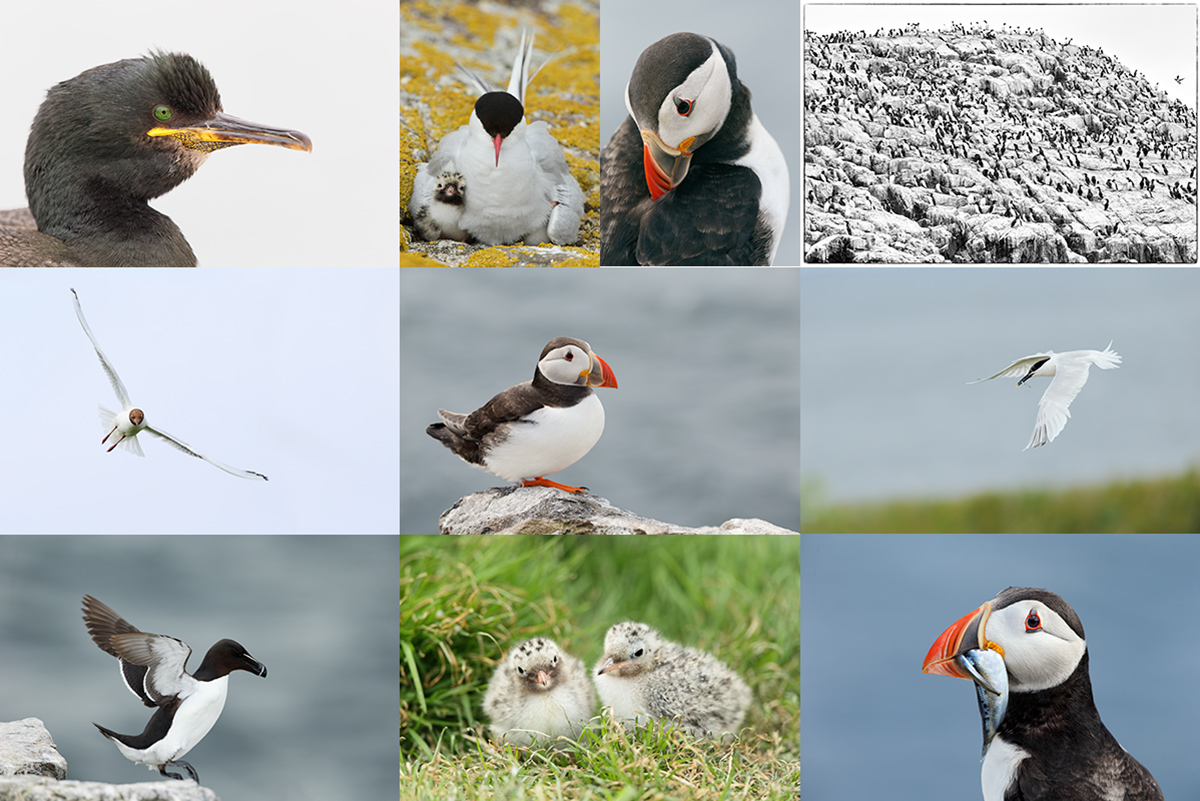
|
|
Images and card design copyright 2014: Arthur Morris/BIRDS AS ART. Click on the card to enjoy a spectacular larger version.
|
The 2015 UK Puffins and Gannets IPT
June 29 through July 5, 2015: $5499: Limit 10 photographers/One opening due to a recent cancellation. Two great leaders: Denise Ippolito and Arthur Morris.
Here are the plans: take a red eye from the east coast of the US on 28 June arriving in Edinburgh, Scotland on the morning of Monday 29 June (or simply meet us then either at the Edinburgh Airport (EDI) or later in the day at our cottages if you are driving your own vehicle either from the UK or from somewhere in Europe. Stay 7 nights in two gorgeous modern country cottages.
There are 5 days of planned puffin/seabird trips—weather permitting, and 1 full day of gannet photography with 2 sessions on the boat.
|
|
|
Images and card design copyright 2014: Arthur Morris/BIRDS AS ART. Click on the card to enjoy a spectacular larger version.
|
The Details
We will be staying in upscale country-side cottages that are beyond lovely with large living areas and lots of open space for image sharing and Photoshop lessons. The shared rooms are decent-sized, each with two roomy single beds and a private bathroom. See the single supplement info below.
All breakfasts, lunches and dinners are included. All 5 puffins boat lunches will need to be prepared in advance, taken with, and consumed at your leisure. I usually eat mine on the short boat trip from one island to the other. Also included is a restaurant lunch on the gannet boat day and a farewell fine dining thank you dinner. The cost of your National Heritage Trust is also included; that covers the twice a day landing fees.
Plan to fly home on the early morning of Monday 6 July or to continue your stay or travels.
|
|
|
Images and card design copyright 2014: Arthur Morris/BIRDS AS ART. Click on the card to enjoy a spectacular larger version. Scroll down to join us in the UK in 2015.
|
Single Supplement Info
The single supplement is $1475. As we will be renting a third cottage the $1475 is due with your deposit and is also non-refundable.
If you are good to go please send your $2,000 deposit check now to save a spot. The balance will be due on March 29, 2015. Please make your check out to “Arthur Morris” and send it to Arthur Morris/BIRDS AS ART, PO Box 7245, Indian Lake Estates, FL, 33855. If you cancel and the trip fills, we will be glad to apply a credit applicable to a future IPT for the full amount less a $100 processing fee. If we do not receive your check for the balance on or before the due date we will try to fill your spot from the waiting list. Whether or not your spot is filled, you will lose your deposit. If not, you can secure your spot by paying your balance.
We do hope that you can join us.
Facebook
Be sure to like and follow BAA on Facebook by clicking on the logo link upper right. Tanks a stack!
Support the BAA Blog. Support the BAA Bulletins: Shop B&H here!
We want and need to keep providing you with the latest free information, photography and Photoshop lessons, and all manner of related information. Show your appreciation by making your purchases immediately after clicking on any of our B&H or Amazon Affiliate links in this blog post. Remember, B&H ain’t just photography!
…..
Amazon.com
Those who prefer to support BAA by shopping with Amazon may use this link:
Amazon Canada
Many kind folks from north of the border, eh, have e-mailed stating that they would love to help us out by using one of our affiliate links but that living in Canada and doing so presents numerous problems. Now, they can help us out by using our Amazon Canada affiliate link by starting their searches by clicking here. Many thanks to those who have written.
Typos
In all blog posts and Bulletins, feel free to e-mail or to leave a comment regarding any typos or errors. Just be right :).
|
|


