What’s Up?
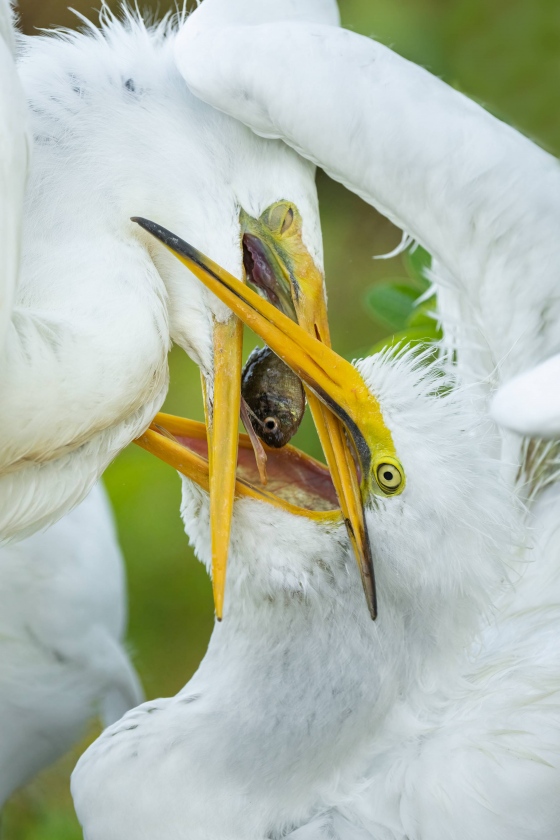
There were lots of fledged Tricolored Herons chicks at Gatorland on Saturday morning. The most cooperative ones were at a nest in the sun so there were lots of harsh shadows to deal with. The Great Egret chicks (in three nests) that I have been photographing for two months are getting as big as the adults (though a few have perished). Anyhoo, I was fortunate that the nest was shaded when an adult came in with a belly full of fish. Can you say, Mayhem?
I took a day off from bursts and swimming yesterday but did try something new: flow rope practice, a fun, simple mobility exercise program that promotes rhythm, timing, and coordination between the left and right brain. It is a fun way to exercise and improve mobility and joint health. And with sufficient practice, it can also be a tool to release stress and anxiety. Not that any of us need that. 🙂 I did watch lots of NHL playoff hockey on TiVo.
I was glad to learn yesterday that San Diego IPT veteran Carolyn Johnson signed up for the first Homer/Kachemak Bay IPT.
Today is Sunday 15 May 2022. It was another gorgeous morning here and I spent an interesting hour down by the lake and will share the details here with you tomorrow. Wherever you are and whatever you are doing, I hope that you too have a great day. This blog post took about two hours to prepare and makes sixty-five days in a row with a new one.
Please remember to use the B&H and Amazon links that are found on most blog pages and to use the BIRDSASART discount code at checkout when purchasing your new gear from Bedfords. Please, also, consider joining a BAA IPT. You will be amazed at how much you will learn!
MacBook Pro with M1 Max Chip Options
The new laptop is amazing. Topaz DeNoise takes only a few seconds and Sharpen AI not much longer. I am using the totally souped up 16.2″ MacBook Pro with M1 Max Chip (Late 2021, Space Gray): Apple M1 Max 10-Core Chip (Processor), 64GB Unified RAM (Memory, 8TB SSD (Storage), and the 32-Core GPU (Graphics configuration). Really serious photo folks can save $1200 by dropping down to the totally souped up 4TB SSD model, this one: Apple 16.2″ MacBook Pro with M1 Max Chip (Late 2021, Space Gray) Those who do not keep their images on their laptops would save another $600.00 and do quite well with the totally souped up 2TB model, the Apple 16.2″ MacBook Pro with M1 Max Chip (Late 2021, Space Gray). All three of these amazingly fast machines feature the Apple M1 Max 10-Core Chip (Processor), 64GB of Unified RAM (Memory), and the 32-Core GPU (Graphics configuration).
Ordering yours from B&H using the links above is the best option — Apple is often slower than slow. Using the BAA B&H link would be greatly appreciated by yours truly.
BIRDS AS ART Image Optimization Service (BAA IOS)
Send a PayPal for $62.00 to birdsasart@verizon.net or call Jim at 863-692-0906 and put $62.00 on your credit card. Pick one of your best images and upload the raw file using a large file sending service like Hightail or DropBox and then send me the link via e-mail. I will download and save your raw file, evaluate the exposure and sharpness, and optimize the image as if it were my own after converting the raw file in Adobe Camera Raw. Best of all, I will make a screen recording of the entire process and send you a link to the video to download, save and study.
|
|
|
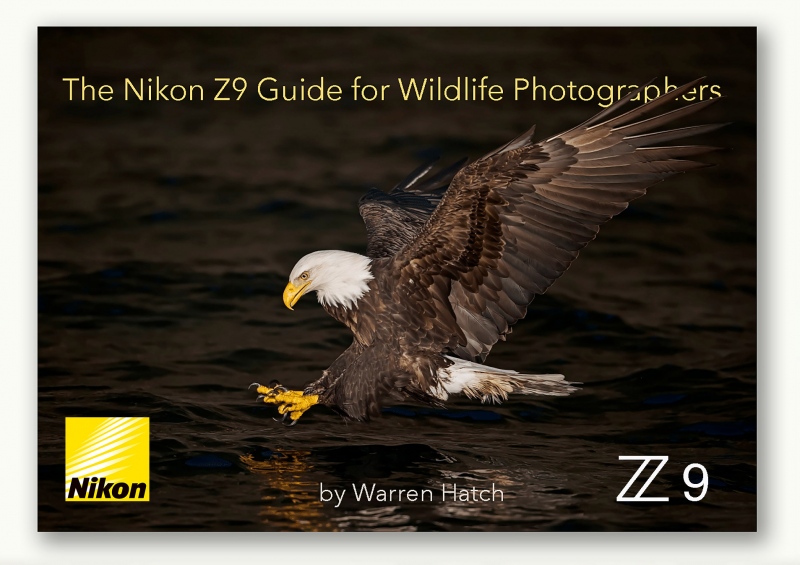
You can purchase your copy here in the BAA Online Store for $69.00. Or Call Jim weekdays at 863-692-0906 with a credit card in hand. The Nikon Z9 Guide for Wildlife Photographers |
The Nikon Z9 Guide for Wildlife Photographers/by Warren Hatch
Editorial Consultant: Arthur Morris
In this downloadable e-book (you will receive a link by e-mail), you’ll learn everything a wildlife photographer needs to know about the Nikon Z9. The Z9 is one of the most complex camera bodies ever made. In this guide, the brilliant Warren Hatch will teach you exactly how to set up your Z9 for bird, wildlife, and nature photography. The camera offers hundreds of settings and options. Selecting the right combination of these is essential if you wish to effectively use the Z9 in the field.
This 83-page guide, created in the tradition of the many mega-successful BIRDS AS ART Camera User’s Guides, includes:
Learn more about the guide here. Order yours here in the BAA Online Store for $69.00. Or Call Jim weekdays at 863-692-0906 with a credit card in hand.
Wanting a Nikon Z9?
The best way to get your hands on a Z9 is to join NPS (Nikon Professional Services) and then send your member number to Steve Elkins at Bedford via e-mail. Nikon insists that Z9s (and other hard to get stuff) go to NPS members. You can get one from B&H, but they have a huge wait list …
|
|
|
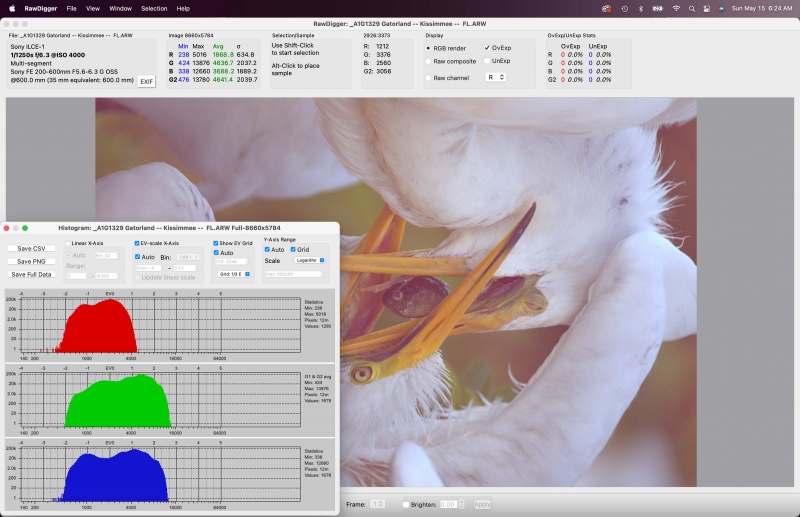
This image was created on 14 May 2022 at Gatorland Kissimmee, FL. I used the hand held Sony FE 200-600mm f/5.6-6.3 G OSS lens (at 600mm) and The One, the Sony Alpha 1 Mirrorless digital camera. ) The exposure was determined using Zebra technology with ISO on the Thumb Dial. ISO 4000: 1/1250 second at f/6.3 (wide open) in Manual Mode. AWB at 8:02:35am iii the shade of a shelter on a clear morning. RawDigger showed the exposure to be perfect (see below). Tracking: Zone AF-C with Bird/Eye-Face Detection enabled. Be sure to click on the image to enjoy the high-res version. Image #1: Great Egret: large chick getting fed
|
Why the 200-600?
I had three rigs available: the 600 f/4, the 70-200 f/2.8 II with the 2X, and the 200-600. The nest is right next to the boardwalk; the 600 f/4 could not have focused that close. I could have gotten close enough to fill the frame as above with the 70-200 f/2.8 with the 2X but went with the 200-600 even though that combo was 1/3 stop slower: f/6.3 as compared to f/5.6. Why? 600mm provides a narrower angle of view than 400mm and helps to eliminate distracting elements in the background.
|
|
|
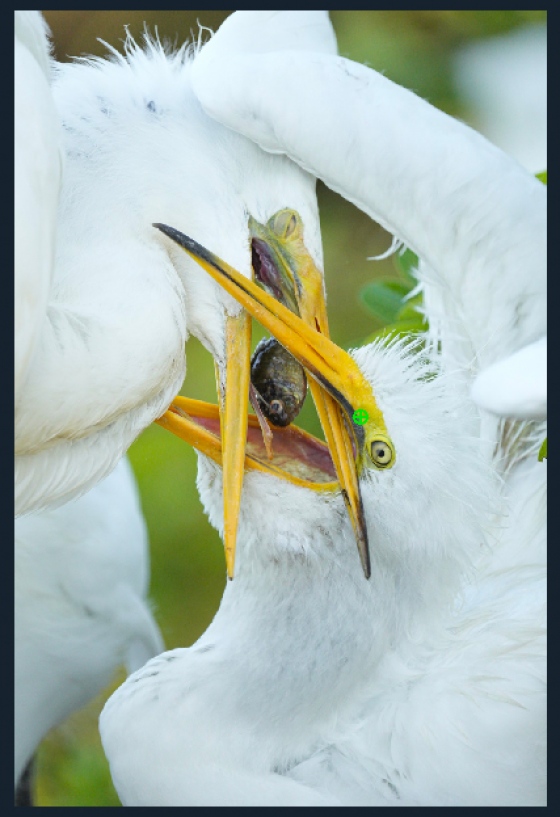
The green icon shows the AF point that was active at the moment of exposure. It just missed the eye while tracking the chick’s face. Image #1A: A7INFO screen capture for the Great Egret: large chick getting fed image |
Surely You Jest …
OK. The AF system missed the eye by just a bit. But that is to be expected when photographing frantic action. The adult bird stands tall with its bill out of reach of the chicks. One chick will jump up, grab the adult’s bill, and yank down on it. All hell breaks loose as the other chick or chicks in the nest try to get in on the action. If anyone using a mirrorless camera body with eye detection tell you that their camera will track the eye perfectly no matter how frenzied the action, ask them to send you ten consecutively numbered raw files and to copy me.
The AF eye-tracking performance of the a1 and the sharpness of today’s featured image both astounded me. That in an almost impossible situation.
|
|
|
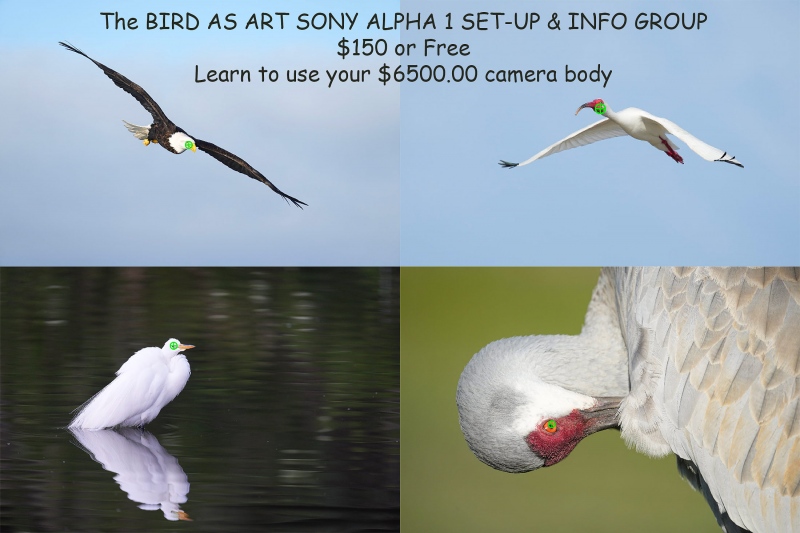
Click on the image to better see the green eye-AF boxes in action. Sony Alpha 1 Flight Photography AF Points! |
The SONY Alpha a1 Set-up Guide and Info Group: $150.00 (or Free)
The SONY Alpha a1 Set-up Guide and Info Group is going great guns as more and more folks chime in with thoughtful questions and experience-based answers. As the a1 is becoming more readily available, more and more folks are getting their hands on this amazing body. By early April, the group was up to an astounding 115 lucky and blessed folks. Early on, we discussed the myriad AF options. I gave my opinion as to the best one for flight and general bird photography. The best news is that everyone in the group receives an e-mail that includes a .DAT file with my a1 settings on it, and explicit directions on how to load my settings onto your a1; talk about convenience! I am now offering a .DAT file compatible with firmware update 1.20. Your entry into the group includes a consolidated Sony a1 CAMSETA2 INFO & GUIDE. New a1 folks will now receive four e-mails instead of the previous 28! You will see new e-mails as they are published. Simply put, this e-mail guide is an incredible resource for anyone with an a1.
All who purchased their Alpha 1 bodies via a BAA affiliate link — B&H or Bedfords — will receive a free Sony Alpha a1 Set-Up Guide and free entry into the Info Updates group after shooting me their receipts via e-mail. (Note: it may take me several days to confirm B&H orders.). Others can purchase their guide here in the BAA Online Store.
|
|
Image #1B: RawDigger screen capture for the Great Egret: large chick getting fed image |
Ho Hum, Another Perfect Exposure
What can I say? The combination of Zebras live in the viewfinder (with your camera set up properly) and post-capture study of the raw files in RawDigger makes it pretty much child’s play to come up with perfect exposure after perfect exposure. It would be impossible to overstate how much I have learned by studying RawDigger and how much better my exposures have become since I started with the program almost two years ago. The G channel for today’s featured is 2/3rds of the way from the 8000 line to the 16000 line. In other words, the raw file brightness is perfect.
RawDigger — not for the faint of heart …
Nothing has ever helped me learn to create perfect exposures to the degree that RawDigger has. I think that many folks are reluctant to learn that most of their images are underexposed by one or more full stops and that highlight warnings in Photoshop, Lightroom, Capture One, and your in-camera histogram are bogus as they are based on the embedded JPEGs. Only your raw files tell the truth all the time. Heck, I resisted RawDigger for several years … Once you get over that feeling, RawDigger can become your very best exposure friend no matter what system you are using. On the recent IPTs and In-the-Field sessions, we have demonstrated that fact. Convincingly.
The RawDigger Adapted (pink) Histogram
In the RawDigger e-Guide, you will learn exactly how to set up the Adapted “pink” RawDigger Histogram and how to use it to quickly and easily evaluate the exposure or raw file brightness of images from all digital cameras currently in use. RawDigger was especially helpful to me as I have struggled with R5 exposures and learned my new camera body, the Sony Alpha a1.
|
|
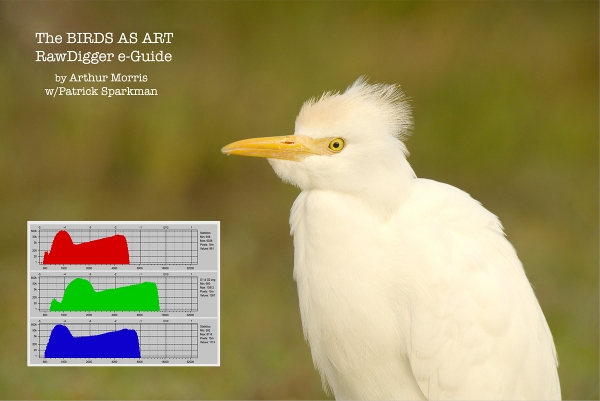
RawDigger e-Guide with Two Videos |
The RawDigger e-Guide with Two Videos
by Arthur Morris with Patrick Sparkman
The RawDigger e-Guide was created only for serious photographers who wish to get the absolute most out of their raw files.
Patrick and I began work on the guide in July 2020. At first, we struggled. We asked questions. We learned about Max-G values. We puzzled as to why the Max G values for different cameras were different. IPT veteran Bart Deamer asked lots of questions that we could not answer. We got help from RawDigger creator Iliah Borg. We learned. In December, Patrick came up with an Adapted Histogram that allows us to evaluate the exposures and raw file brightness for all images created with all digital camera bodies from the last two decades. What we learned each time prompted three complete beginning to end re-writes.
The point of the guide is to teach you to truly expose to the mega-Expose-to-the-Right so that you will minimize noise, maximize image quality, best utilize your camera’s dynamic range, and attain the highest possible level of shadow detail in your RAW files in every situation. In addition, your properly exposed RAW files will contain more tonal information and feature the smoothest possible transitions between tones. And your optimized images will feature rich, accurate color.
We teach you why the GREEN channel is almost always the first to over-expose. We save you money by advising you which version of RawDigger you need. We teach you how to interpret the Max G values for your Canon, Nikon, and SONY camera bodies. It is very likely that the Shock-your-World section will shock you. And lastly — thanks to the technical and practical brilliance of Patrick Sparkman — we teach you a simple way to evaluate your exposures and the raw file brightness quickly and easily the Adapted RawDigger histogram.
The flower video takes you through a session where artie edits a folder of images in Capture One while checking the exposures and Max-G values in RawDigger. The Adapted Histogram video examines a series of recent images with the pink histograms and covers lots of fine points including and especially how to deal with specular highlights. The directions for setting up the Adapted Histogram are in the text.
If we priced this guide based on how much effort we put into it, it would sell it for $999.00. But as this guide will be purchased only by a limited number of serious photographers, we have priced it at $51.00. You can order yours here in the BAA Online Store.
|
|
|
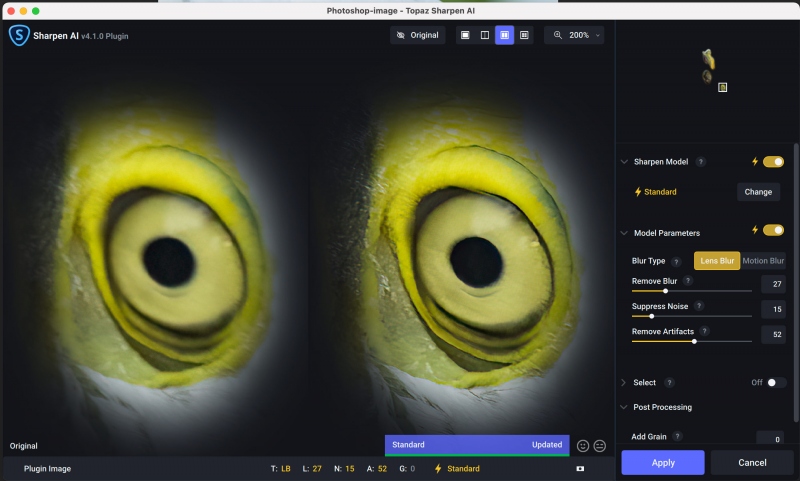
Be sure to click on the JPEG to view the high-res file and note the incredible sharpening of the large chick’s eye (on our right). Image #1C: Topaz Sharpen AI Before & After screen capture for the large chick’s eye from the Great Egret: large chick getting fed image |
Topaz Sharpen AI
Be sure to click on the screen capture to see the increase in sharpness (at 200%) in the After image on our right. That without any degradation of image quality.
As regular readers know, I run DeNoise AI on every image that I process immediately after executing the crop. For images made in sunny conditions, I used Standard. For images made in low light, I use Low Light. In the very recent blog post here, you saw the incredible results on an ISO 5000 Gatorland image. You can check all four methods by using the Comparison View, but I rarely do that anymore as I am confident as noted above.
I never use Sharpen AI on the whole image. I always sharpen small parts of the image selectively as I did with today’s featured image. I selected the large chick’s eye, the fish, and the face of the adult with a Quick Mask. Unlike previous version of Sharpen AI, the latest version of Sharpen AI — with both Auto icons selected (the yellow buttons with the lightning bolt symbol to out left) sets never selects Motion Blur. It always sets Standard and selects Lens Blur even when motion blur is evident. The results with either one are superb so who’s to argue?
Great Topaz News!
Folks who use the BAA Topaz link to purchase Sharpen AI, DeNoise AI, or the Utility Bundle (or any other Topaz plug-ins), will receive a 15% discount by entering the ARTHUR15 code at checkout. If the stuff is on sale (as it usually is), you save 15% off the sale price! To get the discount you must use my link and you must enter the discount code. Be sure to start with this link.
Those who purchase Sharpen AI, DeNoise AI, or any other Topaz plug-ins using my link and then entering the ARTHUR15 code at checkout can e-mail to request a short Getting Started with Topaz e-Guide. Please include a copy of your Topaz receipt that shows the discount. Aside from the basics, the guide explains how to install the plug-ins so that they appear in the Photoshop Filter Menu.
|
|
|
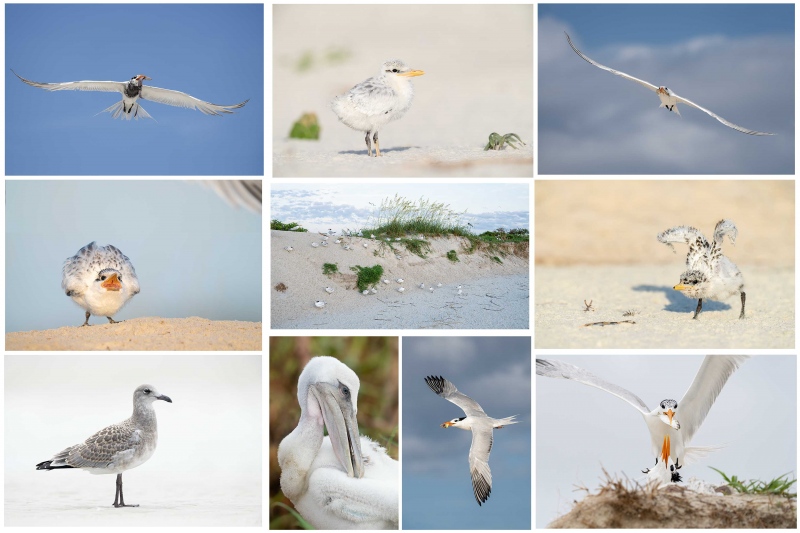
Click on the composite image to enjoy the incredible quality of the hi-res JPEG. Clockwise from upper left clockwise and back around to the center: Royal Tern in flight with squid for chick; Royal Tern chick on beach; Royal Tern in flight with shrimp for young; Royal Tern chick — double overhead wing stretch; Royal Tern landing with greenback for chick; Royal Tern in flight with juvenile mahi mahi for chick; Brown Pelican — large chick preening; Laughing Gull in fresh juvenal plumage; Royal Tern chick begging; Many Royal Terns with many chicks on face of dune. |
Jacksonville IPT: #1: 4 FULL DAYS — the afternoon of 16 June thru the morning of MON 20 June 2022: $2,099.00. (Limit 6 photographers)
Jacksonville IPT #2: 4 FULL DAYS — the afternoon of FRI 1 JULY thru the morning of TUES 5 July 2022: $2099.00 (Limit 6 photographers)
Jacksonville IPT #3: 4 FULL DAYS — the afternoon of FRI 15 JULY thru the morning of TUES 19 July 2022: $2099.00 (Limit 6 photographers/Openings: 5)
Ride with me: add $200.00. I do not like to disappoint: each trip will run with one participant. If necessary.
I first visited the breeding bird colony at Jacksonville in late June 2021. I was astounded. There were many thousands of pairs of Royal Terns nesting along with about 10,000 pairs of Laughing Gulls. In addition to the royals, there were some Sandwich Terns nesting. And there are several dozen pairs of Brown Pelicans nesting on the ground. Flight photography was non-stop astounding. And photographing the tern chicks was relatively easy. Folks could do the whole trip with the Sony 200-600, the Canon 100-500 RF, or the Nikon 500 PF or 200-500 VR. With a TC in your pocket for use on sunny days. Most of the action is within 100 yards of where we park (on the beach). As with all bird photography, there are times when a super-telephoto lens with either TC is the best tool for the job.
Morning sessions will average about three hours, afternoon sessions about 1 1/2 hours. On cloudy mornings with favorable winds, we may opt to stay out for one long session and skip the afternoon, especially when the afternoon forecast is poor. Lunch is included on the first three days of the IPT and will be served at my AirBnB. After the first lunch there will be an introductory program. On days two and three we will do image review and Photoshop after lunch.
We will be based somewhere west and a bit north of Jacksonville where there are many AirBnB possibilities. The deposit is $599.00. Call Jim at the office any weekday at 863-692-0906 to pay by credit card. Balances must be paid by check.
What You Will Learn on a Jacksonville IPT
- 1- First and foremast you will learn to become a better flight photographer. Much better.
- 2-You will learn the basics and fine points of digital exposure. Nikon and Canon folks will learn to get the right exposure every time after making a single test exposure, and SONY folks will learn to use Zebras so that they can be sure of making excellent exposures before pressing the shutter button.
- 3- You will learn to work in Manual exposure mode even if you fear it.
- 4- You will learn to evaluate wind and sky conditions and understand how they affect bird photography, especially the photography of birds in flight.
- 5- You will learn several pro secrets (for each system) that will help you to become a better flight photographer.
- 6- You will learn to zoom out in advance (because the birds are so close!) 🙂
- 7- You will learn how to approach free and wild birds without disturbing them.
- 8- You will learn to spot the good and the great situations.
- 9- You will learn to understand and predict bird behavior.
- 10- You will learn to design pleasing images by mastering your camera’s AF system.
- 11- You will learn to choose the best perspective.
- 12- You will learn to see and control your backgrounds.
- 13- You will learn to see and understand the light.
- 14- You will learn to see and create pleasing blurs in pre-dawn situations.
- 15- You will learn to be ready for the most likely event.
And the best news is that you will be able to take everything you learn home with you so that you will be a better photographer wherever you are and whenever you photograph.
Typos
With all blog posts, feel free to e-mail or to leave a comment regarding any typos or errors.



Leave a Reply