Your Call ?
Which of todays’ five featured flight images is the strongest image? Why?
My Call
At the previous blog post, blog regular David Policansky left this comment:
Weakest: Image 3. Distracting OOF birds and weak composition. Strongest: Image 1. Beautiful bird in beautiful light doing something interesting.
As always, different strokes for different folks. I feel that Image #1 is the weakest in part because the godwit’s head is turned slightly away. And I liked the o-o-f juxtapositions in Image #3.
BPN Avian Moderator Dan Cadieux correctly identified the three shorebirds in Image #3 when he wrote:
Willet, Semipalmated Plover, and Least Sandpiper. I love the incoming plovers; they are placed perfectly!
As for my favorite image, I agree with Dan on #4, the three incoming Wilson’s Plovers.
What’s Up?
Friday morning at Sebastian Inlet was fabulous with lots of fishing and catching Ospreys and terns. The wind was from the east (pretty good) with a touch of north at times (not great), and rarely a touch of south (very good). I quit at 10:30, checked out of my AirBnB at 11, and was home at 12:30. When I looked at my images I was stoked — I had done much better than I thought. I was so excited that I woke at 3:30am on Saturday and decided to drive the 90 minutes back to the inlet. The tide was just a bit later than it had been on Friday and the wind and sky conditions were pretty much identical. And there were no birds. None, zero, nada.
That’s nature photography in a nutshell.
Today is Sunday 29 October 2023. My plan is to head down to the lake for a bit this morning. Wherever you are a whatever you are doing, I hope that you too have a great day.
Please remember to use the B&H and Amazon links that are found on most blog pages and to use the BIRDSASART discount code at checkout when purchasing your new gear from Bedfords to get 3% back on your credit card and enjoy free second-day air FedEx. Please, also, consider joining a BAA IPT. You will be amazed at how much you will learn!
You can find some great photo accessories (and necessities, like surf booties!) on Amazon by clicking on the Stuff tab on the orange/yellow menu bar above. On a related note, it would be extremely helpful if blog-folks who, like me, spend too much money on Amazon, would get in the habit of clicking on the Amazon logo link on the right side of each blog post when they shop online. As you might expect, doing so will not cost you a single penny, but would be appreciated tremendously by yours truly. And doing so works seamlessly with your Amazon Prime account.
If an item — a Delkin flash card, or a tripod head — for example, that is available from B&H and/or Bedfords, is also available in the BAA Online Store, it would be great, and greatly appreciated, if you would opt to purchase from us. We will match any price. Please remember also to use my B&H affiliate links or to earn 3% cash back at Bedfords by using the BIRDSASART discount code at checkout for your major gear purchases. Doing either often earns you free guides and/or discounts. And always earns my great appreciation.
|
|
|
Clockwise from the upper left back around to center: Osprey gaining altitude after missed strike; school of mullet under attack from below; Wood Stork with Southern Whiting; Osprey with Menhaden; Wood Stork with small lobster; Royal Tern with large baitfish; Osprey with Menhaden; juvenile Osprey directly overhead “t-shot”; Osprey taking flight with freshly caught Mullet. |
Sebastian Inlet In-the-Field Sessions
Join me for 3 hours of morning In-the-Field Instruction at Sebastian Inlet for only $300.00/session. The main target will be Ospreys fishing for a variety of migrating saltwater fish that visit the inlet each fall. Back-up subjects include fishing gulls, terns, and Brown Pelicans, Wood Stork, a variety of herons and egrets, sunrise cloud-scapes, and the occasional sea turtle or manatee.
November Dates: 6-11 & 20-25, 2023.
Please get in touch via e-mail to book one or more sessions.
|
|
|
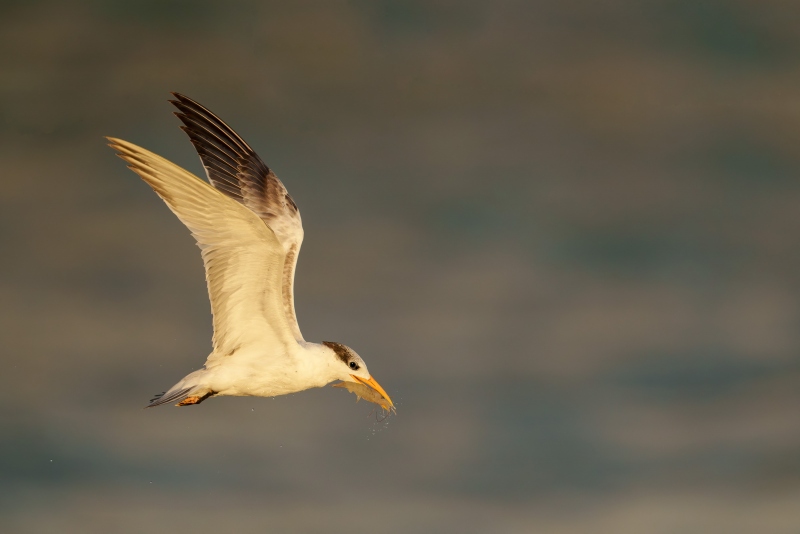
This image was created on 27 October 2023 at Sebastian Inlet, FL. Standing at full height I used the Robus RC-5558 Vantage Series 3 Carbon Fiber Tripod/Levered-Clamp FlexShooter Pro-mounted Sony FE 600mm f/4 GM OSS lens with the Sony FE 1.4x Teleconverter, and The One, the Sony Alpha 1 Mirrorless Digital Camera.. ISO 2500. The exposure was determined by Zebras with ISO on the rear wheel: 1/4000 second at f/5.6 (wide open) in Manual mode. RawDigger showed that the raw file brightness was perfect. AWB at 7:52:14am on a partly sunny morning. Tracking: Zone/AF-C with Bird-Eye/Face Detection performed perfectly. Click on the image to enjoy a larger, sharper high-res version. Image #1: Royal Tern, worn juvenile with shrimp |
Early Exposures
Noting the relatively high ISO, you realize that when the sun is first breaking through the clouds early in the morning, the light levels are but a fraction of what they will be in an hour or two providing that the sky continues to clear.
Remember also that white birds need less light to be properly exposed than middle toned birds. Lastly, remember that most young terns are grayer, not as white, as the adult of the same species.
Yes, Sony’s Zebra technology makes duck soup of complex exposure situations involving changing and early light and subject of varying tonalities. With your camera set up properly, simply dial up the ISO (conveniently assigned to the Thumb Dial) until you see faint Zebras on the highlights.
|
|
|
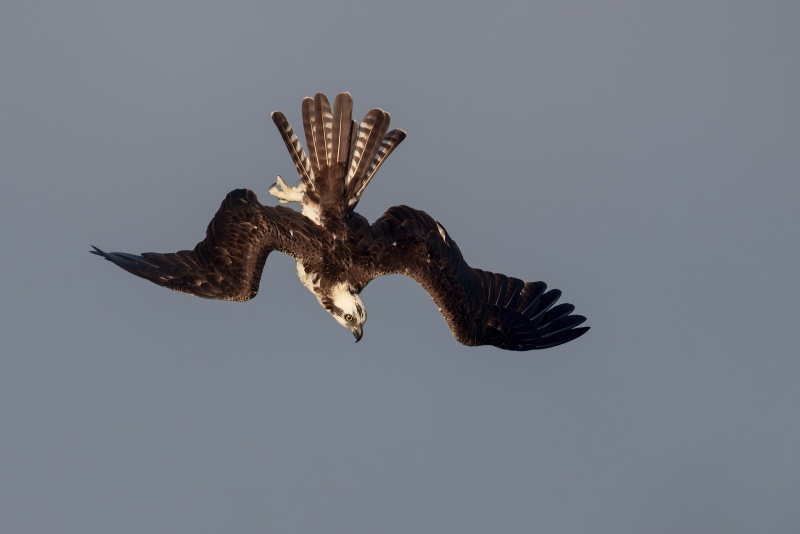
This image was also created on 27 October 2023 at Sebastian Inlet, FL. Standing at full height I used the Robus RC-5558 Vantage Series 3 Carbon Fiber Tripod/Levered-Clamp FlexShooter Pro-mounted Sony FE 600mm f/4 GM OSS lens with the Sony FE 1.4x Teleconverter, and The One, the Sony Alpha 1 Mirrorless Digital Camera.. ISO 1000. The exposure was determined by Zebras with ISO on the rear wheel: 1/3200 second at f/5.6 (wide open) in Manual mode. RawDigger showed that the raw file brightness was perfect. AWB at 8:13:20am on a mostly sunny morning. Tracking: Zone/AF-C with Bird-Eye/Face Detection performed perfectly. Click on the image to enjoy a larger, sharper high-res version. Image #2: Osprey beginning dive |
Looking for Different Flight Poses
When the Ospreys at Sebastian are fishing, they spend lots of time flapping their wings and either remaining relatively in place or moving slightly forward into the wind. This behavior is usually (but incorrectly, I believe) called hovering. Hovering, in the strictest sense, is when a bird flaps in place and maintains its position when there is no wind. Most raptors, especially the larger species, can remain in place only on windy days; this behavior is more properly termed kiting. Larger birds are not capable of hovering because the energy expenditure would be too great.
There are some interesting comments, several by career biologists and ornithologists, in an old Bird Photographer’s.Net thread here.
Anyhoo, when Ospreys are kiting, that is, flapping into the wind while hunting, it is difficult to create dramatic images. Recently, I have been trying to create pleasingly blurred images of this behavior, but have not come up with anything spectacular. Yet.
The trick is to get on and stay on a kiting Osprey until it begins to drop or dive and then hammering the shutter button while striving to keep the bird in the middle of the frame. Photos depicting different and often spectacular flight poses are often the result. Other neat poses can be captured by staying on an Osprey that dives, misses, and then turns back into the wind.
Different always wins.
|
|
|
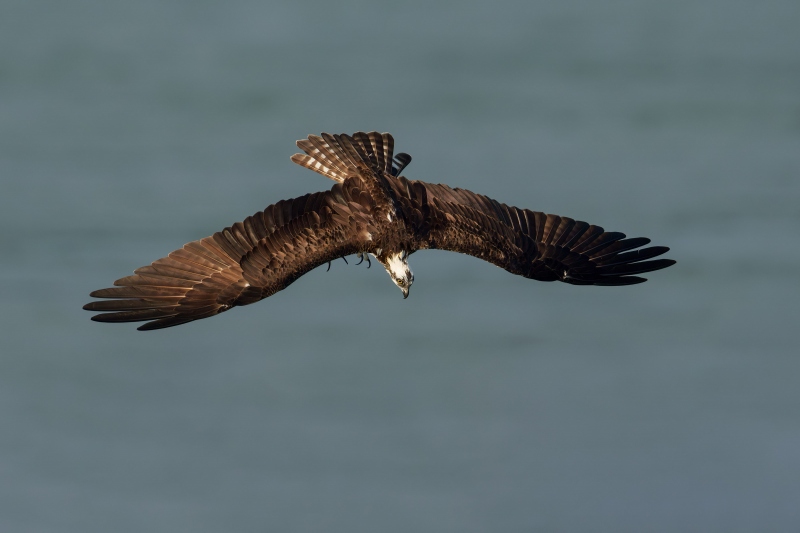
This image was also created on 27 October 2023 at Sebastian Inlet, FL. Standing at full height I used the Robus RC-5558 Vantage Series 3 Carbon Fiber Tripod/Levered-Clamp FlexShooter Pro-mounted Sony FE 600mm f/4 GM OSS lens with the Sony FE 1.4x Teleconverter, and The One, the Sony Alpha 1 Mirrorless Digital Camera.. ISO 1000. The exposure was determined by Zebras with ISO on the rear wheel: 1/4000 second at f/5.6 (wide open) in Manual mode. RawDigger showed that the raw file brightness was 1/3-stop too dark. AWB at 8:26:54am on a mostly sunny morning. Tracking: Zone/AF-C with Bird-Eye/Face Detection performed perfectly. Click on the image to enjoy a larger, sharper high-res version. Image #3: Osprey diving — dorsal view |
Tripod versus Handholding
It is much easier to track a diving raptor or tern when handholding than it is when on a tripod. But when I need additional focal length, the 600mm f/4 with the 1.4X TC is often the only way to go. While some can handhold a 600mm f/4, I simply cannot. So the best option for me is to work on the tripod with the Levered-Clamp FlexShooter Pro.
After you have picked your spot based on the sky conditions, light, and wind direction, the great beauty of the Levered-Clamp FlexShooter Pro is that once you take a moment to level the head, you can point your lens in any direction and have the camera remain square to the world.
That said, I was barely able to keep up with this bird as it dove. Ospreys often attain speeds of 50mph as they rocket down toward an unsuspecting fish. Though the bird in Image #3 was not clipped, it was very close to the bottom frame edge. So, I needed to add canvas and crop the image to come up with something pleasing.
|
|
|
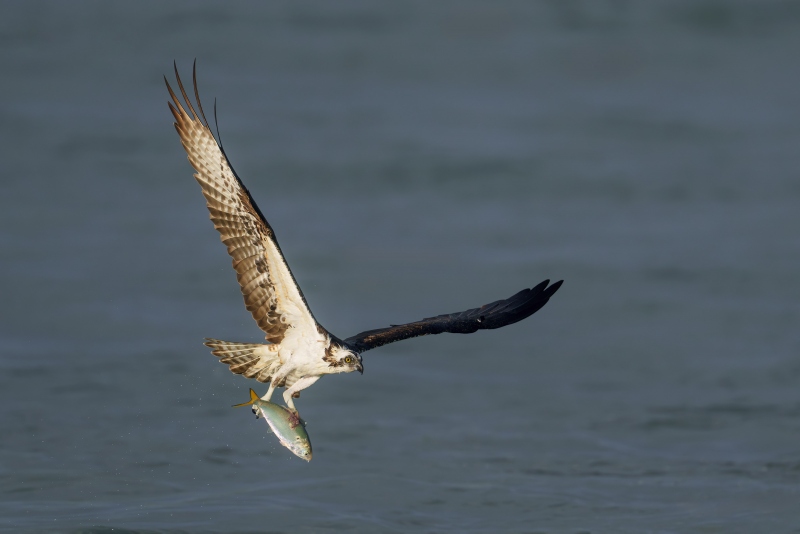
This image was also created on 27 October 2023 at Sebastian Inlet, FL. Standing at full height I used the Robus RC-5558 Vantage Series 3 Carbon Fiber Tripod/Levered-Clamp FlexShooter Pro-mounted Sony FE 600mm f/4 GM OSS lens with the Sony FE 1.4x Teleconverter, and The One, the Sony Alpha 1 Mirrorless Digital Camera.. ISO 1000. The exposure was determined by Zebras with ISO on the rear wheel: 1/4000 second at f/5.6 (wide open) in Manual mode. RawDigger showed that the raw file brightness was 1/3-stop too dark. AWB at 8:26:58am on a mostly sunny morning. Tracking: Zone/AF-C with Bird-Eye/Face Detection performed perfectly. Click on the image to enjoy a larger, sharper high-res version. Image #4: Osprey flying off with Menhaden (mossbunker) |
Why Underexpose?
It pays to get into the habit of underexposing kiting and diving Ospreys so that if they do come up with a bright silver fish, you do not toast (severely overexpose) the Osprey’s prey.
Head Angle Question
Which of today’s five featured images features a bird with a poor head angle?
|
|
|
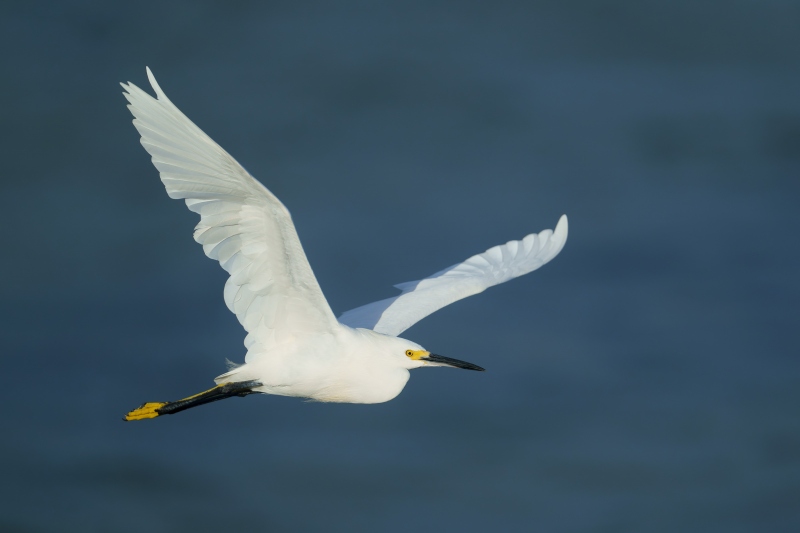
This image was also created on 27 October 2023 at Sebastian Inlet, FL. Standing at full height I used the Robus RC-5558 Vantage Series 3 Carbon Fiber Tripod/Levered-Clamp FlexShooter Pro-mounted Sony FE 600mm f/4 GM OSS lens with the Sony FE 1.4x Teleconverter, and The One, the Sony Alpha 1 Mirrorless Digital Camera.. ISO 640. The exposure was determined by Zebras with ISO on the rear wheel: 1/4000 second at f/5.6 (wide open) in Manual mode. RawDigger showed that the raw file brightness was 1/3-stop too dark. AWB at 8:32:48am on a then sunny morning. Tracking: Zone/AF-C with Bird-Eye/Face Detection performed perfectly. Click on the image to enjoy a larger, sharper high-res version. Image #5: Snowy Egret in flight |
Bright Whites
Knowing that the whites on a Snowy Egret are much brighter than the whites of an Osprey, I lowered the ISO two clicks when I saw it flying to sun angle. The result? A dead solid perfect exposure.
|
|
|
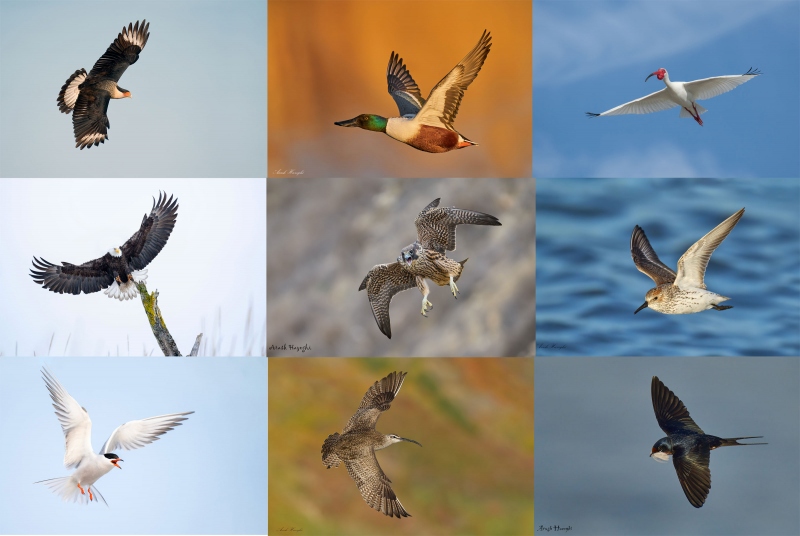
Click on the composite to view a larger version and be even more impressed. The Art & Science of Photographing Birds in Flight with the Sony α-1
|
The Art & Science of Photographing Birds in Flight with the Sony α-1
by Arash Hazeghi and Arthur Morris
First of all, if you use Nikon or Canon (or Olympus or Fuji) gear, do not be put off by the title. While a portion of the guide deals with the Sony α-1, there is a ton of priceless information, tips, and techniques that can help you become a better flight photographer. No matter what system you are using. If you do not use an α-1, be sure to read down to the bottom to save a few bucks.
Arash Hazeghi and Arthur Morris have created the definitive and most comprehensive ever treatise on photographing birds in flight. With more than sixty years of experience photographing birds, they know what you need to know but have not figured out yet! You will be astounded by the depth of their knowledge and the tips they have to offer. More than six months in the making, the guide contains 229 pages, 24,321 words,97 exceptional and inspirational flight images — each with a legendary, enlightening BIRDS AS ART caption, and 22 screen captures. The guide contains a wealth of useful, practical, and for the most part — never-before-available information.
Purchase
Click here to purchase your copy in the BAA Online Store.
What Everyone Will Learn
We will teach you the basic concepts that you need to master to become a great flight photographer along with the techniques used by the world’s best flight photographers.
You will learn that most any telephoto lens can be perfect for flight photography in a given situation; focal lengths for the images in the book range from 200mm to 1200mm and everywhere in between.
We discuss the merits of various lenses in depth, including and especially comparing the 400mm f/2.8 lenses with the 600mm f/4s.
We guide you in getting your hands on the flight photography lens that will best meet your needs. We offer a variety of handholding and rest position tips and include tips on working with a big lens on a tripod when working with a flight lens that is otherwise too heavy for you.
Both authors offer their thoughts on getting the right exposure when photographing birds in flight. You will learn to get the right exposure on foggy days and even when photographing black birds in white sky conditions.
You will learn the tremendous importance of pre-focusing, of finding the bird in the viewfinder quickly, acquiring focus almost instantly (with tips on doing all three).
You will learn the role of image stabilization in flight photography and the best settings.
Both authors share their thoughts on using the focus range limiter switch. In the same vein, you will learn to use Direct Manual Focus to make your flight photography life easier.
All will learn about the best wing positions and the importance of the background with images of birds in flight. With lots of examples.
You will learn about the best shutter speeds (and the best aperture) to use when photographing flying birds.
You will learn to photograph flight while seated and the many advantages of doing so.
You will learn the best methods of controlling high ISO noise.
All will learn to format their flash cards properly and safely.
You will learn what to do when your AF system is temporarily blinded.
All will learn the huge effect that wind strength and direction has on flight photography and to evaluate the quality and direction of the light on both sunny and cloudy days.
You will learn why it is vitally important to shoot aggressively when photographing birds in flight.
You will learn to carefully observe and evaluate a variety of bird behaviors that may shine light on some excellent opportunities for photographing birds in flight. And about getting into the best position from which to photograph.
You will learn to be a much better flight photographer.
What Sony Folks Will Learn
Exactly how Artie uses Zebras to come up with perfect exposure after perfect exposure.
The fine points and recommended settings for Optical Steady Shot (OSS).
The concept of Auto-Focus (AF) tracking in the α-1.
Everything there is to know about the complex Sony autofocus system.
About all the AF patterns, how to quickly switch them, and about those favored by each author. And why.
The Tracking and Non-tracking AF patterns. When and why Arash uses Non-Tracking Zone. And why Artie uses only two AF patterns.
How to set and use Bird Face-Eye detection for flight photography.
How and why to assign various custom functions to the various programmable buttons on the α-1 body.
The perfect settings for the many, many Menu items that are vitally related to flight photography.
How and why the Sony α-1 uses both contrast and phase detection AF to determine focus (and the benefits thereof).
Which are the best memory cards for the Sony α-1.
To quickly access frequently used menu items.
Non-Sony α-1 Discount
Using the honor system, folks who do not use a Sony α-1 body are invited to click here to save $25.00 on the purchase price of the guide.
Typos
With all blog posts, feel free to e-mail or to leave a comment regarding any typos or errors.



I love image 2. The wing-shape does it for me.
All those flight shots are amazing. Will be good to hear when comparing the 400mm f/2.8 lenses with the 600mm f/4s.
Thanks and agree :-). In short, it is much easier for me to handhold the 400 f/2.8 than the 600mm f/4 despite the fact that it is only 4 ounces lighter.
Learn a ton more by purchasing the flight guide above.
with love, artie
Image #2 Spectacular!
Image #1 Royal Tern and images #2 and #3 and #4 of Osprey and image #5 Snowy Egret are all well made and interesting! And the other images with 8 or 9 birds and a photo of a bunch of birds flying are also interesting!