What’s Up?
I got really lucky on Monday morning. Or did I? The wind was wrong and there was not much light, but the 300mm f/2.8 and the a9 iii were the perfect tools for the job. The more I use this amazing gear, the more I am falling in love with it. The super-fast 300mm f/2.8 lens allows for fast shutter speeds even in low light conditions and has me shooting much wider than I usually do (at 840mm). Not to mention the incredibly fast and accurate AF system, or that the a9 iii’s 120 fps were perfect for the situation. What a great time for a bird photographer to be alive!
Today is Wednesday 20 March 2024. I will again be heading down to the lake early to play with my new toys. Wherever you are and whatever you are doing, I hope that you too choose to have a great day.
I got lots of work done on the Sony 300mm Lens Guide. I thought that it would take only minutes to create but I was dead wrong. In the process of creating the guide, I’ve learned a ton about the lens. And even better, I discovered a simple yet potentially fatal flaw that was resulting in sporadically unsharp flight images. The set-up fix is simple. Use or write for either my Bedfords discount code or my B&H affiliate link to purchase your Sony FE 300mm f/2.8 GM OSS Lens (Sony E) and receive the guide for free. Once the guide is finished, it will be available for purchase in the BAA Online store for $209.93. Get your copy of the guide for free by using one of my affiliate links.
In the same vein, if you plan on purchasing a Sony a9 III Mirrorless Camera (or anything else for that matter), please remember to use or write for either my Bedfords discount code or my B&H affiliate link. As above, folks who use one of my two affiliate links to purchase the a9 III will receive my .DAT settings (the complete camera set-up) along with a Buttons and Dials Guide and additional info.
If you would like to enjoy some incredible world class photography and photographic instruction, do yourself a favor and grab one of the three remaining spots on the two 2025 Homer Bald Eagle IPTs. Better yet, save $1000.00 by signing up for both! It will almost surely be my last ever Homer trip … Both trips will surely fill soon. See the details along with all IPT info on the recently updated page here.
Please remember to use the B&H links that are found on most blog pages and to use the BIRDSASART discount code at checkout when purchasing your new gear from Bedfords to get 3% back on your credit card and enjoy free second-day air FedEx. Please, also, consider joining a BAA IPT. You will be amazed at how much you will learn!
If an item — a Delkin flash card, or a tripod head — for example, that is available from B&H and/or Bedfords, is also available in the BAA Online Store, it would be great, and greatly appreciated, if you would opt to purchase from us. We will match any price. Please remember also to use my B&H affiliate links or to earn 3% cash back at Bedfords by using the BIRDSASART discount code at checkout for your major gear purchases. Doing either often earns you free guides and/or discounts. And always earns my great appreciation.
|
|
|
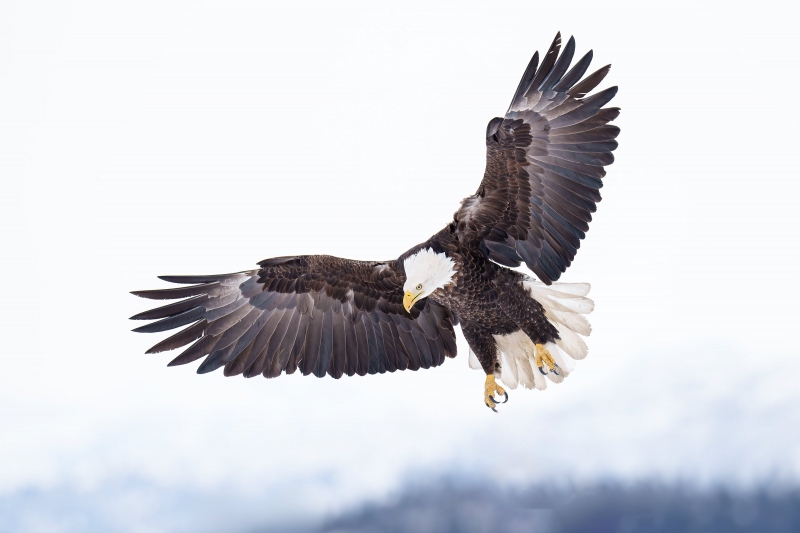
I loved my 400 f/2.8 in Homer and everywhere else. There is still room on the 2025 Homer IPTs, but not much! Bald Eagle adult braking to land |
Sony FE 400mm f/2.8 GM OSS Lens
Used Gear Page veteran Robert Hollyer is offering a Sony FE 400mm f/2.8 GM OSS lens in Like-New condition for a BAA record Low $9,998.00. The sale includes the front lens cap, the rear lens cap, the lens hood, the lens strap, that hard case & strap, the original product box, and insured ground shipping via major courier to lower-48 US addresses only. Your item will not ship until your check clears unless other arrangements are made.
Please contact Bob via e-mail or by phone at 1-206-359-0018 PST.
I purchased my Sony 400mm f/2.8 two years ago to complement my 600mm f/4. Robert is selling his because he rarely uses it, opting instead for the 600mm f/4! It is far easier for me to handhold the 4 ounces lighter, much smaller, and better balanced 400 f/2.8 than it is to handhold the 600mm f/4. The 400 kills for flight with or without the 1.4X teleconverter. This lens sells new right now for $11,998.00 at B&H and there are used copies going for $10998.00 as well. Act quickly to save a handsome $2,000.00 by grabbing Robert’s might-as-well-be-new 400mm GM lens. And you can’t beat the f/2.8 Bokeh! artie
|
|
|
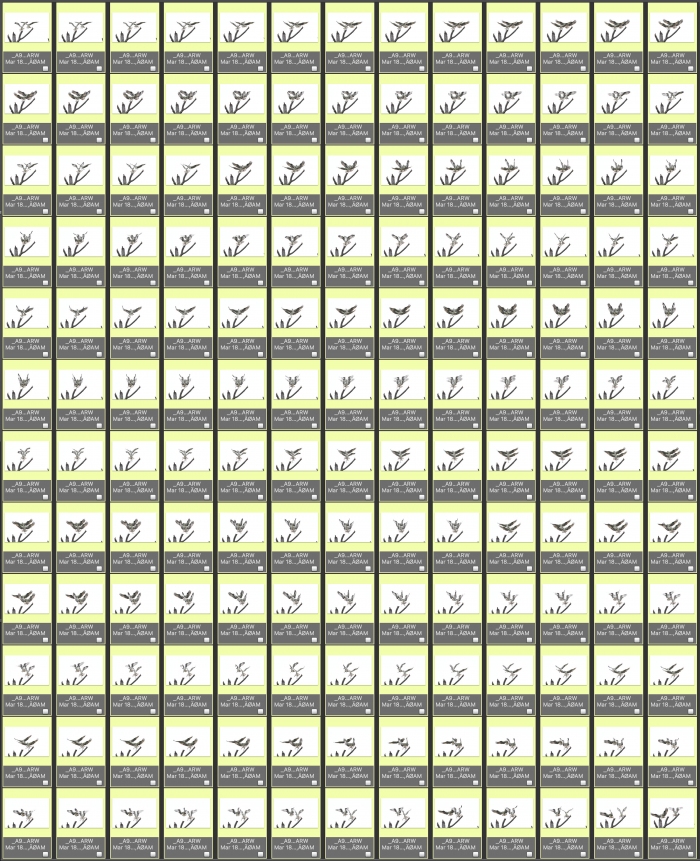
All of these 156 images were created in less than three seconds on 18 March 2024 down by the lake near my home at Indian Lake Estates, FL. Standing outside my vehicle near the old eagle nest, I used the handheld Sony FE 300mm f/2.8 GM OSS Lens (Sony E) and the ridiculously amazing Sony a9 III Mirrorless Camera. The exposure was determined via Zebra technology with ISO on the Thumb Dial. ISO 1250: 1/3200 sec. at f/2.8 (wide open) in Manual mode. When evaluated in RawDigger, the raw file brightness was pretty darned good. AWB at 9:00:05 to :07am on a cloudy morning. Zone/AF-C with Bird Face/Eye detection enabled performed to perfection. Be sure to click on the image to enjoy a high-res version. Osprey pair in flight near nest |
Is the Sony a9 iii Frame Rate Too High?
Many folks state that they do not need 120 fps, that they are “not missing any good poses) and are fine with their (fill-in-the-blank) frame-rate camera. You can choose anywhere from 3 to 30 fps. In addition to not missing any flight or action poses, they feel that having to edit so many images is a great burden.
They are terribly wrong on both counts. From the 156 frame sequence above, one image — _A930218, jumped off the screen as clearly best. I kept only four photos with two birds in the frame. If you’d like to see those four larger, please shoot me an e-mail by clicking here.
As far as picking my keepers — I use and recommend only Photo Mechanic. I find that it takes me less time to edit a larger folder of a9 iii images than a smaller folder of a1 images. Once you have the method down, you simply need to adjust your mindset. If you are new to Photo Mechanic, I can send you a an informal getting started guide for $10.00. It used to be free but Camera Bits discontinued its affiliate program recently.
Or, I can teach you the program on an IPT as I have done many times in the past.
|
|
|
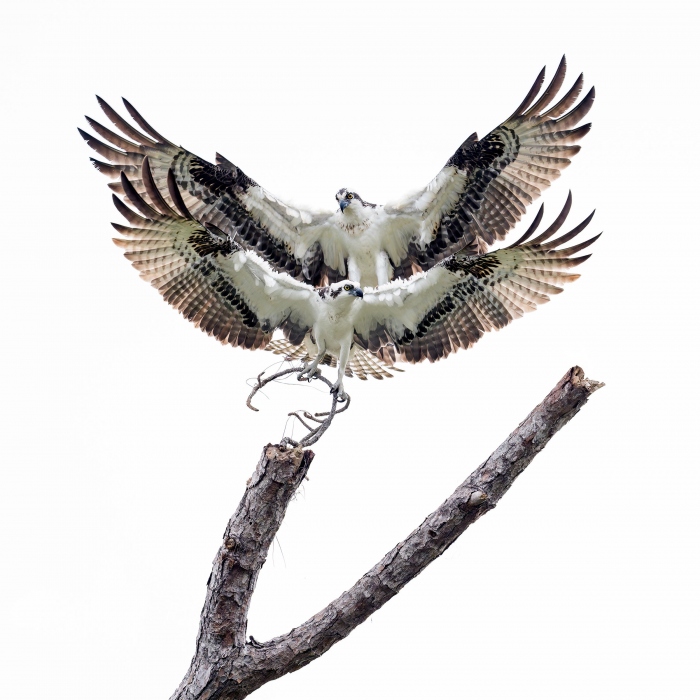
This image was created on 18 March 2024 down by the lake near my home at Indian Lake Estates, FL. Standing outside my vehicle near the old eagle nest, I used the handheld Sony FE 300mm f/2.8 GM OSS Lens (Sony E) and the ridiculously amazing Sony a9 III Mirrorless Camera. The exposure was determined via Zebra technology with ISO on the Thumb Dial. ISO 1250: 1/3200 sec. at f/2.8 (wide open) in Manual mode. When evaluated in RawDigger, the raw file brightness was pretty darned good. AWB at 9:00:06 on a cloudy morning. Zone/AF-C with Bird Face/Eye detection enabled performed to perfection. Be sure to click on the image to enjoy a high-res version. Ospreys near nest: serendipitous synchronous flight |
Bingo!
So, was this image the result of pure luck or the right gear?
Actually, it was a combination of both. And more. Note that I had the perfect lens in my hands and the perfect camera body with the perfect settings. But without knowledge of the wind and sky conditions and the necessary skills, I would have come up empty.
With the wind from the SW in the morning, I was lucky that it was totally overcast. If you are trying for flight on cloudy days, simply position yourself with the wind behind you. See the RawDigger item below and you will see that I did a pretty good job with the exposure. And I followed my own advice: if you are photographing a bird in flight and a second bird flies into the frame, press the shutter button and hold it down until they separate. But don’t quit entirely as one of the two might provide additional good chances. That is exactly what happened in this case; I keep nine additional images of the bird with the stick landing at the nest. None, however, were anywhere near as good as the “Bingo” shot.
I was lucky to witness the behavior; I had never seen anything remotely like it in 47 years of birding. But I was patient :-). And I was lucky that at the magic moment that the faces of both birds were on the exact same plane.
Note, however, that even if you are the luckiest bird photographer in the world and amazing behaviors happen often right in front of you, you will wind up with nothing unless you have mastered the basics needed to consistently create sharp, nicely designed, properly exposed images. Consider joining a BIRDS AS ART IPT.
The Image Optimization
I worked hard on the color with this image. The raw file could have gone a bit brighter, and in the cloudy conditions, there was a green/yellow color cast noticeable in the white feathers. I got started with the Luminance-Targeted Adjustment Tool during the raw conversion in ACR. Once I had the TIFF in Photoshop I created a new layer (Command J), made a selection using the Quick Selection Tool (W), and used Hue-Saturation (Command H) and Selective Color to render the whites neutral. I will be sharing the complete image optimization for this photo in Volume 5 of the Digital Basics III Video Series.
|
|
The Digital Basics III Video Series |
The Digital Basics III Video Series
I realized about a year ago that my digital workflow had changed significantly and was toying with the idea of writing a Digital Basics III. More recently, I have learned and begun working with two great new Photoshop Tools, the Remove Tool and the Luminance Targeted Adjustment Tool. The former is like a smarter Spot Healing Brush Tool on steroids and the latter is a huge step up from the fabulous Color Mixer Tool. During that same time frame, I came up with a new and improved 2-step noise reduction technique. I still use Divide and Conquer, Quick Masks, Layer Masks, an expanded array of personalized keyboard shortcuts, and tons of other stuff from both versions of Digital Basics.
As soon as I realized that I did not want to take on another large writing project, I realized that by creating a series of videos I could much more easily share all the details of my current digital workflow and much more easily incorporate additional new tips, techniques, and tools as I went. And so, The Digital Basics III Video Series was born. You can check out Volume I/#1 here.
You might opt to purchase single videos or to subscribe to Volume I and save $26 by ordering the first five videos in one fell swoop. You can purchase the five videos in Volume I by clicking here. The videos will be most valuable for folks using the latest version of Photoshop (2024) or Lightroom along with Topaz DeNoise AI and Topaz Sharpen AI.
|
|
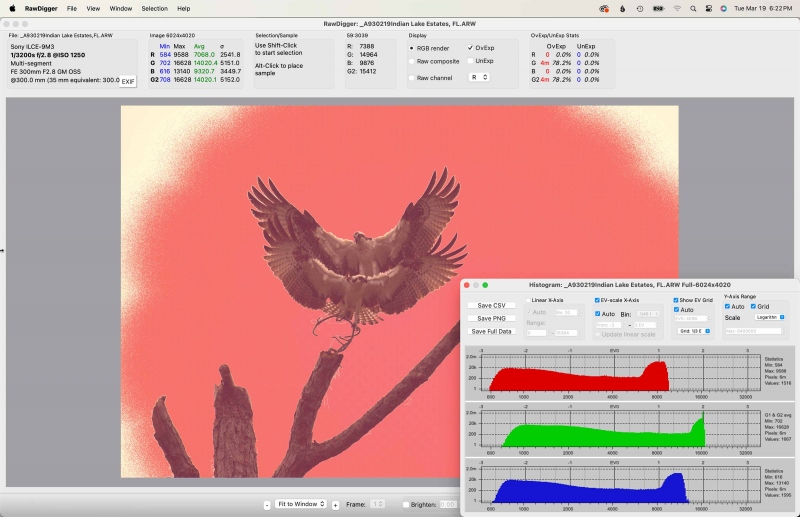
Image #1A: RawDigger screen capture of the (pink) Adapted Histogram for the Ospreys near nest: serendipitous synchronous flight image image |
Is This Image Over-exposed?
With 8 million over-exposed GREEN pixels, should I have added more light for this image? Or is it already over-exposed? If at least one person takes a stab at these questions, I will share the answer in the next blog post.
RawDigger — not for the faint of heart …
It would be impossible to overstate how much I have learned by studying RawDigger and how much better my exposures have become since I started with the program nearly four years ago.
Nothing has ever helped me learn to create perfect exposures to the degree that RawDigger has. I think that many folks are reluctant to learn that most of their images are underexposed by one or more full stops and that highlight warnings with Photoshop, Lightroom, Capture One, and your in-camera histogram are usually way off (because they are based on the embedded JPEGs). Only your raw files tell the truth all the time. Heck, I resisted RawDigger for several years … Once you get over this feeling, RawDigger can become your very best exposure friend no matter what system you are using. On the recent IPTs and In-the-Field sessions, we have demonstrated that fact. Convincingly.
The RawDigger (pink) Adapted Histogram
In the RawDigger e-Guide, you will learn exactly how to set up the Adapted “pink” RawDigger Histogram and how to use it to quickly and easily evaluate the exposure or raw file brightness of images from all digital cameras currently in use. RawDigger was especially helpful to me as I struggled with R5 exposures and learned my then-new camera body, the Sony Alpha a1.
|
|
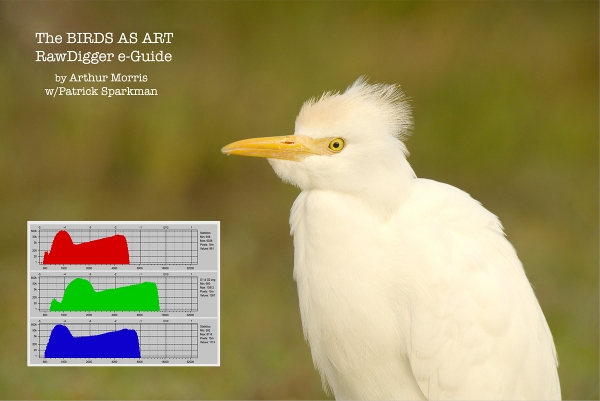
RawDigger e-Guide with Two Videos |
The RawDigger e-Guide with Two Videos
by Arthur Morris with Patrick Sparkman
The RawDigger e-Guide was created only for serious photographers who wish to get the absolute most out of their raw files.
Patrick and I began work on the guide in July 2020. At first we struggled. We asked questions. We learned about Max-G values. We puzzled as to why the Max G values for different cameras were different. IPT veteran Bart Deamer asked lots of questions that we could not answer. We got help from RawDigger creator Iliah Borg. We learned. In December, Patrick came up with an Adapted Histogram that allows us to evaluate the exposures and raw file brightness for all images created with all digital camera bodies from the last two decades. What we learned each time prompted three complete beginning to end re-writes.
The point of the guide is to teach you to truly expose to the mega-Expose-to-the-Right so that you will minimize noise, maximize image quality, best utilize your camera’s dynamic range, and attain the highest possible level of shadow detail in your RAW files in every situation. In addition, your properly exposed RAW files will contain more tonal information and feature the smoothest possible transitions between tones. And your optimized images will feature rich, accurate color.
We teach you why the GREEN channel is almost always the first to over-expose. We save you money by advising you which version of RawDigger you need. We teach you how to interpret the Max G values for your Canon, Nikon, and SONY camera bodies. It is very likely that the Shock-your-World section will shock you. And lastly — thanks to the technical and practical brilliance of Patrick Sparkman — we teach you a simple way to quickly and easily evaluate your exposures and raw file brightness using an Adapted RawDigger histogram.
The flower video takes you through a session where artie edits a folder of images in Capture One while checking the exposures and Max-G values in RawDigger. The Adapted Histogram video examines a series of recent images with the pink histograms and covers lots of fine points including and especially how to deal with specular highlights. The directions for setting up the Adapted Histogram are in the text.
If we priced this guide based on how much effort we put into it, it would sell it for $999.00. But as this guide will be purchased only by a limited number of serious photographers, we have priced it at $51.00. You can order yours here in the BAA Online Store.
Typos
With all blog posts, feel free to e-mail or to leave a comment regarding any typos or errors.




If you’ll forgive another comment, I also meant to say:
In answer to the title question of the post, I actually think skill and experience were, in this instance (and indeed more generally), more important than luck and the right gear.
It depends how you define “the right gear”, of course, but one could conceivably have got this shot with a film camera (!!). Luck is hard to quantify, although it certainly doesn’t hurt. But I suspect that most people would agree that a shot like this would be most unlikely without a great big dollop of expertise.
Yes, far more important than the gear. Plus a bit of luck.
And yes, this shot would have been possible with a film camera. But you would have had maybe six frames to choose from if you were lucky. Not 156 🙂 The world is changing.
with love, artie
Should you have added more light?
No, IMHO. The feathers already look pretty good, and there’s obviously no point in increasing the exposure for the sky.
In fact, there’s already a small section of both of the lower bird’s wing, just before the end on the leading edge, that has a slight greenish tinge (on my iPad at least, which obviously isn’t colour-calibrated). Would an osprey have that colouring? So, if anything, I would have wondered about reducing the green slightly.
So I guess I agree with the second part of Guido’s answer 🙂
I also agree that the 300/2.8 is amazing, by the way (although, having only just fairly recently changed my original A9 for an A1, I’m more than happy with that for now 😉
Andrew
Thanks, Andrew. Color casts are most common in low light and are almost always caused by reflections off the surroundings, in this case, greenish and yellowish grasses and other vegetation. The feathers are still white. So, an Osprey or any other bird would never “have that coloring.” I will address the exposure question in the next post.
with love, artie
Well they say “you makes your own luck” , and I seem to be luckier with the right gear in my hands.
Glad to see you’re appreciating what it has to offer – many seem to think that without at least 40mp no camera can be suitable for wildlife. I am starting to think that without 120fps no camera is suitable for wildlife !! 😉
Love reading your posts.
Cheers
Duncan
https://www.youtube.com/watch?v=PboFDmrxdYw
Thanks, Duncan. I have not used any of the three a-1 bodies in weeks!
with love, artie
Building on Guido’s comments regarding exposure, the subjects (bird/tree) have some room while the sky which is featureless is already slightly overexposed. Looking at the blue and read channels, you could have pushed the exposure up a bit to benefit the birds with no real penalty. Neat image and glad you are enjoying the 300. I imagine it must have been perfect for landing shots at Stick Marsh the other day.
Thanks. The 300 was made for Stick Marsh.
a
WRT exposure, I could say yes and no. Yes, technically the greens are maxed out (16K+), but the red and blue channels, and more importantly, the subject, are not. On the No side, given the birds and the tree are fine, the exposure works, so the important parts are not overexposed.
I am fine with letting the white sky go in a case like this. Any detail in a white sky could reduce the contrast between the feathers and the background, so in my opinion, white works here.
Aside from the technical question, this is a great shot. Also, thanks for turning me on to RawDigger. It has made a difference to me and my shooting. Be well out there, and enjoy Spring.
“Luck is the residue of design.” –Branch Rickey. Great image of the two ospreys. Although I have wondered if 120 fps is too much for me, I have never claimed that I am not missing good poses. As for going through lots of images, I think your experience must help. I find it takes me several passes to properly cull well-exposed, well-framed, and sharp images. Of course the out of focus and motion-blurred and badly framed ones are easy to cull and the ones with ugly backgrounds and unpleasing poses are too.