Sony a-1 II Pre-order Info Updated
Those who wish to receive my Sony a-1 II settings for free in the form of a CAMSET.DAT file with instructions and an explanatory Buttons and Dials Guide should pre-order from one of my affiliate programs as below.
To pre-order your Sony a-1 II from B&H, you must use this link and only this link at or after 9:30am Eastern time today, 20 November 2024:
Once your camera ships, you must send me your B&H receipt to me via e-mail.
If you were on the B&H please-notify-me list and order using a link that they sent you, I will not receive the credit and you will not receive my camera set-up guide information for free.
Those who prefer more personalized service, a far shorter wait list, enjoy free second day air FedEx, and receive 3% back on their credit card when their a1 II ships should to visit the Bedford website here, at or after 9:30am today, search for the Sony a-1 II, pre-order they camera body, and enter the BIRDSASART discount. There is no need to e-mail Steve Elkins.
Thanks to those who pre-order using one of my affiliate links and for the faith they place in the information provided by BIRDS AS ART.
What’s Up?
Monday morning was Day-1 at Sebastian with Steve Shore and his lovely wife Elisabeth (say “eh-LEASE-uh-bet”). We had lots of cooperative subjects down by the gentle surf including Great and Snowy Egrets and lots of Wood Storks. It was a cloudy morning with a bit of a west breeze that turned to the north as the morning wore on. Though conditions were less than ideal for fishing and catching Ospreys, everyone managed a few good flight shots. All in all it was a perfect morning for teaching.
The highlight of our afternoon was the Sabine’s Gull. We all got some nice top shots as it came down to fish and Mr. Eastman got some decent images of one in flight with a Mullet in its bill.
In today’s blog post we will take a look at what you can do with properly exposed to the right raw files made on cloudy days. Yes boys and girls, they should look washed out and over-exposed. There was not however, a single over-exposed pixel in any of today’s featured images. Remember that the histograms on your camera, in Lightroom and Photoshop, and in Photo Mechanic, all mislead photographers as they are based on the embedded JPEGs. Only RawDigger can accurately evaluate the exposure of a raw file. Sorry Charlie; that’s the way it is.
The Ospreys were fishing and catching on Tuesday morning. With the clouds and a south wind Steve and Elisabeth Shore, Bob Eastman, and I did not leave the inlet until after 11:00am. What fun.
|
|
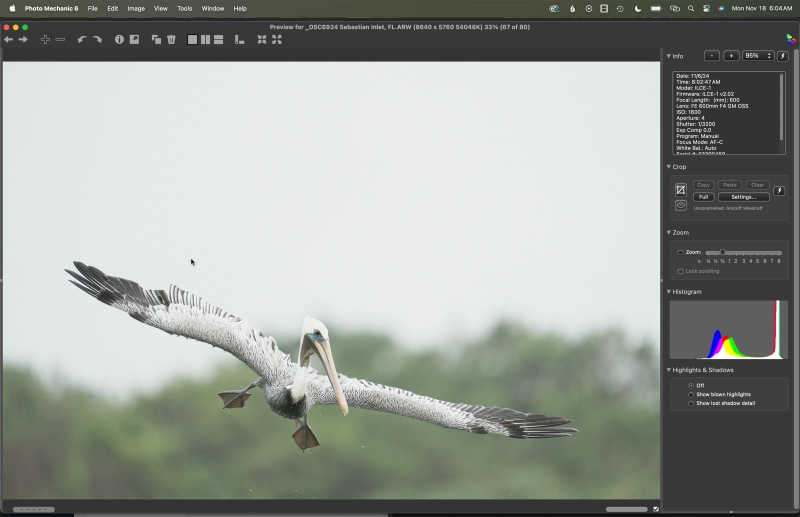
Image 1: The Photo Mechanic screen capture for the Brown Pelican ready to dive — pano crop image |
Blah
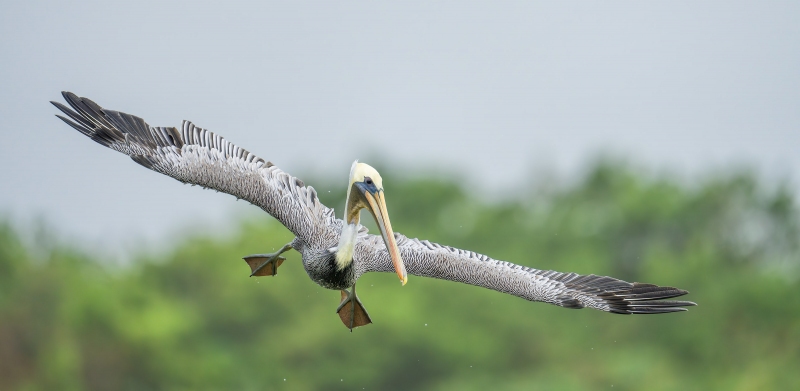
The best word to describe the color and contrast of this properly exposed to the right raw file would be “blah.” With the bird at the bottom of the frame and too much boring sky above, the need for a pano crop was obvious. Bringing such images to life is actually straightforward.
|
|
|
This image was created on 6 November 2024 on the Sebastian Inlet Ospreys and More Extended IPT. Standing in the water at the Northwest Pool, This image was also created on 16 November 2024 on the Sebastian Inlet Ospreys and More Extended IPT. I used the Robus RC-5570 Vantage Series 3 Carbon Fiber Tripod/Levered-Clamp FlexShooter Pro-mounted Sony FE 600mm f/4 GM OSS lens and The One, the Sony Alpha 1 Mirrorless Digital Camera). The exposure was determined via Zebra technology with ISO on the thumb dial. ISO 1600. 1/3200 sec. at f/4 (wide open) in Manual mode. When evaluated in RawDigger, the raw file brightness was determined to be dead solid perfect. AWB at 8:02:47am on a cloudy morning. Zone/AF-C with Bird-Eye/Face Detection performed perfectly. Click on the image to enjoy the high-res version. Be sure to click on the image to enjoy a high-res version. Image 1A: The Brown Pelican ready to dive — pano crop |
The Basic Workflow Plus Some Color Mixer Work
I followed my basic workflow as detailed in both Digital Basics II and the the Digital Basics III Video Series Volume I. This improved both the color and the contrast and then some judicious Color Mixer work really popped the pelican. Easy peasy.
|
|
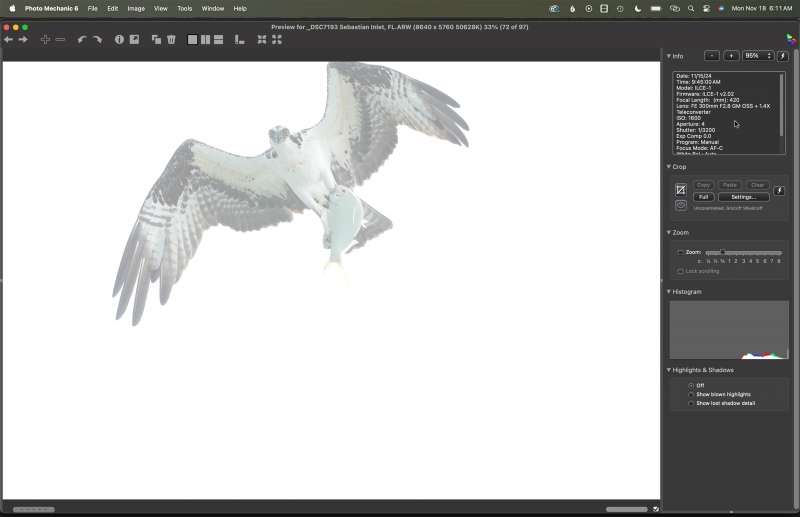
Image #2A: The Photo Mechanic screen capture for the Osprey overhead with Yellow-tailed Menhaden |
Overhead and Hazy
I was near the end of the South Jetty. I looked up and saw an Osprey right over my head carrying a fish. I raised my lens as fast as possible and fired off a handful of frames. In two out of three keepers, I clipped a wing slightly. Note that all of the data is piled up on the far right side of the histogram.
|
|
|
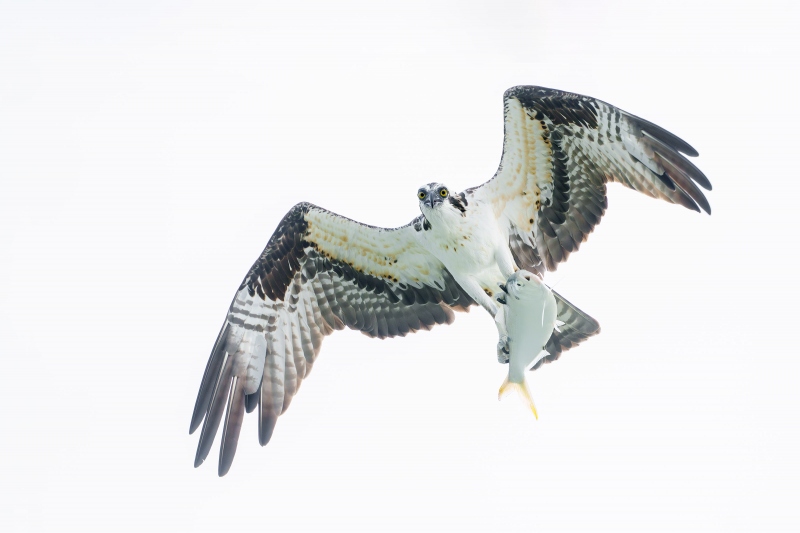
This image was created on 15 November 2024 on the Sebastian Inlet Ospreys and More Extended IPT. Standing near the end of the South Jetty, I used the hand held Sony FE 300mm f/2.8 GM OSS Lens (Sony E) with the Sony FE 1.4x Teleconverter, and The One, the Sony a1 Mirrorless Camera. The exposure was determined via Zebra technology with ISO on the thumb dial. ISO 1600. 1/3200 sec. at f/4 (wide open) in Manual mode. When evaluated in RawDigger, the raw file brightness was determined to be dead solid perfect. AWB at 9:45:00am on a cloudy, heavily overcast morning. Zone/AF-C with Bird Face/Eye detection enabled performed to perfection. Be sure to click on the image to enjoy the high-res version. Image #2A: Osprey overhead with Yellow-tailed Menhaden |
The Successful Image Optimization
All that I did was set the white point and the black point, adjust a few more sliders, do a bit of Color Mixer work, add my double noise reduction technique, and voila: Photoshop magic!
|
|
Image #3A: The Photo Mechanic screen capture for the Sanderling beach-scape image |
Washed Out and Boring
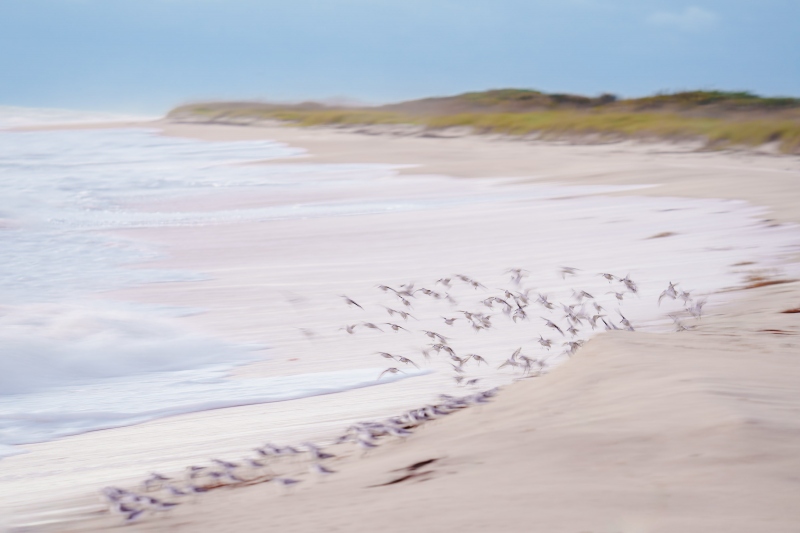
Understand that your properly exposed to the right raw files made on cloudy days should look flat and washed out. Doing so produces raw files with little ISO noise that enable you to increase the contrast and reveal clean, rich colors during the image optimization. As below, those steps are simple as can be.
|
|
|
This image was created on 17 November 2024 on the Sebastian Inlet Ospreys and More Extended IPT. Standing near the base of the South Jetty, I used the hand held Sony FE 200-600mm f/5.6-6.3 G OSS lens (at 223mm) and The One, the Sony Alpha 1 Mirrorless digital camera. ) The exposure was determined via Zebra technology with Exposure Compensation on the thumb dial. Shutter Priority +1.7 stops. AUTO ISO set ISO 800: 1/13 sec. at f/6.3 (wide open). AWB at 6:35:06am on a cloudy morning. RawDigger showed the exposure to be dead solid perfect. Tracking (lower center) Expand Spot AF-C with Bird Face/Eye Detection performed perfectly. Be sure to click on the image to enjoy a high-res version. Image #3A: Sanderling beach-scape |
Simple as Can Be
Nearly all of the incredible color and contrast work on today’s three featured images was done during the raw conversion in Adobe Camera Raw (ACR). ACR is the conversion engine in both Photoshop and in Lightroom. Learn the steps in either Digital Basics II or the Digital Basics III Video Series/Volume I.
|
|
The BIRDS AS ART Current Workflow e-Guide (Digital Basics II).You can order your copy from the BAA Online Store here, by sending a PayPal for $40 here, or by calling Jim or Jennifer weekdays at 863-692-0906 with your credit card in hand. Be sure to specify Digital Basics II. |
The BIRDS AS ART Current Workflow e-Guide (Digital Basics II)
The techniques mentioned above and tons more great Photoshop tips and techniques — along with my complete digital workflow, Digital Eye Doctor Techniques, and all my personalized Keyboard Shortcuts — are covered in detail in the BIRDS AS ART Current Workflow e-Guide (Digital Basics II), an instructional PDF that is sent via e-mail. Note: folks working on a PC and/or those who do not want to miss anything Photoshop may wish to purchase the original Digital Basics along with DB II while saving $15 by clicking here to buy the DB Bundle.
Please note: the Divide and Conquer technique was inadvertently omitted from DB II. It is detailed in a free excerpt in the blog post here.
Folks who learn well by following along rather than by reading can check out the complete collection of MP 4 Photoshop Tutorial Videos by clicking here. Note: most of the videos are now priced at an amazingly low $5.00 each.
You can learn how and why I converted all of my Canon digital RAW files in DPP 4 in the DPP 4 RAW Conversion Guide here. More recently, I became proficient at converting my Nikon RAW (NEF) files in Adobe Camera Raw. About three years ago I began converting my Nikon and Sony RAW files in Capture One and did that for two years. You can learn more about Capture One in the Capture One Pro 12 Simplified MP4 Video here. The next step would be to get a copy of Arash Hazeghi’s “The Nikon Photographers’ Guide to Phase One Capture One Pro e-Guide” in the blog post here. Today, I convert my Sony raw files in Photoshop with Adobe Camera Raw.
You can learn advanced Quick Masking and advanced Layer Masking techniques in APTATS I & II. You can save $15 by purchasing the pair.
|
|
The Digital Basics III Video Series |
The Digital Basics III Video Series
I realized more than a year ago that my digital workflow had changed significantly and was toying with the idea of writing a Digital Basics III. More recently, I learned and begun working with two great new Photoshop Tools, the Remove Tool and the Luminance Targeted Adjustment Tool. The former is like a smarter Spot Healing Brush Tool on steroids and the latter is a step up from the fabulous Color Mixer Tool. During that same time frame, I came up with a new and improved 2-step noise reduction technique. I still use Divide and Conquer, Quick Masks, Layer Masks, an expanded array of personalized keyboard shortcuts, and tons of other stuff from both versions of Digital Basics.
As soon as I realized that I did not want to take on another large writing project, I realized that by creating a series of videos I could much more easily share all the details of my current digital workflow and much more easily incorporate additional new tips, techniques, and tools as I went. And so, The Digital Basics III Video Series was born.
The videos will be most valuable for folks using the latest version of Photoshop (2024) or Lightroom along with Topaz DeNoise AI and Topaz Sharpen AI.
Typos
With all blog posts, feel free to e-mail or to leave a comment regarding any typos or errors.



I dropped by this site for nostalgic reasons: I was going through some of my photography related info and stumbled on an early 2005/6(?) “Digital Basics PDF” – I think I still have the CD somewhere.
The opening lines are classic now: “In early 2002, I wrote, “Some time in the future—probably around 2023 or so— Darrel Gulin and I will surely be the last two professional wildlife photographers using film…” – 2023 was a year ago. Jeepers how time flies!
Glad to see Digital Basics are still alive and well!
Mark.
Tanks for the memory. Your name somehow sounds familiar …
a
Artie,
Today’s photos point out how subjective image appreciation really is. The corrected pelican image is one I would view and enjoy again. The corrected osprey image as presented I would discard. I am sure in my own attempts at editing it I would have attempted to increase color and contrast to make it enjoyable to my eye. Having said that and then reviewing Maggi’s comment I viewed the full size image a second time and felt much the same. Then I heavily cropped the image to show only part of the bird with fish and found the perfectly exposed and captivating photo that I would have mistakenly trashed. Perhaps if you were not using this photo as an example of a teaching principle you might have cropped it as well.
Though I cannot at all conceive why you might “discard” the optimized version of Image #2, I would like to thank you for leaving a comment and aim glad that you liked a cropped version of it if only in your head 🙂
with love, artie
Art: Thanks for all the links! By the way, under “Washed Out and Boring” there is a typo:
“made one cloudy days.” I think you meant “made on cloudy days.”
Thanks and fixed with love, artie
No contest! The modified Osprey image 2A is absolutely brilliant in my opinion, such a piercing gaze straight at you, and the horror on the face of the fish!
Many thanks, Maggi. Both the processing and the image are outstanding in my eyes.
with love, a