|
|
Peter Kes is job hunting |
Peter Kes
Peter Kes, friend of 3 decades and longtime BAA blog webmaster, is a brilliant IT (information technology) and computer expert. He is currently living on and running a Bushveld Farm in Dinokeng Game Reserve, Pretoria, Gauteng, RSA (Republic of South Africa) and is looking to re-locate. You can learn more about Peter and check out his impressive resume at his LinkedIn profile page here. You can contact Peter via e-mail.
Add Green Whenever Possible
I think that those words were first penned in the original The Art of Bird Photography. If you are doing bird photography, they are just as true today as they were three decades ago. As you view today’s three featured images, consider the use of green in the backgrounds and in the last two photos, note the placement of the line of demarcation.
Please do not be fooled by thinking that the placement of the line of demarcation is either “what it is” or is accidental. You change the placement of the quasi-horizon line by getting your lens a few inches higher of lower. But only if you notice it while designing the image.
Your Call?
Which of the three is the strongest image? Why?
In the Last Blog Post
In the last blog post that featured the Tricolored Heron/dragonfly images, most folks preferred the second image for a variety of very good reasons. I preferred Image #1 because of the elegant position and “pose” of the dragonfly that resulted in the photo having a lovely flow to it. In addition, I like the wider view in the first image. And I far prefer the background in the first image because the line of demarcation does not merge with either the bird’s bill or the dragonfly in it. And yes, Add Green Whenever Possible!
What’s Up
The Auto Train trip so far has been blessedly uneventful so far. We should be arriving in Lorton, VA a bit early at 8:30am I pay the $65 extra for Early Off — they guarantee that your vehicle will be among the first 30 off the train. I cannot say that I am lookin forward to the drive to Lido Beach. Google Maps shows it as “typically 4 hours 40 minutes to 6 hours 40 minutes.” In other words, you might hit some nasty delays. I will try to get out of the car every 90 minutes or so to loosen up. Throw in a stop for brunch and gas and I would be thrilled to get to my AirBnB by 6pm. If that happens and it is sunny with a west wind, I might actually head out to the beach to see how the birds are doing.
I did get lots of work done on the train. First, I consolidated all of my June and July 2025 images from Jacksonville, ILE, and Nickerson Beach (on my BILD visit). Then I did second edits on the three new folders along with Homer 2025. The result: I gained .15TB of space by getting from 4.75 TB available down to 4.9 TB available by deleting many thousands of pretty much perfect photographs.
I learned on Monday (!) that multiple IPT veteran Judy Stepenaskie was taking advantage of the late registration discount and will be joining me for the mini IPT; she is driving up from Philadelphia on Wednesday.
I still have room in the AirBnB for the last Nickerson Beach IPT:
Nickerson Beach 4-Day Instructional Photo-Tour (IPT): MON AUG 25 afternoon thru the morning session on FRI AUG 29, 2025: $1899.00.
Today is Tuesday 5 August 2025 and I have lots of driving to do. Whatever you opt to do, I hope that you too choose to have a wonderful and productive day and that you have fun too. Do remember that happiness is a choice — Byron Katie, The Work.Com.
If an item — a Delkin flash card or reader, a Levered-clamp FlexShooter Pro, or a Wimberley lens plate or low foot — for example, that is available from B&H and/or Bedfords, is also available in the BAA Online Store, it would be great, and greatly appreciated, if you would opt to purchase from us. We will match or beat any price. Please remember also to use my B&H affiliate links or to earn 3% cash back at Bedford by using the BIRDSASART discount code at checkout for your major gear purchases. Doing either often earns you free guides and/or discounts. And always earns my great appreciation.
Gear Questions and Advice
Too many folks attending BAA IPTs and dozens of photographers whom I see in the field and on BirdPhotographer’s.Net, are — out of ignorance — using the wrong gear, especially when it comes to tripods and more especially, tripod heads. And the same is true in spades when ordering new camera bodies or lenses. My advice will often save you some serious money and may help you avoid making a seriously bad choice. Please know that I am always glad to answer your gear questions via e-mail. If you are desperate, you can try me on my cell at 863-221-2372. Please leave a message and shoot me a text if I do not pick up.
Don’t Just Shoot: Learn
If you are interested in changing your life and becoming a better photographer by joining me on the Extended IPT at Sebastian Inlet for Ospreys and more (SEPT 25 to NOV 24, 2025), in San Diego for Pacific-race Brown Pelicans and more (JAN 6 to FEB 2, 2026), or for Roseate Spoonbills at Stick Marsh (March 2026), please e-mail for dates, rates, terms, and additional information. Or shoot me a text to 863-221-2372. Some offerings include options for shared AirBnB lodging and meals. Ground transportation during your stay is a possibility at times.
|
|
|
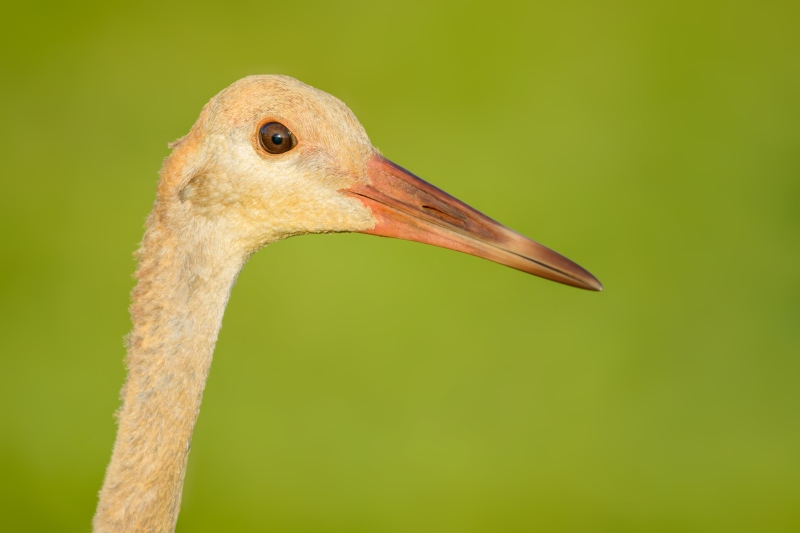
This image was created on 17 July 2025 on the North Field near my home at Indian Lake Estates, FL. Working from my SUV, I used the handheld Sony FE 400-800mm f/6.3-8 G OSS lens (Sony E) (at 700mm) and the SONY a-1, (now replaced by The Latest Greatest Sony Flagship Body, the a1 II Mirrorless Camera). The exposure was determined by Zebras with ISO on the rear wheel: ISO 2500: 1/2000 sec. at f/8 (wide open) in Manual mode. RawDigger showed that the exposure was dead solid perfect. AWB at 7:29:50am on a sunny morning. Wide/AF-C with Bird-Eye/Face Detection performed perfectly. Click on the image to enjoy the larger, inexplicably sharper high-res version. Image #1: Sandhill Crane large colt about 4 months old. |
Sweet
Sweet early morning light, a distant background, the nice clean bill, and one of the (at least) two surviving lakefront colts combined here to create a dramatic head and neck portrait of the handsome young crane. How did zooming out for 800 to 700mm help with the depth of field?
Speaking of zooming with a super-telephoto lens, I will often go with the much slower Sony FE 400-800mm f/6.3-8 G OSS lens (Sony E) and leave the Sony FE 600mm f/4 GM OSS lens in the back of my SUV (or on the passenger side front seat). Why? Being able to fine tune the image design by zooming in or out adds tremendous versatility.
|
|
|
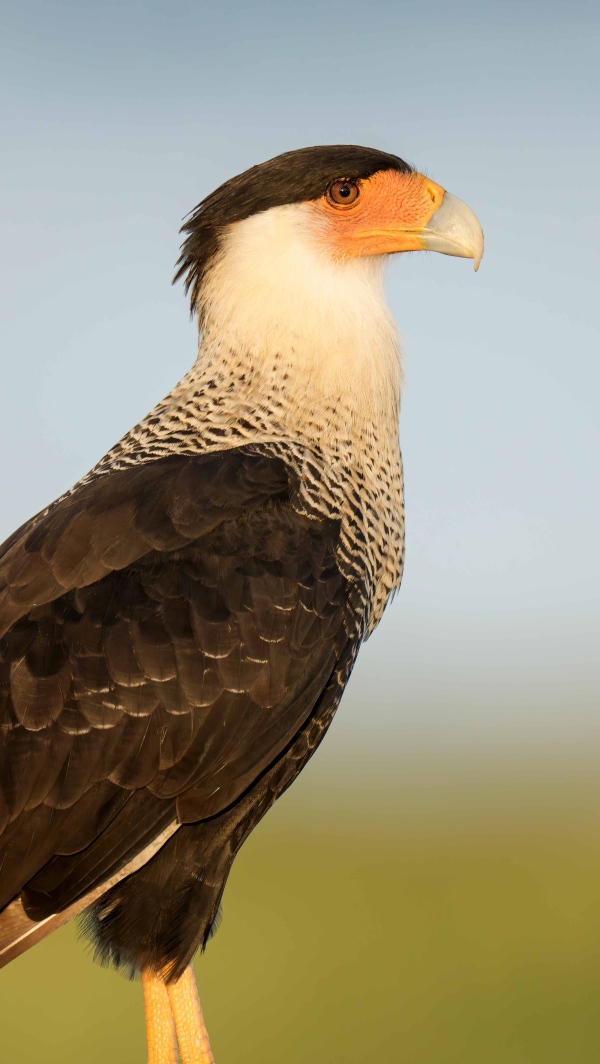
This image was created on 19 July 2025 down by the lake near my home at Indian Lake Estates, FL. Walking on the pier, I used the Robus RCM-439 4-Section Carbon Fiber Monopod, 65/Wimberley MonoGimbal Head-supported Sony FE 600mm f/4 GM OSS lens (at 1200mm!) with the Sony FE 2x Teleconverter and The Latest Greatest Sony Flagship Body, the a1 II Mirrorless Camera. The exposure was determined by Zebras with ISO on the rear wheel: ISO 2000: 1/800 sec. at f/8 (wide open) in Manual mode. RawDigger showed that the exposure was dead solid perfect. AWB at 7:10:41am on a sunny morning. Wide/AF-C with Bird-Eye/Face Detection performed perfectly. Click on the image to enjoy the larger, inexplicably sharper high-res version. Image #2: Crested Caracara on pier railing |
A Rare Second Chance
With large piles of dead mayflies at the base of the pier, a pair of caracaras had been hanging around for several days. On the 18, I put my 1200mm rig on the monopod for the first time ever, and attempted to get in position for a shot by sneaking out from behind the corner of the small pump house just north of the base of the pier. I was too aggressive and both birds flew. Next day: same deal. Only this time I was much more cautious and poked my lens just out from the corner of the structure with me mostly hidden behind it. The second time was the charm.
Sharp at 1200mm at 1/800 sec. on a monopod is nothing to sneeze at. I leaned my right side onto the small building and took care to held as still as possible by bracing the lens against the corner of the structure. The Optcial Stabilization System OSS) on the lens and in the camera (IBIS) insured a sharp image in iffy conditions.
If I had been on the tripod I would have scared the birds for sure and gone home empty-handed. As much as I am not a huge fan pf monopods, there are certain situations when they cannot be beaten.
Why the tall, skinny crop? I do not like including the pier railing in an image unless it is absolutely necessary.
|
|
|
This image was created on 19 July 2025 down by the lake near my home at Indian Lake Estates, FL. Walking on the pier, I used the Robus RCM-439 4-Section Carbon Fiber Monopod, 65/Wimberley MonoGimbal Head-supported Sony FE 400-800mm f/6.3-8 G OSS lens (Sony E) (at 800mm) and The Latest Greatest Sony Flagship Body, the a1 II Mirrorless Camera. The exposure was determined by Zebras with ISO on the rear wheel: ISO 1600: 1/1000 sec. at f/10 (stopped down 2/3-stop) in Manual mode. RawDigger showed that the exposure was dead solid perfect. AWB at 7:59:23am on a sunny morning. Wide/AF-C with Bird-Eye/Face Detection performed perfectly. Click on the image to enjoy the larger, inexplicably sharper high-res version. Image #3: Limpkin on pier railing calling |
Monopod to the Rescue — Again!
By no stretch of the imagination is the Sony FE 400-800mm f/6.3-8 G OSS lens (Sony E) a lightweight. When photographing birds, the battle is often waiting for the bird to do something neat. Or exciting. Or both. When head hunting handheld on the pier with the 4-8, keeping the shot frame indefinitely is an impossibility for me. Fatigue becomes a problem in about a minute. Oftentimes, the moment you take a break, the bird does something fabulous. So, when I begin to hurt, I need to lower the lens for a few seconds, raise it again, and the hope that something good happens. Rinse and repeat. With the lens supported by a decent monopod with the world’s best monopod head, I can wait all morning. On the morning of the 19th, the monopod was the right tool for a variety of jobs.
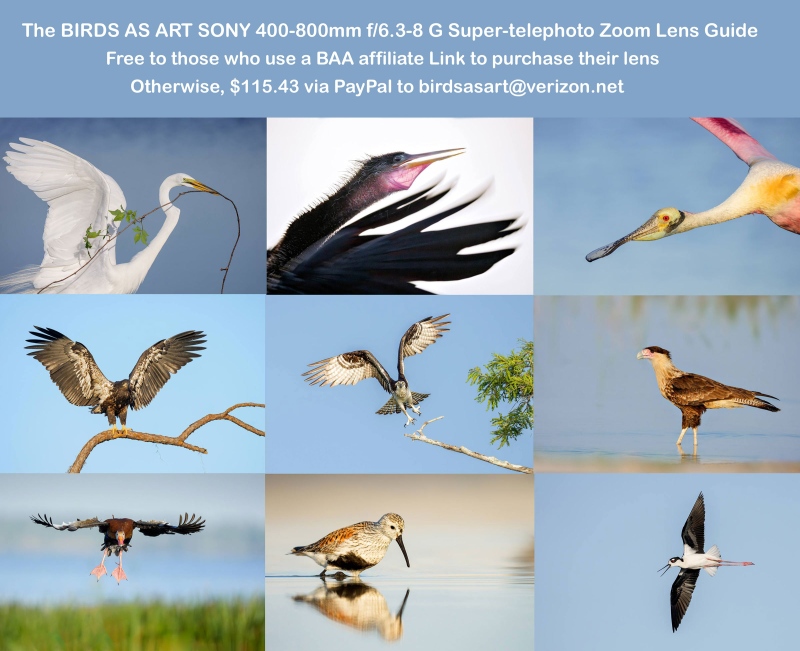
The BIRDS AS ART SONY 400-800mm f/6.3-9 G Super-telephoto Zoom Lens Guide
When I borrowed this lens from Sony, I assumed that at 5.45 pounds it was too heavy to handhold for long and that at f/8 at the long end (800mm,) it was too slow for most bird photography applications. In short, I did not want to like the lens. After a month of using it, I cannot live without it. After returning the loaner, I was miraculously able to get my own from Bedfords on 16 April 2025. In this guide I share everything that I have learned about using the 400-800. For best results, you need to know exactly what you are doing to get the most out of this zoom lens. It would be best, therefore, to consider and study the material in the guide so that you can begin making great images with your new lens.
You will learn how to deal with the relatively show apertures: f/6.3, f/7.1, and f/8 when working in Manual mode.
You will learn how to ensure that you are working at the widest aperture by working in Shutter Priority mode with AUTO ISO.
If you are able to hand hold the lens, you will learn proper hand holding techniques.
If you can’t, you will learn when, why, and how to employ other options. Those include:
1- The knee-pod, heel-pod, and toe-pod techniques
2- Using the lens on a monopod.
3- The best lens plate and low foot for your 4-8.
4- The best tripod and head for the 4-8 and how best to utilize them.
5- How to use the lens from your vehicle while supporting it on a BLUBB (or not and why not).
6- Detailed instructions on how to set and use the lens controls and buttons:
a- AF/MF
b- DMF Switch
c- Limit Range Switch
d- OSS (Optical Steady Shot) Switch
e- OSS Mode Switch
f- Focus Hold Buttons
The guide also includes a Hand Holding Shutter Speed Primer and an illustrative, educational, and inspiring 67-image gallery.
Free to folks who use one of my two affiliate links to purchase their Sony 400-800 G lens. Otherwise, please send a PayPal for $115.43 to birdsasart@verizon.net and include the words “400-800 Lens Guide” in your e-mail.
Typos
With all blog posts, feel free to e-mail or to leave a comment regarding any typos or errors.

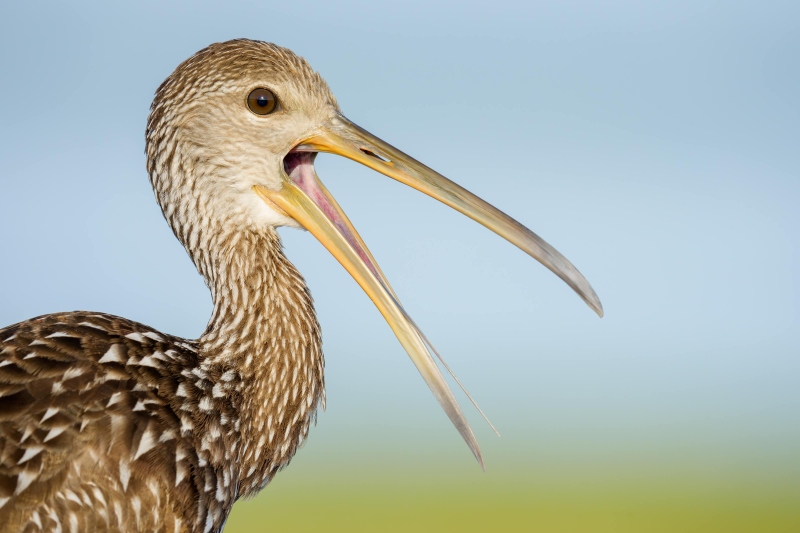


I love caracaras and would usually favor it due to subject bias. However, I would prefer a tighter crop of head and shoulders eliminating the leg and some of the wing/body. As is, I’d prefer either more crop or less (full body). And so of the three, I like the limpkin for its mouth open pose with the long, delicate tongue display, and the clean background (with the touch of green). The limpkin holds my interest more than the other two mages.
Thanks for commenting, Tom. The caracara crop was a tough one. When I made the image I knew that I was not going to include the pier so I intentionally clipped the feet.
artie
I agree with avoiding a pier when possible, and for that reason, I’d crop more. Still, it’s a great subject and congrats on getting a sharp image with 1200mm at 1/800 while not on a tripod.
Thanks. As far as the crop, different strokes.
artie
#3 for me. That open mouth says it all.
Thanks, James. The call of a Limpkin is often described as that of a dying person. At times, the make a sound like my younger daughter Alissa’s dog Percy choking spasmodically.
artie
Typo: “every 90 minutes or so to loosen up”
Loved the caracara! (1) the soft blue and green background, (2) the gorgeous, sharp image and (3) the white edge on the bird’s wing feathers. Honestly, it looks like it has eye lashes.
Good catch! Thanks for your comment. The day before the situation was even better. But I scared the bird away 🙁
artie