L’shana Tova
“L’shana tova” (לְשָׁנָה טוֹבָה) is a common Hebrew greeting that means “for a good year,” and it is used to wish someone a Happy New Year during Rosh Hashanah, the Jewish New Year holiday. Rosh Hashanah began last night and is comprised of two full days. Yom Kippur (one day) begins at sundown on Wednesday 21 October.
|
|
|
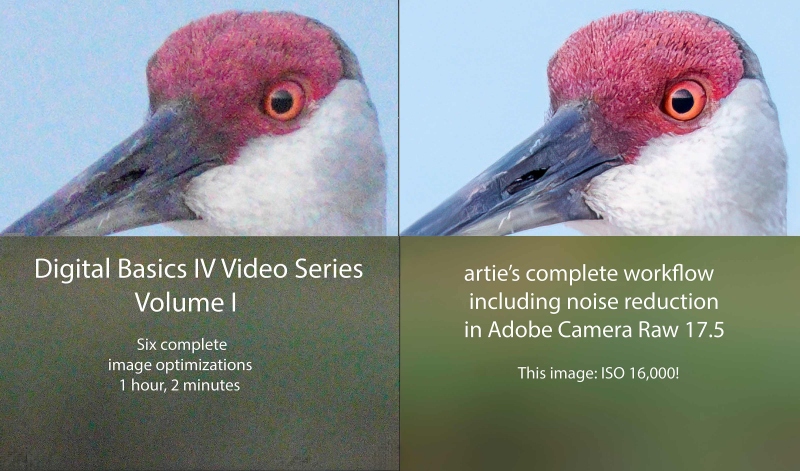
Click on the screen capture to enlarge and check out the amazing noise reduction with this ISO 16000 image. The Digital Basics IV Video Series/Volume I by Arthur Morris/Birds as ArtYou can purchase Volume I by clicking here. Or save $50.00 by purchasing the entire 5 volumes series by clicking here. |
Digital Basics IV Video Series/Volume I
Most importantly, DB IV/Volume I eliminates the confusion that resulted from the changes to AI Noise Reduction (under the Details tab) in the latest update (17.5) to Adobe Camera Raw (in both Photoshop 2025 Release 26.10.0 and the latest version of Lightroom). As you will see below and in the Volume I video, the new interface represents a significant improvement on the results obtained with the Enhance dialogue box in previous versions of ACR. And, as mentioned here recently, I have some fabulous new image optimization tips, techniques, and tricks to share with you. As the Digital Basics III Video Series proved to be so popular, I have decided to run it back in the form of the Digital Basics IV Video Series (Those who have complete faith in the information that I provide may wish to use the preceding link to save $50.00 by ordering the whole series on a pre-publication basis; you will receive Volume I as soon as you order. The rest will follow upon publication.
My new workflow includes the use of the masking feature in Adobe Camera Raw (thanks to Anita North), the use of the Point Color eye dropper to tame super-saturated colors during raw conversions (discovered in tandem with Anita), a fabulous new Remove Tool trick that makes my favorite Photoshop Tool even more powerful than before -— that one discovered by me. In addition, I have recently begun doing some Curves work during my ACR raw conversions.
My basic workflow remains much the same as is detailed in both DB II and in the DB III Video Series:
1- Setting the Color Temperature (when and if needed).
2- Setting the White and Black Points and adjusting the Highlights and Shadows sliders.
3- Setting the Clarity and Dehaze sliders.
4- Fine-tuning color using the Hue/Saturation/Luminance Targeted Adjustment Tool, a huge step up from the Color Mixer Tool.
5- My 2-step noise reduction technique (with most images).
Once I have the .TIF file in Photoshop, I still use my usual cadre of clean-up tools and techniques including the Remove Tool, the Clone Stamp (only rarely), Divide and Conquer, Quick Masking, Layer Masking, Gaussian Blurs, an expanded array of personalized keyboard shortcuts, and tons of other image optimization strategies and methods adapted from previous versions of Digital Basics. I also demonstrate the selective use of Topaz Sharpen AI utilizing the masking feature. And last but not least, I share my JPEG creation methodology.
Volume I of Digital Basics IV details the image optimizations of six images. Most everything above but for the use of the Point Color eye dropper to tame super-saturated colors during raw conversions is at least touched upon in Volume I. Most of it is covered in great detail.
Volume I of Digital Basics IV details the image optimizations of today’s six featured images. Most everything above but for the use of the Point Color eye dropper to tame super-saturated colors during raw conversions is at least touched upon in Volume I. Most of it is covered in detail.
You can purchase your copy of this all new 1 hour, two minute video for $49.00 here in the BAA Online Store. There will be five volumes in DB IV each featuring 5 or 6 complete image optimizations. If you purchase the first four volumes, you will receive the fifth volume for free.
Or, you can save $50.00 by purchasing all five volumes now for only $146.00 by clicking here. I hope to complete Volume II this week.
If …
If you were previously receiving blog post notifications via e-mail on a regular basis but they suddenly quit coming, please let me know via e-mail and cut and paste this into the subject line: Please Add to the Personalized Blog Notification List. Some e-mail providers (likely including Gmail) recently began blocking the post notifications being sent by the Word Press Newsletter program.
In the Last Blog Post
In the last blog post, only two folks picked a favorite, Image #4, both for the same reason: the bird’s elegant pose. My top pick was Image #3: Sandhill Crane colt head portrait, for its overall perfection.
If you are so inclined, feel free to pick a favorite from today’s six featured images and let us know why you made your choice.
What’s Up?
I’ve had several very good morning sessions here at ILE recently with lots of cooperative birds posing on the pier railings. Monday morning began slowly but I wound up working a pair of adult cranes preening on the beach south of a pier and yet another perched young Great Egret on The Perch II. I created 1245 yet-to-be-edited raw files and am of course, hoping for at least one good one.
Today is Tuesday 23 September and I will be headed down to the lake as soon as I hit publish. This blog post took a ridiculous 8+ hours to create, not including the time spent creating the images and the DB IV/VOL I video 🙂 Whatever you opt to do, I hope that you too choose to have a great day.
I am thinking about getting ready to head over to Sebastian on Thursday afternoon to begin my two-month residency at a very nice Vero Beach Estates AirBnB. Click here and scroll down a bit to learn about joining me.
If an item — a Delkin flash card or reader, a Levered-clamp FlexShooter Pro, or a Wimberley lens plate or low foot — for example, that is available from B&H and/or Bedfords, is also available in the BAA Online Store, it would be great, and greatly appreciated, if you would opt to purchase from us. We will match or beat any price. Please remember also to use my B&H affiliate links or to earn 3% cash back at Bedford by using the BIRDSASART discount code at checkout for your major gear purchases. Doing either often earns you free guides and/or discounts. And always earns my great appreciation.
Gear Questions and Advice
Too many folks attending BAA IPTs and dozens of photographers whom I see in the field and on BirdPhotographer’s.Net, are — out of ignorance — using the wrong gear, especially when it comes to tripods and more especially, tripod heads. And the same is true in spades when ordering new camera bodies or lenses. My advice will often save you some serious money and may help you avoid making a seriously bad choice. Please know that I am always glad to answer your gear questions via e-mail. If you are desperate, you can try me on my cell at 863-221-2372. Please leave a message and shoot me a text if I do not pick up.
Don’t Just Shoot: Learn
If you are interested in changing your life and becoming a better photographer by joining me on the Extended IPT at Sebastian Inlet for Ospreys and more (SEPT 25 to NOV 24, 2025), in San Diego for Pacific-race Brown Pelicans and more (JAN 6 to FEB 2, 2026), or for Roseate Spoonbills at Stick Marsh (March 2026), please e-mail for dates, rates, terms, and additional information. Or shoot me a text to 863-221-2372. Some offerings include options for shared AirBnB lodging and meals. Ground transportation during your stay is a possibility at times.
B&H Simplified
To ensure that I get credit for your B&H purchases, you can always click here. The tracking is invisible but using my affiliate links is greatly appreciated. And, with B&H, you can use your PayBoo card. You must use the website to order. You cannot get your free guides if you make a phone order. Once you have an item in your cart, you must complete the order within two hours. Huge thanks!
B&H
Many folks have written recently stating that they purchased a Sony a1 from B&H and would like their free membership in the Sony 1 Info and Updates Group, a $150.00 value. But when I check my affiliate account, their orders have not been there. When I let them know that they get credit for B&H purchases only if they use one of the many B&H affiliate links on the blog or begin their searches with this link, they are always disappointed. If in doubt, please contact me via e-mail and request a BH link. I am always glad to help and to guide you to the right gear.
Bedfords Simplified
Click here to start your search. Choose standard shipping, and when you get to the payment page, enter BIRDSASART in the discount code box and hit apply. You will be upgraded to free second day air Fed-Ex and receive 3% cash back on your credit card once your stuff ships. Using either my affiliate links is greatly appreciated and will often earn you free guides or discounts.
Bedfords Amazing BAA Discount Policy
Folks who have fallen in love with Bedfords can always use the BIRDSASART coupon code at checkout to enjoy a post-purchase, 3% off-statement credit (excluding taxes and shipping charges) on orders paid with a credit card. The 3% credit will be refunded to the card you used for your purchase when your product ships. Be sure, also, to check the box for free shipping to enjoy free Second Day Air Fed-Ex. This offer does not apply to purchases of Classes, Gift Cards, or prior purchases.
You can visit the Bedfords website here, shoot Steve Elkins an e-mail, or text him on his cell phone at (479) 381-2592.
|
|
|
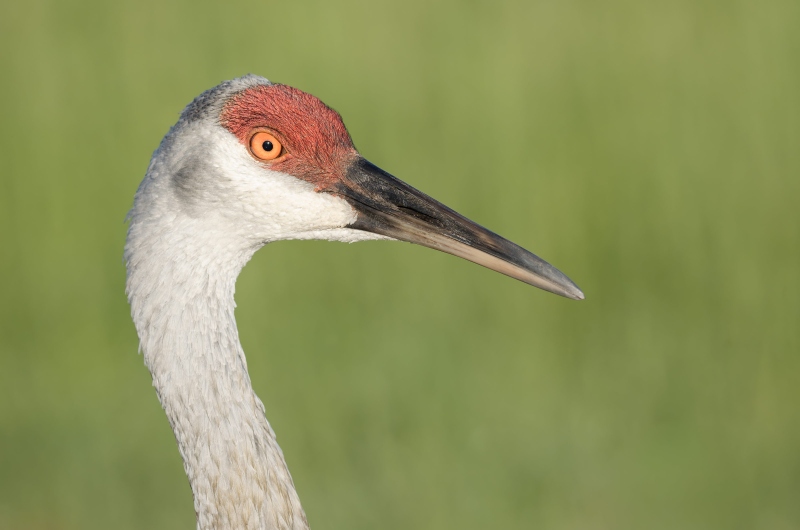
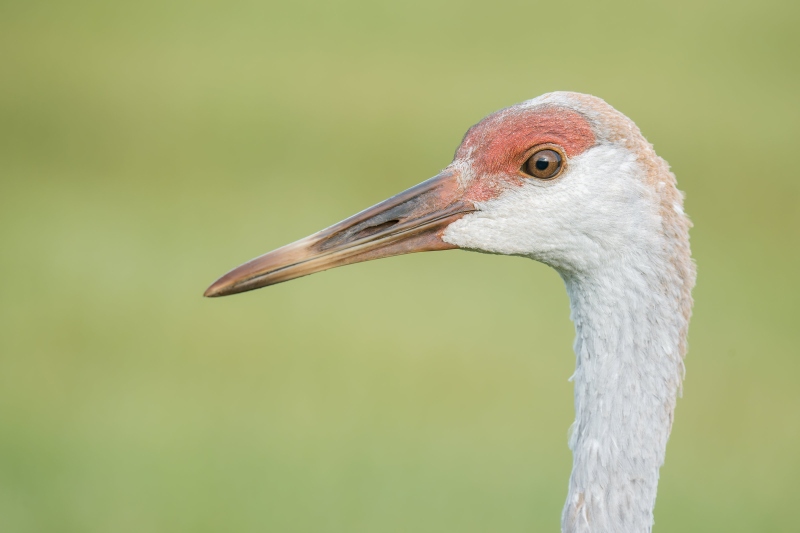
This image was created on 19 September down by the lake near my home at Indian Lake Estates, FL. Standing at full height I used the handheld Sony FE 400-800mm f/6.3-8 G OSS lens (Sony E) (at 648mm) and The Latest Greatest Sony Flagship Body, the a1 II Mirrorless Camera. The exposure was determined by Zebras with ISO on the rear wheel: ISO 1250: 1/1600 sec. at f/9 (stopped down 1/3-stop) in Manual mode. RawDigger showed that the exposure was dead-solid perfect. AWB at 8:12:16am shortly after sunrise with some light clouds on the eastern horizon. < Wide/AF-C with Bird-Eye/Face Detection performed perfectly. Click on the image to enjoy the larger, inexplicably sharper high-res version. Image #1: Sandhill Crane adult head portrait |
The First Volume I Optimization
I chose a straightforward image to start the video to introduce my workflow with a mid-range ISO raw file. But for the new approach to using the Detail tab in ACR 17.5, most everything is similar to what I have been doing for the past two years.
|
|
|
This image was also created on 18 September 2025 down by the lake near my home at Indian Lake Estates, FL. Standing down on a slope that leads to a canal, I used the handheld Sony FE 200-600mm f/5.6-6.3 G OSS lens (at 600mm) and The Latest Greatest Flagship Body, the Sony a1 II Mirrorless Camera. The exposure was determined by Zebras with ISO on the rear wheel: ISO 1600: 1/500 sec. at f/9 (stopped down one stop) in Manual mode. RawDigger showed that the exposure was perfect. AWB at 8:40:42am on a mostly sunny morning. Wide/AF-C with Bird-Eye/Face Detection performed perfectly. Click on the image to enjoy the larger, inexplicably sharper high-res version. Image #2: Sandhill Crane colt head portrait |
The Second DB IV/Volume I Photo
My reasoning for choosing this image was much the same as for the first image. Having optimized this one previously, before I had learned to use the stuff until the Detail tab in the new ACR 17.5 properly, I wanted to compare the results. They were quite similar.
|
|
|
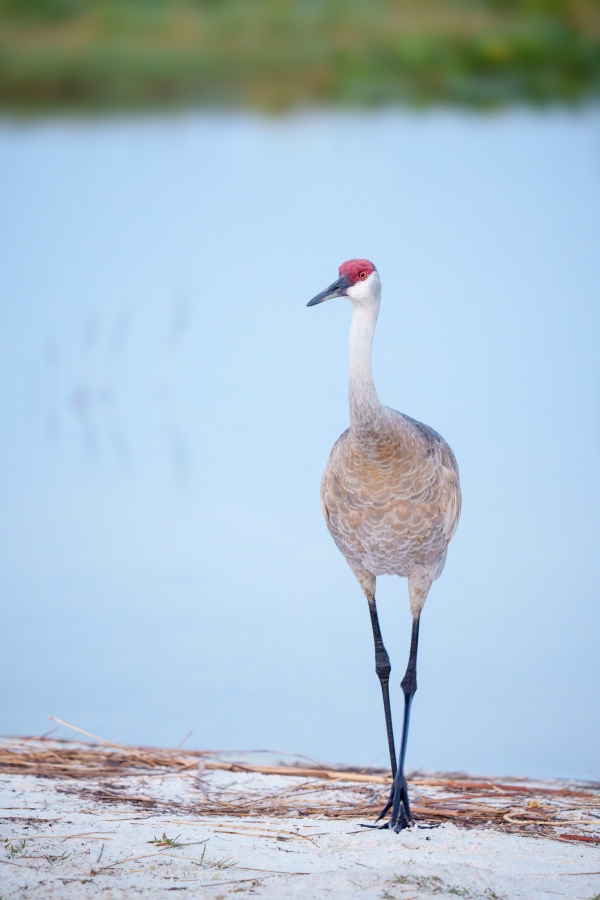
This image was also created on 24 March 2025 down by the lake near my home at Indian Lake Estates, FL. Working from the front seat of my SUV, I used the handheld Sony FE 200-600mm f/5.6-6.3 G OSS lens (at 419mm) and the a-1 (now replaced by The Latest Greatest Flagship Body, the Sony a1 II Mirrorless Camera). The exposure was determined by Zebras with ISO on the rear wheel: ISO 16000 (! — not a typo): 1/125 sec. at f/6.3 (wide open) in Manual mode. RawDigger showed that the exposure was 2/3 stop less than perfect. AWB at 7:14:25am on a totally cloudy morning. Wide/AF-C with Bird-Eye/Face Detection performed perfectly. Image #3: Sandhill Crane adult walking |
Getting Lucky on Shutter Speed
Photographing a walking crane, no matter how slowly, at 1/125 second with a super-telephoto zoom lens, requires some luck as far as getting a sharp image. Surely good technique helps to some degree but it is important to remember that image stabilization, no matter how good it is, will not correct for subject movement, AKA, motion blur.
ISO 16000!
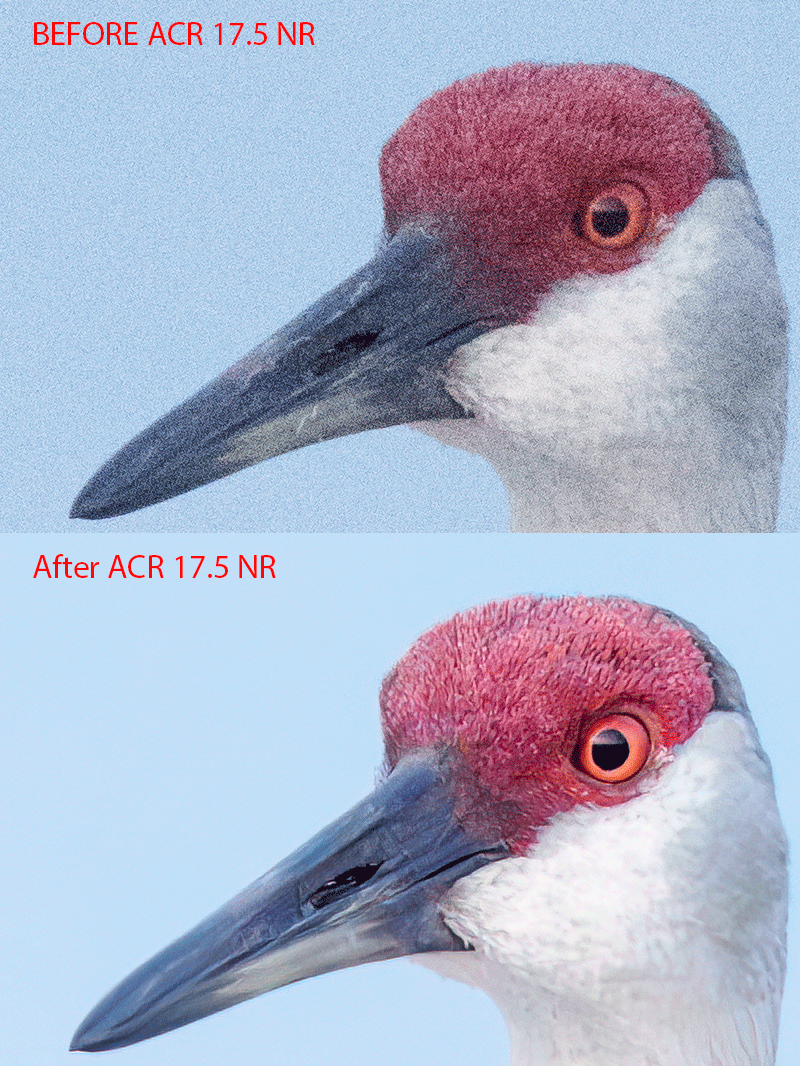
After enlarging this image, it is hard to believe that it was created at such a high ISO. It looks clean, sharp, and detailed with no trace of noise, even in the vegetation at the top of the frame. Considering the high ISO and the fact that the raw file was under-exposed to begin with, the performance of my double noise reduction technique was beyond impressive. See below for before and after views of the noise.
|
Head of Subject Animated GIF
The noise levels in the original were oppressively huge at best, especially considering the overall light tones where noise is generally less prevalent. Note that the bill cleanup was using the Remove Tool after the creation of the video.
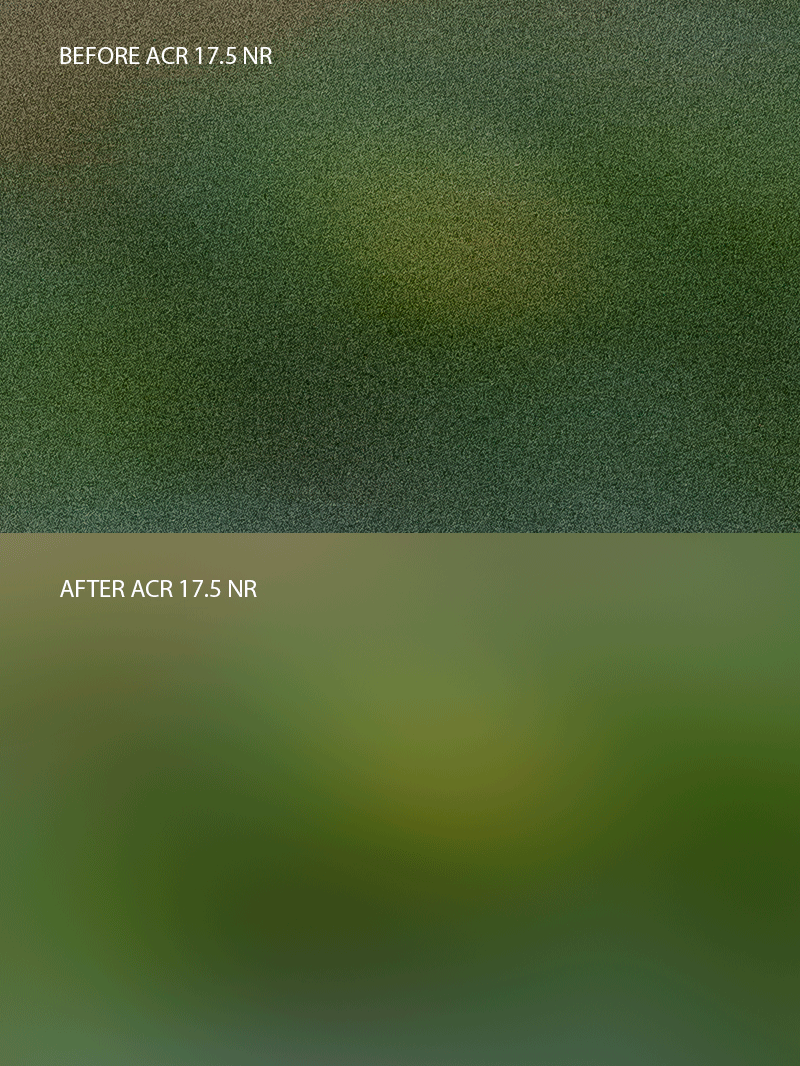
|
Background/Vegetation Animated GIF
Notice that the noise levels in the darker areas of an image are far greater than in light-toned areas. The swirly, wavy artifacts in the “after” version are due to the compression needed to create the proper sizing for the animated GIF. As you can see in the optimized version, they are not present in the optimized image above, Image #3.
|
|
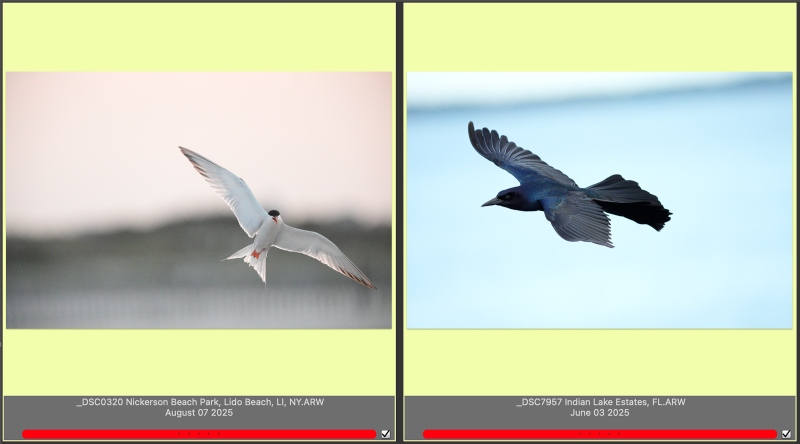
The originals for Images #4 & #5 |
The Originals for Images #4 & #5
I opted to show these originals so that you could see the cropping, leveling, and expanded canvas with #4 and the tight crop with #5.
|
|
|
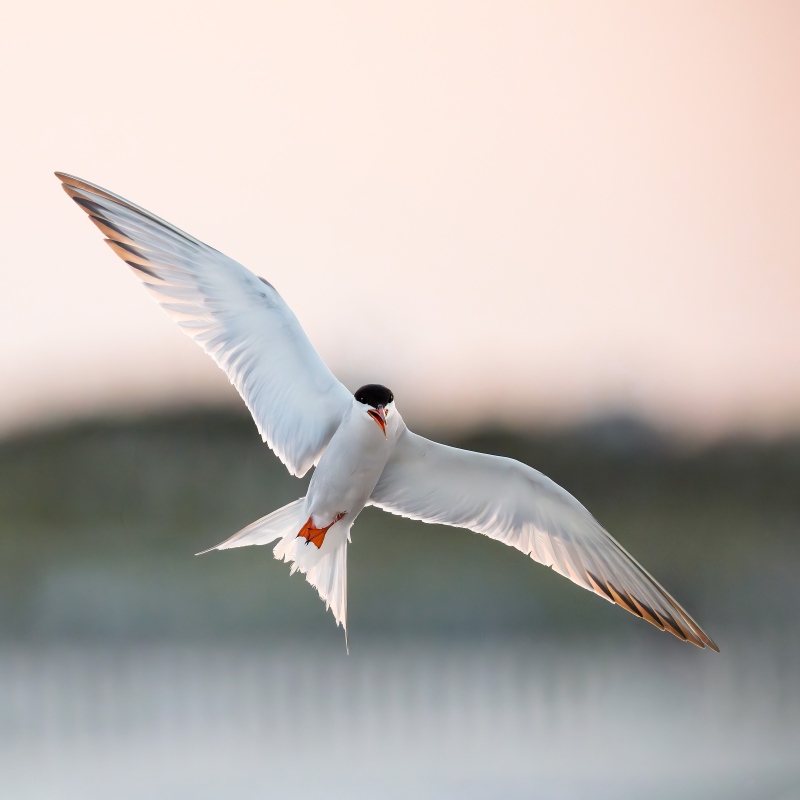
This image was created on 7 August 2025 on a Nickerson Beach Extended IPT. Standing at full height I used the hand held Sony FE 300mm f/2.8 GM OSS Lens (Sony E) with the Sony FE 2x Teleconverter and the Latest Greatest Sony Flagship Body, the a1 II Mirrorless Camera. Exposure determined via Zebras with ISO on the Thumb Wheel. ISO 25600 (!): 1/5000 sec. at f/5.6 (wide open) in Manual mode. RawDigger showed that the exposure was fractionally short of perfect: AWB at 7:47:44pm a few minutes after the time of sunset. Tracking: Zone/AF-C with Bird Eye/Face Detection enabled performed perfectly. Image #4: Common Tern braking to land |
ISO 25600!
Large crops tend to make noise in an image more apparent. I do believe that the new noise reduction available in ACR 17.5 is an improvement as compared to the results in previous versions of Photoshop AI noise reduction. And, as is quite evident in the Volume I video, step two of my double noise reduction technique cleans up any remaining Luminance noise beautifully in images that require it. Such as Image #4. In spades! Also, with this image, we brightened and selectively sharpened the bird’s right eye (on our left), fiddled with the snow fence, and removed a bit of the dark area behind the bird’s head.
|
|
|
This image was created on 6 June 2025 from the pier at the lake near my home at Indian Lake Estates, FL. Standing at full height, I used the handheld Sony FE 400-800mm f/6.3-8 G OSS lens (Sony E) (at 400mm) and The Latest Greatest Sony Flagship Body, the a1 II Mirrorless Camera. The exposure was determined by Zebras with Exposure Compensation (EC) on the thumb wheel. Multi Metering +2.3 stops. AUTO ISO set ISO 6400: 1/4000 second at f/6.3 (wide open) in Shutter Priority mode. RawDigger showed that the exposure was dead-solid perfect. AWB at 8:27:15am on a cloudy morning. RawDigger showed that the exposure was dead solid perfect. Image #5: Boat-tailed Grackle male in flight |
Shutter Priority Mode and ISO 6400
As regular readers know, I will not hesitate to go to Shutter Priority mode with EC on the thumb wheel when I am not sure what might pop up audit is likely that I will be working with consistently toned backgrounds. One of the really huge advantages of working in Shutter Priority mode with slow, variable aperture lenses is that when you zoom out, you can often save a click or two of ISO. The latter as with this image. This tip, and many other valuable others, are explained in detail in the BIRDS AS ART SONY 400-800mm f/6.3-9 G Super-telephoto Zoom Lens Guide.
Notice that I wound up with a dead-solid perfect exposure at +2 1/3 stops. It is likely that few if any photographers have ever created an image at 2 2/3 stops. Why do I saw that? Because, in cloudy conditions, the whole world pretty much consistently under-exposes their raw files.
To learn more about choosing shutter speeds for bird photography, check out the YouTube Video Guide: Bird Photography Shutter Speeds blog post here. Be sure — of course, to watch the video and to bookmark it for future study.
|
|
|
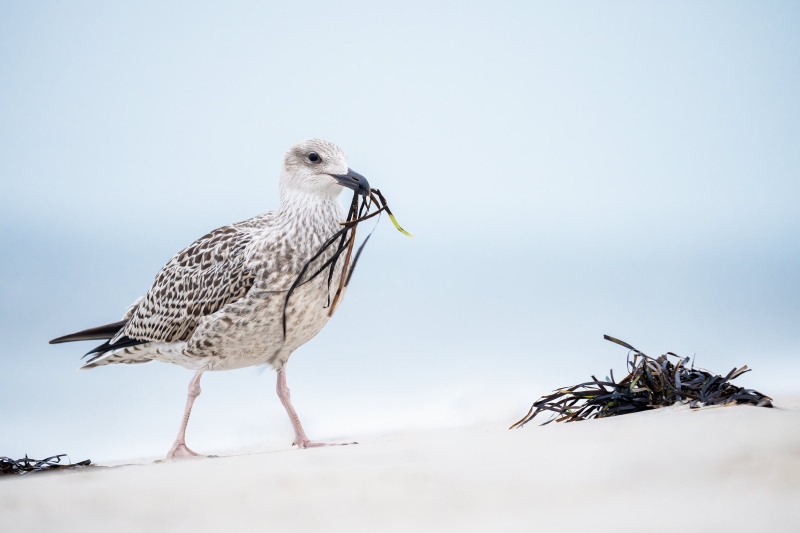
This image was created on 6 August 2025 on a Nickerson Beach Extended IPT. Seated on damp sand I used the knee-pod technique with the handheld Sony FE 400-800mm f/6.3-8 G OSS lens (Sony E) (at 800mm) and The Latest Greatest Sony Flagship Body, the a1 II Mirrorless Camera. The exposure was determined by Zebras with Exposure Compensation (EC) on the thumb wheel. Multi Metering +2.0 stops. AUTO ISO set ISO 8000: 1/250 second at f/8 (wide open) in Shutter Priority mode. RawDigger showed that the exposure was fractionally short of perfect. AWB at 6:20:36am shortly after sunrise with some light clouds on the eastern horizon. < Wide/AF-C with Bird-Eye/Face Detection performed perfectly. Click on the image to enjoy the larger, inexplicably sharper high-res version. Image #6: Great Black-backed Gull juvenile playing with beach wrack |
ISO 8000 and Getting Lucky Again With a Relatively Slow Shutter Speed
Shutter Priority again went to an extremely high ISO despite that fact that I went with a dangerously slow shutter speed, 1/250 second. 1/250 is close to the bottom of the range when you are photographing a bird that is moving. Once again, my double noise reduction technique produced a clean, noise free photograph from a high ISO raw file.
In addition to increasing stability, note that getting down and using the knee-pod technique eases the strain of handholding a relatively heavy lens. And in nearly all cases, getting low provides a much more intimate perspective than standing at full height.
The BIRDS AS ART SONY 400-800mm f/6.3-9 G Super-telephoto Zoom Lens Guide
When I borrowed this lens from Sony, I assumed that at 5.45 pounds it was too heavy to handhold for long and that at f/8 at the long end (800mm,) it was too slow for most bird photography applications. In short, I did not want to like the lens. After a month of using it, I cannot live without it. After returning the loaner, I was miraculously able to get my own from Bedfords on 16 April 2025. In this guide I share everything that I have learned about using the 400-800. For best results, you need to know exactly what you are doing to get the most out of this zoom lens. It would be best, therefore, to consider and study the material in the guide so that you can begin making great images with your new lens.
You will learn how to deal with the relatively show apertures: f/6.3, f/7.1, and f/8 when working in Manual mode.
You will learn how to ensure that you are working at the widest aperture by working in Shutter Priority mode with AUTO ISO.
If you are able to hand hold the lens, you will learn proper hand holding techniques.
If you can’t, you will learn when, why, and how to employ other options. Those include:
1- The knee-pod, heel-pod, and toe-pod techniques
2- Using the lens on a monopod.
3- The best lens plate and low foot for your 4-8.
4- The best tripod and head for the 4-8 and how best to utilize them.
5- How to use the lens from your vehicle while supporting it on a BLUBB (or not and why not).
6- Detailed instructions on how to set and use the lens controls and buttons:
a- AF/MF
b- DMF Switch
c- Limit Range Switch
d- OSS (Optical Steady Shot) Switch
e- OSS Mode Switch
f- Focus Hold Buttons
The guide also includes a Hand Holding Shutter Speed Primer and an illustrative, educational, and inspiring 67-image gallery.
Free to folks who use one of my two affiliate links to purchase their Sony 400-800 G lens. Otherwise, please send a PayPal for $115.43 to birdsasart@verizon.net and include the words “400-800 Lens Guide” in your e-mail.
Typos
With all blog posts, feel free to e-mail or to leave a comment regarding any typos or errors.



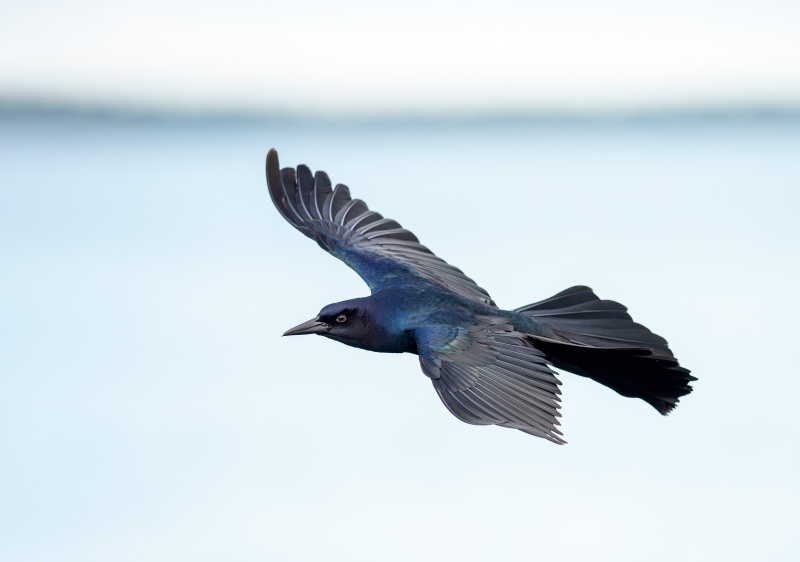


My favorite is #5, the grackle, for the bird’s wonderfully detailed blue-black plumage against the pale blue and somewhat mysterious background. Also the most difficult of the images to capture, I’d say.
Thanks, Cliff. How would you have liked to try that one with film???
with love, a
80 ISO, spot minus one off a black object in the same light, throw slide in waste can.
A close call between #4 and #6 but I have to go with #6. I like the design of the image and the position of the gull’s legs that indicate movement. The seaweed in the birds beak along with the small amount of seaweed in the left corner and right corner of the image gives my eyes a landing point as I look at the image and it breaks up the foreground. Clean and simple. I like #6.
Thanks, Jim. I also love #6. That was actually the first thing that I photographed when I got to Nickerson in early August.
with love, artie