What’s Up?
Today is Thursday 25 September. I drive over to Vero Lake Estates this afternoon to begin a two month teaching residency at Sebastian Inlet State Park. Get in touch via e-mail if you would like to learn about joining me. Whatever you opt to do, I hope that you too choose to have a great day.
If an item — a Delkin flash card or reader, a Levered-clamp FlexShooter Pro, or a Wimberley lens plate or low foot — for example, that is available from B&H and/or Bedfords, is also available in the BAA Online Store, it would be great, and greatly appreciated, if you would opt to purchase from us. We will match or beat any price. Please remember also to use my B&H affiliate links or to earn 3% cash back at Bedford by using the BIRDSASART discount code at checkout for your major gear purchases. Doing either often earns you free guides and/or discounts. And always earns my great appreciation.
Gear Questions and Advice
Too many folks attending BAA IPTs and dozens of photographers whom I see in the field and on BirdPhotographer’s.Net, are — out of ignorance — using the wrong gear, especially when it comes to tripods and more especially, tripod heads. And the same is true in spades when ordering new camera bodies or lenses. My advice will often save you some serious money and may help you avoid making a seriously bad choice. Please know that I am always glad to answer your gear questions via e-mail. If you are desperate, you can try me on my cell at 863-221-2372. Please leave a message and shoot me a text if I do not pick up.
Don’t Just Shoot: Learn
If you are interested in changing your life and becoming a better photographer by joining me on the Extended IPT at Sebastian Inlet for Ospreys and more (SEPT 25 to NOV 24, 2025), in San Diego for Pacific-race Brown Pelicans and more (JAN 6 to FEB 2, 2026), or for Roseate Spoonbills at Stick Marsh (March 2026), please e-mail for dates, rates, terms, and additional information. Or shoot me a text to 863-221-2372. Some offerings include options for shared AirBnB lodging and meals. Ground transportation during your stay is a possibility at times.
|
|
|
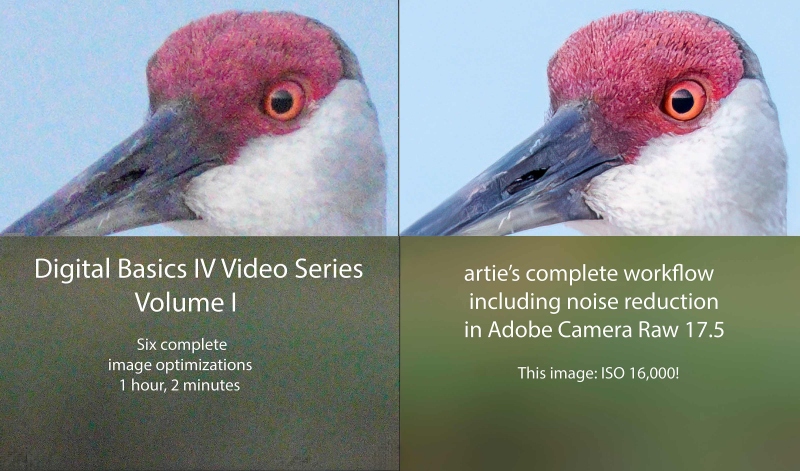
Click on the screen capture to enlarge and check out the amazing noise reduction with this ISO 16000 image. The Digital Basics IV Video Series/Volume I by Arthur Morris/Birds as ArtYou can purchase Volume I by clicking here. Or save $50.00 by purchasing the entire 5 volume series by clicking here. |
Digital Basics IV Video Series/Volume I
Learn more in the blog post here.
Most importantly, DB IV/Volume I eliminates the confusion that resulted from the changes to AI Noise Reduction (under the Details tab) in the latest update (17.5) to Adobe Camera Raw (in both Photoshop 2025 Release 26.10.0 and the latest version of Lightroom). As you will see below and in the Volume I video, the new interface represents a significant improvement on the results obtained with the Enhance dialogue box in previous versions of ACR. And, as mentioned here recently, I have some fabulous new image optimization tips, techniques, and tricks to share with you. As the Digital Basics III Video Series proved to be so popular, I have decided to run it back in the form of the Digital Basics IV Video Series (Those who have complete faith in the information that I provide may wish to use the preceding link to save $50.00 by ordering the whole series on a pre-publication basis; you will receive Volume I as soon as you order. The rest will follow upon publication.
My new workflow includes the use of the masking feature in Adobe Camera Raw (thanks to Anita North), the use of the Point Color eye dropper to tame super-saturated colors during raw conversions (discovered in tandem with Anita), a fabulous new Remove Tool trick that makes my favorite Photoshop Tool even more powerful than before -— that one discovered by me. In addition, I have recently begun doing some Curves work during my ACR raw conversions.
My basic workflow remains much the same as is detailed in both DB II and in the DB III Video Series:
1- Setting the Color Temperature (when and if needed).
2- Setting the White and Black Points and adjusting the Highlights and Shadows sliders.
3- Setting the Clarity and Dehaze sliders.
4- Fine-tuning color using the Hue/Saturation/Luminance Targeted Adjustment Tool, a huge step up from the Color Mixer Tool.
5- My 2-step noise reduction technique (with most images).
Once I have the .TIF file in Photoshop, I still use my usual cadre of clean-up tools and techniques including the Remove Tool, the Clone Stamp (only rarely), Divide and Conquer, Quick Masking, Layer Masking, Gaussian Blurs, an expanded array of personalized keyboard shortcuts, and tons of other image optimization strategies and methods adapted from previous versions of Digital Basics. I also demonstrate the selective use of Topaz Sharpen AI utilizing the masking feature. And last but not least, I share my JPEG creation methodology.
Volume I of Digital Basics IV details the image optimizations of six images. Most everything above but for the use of the Point Color eye dropper to tame super-saturated colors during raw conversions is at least touched upon in Volume I. Most of it is covered in great detail.
Volume I of Digital Basics IV details the image optimizations of today’s six featured images. Most everything above but for the use of the Point Color eye dropper to tame super-saturated colors during raw conversions is at least touched upon in Volume I. Most of it is covered in detail.
You can purchase your copy of this all new 1 hour, two minute video for $49.00 here in the BAA Online Store. There will be five volumes in DB IV each featuring 5 or 6 complete image optimizations. If you purchase the first four volumes, you will receive the fifth volume for free.
Or, you can save $50.00 by purchasing all five volumes now for only $146.00 by clicking here. I hope to complete Volume II this week.
If …
If you were previously receiving blog post notifications via e-mail on a regular basis but they suddenly quit coming, please let me know via e-mail and cut and paste this into the subject line: Please Add to the Personalized Blog Notification List. Some e-mail providers (most likely and especially including Gmail) recently began blocking the post notifications being sent by the Word Press Newsletter program.
In the Last Blog Post
In the last blog post, my favorite was #3, the Sandhill Crane adult walking image for the amazingly clean ISO 25,600 ISO optimized version.
|
|
|
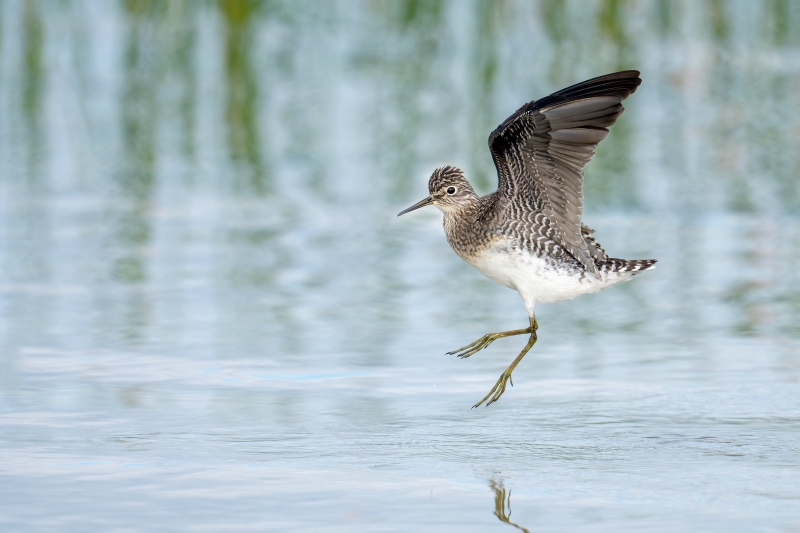
This image was created less than two minutes after Image #1 down by the lake near my home at Indian Lake Estates on 15 April 2025. Seated in the driver’s seat of my SUV, I used the BLUBB-supported Sony FE 600mm f/4 GM OSS lens with the Sony FE 2x Teleconverter and The Latest Greatest Sony Flagship Body, the a1 II Mirrorless Camera. The exposure was determined using Zebra technology with ISO on the Thumb Wheel. ISO 2500: 1/2000 second at f/8 (wide open) in Manual mode. RawDigger showed that the exposure was perfect. AWB at 8:32:42am on a cloudy morning. Tracking: Zone/AF-C with Bird-Eye/Face Detection performed perfectly. Click on the image to enjoy the high-res version. Image #1: Solitary Sandpiper jumping forward (with head replaced) |
The Head Replacement Halo
In the On Photographing a New Species Well blog post here, I posted the image above. I had replaced the head of the jumping bird with the head of the same bird from a static image. Two folks left a comment indicating that they did not like the light halo around the replaced head. Here is how I responded:
Thanks. I noted the halo. I am 99% sure that had I not revealed that the head and been replaced the head. nobody would have had “boo” to say about the halo, most likely passing it off as a matter of really good luck. That said, I may take another run at the .TIF file and attempt to eliminate the halo.
|
|
|
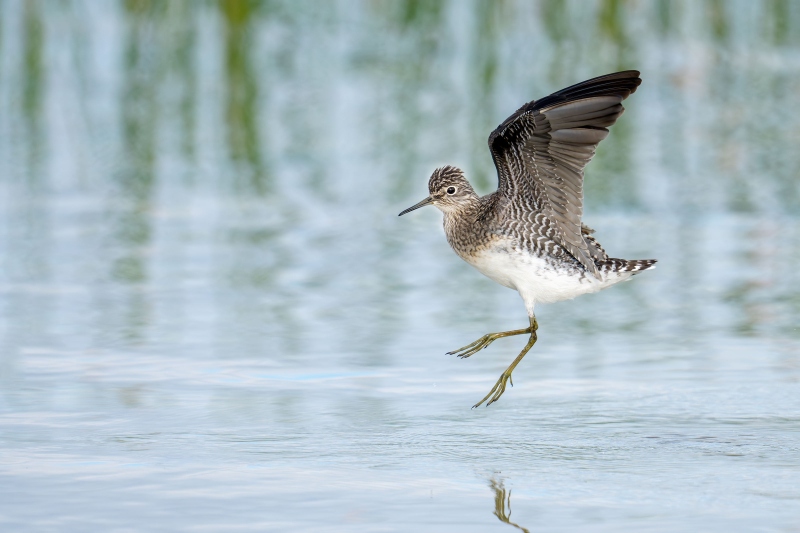
This image was created less than two minutes after Image #1 down by the lake near my home at Indian Lake Estates on 15 April 2025. Seated in the driver’s seat of my SUV, I used the BLUBB-supported Sony FE 600mm f/4 GM OSS lens with the Sony FE 2x Teleconverter and The Latest Greatest Sony Flagship Body, the a1 II Mirrorless Camera. The exposure was determined using Zebra technology with ISO on the Thumb Wheel. ISO 2500: 1/2000 second at f/8 (wide open) in Manual mode. RawDigger showed that the exposure was perfect. AWB at 8:32:42am on a cloudy morning. Tracking: Zone/AF-C with Bird-Eye/Face Detection performed perfectly. Click on the image to enjoy the high-res version. Image #2: Solitary Sandpiper jumping forward (with head replaced) — halo eliminated |
Eliminating the Halo
I an attempt to eliminate the halo, I painted a Quick Mask of the bill and the background, moved it into place, refined the placement, and then added a Regular Layer Mask to paint away the bill and a bit more. I am not sure which version I like better but am leaning toward the version with the halo as it seems to me to look more natural. And when I examine Image #2, the version without the halo, I find myself looking very closely at the background around the head. Whenever you make a significant repair, the tendency for most folks including me to view the area with great suspicion.
What do you think?
|
|
|
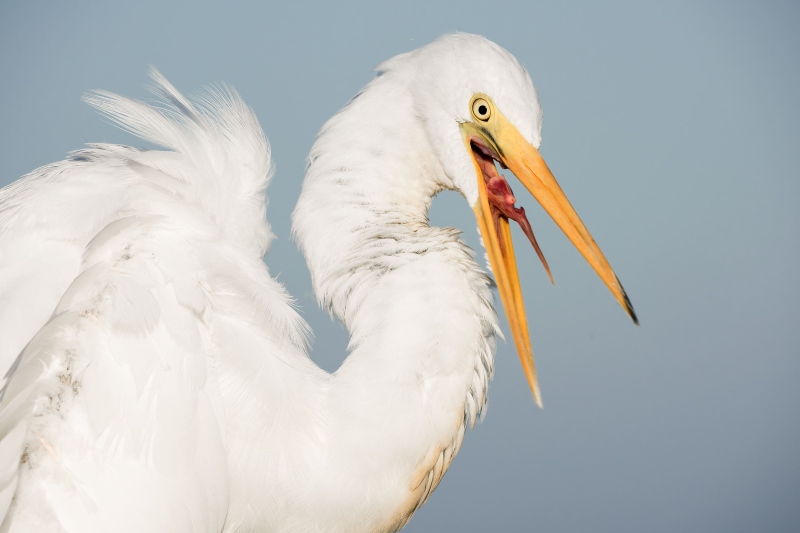
This image was created on 20 September on the pier down by the lake near my home at Indian Lake Estates, FL. Standing at full height I used the Robus RCM-439 4-Section Carbon Fiber Monopod, 65/Wimberley MonoGimbal Head-supported Sony FE 400-800mm f/6.3-8 G OSS lens (Sony E) (at 538mm) and The Latest Greatest Sony Flagship Body, the a1 II Mirrorless Camera. The exposure was determined by Zebras with ISO on the rear wheel: ISO 1250: 1/1600 sec. at f/11 (stopped down 1-stop for additional depth of field at point blank range) in Manual mode. RawDigger showed that the exposure was dead-solid perfect. AWB at 8:00:20am on a sunny morning. Wide/AF-C with Bird-Eye/Face Detection performed perfectly. Click on the image to enjoy the larger, inexplicably sharper high-res version. Image #3: Great Egret shaking head violently |
Photoshop Hank Panky?
Do you see any signs or evidence of significant Photoshop changes that have been made to Image #3? If yes, where and what?
Shooting Action Tips
As mentioned here dozens of times, when unexpected action occurs, press the shutter button and keep it pressed until the action stops. If you attempt to change the shutter speed or the ISO, you will likely wind up with nothing. In addition, do not stop shooting if you are framed too tightly and are worried about clipping something. Why? Because you just might get lucky.
Handholding Versus MonoPodding with the 400-800
With relatively heavy lenses, it is actually easier to handhold for flight photography than when working a static subject. Why? When doing flight, proper technique calls for raising the lens from the rest position, finding the subject, panning with it while acquiring focus, and squeezing off a sequence. Total time? Several seconds at most. When working a static subject like a Great Egret on a pier railing, however, you might wind up holding the lens up for five or ten or even more minute. Having the lens supported by a quality monopod reduces stress and strain especially on your left shoulder. A tripod would be even better but then you lose the stealth and mobility advantages that come with using a monopod.
You can learn a ton about using a monopod in the Robus MonoPodding With the Sony 400-800 G Lens blog post here..
Typos
With all blog posts, feel free to e-mail or to leave a comment regarding any typos or errors.


I see the halo gone in only one small place below the bill or “chin”. I really like the colors in this photo and the bird in a ready to land position.
An improvement Artie, but sorry, for picky old me, the halo is still there in places, particularly around the top of the head…. Difficult without ruining the crown of feathers. In the past maybe, and it would have taken me hours, but now I certainly couldn’t do any better…..
Thanks for leaving a comment. My reply is the same. Without knowing that I replaced the head, very few folks would have been having halo problems 🙂
with love, artie