What’s Up?
Pelican photography has continued to be amazing at La Jolla. Yesterday I created 10,450 images in the morning session alone. My rain pants and hands and the arms of my sweatshirt were totally covered by wet, slimy, pelican and gull poop as I stayed low and moved around the lower shelf. Note: great photographers move hundreds of times during most shooting sessions to improve their backgrounds and get on or close to sun angle. Not-so-great photographers often stand in the same spot for hours …
I began working with the 400-800 on the tripod but soon switched to handholding using the knee-pod technique (with a twist). I will detail the twist when I post some photos from the amazing morning of 20 January 2026. We had a decent session with the ducks yesterday afternoon. We all enjoyed the baked chicken dinner that I had prepared before we headed to Santee. But as usual, Bob Eastman refused to try the butternut squash!
Today is Wednesday 21 January. Ed, Bob, and I will be headed back out very early to La Jolla. As Bob and I fly back to our respective homes (Reedsburg, WI and Indian Lake Estates) tomorrow, we will be packing today. Ed Dow takes the train back up the coast to his home in central California tomorrow afternoon. I hope that you too choose to have a wonderful and productive day and that you have fun too. Please remember that happiness is a choice — Byron Katie, The Work.Com (and as discussed in the previous blog post).
If an item — a Delkin flash card or reader, a Levered-clamp FlexShooter Pro, or a Wimberley lens plate or low foot — for example, that is available from B&H and/or Bedfords, is also available in the BAA Online Store, it would be great, and greatly appreciated, if you would opt to purchase from us. We will match or beat any price. Please remember also to use my B&H affiliate links or to earn 3% cash back at Bedford by using the BIRDSASART discount code at checkout for your major gear purchases. Doing either often earns you free guides and/or discounts. And always earns my great appreciation.
Gear Questions and Advice
Too many folks attending BAA IPTs and dozens of photographers whom I see in the field and on BirdPhotographer’s.Net, are — out of ignorance — using the wrong gear, especially when it comes to tripods and more especially, tripod heads. And the same is true in spades when ordering new camera bodies or lenses. My advice will often save you some serious money and may help you avoid making a seriously bad choice. Please know that I am always glad to answer your gear questions via e-mail.. If you are desperate, you can try me on my cell at 863-221-2372. Please leave a message and shoot me a text if I do not pick up.
B&H Simplified
To ensure that I get credit for your B&H purchases, you can always click here. The tracking is invisible but using my affiliate links is greatly appreciated. And, with B&H, you can use your PayBoo card. You must use the website to order. You cannot get your free guides if you make a phone order. Once you have an item in your cart, you must complete the order within two hours. Huge thanks!
B&H
Many folks have written recently stating that they purchased a Sony a1 from B&H and would like their free membership in the Sony 1 Info and Updates Group, a $150.00 value. But when I check my affiliate account, their orders have not been there. When I let them know that they get credit for B&H purchases only if they use one of the many B&H affiliate links on the blog or begin their searches with this link, they are always disappointed. If in doubt, please contact me via e-mail and request a BH link. I am always glad to help and to guide you to the right gear.
Bedfords Simplified
Click here to start your search. Choose standard shipping, and when you get to the payment page, enter BIRDSASART in the discount code box and hit apply. You will be upgraded to free second day air Fed-Ex and receive 3% cash back on your credit card once your stuff ships. Using either my affiliate links is greatly appreciated and will often earn you free guides or discounts. To receive a free guide or free entry into a Sony Set-up and Info Notes e-Mail group, you need to shoot me your receipt via e-mail. The B&H receipts need to include the order number.
Bedfords Amazing BAA Discount Policy
Folks who have fallen in love with Bedfords can always use the BIRDSASART coupon code at checkout to enjoy a post-purchase, 3% off-statement credit (excluding taxes and shipping charges) on orders paid with a credit card. The 3% credit will be refunded to the card you used for your purchase when your product ships. Be sure, also, to check the box for free shipping to enjoy free Second Day Air Fed-Ex. This offer does not apply to purchases of Classes, Gift Cards, or prior purchases.
You can visit the Bedfords website here, shoot Steve Elkins an e-mail, or text him on his cell phone at (479) 381-2592.
|
|
|
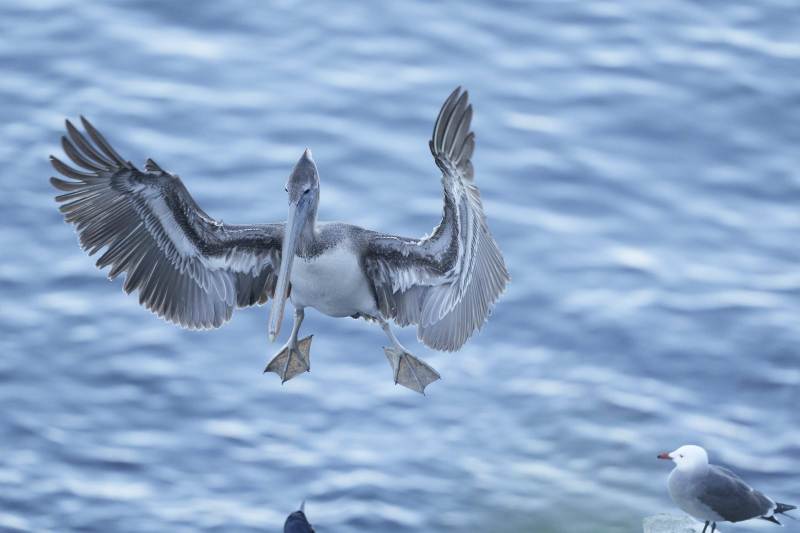
This image was also created on 19 January 2026 by yours truly at LA JOLLA, CA. Standing on the downhill sidewalk, I used the hand held Sony FE 300mm f/2.8 GM OSS Lens (Sony E) with the Sony FE 1.4x Teleconverter with the Latest Greatest Sony Flagship Body, the a1 II Mirrorless Camera. Exposure determined via Zebras with ISO on the Thumb Wheel. ISO 3200: 1/2000 sec. at f/4 (wide open) in Manual mode. AWB at 3:45:38am in deep shade on a sunny afternoon. Tracking: Zone/AF-C with Bird Eye/Face Detection enabled performed perfectly. Click on the image to enjoy the larger, inexplicably sharper high-res version. Image #1: The raw file for Brown Pelican juvenile braking to land in blue light |
Flight Shooting in the Shade
On Monday afternoon, Ed Dow, Bob Eastman, and I had planned to do the Brandt’s Cormorants flying into the colony ledge with nesting material. But with it being a holiday and a very low tide, the beach below was pockmarked by thousands of footprints that resulted in horrifically ugly backgrounds. After working the very upper ledge of the colony and making a few nice head portraits, I continued up the hill and found lots of flying pelicans. As the birds were in the deep shade of the buildings on the ridge that is Prospect Place, there was not a lot of light so I was glad to have the 300mm f/2.8 GM with the 1.4X TC so that I could work at f/4 at ISO 3200. Note that while I prefer at least 1/3200 second as a fight photography shutter speed, I often compromise a bit in low light conditions for two reasons in this case:
1- Pelicans are relatively slow flyers and their large size prevents them from making sharp turns or fast, unexpected movements.
2- In this exact case 1/2000 second allowed me to expose to the right without having to work at an ISO higher than 3200. In general, I try to avoid ISOs of 4000 and above unless they are absolutely necessary. And in those cases I am often amazed by the noise free results.
Using AUTO White Balance, the properly exposed raw files looked washed out and lifeless (as they should!) and exhibited a strong blue color cast.
|
|
|
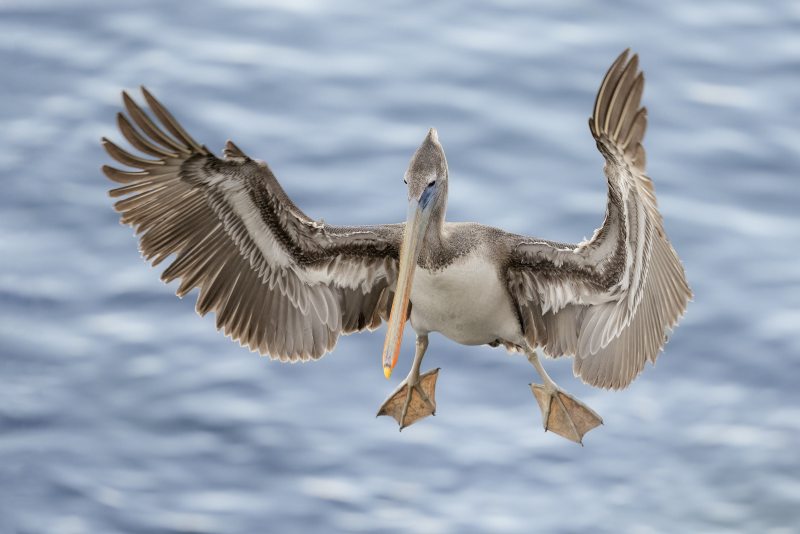
This image was also created on 19 January 2026 by yours truly at La Jolla, CA. Standing on the downhill sidewalk, I used the hand held Sony FE 300mm f/2.8 GM OSS Lens (Sony E) with the Sony FE 1.4x Teleconverter with the Latest Greatest Sony Flagship Body, the a1 II Mirrorless Camera. Exposure determined via Zebras with ISO on the Thumb Wheel. ISO 3200: 1/2000 sec. at f/4 (wide open) in Manual mode. AWB at 3:45:38am in deep shade on a sunny afternoon. Tracking: Zone/AF-C with Bird Eye/Face Detection enabled performed perfectly. Click on the image to enjoy the larger, inexplicably sharper high-res version. Image #1A: The optimized version of the Brown Pelican juvenile braking to land image |
Eliminating the Blues I
When you select the subject using the Adobe Camera Raw masking feature, you quite often need to do a bit of fine-tuning in the small areas between the primary feathers. The process can take a few minutes when done carefully. Last week I came up with a time saving trick so that you do not have to repeat the same process if you wish to work on the background. For this very blue image, I first worked on the bird alone by raising the color temperature, the saturation, and the exposure (the latter only a bit). Then I used my new trick to save time and work on the background.
This image will be one of six that will be optimized in Volume V of the Digital Basics IV Video Series; you will be able to sit beside me at my laptop while I convert each image in Adobe Camera Raw (ACR), create and use multiple masks (in most cases), do the second step of my noise reduction and the image cleanup work in Photoshop, and then Save the .TIF file and create and save the JPEG. Work on Volume V should be completed in less than two weeks.
|
|
|
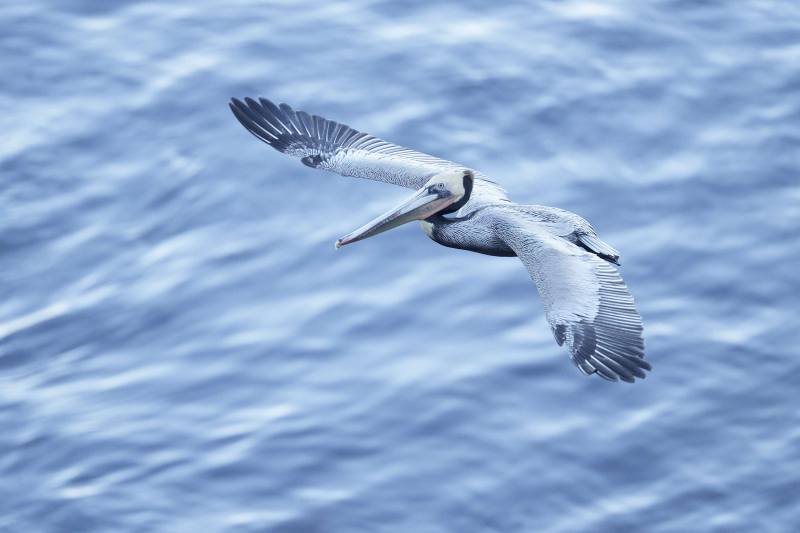
This image was also created on 19 January 2026 by yours truly at LA JOLLA, CA. Standing on the downhill sidewalk, I used the hand held Sony FE 300mm f/2.8 GM OSS Lens (Sony E) with the Sony FE 1.4x Teleconverter with the Latest Greatest Sony Flagship Body, the a1 II Mirrorless Camera. Exposure determined via Zebras with ISO on the Thumb Wheel. ISO 3200: 1/2000 sec. at f/4 (wide open) in Manual mode. AWB at 3:45:38am in deep shade on a sunny afternoon. Tracking: Zone/AF-C with Bird Eye/Face Detection enabled performed perfectly. Click on the image to enjoy the larger, inexplicably sharper high-res version. Image #2: The raw file for Brown Pelican adult — dorsal view flight in blue light |
Why Not Change the White Balance?
Folks might ask, why not change the White Balance to Cloudy or to Shade?
I opt not to do that for several main reasons:
1- My experience is that if I do that, I will — in most cases, still need to work on the color of the subject and the background using ACR masks.
2- My experience is that if I do change the WB I will forget to change it back to AUTO and will wind up creating more and more challenging work for me in the long run.
3- As long as you are capturing raw, adjusting the color balance is fairly simple.
|
|
|
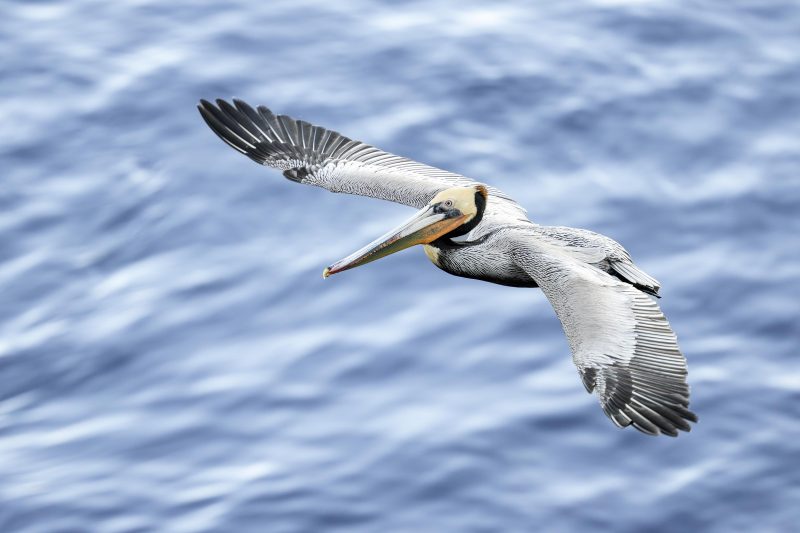
This image was also created on 19 January 2026 by yours truly at LA JOLLA, CA. Standing on the downhill sidewalk, I used the hand held Sony FE 300mm f/2.8 GM OSS Lens (Sony E) with the Sony FE 1.4x Teleconverter with the Latest Greatest Sony Flagship Body, the a1 II Mirrorless Camera. Exposure determined via Zebras with ISO on the Thumb Wheel. ISO 3200: 1/2000 sec. at f/4 (wide open) in Manual mode. AWB at 3:45:38am in deep shade on a sunny afternoon. Tracking: Zone/AF-C with Bird Eye/Face Detection enabled performed perfectly. Click on the image to enjoy the larger, inexplicably sharper high-res version. Image #2A: The optimized version of the Brown Pelican adult — dorsal view flight image |
Eliminating the Blues II
First I used Select Object to select the richly colored parts of the bird’s face and bill and boosted both the color temperature and the saturation. Then I again selected the subject and did the same thing. Then I used my new trick to work on the color of the Pacific Ocean, i.e., the background. Using ACR masks allows you to work on the color of the bird and the color of the subject independently of each other.
|
|
|
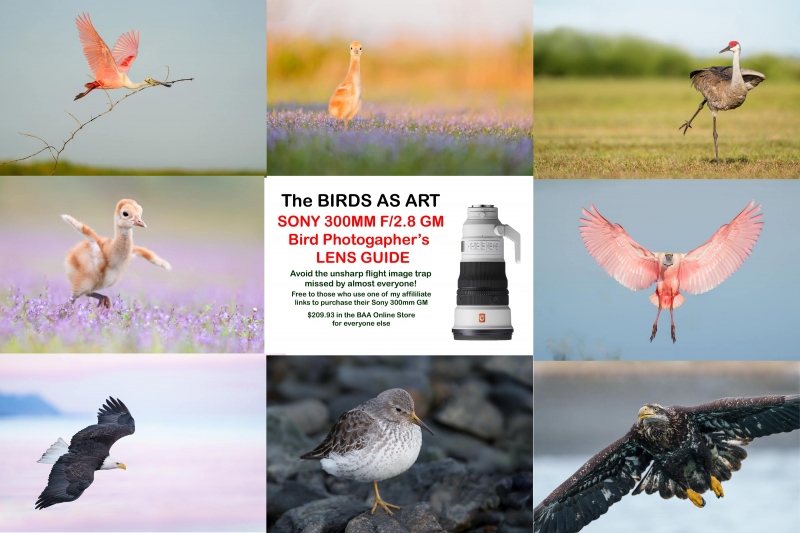
For those who did not use my link to purchase their Sony 300mm f/2.8 GM lens, you can order your a copy here for $209.93. Click on the image to enlarge and to be able to read the fine print. |
The BAA Sony 300mm f/2.8 Lens Guide
The handheld 300mm f/2.8 GM lens is one of my very favorite flight photography lenses bare or with either TC. It is incredibly light and the images are incredibly sharp. If you have been impressed by my Sony FE 300mm f/2.8 GM OSS Lens (Sony E) images, you can use either my Bedfords or B&H affiliate link to purchase your Sony 300mm f/2.8 GM lens and shoot me your receipt via e-mail and request a copy of the first-ever BAA Lens Guide. I thought that it would take only minutes to create this guide, but I was dead wrong. In the process of creating it, I learned a ton about the lens. And even better, I discovered a simple yet potentially fatal flaw that was resulting in sporadically unsharp flight images. The set-up fix is simple. Just be sure to use one of my affiliate links and get the guide for free.
If not, you can purchase a copy here for $209.93. Yes, it never hurts to use my links and it never costs you one penny more. And if you contact me via e-mail before you make a major purchase, I can often help save you some money.
|
|
|
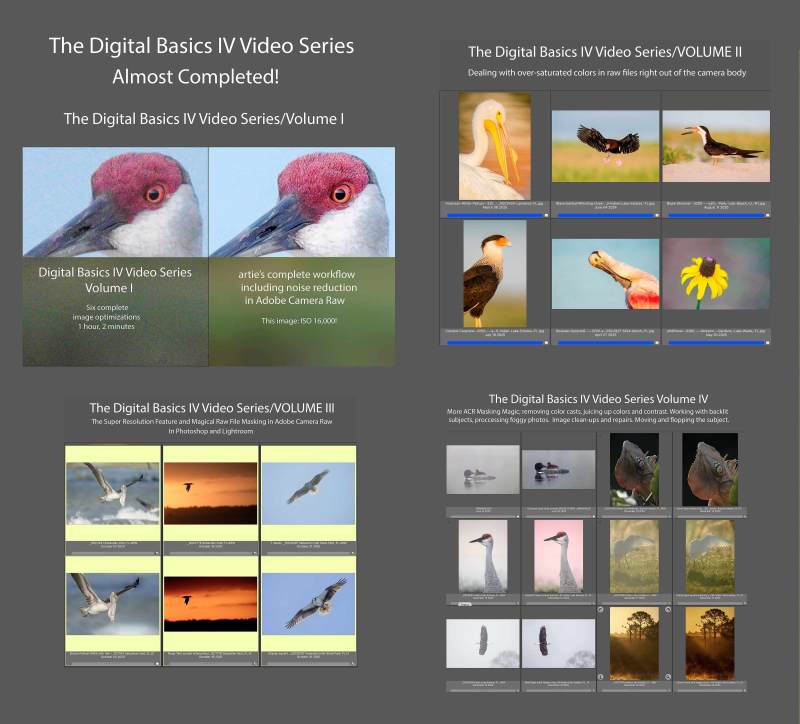
Click to enlarge. The Digital Basics IV Video Series by Arthur Morris/BIRDS AS ARTYou can save $50.00 by purchasing the entire 5-Volume Series by clicking here. |
Digital Basics IV Video Series: $146.00 for all five videos/save $50.00
I have some fabulous new image optimization tips, techniques, and tricks to share. As the Digital Basics III Video Series proved to be so popular, I decided last fall to run it back in the form of Digital Basics IV. Digital Basics V is on the horizon.
My new workflow includes the use of the masking feature in Adobe Camera Raw (thanks to Anita North), the use of the Point Color eye dropper to tame super-saturated colors during raw conversions (discovered in tandem with Anita), a fabulous new Remove Tool trick that makes my favorite Photoshop Tool even more powerful than before -— that one discovered by me. In addition, I have recently begun doing some Curves work during my ACR raw conversions.
My basic workflow remains much the same as is detailed in both the Digital Basics II PDF and in the Digital Basics III Video Series:
1- Setting the Color Temperature (when and if needed).
2- Setting the White and Black Points and adjusting the Highlights and Shadows sliders.
3- Setting the Clarity and Dehaze sliders.
4- Fine-tuning color using the Hue/Saturation/Luminance Targeted Adjustment Tool, a huge step up from the Color Mixer Tool.
5- My 2-step noise reduction technique (with most images).
Once I have the .TIF file in Photoshop, I use my usual cadre of clean-up tools and techniques including the Remove Tool, the Clone Stamp (only rarely), Divide and Conquer, Quick Masking, Layer Masking, Gaussian Blurs, an expanded array of personalized keyboard shortcuts, and tons of other image optimization strategies and methods adapted from previous versions of Digital Basics. I also demonstrate the selective use of Topaz Sharpen AI utilizing the masking feature. And last but not least, I share my JPEG creation methodology.
|
|
|
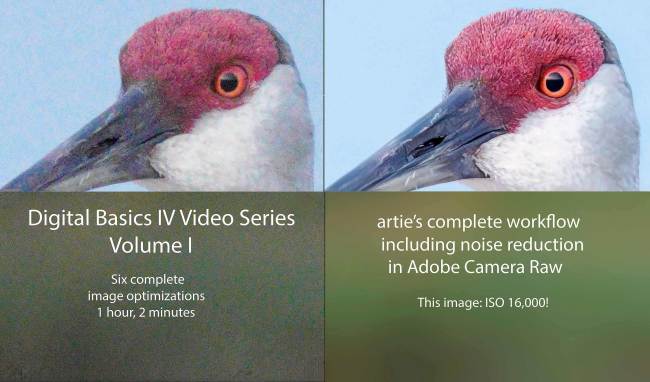
Click to enlarg and check out the noise reduction. Volume I of The Digital Basics IV Video Series by Arthur Morris/BIRDS AS ARTYou can purchase Volume I alone here for $49.00. |
Volume I of the Digital Basics IV Video Series
Volume I of the Digital Basics IV Video Series details the image optimizations of six images; it eliminates the confusion that resulted from the changes to AI Noise Reduction (under the Details tab) in the recent updates to Adobe Camera Raw (in both Photoshop 2025 Release 26.10.0 and the latest version of Lightroom). As you will learn in the Volume I video, the new interface represents a significant improvement as compared to those obtained with the Enhance dialogue box in previous versions of ACR. All the new stuff but for the use of the Point Color eye dropper to tame super-saturated colors during raw conversions is at least touched upon in Volume I, most of it in great detail. One hour, two minutes.
|
|
|
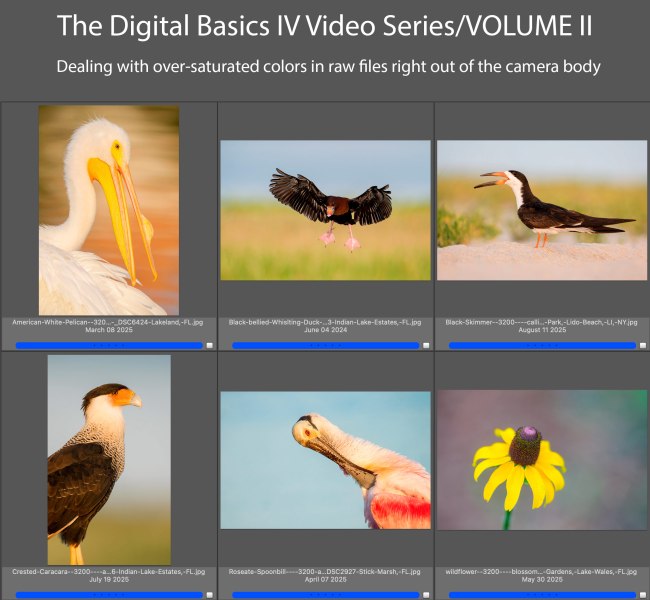
Click to enlarge. Volume II of The Digital Basics IV Video Series by Arthur Morris/BIRDS AS ARTYou can purchase Volume I alone here for $49.00. |
Volume II of the Digital Basics IV Video Series
Volume II of Digital Basics IV explains in detail how to handle images where some bright colors like reds, oranges, and yellows show as over-exposed as soon as you hold down the Alt or Option key and move the Whites slider to the right in Adobe Camera Raw. This is a commonly encountered problem for folks using Adobe Camera Raw either in Photoshop or Lightroom. The simple solution is to use the Point Color eyedropper the moment you encounter super-saturated colors in images right out of the camera. Raw files from all of the major dSLR and Mirrorless camera manufacturers will exhibit this problem. Depending on the system that you use, you may find that the certain colors are more problematic in one system than in another. Huge thanks to Anita North; working together, we came up with the Point Color Supersaturated Colors Fix. Just under one full hour.
|
|
|
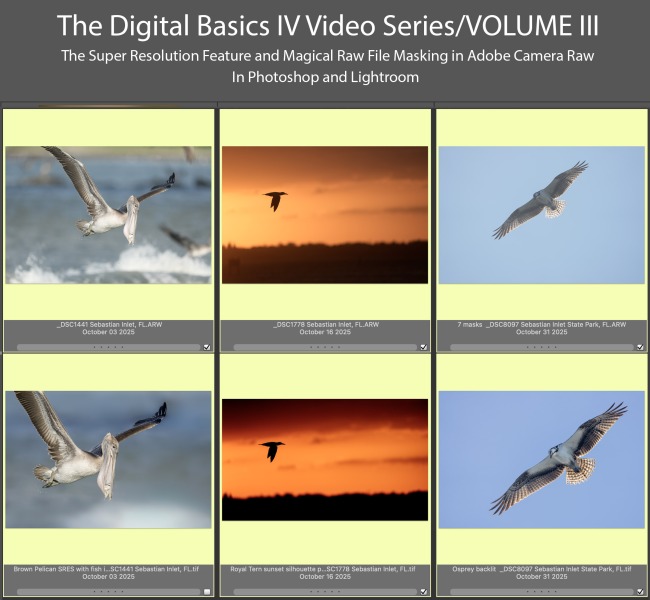
Click to enlarge. Volume III of The Digital Basics IV Video Series by Arthur Morris/BIRDS AS ARTYou can purchase Volume III alone here for $49.00. |
Volume III of the Digital Basics IV Video Series
Volume III of the Digital Basics IV Video Series goes into additional on making selections with the Masking feature in ACR in both Photoshop and Lightroom. Selections include the automatic one like Sky, Subject, and Background (and shows how they sometimes need to be refined). In addition, we cover as Linear and Radial Gradients and how to create your own masked area using the Brush Tool. This feature has transformed my workflow and I am now routinely using as many as six or seven masks on a single raw file. I am even using ACR masks to effectively do my Eye Doctor work. Also, you will learn when and how to use the new Super Resolution feature in Adobe Camera Raw to upsize your cropped .TIF files and the two effective ways to use the Remove Took. Just under one full hour.
|
|
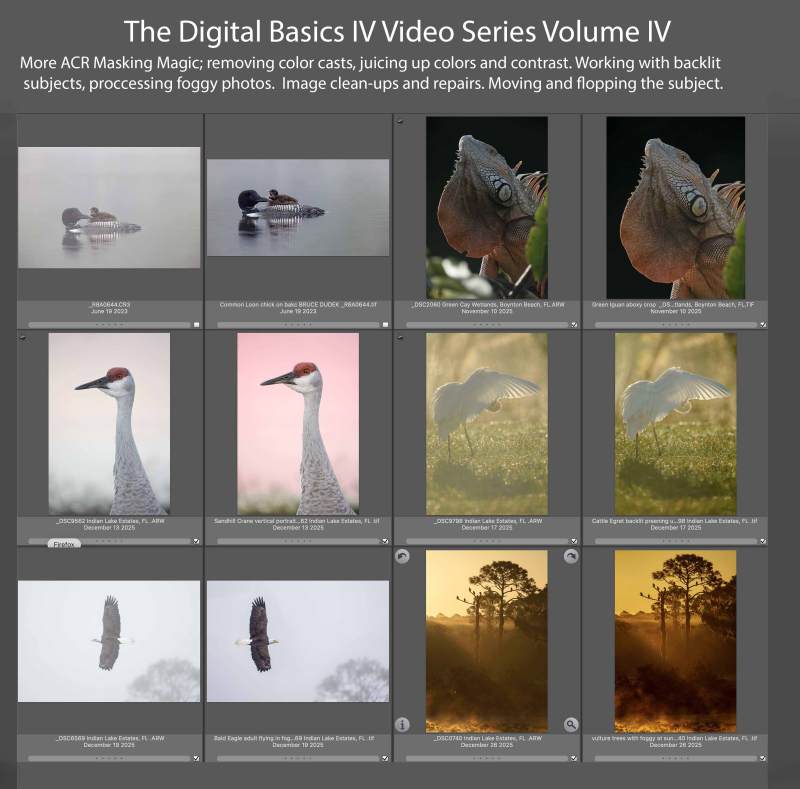
Volume IV of The Digital Basics IV Video Series by Arthur Morris/BIRDS AS ARTYou can purchase Volume IV alone here for $49.00. |
Volume IV of the Digital Basics IV Video Series
My current workflow includes the use of the masking feature in Adobe Camera Raw (thanks to Anita North), the use of the Point Color eye dropper to tame super-saturated colors during raw conversions (discovered in tandem with Anita), a fabulous new Remove Tool trick that makes my favorite Photoshop Tool even more powerful than before -— that one discovered by me. In addition, I have recently begun doing some Curves work during my ACR raw conversions.
My basic workflow remains much the same as is detailed in both DB II and in the DB III Video Series:
1- Setting the Color Temperature (when and if needed).
2- Setting the White and Black Points and adjusting the Highlights and Shadows sliders.
3- Setting the Clarity and Dehaze sliders.
4- Fine-tuning color using the Hue/Saturation/Luminance Targeted Adjustment Tool, a huge step up from the Color Mixer Tool.
5- My 2-step noise reduction technique (with most images).
Volume IV details the use the ACR Masking feature to selectively lighten the shaded side of backlit subjects, remove color casts, and juice up color (and contrast). In addition we cover and review the processing of foggy photos, the use of Quick Masks to flop and re-position a flying subject, the best ways to use of the Remove Tool, and a variety of repair and clean-up techniques. One hour, 18+ minutes.
There will be five volumes in DB IV, each featuring six complete image optimizations.
Typos
With all blog posts, feel free to e-mail or to leave a comment regarding any typos or errors.




1A is a beauty, Artie!
Bob, butternut squash is fantastic – come on now! 🙂
Not sure about that, but one day 🙂
Thanks, Pugs. ACR masking rocks!
with love, artie
Artie, it looks to me the either the images or titles of #2 and 2A are reversed. Thanks for all the great La Jolla images! Having been there with you last year made it even more enjoyable. Looking forward to your Homer blogs soon! Safe travels.
You are correct, sir! I somehow reversed the captions for those two. They have been fixed.
Missing you and your war stories greatly!
with love, artie
Dear Art: It has been a pleasure to vicariously enjoy bird photography at La Jolla Cliffs. Thank you!
Thanks, Pat. Our next to last morning just might have been the best as we finally got some clouds; we photographed until 10:45am.
with love, artie