Your Call?
Which of Red Stevens’ three image do you like best? Why?
My Call
In the recent YouTube Video: How I Picked the Best Four of 1206 Images blog post here, only two folks picked a favorite. Both liked #4 with the eye of the female crane visible through the splayed primary feathers of the male’s right wing. By a slim margin, I preferred Image #3 for it simplicity and intimacy.
What’s Up?
It is still cold here and I have still been going out every morning and making a few good images. There is lots to learn today so let’s get going.
The Analog Scale (AKA the Exposure Indicator)
It is correct to call the exposure indicator on a camera an analog scale, regardless of whether the camera itself is digital or film. While modern digital cameras use digital sensors and processors, the visual representation of the exposure meter—usually a line with a marker moving between negative (-) and positive (+) values—is designed to mimic the analog needle-and-scale meters found in older, manual cameras.
Here is why it is called an analog scale:
Continuous Representation: Even though the camera calculates exposure digitally, the indicator provides a continuous, relative representation of whether the image is overexposed or underexposed compared to a middle-grey point (0).
Analog” in Digital: It is a graphical, visual representation that acts like an “analog” tool (a gauge) rather than just displaying raw numerical data.
Measurement of Stops: The scale is used to show how many stops of light are over or under the meter’s recommendation.
Key Points About the Exposure Scale:
Zero (0): This is the center point, which the camera’s light meter suggests is a “proper” exposure (middle grey). It is rarely correct.
Left Side (-): Indicates underexposure (too dark).
Right Side (+): Indicates overexposure (too bright).
Range: It typically ranges from -3 to +3, representing steps or “stops” of light.
Therefore, even when looking at an LCD screen or in the viewfinder of a brand-new mirrorless camera, the “+ | – | 0” bar is referred to as the analog exposure scale.
Understanding the Analog Exposure Scale
An e-Mail Conversation with Red Stevens
RS: Good Morning, Harry.
AM: Red My Man,
Re:
RS: When looking through the view finder there is a gradient on the lower center. I don’t know what it is called but I believe that you had me adjust it a times.
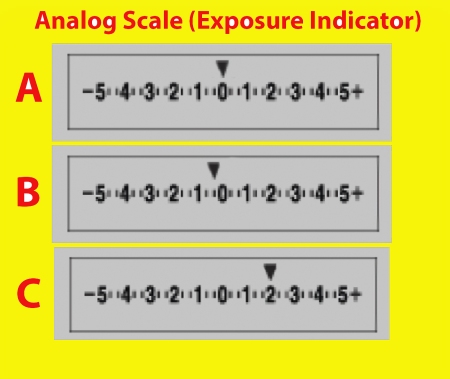
AM: I believe that you are referring to this, the analogue exposure scale:
Please understand that everything that follows is review. 🙂 You learned it and then forgot it. 🙂 Do understand that many beginning and intermediate photographers do not have a thorough understanding of the analog exposure scale and are often confused by it.
RS: Is it only adjusted in certain shutter modes or when?
AM: Sort of.
The arrow at A in the screen capture above is on the zero. When you are in Manual exposure mode it shows how much higher or lower the exposure that you have set is than the exposure suggested by the camera’s meter. When the arrow is on the zero, it is telling you that the exposure that you have set is the same as the same as the one determined by the camera’s metering system. With bird and nature photography, it is wrong far more often than it is right. Again, this is only when you are in Manual exposure mode. If the arrow is to the left as at B, above, then you are shooting darker than what the camera has suggested. If the arrow is to the right, as in C above, it is telling you how much lighter your settings are than those suggested by the camera’s meter.
The -1/3 stop shown at B might be correct for a head portrait of a bright white bird against dark blue water on a sunny day. The +2 stops shown at C could be correct on a cloudy day when photographing a bird in flight on a cloudy day or a penguin on snow.
When you are in Manual exposure mode, there is no Exposure Compensation. The scale itself cannot be adjusted. The arrow will move depending on your choice of shutter speed and aperture and what you are pointing your lens at.
Remember, everything above applies only when you are in Manual exposure mode; as you move your lens while half pressing the shutter button the arrow will move left and right along the exposure scale depending on the tonality of the scene at a given instant.
When you are in Shutter Priority mode (or very rarely, in Aperture Priority mode), however, you adjust the arrow on the analogu scale by turning the Exposure Compensation (EC) dial to add or to subtract light. Turn it clockwise to add light, counterclockwise to subtract light. Just as you learned at Sebastian.
I never adjusted it in Antartica or since I left Melbourne. Can you enlighten me on this?
See above. No worries, if you were setting your exposures to get a few Zebras all of your exposures will be excellent. But understanding the analog exposure scale will help you to become a better photographer. Thanks for asking the questions that inspired this blog post.
With love, harry
(Why Harry? Both Red and I are big Harry Bosch/Michael Connelly/Netflix fans.)
|
|
|
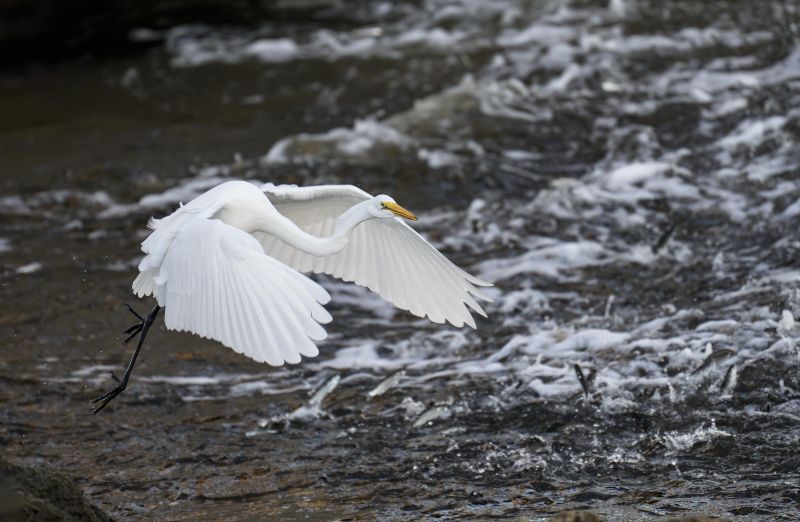
This image was created on 14 October 2025 on a Sebastian Inlet Extended IPT by Alvin “Red” Stevens of Birmingham, AL. Standing at full height, just east of the bridge on the south side, he used the handheld Sony FE 70-200mm f/2.8 GM OSS II Lens with the Sony FE 2x Teleconverter (at 400mm) and The Latest Greatest Sony Flagship Body, the a1 II Mirrorless Camera. The exposure was determined by Zebras with ISO on the rear wheel — ISO 4000: 1/1000 second at f/5.6 (wide open) in Manual mode. AWB at 7:35:06am in the shade. Wide/AF-C with Bird-Eye/Face Detection performed perfectly. Click on the image to enjoy the larger, inexplicably sharper high-res version. Image #1: Great Egret fishing/breaking mullet background |
Same Old Same Old
In the recent blog post that featured Nora Kane’s fine images, I wrote:
For years I have been saying the beginning and intermediate photographers can — with their camera bodies set up properly and a bit of good instruction, create images as good as or better than those made by a professional with 40+ years of experience. Nora proved that time and time again.
And Alvin “Red” Stevens did the exact same thing many times at Sebastian last fall even though he was a certified 100% beginner. Several of us were on this great situation with a Great Egret going after finger mullet near the bridge abutment. Red’s image was the strongest by far. It will be great to work with him again on Stick Marsh #1. He is coming to ILE two days early for a bit of Sandhill Crane photography and lots of Photoshop lessons.
You can see more of Red’s fabulous images in the Red From Birmingham’s First Bird Photographs. Honest! The Astounding Success of an 80-Year Old 100% Beginner blog post here.
|
|
|
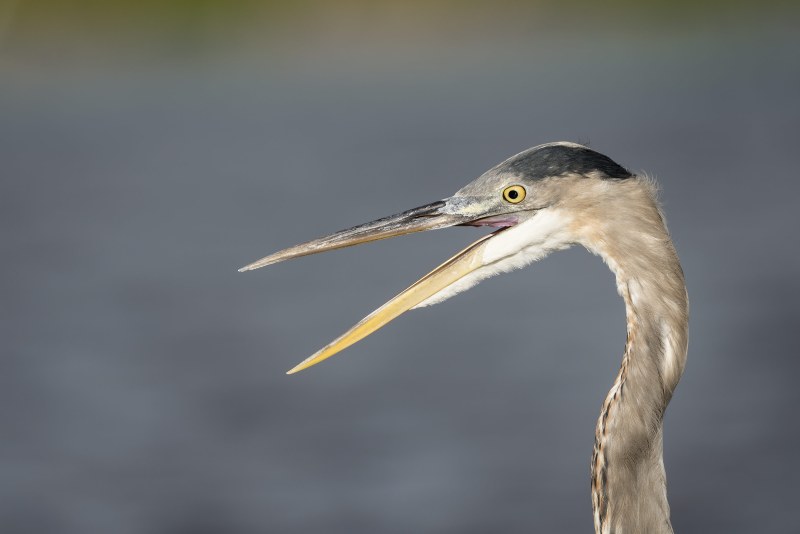
This image was created on 16 October 2025 by Alvin “Red” Stevens of Birmingham, AL on a Sebastian Inlet Ospreys and More Extended IPT. Standing at full height, he used the handheld Sony FE 300mm f/2.8 GM OSS Lens (Sony E) with the Sony FE 2x Teleconverter and the Latest Greatest Sony Flagship Body, the a1 II Mirrorless Camera. The exposure was determined by Zebras with ISO on the rear wheel — ISO 640: 1/2500 second at f/5.6 (wide open) in Manual mode. AWB at 9:15:14am on a variably sunny morning. Tracking: Zone/AF-C with Bird Eye/Face Detection enabled performed perfectly. Image #2: Great Blue Heron squawking |
The 300mm f/2.8 GM with the Teleconverters
While the Sony 200-600 super-telephoto zoom lens offers great versatility, the 300mm f/2.8 GM with the teleconverters is lighter and faster. Red was easily able to handhold the 300mm f/2.8/2X TC and consistently create sharp images with it. The 200-600 was a bit on the heavy side for him. With the 2X TC, the 300 f/2.8 rig is only 1/3-stop faster than the 2-6 at 600 (f/5.6 as compared to f/6.3). But with the 1.4X on the 300, it is — at f/4, 1 1/3 stops faster. At 420mm, it is a deadly combination for shooting birds in flight. As Red does not own this lens, I loaned him mine on occasion at Sebastian Inlet.
|
|
|
For those who did not use my link to purchase their Sony 300mm f/2.8 GM lens, you can order your a copy here for $209.93. Click on the image to enlarge and to be able to read the fine print. |
The BAA Sony 300mm f/2.8 Lens Guide
Impressed by my (or Pat’s) Sony FE 300mm f/2.8 GM OSS Lens (Sony E) images? Use either my Bedfords or B&H affiliate link to purchase your Sony 300mm f/2.8 GM lens and shoot me your receipt via e-mail and request a copy of the first-ever BAA Lens Guide. I thought that it would take only minutes to create this guide, but I was dead wrong. In the process of creating it, I learned a ton about the lens. And even better, I discovered a simple yet potentially fatal flaw that was resulting in sporadically unsharp flight images. The set-up fix is simple. Just be sure to use one of my affiliate links and get the guide for free.
If not, you can purchase a copy here for $209.93. Yes, it never hurts to use my links and it never costs you one penny more. And if you contact me via e-mail before you make a major purchase, I can often save you some money.
|
|
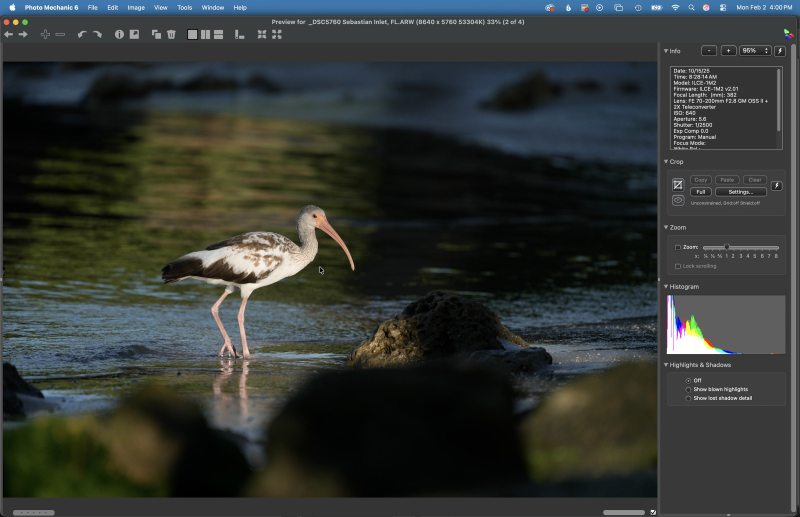
Image #3: The Photo Mechanic screen capture for the Spotlit White Ibis juvenile plumage |
Keep or Delete?
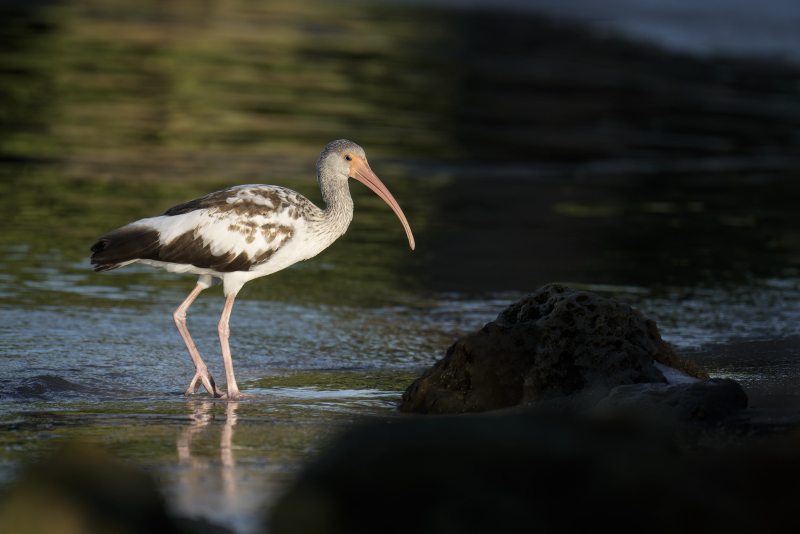
I loved the spotlit effect on this young White Ibis but with sunlight and shadows all over the place the foreground and background left a lot to be desired. Would you have kept this one or deleted it?
In any case, Red did a great job with the exposure in a challenging situation simply by using Zebra technology.
|
|
|
This image was created on 15 October 2025 on a Sebastian Inlet Extended IPT by Alvin “Red” Stevens of Birmingham, AL. Standing at full height at NW Cove he used the handheld Sony FE 70-200mm f/2.8 GM OSS II Lens with the Sony FE 2x Teleconverter (at 382mm) and The Latest Greatest Sony Flagship Body, the a1 II Mirrorless Camera. The exposure was determined by Zebras with ISO on the rear wheel — ISO 640: 1/2500 second at f/5.6 (wide open) in Manual mode. AWB at 8:28:14am on a sunny morning. Wide/AF-C with Bird-Eye/Face Detection performed perfectly. Click on the image to enjoy the larger, inexplicably sharper high-res version. Image #3A: Spotlit White Ibis juvenile plumage |
More ACR Masks to the Rescue
After cropping, I used several ACR masks along with the Clone Stamp and Remove tools to even out the lighting to some degree. Red left Sebastian with more than a few image optimization videos.
|
|
|
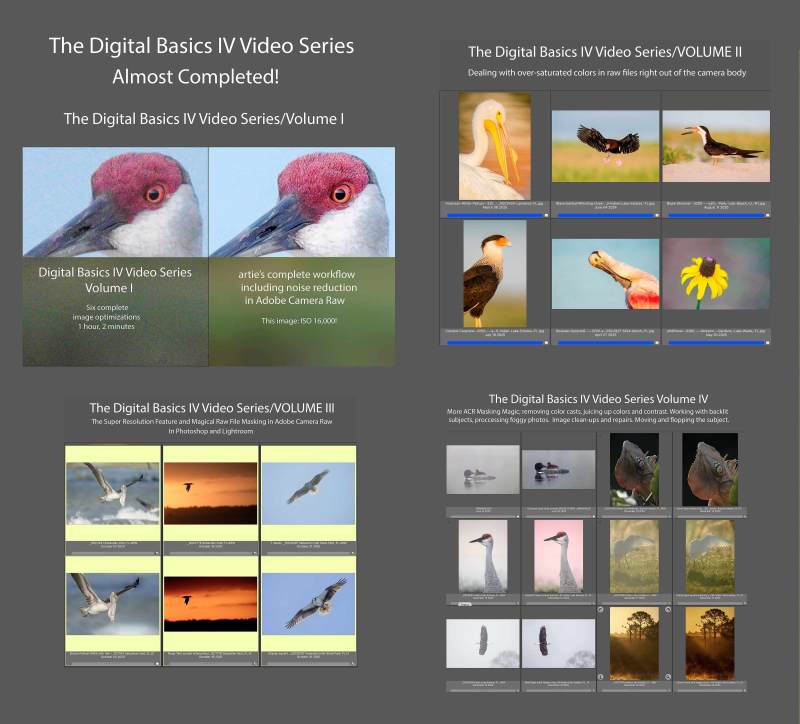
Click to enlarge. The Digital Basics IV Video Series by Arthur Morris/BIRDS AS ARTYou can save $50.00 by purchasing the entire 5-Volume Series by clicking here. |
Digital Basics IV Video Series: $146.00 for all five videos/save $50.00
I have some fabulous new image optimization tips, techniques, and tricks to share. As the Digital Basics III Video Series proved to be so popular, I decided last fall to run it back in the form of Digital Basics IV. Digital Basics V is on the horizon.
My new workflow includes the use of the masking feature in Adobe Camera Raw (thanks to Anita North), the use of the Point Color eye dropper to tame super-saturated colors during raw conversions (discovered in tandem with Anita), a fabulous new Remove Tool trick that makes my favorite Photoshop Tool even more powerful than before -— that one discovered by me. In addition, I have recently begun doing some Curves work during my ACR raw conversions.
My basic workflow remains much the same as is detailed in both the Digital Basics II PDF and in the Digital Basics III Video Series:
1- Setting the Color Temperature (when and if needed).
2- Setting the White and Black Points and adjusting the Highlights and Shadows sliders.
3- Setting the Clarity and Dehaze sliders.
4- Fine-tuning color using the Hue/Saturation/Luminance Targeted Adjustment Tool, a huge step up from the Color Mixer Tool.
5- My 2-step noise reduction technique (with most images).
Once I have the .TIF file in Photoshop, I use my usual cadre of clean-up tools and techniques including the Remove Tool, the Clone Stamp (only rarely), Divide and Conquer, Quick Masking, Layer Masking, Gaussian Blurs, an expanded array of personalized keyboard shortcuts, and tons of other image optimization strategies and methods adapted from previous versions of Digital Basics. I also demonstrate the selective use of Topaz Sharpen AI utilizing the masking feature. And last but not least, I share my JPEG creation methodology.
I will do my best to work on, finish, and distribute Volume V before I leave for Homer next Monday.
Typos
With all blog posts, feel free to e-mail or to leave a comment regarding any typos or errors.




Jim, Tom, and Steve.
Thanks all for commenting. Very interesting: three folks, three different favorites.
with love, artie
#2 for me, clean and simple with a nice subject.
Congratulations to Red (good name!) for learning fast! I like #1 best- there is a ton of mullet action going on and the main subject is positioned right in the frame. Second, I like number 2 – simple portrait. Last preference is 3 and 3a. I struggle with the out of focus foreground. Perhaps if the photographer could have gotten a bit higher to take the image, I would have rated it second. But hey, still good overall set of images.
Definitely #3A. In #1, I think the background is too busy. #2, a static profile shot, doesn’t do anything for me. #3A crops #3 very nicely and shows the subject in its environment, doing what it does best: being an ibis.
This is how I understand exposure compensation to work.
When you adjust EC what you are really doing is changing the in camera meter’s target or zero point. When in Shutter Priority this will change the shutter speed to try to match the new zero point. When in Aperture Priority it will adjust aperture to do it’s best to match the new zero. If auto ISO is on when the Shutter or Aperture limit is reach the ISO will adjust.
In full manual mode Exposure Comp still adjusts the meter target but the photographer must manually adjust settings to match the new target. In manual with Auto ISO, EC will adjust the ISO and leave the shutter and aperture alone.
Hi Bob, Thanks for your comment. I am confused by much of what you wrote and I think that you may be confused about exposure. I will reply point by point here to the best of my ability.
re:
BP: This is how I understand exposure compensation to work.
When you adjust EC what you are really doing is changing the in camera meter’s target or zero point.
AM: In a given situation, the camera’s metering system will always suggest what it believes to be the best exposure. That of course depends on the metering pattern you are using. But in any case, nothing changes the camera’s suggested exposure values. What you are doing when you add or subtract light is over-riding that suggested exposure value.
Your point may or may not be argued semantically, but understanding that you are over-riding what the camera suggests is very important …
BP: When in Shutter Priority this will change the shutter speed to try to match the new zero point.
AM: That is 100% incorrect. When in Shutter Priority the photographer picks and sets the shutter speed. The camera sets the aperture value.
Please understand that I find your use of the “new zero point” to be very confusing.
BP: When in Aperture Priority it will adjust aperture to do it’s best to match the new zero.
AM: Incorrect again. In Aperture Priority the photographer chooses and sets the aperture value and the camera sets the shutter speed.
Again, understand that I find your use of the “new zero” to be very confusing.
BP: If auto ISO is on when the Shutter or Aperture limit is reached, the ISO will adjust.
AM: Incorrect and confusing. When in any automatic exposure mode with AUTO ISO the camera will always adjust the ISO to reflect the Exposure Compensation set by the photographer. I firmly believe that if you are using any automatic exposure mode that you should be using AUTO ISO with Exposure Compensation (EC) on a convenient dial. If you are using Shutter or Aperture Priority without setting the EC then you will wind up with the wrong exposure 90% of the time.
BP: In full manual mode Exposure Comp still adjusts the meter target but the photographer must manually adjust settings to match the new target.
AM: As implied in the original post, there is no Exposure Compensation when you are working in Manual exposure mode. I re-crafted that original blog post text as follows to better reflect this:
When you are in Manual exposure mode, there is no Exposure Compensation. The scale itself cannot be adjusted. The arrow will move depending on your choice of shutter speed and aperture and what you are pointing your lens at.
BP: In manual with Auto ISO, EC will adjust the ISO and leave the shutter and aperture alone.
AM: Again, there is NO EC when you are working in Manual exposure mode. Furthermore, using ISO when in Manual exposure mode has never made any sense at all to me. Why? Whenever the tonality of the background (and often the size of the subject in the frame) changes, you will get the wrong exposure.
I hope that my comments help you to better understand exposure and the analog exposure scale.
with love, artie