
Summary
After using my new 100–400mm f/4.5 GM lens almost daily for six weeks at Nickerson Beach late last summer, I sent it off to Sony last week for a clean and check. In the interim, the Sony 400–800mm G lens has been the weapon of choice on my daily pier walks here at Indian Lake Estates. On Monday, I paired it with the 1.4X TC and created several superb images. Today, I am sharing two of my favorites — one made in APS-C Crop Mode and the other at full frame. Keep reading for key pointers on handholding ultra-long focal lengths and tips on creating dramatic backlit images.
Note: General information, copy editing, re-crafting, technical refinement, and formatting for this blog post were assisted by Gemini AI.
Your Call
Which of today’s two featured images do you like best. Why?
In the Last Blog Post
The new YouTube video, An Old Man’s Take on the Sony 100-400mm f/4.5 GM Lens, that was featured in the last blog post has had an astounding 5,400 views in just two days and garnered nearly twenty comments and questions. I am still working on replying to all of them. There were zero comments and questions at the blog post 🙁
What’s Up?
It was cloudy and dark on Tuesday morning so I grabbed the 300mm f/2.8 GM lens with the 1.4X TC in place for my walk. (Yes, I am blessed to own so many great lenses) I even created a few videos of preening cranes and one of a preening Limpkin. I had a nice adult Little Blue Heron on the pier railing along with some female Boat-tailed Grackles, a few Anhingas, and several Turkey Vultures. I made lots of flight shots of the grackles and the Anhingas but those did not include any winners. I was so busy finishing up the tax stuff that I still have 1334 as-yet unedited images and videos from yesterday to go through.
Speaking of walking … I did not eat too well on Long Island. That included several visits to Baskin Robbins and some Trader Joe’s hazelnut chocolate before bed every night. 🙁 Not recommended for a diabetic. By the time I got home, I was needing twice as much fast-acting insulin to manage my post mealtime blood sugar levels and bring my numbers somewhat back under control. While scrolling on Instagram, I found Dr. Boz [Annette Bosworth, MD], and began following her on YouTube where she has a nifty 1.29 million subscribers! I’ve gone all-in on her keto deal, have lost some weight, and in a week I am needing only about half the insulin I was using in June and July. And my numbers have been pretty much perfect. There’s a lot to be said about limiting your carbs to less than 20 grams a day! You can check out her “95% of you are doing keto wrong. Here’s how to do it right” YouTube video here.
So, what does walking have to do with the above? Since I got home, I have been averaging just under 4 miles per day — my pier walk comes in at a bit less than a mile. Then I take a 2+ mile walk after a late breakfast, a short walk right after dinner, and a final trip out to the end of the pier and back at sunset. In addition, I have been doing 36 lengths in the pool every day, about .4 miles. My goal is to be fit and photographing at 95 🙂
Yesterday, we shipped off all of the 1099s and 1099-DIVs to James Carlstedt, my new accountant. My dear and longtime friend Chip Jackson retired last year. Once today’s missive is published, I should have time to put the finishing touches on the two Excel files that I will be e-mailing to Jim today before I head down to the lake.
A link to the brand new BAA Sony 100–400mm f/4.5 GM Lens Guide was e-mailed on Tuesday afternoon to those who used either my Bedford’s or B&H affiliate link to purchase their copy of this amazingly versatile lens. And I was glad to hear that the sale of Pat Fisburne’s Sony a-9 iii is pending.
Today is Wednesday 30 September 2026. The forecast is calling for cloudy early with a light SE breeze. Pretty good if you have a fast lens or two. Whatever you opt to do, I hope that you choose to have fun and enjoy life. Please remember that happiness is a choice — Byron Katie – The Work.Com
If an item — a Delkin flash card or reader, a Levered-clamp FlexShooter Pro, or a Wimberley lens plate or low foot — for example, that is available from B&H and/or Bedfords, is also available in the BAA Online Store, it would be great, and greatly appreciated, if you would opt to purchase from us. We will match or beat any price. Please remember also to use my B&H affiliate links or to earn 3% cash back at Bedford by using the BIRDSASART discount code at checkout for your major gear purchases. Doing either often earns you free guides and/or discounts. And always earns my great appreciation.
Note: capitalizing the “M” in “the whole Megillah” is correct because Megillah comes directly from the Hebrew word for “scroll” and specifically refers to the Book of Esther read during Purim — thus, it functions as a proper noun in its original context. When used in the popular Yiddish-derived idiom meaning “the entire long, complicated story” or “everything down to the last detail,” keeping the M capitalized remains the standard dictionary and style guide convention. (Gemini AI)
Gear Questions and Advice
Too many folks attending BAA IPTs and dozens of photographers whom I see in the field and on BirdPhotographer’s.Net, are — out of ignorance — using the wrong gear, especially when it comes to tripods and more especially, tripod heads. And the same is true in spades when ordering new camera bodies or lenses. My advice will often save you some serious money and may help you avoid making a seriously bad choice. Please know that I am always glad to answer your gear questions via e-mail. If you are desperate, you can try me on my cell at 863-221-2372. Please leave a message and shoot me a text if I do not pick up.
|
|
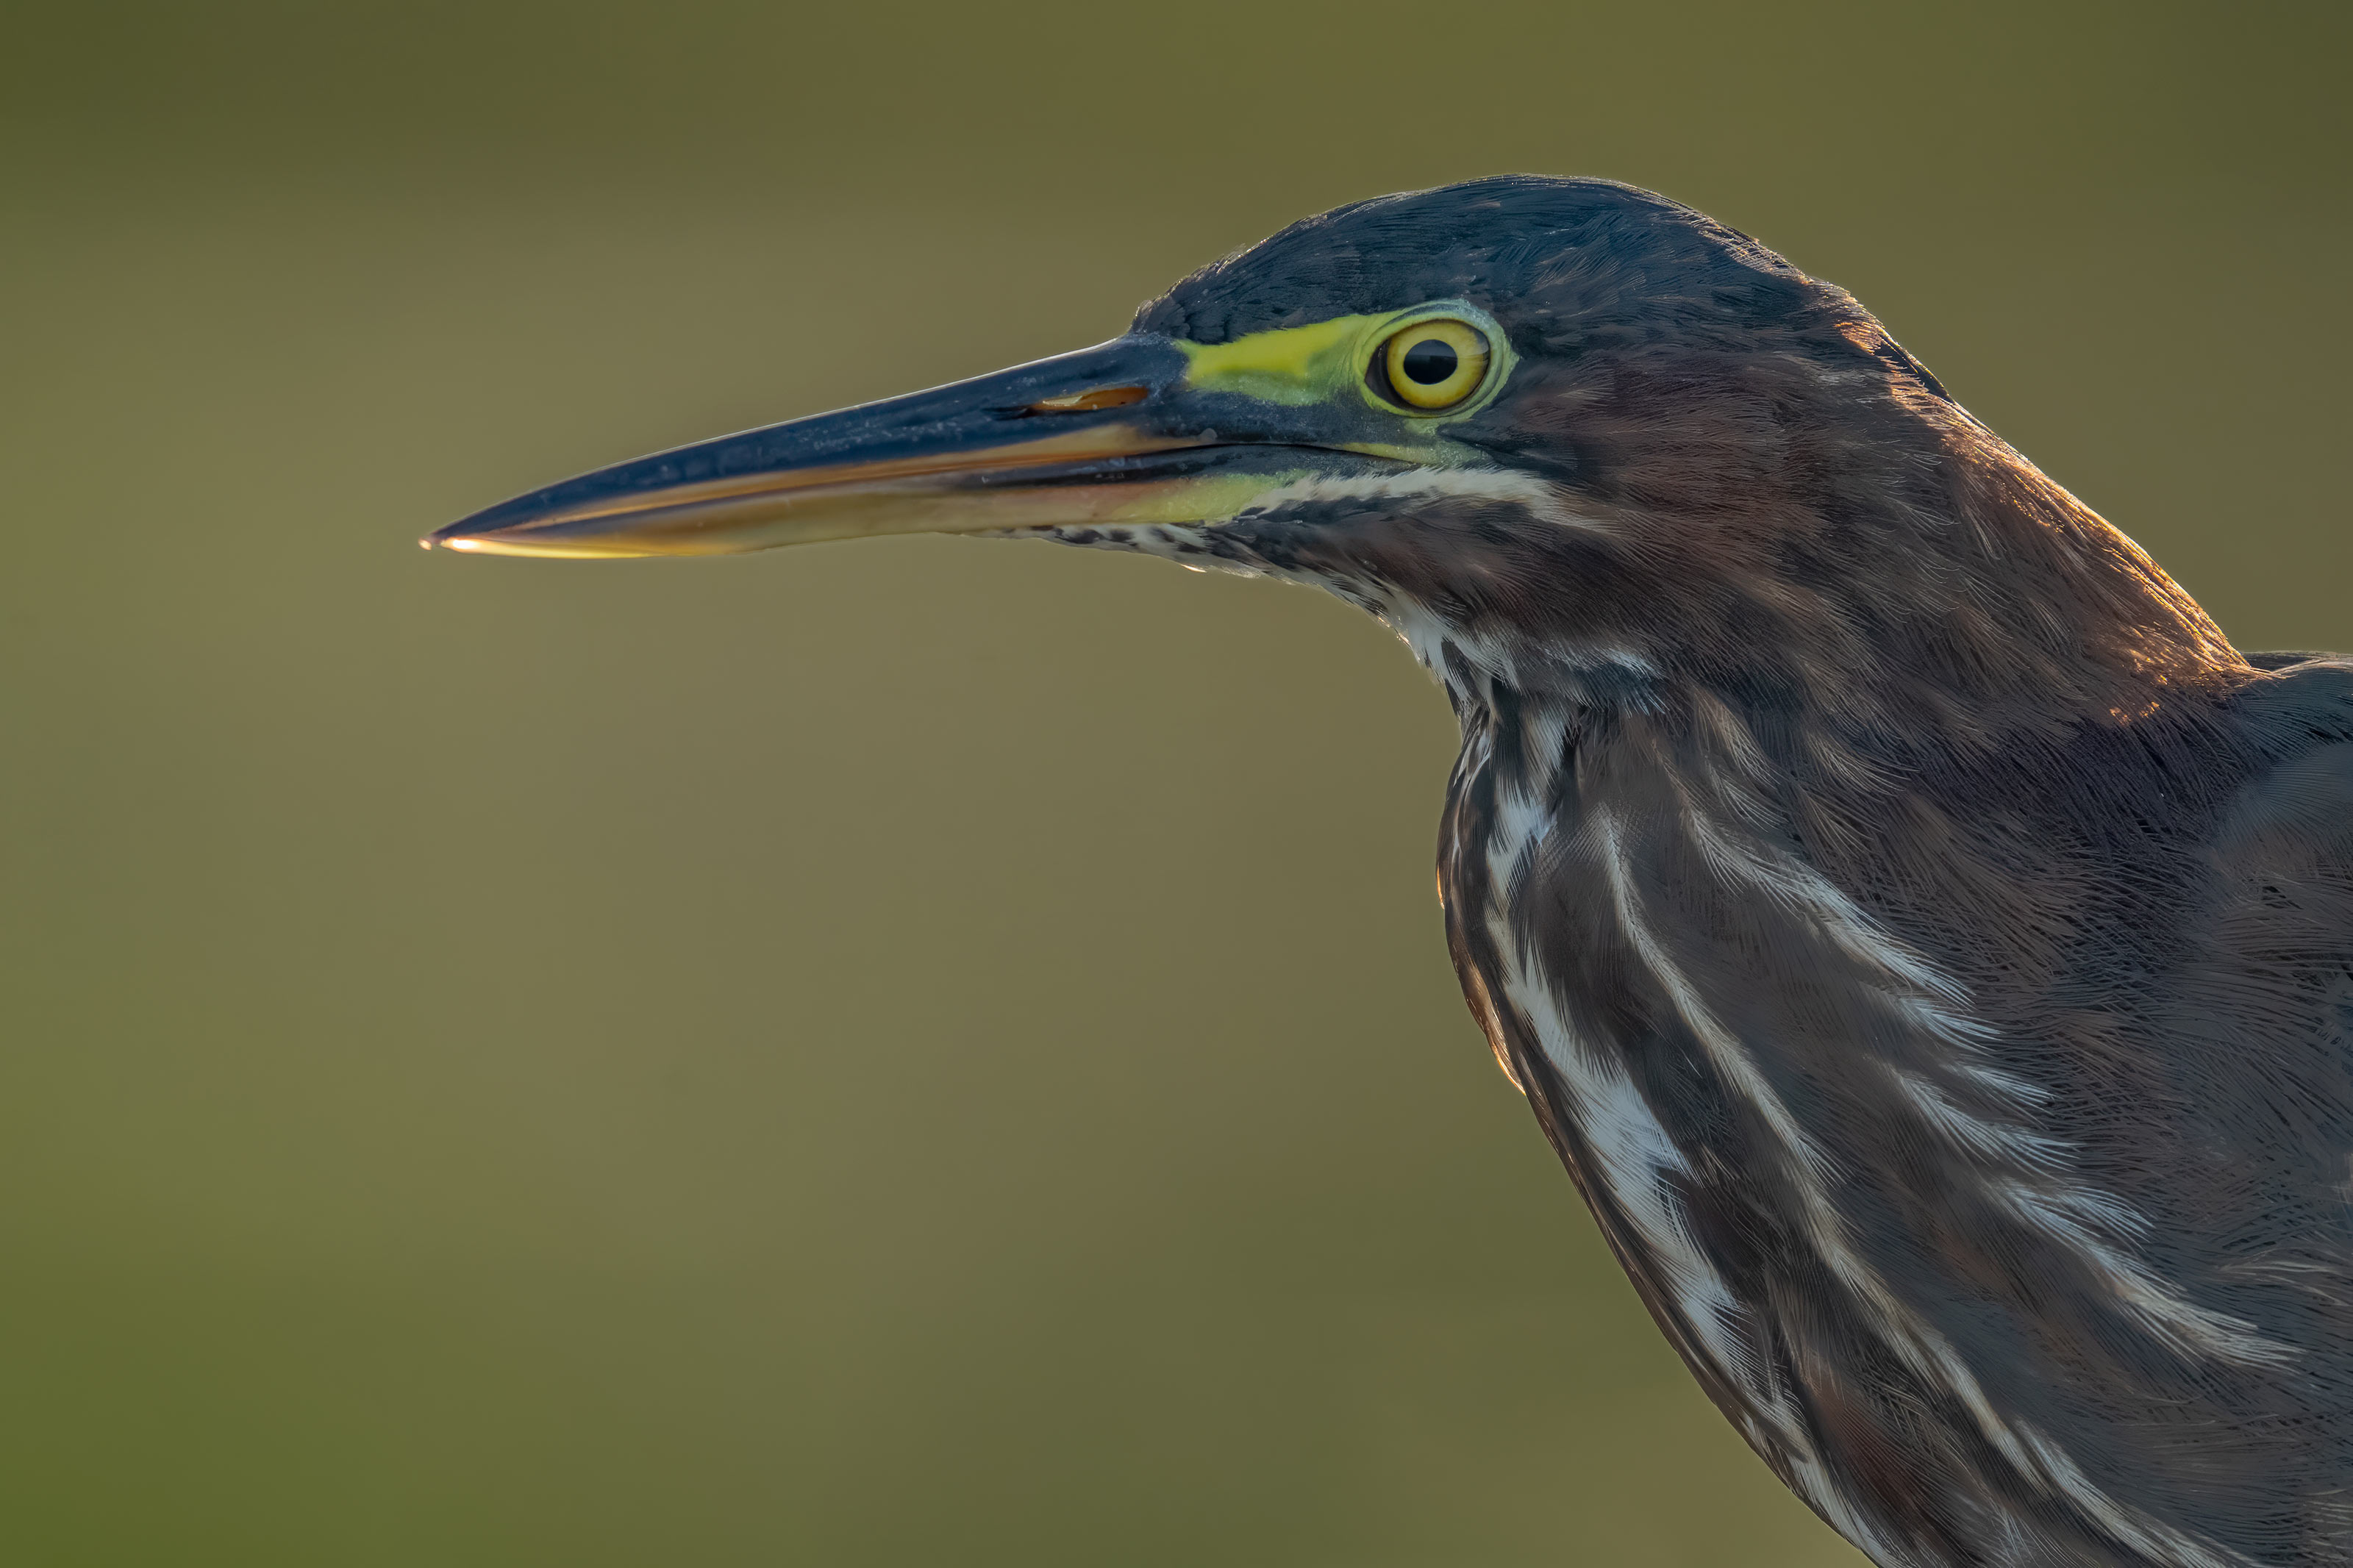
This image was created on 28 September 2026 by yours truly on the pier down by the shore at Indian Lake Estates, FL. I used the handheld Sony FE 400-800mm f/6.3-8 G OSS lens (Sony E) with the Sony FE 1.4x Teleconverter and The Latest Greatest Sony Flagship Body, the a1 II Mirrorless Camera in APS-C crop mode (effective focal length = 1680mm)! The exposure was determined by Zebras with ISO on the rear wheel. ISO 2500: 1/800 second at f/11 (wide open) in Manual mode. AWB at 8:27:36am on a mostly sunny morning. Wide (!)/AF-C with Bird-Eye/Face Detection performed perfectly. Click on the image to enjoy the larger, inexplicably sharper high-res version. Image #1: Green Heron — backlit juvenile front end portrait |
Backlit Tips
1- Strive for a relatively dark background
2- Position yourself so that the sun is as close to directly behind the subject as possible — this heightens the back light.
3- Expose so that the rim light is right on the edge of over-exposure. This renders the dark tones as bright as possible. Sony Zebra technology renders these exposures child’s play: work wide open, pick your shutter speed, and then adjust the ISO until you see Zebras on the rim-lit highlights — you will produce a perfectly exposed raw file every time.
4- Use several Adobe Camera Raw (ACR) masks to brighten the shadowed side of the bird to taste as needed. Learn about using ACR masks in the Digital Basics IV Video Series — scroll down for details on that. Or better yet, save a sweet $86.00 by purchasing The BIRDS AS ART Digital Basics Collection.
Note: APS-C crop mode helped me tremendously here by eliminating some bright areas along the edges of the frame.
|
|
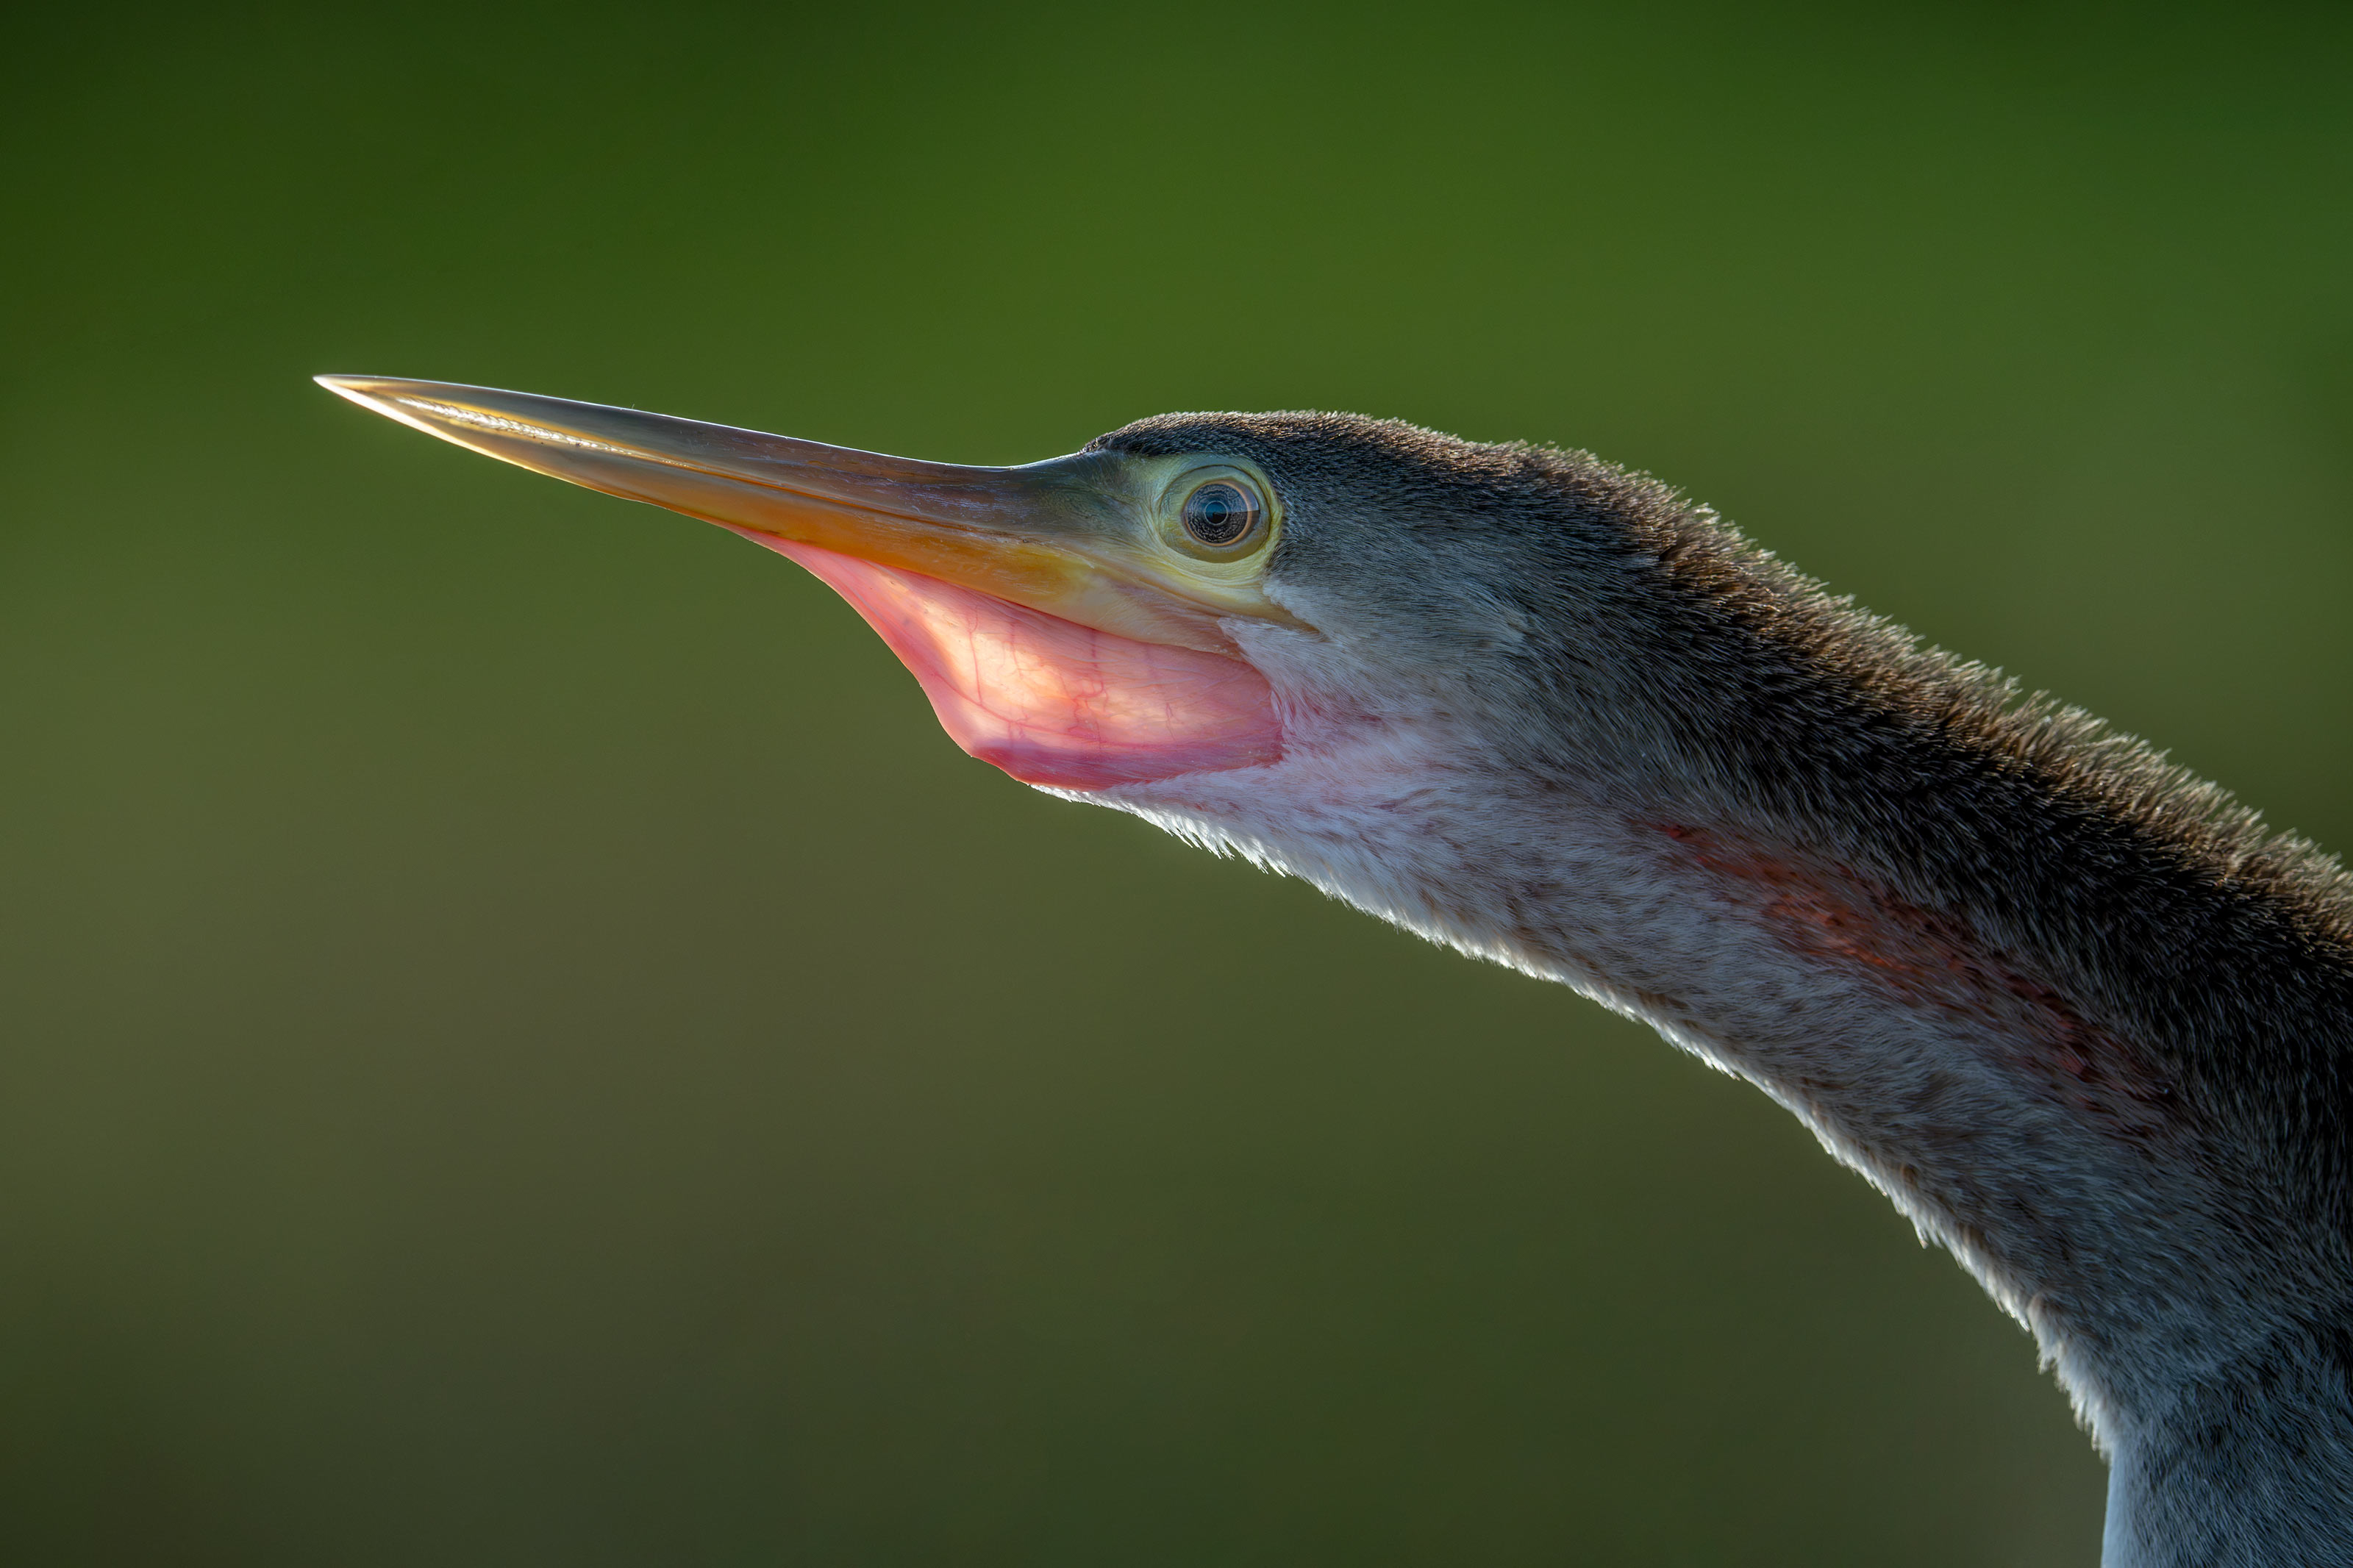
This image also was created on 28 September 2026 by yours truly on the pier down by the shore at Indian Lake Estates, FL. Again, I used the handheld Sony FE 400-800mm f/6.3-8 G OSS lens (Sony E) with the Sony FE 1.4x Teleconverter (at 959mm) and The Latest Greatest Sony Flagship Body, the a1 II Mirrorless Camera in full frame mode. ISO 2500: 1/1250 second at f/11 (wide open) in Manual mode. AWB at 8:32:33am on a mostly sunny morning. Tracking: Zone/AF-C with Bird-Eye/Face Detection performed perfectly. Click on the image to enjoy the larger, inexplicably sharper high-res version. Image #2: Anhinga — backlit juvenile head and neck portrait |
Early Fall Anhingas on the ILE Pier
Most mornings for the past two weeks there have been six to eight Anhingas on the pier railings and lampposts. Most are not terribly friendly but some of the juvies are approachable as long as you take tiny steps and move ultra-slowly. Note that for this one — made in full frame mode, I actually had to zoom out a bit! That tells you that this youngster was quite tame.
More ACR Masking!
Without Adobe Camera Raw masking, this image would have been lifeless. I used about six different ACR masks to bring it to life. Learn about using ACR masks in the Digital Basics IV Video Series — scroll down for details on that.
Static Handholding Tip
When handholding and working at extremely long focal lengths, I always remember to switch to OSS Mode 1 as that is designed for static subjects. If I forget to switch back to OSS Mode 3 for flight and action, I find that it does not make a huge difference (if any). But as your shutter speeds get relatively low — in the 1/250 to 1/800 second range, OSS Mode 1 will make a positive difference.
Note: Both gear shake and depth of field will be identical whether you are in full frame mode or in crop mode.

|
The BIRDS AS ART Current Workflow e-Guide (Digital Basics II).You can order your copy from the BAA Online Store here, by sending a PayPal for $40 here, or by calling Jim or Jennifer weekdays at 863-692-0906 with your credit card in hand. Be sure to specify Digital Basics II. |
The BIRDS AS ART Current Workflow e-Guide (Digital Basics II)
The techniques mentioned above and tons more great Photoshop tips and techniques — along with my complete digital workflow, Digital Eye Doctor Techniques, and all my personalized Keyboard Shortcuts — are covered in detail in the BIRDS AS ART Current Workflow e-Guide (Digital Basics II), an instructional PDF that is sent via e-mail. Note: folks working on a PC and/or those who do not want to miss anything Photoshop may wish to purchase the original Digital Basics along with DB II while saving $15 by clicking here to buy the DB Bundle.
Please note: the Divide and Conquer technique was inadvertently omitted from DB II. It is detailed in a free excerpt in the blog post here.
Folks who learn well by following along rather than by reading can check out the complete collection of MP 4 Photoshop Tutorial Videos by clicking here. Note: most of the videos are now priced at an amazingly low $5.00 each.
You can learn how and why I converted all of my Canon digital RAW files in DPP 4 in the DPP 4 RAW Conversion Guide here. More recently, I became proficient at converting my Nikon RAW (NEF) files in Adobe Camera Raw. About three years ago I began converting my Nikon and Sony RAW files in Capture One and did that for two years. You can learn more about Capture One in the Capture One Pro 12 Simplified MP4 Video here. The next step would be to get a copy of Arash Hazeghi’s “The Nikon Photographers’ Guide to Phase One Capture One Pro e-Guide” in the blog post here. Today, I convert my Sony raw files in Photoshop with Adobe Camera Raw.
You can learn advanced Quick Masking and advanced Layer Masking techniques in APTATS I & II. You can save $15 by purchasing the pair.

|
The Digital Basics III Video Series |
The Digital Basics III Video Series
I realized more than a year ago that my digital workflow had changed significantly and was toying with the idea of writing a Digital Basics III. More recently, I learned and begun working with two great new Photoshop Tools, the Remove Tool and the Luminance Targeted Adjustment Tool. The former is like a smarter Spot Healing Brush Tool on steroids and the latter is a step up from the fabulous Color Mixer Tool. During that same time frame, I came up with a new and improved 2-step noise reduction technique. I still use Divide and Conquer, Quick Masks, Layer Masks, an expanded array of personalized keyboard shortcuts, and tons of other stuff from both versions of Digital Basics.
As soon as I realized that I did not want to take on another large writing project, I realized that by creating a series of videos I could much more easily share all the details of my current digital workflow and much more easily incorporate additional new tips, techniques, and tools as I went. And so, The Digital Basics III Video Series was born.
You can save $26 by ordering the first five videos in Volume I by clicking here. The videos will be most valuable for folks using the latest version of Photoshop (2024) or Lightroom along with Topaz DeNoise AI and Topaz Sharpen AI.
|
|
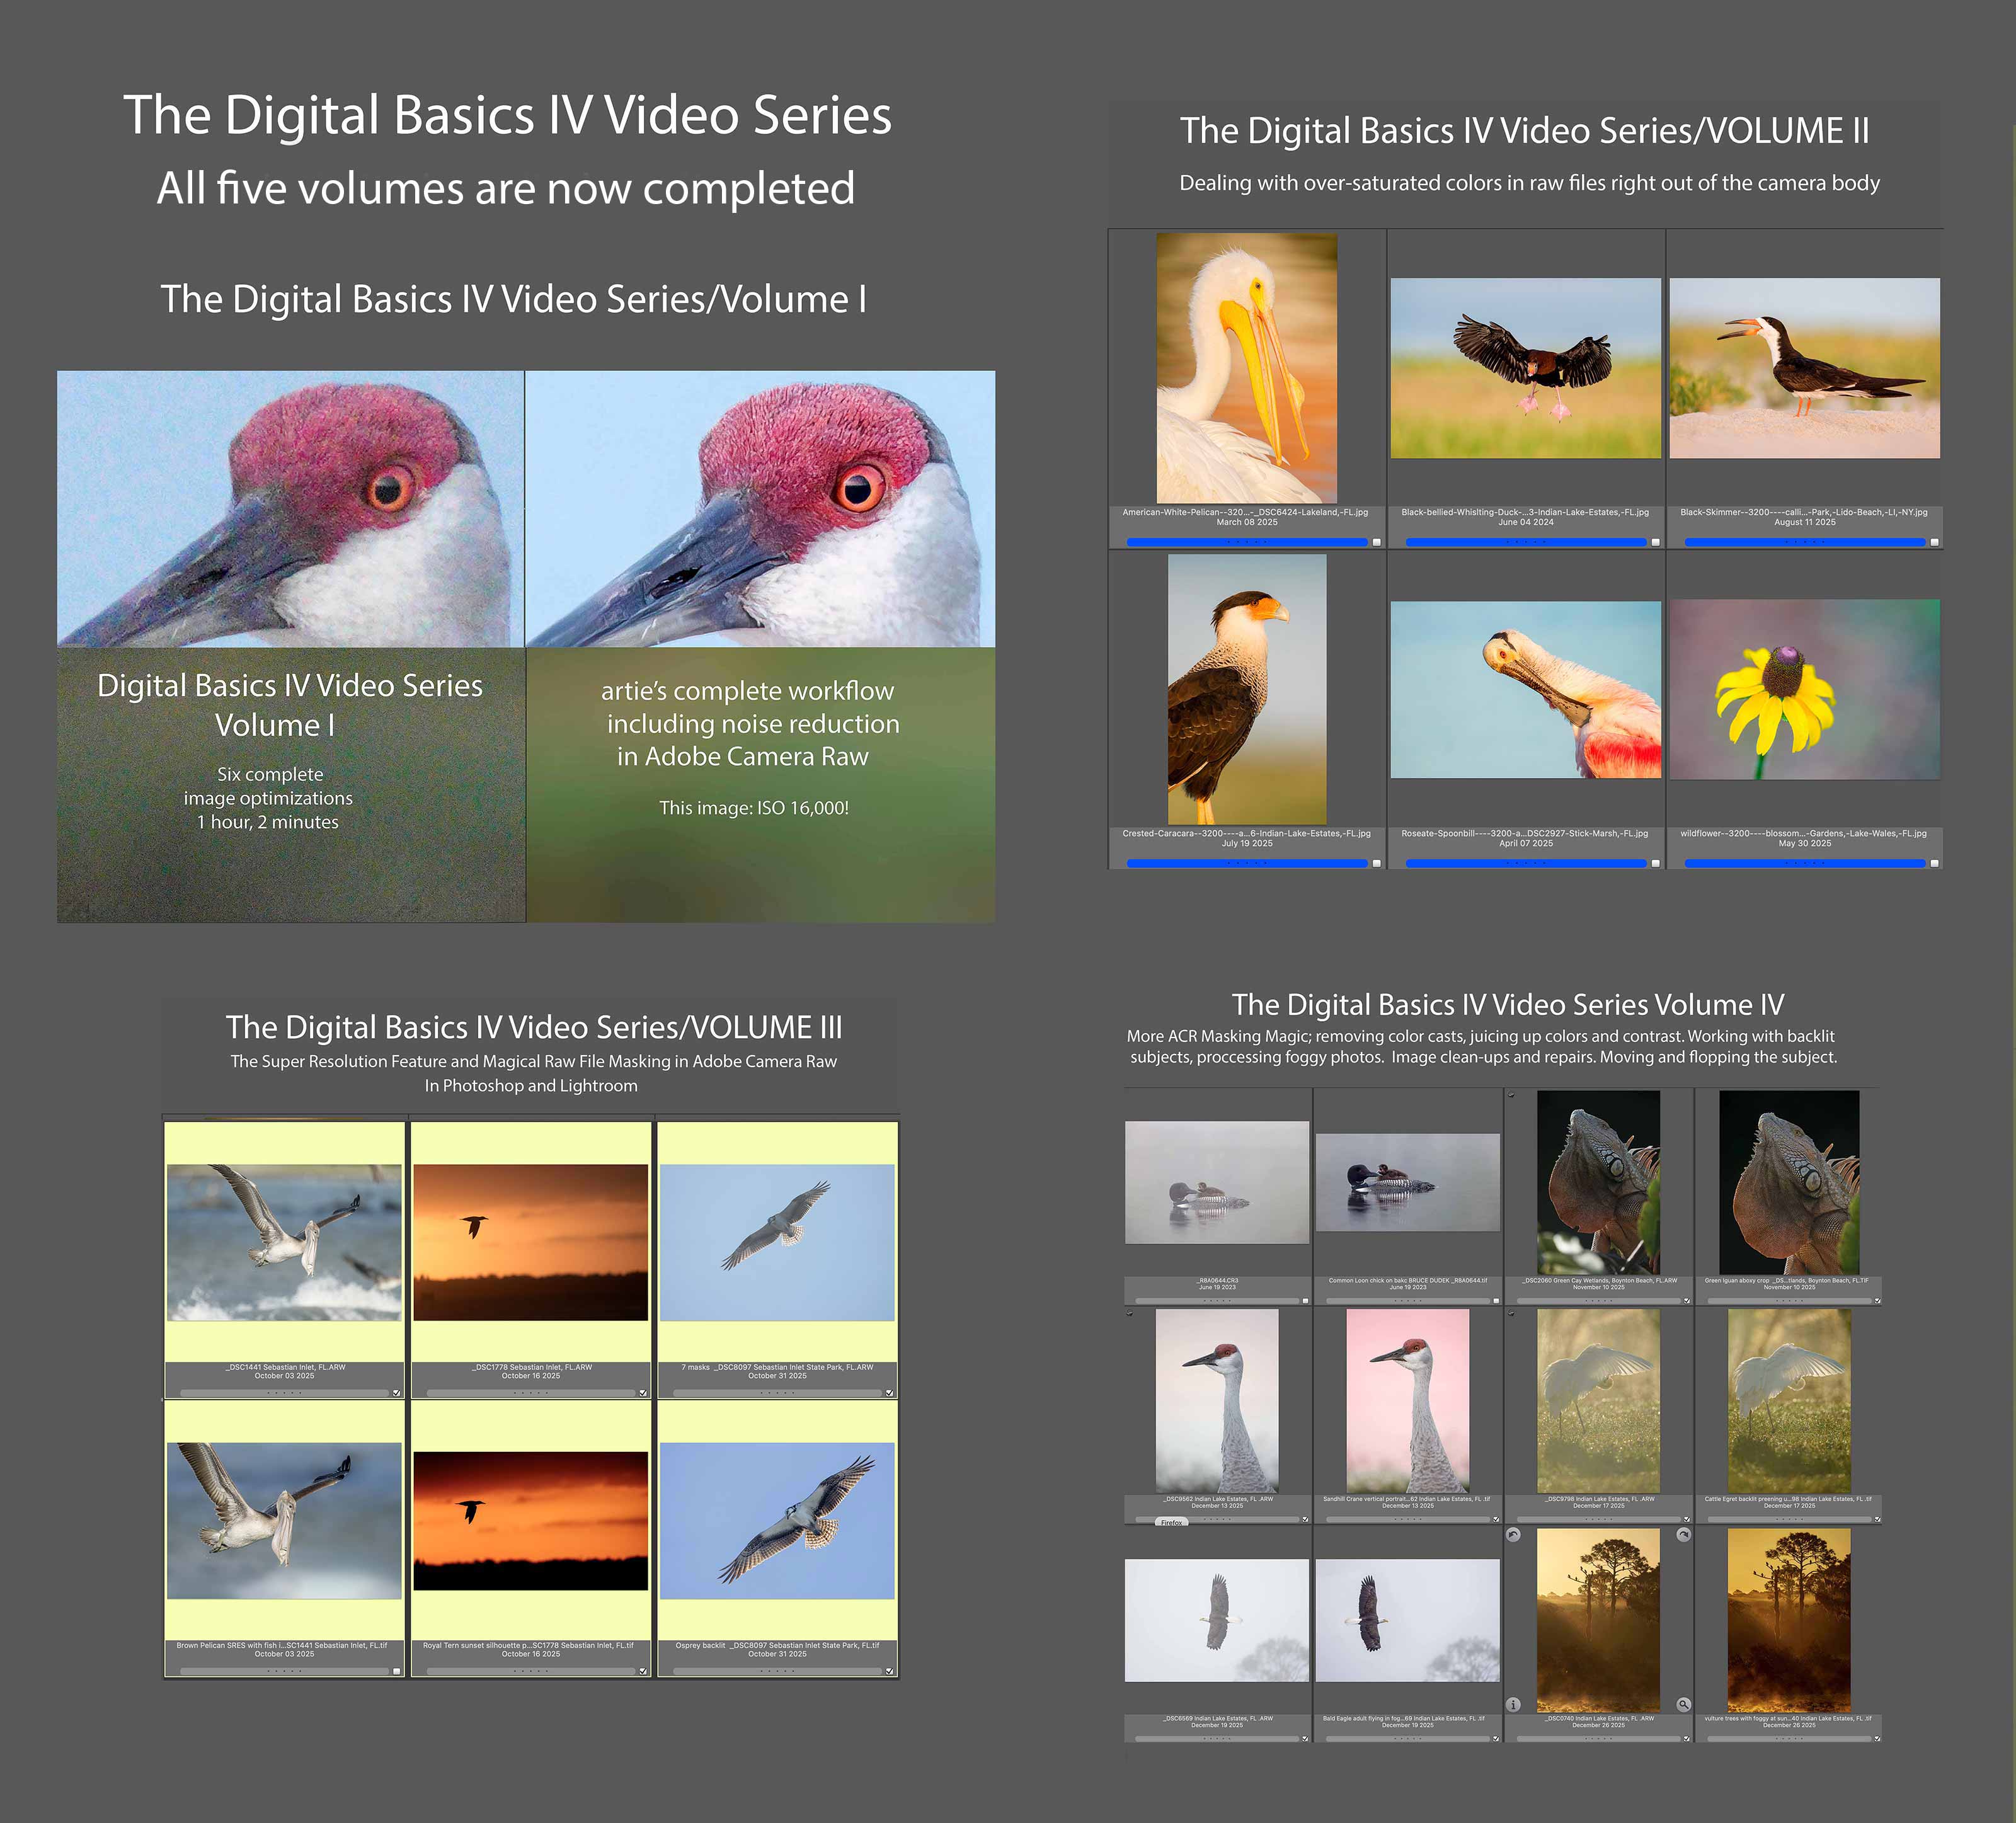
Click to enlarge. The Digital Basics IV Video Series by Arthur Morris/BIRDS AS ARTYou can save $50.00 by purchasing the entire 5-Volume Series by clicking here. |
Digital Basics IV Video Series: $146.00 for all five videos/save $50.00
I have some fabulous new image optimization tips, techniques, and tricks to share. As the Digital Basics III Video Series proved to be so popular, I decided last fall to run it back in the form of Digital Basics IV. Digital Basics V is on the horizon.
My new workflow includes the use of the masking feature in Adobe Camera Raw (thanks to Anita North), the use of the Point Color eye dropper to tame super-saturated colors during raw conversions (discovered in tandem with Anita), a fabulous new Remove Tool trick that makes my favorite Photoshop Tool even more powerful than before -— that one discovered by me. In addition, I have recently begun doing some Curves work during my ACR raw conversions.
My basic workflow remains much the same as is detailed in both the Digital Basics II PDF and in the Digital Basics III Video Series:
1- Setting the Color Temperature (when and if needed).
2- Setting the White and Black Points and adjusting the Highlights and Shadows sliders.
3- Setting the Clarity and Dehaze sliders.
4- Fine-tuning color using the Hue/Saturation/Luminance Targeted Adjustment Tool, a huge step up from the Color Mixer Tool.
5- My 2-step noise reduction technique (with most images).
Once I have the .TIF file in Photoshop, I use my usual cadre of clean-up tools and techniques including the Remove Tool, the Clone Stamp (only rarely), Divide and Conquer, Quick Masking, Layer Masking, Gaussian Blurs, an expanded array of personalized keyboard shortcuts, and tons of other image optimization strategies and methods adapted from previous versions of Digital Basics. I also demonstrate the selective use of Topaz Sharpen AI utilizing the masking feature. And last but not least, I share my JPEG creation methodology.
The Digital Basics IV Video Series is now complete.

|
The BIRDS AS ART Digital Basics Collection: $199.00. |
The BIRDS AS ART Digital Basics Collection
The best news is that learning to use the tools and techniques that I use to improve my images is made fairly simple for those who purchase, use and study the Digital Basics offerings from BIRDS AS ART. One of the great skills that I have been blessed with is writing coherent how-to instructions that can be followed easily by a third grader. Learn to unlock the potential in your images by purchasing the Digital Basics Collection here. The collection includes the Digital Basics II PDF, and all the videos in the Digital Basics III and the Digital Basics IV Video Series.
The original Digital Basics file was created in the mid-aughts when I saw countless numbers of folks creating sharp, nicely designed, well exposed images and then ruining them in Photoshop. I sold enough copies at $20.00 a pop to pay for my $68,000 lap pool! As my workflow changed and improved, various versions of Digital Basics were created to help folks learn to improve their images at the computer during post processing. Save an incredible $86.00 by purchasing the Digital Basics Collection here. Folks who own one or two of the three afore-mentioned products are invited to contact me via e-maill for personalized discount information.
Typos
With all blog posts, feel free to e-mail or to leave a comment regarding any typos or errors.









#2 for me due to the added interest from the light through the gular pouch and beak.
I have to agree with Sandra, the rim light on the Anhinga has a bit more pop than the Green Heron. Both are great shots however.
Thanks, Bags. Much appreciated.
with love, a
I genuinely appreciate both images, particularly because Little Green Herons are so skittish. However, the Anhinga portrait stands out to me due to its captivating light dynamics. It’s truly spectacular!
Thanks, Sandy. I cannot disagree 🙂 The light coming through the translucent gular region is quite loverly.
with love, a
ps: I send your 100-400mm f/4.5 guide this morning.