Your Call
Please take a moment away from Instagram, Facebook, and TikTok and leave a comment letting us know which three of today’s seven featured images are your favorites and what you liked about each.
What’s Up?
Photography at Sebastian Inlet has continued to be challenging with wind against sun conditions. Friday morning’s northeast wind was a bit better than the northwests that have predominated since Red Steven’s arrived last Sunday.
I took Eugen and Red to a new restaurant in Vero, The Oar on 19th Place. Everyone’s food was incredibly delicious; it was fine dining at its best, and not terribly pricey. It was the best meal I have had in recent memory. The Thank You dinner was supposed to be my treat. But Red had surreptitiously snuck his credit card to the waiter and my plan was spoiled. Thank you Mr. Stevens!
Today is Saturday 18 October. The forecast is the most promising in more than a week: an east wind with partly cloudy skies. We will of course be heading to the inlet early. Red leaves on Sunday afternoon. Mishael Voisin is arriving early on Monday morning and will be joining me for a full week. Eugen Dolan is heading back to Toronto this coming Friday. Whatever you choose to do, I hope that you too have a happy and productive day.
If you would like to join in the fun and learn an absolute ton, I have room at the AirBnB for you on a Sebastian Extended IPT any time from 25 October through and including 23 November. For complete details you can scroll down here, get in touch via e-mail, or try me on my cell at 863-221-2372. Please leave a message and shoot me a text if I do not pick up.
If an item — a Delkin flash card or reader, a Levered-clamp FlexShooter Pro, or a Wimberley lens plate or low foot — for example, that is available from B&H and/or Bedfords, is also available in the BAA Online Store, it would be great, and greatly appreciated, if you would opt to purchase from us. We will match or beat any price. Please remember also to use my B&H affiliate links or to earn 3% cash back at Bedford by using the BIRDSASART discount code at checkout for your major gear purchases. Doing either often earns you free guides and/or discounts. And always earns my great appreciation.
Gear Questions and Advice
Too many folks attending BAA IPTs and dozens of photographers whom I see in the field and on BirdPhotographer’s.Net, are — out of ignorance — using the wrong gear, especially when it comes to tripods and more especially, tripod heads. And the same is true in spades when ordering new camera bodies or lenses. My advice will often save you some serious money and may help you avoid making a seriously bad choice. Please know that I am always glad to answer your gear questions via e-mail. If you are desperate, you can try me on my cell at 863-221-2372. Please leave a message and shoot me a text if I do not pick up.
Don’t Just Shoot: Learn
If you are interested in changing your life and becoming a better photographer by joining me on the Extended IPT at Sebastian Inlet for Ospreys and more (OCT 25 to NOV 24, 2025), in San Diego for Pacific-race Brown Pelicans and more (JAN 6 to FEB 2, 2026), or for Roseate Spoonbills at Stick Marsh (March 2026), please e-mail for dates, rates, terms, and additional information. Or shoot me a text to 863-221-2372. Some offerings include options for shared AirBnB lodging and meals. Ground transportation during your stay is a possibility at times.
|
|
|
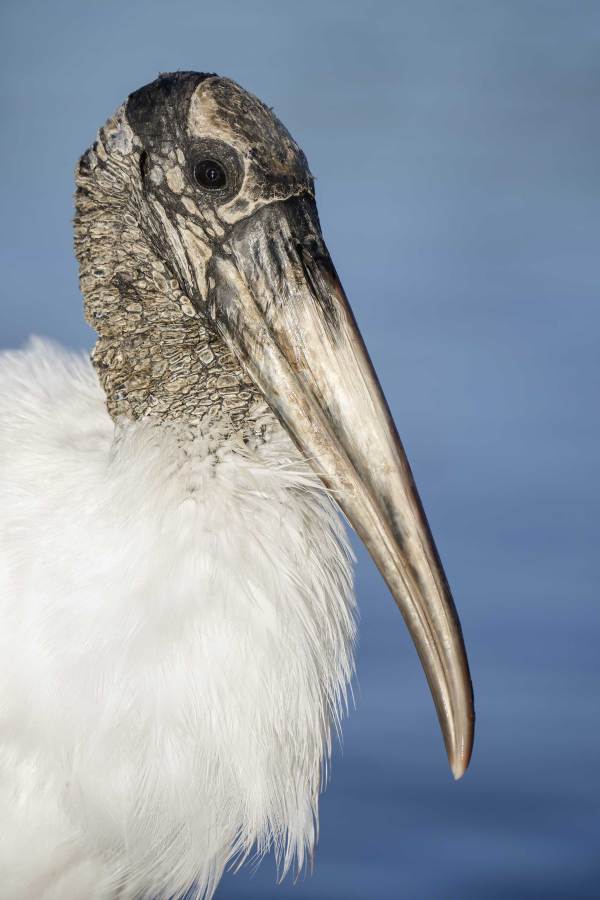
This image was created by yours truly on 13 October 2025 while leading a Sebastian Inlet Ospreys and More Extended IPT. I used the handheld Sony FE 70-200mm f/2.8 GM OSS II Lens with the Sony FE 2x Teleconverter (at 400mm) and The Latest Greatest Sony Flagship Body, the a1 II Mirrorless Camera. The exposure was determined by Zebras with ISO on the rear wheel — ISO 640: 1/3200 second at f/5.6 (wide open) in Manual mode. AWB at 8:22:35am on a sunny morning. RawDigger showed that the exposure was dead solid perfect. AWB at 6:47:10pm on a partly cloudy afternoon. Tracking: Zone/AF-C with Bird-Eye/Face Detection performed perfectly. Click on the image to enjoy the larger, inexplicably sharper high-res version. Image #1: Wood Stork adult head and shoulders portrait |
Shooting from the Hip Using the Vertically Tilted Rear Monitor
Regular readers know that I was thrilled to learn that the Sony a-1 ii would have a rear monitor that could be tilted vertically. Kneeling is both difficult and less than stable for me for a variety of reasons. While standing, I often want to get lower so that I can move the background farther from the subject. If you do not understand that concept, please leave a comment and I will prepare an explanatory diagram.
Anyhoo, now that I have two a-1 ii bodies, the solution is to put on my reading glasses, tilt the rear monitor vertically, hold the lens a bit below waist level, find and frame the subject, and make some images. With practice, this becomes fairly easy to do. As this position is not the most stable, you may experience a bit of what I call compositional bracketing — small but sometimes significant differences in the framing. It pays, therefore, to use a faster shutter speed for static subjects than you would use normally (i.e., when holding the camera to your eye and shooting through the viewfinder.
Note also: when shooting all handheld verticals your right hand should be holding the camera from above after rotating the lens counter-clockwise.
|
|
|
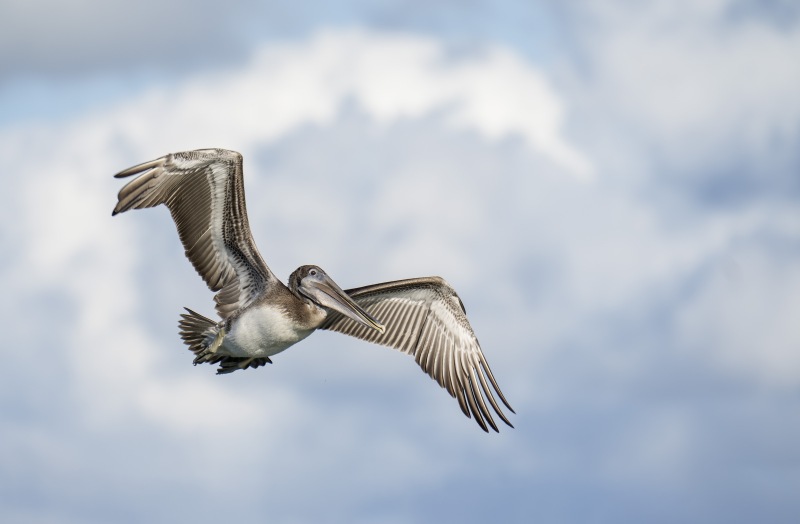
This image was created on 14 October 2025 by Alvin “Red” Stevens of Birmingham, AL on a Sebastian Inlet Ospreys and More Extended IPT. Standing at full height, he used the handheld Sony FE 70-200mm f/2.8 GM OSS II Lens with the Sony FE 2x Teleconverter (at 400mm) and The Latest Greatest Sony Flagship Body, the a1 II Mirrorless Camera. The exposure was determined by Zebras with ISO on the rear wheel — ISO 250: 1/1250 second (!) at f/5.6 (wide open) in Manual mode. AWB at 5:29:48pm on a sunny afternoon. Wide/AF-C with Bird-Eye/Face Detection performed perfectly. Click on the image to enjoy the larger, inexplicably sharper high-res version. Image #2: Brown Pelican in flight with puffy white clouds |
Pulled One Out of the Hat
We spent most of Tuesday afternoon past photographing Reddish Egrets and Wood Storks at close range. While reviewing the folder of Red’s images I was stunned to see this lovely image of a young Brown Pelican flying against a background of fluffy white clouds. Considering that he had been photographing birds for well less than two days, I was beyond astounded. Red did not remember creating the image. I gather from that that he saw the bird coming, reacted, and fired off a frame or two at just the right moment.
|
|
|
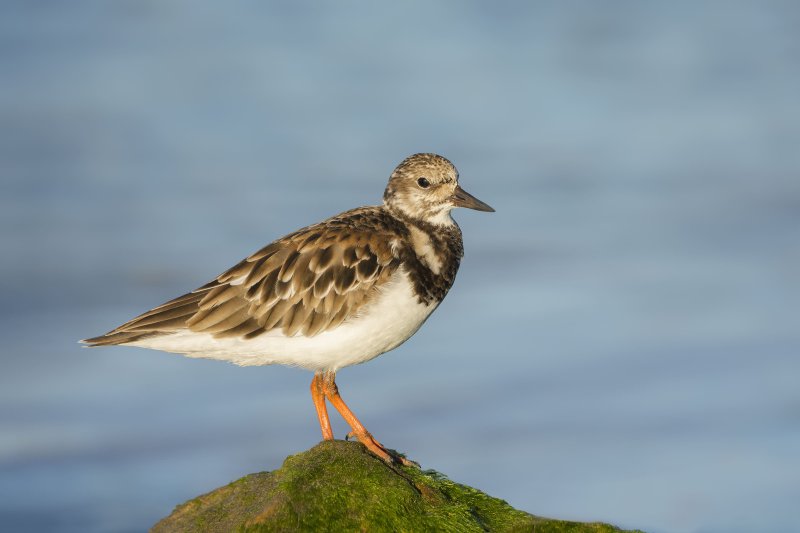
This image was created on 15 October 2025 at Sebastian Inlet State Park by IPT veteran Eugen Dolan on an Extended Instructional Photo-Tour. Seated on a rock and working low off the tilted, lowered rear monitor, he used the handheld Sony FE 200-600mm f/5.6-6.3 G OSS lens (at 376mm) and The Latest Greatest Flagship Body, the Sony a1 II Mirrorless Camera. The exposure was determined via Zebras with ISO on the Thumb Wheel. ISO 800: 1/2000 sec. at f/6.3 (wide open) in Manual mode. RawDigger showed that the exposure was perfect. AWB at 8:22:42am on a sunny morning. Wide/AF-C with Bird-Eye/Face Detection performed perfectly. Click on the image to enjoy the larger, inexplicably sharper high-res version. Image #3: Ruddy Turnstone on seaweed-covered rock |
Kudos to Eugen
Kudos to Eugen for sitting down on a rock, and — for the first time, working low off the tilted rear monitor. Again, this effectively moves the background farther from the subject and creates lovely, soft, out of focus backgrounds.
|
|
|
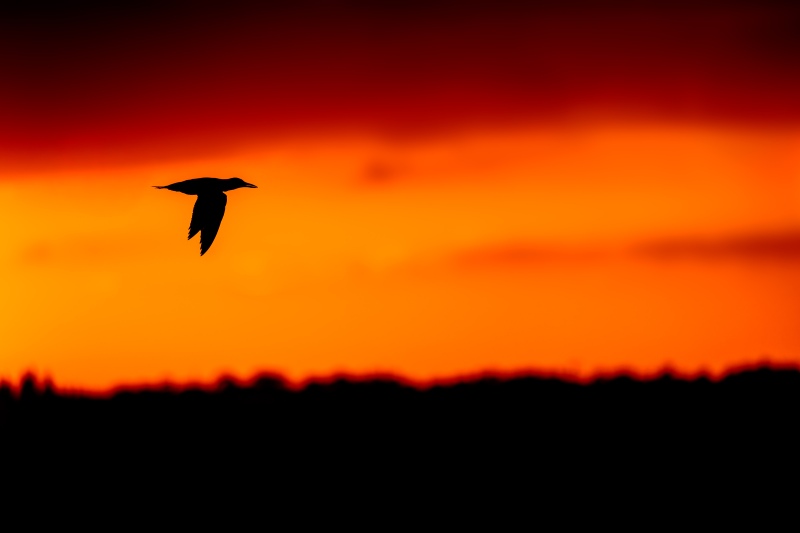
This image was created on 16 October 2025 at Sebastian Inlet State Park by yours truly while leading and Instructional Photo-Tour. Standing at full height, I used the handheld Sony FE 200-600mm f/5.6-6.3 G OSS lens (at 600mm) and The Latest Greatest Flagship Body, the Sony a1 II Mirrorless Camera. The exposure was determined by Zebras with Exposure Compensation (EC) on the thumb wheel. Multi Metering +1.0 stop. AUTO ISO set ISO 500: 1/2500 second at f/6.3 (wide open) in Shutter Priority mode. RawDigger showed that the exposure was dead solid perfect. AWB at 6:47:10pm on a partly cloudy afternoon. Wide/AF-C with Bird-Eye/Face Detection performed perfectly. Click on the image to enjoy the larger, inexplicably sharper high-res version. Image #4: Royal Tern in flight at sunset |
Wind Against Sun & Silhouettes
While wind against sun conditions are terrible for traditional frontlit flight photography, they are ideal for sunrise and in this case, sunset silhouettes. Aware of the weather forecast, we did not leave the Airbnb until after 5pm. With the sun behind us that afternoon and a 20 mph northeast wind in our faces, we struggled for more than an hour; bird photography was impossible. As the sun neared the horizon, we faced northwest and began creating silhouettes of gulls and terns against the colored skies.
|
|
|
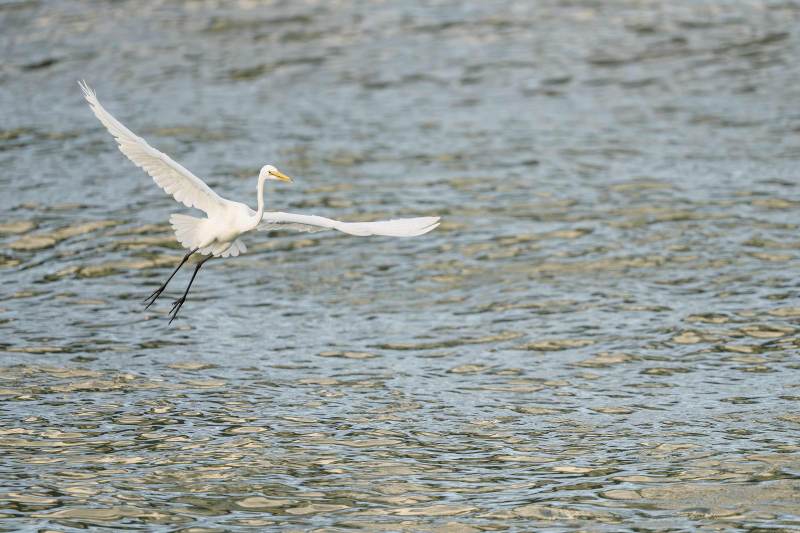
This image was created on 16 October 2025 by Alvin “Red” Stevens of Birmingham, AL on a Sebastian Inlet Ospreys and More Extended IPT. Standing at full height, he used the hand held Sony FE 300mm f/2.8 GM OSS Lens (Sony E) with the Sony FE 1.4x Teleconverter and the Latest Greatest Sony Flagship Body, the a1 II Mirrorless Camera. Exposure determined via Zebras with ISO on the Thumb Wheel. ISO 3200: 1/2000 sec. at f/4 (wide open) in Manual mode. RawDigger showed that the exposure was dead solid perfect: AWB at 7:45:20am on a cloudy morning. Tracking: Zone/AF-C with Bird Eye/Face Detection enabled performed perfectly. Image #5: Great Egret in flight |
Red’s First Session With the 300mm f/2.8 GM
After working with his 70-200 II, a-1 ii, and both teleconverters for the first 3 1/2 days of his bird photography career, I had Red borrow my 300mm f.2.8 GM on a cloudy Thursday morning. With the 1.4X TC in place, he had 420mm of reach and, at first/4, a faster kit. He took to it like a duck to water.
|
|
|
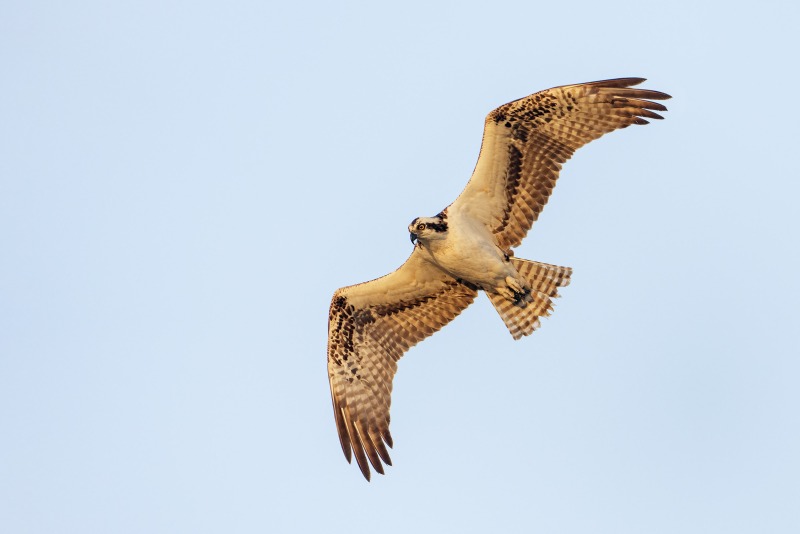
This image was created on 15 October 2025 at Sebastian Inlet State Park by IPT veteran Eugen Dolan on an Extended Instructional Photo-Tour. Seated on a rock and working low off the tilted, lowered rear monitor, he used the handheld Sony FE 200-600mm f/5.6-6.3 G OSS lens (at 376mm) and The Latest Greatest Flagship Body, the Sony a1 II Mirrorless Camera. The exposure was determined via Zebras with ISO on the Thumb Wheel. ISO 4000: 1/1600 sec. at f/6.3 (wide open) in Manual mode. RawDigger showed that the exposure was perfect. AWB at 7:44:39am on a partly sunny morning. Wide/AF-C with Bird-Eye/Face Detection performed perfectly. Click on the image to enjoy the larger, inexplicably sharper high-res version. Image #6: Osprey gliding |
Angled, Gliding Flight
Though the sun broke through the clouds early on Friday morning, the wind from the northeast was not our friend.
Ninety-nine percent of the time, the 20 or so Ospreys holding in the strong onshore wind were high above us on sun angle at fairly close range. The bad news is that they were facing and looking about 20 degrees away from us. When this bird glided toward the ocean to our left, Eugen nailed the shot with a perfect exposure and zero underwing shadows.
|
|
|
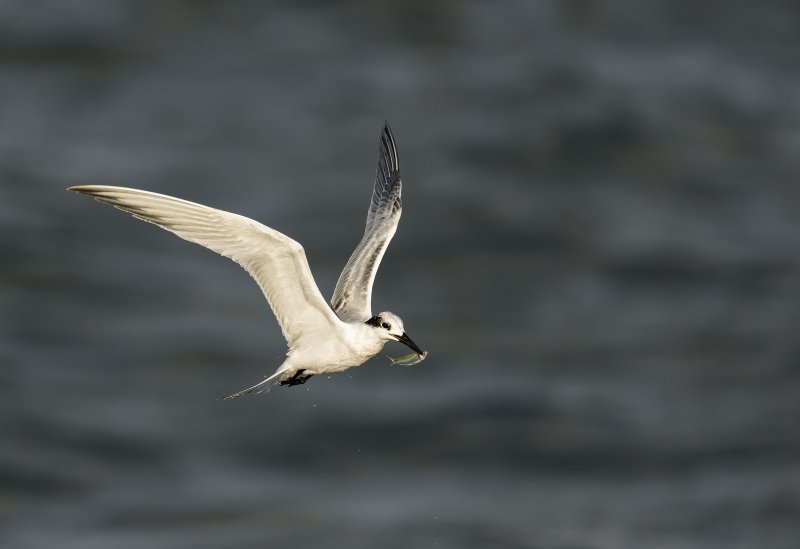
This image was created on 3 October 2025 on a Sebastian Inlet Extended IPT. Standing at full height, I used the Robus RC-5570 Vantage Series 3 Carbon Fiber Tripod/Levered-Clamp FlexShooter Pro-mounted Sony FE 600mm f/4 GM OSS lens with the Sony FE 1.4x Teleconverter and the Latest Greatest Sony Flagship Body, the a1 II Mirrorless Camera. Exposure determined via Zebras with ISO on the Thumb Wheel. ISO 1000: 1/4000 sec. at f/5.6 (wide open) in Manual mode. RawDigger showed that the exposure was dead solid perfect. AWB at 8:12:01am on a sunny morning. Tracking: Zone/AF-C with Bird Eye/Face Detection enabled performed perfectly. Click on the image to enjoy the larger, inexplicably sharper high-res version. Image #7: Sandwich Tern juvenile with baitfish |
The Best Available Situation
As only two Ospreys had caught a fish on Friday morning, I decided to concentrate on the terns fishing southeast of the base of the bridge. The photography was far more challenging than the Osprey situation that had the birds hovering but angled away from us and away from the light. As many of the terns were flying and fishing quite close to us (and right on sun angle), I would have been better off with the 200-600, but the action was hot and I did not want to miss anything so I stuck with 840mm on the tripod. Red made a few nice tern images with his 420mm rig.
|
|
|
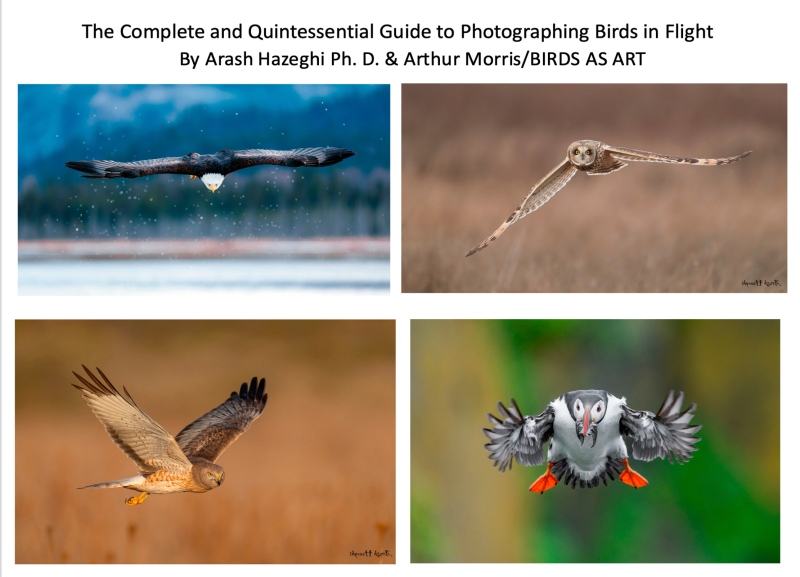
The title says it all. Purchase your copy here. The Complete and Quintessential Guide to Photographing Birds in Flight
|
The Complete and Quintessential Guide to Photographing Birds in Flight: $99.00
I had long dreamed of becoming a great flight photographer. When using dSLR gear, making sharp images was a huge problem. Most of the time, the camera bodies simply were not up to snuff. Things have changed dramatically with mirrorless technology. The high-end mirrorless camera bodies now feature science fiction-like autofocus systems and frame rates of 30, 40, and even 125 fps. Nowadays, getting the eye sharp is no longer a problem. The problem more often involves selecting the strongest image from a long series of sharp images.
The truth, however, is that there is a lot more than owning a Canon EOS R1, a Nikon Z9, or a Sony a-1 ii to consistently creating great photographs of birds in flight. Some of the biggest factors to success include gear choice, shooting strategies, and understanding the importance of sky conditions and wind speed and direction. Once you have the techniques and technical aspects down pat and can routinely create sharp images, learning the importance of flight poses, wing positions, backgrounds, and subject placement and image design enable you to create and then select superb flight images. And you guessed it, each of those topics and tons more are covered in detail in The Complete and Quintessential Guide to Photographing Birds in Flight.
The guide consists of 267 pages and 21,013 words. There are 82 illustrative photos scattered throughout the text, two screen captures, and a 112-image gallery that includes examples created by Canon, Nikon, and mostly Sony gear. As seen above, each of the 194 inspirational photos is labeled with an educational caption.
You can purchase your copy here for $99.00.
Arash Hazeghi
Arash Hazeghi, Ph.D. is a principal electron device engineer. He received his Ph.D. degree in Electrical Engineering in 2011, from Stanford University, Stanford, California. His pioneering research on Carbon Nanotubes has been cited many times. In the past decade, Arash Hazeghi has been a major contributor to the research and the development of some of the most cutting-edge technologies introduced by Silicon Valley’s most reputable names including SanDisk, Intel and Apple.
More relevant here is that he is widely recognized as one of the world’s best birds in flight photographers. He specializes in raptors and the technical aspects of bird photography.
|
|
|
Flight photography is a skill that can be studied, practiced, and learned. Improve your skills by studying The Complete and Quintessential Guide to Photographing Birds in Flight |
The Complete and Quintessential Guide to Photographing Birds in Flight
By Arash Hazeghi Ph.D., and Arthur Morris/BIRDS AS ART
What you will learn (about):
-
1- Weight and handholding super-telephoto lenses.
2- Weight and handholding intermediate telephoto and telephotos zoom lenses.
3- Choosing the right flight photography lens or lenses for you.
4- The importance of focal length for flight photography.
5- The importance of lens speed (the maximum aperture for flight photography.
6- Choosing between fixed focal lengths and zoom lenses for flight photography.
7- The importance of AF speed and performance for flight photography.
8- Handholding tips and techniques.
9- Shooting flight off a tripod with the Levered-clamp FlexShooter Pro.
10- Flight poses and wing positions.
11- Why artie changed his mind about the 400mm f/2.8 lenses for flight and more.
12- The advantages and disadvantages of using teleconverters for flight photography.
13- Why to stay away from off-brand lenses.
14- Understanding the importance of wind direction and speed for flight photography.
15- The relationship between sky conditions and wind direction and how it affects flight photography.
16- Creating flight silhouettes in wind-against-sun conditions.
17- The importance of being on sun angle for flight photography (and avoiding harsh shadows).
18- Tips on doing flight photography in cloudy, foggy, or overcast conditions.
19- About the direction of light in cloudy, foggy, or overcast conditions and how it affects flight photography.
20- How your understanding of bird behavior can dramatically improve your flight photography.
21- Tips on attracting birds for flight photography.
22- What to do when your camera’s AF system is temporarily blind.
23- The vital importance of pre-focusing.
24- How Direct Manual Focus can help you with flight photography.
25- The importance of shooting aggressively when doing flight photography.
26- Everything that you need to know with regards to rest positions for flight photography.
27- The importance of getting low when doing flight in many situations.
28- Getting the right exposure when doing flight photography.
29_ Why to use Manual mode 95% of the time for flight.
30- Tips on finding the bird in the frame, acquiring focus, and tracking the bird in flight.
31- How to set and best utilize your lens’s image stabilization feature (and why).
32- Setting the focus range limiter switch on your flight lens or lenses.
33- To choose the best shutter speed for photographing birds in flight.
34- The vital importance of pre-focusing. And yes, this is so important that it is on the list twice.
You can see four sample pages in the blog post here. And you can purchase your copy here.
Typos
With all blog posts, feel free to e-mail or to leave a comment regarding any typos or errors.



My favorite was #1, the wood stork portrait — I loved the beautiful detail in the head/beak (besides, wood storks are one of my favorites!). I would have put #3 first, but I don’t like the fact that the ruddy turnstone is in the middle of the image. Were it my photo, I would have cropped a little off the left side of the image so the bird would not have been in the middle. My third choice is #2 — a nice, simple image of an immature brown pelican against a beautiful cloudy sky.
Thanks for commenting Pat. I love all of your choices. For #2, the image design is perfect for me. We followed the Mike DeRosa rule for horizontal composition: more room in front than behind and more room above than below. Many times when you do that the bird’s head winds up in the middle of the frame. I’m betting you have dozens of birds photos with the same basic design.
with love, artie
Sounds like quite the Blog comment creation week at Sebastian Inlet, Artie! Those wind-against-sun days can be tough, but it’s great to hear the conditions are finally turning in your favor. Also, loved the bit about The Oar—always nice when a photography trip includes a memorable meal and good company.
Artie your two students are right up there with you….Especially enjoy the first three photos as the background does not distract and the birds are such that you feel like reaching out and touching them. The third with a little green foreground helps bring out colors in the bird. The 70-200 with 2x is back on the A1 ii for a while thanks to Red..
Thanks, Jim! Man, that food was great. I had the flank steak with the crispiest, tastiest fried onions ever.
a