July 4th, 2014 Galapagos 2015 Photo-Cruise
If you missed the announcement of the Galapagos July 2015 Photo-Cruise, click here and scroll down.
Used Photography Gear for Sale
After two weeks of nothing-happening four major items sold recently: Ellen Anon’s “old” 500mm and the new in the box 5D Mark III KIt offered by Chuck Pettis. The I learned that Carl Zanoni’s pristine 500 II had sold. And then Jim Bicket e-mailed saying that his immaculate 800 had sold a few days back but that he had forgotten to let me know :).
I got this from the office yesterday:
Artie: I sold the 800! I was sure I wrote you last weekend to share the good news. But I cannot find my file copy of the sent email. At any rate, I am again in your debt. Your continued reminders in the blog were much appreciated and no doubt contributed to the sale. Your commission check was mailed to you on June 30ieth. Please let me know if you do not receive it or it is not in the correct amount.
Happy to hear you are making progress with your health problems. I will have to make a decision on a hip replacement for the right (the good one!) soon. My arthritis not improving and may keep me from any workshop where extensive walking is involved. But we’ll keep plugging along and hope for a breakthrough.
Many thanks for your friendship and many courtesies! Jim
There are still some great deals and lots of used photo gear for you here. And there are a few new lenses in the pipeline that will be listed soon.
The Streak Continues: 216
It is just before 6:30 am here in Bamburgh (say BUM-bu-Ruh) as I finish today’s blog post. Our first day on the puffin boat was incredible with tame nesting seabirds at close range in all directions. After a too-sunny start we were blessed with cloudy bright conditions for the rest of the day. Here I share with you two of my favorites from the 1454 images that I created on the gannet boat in less than 2 hours. That is what I call frantic action. Most everyone in the group was too fatigued to photograph well before we headed back to the dock. Read the whole story below.
This post marks 215 consecutive days with a new blog post. With so many folks getting in the habit of using our B&H links and our Amazon logo-links why quit now? April, May and June have been fantastic as lots of folks are getting the message; using my affiliate links does not cost you a penny and helps support my efforts here. To show your appreciation, I do ask that you use our B&H and Amazon affiliate links on the right side of the blog for all of your purchases. Please check the availability of all photographic accessories in the BIRDS AS ART Online Store, especially Gitzo tripods, Wimberley tripod heads, and the like. We sell only what I have used and tested, and know that you can depend on. We will not sell you junk. We know the tools that you need to make creating great images easy and fun. And we are always glad to answer your gear questions via e-mail.
You can find the following items in the store: Gitzo tripods, Mongoose M3.6 and Wimberley heads, plates, low feet, and accessories, flash brackets, , Delkin e-film Pro Compact Flash Cards, LensCoat products, and our unique line-up of educational materials including ABP I & II, Digital Basics, Site and Set-up e-Guides, Canon and Nikon Camera Users and AF e-Guides, and MP-4 Photoshop video tutorials among others.
I would of course appreciate your using our B&H affiliate links for all of your major gear, video, and electronic purchases. For the photographic stuff mentioned in the paragraph above we, meaning BAA, would of course greatly appreciate your business. Here is a huge thank you to the many who have been using our links on a regular basis and visiting the BAA Online store as well.
|
|
|
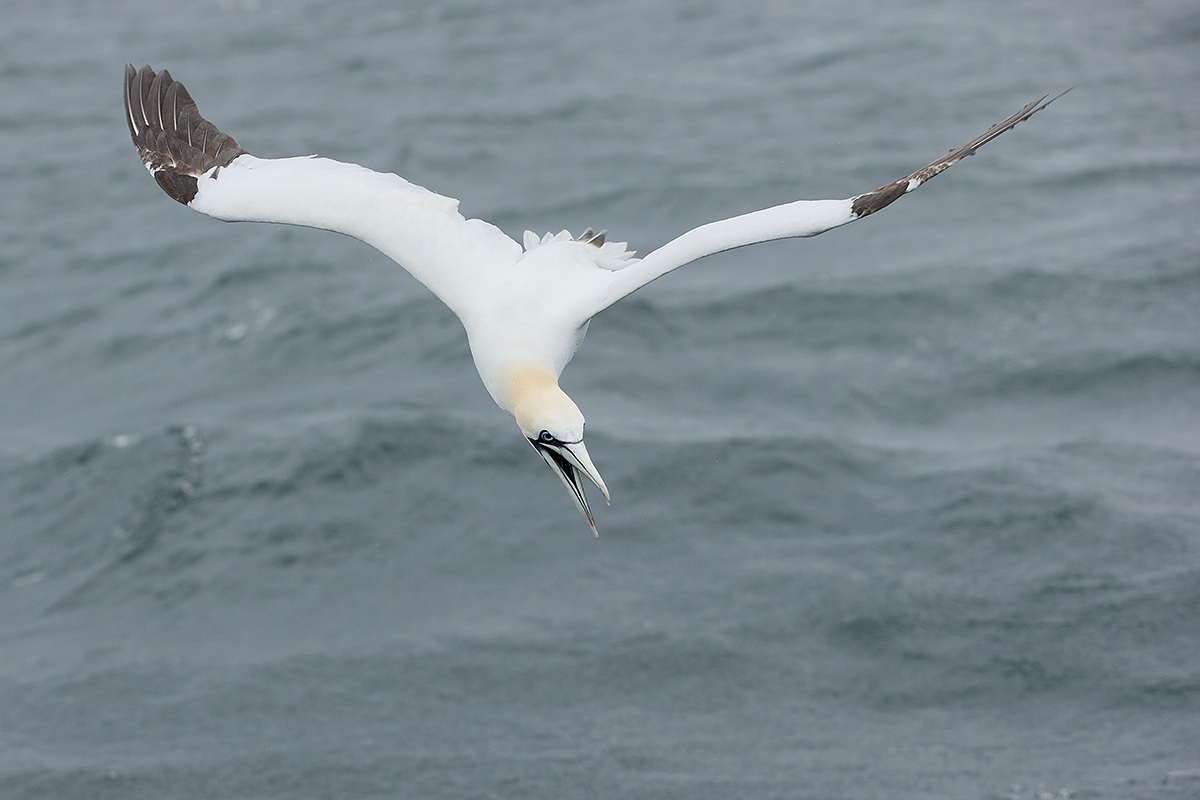
This image was created on the gannet boat on the UK Puffins and Gannets IPT with the Canon EF 70-200mm f/2.8L IS II USM lens (hand held at 100mm) and the Canon EOS-1D X. ISO 400. Evaluative metering +1 2/3 stops off the white sky: 1/2000 sec. at f/4.5 in Manual mode.
Central sensor Surround/AI Servo Rear Focus AF just caught the bird’s face and was active at the moment of exposure. Click here to see the latest version of the Rear Focus Tutorial. Click on the image to see a larger version.
Image #1: Outta My Way!
|
Left Hand on the Stick
Denise, long-time IPT Veteran Mike Goldhamer, new BAA-friend George Golumbeski, and I were on the same flight from Newark to EDI, UA 36. We got into Edinburgh, Scotland about 20 minutes early. Soon we met up with Donna Bourdon who made her tight connection in Paris and finally found long-time IPT veteran Jean-Luc Vailliant at Domestic Arrivals; he had flown in from London….
I had envisioned us getting to our hotel in Bamburgh, UK, way too early to check in. Not. Our vans were being “delivered” to the airport and it took us more than 2 hours to find the drivers and learn a bit about our 12-passenger mini bus and our 7-passenger SUV. I had e-mailed and called the company several times to make sure that they removed the last row of seats in the mini-bus and had confirmed that we were to have a GPS in each vehicle. They had removed the last row of seats but there were no GPS units in sight anywhere :).
After a round of phone calls we realized that we would be going GPS-less. George came to our rescue and Google Maps on his I-phone has been our guiding beacon ever since. Thank God for Mr. Golumbeski!
South we headed down the A1 looking for some gas; both vehicles had been delivered practically empty. I was driving the mini-bus. I guess that it was mini as compared to a Greyhound bus but I kept hitting the curb on the right and driving over the medians when I turned the monster. Ah, I forgot to mention a few things: Denise and I would need to remember to drive on what for us was the “wrong” side of the road. And both vehicles had manual transmissions. We had anticipated that not being a problem at all until we realized that we would have to work the stick with our left hands. That frazzled my brain. I kept reaching out with my right hand for the stick and when it was not there I found myself for no reason at all trying to operate both the clutch pedal and the brake pedal with my left foot. That with the expected result of the vehicle coming to a shuddering stop in the middle of the highway…. While I had been confident before I got into the driver’s seat and Denise had been somewhat fearful, she did much better than I did.
We finally found a petrol station in Dunbar; filling up both vehicles with diesel foul cost in excess of $350 US dollars. We had a leisurely meal at a nearby garden shop where they refused to take our lunch orders until precisely 12 noon. During lunch I came up with a great plan. We would enjoy some down time and then head to Dunbar harbor to meet the boatman thus saving an 80 minute drive south followed by an 80 minute drive north to wind up pretty much in the same spot. Great plan not. It was Donna who realized that we would need to do the drive in order to pick up Bear Boat veteran David Neilson and his wife Robin who had arrived a few days early and were already in Bamburgh.
Now we were worried about getting to the hotel and getting to the boat on time.
We arrived at the hotel at about 2pm, got checked in, and realized that it would make total sense to take only the larger vehicle. So we did. And I drove since Denise was having no part of our not-mini-bus. On the way to the dock I realized that I had left the 3,000 British pounds in cash in my laptop bag that was safely in the hotel room. When we finally arrived a few minutes late our boatman was not a happy boatman. In fact, when I began to speak he knew what was coming. In short order he agreed to take us out. I would pay him the cash for both trips when we returned on July 7th.
|
|
|
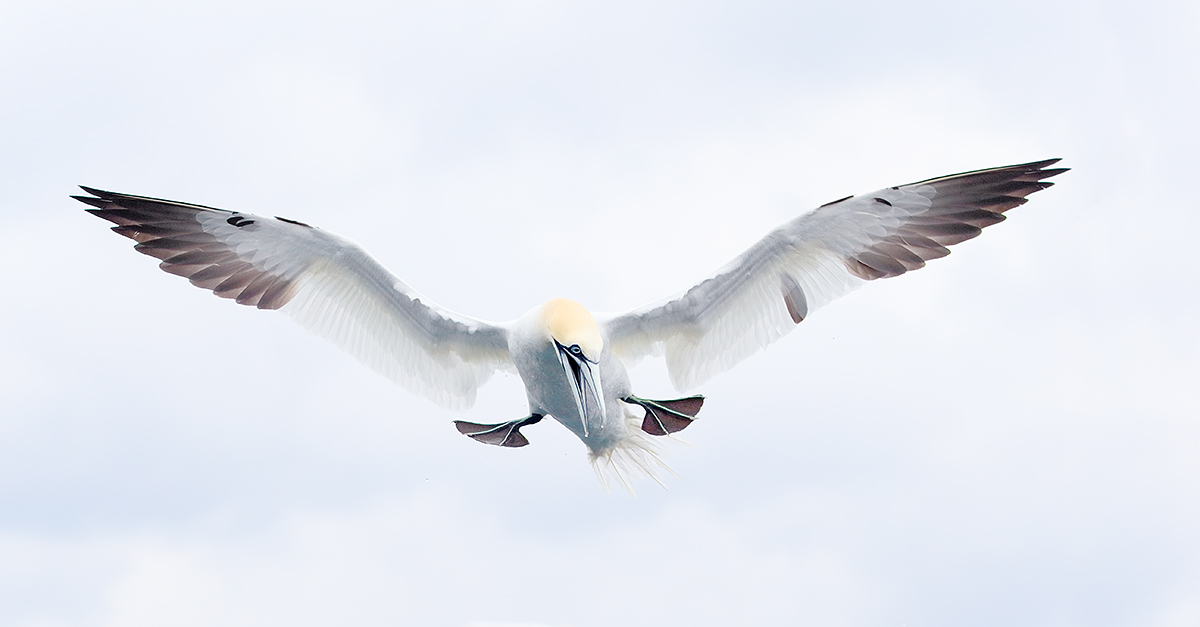
This image was also created on the gannet boat on the UK Puffins and Gannets IPT, this one with the Canon EF 70-200mm f/2.8L IS II USM lens (hand held at 140mm) and the and the Canon EOS-1D X. ISO 800. Evaluative metering +2 srey stops off the dreary grey sky was still a significant under-exposure: 1/2000 sec. at f/4 in Manual mode. AWB
Central sensor Surround/AI Servo Rear Focus AF on the bird’s right foot was active at the moment of exposure. Click here to see the latest version of the Rear Focus Tutorial. Click on the image to see a larger version.
Image #2: Spotting the Fish
|
The Gannet Boat
Having baited gannets with fish previously at another location, I said to the captain, “These folks have no idea what to expect.” He said in his thick Scottish brogue, “You have too much confidence in us laddie.” Again he was teasing me.
Once we got the birds coming, the action was nonstop for about 90 minutes. At the one hour mark most folks quit because they no longer had the strength to raise their lenses. I carefully explained to the captain exactly how to position the boat and where to have Eric the mate toss the dabs. Though the action was amazing the photography was difficult. There were so many birds in the air at once that isolating a single bird was nearly impossible. I kept going the whole time though I am not sure how. But even I was forced to give up the ghost after a while.
A Tale of Heroism and Exhaustion
We were back at the dock by 7:20pm and I was driving south in short order. We planned to stop for some chow in Berwick (say BERR-ick) as it was about the halfway mark between Dunbar and Bamburgh. Was I tired when we started? Well, actually I was far beyond tired. And jet-lagged. I had slept for about 2 hours on the flight over. As I had gotten up at 5am on Tuesday to finish packing that meant that I had had 2 hours of sleep in the previous 32 hours….
When we stopped at a pub for dinner I grabbed a bag of potato chips and napped in the car while the group ate. I would not have made it safely back to the hotel without that nap.
When we finally made it back to the hotel with the mini-bus in one piece, Denise led the cheers for me. 🙂
Nickerson Baby Beach-nesting Birds IPT: 3-Full Days/July 15-17, 2014: $1199. Introductory meet and greet: 8pm, Monday, July 14, 2014. Co-leaders Arthur Morris and Denise Ippolito
Late Registration Discount: Call Jim weekdays at 863-692-0906 for details. Or contact me via e-mail.
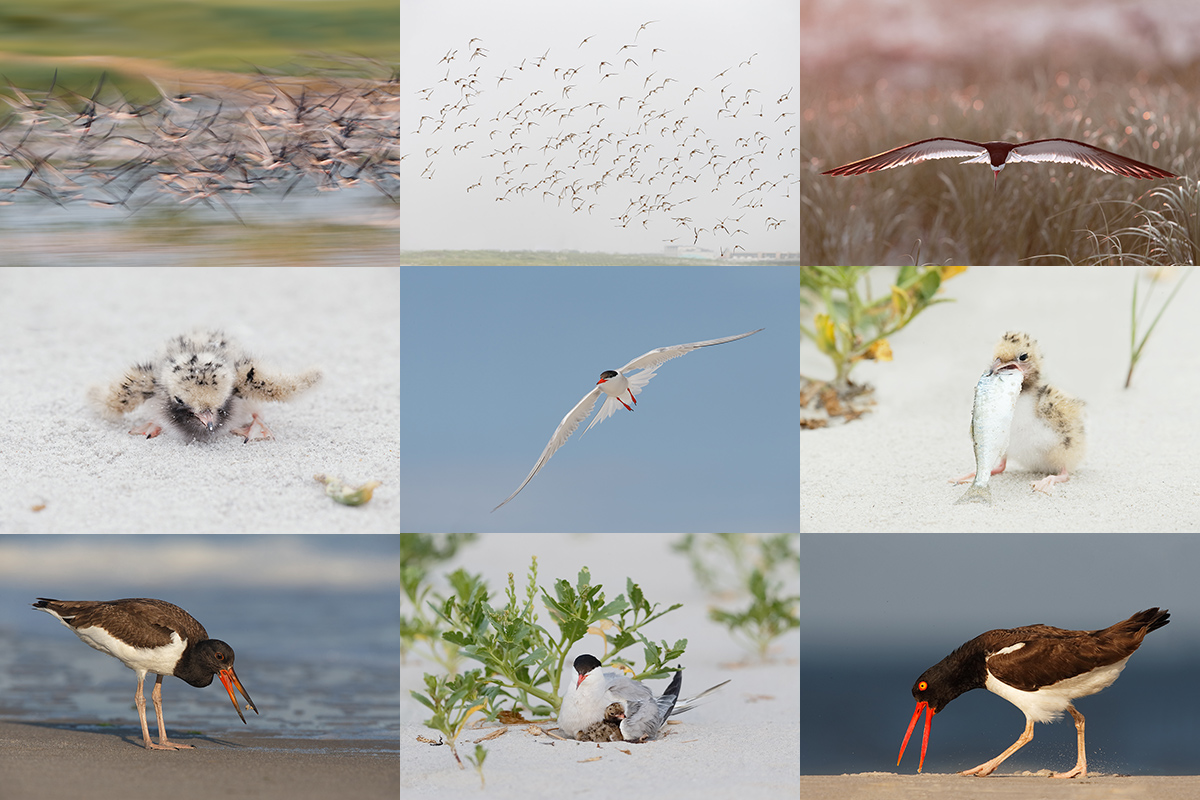
With a small group pretty much guaranteed, do consider joining us on Long Island, NY this coming July to photograph Black Skimmers–it’s looking like a great year for skimmer nesting, Common Terns with chicks, American Oystercatcher families, and possibly some just-hatched Black Skimmer chicks. The opportunities will include chances to photograph a variety of breeding behaviors including courtship feeding, display flight and combat, and copulations. Car-pooling is recommended; if we opt to return to the beach before 5pm on cloudy days for example) there is a $30/vehicle parking fee that is not included so it is best to share that expense. Parking in the morning is free.
Because of the late date, your non-refundable payment in full is due when you register.
Please print, complete, and sign the form that is linked to here and shoot it to us along with your deposit check (made out to “Arthur Morris.”) Though we prefer a check, you can also leave your deposit with a credit card by calling the office at 863-692-0906. If you register by phone, please print, complete and sign the form as noted above and either mail it to us or e-mail the scan.
If you have any questions, please feel free to contact me via e-mail
Facebook
Be sure to like and follow BAA on Facebook by clicking on the logo link upper right. Tanks a stack!
Support the BAA Blog. Support the BAA Bulletins: Shop B&H here!
We want and need to keep providing you with the latest free information, photography and Photoshop lessons, and all manner of related information. Show your appreciation by making your purchases immediately after clicking on any of our B&H or Amazon Affiliate links in this blog post. Remember, B&H ain’t just photography!
…..
Amazon Canada
Many kind folks from north of the border, ay, have e-mailed stating that they would love to help us out by using one of our affiliate links but that living in Canada and doing so presents numerous problems. Now, they can help us out by using our Amazon Canada affiliate link by starting their searches by clicking here. Many thanks to those who have written.
Typos
In all blog posts and Bulletins, feel free to e-mail or to leave a comment regarding any typos, wrong words, misspellings, omissions, or grammatical errors. Just be right. 🙂
July 3rd, 2014 Galapagos 2015 Photo-Cruise
If you missed the announcement of the Galapagos July 2015 Photo-Cruise, click here and scroll down.
Used Photography Gear for Sale
After two weeks of nothing-happening two major items sold recntly: Ellen Anon’s “old” 500mm and the new in the box 5D Mark III KIt offered by Chuck Pettis. See lots more great used photo gear including the perfect big lens for you here. Cheap! There are 2 folks seriously interested in Carl Zanoni’s 500 II…. I just this second learned that Carl’s lens sold as well!
The Streak Continues: 215
It is just before 7:00 am here in Bamburgh (say BUM-bu-Ruh) as I finish today’s blog post. The UK Puffins and Gannets IPT got off to an incredible start late yesterday afternoon with an incredible gannet boat trip–I hope to edit my 1347 images before we leave for our first full day of puffin boat trips. Lots on the gannet boat tomorrow. This post took about 1 1/2 hours to prepare. Enjoy and learn.
ps: recount update: 1454 images. All in less than 2 hours; that is what I call frantic action. Most everyone in the group was too fatigued to photograph well before we headed back to the dock.
This post marks 215 consecutive days with a new blog post. With so many folks getting in the habit of using our B&H links and our Amazon logo-links why quit now? April, May and June have been fantastic as lots of folks are getting the message; using my affiliate links does not cost you a penny and helps support my efforts here. To show your appreciation, I do ask that you use our B&H and Amazon affiliate links on the right side of the blog for all of your purchases. Please check the availability of all photographic accessories in the BIRDS AS ART Online Store, especially Gitzo tripods, Wimberley tripod heads, and the like. We sell only what I have used and tested, and know that you can depend on. We will not sell you junk. We know the tools that you need to make creating great images easy and fun. And we are always glad to answer your gear questions via e-mail.
You can find the following items in the store: Gitzo tripods, Mongoose M3.6 and Wimberley heads, plates, low feet, and accessories, flash brackets, , Delkin e-film Pro Compact Flash Cards, LensCoat products, and our unique line-up of educational materials including ABP I & II, Digital Basics, Site and Set-up e-Guides, Canon and Nikon Camera Users and AF e-Guides, and MP-4 Photoshop video tutorials among others.
I would of course appreciate your using our B&H affiliate links for all of your major gear, video, and electronic purchases. For the photographic stuff mentioned in the paragraph above we, meaning BAA, would of course greatly appreciate your business. Here is a huge thank you to the many who have been using our links on a regular basis and visiting the BAA Online store as well.
Canon and Me…
Marc Cox kindly left a comment on the 300 II, 200-400, & 600 f4L IS II/Canon Big Lens Gear Bag Questions blog post here on Tuesday past. I replied briefly just before getting on the plane to Scotland but felt that his comments were so out of line that I would share them with you along with a more detailed response.
Why some folks go out of their way to comment at length in a negative fashion without having a clue as to what they are talking about is beyond me. I love when stuff like this happens as it gives me a chance to set the record straight. I take notes like this as compliments that speak of the success that I have been blessed with over the past two decades. Success, I might add, that has come mainly not due to my possessing any great skills other than the desire to work hard and my determination to succeed after being told numerous times in the early 1990s that it would be impossible for me to make a decent living photographing birds….
MC: Hi Artie, Firstly thanks for your time and the insight you provide on your blog.
AM: YAW.
MC: I was looking through the choices of gear that you are thinking of taking on your trip to Scotland recently. Artie it is a pretty self- indulgent list – 3 of this and 2 of this oh by the way 2 Canon 1dDx’s and 3 extenders etc., etc.
AM: Self-indulgent makes no sense to me. My lenses are the tools of my trade. Cameras and teleconverters are among my most important tools. To go on a big international trip without proper back-ups at hand is just plain stupid. What you see as self-indulgent I see as sensible and prepared.
MC: For the most of us this is just camera porn. Truly, how many photo pros in the world can really stroke their chin and think about such gear to take.
AM: Many. Not to mention countless friends and clients who have as much or more gear than I do.
MC: I know people like Greg de Toit, winner of the Wildlife Photographer of the year has no such choices nor do many other pros.
AM: I am not at all of sure of what your point is. Perhaps your comment was meant to be insulting? Congrats to Greg; I have eight honored BBC images myself.
I have long espoused three things that are relevant here:
1-folks should buy the best gear that they can afford.
2-It ain’t the lens and it ain’t the camera. It is the heart, soul, skill, and vision of the person holding the gear that matters.
3-Folks should spend more time studying and practicing with the gear that they own instead of worrying about buying the next great lens or camera body.
MC: It is really time Artie for you to come clean and say what of your gear is free from Canon so we, as your reading public, can truly make our mind up about the potential bias in your judgments.
AM: It is really time for you to come clean and apologize Mark as none of my gear is or ever has been “free from Canon.” I receive a small discount off the best retail prices–Canon calls it 10% off low dealer net–that ranging from about 8% to no more than 10% off. BTW, someone here is clearly biased.
MC: It is quite clear that Canon seem always to be slightly better than Nikon (surprise surprise).
AM: It is not a big surprise that most folks feel that the big Canon lenses of recent years are quite excellent. It is very rare that I state that Canon is “slightly better than Nikon” but when it comes to comparing the current 200-400s for example, I really cannot help but state the facts: the Canon 2-4 with internal extender kills the Nikon 2-4 six ways to Sunday.
MC: Yes, I have heard your reasoned opinion on this but however your reading audience would be glad to know if your gear is supplied free by Canon as is many Canon photographers.
AM: Here, and there is no polite way to say this, but you are full of it. You should try getting your facts straight. As I noted above, none of my gear is given to me by Canon. None as in zero, zilch, nada. The hard-earned money that I use to buy all of my Canon gear comes out of my pocket. And with the possible exception of Art Wolfe many years ago, I know of no pros in the US who receive their gear free from Canon. And that story was an unconfirmed rumor. Art Wolfe is no longer an Explorer of Light; he left the program several years ago.
MC: You see Artie when you enter the Canon is better than Nikon blog, as you have done in the past, re: lenses, we need to know that you are sponsored by Canon.
AM: As an Explorer of Light, Canon has supported most of my speaking events for nearly two decades now. And I get paid nicely on occasion for various writing assignments. But as someone who is obviously late to the party, you have not realized that that fact has been revealed here and in my various books for years.
MC: If you study history the first thing they teach you is to deduct bias and the reason for that bias. No matter how much you tell us you are objective, how can we believe this if you are, as I believe you are, supplied with free kit from Canon which might total what, 50-100,000 dollars.
AM: Again Mark, you are totally full of it and I think that I forgot the “sh.” Please let us know where do you come up with such drivel? And why on earth would you choose to pass along such stuff as fact?
MC: I have gone to Africa a few times with one camera and two lenses, got some good snaps.
AM: I applaud you. Trips to Africa are not cheap….
MC: Your blog is fantastic, great insight and I have learnt a lot, but you really have got to read through some of it.
AM: I am truly sorry that you have to work so hard to dig out the free information that I provide pretty much on a daily basis; you have my sincere apologies.
MC: It can sound pretty materialist stuff, ever so slanted the Canon way and I think we are all a bit too old around the edges for that now.
AM: Please speak for yourself. Over the years I have created a few dozen images at most with Nikon Digital gear. Though I rarely engage in the Canon/Nikon wars, I must say that I was not impressed at all by the Dark Side stuff, that surely in part due to my familiarity with Canon camera bodies. I do comment regularly on the gear that I have used and depended on for more than 3 decades.
MC: Please, please, keep it real regarding real world photographer’s needs with real world photographers budgets paid for by themselves and please don’t go in for Canon is better than Nikon crap.
AM: Well, it surely seems that you know a lot about the crap business. Just for the record, there are 7 folks on the puffin trip. At least 4 of them own 600 IIs. And two of those folks also own the 200-400. That is my real world. Not to mention that everyone, no matter how humble their gear, can learn a ton just by looking at the captions for each image.
MC: There is no need for a reply Artie. I am a follower of yours nothing more, but I really felt these points need to be made to ground some of this in reality.
AM: Whatever.
MC: Cheers mate.
AM: If you do reply you might consider apologizing. If you have any more nasty stuff to pitch you will be spammed mate. Cheers yourself. artie
Support the BAA Blog. Support the BAA Bulletins: Shop B&H here!
We want and need to keep providing you with the latest free information, photography and Photoshop lessons, and all manner of related information. Show your appreciation by making your purchases immediately after clicking on any of our B&H or Amazon Affiliate links in this blog post. Remember, B&H ain’t just photography!
…..
Amazon Canada
Many kind folks from north of the border, ay, have e-mailed stating that they would love to help us out by using one of our affiliate links but that living in Canada and doing so presents numerous problems. Now, they can help us out by using our Amazon Canada affiliate link by starting their searches by clicking here. Many thanks to those who have written.
Typos
In all blog posts and Bulletins, feel free to e-mail or to leave a comment regarding any typos, wrong words, misspellings, omissions, or grammatical errors. Just be right. 🙂
July 2nd, 2014 Galapagos 2015 Photo-Cruise
If you missed the announcement of the Galapagos July 2015 Photo-Cruise, click here and scroll down.
Used Photography Gear for Sale
After two weeks of nothing-happening two major items sold yesterday: Ellen Anon’s “old” 500mm and the new in the box 5D Mark III KIt offered by Chuck Pettis. See lots more great used photo gear including the perfect big lens for you here. Cheap! There are 2 folks seriously interested in Carl Zanoni’s 500 II….
The Streak Continues: 214
It is just before 7:00pm here in Newark Airport as I finish tomorrow’s blog post. Jim should be publishing this tomorrow morning before his walk. We take a red eye flight to Edinburgh, Scotland, arriving in the UK at 7:55am on Wednesday morning. This post took about 1 1/2 hours to prepare. Enjoy and learn.
This post marks 214 consecutive days with a new blog post. With so many folks getting in the habit of using our B&H links and our Amazon logo-links why quit now? April, May and June have been fantastic as lots of folks are getting the message; using my affiliate links does not cost you a penny and helps support my efforts here. To show your appreciation, I do ask that you use our the B&H and Amazon affiliate links on the right side of the blog for all of your purchases. Please check the availability of all photographic accessories in the BIRDS AS ART Online Store, especially Gitzo tripods, Wimberley tripod heads, and the like. We sell only what I have used and tested, and know that you can depend on. We will not sell you junk. We know the tools that you need to make creating great images easy and fun. And we are always glad to answer your gear questions via e-mail.
You can find the following items in the store: Gitzo tripods, Mongoose M3.6 and Wimberley heads, plates, low feet, and accessories, flash brackets, , Delkin e-film Pro Compact Flash Cards, LensCoat products, and our unique line-up of educational materials including ABP I & II, Digital Basics, Site and Set-up e-Guides, Canon and Nikon Camera Users and AF e-Guides, and MP-4 Photoshop video tutorials among others.
I would of course appreciate your using our B&H affiliate links for all of your major gear, video, and electronic purchases. For the photographic stuff mentioned in the paragraph above we, meaning BAA, would of course greatly appreciate your business. Here is a huge thank you to the many who have been using our links on a regular basis and visiting the BAA Online store as well.
|
|
|
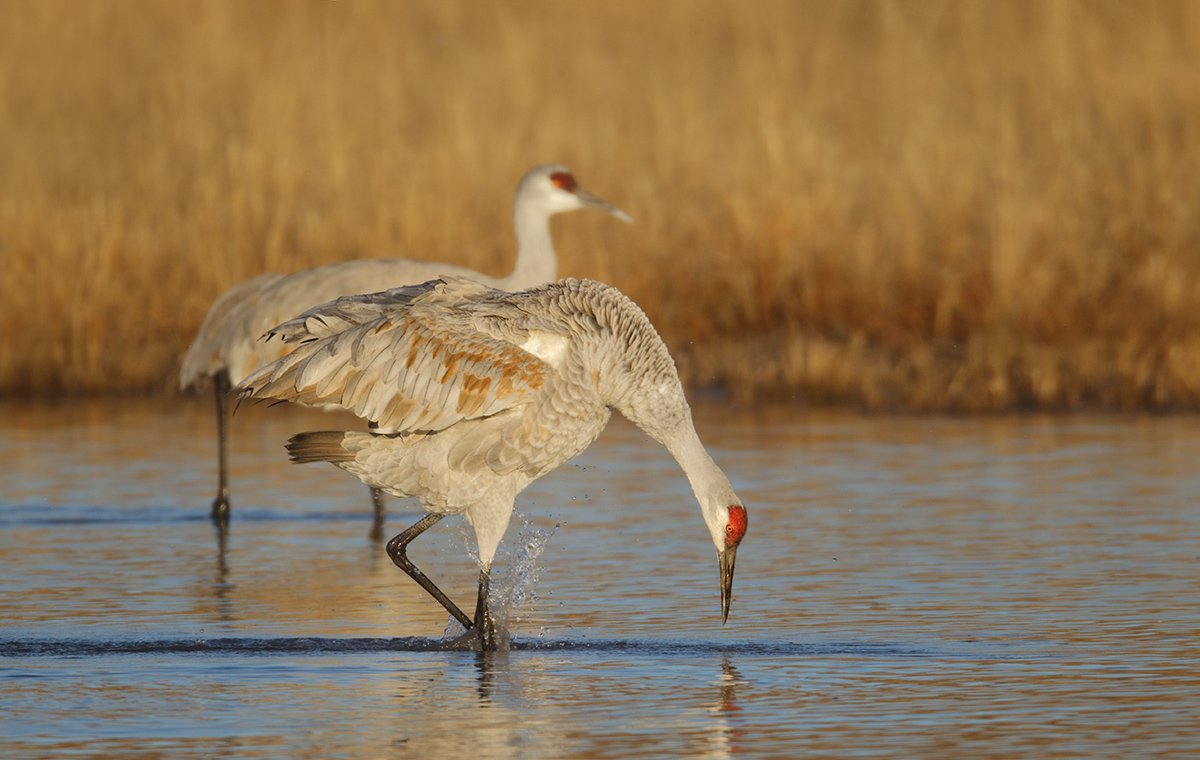
This image was created on the 2011 Bosque IPT on NOV 23 at 7:23am with the Gitzo 3532 LS carbon fiber tripod, the Mongoose M3.6 head, the Canon EF 800mm f/5.6L IS USM lens, the Canon Extender EF 1.4X III, and the EOS-1D Mark IV (now replaced by the Canon EOS-1D X. ISO 400. Evaluative metering +2/3 stop off the yellow grasses: 1/1000 sec. at f/8 in Manual Av mode. AWB.
Central Sensor (by necessity)/AI Servo-Expand/Rear Focus AF on the base of the bird’s neck was active at the moment of exposure. When you add the 2X TC to an f/4 lens with the 1DX or the 5D III hit the MFn button once to toggle to AF Expand and enjoy 4 extra AF sensors. Learn everything there is to know about the 1D X and 5D III AF systems including how to manage the various AF Area Selection Modes, when to use which one, and several ways to move the AF sensor around in the 1D X AF Guide and the 5D Mark III User’s Guide. Click here to see the latest version of the Rear Focus Tutorial. Click on the image to see a larger version.
|
The Forgotten 800mm f/5.6L IS Lens
Folks who have been here for several years know how much I used and loved the 800 after initially dissing it :). With the higher ISOs getting better with each new generation of camera bodies, working at f/9 or f/10 with the 1.4X TC in place is not a problem at all. For folks who work with small, less than tame birds and who have trouble making sharp images with a 2X TC, the 800 has long been the way to go. And it continues to be a great lens for anyone who loves birds.
Those interested in this lens are invited to type 800mm f/5.6L IS into the small white search box above right and hit enter; they will find links to many dozens if not hundreds of images created with this great lens
A Great Used 800mm Lens for You
I am still at a loss as to how this lens has not sold…
Multiple IPT veteran, the too-kind Jim Bicket, is offering a Canon EF 800mm f/5.6L IS USM lens in excellent condition for $8750. The lens is like new except for some wear on the bottom of the lens hood near the forward edge when the hood is reversed. The sales includes the LensCoat that has protected the lens since day 1, the leather hood, the original hard case and key, and insured shipping via UPS Ground to US addresses only. Personal checks only; your new lens will be shipped only after your check clears.
This great lens, my favorite for 3 years, sells new at B&H for $13,999.00. B&H is asking $11,999.90 for a used one in the same condition as Jim’s here. Buy Jim’s lens and save $3249.90 right now! It will save you a ton of dough and you will have a super-sharp lens with lots of reach. And it works great with a 1.4X TC too.
Interested folks can contact Jim via e-mail or try him at 501-915-9336.
|
|
|
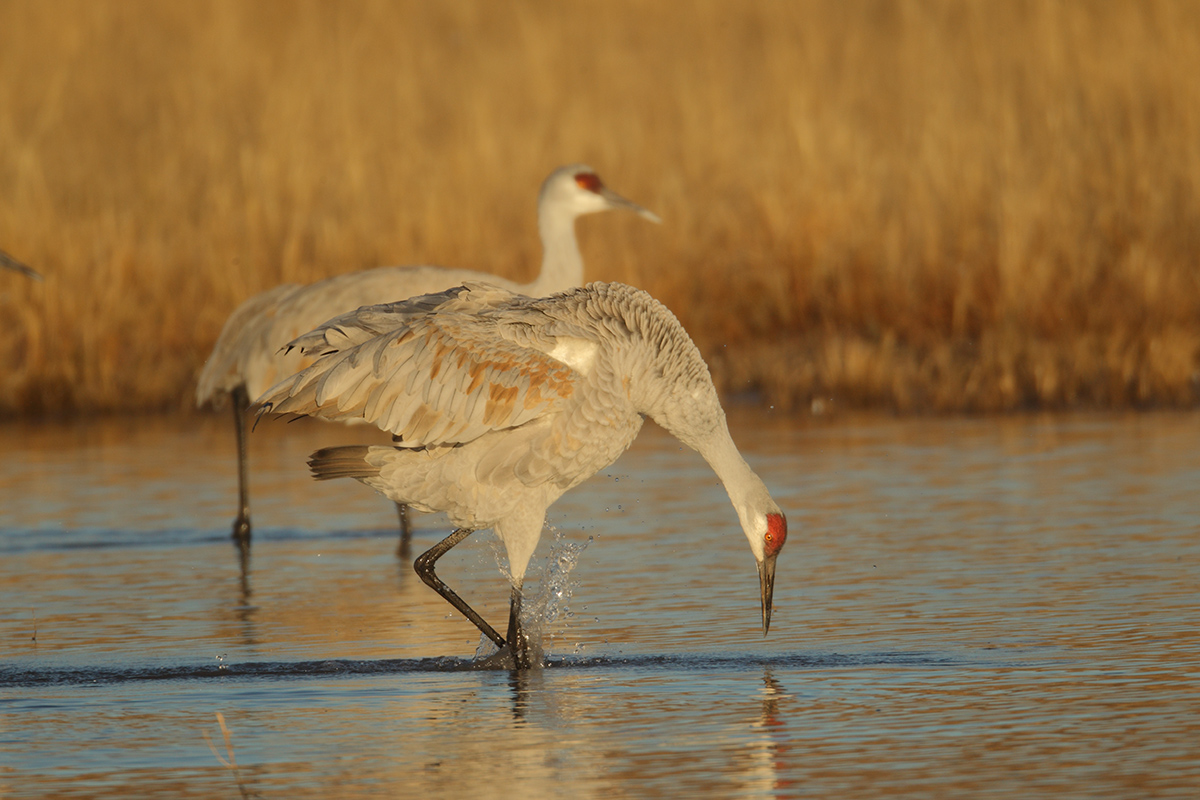
This is the original image capture from which the image that opened this blog post was created.
|
The Image Optimization
When I first converted this image it in DPP V3.14 the TIFF was too light; the WHITE body feathers just above the bend of the wing were hot with some RGB values of 255. So I reconverted it darker and all was fine.
First I leveled the image. Then I eliminated some unwanted stalks and the crane bill on the left frame edge and did some general clean up along with the dust spotting, all with my usual friends: the Patch Tool, the Clone Stamp Tool, and the Spot Healing Brush. Then I selected the bird only with the Quick Selection Tool and ran my NIK 50-50 pre-set and then reduced the opacity to 70%. That followed by some Eye Doctor work. Then I selected the face and bill, again with the Quick Selection Tool and ran a Contrast Mask on that layer to sharpen things up. Compare the look of the face on the optimized image with the look of the face on the original.
Image Question
Observant folks will note that even though I cropped this image a bit from the bottom and the rear that there is a bit more room in front of the displaying bird in the optimized image than in the original. Please leave a comment if you know how I did that seamlessly.
DPP V4.0
Canon recently released a new version of DPP, V4.0. It can be downloaded here. You will need to enter your 1D X or 5D Mark III serial number to start the download. I downloaded 4.0 to my old computer and opened it yesterday. While early reports are that it is significantly better in many areas than any previous versions, I was totally baffled by the interface. It bears no resemblance to any current version of DPP. If I can figure it out, and I am sure that I will at some point, there will be an all-new DPP V4.0 eGuide that will require a separate purchase. V4.0 works only with 1D X, 5D III, 6D, and 1Dc (whatever that is) images. Folks with older bodies (both pro-sumer and professional) will need to continue using previous versions of DPP. I recently updated to V3.11 and have been very happy with it and was glad to note the addition of a Color Temperature slider.
Digital Basics
Everything that I did to optimize today’s image is detailed in the Digital Basics File–written in my easy-to-follow, easy-to-understand style. Are you tired of making your images look worse in Photoshop? Digital Basics File is an instructional PDF that is sent via e-mail. It includes my complete digital workflow, dozens of great Photoshop tips, the use of Contrast Masks, several different ways of expanding and filling in canvas, all of my time-saving Keyboard Shortcuts, Quick Masking, Layer Masking, and NIK Color Efex Pro basics, my killer image clean-up techniques, Digital Eye Doctor, creating time-saving actions, and lots more.
APTATS I & II
Learn the details of advanced Quick Masking techniques in APTATS I. Learn Advanced Layer Masking Techniques in APTATS I. Mention this blog post and apply a $5 discount to either with phone orders only. Buy both APTATS I and APTATS II and we will be glad to apply at $15 discount with phone orders only. Please call Jim or Jennifer weekdays at 863-221-2372 to take advantage of this special offer.
Join Denise Ippolito and me for two great days of photography, fun, and learning at one of our soul places. We will surely be taking you out of the box on this workshop. Please click on the card to enjoy a larger version.
Bosque del Apache 2014 A Creative Adventure/BIRDS AS ART “Creative Photography Instructional Photo-Tour.” (IPT). NOV 24-25, 2014. 2-FULL DAYS: $729. Leaders: Denise Ippolito & Arthur Morris. Introductory Slide program: 7:00pm on Sunday 11/23.
Get Out of Your Box!
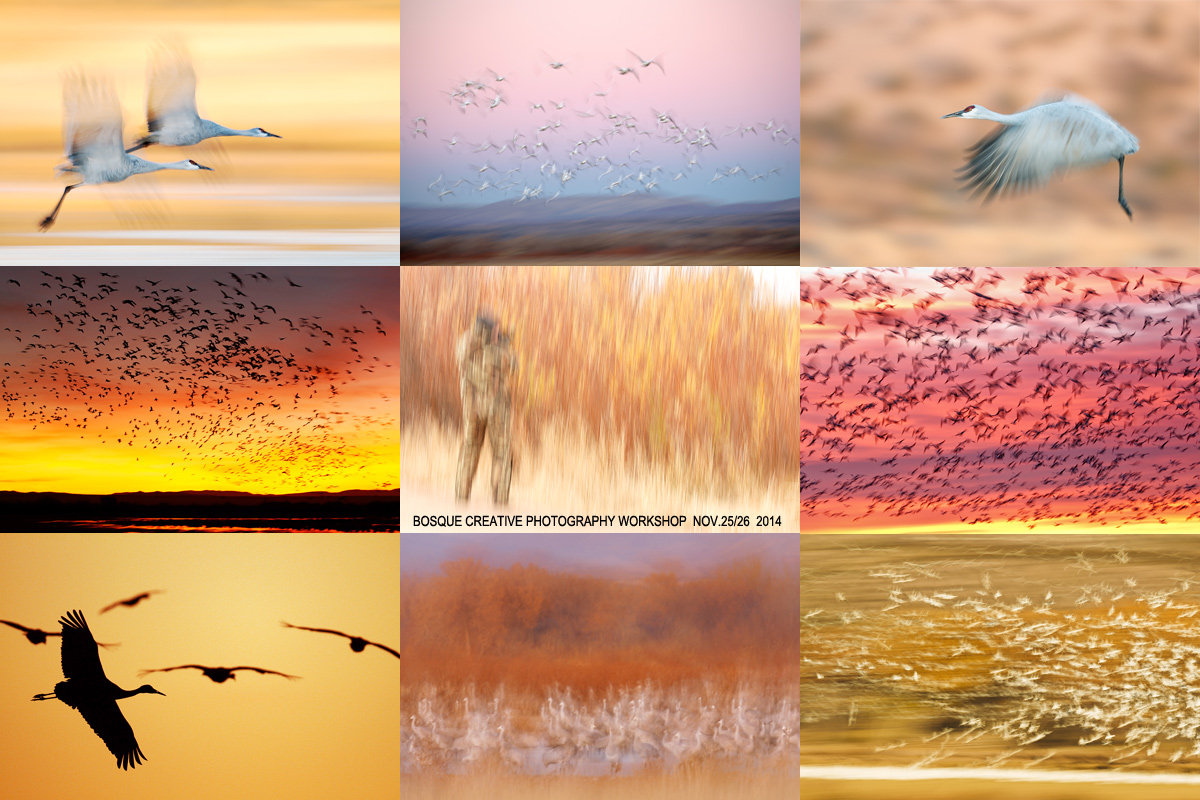
The Creative Bosque IPT is perfect for folks who want to learn to think outside the box, to create new and different images. This workshop is the perfect add-on for folks who are planning on attending the Festival of the Cranes. Learn to unleash your creative juices at the wondrous Bosque del Apache National Wildlife Refuge in San Antonio, New Mexico with two great leaders including the amazingly talented and creative Denise Ippolito. In-the-field instruction will include tips on gear set-up, on creating a variety of pleasing blurs, on getting the right exposure, and on designing pleasing images. And lots more. From vertical pan blurs to subject motion blurs to zoom blurs to multiple exposures we will cover it all. If conditions are perfect, we will not hesitate to take advantage of them to do some traditional bird photography. This workshop will include an inspirational introductory slide program on Sunday evening, 11/23, after dinner on your own, two morning and two afternoon photography sessions, all lunches, a digital workflow and Photoshop session after lunch on Monday, and an image critiquing session after lunch on Tuesday.
A $329 non-refundable deposit is required to hold your slot for this IPT. Your balance, payable only by check, will be due on 7/25/2014. If the trip fills, we will be glad to apply a credit applicable to a future IPT for the full amount less a $100 processing fee. If we do not receive your check for the balance on or before the due date we will try to fill your spot from the waiting list. If your spot is filled, you will lose your deposit. If not, you can secure your spot by paying your balance.
Please print, complete, and sign the form that is linked to here and shoot it to us along with your deposit check (made out to “Arthur Morris.”) You can also leave your deposit with a credit card by calling the office at 863-692-0906. If you register by phone, please print, complete and sign the form as noted above and either mail it to us or e-mail the scan. If you have any questions, please feel free to contact me via e-mail.
Join Denise Ippolito and me for four great days of photography and learning at one of our soul places. Please click on the card to enjoy a larger version.
Bosque del Apache 2014 BIRDS AS ART/A Creative Adventure Instructional Photo-Tour (IPT). NOV 29 (afternoon photo session)-DEC 3 (morning session), 2014. Totaling 4 FULL-DAYS: $1449. Leaders: Arthur Morris and Denise Ippolito. Introductory Slide program: 7:00pm on Saturday 11/29.
Sold Out; See Above 🙂
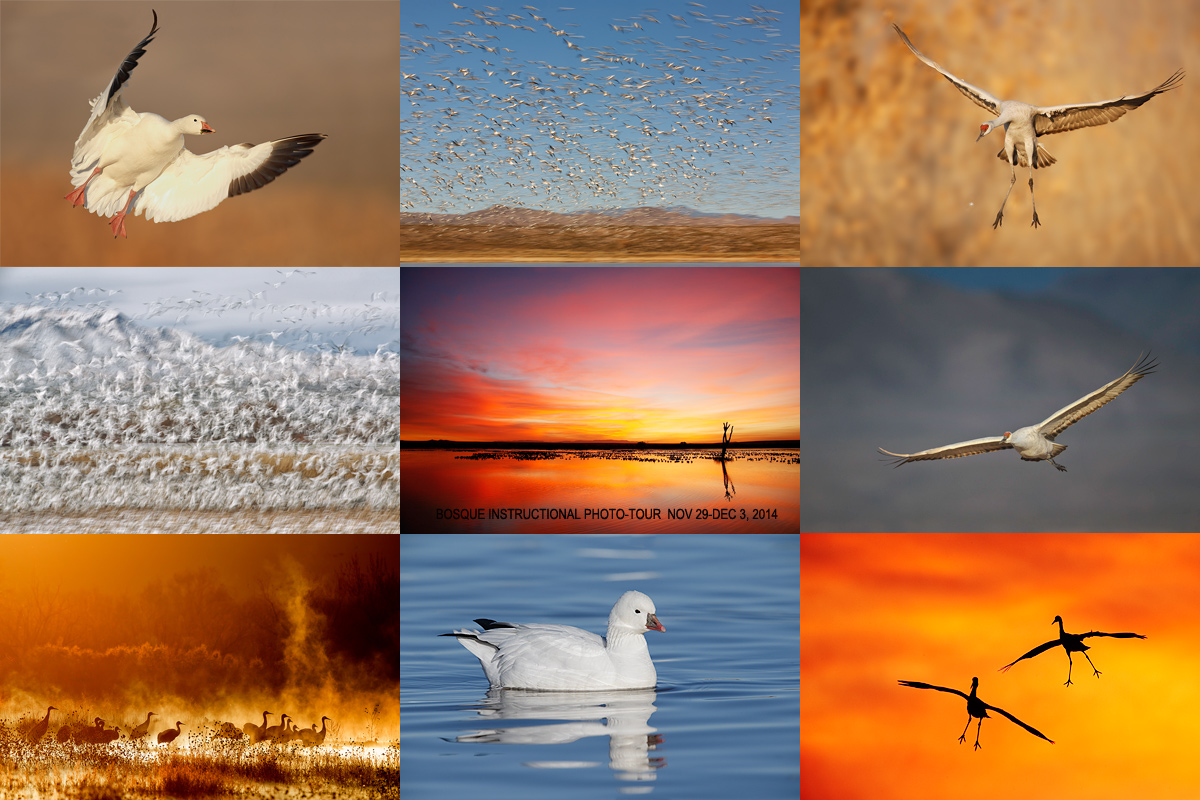
Tens of thousands of Snow Geese, 10,000 Sandhill Cranes, ducks, amazing sunrises, sunsets, and blast-offs. Live, eat, and breathe photography with two of the world’s premier photographic educators at one of their very favorite photography locations on the planet. Top-notch in-the-field and Photoshop instruction. This will make 21 consecutive Novembers at Bosque for artie. This will be denise’s 6th workshop at the refuge. Nobody knows the place better than artie does. Join us to learn to think like a pro, to recognize situations and to anticipate them based on the weather, especially the sky conditions, the light, and the wind direction. Every time we make a move we will let you know why. When you head home being able to apply what you’ve learned on your home turf will prove to be invaluable.
This workshop includes 4 afternoon (11/29 through 12/2), 4 morning (11/30 to 12/3) photography sessions, an inspirational introductory slide program after dinner on your own on Saturday, 11/29, all lunches, and after-lunch digital workflow, Photoshop, and image critiquing sessions.
There is never a strict itinerary on a Bosque IPT as each day is tailored to the local conditions at the time and to the weather. We are totally flexible in order to maximize both the photographic and learning opportunities. We are up early each day leaving the hotel by 5:30 am to be in position for sunrise. We usually photograph until about 10:30am. Then it is back to Socorro for lunch and then a classroom session with the group most days. We head back to the refuge at about 3:30pm each day and photograph until sunset. We will be photographing lots of Snow Geese and lots of Sandhill Cranes with the emphasis on expanding both your technical skills and your creativity.
A $449 non-refundable deposit is required to hold your slot for this IPT. Your balance, payable only by check, will be due on 7/25/2014. If the trip fills, we will be glad to apply a credit applicable to a future IPT for the full amount less a $100 processing fee. If we do not receive your check for the balance on or before the due date we will try to fill your spot from the waiting list. If your spot is filled, you will lose your deposit. If not, you can secure your spot by paying your balance.
Please print, complete, and sign the form that is linked to here and shoot it to us along with your deposit check (made out to “Arthur Morris.”) You can also leave your deposit with a credit card by calling the office at 863-692-0906. If you register by phone, please print, complete and sign the form as noted above and either mail it to us or e-mail the scan. If you have any questions, please feel free to contact me via e-mail.
Support the BAA Blog. Support the BAA Bulletins: Shop B&H here!
We want and need to keep providing you with the latest free information, photography and Photoshop lessons, and all manner of related information. Show your appreciation by making your purchases immediately after clicking on any of our B&H or Amazon Affiliate links in this blog post. Remember, B&H ain’t just photography!
…..
Amazon Canada
Many kind folks from north of the border, ay, have e-mailed stating that they would love to help us out by using one of our affiliate links but that living in Canada and doing so presents numerous problems. Now, they can help us out by using our Amazon Canada affiliate link by starting their searches by clicking here. Many thanks to those who have written.
Typos
In all blog posts and Bulletins, feel free to e-mail or to leave a comment regarding any typos, wrong words, misspellings, omissions, or grammatical errors. Just be right. 🙂
July 1st, 2014 Galapagos 2015 Photo-Cruise
If you missed the announcement of the Galapagos July 2015 Photo-Cruise, click here and scroll down.
Used Photography Gear for Sale
After two weeks of nothing-happening two major items sold yesterday: Ellen Anon’s “old” 500mm and the new in the box 5D Mark III KIt offered by Chuck Pettis. See lots more great used photo gear including the perfect big lens for you here. Cheap! There are 2 folks seriously interested in Carl Zanoni’s 500 II….
The Streak Continues: 213
It is just before 6:00am here in Indian Lake Estates as today’s blog post is being published. I fly to Newark this afternoon to meet Denise and two of our 7 clients for the red eye flight to Edinburgh, Scotland, arriving in the UK at 7:55am on Wednesday morning. I still need to pack 🙂 This post took about one hour to prepare. Enjoy and learn.
This post marks 213 consecutive days with a new blog post. With so many folks getting in the habit of using our B&H links and our Amazon logo-links why quit now? April, May and June have been fantastic as lots of folks are getting the message; using my affiliate links does not cost you a penny and helps support my efforts here. To show your appreciation, I do ask that you use our the B&H and Amazon affiliate links on the right side of the blog for all of your purchases. Please check the availability of all photographic accessories in the BIRDS AS ART Online Store, especially Gitzo tripods, Wimberley tripod heads, and the like. We sell only what I have used and tested, and know that you can depend on. We will not sell you junk. We know the tools that you need to make creating great images easy and fun. And we are always glad to answer your gear questions via e-mail.
You can find the following items in the store: Gitzo tripods, Mongoose M3.6 and Wimberley heads, plates, low feet, and accessories, flash brackets, , Delkin e-film Pro Compact Flash Cards, LensCoat products, and our unique line-up of educational materials including ABP I & II, Digital Basics, Site and Set-up e-Guides, Canon and Nikon Camera Users and AF e-Guides, and MP-4 Photoshop video tutorials among others.
I would of course appreciate your using our B&H affiliate links for all of your major gear, video, and electronic purchases. For the photographic stuff mentioned in the paragraph above we, meaning BAA, would of course greatly appreciate your business. Here is a huge thank you to the many who have been using our links on a regular basis and visiting the BAA Online store as well.
|
|
|
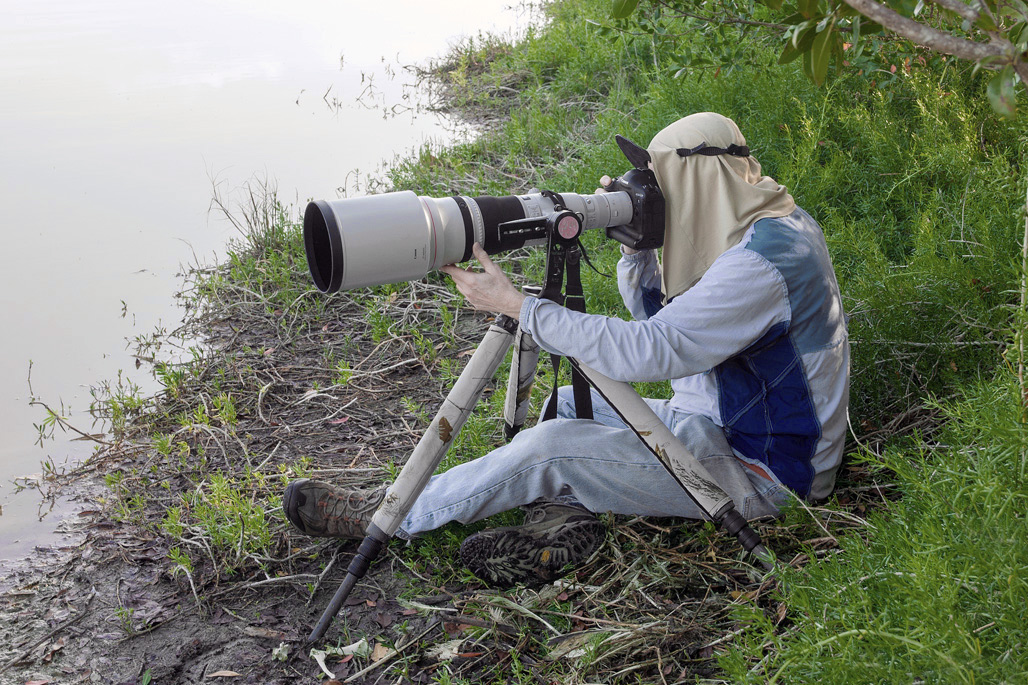
That’s me seated behind the 600 II at Eco Pond in Everglades National Park last February.
Image courtesy of and copyright 2014: Roger Burnard.
I have somewhat reluctantly decided to leave the 600 at home for the UK trip….
Roger used a lens that I had never heard of before to create the image above, the Nikon 16-85mm f/3.5-5.6G ED VR AF-S DX Nikkor (at 32mm). It is a relatively inexpensive B-roll zoom lens.
|
State of the Art (That’s Me)
Eleven days after the alternative treatment (stem cell PRP and prolozone injections) on my right shoulder, it is doing much better. Range of motion is pretty much normal with just a bit of tightness on full overhead extension. After two prolozone injections the left knee it is also doing better, but it still hurts a bit at times, especially at bedtime. That makes zero sense as it feels pretty good all day long with just a twinge here and there. Overall I am feeling great. I have been eating well and swimming my half-mile plus most every day with a 40-minute 58 degree ice bath every evening. (See Cold Thermogenisis here.)
The Decision
While my shoulder is feeling pretty good, I decided to leave the 600 II (and the 200-400) at home. Why? After writing yesterday’s blog post I took a step back and listened to my body. Perhaps it is a sign of maturity on my part. Jim will be shipping the 600 II to my Mom’s. If my shoulder continues to progress well, I will be using the 600 on the Nickerson IPT. The coolest news is that I learned that Scott Elowitz’s new 3Xpandable Long Lens bag will, when expanded, comfortably hold the 600 II with the hood in place and a 1D X mounted to the lens. We added the harness and the waist belt and I went tooling around the house, also quite comfortably. And unlike with the prototype bags that I tested for Scott, removing the lens from the bag was a snap.
To learn more about the 3Xpandable and 4Xpandable bags click here and scroll down.
Under-gunned?
For sure.
For the first time ever I will be leaving for a major bird photography trip without my longest super-telephoto lens. I am, however, sure that I will return with lots of great images including head portraits of puffins, hopefully puffins with beaks full of small fishes (those courtesy of the 300 II/2X III combination). And using a shorter, lighter, hand holdable lens always increases the chances of creating great images of birds in flight and in action. As a lover of what is, I am looking forward to the trip.
Nickerson Baby Beach-nesting Birds IPT: 3-Full Days/July 15-17, 2014: $1199. Introductory meet and greet: 8pm, Monday, July 14, 2014. Co-leaders Arthur Morris and Denise Ippolito
Late Registration Discount: Call Jim weekdays at 863-692-0906 for details. Or contact us via e-mail.
With a small group pretty much guaranteed, do consider joining us on Long Island, NY this coming July to photograph Black Skimmers–it’s looking like a great year for skimmer nesting, Common Terns with chicks, American Oystercatcher families, and possibly some just-hatched Black Skimmer chicks. The opportunities will include chances to photograph a variety of breeding behaviors including courtship feeding, display flight and combat, and copulations. Car-pooling is recommended; if we opt to return to the beach before 5pm on cloudy days for example) there is a $30/vehicle parking fee that is not included so it is best to share that expense. Parking in the morning is free.
Because of the late date, your non-refundable payment in full is due when you register.
Please print, complete, and sign the form that is linked to here and shoot it to us along with your deposit check (made out to “Arthur Morris.”) Though we prefer a check, you can also leave your deposit with a credit card by calling the office at 863-692-0906. If you register by phone, please print, complete and sign the form as noted above and either mail it to us or e-mail the scan.
If you have any questions, please feel free to contact me via e-mail
Facebook
Be sure to like and follow BAA on Facebook by clicking on the logo link upper right. Tanks a stack!
Support the BAA Blog. Support the BAA Bulletins: Shop B&H here!
We want and need to keep providing you with the latest free information, photography and Photoshop lessons, and all manner of related information. Show your appreciation by making your purchases immediately after clicking on any of our B&H or Amazon Affiliate links in this blog post. Remember, B&H ain’t just photography!
…..
Amazon Canada
Many kind folks from north of the border, ay, have e-mailed stating that they would love to help us out by using one of our affiliate links but that living in Canada and doing so presents numerous problems. Now, they can help us out by using our Amazon Canada affiliate link by starting their searches by clicking here. Many thanks to those who have written.
Typos
In all blog posts and Bulletins, feel free to e-mail or to leave a comment regarding any typos, wrong words, misspellings, omissions, or grammatical errors. Just be right. 🙂
June 30th, 2014 Galapagos 2015 Photo-Cruise
Details of the Galapagos 2015 Photo-Cruise are announced below.
|
|
|
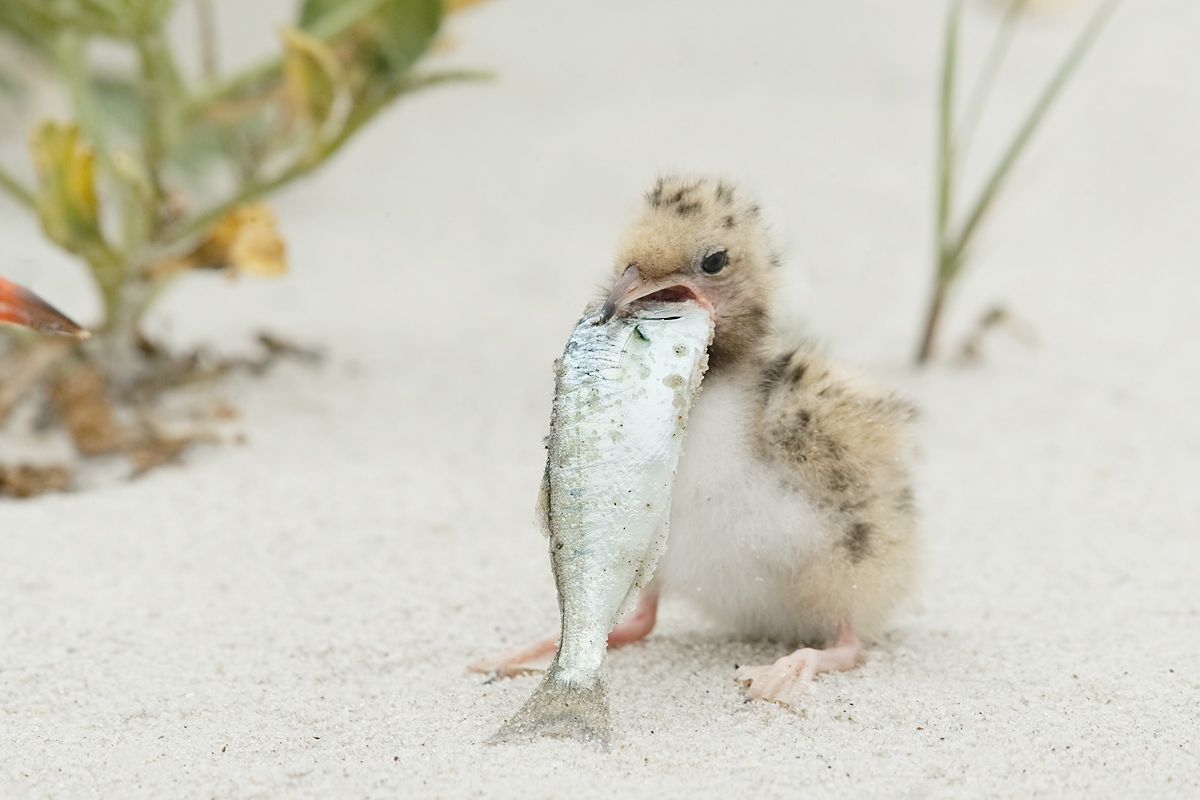
This image was created at Nickerson Beach, Long Island NY on the recently concluded Nickerson Beach Baby Beach Nesting Birds IPT with the tripod-mounted Canon EF 600mm f/4L IS II USM lens, the Canon 2x EF Extender III (Teleconverter), and the Canon EOS-1D X Digital SLR camera. ISO 800. Evaluative metering +1 stop: 1/160 sec. at f/10 in Manual Mode.
For general bird photography the 600 II cannot be beat, especially for those capable of making sharp images with the 2X III TC. For those who cannot the 800 f/5.6L IS with the 1.4X III TC is the way to go.
Central sensor Expand (by necessity)/AI Servo/Rear Focus AF just in front of the bend of the chick’s wing stub active at the moment of exposure. Click here if you missed the Rear Focus Tutorial. Click on the image to see a larger version.
|
The Streak Continues: 212
It is now about 8:30am here in Indian Lake Estates as today’s blog post is being published. I am getting really excited about the UK Puffin IPT. Today is packing day. I fly to Newark on Tuesday afternoon where I will meet Denise and two of our 7 clients for the red eye flight to Edinburgh, Scotland, arriving in the UK at 7:55am on Wednesday morning. This post took about 3 hours to prepare. Enjoy and learn.
This post marks 212 consecutive days with a new blog post. With so many folks getting in the habit of using our B&H links and our Amazon logo-links why quit now? April, May and June have been fantastic as lots of folks are getting the message; using my affiliate links does not cost you a penny and helps support my efforts here. To show your appreciation, I do ask that you use our the B&H and Amazon affiliate links on the right side of the blog for all of your purchases. Please check the availability of all photographic accessories in the BIRDS AS ART Online Store, especially Gitzo tripods, Wimberley tripod heads, and the like. We sell only what I have used and tested, and know that you can depend on. We will not sell you junk. We know the tools that you need to make creating great images easy and fun. And we are always glad to answer your gear questions via e-mail.
You can find the following items in the store: Gitzo tripods, Mongoose M3.6 and Wimberley heads, plates, low feet, and accessories, flash brackets, , Delkin e-film Pro Compact Flash Cards, LensCoat products, and our unique line-up of educational materials including ABP I & II, Digital Basics, Site and Set-up e-Guides, Canon and Nikon Camera Users and AF e-Guides, and MP-4 Photoshop video tutorials among others.
I would of course appreciate your using our B&H affiliate links for all of your major gear, video, and electronic purchases. For the photographic stuff mentioned in the paragraph above we, meaning BAA, would of course greatly appreciate your business. Here is a huge thank you to the many who have been using our links on a regular basis and visiting the BAA Online store as well.
|
|
|
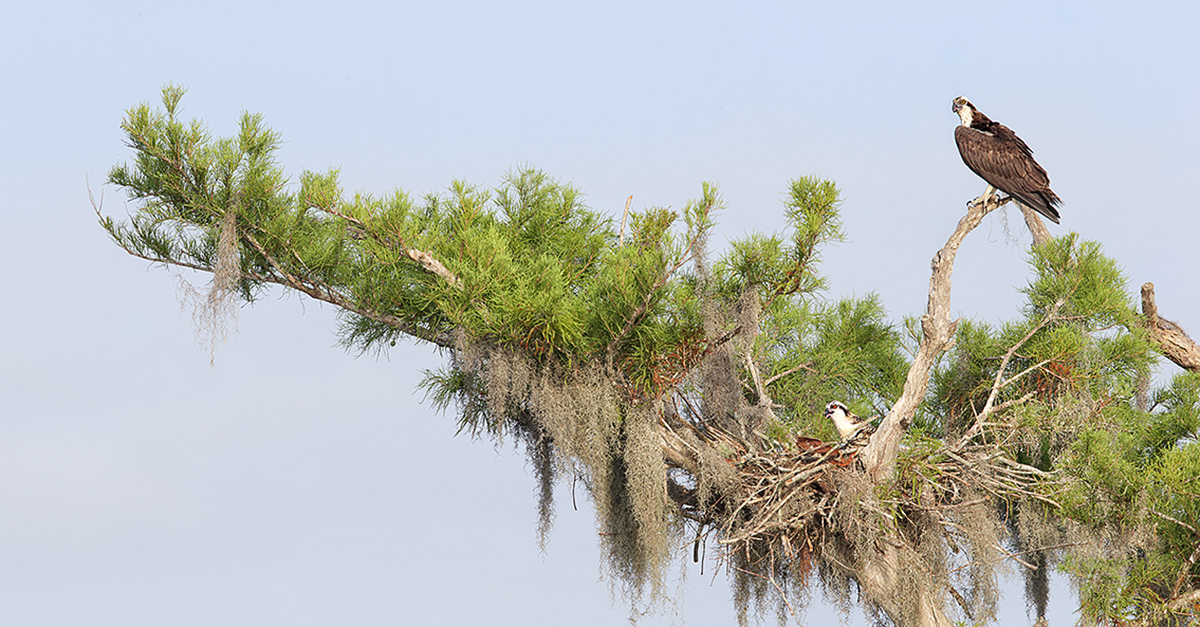
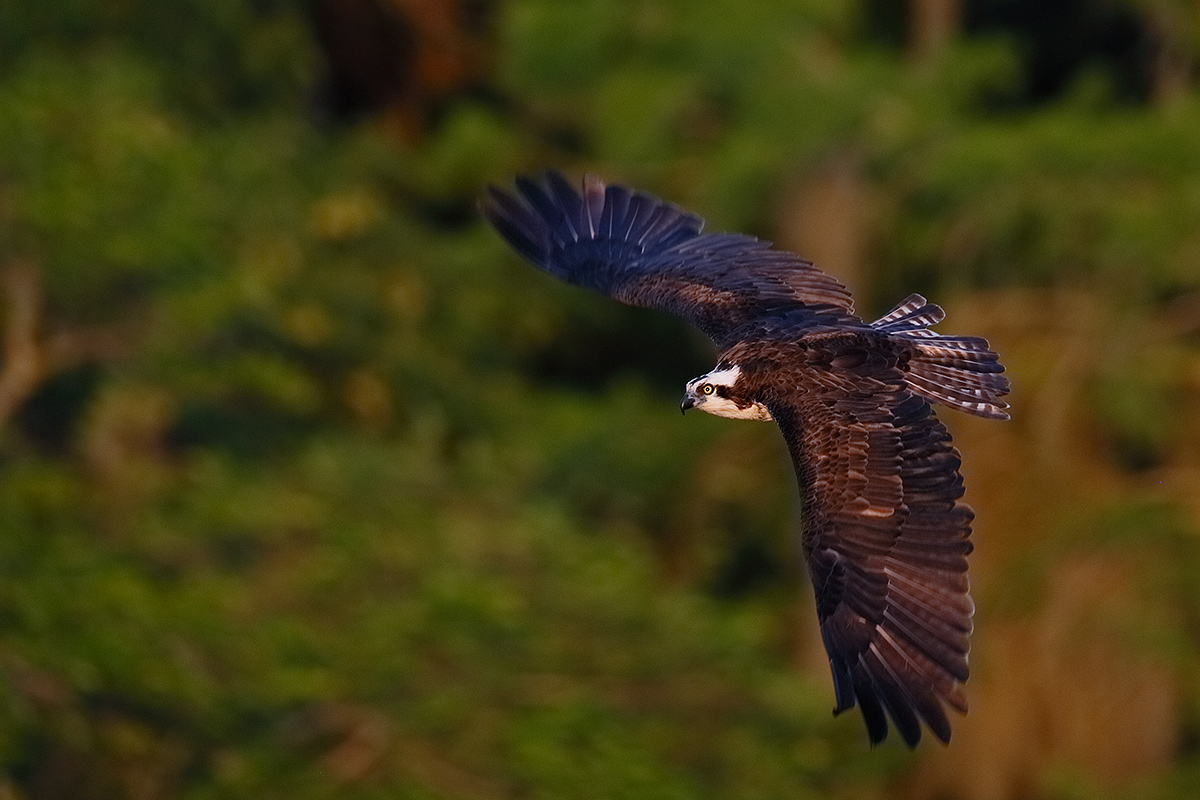
This Osprey top shot was created very late in the day (7:30pm) on a mostly clear afternoon on Lake Blue Cypress on Saturday, April 12. There were five of us aboard Jim Neiger’s pontoon boat. I used the hand held Canon EF 300mm f/2.8L IS II USM lens, the Canon Extender EF 2X III, and the Canon EOS-1D X. ISO 1600. Evaluative metering -1/3 stop off the green vegetation: 1/640 sec. at f/5.6 in Manual mode. AWB.
The 300 II either alone or with either Series III teleconverter is a versatile, hand holdable option.
Central Sensor/AI Servo-Surround/Rear Focus AF as originally framed was active at the moment of exposure. The image was cropped from behind and from above. Learn everything there is to know about the 1D X and 5D III AF systems including how to manage the various AF Area Selection Modes, when to use which one, and several ways to move the AF sensor around in my 1D X AF Guide and the 5D Mark III User’s Guide. Click here to see the latest version of the Rear Focus Tutorial. Click on the image to see a larger version. .
|
300 II, 200-400, & 600 f4L IS II/Canon Big Lens Gear Bag Questions and Answers
My Dilemma
My dilemma is a simple one. I know that my gear bag for the UK Puffin IPT will include the following:
1 @ Canon EF 24-70mm f/2.8L II USM lens
1@ Canon EF 70-200mm f/2.8L IS II USM lens
1 @ Canon EF 300mm f/2.8L IS II USM lens
3 @ Canon Extender EF 1.4X III
2 @ Canon Extender EF 2X III
2 @ Canon EOS-1D X
1 @ Canon EOS 5D Mark III DSLR Camera (Body Only)
I am sure that with the gear above that my shoulder will get a pretty good rest and that I will make lots of great images. In Iceland I made head portraits of puffins with a 70-200, a 1.4X TC, and a 1.3X camera body so the 300 II/2X III TC will do fine as a long lens.
My dilemma is whether or not to bring the Canon EF 600mm f/4L IS II USM lens. My shoulder is dong better but is not yet completely healed. I know that the 600 II will be worthless on the Gannet boat trips where the 70-200 will shine. The 600 will likely prove useful on our puffin boat landings should I chose to carry it on our landings…. That I would do only once or twice. I am considering bringing the 600 II for early morning or late afternoon/early evening shoreline sessions. Writing this has me leaning towards being smart for once and leaving the 600 II at home. Jim can ship it to my Mom’s so that I will have it for the Nickerson Beach IPT where a long super-telephoto is pretty much a necessity for my style of shooting.
George Golumbeski’s Question
On Saturday afternoon, just after rooting the The Netherlands home in their last minute come-back-from-the-dead defeat of Mexico in the World Cup round of 16, I received an e-mail from UK Puffin IPT George Golumbeski. Here is our e-mail conversation:
AM: Hi George,
re:
GG: I am in final prep mode for this IPT and have one last question about which lenses to take. My current plan is to go with the following Canon gear:
24-70 f/2.8 L II, 70-200 f/2.8 L IS II, Canon EF 200-400mm f/4L IS USM lens with Internal 1.4x Extender, the 300 f/2.8 L IS II, and EF Extenders 1.4x and 2X.
This means I will be without my beloved 600 f/4 L Mk2. Do you endorse this decision or would you suggest I take my 600 instead of the 200-400 zoom?
AM: First of, you will need a 300 II (or one of the intermediate telephotos) for hand held flight photography. If it were me I would choose to bring the 600 II over the 2-4 as the 600 with the 2X TC gives you 1200mm as opposed to a max of 784mm with the 2-4 (and an external 1.4X TC). In addition, the 300 II with both TCs counterfeits the 200-400 focal length wise. You will surely miss the versatility of the 2-4 on the puffin islands but only a bit. If my shoulder were fine and I did bring a big lens it would be the 600 II not the 2-4 as the 600 f/4 may help for birds along the shore. Hey, I just got a great idea. I can borrow yours once in a while :).
Do know that if we were going on a Cheesemans’ Southern Ocean expedition, to the Galapagos, or to the Palouse, I would not be without the 200-400 for a minute. On the first of those two trips I’d be bringing the 300 II for flight photography from the trip. On a Galapagos trip I’d be bringing the 300 II as back-up. I leave it at home for Palouse trips. Note that Denise who does not own the 200-400 uses her 300 II for the long rolling farm field images. The 24-70 and the 70-200 II makes all three trips.
later and love and see you soon, artie
George wrote back:
Thanks. I feel better with the 600. See you in Edinburgh.
|
|
|
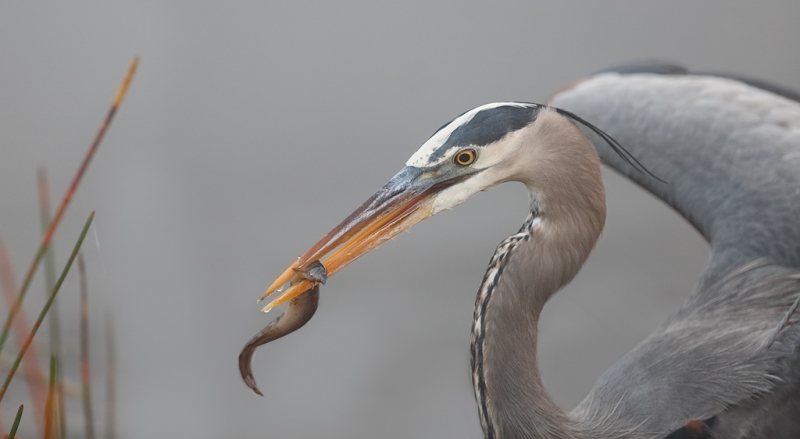
This Great Blue Heron was photographed at Anhinga Trail with the hand held Canon EF 300mm f/2.8L IS II USM lens and the Canon EOS-1D X Digital SLR camera. ISO 800. Evaluative metering +1 1/3 stops as framed: 1/320 sec. at f/3.2.
The 300 f.2.8L IS II alone can be deadly in low light conditions.
61-point/AI Servo/Rear Focus AF active at the moment of exposure. Click here if you missed the Rear Focus Tutorial. Click on the image to see a larger version.
|
Indranil Sircar is Getting Back in the Game With a Vengeance
Indranil is a fine photographer and a good friend. He has been on many IPTs. And he is coming on the July 2015 Galapagos Photo Cruise IPT. Best of all, we have enjoyed some very fine Thai food in a variety of locations. Indranil was a moderator in the Out-of-the-Box Forum on BPN.
Here is our first Saturday morning e-mail chat:
AM: Hi Indranil,
re:
IS: Hope you are doing well. I wish I could join you and Denise for the Puffin IPT.
AM: Am thanks and ditto. Us too. It is good to hear from you; how is your Dad?
IS: I am finally planning to get my next lens and to get back into photography after a 2 year of hiatus!
AM: Great! I still find it a lot of fun!
IS: I was considering 200-400 for the versatility alone. I read through your blog on 300 vs. 2-4. Although you have made it clear, I still need your advice on the following –
1-Should I go with 200-400 as it gives me a good range option up-to 560mm. Does this lens work with external 2X with internal extender off? I am not worried about the weight yet.
AM: There is no need for the 2X III TC. You put the internal TC in place and then add an external 1.4X III. Same as a 2X but sharper.
IS: Or 2-, should I go with 300 II and use the 1.4X and the 2X III TCs? That is a lot cheaper as an option compared to 200-400.
AM: I could kick myself for forgetting to mention the huge price difference in that comparative blog post here. That said, it is a personal choice. The heavier, more expensive 2-4 is more versatile but the 300II is lighter, cheaper, and much more easily hand held for flight and for everything else as well. I cannot make that call for you. 🙂
IS: Or 3, alternately get only the 600 II only.
AM: For Galapagos either the 2-4 or the 300II would be a much better choice than the 600 II. For general bird photography of course the 600 II rules….
IS: For next year’s Galapagos, as you have said, I may not need a 600. 300 or 2-4 would be sufficient.
AM: Yes.
IS: Right now I have only the newer 70-200. I could add either the 300 II or tje 2-4 now and eventually add the 600 II. Is there any other combination I should plan to build towards. I am using the 5D MK3
AM: Below you mention the 500 II. The combination of 70-200 II, 300 II, 500 II is an attractive one.
But if you go to the 600 II then focal-length-wise that works much better with the 70-200 and the 200-400 as you have everything covered from 70-1200mm with no gaps…. The only thing missing is a light hand holdable lens—you guessed it, the 300 II. That’s why I own both. BTW, on the Galapagos trip I will be bringing the 200-400 and the 300 II. Same on the Southern Oceans expedition. Why? For easy flight photography with the 300 II (oespecially from the ship with the Cheesmans), the versatility of the 200-400 for the landings on both trips, and with the overlap, a back-up in case of disaster…. Been there done that.
IS: Any final advice?
AM: See above. 🙂
IS: Does it matter if I use your Amazon link or your B&H link for the new gear?
AM: Many thanks for that question. B&H works much better for me. Amazon has cheated me out of a few large commissions by pointing to their “agreement.” Also, some folks have been really pissed at Amazon when they get boxes with supposedly new lenses that have been opened by previous purchasers… More than one person has found copies of previous invoices in their long lens boxes. And some of the third party sellers that are standard among the Amazon listings are a bit suspect.
That is why I have been pushing folks to buy their photo gear from the much more trustworthy B&H and their underwear, CDs, and toothpaste from Amazon. That said, every use of any of our affiliate links is greatly appreciated.
IS: BTW, I was tempted by the used 500 II on your Used Photography Gear page.
AM: That lens is a great buy; Carl is a stickler for neatness and takes great care of his gear. Please don’t tell him that I said that he is a neat-nik.
One thing that everyone should remember is that they when they buy a big new Canon or Nikon lens that if they take good care of it and have a LensCoat on it from day 1, that they can use it for 1 or 2 or 3 or more years and then sell it for close to what they paid for it. Big glass is amazing when it comes to holding its value for resale.
If you went 300 II/500 II/1.4X III/2X III you could always rent a 200-400 from Borrow Lenses for the Galapagos trip….
Let me know if you have any more questions.
later and love, artie
|
|
|
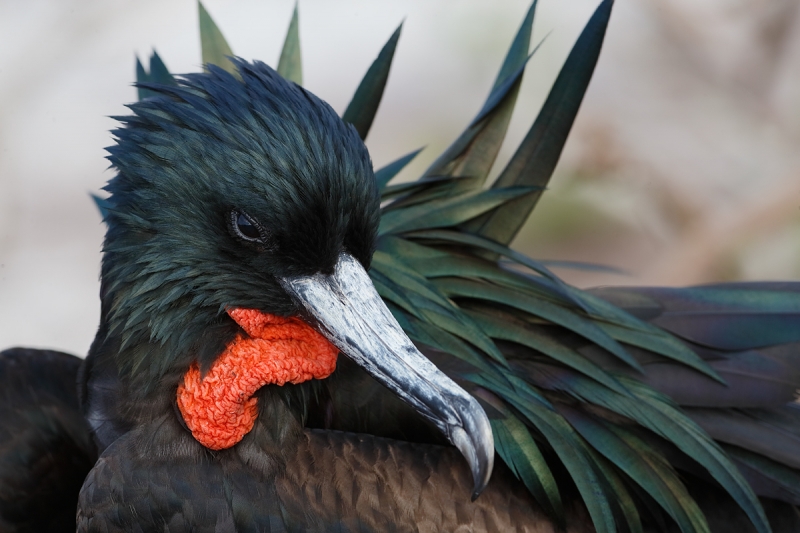
This Great Frigatebird image was created on our afternoon landing at Prince Philips Steps, Tower Island with the tripod-mounted Canon EF 200-400mm f/4L IS USM Lens with Internal 1.4x Extender (at 490mm with the internal TC in place) and the Canon EOS-1D X). ISO 400. Evaluative metering -1 2/3 stops as framed: 1/200 sec. at f/9.
Most Galapagos wildlife is so tame that a 600 is not needed. The framing versatility of the 200-400 with Internal Extender is unmatched.
Two sensors above and three to the left of the central sensor/AI Servo-Surround on the bird’s forehead active at the moment of exposure. Click here if you missed the Rear Focus Tutorial. Click on the image to see a larger version.
|
Here is our second Saturday morning e-mail chat:
AM: Hi Again Indranil,
re:
IS: Thank you so much for the detailed explanation. I do like both the combination but 300+500 II is a quiet a bit cheaper compared to 2-4 + 600.
AM: YAW.
IS: Two more questions:
1-How often do you change TCs with the 300.
AM: Anywhere from never or almost never to often, depending on the situation.
IS: 2-Is it practical to change TCs in the field?
AM: I have never had a problem changing TCs in the field even on windy days at the beach…. The trick with that is to turn your back to the wind. And be sure to turn the camera off before taking the camera body off the lens. I always remember to do that now but I rarely remember to turn it back on.
IS: When I use the 70-200, I always find myself either using 1.4x or 2X and rarely changing during a session. I am guessing it changes based on individual situation.
AM: You are correct sir.
IS: With 70-200 f/2.8L IS II, when I use 2X III TC, I find that it takes just a bit longer to focus as compared to 1.4X III TC. Most time I use 1.4X. Do you see the same with 300.
AM: Yes to some degree, but the 300 II acquires focus very quickly, TC or no TC. Initial AF acquisition will always be a bit slower with TCs as the AF system needs light (and contrast) to function. Any TC reduces the amount of light: 1 stop for a 1.4X, 2 stops for a 2X.
IS: I am going to rent a 2-4 for a weekend and test it out to see how I feel hand holding it.
AM: That is a good plan. I ask that if feasible, you consider renting from Borrow Lenses—there is a big logo link on the right side of each blog page. They have great rates and are very dependable. Heck, since I know you well, I would be glad to rent you mine as I am not bringing it to the UK or to Long Island for the Nickerson Beach IPT.
IS: How well I do hand holding the 2-4 will be the key decision factor. I have already seen the 300 II so it would be easy to compare the 2 lenses. Also, I will use your B&H affiliate links for the purchase. Thanks for the heads-up.
AM: Many thanks on all counts. And later and love, artie
ps: you missed this: how is your Dad doing?
pps: these two e-mails will make a great blog post soon; folks love anything to do with gear.
|
|
|
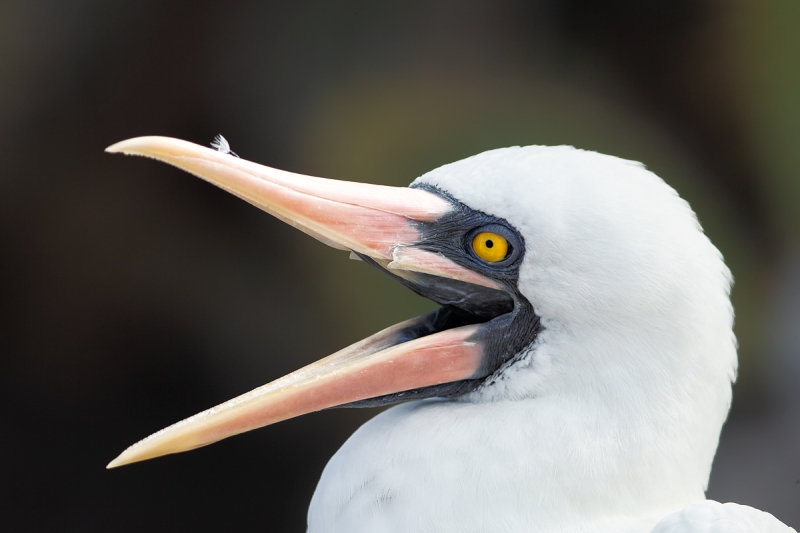
This image of a yawning adult Nazca Booby was created with the tripod mounted Canon EF 200-400mm f/4L IS USM Lens with Internal 1.4x Extender (with the internal TC in place), the Canon 1.4x EF Extender III (Teleconverter) (at 728mm), and the Canon EOS-1D X). ISO 400. Evaluative metering at zero: 1/320 sec. at f/8.
With the internal extender engaged and an external 1.4X TC added the 200-400 can get you out to 784mm.
Central sensor (by necessity)/AI Servo-Expand/Rear Focus AF on the base of the bird’s bill active at the moment of exposure. Click here if you missed the Rear Focus Tutorial. Click on the image to see a larger version.
|
Indranil wrote back late in the day:
Hi Artie,
Thanks again for the email and for asking about my Dad. Yes, I forgot to respond. He is doing great. We found the right cardiologist for him and he seems to be happy since moving here. He spends a lot of time photographing things around the house and also photographing gourmet food , mostly the healthy type that I cook! My mother is a borderline diabetic and I have been using the book by Dr. Richard K. Bernstein that you recommended as a reference in creating a great food plan. End of the day, it is also keeping me healthy!
I can certainly use BorrowLenses.com. If it is not too much of an inconvenience, I will take up on your offer to rent your lens. Let me know.
I like your idea of making a blog post of our conversations. Please feel free to edit and use the e-mail as you feel appropriate. Your advice is invaluable and others can always benefit from it as I do. I will always remain one of your biggest fans. 🙂
Regards, Indranil
|
|
|
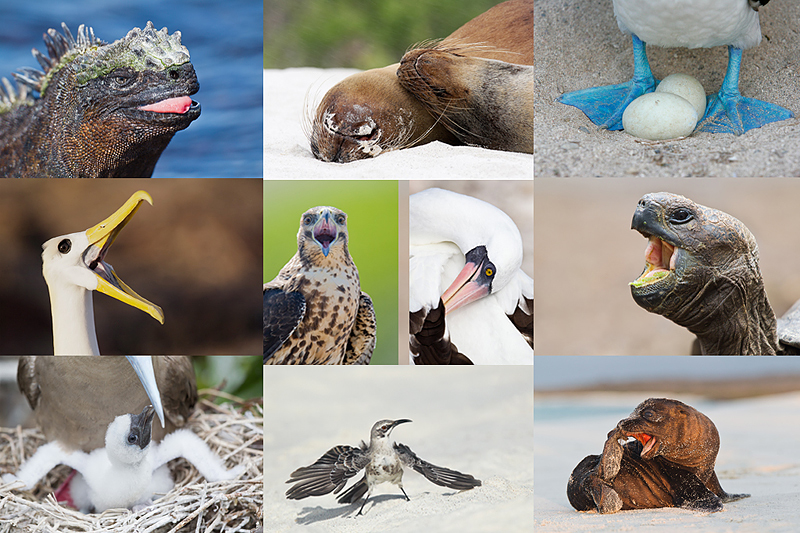
Do consider joining me for a once in a lifetime trip to the Galapagos archipelago in July, 2015.
|
GALAPAGOS Photo Cruise of a Lifetime IPT/The Complete Galapagos Photographic Experience. July 14-28, 2015 on the boat. 13 FULL and two half-days of photography: $12,499. Limit 14 including the leader(s)/Openings: 7.
My two-week Galapagos Photo-Cruises are without equal. The world’s best guide, a killer itinerary, a great boat (the Samba), and the best leader with eight Galapagos cruises under his belt. Pre-trip and pre-landing location-specific gear advice. In-the-field photo instruction and guidance. Jeez, I almost forgot: fine dining at sea!
The great spots that we will visit include Tower Island (including Prince Phillips Steps and Darwin Bay), Hood Island (including Punta Suarez, the world’s only nesting site of Waved Albatross, and Gardner Bay)—each of the preceding are world class wildlife photography designations that rank right up there with Antarctica, Africa, and Midway. We will also visit Fernandina, Puerto Ayora for the tortoises, Puerto Egas—James Bay, North Seymour and Isla Lobos for nesting Blue-footed Booby (most years), South Plaza, Floreana, and Urbina Bay, all spectacular in their own right. We visit every great spot on a single trip. Plus tons more. And there will he lots of opportunities to snorkel on sunny mid-days for those like me who wish to partake.
We will be the first boat on each island in the morning and the last boat to leave each island every afternoon. If we are blessed with overcast weather, we will often spend 5-6 hours at the best sites. And as noted above, mid-day snorkeling is an option on most sunny days depending on location. Note: some of the walks are a bit strenuous. Great images are possible on all landings with a hand held 70-200mm lens and a 1.4X teleconverter. I bring a longer lens ashore on most landings as that fits my style. I generally work with either the Canon 300mm f/2.8L IS or the Canon 200-400mm f/4 L IS with Internal Extender.
Do know that there is a NatureScapes Galapagos trip: one week for $8495. Thus, my trip represents a tremendous value; why go all that way and miss half of the great photographic locations?
The Logistics
Fly to Guayacil, Ecuador on July 12, 2015. Travel insurance/rest day: July 13 (We may or may not offer a photo outing on the 13th). Fly to the archipelago on July 14 and board the Samba. Get off the boat on July 28. Fly to Guayacil that afternoon. Fly home on the early morning of July 29 unless you are staying on or going elsewhere (or catching a red-eye flight on the evening of the 28th).
$12,499 includes just about everything: all transfers, guide and park fees, all food on the boat, transfers and ground transportation, your flights to the archipelago, and three nights (double occupancy) in a top notch hotel in Guayacil. If you are good to go, a non-refundable deposit of $5,000 per person is due immediately. The second payment of $4,000 is not due until 11/1/14. The final payment of $3749 per person will be due on 2/1/15. A $200 discount will be applied to each of the balances for couples or friends who register at the same time.
Purchasing travel insurance within 2 weeks of our cashing your deposit check is strongly recommended. On my past two cruises a total of 5 folks were forced to cancel less than one week prior to the trip. My family and I use Travel Insurance Services and strongly recommend that you do the same.
Not included: your round trip airfare from your home to and from Guayacil, beverages on the boat, phone calls, your meals in Guayacil, personal items, and a $600/person cash tip for the crew and the guide—this works out to roughly $40/day to be shared by the 7 folks who will be waiting on us hand and foot every day for two weeks. The service is so wonderful that many folks choose to tip extra.
Please e-mail for the complete itinerary and for additional info and images. Please cut and paste “Galapagos 2015 Info Please) into the Subject line.
Support the BAA Blog. Support the BAA Bulletins: Shop B&H here!
We want and need to keep providing you with the latest free information, photography and Photoshop lessons, and all manner of related information. Show your appreciation by making your purchases immediately after clicking on any of our B&H or Amazon Affiliate links in this blog post. Remember, B&H ain’t just photography!
…..
Amazon Canada
Many kind folks from north of the border, ay, have e-mailed stating that they would love to help us out by using one of our affiliate links but that living in Canada and doing so presents numerous problems. Now, they can help us out by using our Amazon Canada affiliate link by starting their searches by clicking here. Many thanks to those who have written.
Typos
In all blog posts and Bulletins, feel free to e-mail or to leave a comment regarding any typos, wrong words, misspellings, omissions, or grammatical errors. Just be right. 🙂
June 29th, 2014 The Streak Continues: 211
It is now about 9:30am here in Indian Lake Estates as today’s blog post is being published. I am getting really excited about the UK Puffin IPT. I fly to Newark on Tuesday afternoon where I will meet Denise and one of our 7 clients for the red eye flight to Edinburgh, Scotland, arriving in the UK at 7:55am on Wednesday morning. This post took about 3 hours to prepare. Enjoy and learn.
This post marks 211 consecutive days with a new blog post. With so many folks getting in the habit of using our B&H links and our Amazon logo-links why quit now? April, May and June have been fantastic as lots of folks are getting the message; using my affiliate links does not cost you a penny and helps support my efforts here. To show your appreciation, I do ask that you use our the B&H and Amazon affiliate links on the right side of the blog for all of your purchases. Please check the availability of all photographic accessories in the BIRDS AS ART Online Store, especially Gitzo tripods, Wimberley tripod heads, and the like. We sell only what I have used and tested, and know that you can depend on. We will not sell you junk. We know the tools that you need to make creating great images easy and fun. And we are always glad to answer your gear questions via e-mail.
You can find the following items in the store: Gitzo tripods, Mongoose M3.6 and Wimberley heads, plates, low feet, and accessories, flash brackets, , Delkin e-film Pro Compact Flash Cards, LensCoat products, and our unique line-up of educational materials including ABP I & II, Digital Basics, Site and Set-up e-Guides, Canon and Nikon Camera Users and AF e-Guides, and MP-4 Photoshop video tutorials among others.
I would of course appreciate your using our B&H affiliate links for all of your major gear, video, and electronic purchases. For the photographic stuff mentioned in the paragraph above we, meaning BAA, would of course greatly appreciate your business. Here is a huge thank you to the many who have been using our links on a regular basis and visiting the BAA Online store as well.
|
|
|
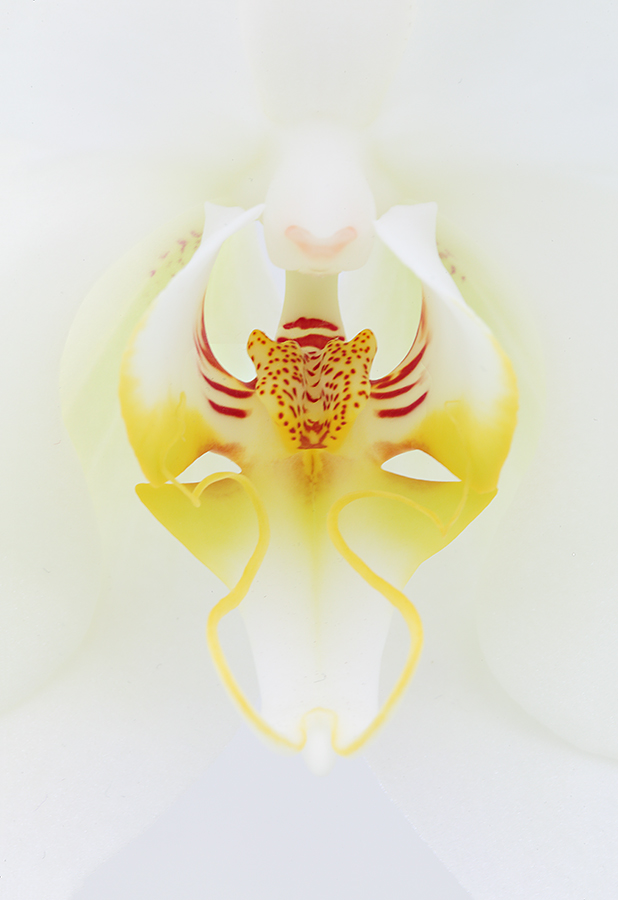
This Orchid Opti Grandi image was created on last spring’s Tulips and a Touch of Holland IPT in the Beatrix Pavilion with the Gitzo GT1542T 4-section Traveler Tripod , the Mongoose M3.6 head on it,
Canon EF 100mm f/2.8L IS macro lens and the Canon EOS 5D Mark III Digital camera body. ISO 400. Evaluative metering +1 2/3 stops: 1/2 sec. at f/16 in Av mode. Color Temperature: 5000K.
Live View for mirror lock and the live RGB histogram. 2-second timer. Manual Focus. Click on the image to enjoy a larger version. Here is a tip on using the Live View RGB histogram: though it will get you in the neighborhood be sure to check for blinkies. There are times when all 3 channels (R, G, & B) seem to be well inside the right hand axis of the histogram but you still have a few flashing highlights…. In those cases you simply go 1/3 darker with the EC (Exposure Compensation).
|
On Learning to Think and See Like a Pro
In the June 27, 2014 blog post, “Learning to Think and See Like a Pro/The Third of a Series” here, I posted, with regards to the image immediately below:
When I walked up to this display of Orchid Opti Grandi, my eye instantly went to the single flower that would yield the image that I saw in my mind’s eye: a large-in-the-frame vertical of the center of one of the tiny orchid blooms. With a relatively distant background…. After I created the image that I saw I shared it with nearby members or our group and said: “There is only one blossom in this display that works; which one is it?”
All struggled.
So I ask you, “Which is the only blossom in the display that will yield a large=in-the-frame vertical of the center an Orchid Opti Grande flower with a relatively distant background?”
Canon Tripod Mount Ring D for IS 100mm f/2.8L Macro Lens
Because the 100 macro does not come with a tripod collar, those of you who own the lens are likely wondering “How does he get the 100 macro onto a Mongoose?” The answer is simple. I purchased the right tripod collar as a Canon accessory. In general it is not a good policy to mount the camera onto a ball head with the lens hanging from the front of it and stressing the lens mount. I prefer using the Mongoose for my flower photography for a variety of reasons so once I learned of the Canon Tripod Mount Ring D for IS 100mm f/2.8L Macro Lens I made it a point to get my hands on one asap and to bring it to Holland. And I did.
I tried the much cheaper ($49.95 as compared to $172.00) Vello Tripod Collar D (Black) for Canon EF 100mm f/2.8L IS USM Macro Lens but it pretty much turned out to be junk. It was very difficult to loosen and open it and very difficult to get it on the lens and tighten it. So I went with the Canon version. In general, you get what you pay for.
I have owned this tripod for about a year now. For the most part, I use it mostly to hold the LensAlign Mark II when micro-adjusting my lenses. On a whim, I packed it in one of my two checked bags for the Holland trip along with my workhorse Gitzo 3532 tripod. I have been rehabbing my right shoulder for more than a decade…. Yesterday I decided to go super-light with the tiny tripod and the Mongoose. Lord was I pleased. I used the 300 II with the 2X III TC and using good sharpness techniques on my part I was able to make sharp images at shutter speeds below 1/100 sec. And my shoulder felt great after the 5 hour photo session.
Because the Gitzo GT1542T will be top heavy with pretty much any camera and lens mounted on it, it is imperative that you never ever leave your tripod unattended, even for an instant. If you do lots of flowers and/or work with an intermediate telephoto lens and you like lightweight stuff, the Gitzo GT1542T tripod might just be perfect for you. Click here to read my probably too honest evaluation. As for me, I am sold on it for flower and many types of travel photography.
|
|
|
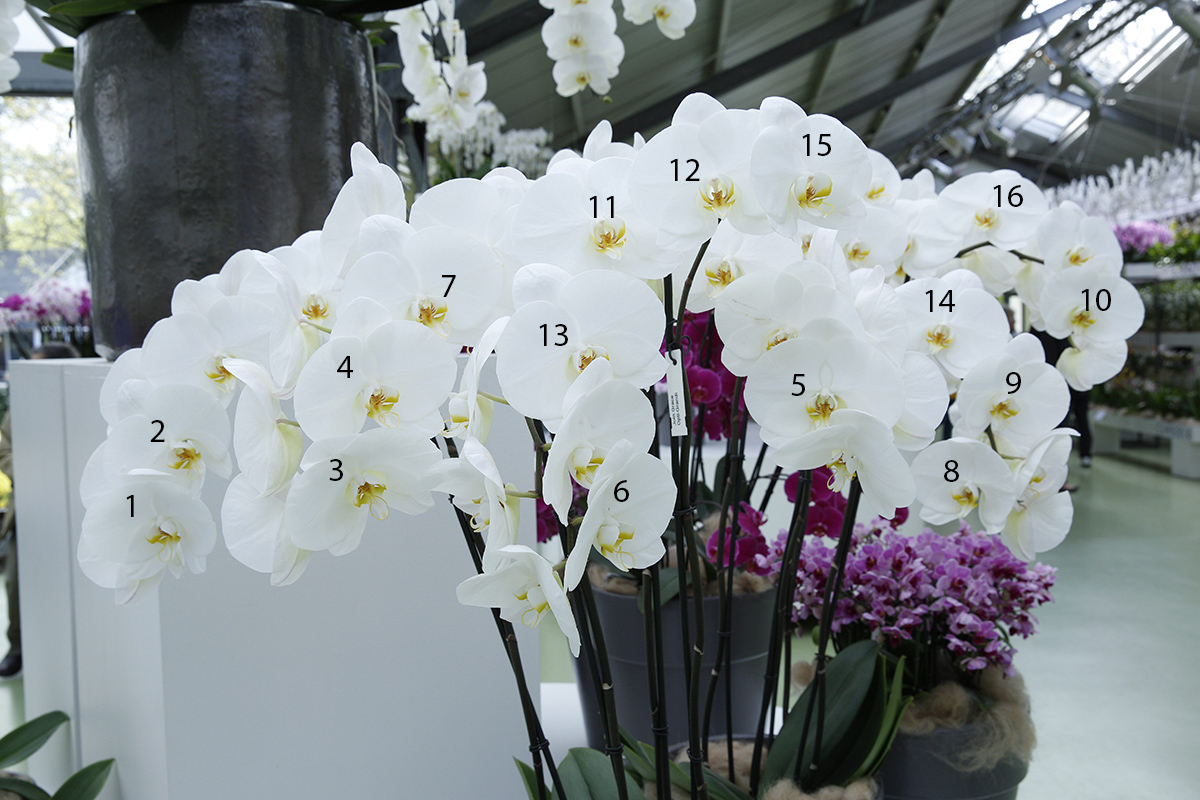
This image was created on last April’s Tulip and a Touch of Holland ITP in the Beatrix Pavilion with the hand held Canon EF 24-70mm f/2.8L II USM lens (at 35mm), and the Canon EOS 5D Mark III . ISO 640. Evaluative metering +1 1/3 stops: 1/80 sec. at f/9 in Av mode.
Central sensor/AI Servo Rear Focus AF on orchid #6 and re-compose. Click here if you missed the Rear Focus Tutorial. Click on the image to see the larger version.
|
What I Saw and Thought
Well, lots of folks tried but nobody was even close…. The opening image above features flower #3. The instant I walked up to the display, that single flower jumped out at me. The flower center was nicely isolated and I knew that the soft, white, matte finished wall of the
display behind the bottom of the flower would provide an ideal distant background. I chose flower #3 over flower #1 because it was positioned a bit higher and I knew that it would be easier to get the lens on it.
And you can believe this or not, but the God’s-honest-truth is that when I was on the phone with Denise Ippolito yesterday I asked her to go to the June 27, 2014 blog post and let me know which flower center she would have photographed. In less than 1/1000 sec. she said, “#3.”
Everyone Fanned on This One…
When I posted the question I thought that it was much too easy, that everyone would have answered “#3,”, or at least #1. I was wrong. Nobody was even close.
There was one vote for #10. That would have yielded a horrible background. Two votes for #11; that one was blocked both left and below by the petals of another orchid. Three folks suggested #12 and #15 but each of those had other flowers as the proximal background, so close that there would have been lots of unwanted detail brought up. And the same goes for flower #16 with its single vote.
Perhaps everyone was thrown off because they failed to consider the man-made wall of the display as a possible background….
Is There Hope?
Summing up, the two professionals pick out the best possible subject instantly. Folks in our group and everyone else who tried here on the blog struck out on three pitches. Is there hope? Can everyone learn to see and design pleasing images?
Absolutely. The best way to start is to look at as many good and great images as you can every day, every week, and every month. The blog here and the Bulletins are great places to do that. Joining BPN and participating actively is an even better option. There are simply no better ways to learn than to have your best images critiqued by others and to critique the work of other photographers. I can still remember my one and only photography teacher Milton Heiberg commenting on my Greater Yellowlegs image. “It’s nice, but why is the bird in the center of the frame?” And the rest is history.
In addition you can visit the websites of photographers that you admire and study their image galleries. In all of cases ask yourself why they choose a given perspective? What do I like about this image? What don’t I like? What would I have done differently? Try to imagine what they were thinking when the pressed the shutter button.
Lastly, be sure to get yourself copies of the original “The Art of Bird Photography” (ABP, the classic how-to work on bird photography, now in soft cover) and of the then all-new follow-up, “The Art of Bird Photography II” (ABP II: 916 pages, 900+ images, on CD only). In ABP, study chapter seven, Designing the Image. In ABP II, study the section on Advanced Composition and Image Design. And you can save $10 by buying both together here.
|
|
|
Denise and artie hope that you can join us next spring in Holland and learn to improve both the technical and creative aspects of your flower (and street) photography.
|
7 1/2-Day/8-Night: A Creative Adventure/BIRDS AS ART/Tulips & A Touch of Holland Instructional Photo-Tour (IPT)
Keukenhof—Delft—Amsterdam–Flower Fields—Kinderdijk
April 9 -April 16, 2015: $4995. Limit: 12 photographers/Openings 10. Four more to make the trip a go.
This trip needs 6 registrants to run so please do not purchase your plane tickets until you hear from us that the trip is a go.
Join Denise Ippolito, the author of “Bloomin’ Ideas,” and Arthur Morris, Canon Explorer of Light Emeritus, for a great trip to Holland in mid-April 2015. Day 1 of the IPT will be April 9, 2015. We will have a short afternoon get-together and then our first photographic session at the justly-famed Keukenhof. Our last day, Day 8, April 16 will be a full day of photography.
The primary subjects will be tulips and orchids at Keukenhof and the spectacularly amazing tulip, hyacinth, and daffodil bulb fields around Lisse and points north. We will spend one full day in Amsterdam. There will be optional visits to the Van Gogh Museum, the Anne Frank House and/or the Rijk’s Museum. Street photography and sightseeing will be other options. We will spend a half day at Kinderdijk where we will be photographing the windmills and doing some creative photography. We will spend an afternoon in the lovely Dutch town of Delft where we will do some street photography and shopping. There is an optional church tower tour/climb. We will also enjoy a superb fine dining experience in a traditional restaurant.
Other than the arrival date: April 9, Day 1, and the date of our last day of photography on April 16, Day 8, there is no set itinerary. We will check the weather and play everything by ear to maximize the photographic opportunities. We will try to do Amsterdam, Delft, and especially Kinderdijik, on cloudy days.
There are several huge pluses to this trip. First off, denise is an amazingly skilled and caring instructor. Both her creativity and her willingness to share and to help beginning and intermediate photographers are unmatched. And though artie has learned a ton about flower photography from denise, their styles and techniques do vary considerably. You will have a chance to be counseled by and to learn from both of them. While denise will hunt you down to help you, artie’s teaching style is more “the closer you stay to me, the more you will learn.” Both leaders consistently inspire the participants. And each other. The sky, of course, is the limit.
You will learn to create tight abstracts, how best to use depth-of-field (or the lack thereof) to improve your flower photography, how to get the right exposure and make sharp images every time, how to see the best shot, and how to choose the best perspective for a given situation. And you will of course learn to create a variety of pleasingly blurred flower images. If you bring a long lens, you will learn to use it effectively for flower photography. Denise’s two favorite flower lenses are the Canon EF 100mm f/2.8L Macro IS USM lens and the Canon EF 24-105mm f/4L IS USM lens. Mine are the Canon 100mm f/2.8L IS macro , the Canon EF 180mm f/3.5L Macro USM lens ,and the Canon EF 300mm f/2.8L IS II USM lens, all almost always on a tripod. Often with extension tubes and/or either the 1.4X or the 2X (with the 300 II) teleconverters. Denise hand holds a great deal of the time. For flower field blurs denise uses the same lenses mentioned above along with her new 70-200mm f/2.8L IS III lens. Artie’s favorite is that same 70-200 often with a 1.4X TC but he uses both the new Canon EF 24-70mm f/2.8L II USM lens and the 300 II as well. Both of us use and love the Canon EOS 5D Mark IIIfor all of our flower photography. The in-camera HDR and Multiple Exposure features are a blast.
One of the great advantages of our trip is that we will be staying in a single, strategically located hotel that is quite excellent. Do note that all ground transfers to and from Schipol Airport will be via the free hotel shuttle bus.
What’s included: Eight hotel nights. All ground transportation except for airport transfers as noted above. In-the-field instruction and small group image review and Photoshop sessions. All meals from dinner on Day 1 through dinner on Day 8. There is good food at the hotel and we will be dining there on occasion; whenever you order off the menu be it at the hotel or at another restaurant only the cost of your main course is included. On these occasions the cost of soups, appetizers, salads, sodas and other beverages, alcoholic drinks and wine, bottled water, and desserts are not included. Snacks, personal items, phone calls, etc. are also not included. The cost of bus or train transportation to and from Amsterdam (about $20 US), museum entry, and tower and church entry fees (optional) are likewise not included.
Beware of seemingly longer, slightly less expensive tours that include travel days and days sitting in the hotel doing nothing as part of the tour. In addition, other similar trips have you changing hotels often and needlessly. One final note on other similar trips: the instructors on this trip actually instruct. On other similar trips the instructors, though usually imminently qualified, serve for the most part as van drivers and van door openers.
A non-refundable deposit of $1,000 per person is required to hold your spot. The second payment of $2,000 due by October 30, 2014. The balance is due on January 15, 2015. Payments in full are of course welcome at any time. All payments including the deposit must be by check made out to “Arthur Morris.” As life has a way of throwing an occasional curve ball our way, you are urged to purchase travel insurance within 15 days of our cashing your check. Artie uses and recommends Travel Insurance Services. All payments are non-refundable unless the trip fills to capacity. In that case, all payments but your deposit will be refunded. If the trip does not run every penny will of course be refunded. Again, please do not purchase your air tickets until you hear from us that the trip is a go. We are very confident that it will.
All checks should be made out to “Arthur Morris” and sent to: Arthur Morris, PO Box 7245, Indian Lake Estates, FL 33855. Call Jim or Jen in the BAA office with any additional registration questions: 863-692-0906.
For couples or friends signing up at the same time for the tulip trip, a $200/duo discount will be applied to the final payment.
When you send your deposit check, please print, sign, and include the paperwork here.
If you have any questions on the trip please contact artie by e-mail or denise by e-mail.
Selling Your Used Photo Gear Through BIRDS AS ART
Selling your used (or like-new) photo gear through the BAA Blog or via a BAA Online Bulletin is a great idea. We charge only a 5% commission. One of the more popular used gear for sale sites charges a minimum of 20% plus assorted fees! Yikes. The minimum item price here is $500 (or less for a $25 fee). If you are interested please e-mail with the words Items for Sale Info Request cut and pasted into the Subject line :). Stuff that is priced fairly–I offer free pricing advise, usually sells in no time flat.
In late May and early June, practically everything on the shelves was sold. I am still at a loss as to how Jim Bicket’s 800mm lens (see above) has not sold. It is a great lens in perfect condition that is more than fairly priced. B&H is asking $11,999.90 for a used one in the same condition here. Buy Jim’s lens and save $3249.90 right now!
Used Gear Caution
Though I am not in a position to post images of gear for sale here or elsewhere, prospective buyers are encouraged to request for photos of the gear that they are interested in purchasing via e-mail. Doing so will help to avoid any misunderstandings as to the condition of the gear.
One Week Sale Only: Used Canon 500mm f/4L IS Lens at a Ridiculous Low Price
Ellen Anon is offering a used Canon 500mm f/4L IS lens for only $4949.00. This super-low price if for this week only as Ellen is desperate to purchase a 200-400 for a polar bear trip. The lens is in Very Good condition (8/10). Included in the sale are the installed LensCoat that has protected the lens, the lens trunk, hood, leather front cover and the rear lens cap. The seller will pay for insured UPS Ground shipping to US addresses only. The lens will not ship until after your check clears.
Interested folks can contact Ellen via e-mail or try her at 1-814-838-1996. Photos of the lens are available upon request.
Canon EOS 5D Mark III Kit with EF24-105mm f/4L IS USM Lens
Chuck Pettis is offering a Canon EOS-5D Mark III Kit with EF24-105mm f/4L IS USM Lens new in the box–from an insurance claim for only $3499. Save $500 off the B&H price. The seller will pay insured UPS shipping within the continental US. And here is the best part: the lucky purchaser of this kit will receive a free copy of my EOX-5D Mark III User’s Guide, a $50 value.
Interested folks can contact Chuck via e-mail or try him at 360-331-6667 or on his cell at 206-930-2623.
Canon EF 600mm f/4L IS USM Lens, the “old six”
An Amazing Package for Someone Young and Strong. Or Old and Strong.
Chuck is also offering a Canon EF 600mm f/4L IS USM lens for $6199 with an amazing package of extras, extras that I used and depend on. The lens is in excellent condition used only a dozen times. The sale includes the Lens Trunk (one latch on the case was damaged by the TSA on a trip to Bosque but the latch still functions fine), the leather lens hood, and the rear cap. Amazingly Chuck is also including more than $30 in extras: a Canon 52mm Drop-in Circular Polarizing Filter PL-C, also in excellent condition and an extra Canon 52mm Drop-in Filter Holder in excellent condition. I put a 3-stop ND in my extra filter draw for creating blurs on sunny days.
The seller will also pay insured UPS shipping within the continental US.
Interested folks can contact Chuck via e-mail or try him at 360-331-6667 or on his cell at 206-930-2623.
The old six was my workhorse super-telephoto for too many years….
Canon 500mm f/4L IS II USM Lens
Multiple IPT veteran and BAA friend Carl Zanoni is offering an immaculate Canon 500mm f/4L IS II USM lens in Like New condition for the ridiculously low price of $8,999. With lots of extras. The sale includes the Canon E-163B Lens Cap, a Canon Rear Lens Cap, the Canon ET-138W II Lens Hood, the Canon Hard Lens Trunk 500B, a Canon Drop-in 52mm Circular Polarizer, 2 Canon shoulder straps, a LensCoat(Realtree Max 4), a Kirk LP-55SG Quick Release Plate/Foot, the original Canon lens foot, and insured UPS Ground shipping to US addresses. The items will be shipped only after the buyer’s check clears.
Please contact Carl via e-mail or by phone at 860 349 3840. This is a dream lens for all bird and wildlife photographers who do not want to deal with the bulk and weight of a 600mm lens. Save a ton as the lens sells new for $10,499.00.
Canon 400 DO IS USM Lens
Joe Messina is offering a used Canon 400 DO IS USM lens in very good ++ condition for $4200. There are some minor cosmetic scratches to the finish. The lens hood is slightly out of round and is difficult to install. The sale includes an AquaTech flexible strap-on hood, a $150 value. The sale also includes the lens trunk (with key), the original leather hood, and a hard plastic lens cap. The seller will pay insured UPS shipping within continental US. The lens will ship after the check clears.
Please contact Joe via e-mail or by phone at 415-563-6577.
If you are looking for a fast, lightweight, hand holdable telephoto lens, this is the lens for you. Learn a ton more about the 400 DO here and see lots of 400 DO images by visiting the “The Canon 400mm f/4 IS DO Lens: Fourteen Images that Prove that the Internet Experts are (As Usual) Idiots” blog post here. The lens sells new at B&H for $6499.00.
Canon EOS-1D Mark III
Michael Zajac is offering a Canon EOS-1D Mark III professional digital camera body in Excellent condition for $1250. The sale includes the battery charger, one battery, the original paperwork, the camera strap, the original box, and shipping to the continental US.
Please contact Michael via e-mail or by phone at 732-979 -6644. Photos are available upon request.
Some EOS-1D Mark III bodies originally had AF problems. Michael’s did not. I have seen his great flight images made with this camera. This body features a 1.3X crop factor sensor and is a great step-up for someone who wants to take a big step up from a 7D. It’s powerful battery drives AF much faster than the pro-sumer bodies especially with either a 1.4X or 2X teleconverter in place.
Used Mongoose Package for Sale
Upgraded Mongoose M3.5 Package: $630
John Stuhlmuller is offering a used Mongoose M3.5 tripod head that has been upgraded to an M3.6 (approximate value $550). The only differences between a refurbished M3.5 and a new M3.6 is the internal finish of several parts. Otherwise, it functions as an M3.6, the head I have used and depended on for nearly a decade. The sale includes an installed Horizontal) Low Mount Arm (sells new for $90), the Integrated Flash Arm (sells new for $110), a CR-X5 plate, the low foot for the four Series II Canon Super-Telephoto lenses and teh 200-400 (sells for $122 new), a CP16 lens plate for B-tripod ring lenses like the Canon 70-200mm f/2.8L IS (sells for $75 new).
There are some minor scratches on the top of the mounting clamp. Otherwise, there are no other signs of wear and the head works perfectly. John prefers his Wimberley V2 head.
The package is valued at approximately $947. The cost of insured ground shipping to US addresses is included. Sale price: $630. Save $300+.
Contact John via e-mail. Photos available upon request.
Used Canon 800mm f/5.6L IS Lens for Sale
Multiple IPT veteran, the too-kind Jim Bicket, is offering a Canon EF 800mm f/5.6L IS USM lens in excellent condition for $8750. The lens is like new except for some wear on the bottom of the lens hood near the forward edge when the hood is reversed. The sales includes the LensCoat that has protected the lens since day 1, the leather hood, the original hard case and key, and insured shipping via UPS Ground to US addresses only. Personal checks only; your new lens will be shipped only after your check clears.
This great lens, my favorite for 3 years, sells new at B&H for $13,999.00. B&H is asking $11,999.90 for a used one in the same condition as Jim’s here. Buy Jim’s lens and save $3249.90 right now! It will save you a ton of dough and you will have a super-sharp lens with lots of reach. And it works great with a 1.4X TC too.
Interested folks can contact Jim via e-mail or try him at 501-915-9336.
Support the BAA Blog. Support the BAA Bulletins: Shop B&H here!
We want and need to keep providing you with the latest free information, photography and Photoshop lessons, and all manner of related information. Show your appreciation by making your purchases immediately after clicking on any of our B&H or Amazon Affiliate links in this blog post. Remember, B&H ain’t just photography!
…..
Amazon Canada
Many kind folks from north of the border, ay, have e-mailed stating that they would love to help us out by using one of our affiliate links but that living in Canada and doing so presents numerous problems. Now, they can help us out by using our Amazon Canada affiliate link by starting their searches by clicking here. Many thanks to those who have written.
Typos
In all blog posts and Bulletins, feel free to e-mail or to leave a comment regarding any typos, wrong words, misspellings, omissions, or grammatical errors. Just be right. 🙂
June 28th, 2014 The Streak Continues: 210
It is now just before 8:45am at my home in Indian Lake Estates–I slept really well last night. I am getting really excited about the UK Puffin IPT. I fly to Newark on Tuesday afternoon where I will meet Denise and one of our 7 clients for the red eye flight to Edinburgh, Scotland, arriving in the UK at 7:55am on Wednesday morning. Amazingly this post took about 2 1/2 hours to prepare. Enjoy and learn.
This post marks 210 consecutive days with a new blog post. With so many folks getting in the habit of using our B&H links and our Amazon logo-links why quit now? April, May and June have been fantastic as lots of folks are getting the message; using my affiliate links does not cost you a penny and helps support my efforts here. To show your appreciation, I do ask that you use our the B&H and Amazon affiliate links on the right side of the blog for all of your purchases. Please check the availability of all photographic accessories in the BIRDS AS ART Online Store, especially Gitzo tripods, Wimberley tripod heads, and the like. We sell only what I have used and tested, and know that you can depend on. We will not sell you junk. We know the tools that you need to make creating great images easy and fun. And we are always glad to answer your gear questions via e-mail.
You can find the following items in the store: Gitzo tripods, Mongoose M3.6 and Wimberley heads, plates, low feet, and accessories, flash brackets, , Delkin e-film Pro Compact Flash Cards, LensCoat products, and our unique line-up of educational materials including ABP I & II, Digital Basics, Site and Set-up e-Guides, Canon and Nikon Camera Users and AF e-Guides, and MP-4 Photoshop video tutorials among others.
I would of course appreciate your using our B&H affiliate links for all of your major gear, video, and electronic purchases. For the photographic stuff mentioned in the paragraph above we, meaning BAA, would of course greatly appreciate your business. Here is a huge thank you to the many who have been using our links on a regular basis and visiting the BAA Online store as well.
The Situation
I had been checking out this nest from a great distance for a while as there was not a whole lot going on. But the chick was asleep. When I noticed that the large young Osprey had not only woken up but was posed exactly the same as the adult and had paralleled it as well I created what I call “Osprey right-hand image” below. Since it was the sweep of the pine bough that had caught my eye I decided right then and there to create a second image, “Osprey left-hand image” below, that I could use to complete the stitched pano.
Learn to create a stitched pano in Photoshop by scrolling down.
|
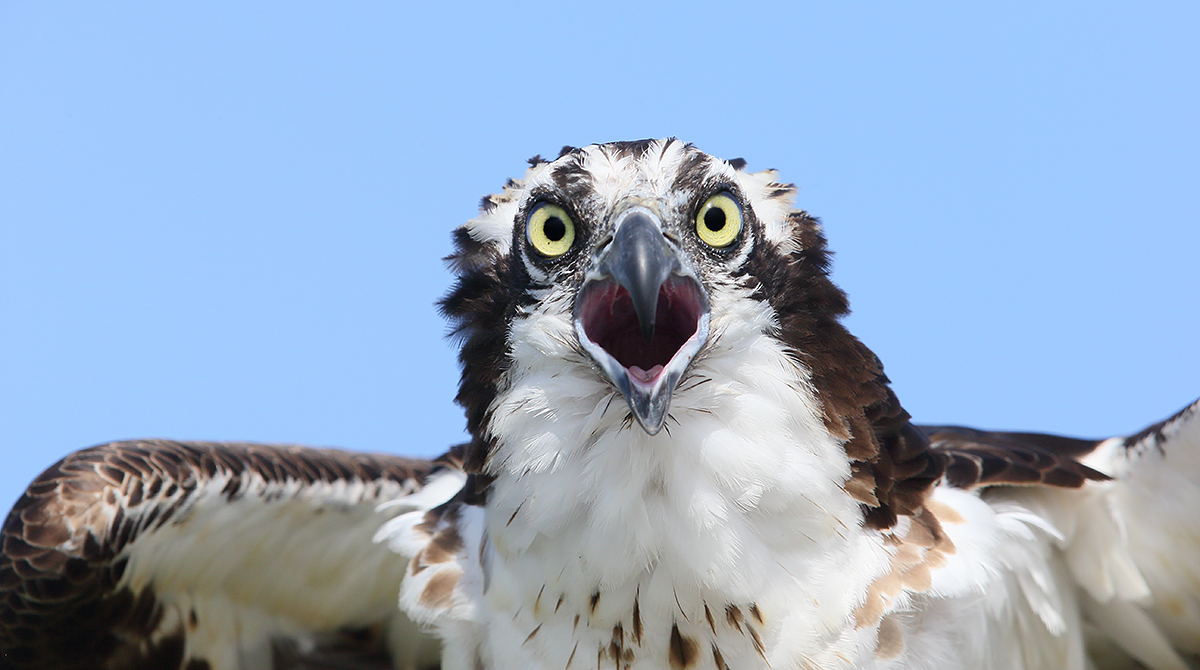
|
|
This image was created at 9:17am on the same morning in sunnier conditions with the Gitzo 3532 LS carbon fiber tripod, the Mongoose M3.6 head, the Canon EF 600mm f/4L IS II USM lens, the Canon Extender EF 2X III, and the Canon EOS-1D X. ISO 400. Evaluative metering -1/3 stop as framed (I was worried about burning the WHITEs: 1/1000 sec. at f/11 in Manual Av mode turned out to be about a 1 stop under exposure. AWB.
Central Sensor (by necessity)/AI Servo-Expand/Rear Focus AF just to the right of the bird’s upper mandible was active at the moment of exposure. When you add the 2X TC to an f/4 lens with the 1DX or the 5D III hit the MFn button once to toggle to AF Expand and enjoy 4 extra AF sensors. Learn everything there is to know about the 1D X and 5D III AF systems including how to manage the various AF Area Selection Modes, when to use which one, and several ways to move the AF sensor around in the 1D X AF Guide and the 5D Mark III User’s Guide. Click here to see the latest version of the Rear Focus Tutorial. Click on the image to see a larger version. .
|
From One Extreme to Another With the Canon 600mm f/4L IS II. And the 2X III TC
We decided to go head-hunting so I put the big lens on the tripod and added the 2X III TC. I pulled the tripod legs in tight to get a bit higher even though this meant that the rig would a bit less stable but at 1/1000 sec. I was not worried much. I created this image as the boat drifted slowly toward the perch tree.
The optimized image above is a small crop from the top resulting in somewhat of a panoramic look.
As much as the two images above show how versatile a given lens can be, it shows what is possible when a photographer learns to see and to think creatively….
Your Favorite?
Which of today’s 2 images do you like best, the wide pano or the tight head shot? Please leave a comment and let us know why.
|
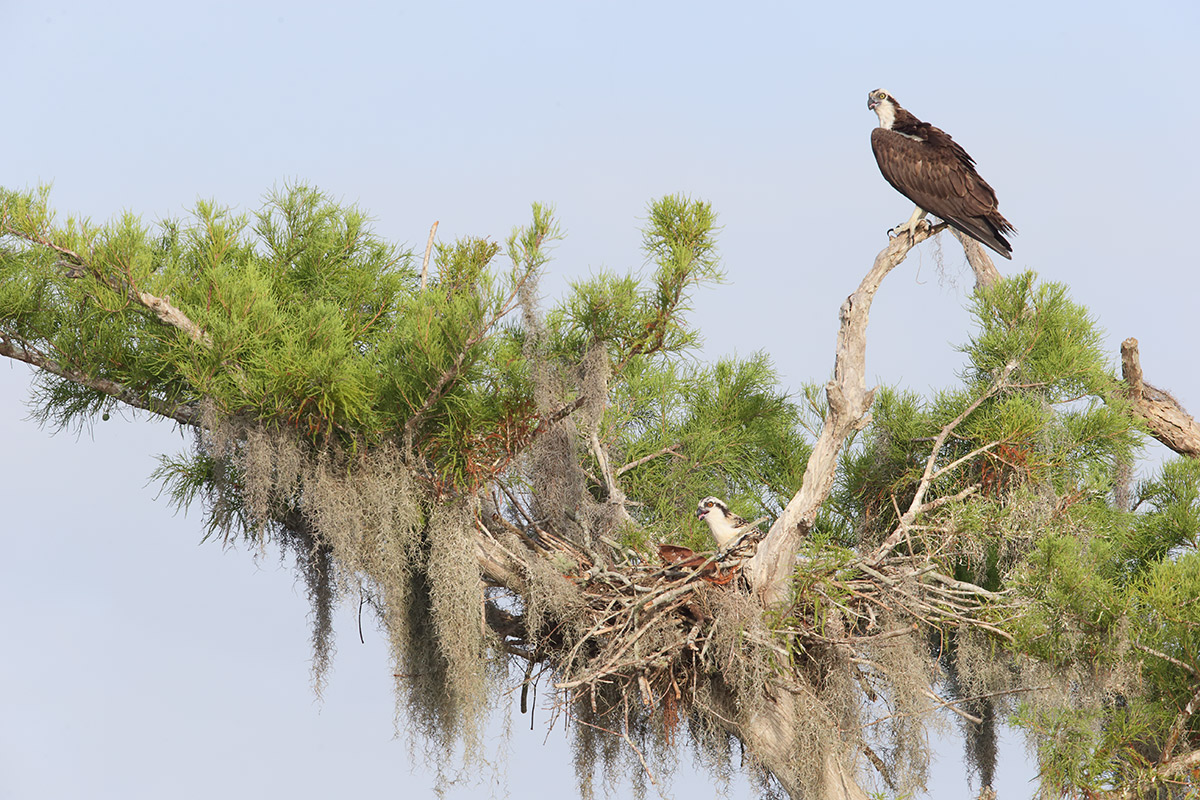
|
Osprey right-hand image
Gear as noted above.
Four sensors to the right of the Central Sensor/AI Servo-Surround/Rear Focus AF fell halfway down the adult’s perch branch and was active at the moment of exposure. Learn to manage the various AF Area Selection Modes, when to use which one, and several ways to move the AF sensor around in the 1D X AF Guide and the 5D Mark III User’s Guide. Click here to see the latest version of the Rear Focus Tutorial. Click on the image to see a larger version. .
|
Osprey Right-hand Image Question
1-Why did I opt to focus halfway down the adult’s perch branch?
|
|
Osprey left-hand image
Central Sensor/AI Servo-Surround/Rear Focus AF as framed was active at the moment of exposure. Learn to manage the various AF Area Selection Modes, when to use which one, and several ways to move the AF sensor around in the 1D X AF Guide and the 5D Mark III User’s Guide. Click here to see the latest version of the Rear Focus Tutorial. Click on the image to see a larger version. .
|
Osprey Left-hand Image Questions
2-Why did I opt to focus halfway down the adult’s perch branch?
3-After comparing the right-hand and left-hand images, why is it mandatory to be in Manual Mode when creating a stitched pano?
4-When creating stitched panos the standard operating procedure is to set the focus for the first image and leave it. Why did I choose to keep AF active and to re-focus for the left-hand image?
|
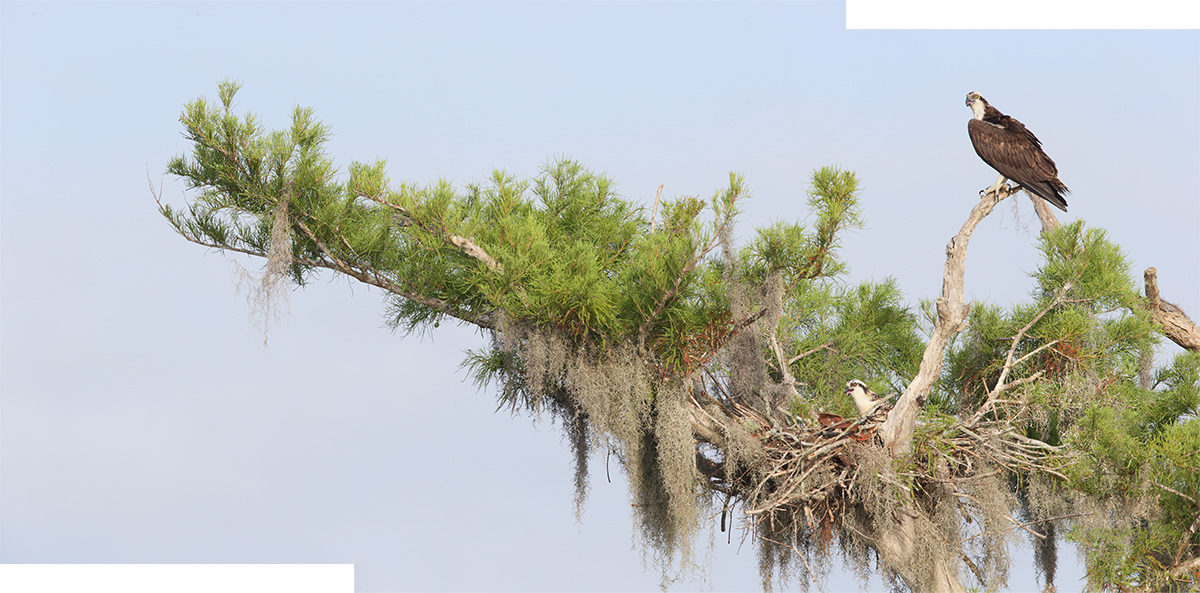
|
|
The image after running File/Automate/Photomerge… in Photoshop CS-6.
|
Stitched Pano Tutorial
Adapted from the Digital Basics File/Stitched Panoramas Using Photoshop’s Photo Merge
The stitching feature in CS6 is phenomenal.
Here are the very basics for creating the source images for a stitched panoramic image: Make sure that your tripod is level. Set both exposure and focus manually. Frame loosely so that you have room to crop. Tighten all the tripod controls but the panning control. Note: You may wish to tighten and then loosen this control for each image when you are using slow shutter speeds. Start from left (for example). Make one image, and then pan to the right, overlapping by about 25-20 percent. Continue until you have reached the last image in your envisioned panoramic image. If do this while hand holding, frame even more loosely.
Assuming that you are using RAW capture, convert each image. In Photoshop, click on File/Automate/Photomerge. When the Photomerge dialogue box opens, browse to the folder that contains the images that you want to stitch together and highlight those files. Select Reposition Only in the Layout box—I find that this is best for most natural history panoramas made with long or intermediate telephotos lenses. Make sure that the Blend images together box is checked. Then click OK and take a short break; depending on the number of images and the speed of your computer the panoramic image will open at some point. The files may be huge, again depending on how many images you are stitching. Before you begin to optimize the image it is best to hit Control E (Merge Layers). When using previous versions of Photoshop this step often eliminates what look like cracks where the images have been stitched together. You will almost always need to crop, sometimes considerably–that is why we advise that you frame loosely. I find this technique easy to use and with CS-6 the stitching is usually seamless.
With the two-frame stitched Osprey at the nest pano here note that I needed to use the Clone Stamp Tool to fill in the two rectangular strips of missing sky.
DPP V4.0
Canon recently released a new version of DPP, V4.0. It can be downloaded here. You will need to enter your 1D X or 5D Mark III serial number to start the download. I downloaded 4.0 to my old computer and opened it yesterday. While early reports are that it is significantly better in many areas than any previous versions, I was totally baffled by the interface. It bears no resemblance to any current version of DPP. If I can figure it out, and I am sure that I will at some point, there will be an all-new DPP V4.0 eGuide that will require a separate purchase. V4.0 works only with 1D X, 5D III, 6D, and 1Dc (whatever that is) images. Folks with older bodies (both pro-sumer and professional) will need to continue using previous versions of DPP. I recently updated to V3.11 and have been very happy with it and was glad to note the addition of a Color Temperature slider.
Digital Basics
Everything that I did to optimize today’s image is detailed in the Digital Basics File–written in my easy-to-follow, easy-to-understand style. Are you tired of making your images look worse in Photoshop? Digital Basics File is an instructional PDF that is sent via e-mail. It includes my complete digital workflow, dozens of great Photoshop tips, the use of Contrast Masks, several different ways of expanding and filling in canvas, all of my time-saving Keyboard Shortcuts, Quick Masking, Layer Masking, and NIK Color Efex Pro basics, my killer image clean-up techniques, Digital Eye Doctor, creating time-saving actions, and lots more.
APTATS I & II
Learn the details of advanced Quick Masking techniques in APTATS I. Learn Advanced Layer Masking Techniques in APTATS I. Mention this blog post and apply a $5 discount to either with phone orders only. Buy both APTATS I and APTATS II and we will be glad to apply at $15 discount with phone orders only. Please call Jim or Jennifer weekdays at 863-221-2372 to take advantage of this special offer.
Nickerson Baby Beach-nesting Birds IPT: 3-Full Days/July 15-17, 2014: $1199. Introductory meet and greet: 8pm, Monday, July 14, 2014. Co-leaders Arthur Morris and Denise Ippolito
Late Registration Discount: Call Jim weekdays at 863-692-0906 for details or call artie this SAT or SUN (6/28 or 29) only at 863-692-0806. Or contact us via e-mail.
With a small group pretty much guaranteed, do consider joining us on Long Island, NY this coming July to photograph Black Skimmers–it’s looking like a great year for skimmer nesting, Common Terns with chicks, American Oystercatcher families, and possibly some just-hatched Black Skimmer chicks. The opportunities will include chances to photograph a variety of breeding behaviors including courtship feeding, display flight and combat, and copulations. Car-pooling is recommended; if we opt to return to the beach before 5pm on cloudy days for example) there is a $30/vehicle parking fee that is not included so it is best to share that expense. Parking in the morning is free.
Because of the late date, your non-refundable payment in full is due when you register.
Please print, complete, and sign the form that is linked to here and shoot it to us along with your deposit check (made out to “Arthur Morris.”) Though we prefer a check, you can also leave your deposit with a credit card by calling the office at 863-692-0906. If you register by phone, please print, complete and sign the form as noted above and either mail it to us or e-mail the scan.
If you have any questions, please feel free to contact me via e-mail
Facebook
Be sure to like and follow BAA on Facebook by clicking on the logo link upper right. Tanks a stack!
Support the BAA Blog. Support the BAA Bulletins: Shop B&H here!
We want and need to keep providing you with the latest free information, photography and Photoshop lessons, and all manner of related information. Show your appreciation by making your purchases immediately after clicking on any of our B&H or Amazon Affiliate links in this blog post. Remember, B&H ain’t just photography!
…..
Amazon Canada
Many kind folks from north of the border, ay, have e-mailed stating that they would love to help us out by using one of our affiliate links but that living in Canada and doing so presents numerous problems. Now, they can help us out by using our Amazon Canada affiliate link by starting their searches by clicking here. Many thanks to those who have written.
Typos
In all blog posts and Bulletins, feel free to e-mail or to leave a comment regarding any typos, wrong words, misspellings, omissions, or grammatical errors. Just be right. 🙂
June 27th, 2014 Used Photography Gear
Right now the BAA Used Photography Gear for Sale page surely has the finest collection of used super-telephoto lenses at affordable prices ever assembled. Normally you would need to click here or click on the link on the yellow tool bar on the upper left of each blog page to see all of the listings, but as we have so many great new lenses and a few great camera bodies as well (including a 5D III KIt), that I have chosen to publish the entire list below. The super-teles include and old 500, a new 500!, a killer 800mm f/5.6L IS, another 400 DO, and an old 600 with lots of extras. Please scroll down to find the great lens or body that is just right for you.
The Streak Continues: 209
It is now just after 7:00am here at my home in Indian Lake Estates. I am getting really excited about the UK Puffin IPT. I fly to Newark on Tuesday afternoon where I will meet Denise and one of our 7 clients for the red eye flight to Edinburgh, Scotland, arriving in the UK at 7:55am on Wednesday morning. Amazingly this post took only 1 1/2 hours to prepare. Enjoy and learn.
This post marks 209 consecutive days with a new blog post. With so many folks getting in the habit of using our B&H links and our Amazon logo-links why quit now? April, May and June have been fantastic as lots of folks are getting the message; using my affiliate links does not cost you a penny and helps support my efforts here. To show your appreciation, I do ask that you use our the B&H and Amazon affiliate links on the right side of the blog for all of your purchases. Please check the availability of all photographic accessories in the BIRDS AS ART Online Store, especially Gitzo tripods, Wimberley tripod heads, and the like. We sell only what I have used and tested, and know that you can depend on. We will not sell you junk. We know the tools that you need to make creating great images easy and fun. And we are always glad to answer your gear questions via e-mail.
You can find the following items in the store: Gitzo tripods, Mongoose M3.6 and Wimberley heads, plates, low feet, and accessories, flash brackets, , Delkin e-film Pro Compact Flash Cards, LensCoat products, and our unique line-up of educational materials including ABP I & II, Digital Basics, Site and Set-up e-Guides, Canon and Nikon Camera Users and AF e-Guides, and MP-4 Photoshop video tutorials among others.
I would of course appreciate your using our B&H affiliate links for all of your major gear, video, and electronic purchases. For the photographic stuff mentioned in the paragraph above we, meaning BAA, would of course greatly appreciate your business. Here is a huge thank you to the many who have been using our links on a regular basis and visiting the BAA Online store as well.
|

|
|
This image was created on last April’s Tulip and a Touch of Holland ITP in the Beatrix Pavilion with the hand held Canon EF 24-70mm f/2.8L II USM lens (at 35mm), and the Canon EOS 5D Mark III . ISO 640. Evaluative metering +1 1/3 stops: 1/80 sec. at f/9 in Av mode.
Central sensor/AI Servo Rear Focus AF on orchid #6 and re-compose. Click here if you missed the Rear Focus Tutorial. Click on the image to see the larger version.
|
Learning to Think and See Like a Pro/The Third of a Series
When I walked up to this display of Orchid Opti Grandi, my eye instantly went to the single flower that would yield the image that I saw in my mind’s eye: a large-in-the-frame vertical of the center of one of the tiny orchid blooms. With a relatively distant background…. After I created the image that I saw I shared it with nearby members or our group and said: “There is only one blossom in this display that works; which one is it?”
All struggled.
So I ask you, “Which is the only blossom in the display that will yield a large=in-the-frame vertical of the center an Orchid Opti Grande flower with a relatively distant background?”
I will share the image that I created with you here soon.
|

|
|
Denise and artie hope that you can join us next spring in Holland and learn to improve both the technical and creative aspects of your flower (and street) photography.
|
7 1/2-Day/8-Night: A Creative Adventure/BIRDS AS ART/Tulips & A Touch of Holland Instructional Photo-Tour (IPT)
Keukenhof—Delft—Amsterdam–Flower Fields—Kinderdijk
April 9 -April 16, 2015: $4995. Limit: 12 photographers/Openings 10. Four more to make the trip a go.
This trip needs 6 registrants to run so please do not purchase your plane tickets until you hear from us that the trip is a go.
Join Denise Ippolito, the author of “Bloomin’ Ideas,” and Arthur Morris, Canon Explorer of Light Emeritus, for a great trip to Holland in mid-April 2015. Day 1 of the IPT will be April 9, 2015. We will have a short afternoon get-together and then our first photographic session at the justly-famed Keukenhof. Our last day, Day 8, April 16 will be a full day of photography.
The primary subjects will be tulips and orchids at Keukenhof and the spectacularly amazing tulip, hyacinth, and daffodil bulb fields around Lisse and points north. We will spend one full day in Amsterdam. There will be optional visits to the Van Gogh Museum, the Anne Frank House and/or the Rijk’s Museum. Street photography and sightseeing will be other options. We will spend a half day at Kinderdijk where we will be photographing the windmills and doing some creative photography. We will spend an afternoon in the lovely Dutch town of Delft where we will do some street photography and shopping. There is an optional church tower tour/climb. We will also enjoy a superb fine dining experience in a traditional restaurant.
Other than the arrival date: April 9, Day 1, and the date of our last day of photography on April 16, Day 8, there is no set itinerary. We will check the weather and play everything by ear to maximize the photographic opportunities. We will try to do Amsterdam, Delft, and especially Kinderdijik, on cloudy days.
There are several huge pluses to this trip. First off, denise is an amazingly skilled and caring instructor. Both her creativity and her willingness to share and to help beginning and intermediate photographers are unmatched. And though artie has learned a ton about flower photography from denise, their styles and techniques do vary considerably. You will have a chance to be counseled by and to learn from both of them. While denise will hunt you down to help you, artie’s teaching style is more “the closer you stay to me, the more you will learn.” Both leaders consistently inspire the participants. And each other. The sky, of course, is the limit.
You will learn to create tight abstracts, how best to use depth-of-field (or the lack thereof) to improve your flower photography, how to get the right exposure and make sharp images every time, how to see the best shot, and how to choose the best perspective for a given situation. And you will of course learn to create a variety of pleasingly blurred flower images. If you bring a long lens, you will learn to use it effectively for flower photography. Denise’s two favorite flower lenses are the Canon EF 100mm f/2.8L Macro IS USM lens and the Canon EF 24-105mm f/4L IS USM lens. Mine are the Canon 100mm f/2.8L IS macro , the Canon EF 180mm f/3.5L Macro USM lens ,and the Canon EF 300mm f/2.8L IS II USM lens, all almost always on a tripod. Often with extension tubes and/or either the 1.4X or the 2X (with the 300 II) teleconverters. Denise hand holds a great deal of the time. For flower field blurs denise uses the same lenses mentioned above along with her new 70-200mm f/2.8L IS III lens. Artie’s favorite is that same 70-200 often with a 1.4X TC but he uses both the new Canon EF 24-70mm f/2.8L II USM lens and the 300 II as well. Both of us use and love the Canon EOS 5D Mark IIIfor all of our flower photography. The in-camera HDR and Multiple Exposure features are a blast.
One of the great advantages of our trip is that we will be staying in a single, strategically located hotel that is quite excellent. Do note that all ground transfers to and from Schipol Airport will be via the free hotel shuttle bus.
What’s included: Eight hotel nights. All ground transportation except for airport transfers as noted above. In-the-field instruction and small group image review and Photoshop sessions. All meals from dinner on Day 1 through dinner on Day 8. There is good food at the hotel and we will be dining there on occasion; whenever you order off the menu be it at the hotel or at another restaurant only the cost of your main course is included. On these occasions the cost of soups, appetizers, salads, sodas and other beverages, alcoholic drinks and wine, bottled water, and desserts are not included. Snacks, personal items, phone calls, etc. are also not included. The cost of bus or train transportation to and from Amsterdam (about $20 US), museum entry, and tower and church entry fees (optional) are likewise not included.
Beware of seemingly longer, slightly less expensive tours that include travel days and days sitting in the hotel doing nothing as part of the tour. In addition, other similar trips have you changing hotels often and needlessly. One final note on other similar trips: the instructors on this trip actually instruct. On other similar trips the instructors, though usually imminently qualified, serve for the most part as van drivers and van door openers.
A non-refundable deposit of $1,000 per person is required to hold your spot. The second payment of $2,000 due by October 30, 2014. The balance is due on January 15, 2015. Payments in full are of course welcome at any time. All payments including the deposit must be by check made out to “Arthur Morris.” As life has a way of throwing an occasional curve ball our way, you are urged to purchase travel insurance within 15 days of our cashing your check. Artie uses and recommends Travel Insurance Services. All payments are non-refundable unless the trip fills to capacity. In that case, all payments but your deposit will be refunded. If the trip does not run every penny will of course be refunded. Again, please do not purchase your air tickets until you hear from us that the trip is a go. We are very confident that it will.
All checks should be made out to “Arthur Morris” and sent to: Arthur Morris, PO Box 7245, Indian Lake Estates, FL 33855. Call Jim or Jen in the BAA office with any additional registration questions: 863-692-0906.
For couples or friends signing up at the same time for the tulip trip, a $200/duo discount will be applied to the final payment.
When you send your deposit check, please print, sign, and include the paperwork here.
If you have any questions on the trip please contact artie by e-mail or denise by e-mail.
Selling Your Used Photo Gear Through BIRDS AS ART
Selling your used (or like-new) photo gear through the BAA Blog or via a BAA Online Bulletin is a great idea. We charge only a 5% commission. One of the more popular used gear for sale sites charges a minimum of 20% plus assorted fees! Yikes. The minimum item price here is $500 (or less for a $25 fee). If you are interested please e-mail with the words Items for Sale Info Request cut and pasted into the Subject line :). Stuff that is priced fairly–I offer free pricing advise, usually sells in no time flat.
In late May and early June, practically everything on the shelves was sold. I am still at a loss as to how Jim Bicket’s 800mm lens (see above) has not sold. It is a great lens in perfect condition that is more than fairly priced. B&H is asking $11,999.90 for a used one in the same condition here. Buy Jim’s lens and save $3249.90 right now!
Used Gear Caution
Though I am not in a position to post images of gear for sale here or elsewhere, prospective buyers are encouraged to request for photos of the gear that they are interested in purchasing via e-mail. Doing so will help to avoid any misunderstandings as to the condition of the gear.
One Week Sale Only: Used Canon 500mm f/4L IS Lens at a Ridiculous Low Price
Ellen Anon is offering a used Canon 500mm f/4L IS lens for only $4949.00. This super-low price if for this week only as Ellen is desperate to purchase a 200-400 for a polar bear trip. The lens is in Very Good condition (8/10). Included in the sale are the installed LensCoat that has protected the lens, the lens trunk, hood, leather front cover and the rear lens cap. The seller will pay for insured UPS Ground shipping to US addresses only. The lens will not ship until after your check clears.
Interested folks can contact Ellen via e-mail or try her at 1-814-838-1996. Photos of the lens are available upon request.
Canon EOS 5D Mark III Kit with EF24-105mm f/4L IS USM Lens
Chuck Pettis is offering a Canon EOS-5D Mark III Kit with EF24-105mm f/4L IS USM Lens new in the box–from an insurance claim for only $3499. Save $500 off the B&H price. The seller will pay insured UPS shipping within the continental US. And here is the best part: the lucky purchaser of this kit will receive a free copy of my EOX-5D Mark III User’s Guide, a $50 value.
Interested folks can contact Chuck via e-mail or try him at 360-331-6667 or on his cell at 206-930-2623.
Canon EF 600mm f/4L IS USM Lens, the “old six”
An Amazing Package for Someone Young and Strong. Or Old and Strong.
Chuck is also offering a Canon EF 600mm f/4L IS USM lens for $6199 with an amazing package of extras, extras that I used and depend on. The lens is in excellent condition used only a dozen times. The sale includes the Lens Trunk (one latch on the case was damaged by the TSA on a trip to Bosque but the latch still functions fine), the leather lens hood, and the rear cap. Amazingly Chuck is also including more than $30 in extras: a Canon 52mm Drop-in Circular Polarizing Filter PL-C, also in excellent condition and an extra Canon 52mm Drop-in Filter Holder in excellent condition. I put a 3-stop ND in my extra filter draw for creating blurs on sunny days.
The seller will also pay insured UPS shipping within the continental US.
Interested folks can contact Chuck via e-mail or try him at 360-331-6667 or on his cell at 206-930-2623.
The old six was my workhorse super-telephoto for too many years….
Canon 500mm f/4L IS II USM Lens
Multiple IPT veteran and BAA friend Carl Zanoni is offering an immaculate Canon 500mm f/4L IS II USM lens in Like New condition for the ridiculously low price of $8,999. With lots of extras. The sale includes the Canon E-163B Lens Cap, a Canon Rear Lens Cap, the Canon ET-138W II Lens Hood, the Canon Hard Lens Trunk 500B, a Canon Drop-in 52mm Circular Polarizer, 2 Canon shoulder straps, a LensCoat(Realtree Max 4), a Kirk LP-55SG Quick Release Plate/Foot, the original Canon lens foot, and insured UPS Ground shipping to US addresses. The items will be shipped only after the buyer’s check clears.
Please contact Carl via e-mail or by phone at 860 349 3840. This is a dream lens for all bird and wildlife photographers who do not want to deal with the bulk and weight of a 600mm lens. Save a ton as the lens sells new for $10,499.00.
Canon 400 DO IS USM Lens
Joe Messina is offering a used Canon 400 DO IS USM lens in very good ++ condition for $4200. There are some minor cosmetic scratches to the finish. The lens hood is slightly out of round and is difficult to install. The sale includes an AquaTech flexible strap-on hood, a $150 value. The sale also includes the lens trunk (with key), the original leather hood, and a hard plastic lens cap. The seller will pay insured UPS shipping within continental US. The lens will ship after the check clears.
Please contact Joe via e-mail or by phone at 415-563-6577.
If you are looking for a fast, lightweight, hand holdable telephoto lens, this is the lens for you. Learn a ton more about the 400 DO here and see lots of 400 DO images by visiting the “The Canon 400mm f/4 IS DO Lens: Fourteen Images that Prove that the Internet Experts are (As Usual) Idiots” blog post here. The lens sells new at B&H for $6499.00.
Canon EOS-1D Mark III
Michael Zajac is offering a Canon EOS-1D Mark III professional digital camera body in Excellent condition for $1250. The sale includes the battery charger, one battery, the original paperwork, the camera strap, the original box, and shipping to the continental US.
Please contact Michael via e-mail or by phone at 732-979 -6644. Photos are available upon request.
Some EOS-1D Mark III bodies originally had AF problems. Michael’s did not. I have seen his great flight images made with this camera. This body features a 1.3X crop factor sensor and is a great step-up for someone who wants to take a big step up from a 7D. It’s powerful battery drives AF much faster than the pro-sumer bodies especially with either a 1.4X or 2X teleconverter in place.
Used Mongoose Package for Sale
Upgraded Mongoose M3.5 Package: $630
John Stuhlmuller is offering a used Mongoose M3.5 tripod head that has been upgraded to an M3.6 (approximate value $550). The only differences between a refurbished M3.5 and a new M3.6 is the internal finish of several parts. Otherwise, it functions as an M3.6, the head I have used and depended on for nearly a decade. The sale includes an installed Horizontal) Low Mount Arm (sells new for $90), the Integrated Flash Arm (sells new for $110), a CR-X5 plate, the low foot for the four Series II Canon Super-Telephoto lenses and teh 200-400 (sells for $122 new), a CP16 lens plate for B-tripod ring lenses like the Canon 70-200mm f/2.8L IS (sells for $75 new).
There are some minor scratches on the top of the mounting clamp. Otherwise, there are no other signs of wear and the head works perfectly. John prefers his Wimberley V2 head.
The package is valued at approximately $947. The cost of insured ground shipping to US addresses is included. Sale price: $630. Save $300+.
Contact John via e-mail. Photos available upon request.
Used Canon 800mm f/5.6L IS Lens for Sale
Multiple IPT veteran, the too-kind Jim Bicket, is offering a Canon EF 800mm f/5.6L IS USM lens in excellent condition for $8750. The lens is like new except for some wear on the bottom of the lens hood near the forward edge when the hood is reversed. The sales includes the LensCoat that has protected the lens since day 1, the leather hood, the original hard case and key, and insured shipping via UPS Ground to US addresses only. Personal checks only; your new lens will be shipped only after your check clears.
This great lens, my favorite for 3 years, sells new at B&H for $13,999.00. B&H is asking $11,999.90 for a used one in the same condition as Jim’s here. Buy Jim’s lens and save $3249.90 right now! It will save you a ton of dough and you will have a super-sharp lens with lots of reach. And it works great with a 1.4X TC too.
Interested folks can contact Jim via e-mail or try him at 501-915-9336.
Support the BAA Blog. Support the BAA Bulletins: Shop B&H here!
We want and need to keep providing you with the latest free information, photography and Photoshop lessons, and all manner of related information. Show your appreciation by making your purchases immediately after clicking on any of our B&H or Amazon Affiliate links in this blog post. Remember, B&H ain’t just photography!
…..
Amazon Canada
Many kind folks from north of the border, ay, have e-mailed stating that they would love to help us out by using one of our affiliate links but that living in Canada and doing so presents numerous problems. Now, they can help us out by using our Amazon Canada affiliate link by starting their searches by clicking here. Many thanks to those who have written.
Typos
In all blog posts and Bulletins, feel free to e-mail or to leave a comment regarding any typos, wrong words, misspellings, omissions, or grammatical errors. Just be right. 🙂
June 26th, 2014 The Streak Continues: 208
It is now just before 6:00am here at my home in Indian Lake Estates. I am getting really excited about the UK Puffin IPT. I fly to Newark on Tuesday afternoon where I will meet Denise and one of our 7 clients for the red eye flight to Edinburgh, Scotland, arriving in the UK at 7:55am on Wednesday morning. This post took about 2 hours to prepare. Enjoy and learn.
This post marks 208 consecutive days with a new blog post. With so many folks getting in the habit of using our B&H links and our Amazon logo-links why quit now? April, May and June have been fantastic as lots of folks are getting the message; using my affiliate links does not cost you a penny and helps support my efforts here. To show your appreciation, I do ask that you use our the B&H and Amazon affiliate links on the right side of the blog for all of your purchases. Please check the availability of all photographic accessories in the BIRDS AS ART Online Store, especially Gitzo tripods, Wimberley tripod heads, and the like. We sell only what I have used and tested, and know that you can depend on. We will not sell you junk. We know the tools that you need to make creating great images easy and fun. And we are always glad to answer your gear questions via e-mail.
You can find the following items in the store: Gitzo tripods, Mongoose M3.6 and Wimberley heads, plates, low feet, and accessories, flash brackets, , Delkin e-film Pro Compact Flash Cards, LensCoat products, and our unique line-up of educational materials including ABP I & II, Digital Basics, Site and Set-up e-Guides, Canon and Nikon Camera Users and AF e-Guides, and MP-4 Photoshop video tutorials among others.
I would of course appreciate your using our B&H affiliate links for all of your major gear, video, and electronic purchases. For the photographic stuff mentioned in the paragraph above we, meaning BAA, would of course greatly appreciate your business. Here is a huge thank you to the many who have been using our links on a regular basis and visiting the BAA Online store as well.
|
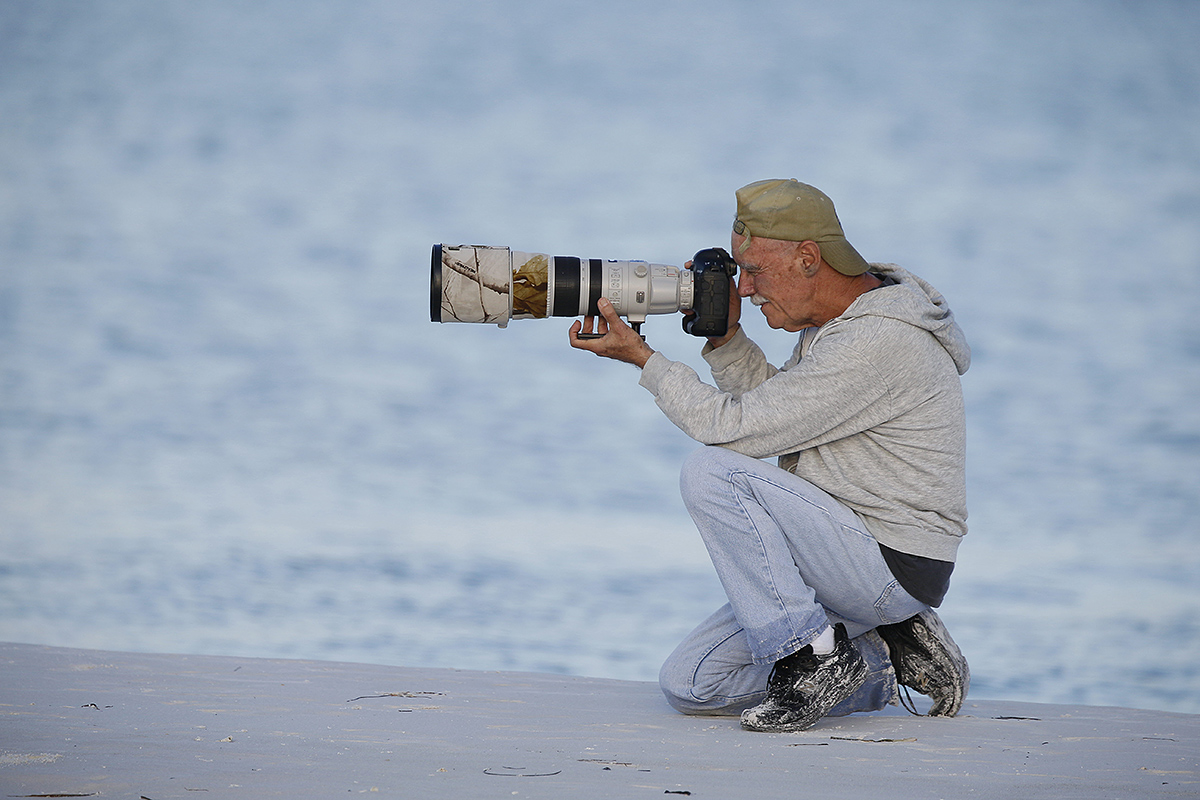
|
|
This image was created on May 30, 2014 at Fort DeSoto with the hand held Canon EF 300mm f/2.8L IS II USM lens, the Canon Extender EF 2X III, and the Canon EOS-1D X. ISO 800. Evaluative metering +1 1/3 stops as framed: 1/640 sec. at f/5.6 in Av mode. AWB.
Two sensors up from the central sensor/Rear Focus/AI Servo AF as framed on Jim’s left hand was active at the moment of exposure. Click here to see the latest version of the Rear Focus Tutorial. Click on the image to see a larger version.
Image #1: Keep Your Butt Clean & Dry Knee-Pod Position
|
The Trip
I have been going to Bradenton and Tampa for some alternative medicine therapies for my right shoulder, left knee, and on Wednesday June 25, for some experimental prolozone stuff on my 3 trigger fingers. Early results on the shoulder and the knee are very promising but I need to give it some time before I share the whole story with you. I do not want to put a jinx on things. 🙂
On our first visit to the Bradenton office Jim and I stayed over on St. Pete Beach and enjoyed a short busman’s holiday with a morning of photography at Fort DeSoto Park. I set Jim up with my Canon EF 200-400mm f/4L IS USM lens with Internal 1.4x Extender and with one of my Canon EOS-1D X bodies.
You can see 6 wonderful images from our great morning in the “The Amazing Canon 300mm F/2.8L IS USM Lens/Part II of a Series: The Revelation” blog post here. BTW, I simply could not pick a favorite from among those 6; I love each one of them.
|
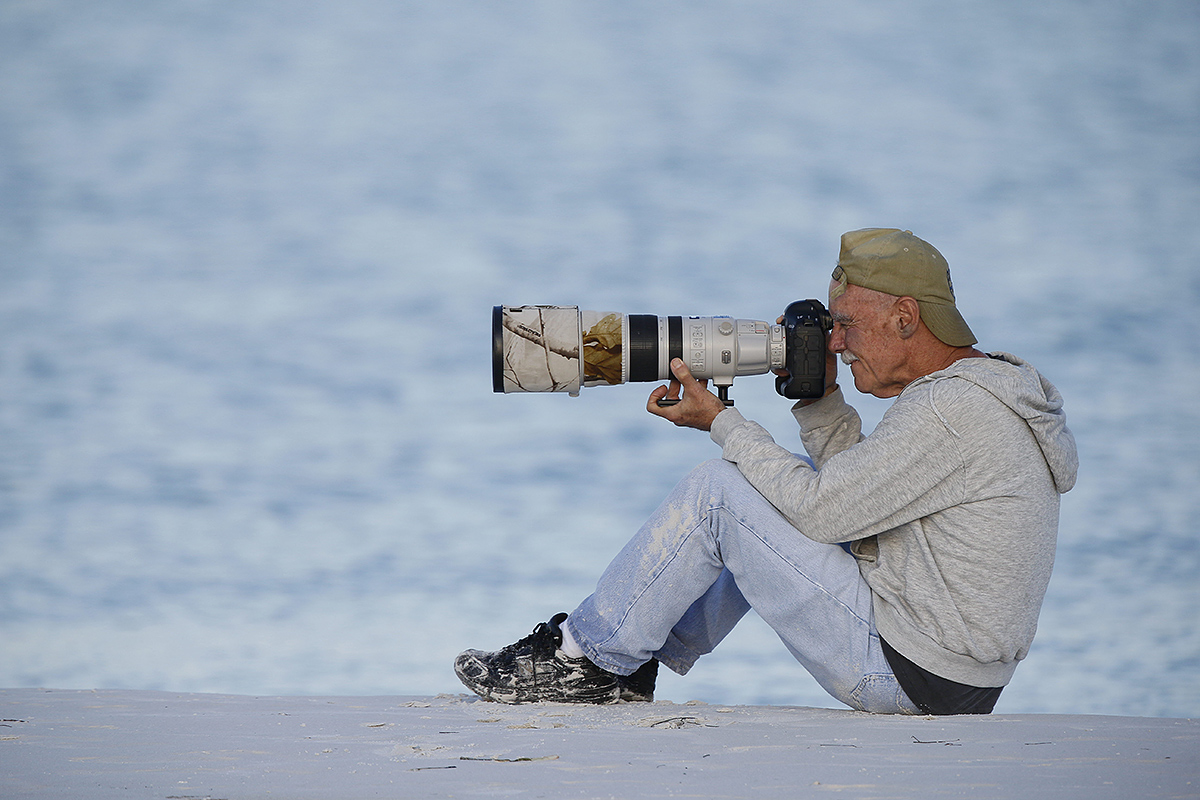
|
|
This image was (obviously) also created on May 30, 2014 at Fort DeSoto with the hand held Canon EF 300mm f/2.8L IS II USM lens, the Canon Extender EF 2X III, and the Canon EOS-1D X. ISO 800. Evaluative metering +1 1/3 stops as framed: 1/640 sec. at f/5.6 in Av mode. AWB.
Three sensors to the right and one row up from the central sensor/Rear Focus/AI Servo AF as framed on the spot where the camera body meets the lens barrel was active at the moment of exposure. Click here to see the latest version of the Rear Focus Tutorial. Click on the image to see a larger version.
Image #2: Get Your Butt Dirty Knee-Pod Position
|
As Promised/Almost…
I have long been saying that I would publish an image of me using my knee-pod, with my left knee supporting what I would call the back of my left forearm. When Jim and I were on the beach early that day a light cloud passed in front of the sun so I asked Jim to pose for me. He did. Thanks Jim! I will try to have some images made of me using my knee pod position made on the UK Puffin IPT as I will be using the hand held Canon EF 300mm f/2.8L IS II USM lens a great deal of the time.
I use the knee-pod position shown in Image #2 as it is far more stable than the one shown in Image #1, the Keep Your Butt Clean & Dry Knee-Pod Position. When you keep your butt clean there is a lot more stress on both knees, and for me, anytime I get down on one knee I invite serious hamstring cramps.
CRX-5 Fine Point
I do things a bit differently than Jim when it comes to gripping the CRX-5 plate advantageously when using the Canon EF 200-400mm f/4L IS USM lLens with Internal 1.4x Extender. I grasp the front of the plate with the last 2 fingers of my left hand; this allows my thumb along with my pointer and my long (as my hand surgeon Dr. Steve Puopolo calls the middle finger) fingers to fall on the zoom ring. I did not realize until this morning that Jim has his fingers on the focus ring. Though this is a fine point it is an important one. It was the first time that Jim had used the 200-400.
I would be remiss by not mentioning that hiring Jim–wow!–could it be more than 10 years ago?, was one of the best and smartest things that I have ever done. In addition to being my right- hand man, someone I depend on every day to keep BAA running smoothly, Jim has been and is a great friend. Having him in my life has been a great blessing. We are the same age; I have told him that he is not allowed to quit until they nail my box shut. 🙂
No matter which fingers you put on the zoom ring it is pretty much impossible for most folks to zoom more than 50mm in either direction as discussed in the recent “The Two Things I Hate About the 200-400 with Internal Extender” blog post here.
The Question of the Day
The question here today is why is the Get Your Butt Dirty Knee-Pod Position more stable than the Keep Your Butt Clean & Dry Knee-Pod Position?
Added Bonus Questions
#1: Why is it unnecessary for Jim to have his fingers on the focusing ring?
#2: When hand holding, why is it necessary to be in AI Servo rather than One-Shot AF?
#3: When hand holding, why is it best to have AF active at the moment of exposure if at all possible?
Miracle of Miracles
Right now we have both the Gitzo tripods, Mongoose M3.6 and the CRX-5 plate in stock.
Selling Your Used Photo Gear Through BIRDS AS ART
Selling your used (or like-new) photo gear through the BAA Blog or via a BAA Online Bulletin is a great idea. We charge only a 5% commission. One of the more popular used gear for sale sites charges a minimum of 20% plus assorted fees! Yikes. The minimum item price here is $500 (or less for a $25 fee). If you are interested please e-mail with the words Items for Sale Info Request cut and pasted into the Subject line :). Stuff that is priced fairly–I offer free pricing advise, usually sells in no time flat.
In the past two weeks, practically everything on the shelves has been sold. I am still at a loss as to how Jim Bicket’s 800 has not sold. It is a great lens in perfect condition that is more than fairly priced. B&H is asking $11,999.90 for a used one in the same condition here. Buy Jim’s lens and save $3249.90 right now!
And be sure to check out the great Mongoose M3.6 package.
IAC, there are several great new listings including Carl Zanoni’s immaculate 500 II, another great 400 DO, and Michael Zajac’s Canon EOS-1D Mark III, Coming soon: a 500 f/4 L IS, a 300 f/28 L IS, and an EOS-5D Mark III/24-105 kit with extras. I share all of the current listings with you below.
Used Gear Caution
Though I am not in a position to post images of gear for sale here or elsewhere, prospective buyers are encouraged to request for photos of the gear that they are interested in purchasing via e-mail. Doing so will help to avoid any misunderstandings as to the condition of the gear.
Canon 500mm f/4L IS II USM Lens
Multiple IPT veteran and BAA friend Carl Zanoni is offering an immaculate Canon 500mm f/4L IS II USM lens in Like New condition for the ridiculously low price of $8,999. With lots of extras. The sale includes the Canon E-163B Lens Cap, a Canon Rear Lens Cap, the Canon ET-138W II Lens Hood, the Canon Hard Lens Trunk 500B, a Canon Drop-in 52mm Circular Polarizer, 2 Canon shoulder straps, a LensCoat(Realtree Max 4), a Kirk LP-55SG Quick Release Plate/Foot, the original Canon lens foot, and insured UPS Ground shipping to US addresses. The items will be shipped only after the buyer’s check clears.
Please contact Carl via e-mail or by phone at 860 349 3840. This is a dream lens for all bird and wildlife photographers who do not want to deal with the bulk and weight of a 600mm lens. Save a ton as the lens sells new for $10,499.00.
Canon 400 DO IS USM Lens
Joe Messina is offering a used Canon 400 DO IS USM lens in very good ++ condition for $4200. There are some minor cosmetic scratches to the finish. The lens hood is slightly out of round and is difficult to install. The sale includes an AquaTech flexible strap-on hood, a $150 value. The sale also includes the lens trunk (with key), the original leather hood, and a hard plastic lens cap. The seller will pay insured UPS shipping within continental US. The lens will ship after the check clears.
Please contact Joe via e-mail or by phone at 415-563-6577.
If you are looking for a fast, lightweight, hand holdable telephoto lens, this is the lens for you. Learn a ton more about the 400 DO here and see lots of 400 DO images by visiting the “The Canon 400mm f/4 IS DO Lens: Fourteen Images that Prove that the Internet Experts are (As Usual) Idiots” blog post here. The lens sells new at B&H for $6499.00.
Canon EOS-1D Mark III
Michael Zajac is offering a Canon EOS-1D Mark III professional digital camera body in Excellent condition for $1250. The sale includes the battery charger, one battery, the original paperwork, the camera strap, the original box, and shipping to the continental US.
Please contact Michael via e-mail or by phone at 732-979 -6644. Photos are available upon request.
Some EOS-1D Mark III bodies originally had AF problems. Michael’s did not. I have seen his great flight images made with this camera. This body features a 1.3X crop factor sensor and is a great step-up for someone who wants to take a big step up from a 7D. It’s powerful battery drives AF much faster than the pro-sumer bodies especially with either a 1.4X or 2X teleconverter in place.
Used Mongoose Package for Sale
Upgraded Mongoose M3.5 Package: $630
John Stuhlmuller is offering a used Mongoose M3.5 tripod head that has been upgraded to an M3.6 (approximate value $550). The only differences between a refurbished M3.5 and a new M3.6 is the internal finish of several parts. Otherwise, it functions as an M3.6, the head I have used and depended on for nearly a decade. The sale includes an installed Horizontal Low Mount Arm (sells new for $90), the Integrated Flash Arm (sells new for $110), a CR-X5 plate, the low foot for the four Series II Canon Super-Telephoto lenses and teh 200-400 (sells for $122 new), a CP16 lens plate for B-tripod ring lenses like the Canon 70-200mm f/2.8L IS (sells for $75 new).
There are some minor scratches on the top of the mounting clamp. Otherwise, there are no other signs of wear and the head works perfectly. John prefers his Wimberley V2 head.
The package is valued at approximately $947. The cost of insured ground shipping to US addresses is included. Sale price: $630. Save $300+.
Contact John via e-mail. Photos available upon request.
Used Canon 800mm f/5.6L IS Lens for Sale
Multiple IPT veteran, the too-kind Jim Bicket, is offering a Canon EF 800mm f/5.6L IS USM lens in excellent condition for $8750. The lens is like new except for some wear on the bottom of the lens hood near the forward edge when the hood is reversed. The sales includes the LensCoat that has protected the lens since day 1, the leather hood, the original hard case and key, and insured shipping via UPS Ground to US addresses only. Personal checks only; your new lens will be shipped only after your check clears.
This great lens, my favorite for 3 years, sells new at B&H for $13,999.00. B&H is asking $11,999.90 for a used one in the same condition as Jim’s here. Buy Jim’s lens and save $3249.90 right now! It will save you a ton of dough and you will have a super-sharp lens with lots of reach. And it works great with a 1.4X TC too.
Interested folks can contact Jim via e-mail or try him at 501-915-9336.
Support the BAA Blog. Support the BAA Bulletins: Shop B&H here!
We want and need to keep providing you with the latest free information, photography and Photoshop lessons, and all manner of related information. Show your appreciation by making your purchases immediately after clicking on any of our B&H or Amazon Affiliate links in this blog post. Remember, B&H ain’t just photography!
…..
Amazon Canada
Many kind folks from north of the border, ay, have e-mailed stating that they would love to help us out by using one of our affiliate links but that living in Canada and doing so presents numerous problems. Now, they can help us out by using our Amazon Canada affiliate link by starting their searches by clicking here. Many thanks to those who have written.
Typos
In all blog posts and Bulletins, feel free to e-mail or to leave a comment regarding any typos, wrong words, misspellings, omissions, or grammatical errors. Just be right. 🙂
June 25th, 2014 The Streak Continues: 207
It is now just before 8:45am here on yet another sunny morning here at Indian Lake Estates. The afternoon thunderstorms will be coming for sure. This post took abut 3 hours to prepare. Enjoy and learn.
This post marks 207 consecutive days with a new blog post. With so many folks getting in the habit of using our B&H links and our Amazon logo-links why quit now? April, May and June have been fantastic as lots of folks are getting the message; using my affiliate links does not cost you a penny and helps support my efforts here. To show your appreciation, I do ask that you use our the B&H and Amazon affiliate links on the right side of the blog for all of your purchases. Please check the availability of all photographic accessories in the BIRDS AS ART Online Store, especially Gitzo tripods, Wimberley tripod heads, and the like. We sell only what I have used and tested, and know that you can depend on. We will not sell you junk. We know the tools that you need to make creating great images easy and fun. And we are always glad to answer your gear questions via e-mail.
You can find the following items in the store: Gitzo tripods, Mongoose M3.6 and Wimberley heads, plates, low feet, and accessories, flash brackets, , Delkin e-film Pro Compact Flash Cards, LensCoat products, and our unique line-up of educational materials including ABP I & II, Digital Basics, Site and Set-up e-Guides, Canon and Nikon Camera Users and AF e-Guides, and MP-4 Photoshop video tutorials among others.
I would of course appreciate your using our B&H affiliate links for all of your major gear, video, and electronic purchases. For the photographic stuff mentioned in the paragraph above we, meaning BAA, would of course greatly appreciate your business. Here is a huge thank you to the many who have been using our links on a regular basis and visiting the BAA Online store as well.
The One Thing That I Don’t Like About My Beach Rolly
The one thing that I really do not like about the Beach Rolly is that it is too big and bulky to travel with. It fits easily into the back of my SUV, and will fit pretty easily into the back seat of most passenger vehicles. But there is no way to get it onto an airplane.
The Beach Rolly is ideal when you need to carry a ton of gear at locations with boardwalks or paved pathway. It would be wonderful to have the Beach Rolly at the Albuquerque Zoo. We visit there each year on the Bosque IPT to photograph Wood Ducks and other free and wild duck species that come in for the free lunches and dinners that are provided to the captive species on display there. As you can see above, theBeach Rolly can also be useful on beaches with fairly hard-packed sand. I would be reluctant to use it on a soft sand beach unless I was going with just a single telephoto lens.
If I look hot there is a reason for that…. But I would have been a lot hotter without my Beach Rolly.
|
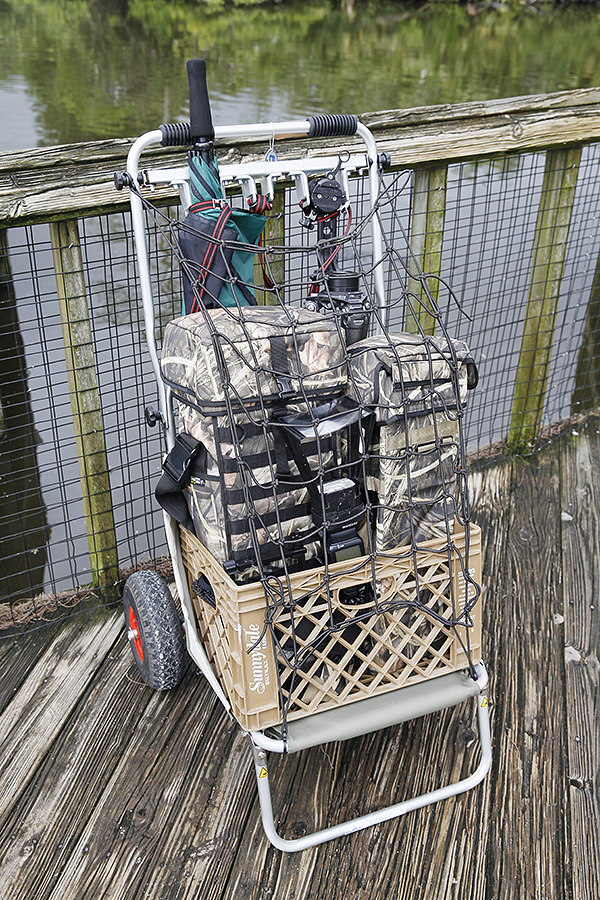
|
|
This image was created on the boardwalk at Gatorland with the Canon EF 24-70mm f/2.8L II USM lens (hand held at 35mm) and the Canon EOS 5D Mark III. ISO 400. Evaluative metering +1/3 stop: 1/500 sec. at f/6.3 in Av mode.
Central sensor/AI Servo/Surround Rear Focus AF as framed active at the moment of exposure. Click here to see the latest version of the Rear Focus Tutorial. Click on the image to see a larger version.
|
The Beach Rolly at the Gator Rookeries
With my shoulder bugging me significantly, I used my Beach Rolly this spring on each and every visit to Gatorland and St. Augustine. In the image above I am actually traveling light with only the Canon EF 600mm f/4L IS II USM lens and the Canon EF 200-400mm f/4L IS USM Lens with Internal 1.4x Extender, each with a Canon EOS-1D X mounted to the lens.
The bags are prototypes of the new 3Xpandable and 4Xpandable Long Lens Bags from LensCoat. Learn more about these two great new bags, the Universal Harness for either Expandable Long Lens Bag, and the The Lenscoat Waistbelt
by scrolling down here.
Note that when I am working in Florida I travel with my Canon 580Ex II Flash with a Better Beamer and a Canon OC-E3 Off Camera Shoe Cord 3 attached, all mounted to the Mongoose Integrated Flash Arm. This reduces flash set-up time by more than 90%.
|
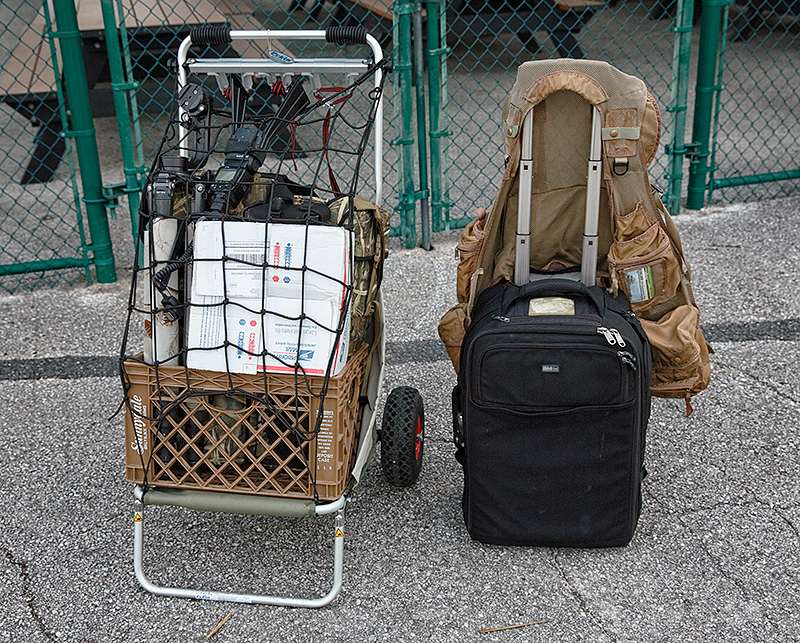
|
|
This image was created outside of the early morning entrance to Gatorland with the Canon EF 24-70mm f/2.8L II USM lens (hand held at 35mm) and the Canon EOS 5D Mark III. ISO 800. Evaluative metering -1/3 stop: 1/40 sec. at f/5 in Manual mode.
Two sensors to the left of the Central sensor/AI Servo/Surround Rear Focus AF as framed active at the moment of exposure. Click here to see the latest version of the Rear Focus Tutorial. Click on the image to see a larger version.
|
Loaded for Bear
Here I am carrying just about everything I own packed into the Beach Rolly and my workhorse Think Tank Airport Security™ V 2.0 Rolling Camera Bag. I never leave home without my Think Tank bag.
In addition to the 600II and the 200-400 I have the Canon EF 300mm f/2.8L IS II USM lens, the Canon EF 70-200mm f/2.8L IS II, the 24-70, a load of Series III teleconverters, and even the Canon EF 100mm f/2.8L Macro IS USM lens. Though I never got to photograph them there were some neat flowers in bloom right next to the Gatorland boardwalk.
The white box had a few of my books and a few bottles of LensClens that I leave on a bench for potential buyers.
Imagine trying to carry all of that gear myelf?
Xtrahand Vest
Please e-mail with the words Xtrahand Vest cut and pasted into the Subject line for info on my one and only photography vest.
Image Exposure Question
Why -1/3 stop in the 3rd image?
Join Denise Ippolito and me for four great days of photography and learning at one of our soul places. Please click on the card to enjoy a larger version.
Bosque del Apache 2014 BIRDS AS ART/A Creative Adventure Instructional Photo-Tour (IPT). NOV 29 (afternoon photo session)-DEC 3 (morning session), 2014. Totaling 4 FULL-DAYS: $1449. Leaders: Arthur Morris and Denise Ippolito. Introductory Slide program: 7:00pm on Saturday 11/29.
Tens of thousands of Snow Geese, 10,000 Sandhill Cranes, ducks, amazing sunrises, sunsets, and blast-offs. Live, eat, and breathe photography with two of the world’s premier photographic educators at one of their very favorite photography locations on the planet. Top-notch in-the-field and Photoshop instruction. This will make 21 consecutive Novembers at Bosque for artie. This will be denise’s 6th workshop at the refuge. Nobody knows the place better than artie does. Join us to learn to think like a pro, to recognize situations and to anticipate them based on the weather, especially the sky conditions, the light, and the wind direction. Every time we make a move we will let you know why. When you head home being able to apply what you’ve learned on your home turf will prove to be invaluable.
This workshop includes 4 afternoon (11/29 through 12/2), 4 morning (11/30 to 12/3) photography sessions, an inspirational introductory slide program after dinner on your own on Saturday, 11/29, all lunches, and after-lunch digital workflow, Photoshop, and image critiquing sessions.
There is never a strict itinerary on a Bosque IPT as each day is tailored to the local conditions at the time and to the weather. We are totally flexible in order to maximize both the photographic and learning opportunities. We are up early each day leaving the hotel by 5:30 am to be in position for sunrise. We usually photograph until about 10:30am. Then it is back to Socorro for lunch and then a classroom session with the group most days. We head back to the refuge at about 3:30pm each day and photograph until sunset. We will be photographing lots of Snow Geese and lots of Sandhill Cranes with the emphasis on expanding both your technical skills and your creativity.
A $449 non-refundable deposit is required to hold your slot for this IPT. Your balance, payable only by check, will be due on 7/25/2014. If the trip fills, we will be glad to apply a credit applicable to a future IPT for the full amount less a $100 processing fee. If we do not receive your check for the balance on or before the due date we will try to fill your spot from the waiting list. If your spot is filled, you will lose your deposit. If not, you can secure your spot by paying your balance.
Please print, complete, and sign the form that is linked to here and shoot it to us along with your deposit check (made out to “Arthur Morris.”) You can also leave your deposit with a credit card by calling the office at 863-692-0906. If you register by phone, please print, complete and sign the form as noted above and either mail it to us or e-mail the scan. If you have any questions, please feel free to contact me via e-mail.
Join Denise Ippolito and me for two great days of photography, fun, and learning at one of our soul places. We will surely be taking you out of the box on this workshop. Please click on the card to enjoy a larger version.
Bosque del Apache 2014 A Creative Adventure/BIRDS AS ART “Creative Photography Instructional Photo-Tour.” (IPT). NOV 24-25, 2014. 2-FULL DAYS: $729. Leaders: Denise Ippolito & Arthur Morris. Introductory Slide program: 7:00pm on Sunday 11/23.
Get Out of Your Box!
The Creative Bosque IPT is perfect for folks who want to learn to think outside the box, to create new and different images. This workshop is the perfect add-on for folks who are planning on attending the Festival of the Cranes. Learn to unleash your creative juices at the wondrous Bosque del Apache National Wildlife Refuge in San Antonio, New Mexico with two great leaders including the amazingly talented and creative Denise Ippolito. In-the-field instruction will include tips on gear set-up, on creating a variety of pleasing blurs, on getting the right exposure, and on designing pleasing images. And lots more. From vertical pan blurs to subject motion blurs to zoom blurs to multiple exposures we will cover it all. If conditions are perfect, we will not hesitate to take advantage of them to do some traditional bird photography. This workshop will include an inspirational introductory slide program on Sunday evening, 11/23, after dinner on your own, two morning and two afternoon photography sessions, all lunches, a digital workflow and Photoshop session after lunch on Monday, and an image critiquing session after lunch on Tuesday.
A $329 non-refundable deposit is required to hold your slot for this IPT. Your balance, payable only by check, will be due on 7/25/2014. If the trip fills, we will be glad to apply a credit applicable to a future IPT for the full amount less a $100 processing fee. If we do not receive your check for the balance on or before the due date we will try to fill your spot from the waiting list. If your spot is filled, you will lose your deposit. If not, you can secure your spot by paying your balance.
Please print, complete, and sign the form that is linked to here and shoot it to us along with your deposit check (made out to “Arthur Morris.”) You can also leave your deposit with a credit card by calling the office at 863-692-0906. If you register by phone, please print, complete and sign the form as noted above and either mail it to us or e-mail the scan. If you have any questions, please feel free to contact me via e-mail.
Antarctica/The Extended Expedition Voyage
Antarctic Peninsula, South Georgia and Falkland Islands: December 13, 2014 to January 10, 2015
Breathe deeply, bite the bullet, and live life to its fullest; we all get only one ride on the merry-go-round… Join me on this great trip. Click here for additional details.
Facebook
Be sure to like and follow BAA on Facebook by clicking on the logo link upper right. Tanks a stack!
Support the BAA Blog. Support the BAA Bulletins: Shop B&H here!
We want and need to keep providing you with the latest free information, photography and Photoshop lessons, and all manner of related information. Show your appreciation by making your purchases immediately after clicking on any of our B&H or Amazon Affiliate links in this blog post. Remember, B&H ain’t just photography!
…..
Amazon Canada
Many kind folks from north of the border, ay, have e-mailed stating that they would love to help us out by using one of our affiliate links but that living in Canada and doing so presents numerous problems. Now, they can help us out by using our Amazon Canada affiliate link by starting their searches by clicking here. Many thanks to those who have written.
Typos
In all blog posts and Bulletins, feel free to e-mail or to leave a comment regarding any typos, wrong words, misspellings, omissions, or grammatical errors. Just be right. 🙂
June 24th, 2014 The Streak Continues: 206
It is now just before 9:00am here on yet another sunny morning here at Indian Lake Estates. The afternoon thunderstorms will be coming for sure. This post took abut 3 hours to prepare. Enjoy and learn.
This post marks 206 consecutive days with a new blog post. With so many folks getting in the habit of using our B&H links and our Amazon logo-links why quit now? April, May and June have been fantastic as lots of folks are getting the message; using my affiliate links does not cost you a penny and helps support my efforts here. To show your appreciation, I do ask that you use our the B&H and Amazon affiliate links on the right side of the blog for all of your purchases. Please check the availability of all photographic accessories in the BIRDS AS ART Online Store, especially Gitzo tripods, Wimberley tripod heads, and the like. We sell only what I have used and tested, and know that you can depend on. We will not sell you junk. We know the tools that you need to make creating great images easy and fun. And we are always glad to answer your gear questions via e-mail.
You can find the following items in the store: Gitzo tripods, Mongoose M3.6 and Wimberley heads, plates, low feet, and accessories, flash brackets, , Delkin e-film Pro Compact Flash Cards, LensCoat products, and our unique line-up of educational materials including ABP I & II, Digital Basics, Site and Set-up e-Guides, Canon and Nikon Camera Users and AF e-Guides, and MP-4 Photoshop video tutorials among others.
I would of course appreciate your using our B&H affiliate links for all of your major gear, video, and electronic purchases. For the photographic stuff mentioned in the paragraph above we, meaning BAA, would of course greatly appreciate your business. Here is a huge thank you to the many who have been using our links on a regular basis and visiting the BAA Online store as well.
|
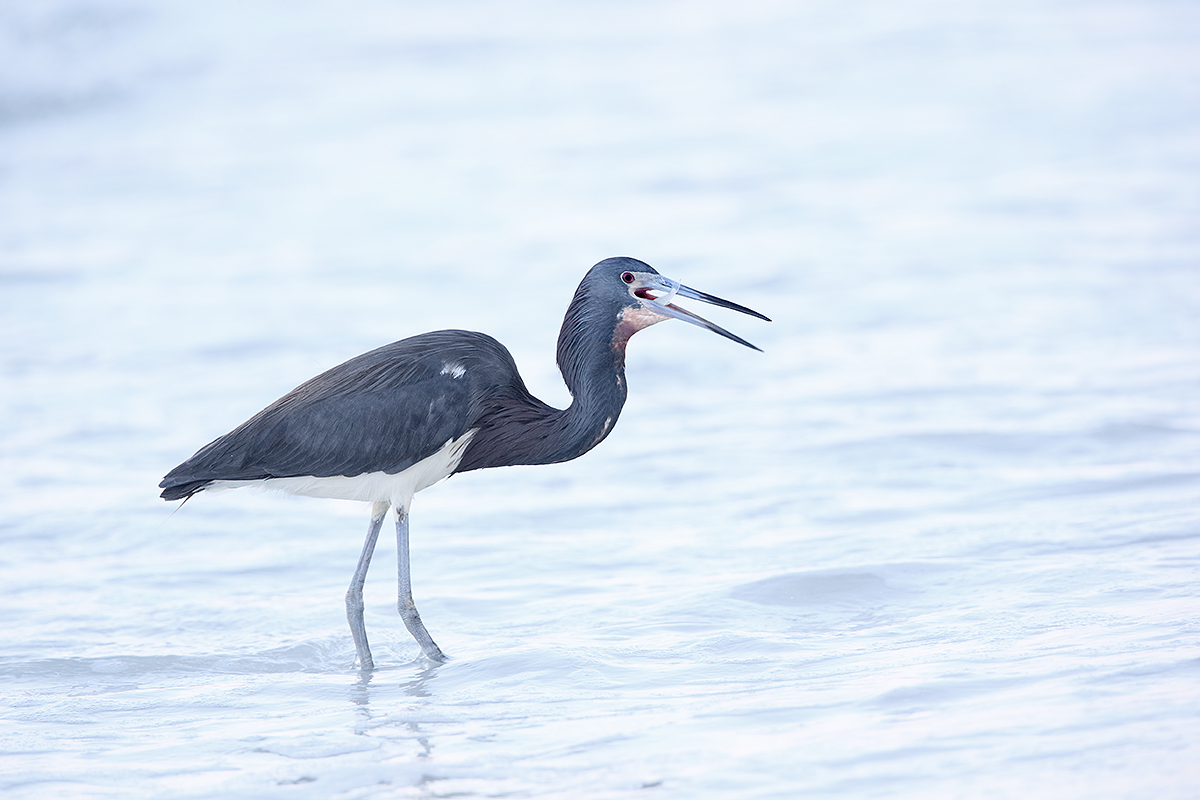
|
|
This image was created at Fort DeSoto at 7:45am in the shade of a stand of large Australian pines on May 9 with the hand held Canon EF 300mm f/2.8L IS II USM lens, the Canon Extender EF 2X III, and the Canon EOS-1D X. ISO 800. Evaluative metering + 2 2/3 stops off the water: 1/500 sec. at f/5.6 in Manual mode. AWB.
61-Point/AI Servo-Surround/Rear Focus AF as framed activated 2 sensors on the bird’s face and was active at the moment of exposure. Click here to see the latest version of the Rear Focus Tutorial. Click on the image to see a larger version.
Image #1: Tricolored Heron swallowing small baitfish
|
What Does the 300mm f/2.8L IS Have Over the 200-400mm f/L IS with Internal Extender?
One of the advantages that the 300 II has over the Canon 2-4 with Internal Extender is its lighter weight. At 5.19 pounds the 300 II is exactly 2.79 pounds lighter than the 200-400 that comes in at 7.98 pounds. The nearly 3 pound advantage goes hand in hand with the the 300II’s smaller physical dimensions. In tandem, these combine to make the 300II eminently more hand holdable than the larger, heavier 200-400. While some folks can easily hand hold the 200-400 for a full day of shooting, I am not in that group.
The foraging Tricolored Heron in the image above was chasing fish along the shore, moving at a good pace from north to south. In order to maintain a nice subject size in the frame, I moved along with the bird. As it was actively fishing and catching, the bird paid me no attention at all. In order to stay mobile, I remained standing. While it is relatively easy to hand hold the 200-400 while seated–see the knee-pod blog post coming here very soon–hand holding the 2-4 while standing is a completely different story even when you are using the proper technique. So the big advantage when hand holding for action while standing goes to the 300 II.
|
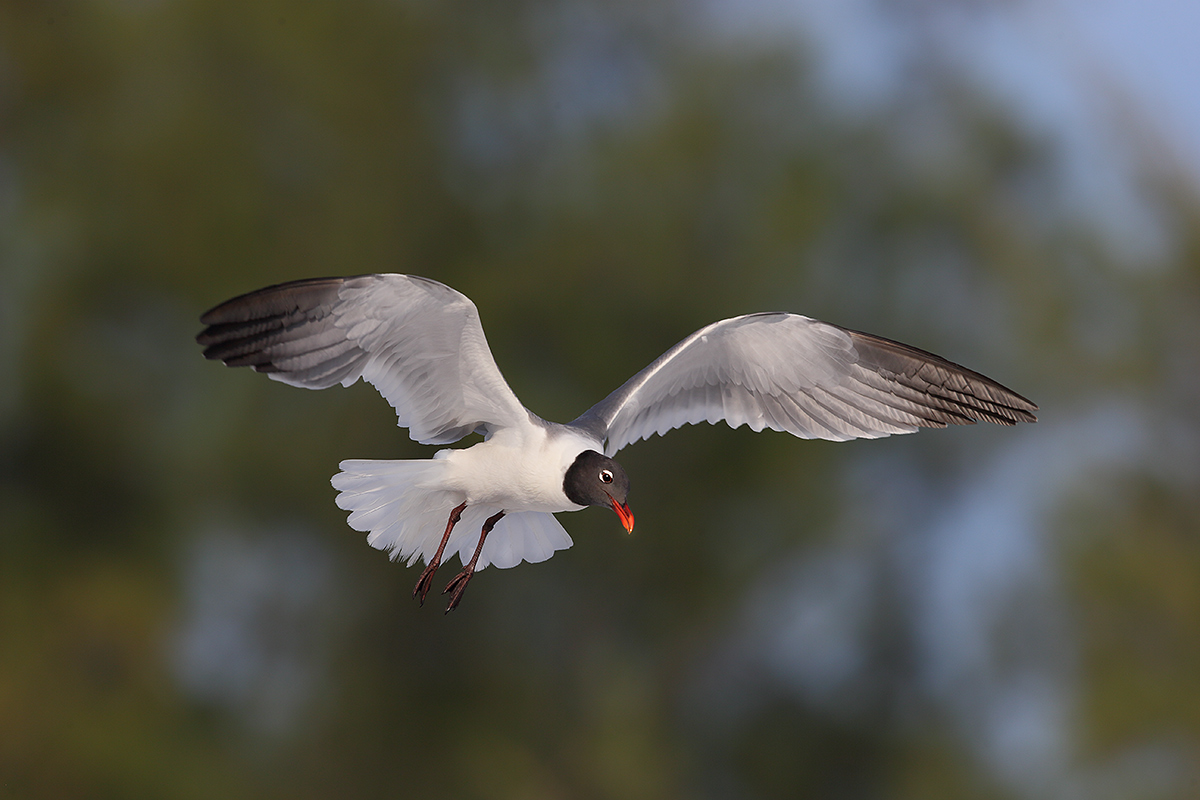
|
|
This image was created at Fort DeSoto at 6:30pm on the sunny afternoon of May 9 with the hand held Canon EF 300mm f/2.8L IS II USM lens, the Canon Extender EF 2X III, and the Canon EOS-1D X. ISO 400. Evaluative metering -1/3 stop as framed: 1/2000 sec. at f/7.1 in Manual mode. AWB.
Central Sensor/AI Servo-Surround/Rear Focus AF as framed on the base of the far wing just above the bird’s head was active at the moment of exposure. Click here to see the latest version of the Rear Focus Tutorial. Click on the image to see a larger version.
Image #2: Breeding Plumage Laughing Gull in flight
|
Hand Holding for Flight
I find it possible to hand hold the 200-400 for flight for short sessions. On the sea-eagle boat in Japan, I had to quit after about an hour and put the 2-4 onto the tripod with the Mongoose M3.6. While I made some good images off the tripod it is simply more difficult to shoot flight off the tripod than when hand holding. Hand holding the 300 II for flight even with the 2X III TC in place (as here) is much less taxing on the arm and shoulder muscles than hand holding the 200-400 with Internal extender. Most folks, but surely not all, will be able to hand hold the 300 II for long flight photography sessions.
|
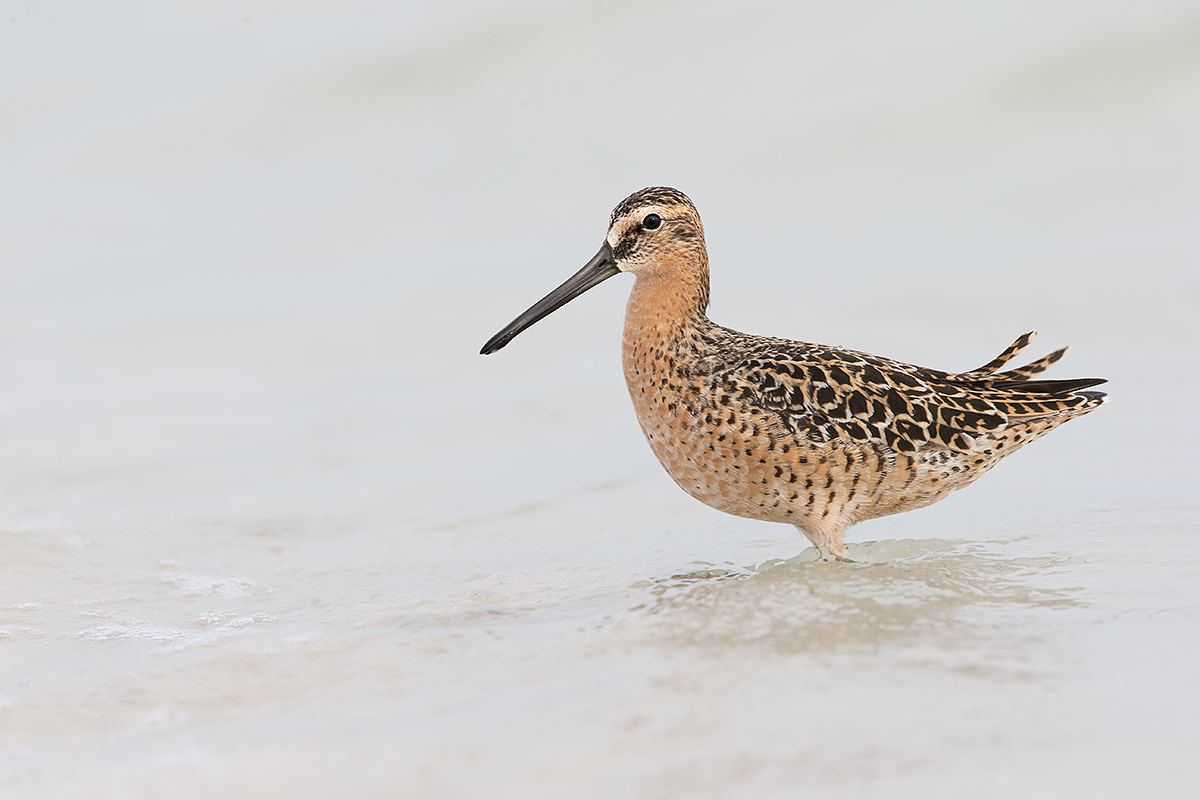
|
|
This image was created 9:02am on the cloudy morning of May 11 at Fort DeSoto with the hand held Canon EF 300mm f/2.8L IS II USM lens, the Canon Extender EF 2X III, and the Canon EOS-1D X. ISO 640. Evaluative metering +1 stop as framed: 1/500 sec. at f/10 in Av mode. AWB.
Central Sensor/AI Servo-Surround/Rear Focus AF as framed that just caught the front of the bird’s breast was active at the moment of exposure. Click here to see the latest version of the Rear Focus Tutorial. Click on the image to see a larger version.
Image #3: Breeding Plumage Short-billed Dowitcher
|
Increased Mobility
With its significantly lighter weight and smaller size, approaching birds and getting down and up off the beach when sitting with the 300 II is easier to some degree than doing the same with the 200-400. And if you are lying flat on the beach, you can double that advantage. Being freed from having to use a tripod makes stalking birds and getting into position relatively easy for those who know the birds and their behavior. The best way to learn beach birds and their behavior is to join us on the Nickerson Beach IPT.
|
|
|
This image was created at 6:41pm at Fort DeSoto Park on the sunny afternoon of May 11 with the hand held Canon EF 300mm f/2.8L IS II USM lens and the Canon EOS-1D X. ISO 400. Evaluative metering +1/3 stop as framed: 1/5000 sec. at f/4 in Av mode. AWB.
Central Sensor/AI Servo-Surround/Rear Focus AF as framed on the side of the bird’s upper breast was active at the moment of exposure. Click here to see the latest version of the Rear Focus Tutorial. Click on the image to see a larger version.
Image #4: Female winter plumage Red-Breasted Merganser flapping
|
Focal Length Flexibility
While the 300 II will never match the infinite framing possibilities that come with the 200-400, adding, or as above, removing a TC gives you three different focal lengths: 300mm with the prime lens alone, 420mm with the 1.4X III TC, and 600mm with the 2X III TC. The lady merganser above had been standing up and flapping on a regular basis every five minutes close to half an hour. Having gotten tired of clipping the wings at 600mm, I removed the 2X, approached the bird slowly, sat down without much ado, and went to work.
Head Angles
Note the absolutely perfect head angles in the tricolored, dowitcher, and merganser images; in each of those, the bird’s head is turned about 2-3 degrees toward the viewer. To learn more about head angle, see the BPN Head Angle Fine Points thread here. I began this thread on August 7, 2010. With 392 replies and 39,587 views it has grown a bit since then….
This comment from new BPN member Sandy Vitvoet:
As always, ROCKIN’ images and education, Artie!
There is a large collection of great tutorials in the Education Resources Forum on BPN. And they are all free.
Your Favorite?
Please take a moment to leave a comment and let us know which of the four images you like best and why.
Good Writing & Human Interest
Even if you never heard of the late Tony Gywnn and even if you hate baseball, you need to click here and read David Johnson’s Deadspin blog post. It pretty much has nothing at all to do with how great Tony Gywnn was as a hitter and everything to do with how great he was as a person. There are many lessons there for all of us and some of the finest writing you will ever come across.
Nickerson Baby Beach-nesting Birds IPT: 3-Full Days/July 15-17, 2014: $1199. Introductory meet and greet: 8pm, Monday, July 14, 2014. Co-leaders Arthur Morris and Denise Ippolito. Limit 12.
With a relatively small group pretty much guaranteed, do consider joining us on Long Island, NY this coming July to photograph Black Skimmers–it’s looking like a great year for skimmer nesting, Common Terns with chicks, American Oystercatcher families, and possibly some just-hatched Black Skimmer chicks. The opportunities will include chances to photograph a variety of breeding behaviors including courtship feeding, display flight and combat, and copulations. Car-pooling is recommended; if we opt to return to the beach before 5pm on cloudy days for example) there is a $30/vehicle parking fee that is not included so it is best to share that expense. Parking in the morning is free.
Because of the late date, your non-refundable payment in full is due when you register.
Please print, complete, and sign the form that is linked to here and shoot it to us along with your deposit check (made out to “Arthur Morris.”) Though we prefer a check, you can also leave your deposit with a credit card by calling the office at 863-692-0906. If you register by phone, please print, complete and sign the form as noted above and either mail it to us or e-mail the scan.
If you have any questions, please feel free to contact me via e-mail
Facebook
Be sure to like and follow BAA on Facebook by clicking on the logo link upper right. Tanks a stack!
Support the BAA Blog. Support the BAA Bulletins: Shop B&H here!
We want and need to keep providing you with the latest free information, photography and Photoshop lessons, and all manner of related information. Show your appreciation by making your purchases immediately after clicking on any of our B&H or Amazon Affiliate links in this blog post. Remember, B&H ain’t just photography!
…..
Amazon Canada
Many kind folks from north of the border, ay, have e-mailed stating that they would love to help us out by using one of our affiliate links but that living in Canada and doing so presents numerous problems. Now, they can help us out by using our Amazon Canada affiliate link by starting their searches by clicking here. Many thanks to those who have written.
Typos
In all blog posts and Bulletins, feel free to e-mail or to leave a comment regarding any typos, wrong words, misspellings, omissions, or grammatical errors. Just be right. 🙂
June 23rd, 2014
|
|
|
Avian Moderator Arash Hazeghi posted this sick image this morning. You can read the comments and see my question here. Sometimes it’s my job to ascertain the facts and in so doing, I stir the pot a bit at times.
|
Bird Photographer’s.Net
In late 2007, after several months of planning, I became one of the original founders and owners of BirdPhotographer’s.Net; It Ain’t Just Birds. Our goal was to provide honest critiques done gently and we have done a fairly good job of that. We have an incredible team of moderators who work hard every day to help folks become better photographers.
For many years James Shadle handled everything on the administrative/behind the scenes end. By the end of 2013 James, saddled by work and serious health issues, opted to leave BPN. That left me as sole owner with no idea of how to keep the site running smoothly. Note: James did not leave me in the lurch–we had a plan in place.
That plan involved bringing in the brilliant Peter Kes to handle all of the back-end stuff in exchange for 49% ownership. Peter is an absolute computer genius and he has worked hard under difficult circumstances to not only keep BPN up and running but to improve it. He recently revamped and updated the home page; you can see his handiwork here.
With all of my travel and the insane blog streak going on I have been remiss over the past six months in not visiting my baby very often. On the recent Palouse scouting trip BPN Out-of-the-Box Forum Moderator Cheryl Slechta kindly noted that folks really missed my absence. Since our conversation I have re-dedicated myself to BPN. I have been visiting a different critique forum each night for 30 minutes or so. It has been both great fun and very rewarding. There are so, so many great images and so much teaching and learning going on that I have decided to share some great photography with you here on the blog on a regular basis. Enjoy.
|
|
|
Be sure to check out Greg Oakley’s spectacular Australian Magpie here in the Avian Forum.
|
Avian Forum
With 49,732 threads and 450,718 replies the Avian Forum is by far our most active. The more than half a million BPN Avian entries (500,450 as I type to be exact and increasing every minute) are quite impressive.
With my 25,071 posts, a great percentage of them in Avian, I am proud of the work that I have done at BPN. I do however look forward to visiting each and every critique forum on a regular basis.
I’d be remiss without mentioning the contributions of Super-Moderator Dan Cadieux to the continuing success of BPN. He has been offering superb critiques not only in Avian but in forums across the board since January 2008. Thanks a stack Dan.
The Avian Forum is for posting and critiquing avian images. The images may include hand of man elements. If your subject is captive, please disclose that fact. If you have attracted your subject or subjects into photographic range with food, water, audio, or by any other means, please let us know in your original post. If you have significantly altered your image by adding or removing elements of the composition, we ask that you let folks know that as well.
|
|
|
Rahul Belsare’s Ultramarine Flycatcher image in the Eager to Learn Forum may be the best-ever first post. You can check out the comments and the learning here.
|
Eager To Learn
Under the more-than-skillful leadership of Moderator Diane Miller, ETL has really blossomed over the past six months. Many folks so enjoy the attention they get in the Eager to Learn Forum that they simply stay there even when their skills have improved immensely. ETL is our second most popular critique forum.
Eager to Learn is for those of who may be new to critique forums and are a little unsure about posting. Post here and you will receive help, guidance and gentle critiques. Soon you will be ready to post in our other forums if you so choose. General nature photography images may be posted, with or without hand of man elements. If you have significantly altered your image by adding or removing elements of the composition, we ask that you let folks know what you have done.
|
|
|
You can learn how Keith Mitchell captured this wonderful image of a squirrel dropping an acorn in his Wildlife post here.
|
Wildlife
With 3 skilled Mods and many skilled folks posting images daily in the Wildlife Forum, it is an exciting place to visit and learn. I love that the range of subjects is wide and that you can see great images of both backyard animals and wildlife from the best and most spectacular locations on the planet. Kudos to Mods Steve Kaluski, Morkel Erasmus, and Rachel Hollander.
|
|
|
That Macro and Flora Moderator Steve Maxson is a skilled photographer is quite evident after a quick glance at his Cecropia Moth image above. You can check out the accolades here. Many thanks to Steve for his nearly 5,000 BPN posts.
|
Macro and Flora
In this forum you will find spectacular images of moths, butterflies, dragonflies, damselflies, snakes, buds, and not quite enough flowers for me. Brit Jon Ashton with his 5.000+ plus posts joins Steve in making the Macro and Flora Forum a great place to learn. Relative newcomer Ron Conlon has wowed everyone with his innovative macro techniques; I will be sharing some of his images with you here soon.
For posting and critiquing close-ups of Flora, Fauna and minerals as well as images of plant life other than landscapes or scenery. If you have significantly altered your image by adding or removing elements of the composition, we ask that you let folks know what you have done.
|
|
|
Most folks who commented on Dan Kearl’s spectacular rainbow image, Pot of Gold, made the same suggestion. How would you have advised Dan to improve this image? You can learn what others (and I) thought by clicking here.
|
Landscapes, Cityscapes, and Travel
Wildlife Moderator Morkel Erasmus recently joined Landscapes Mod Andrew McLachlan as co-moderator of the Landscapes, Cityscapes, and Travel Forum. The fact is that we need lots more landscape images–great and otherwise–in this forum. If you enjoy creating scenic, city, and travel images please visit and begin posting.
For posting and critiquing images of landscapes and scenery, including panoramic, stitched, and HDR images. Images with hand of man elements are obviously fine as are both color and black and white images. If you have significantly altered your image by adding or removing elements of the composition, we ask that you let folks know what you have done.
|
|
|
Paul Lagasi’s “Elton John of the Bird World” post left me envious. You can learn why and read my comment by scrolling down here.
|
Out-of-the-Box, In-camera and Post-Processing Techniques
My friend, co-leader, and associate Denise Ippolito worked hard (to the tune of 23,206 posts) in the Out-of-the-Box Forum for more than 5 years. Her tireless efforts single-handedly put OOTB on the map. Losing her at BPN was a serious blow. Since Denise’s departure OOTB Moderator Cheryl Slechta has kept things going nicely with able help from Co-Moderator Kerry Perkins. They have recently been joined by Nancy Bell. Out-of-the-Box is BPN’s third most popular critique forum.
Not every image adheres to the so called “rules” of traditional photography. This forum is dedicated to breaking out of the box of conformity. Post Avian, Wildlife, Macro/Flora, Landscapes and other Natural History images with or without hand of man elements that will expose us to new ideas and new ways of thinking. This forum is for Out-of-the-Box images made in-camera (including infrared) or those modified using a variety of post processing techniques including but not limited to Photoshop filters and plug-ins, toning, de-saturation, and hand coloring among others.
The Streak Continues: 205
It is now just before 9:30am here on yet another sunny morning here at Indian Lake Estates. But the afternoon thunderstorms are coming for sure. As I was up working at 4:30am, this post took well more than 4 hours to prepare. Enjoy and learn.
This post marks 205 consecutive days with a new blog post. With so many folks getting in the habit of using our B&H links and our Amazon logo-links why quit now? April, May and June have been fantastic as lots of folks are getting the message; using my affiliate links does not cost you a penny and helps support my efforts here. To show your appreciation, I do ask that you use our the B&H and Amazon affiliate links on the right side of the blog for all of your purchases. Please check the availability of all photographic accessories in the BIRDS AS ART Online Store, especially Gitzo tripods, Wimberley tripod heads, and the like. We sell only what I have used and tested, and know that you can depend on. We will not sell you junk. We know the tools that you need to make creating great images easy and fun. And we are always glad to answer your gear questions via e-mail.
You can find the following items in the store: Gitzo tripods, Mongoose M3.6 and Wimberley heads, plates, low feet, and accessories, flash brackets, , Delkin e-film Pro Compact Flash Cards, LensCoat products, and our unique line-up of educational materials including ABP I & II, Digital Basics, Site and Set-up e-Guides, Canon and Nikon Camera Users and AF e-Guides, and MP-4 Photoshop video tutorials among others.
I would of course appreciate your using our B&H affiliate links for all of your major gear, video, and electronic purchases. For the photographic stuff mentioned in the paragraph above we, meaning BAA, would of course greatly appreciate your business. Here is a huge thank you to the many who have been using our links on a regular basis and visiting the BAA Online store as well.
Nickerson Baby Beach-nesting Birds IPT: 3-Full Days/July 15-17, 2014: $1199. Introductory meet and greet: 8pm, Monday, July 14, 2014. Co-leaders Arthur Morris and Denise Ippolito. Limit 12/Openings 3.
With a small group pretty much guaranteed, do consider joining us on Long Island, NY this coming July to photograph Black Skimmers–it’s looking like a great year for skimmer nesting, Common Terns with chicks, American Oystercatcher families, and possibly some just-hatched Black Skimmer chicks. The opportunities will include chances to photograph a variety of breeding behaviors including courtship feeding, display flight and combat, and copulations. Car-pooling is recommended; if we opt to return to the beach before 5pm on cloudy days for example) there is a $30/vehicle parking fee that is not included so it is best to share that expense. Parking in the morning is free.
Because of the late date, your non-refundable payment in full is due when you register.
Please print, complete, and sign the form that is linked to here and shoot it to us along with your deposit check (made out to “Arthur Morris.”) Though we prefer a check, you can also leave your deposit with a credit card by calling the office at 863-692-0906. If you register by phone, please print, complete and sign the form as noted above and either mail it to us or e-mail the scan.
If you have any questions, please feel free to contact me via e-mail
Facebook
Be sure to like and follow BAA on Facebook by clicking on the logo link upper right. Tanks a stack!
Support the BAA Blog. Support the BAA Bulletins: Shop B&H here!
We want and need to keep providing you with the latest free information, photography and Photoshop lessons, and all manner of related information. Show your appreciation by making your purchases immediately after clicking on any of our B&H or Amazon Affiliate links in this blog post. Remember, B&H ain’t just photography!
…..
Amazon Canada
Many kind folks from north of the border, ay, have e-mailed stating that they would love to help us out by using one of our affiliate links but that living in Canada and doing so presents numerous problems. Now, they can help us out by using our Amazon Canada affiliate link by starting their searches by clicking here. Many thanks to those who have written.
Typos
In all blog posts and Bulletins, feel free to e-mail or to leave a comment regarding any typos, wrong words, misspellings, omissions, or grammatical errors. Just be right. 🙂
June 22nd, 2014
|
|
|
Please note that there are two Palouse IPTs in place. The first is sold out. I hope that you can join us 🙂 Card and design by Arthur Morris/BIRDS AS ART. Register now or risk missing this great trip.
|
The Palouse A Creative Adventure/BIRDS AS ART Instructional Photo-Tour (IPT)/Eastern Washington State. June 5-9, 2015/5 Full Days: $1699/Limit 12 photographers/Openings 5; this trip is a go.
The 2nd Palouse IPT Added By Popular Demand is Filling Up Fast
Please click here and then scroll down for details.
The Streak Continues: 204
It is now just before 9:30am here on another sunny morning here at Indian Lake Estates. This post took about 3 1/2 hours to prepare. Enjoy and learn.
This post marks 204 consecutive days with a new blog post. With so many folks getting in the habit of using our B&H links and our Amazon logo-links why quit now? April, May and June have been fantastic as lots of folks are getting the message; using my affiliate links does not cost you a penny and helps support my efforts here. To show your appreciation, I do ask that you use our the B&H and Amazon affiliate links on the right side of the blog for all of your purchases. Please check the availability of all photographic accessories in the BIRDS AS ART Online Store, especially Gitzo tripods, Wimberley tripod heads, and the like. We sell only what I have used and tested, and know that you can depend on. We will not sell you junk. We know the tools that you need to make creating great images easy and fun. And we are always glad to answer your gear questions via e-mail.
You can find the following items in the store: Gitzo tripods, Mongoose M3.6 and Wimberley heads, plates, low feet, and accessories, flash brackets, , Delkin e-film Pro Compact Flash Cards, LensCoat products, and our unique line-up of educational materials including ABP I & II, Digital Basics, Site and Set-up e-Guides, Canon and Nikon Camera Users and AF e-Guides, and MP-4 Photoshop video tutorials among others.
I would of course appreciate your using our B&H affiliate links for all of your major gear, video, and electronic purchases. For the photographic stuff mentioned in the paragraph above we, meaning BAA, would of course greatly appreciate your business. Here is a huge thank you to the many who have been using our links on a regular basis and visiting the BAA Online store as well.
The Two Things I Hate About the 200-400 with Internal Extender
First off, I do not hate anything about my Canon EF 200-400mm f/4L IS USM Lens with Internal 1.4x Extender. I always opt for an overly dramatic blog post title simply to get more folks to click on the link and read a given post.
As noted here previously and often, it can be the very best tool for a given photographic task. I would never be without it on an African safari. I would never be without it in the Galapagos. I would never be without it in Yellowstone National Park. I would never be without it on a Southern Oceans Expedition. And I would never be without it in the Palouse. If you are new here or if you would like to learn more about the many huge positives of this lens, type “200-400 with Internal Extender” into the little white search box on the upper right of each blog page, hit Search, and follow the links. You will be quite busy.
There are however two things about my 2-4 that I find challenging, more challenging than they need to have been. Bird and wildlife photography often require you to work as quickly as possible. Potential BBC-honored image moments might last only a second or two. Time spent trying to access a small, flat switch in an inaccessible location or turning the zoom ring might very cause you to miss a very special moment….
The Limit Range Switch….
I firmly believe that when photographing birds in flight the limit range switch should be set to 6 meters to infinity so that the lens does not have to focus all the way down to the minimum focusing distance of the lens (2 meters or 6.56 feet in this case). With the switch set to far focus (as I call the 6m to infinity setting), initial focusing acquisition will be much faster than with the limit range switch set to full (as it is in the image above).
When photographing birds closer to you than 6 meters (19.68 feet), you must have the limit range switch set to Full or the lens simply will not focus.
So what’s my gripe? The limit range switch is located on the left side of the lens very close to the lens mount, just below the AF/MF switch. If anyone knows what PF is please do share… The limit range switch is located behind and below the housing for the internal teleconverter that is similar in size and shape to the hump on some 747 jet airliners…. In addition, the flange on the front of the camera’s battery compartment further blocks access to the limit range switch. Thus I have nicknamed this 2-switch panel the “inaccessible switch panel.” Contrast that with what I call the “accessible switch panel” located on the left side of the lens about halfway down the barrel. There you will find (from top to bottom) the Stabilizer Mode switch, the Stabilizer switch, and the Focus Preset button and switch.
With the lens on a tripod, it is hard to get at the limit range switch. When hand holding it is very difficult to access the limit range switch as you need to support the lens from below with your right hand at the center of the lens barrel while moving the switch with your left hand. Due to the weight of the 200-400 this is a daunting task for some folks. Like me.
Had the limit range switch been placed above the AF/MF switch it would have been a bit easier to access, but a much better solution would have been to design the lens with the limit range switch in the top position on the accessible switch panel where it would be easily and instantly accessible. If need be either one or both of the Stabilizer switches could have been moved to the inaccessible panel. I set Stabilizer Mode to 2 and rarely if ever change it. And I leave IS ON 99.99% of the time.
Lastly, I propose that the limit range switch should be a raised switch like the Stablizer switch rather than a flat switch.
The bottom line is that when you are working a bird at close range with the limit range switch set to full and you see a bird flying at you or you spot some relatively distant action, you need to be able to move the switch to the far (6 meter to infinity) setting almost instantly. With the 200-400 doing that is simply not possible; it is one of the two flaws in an otherwise wonderfully designed lens.
|
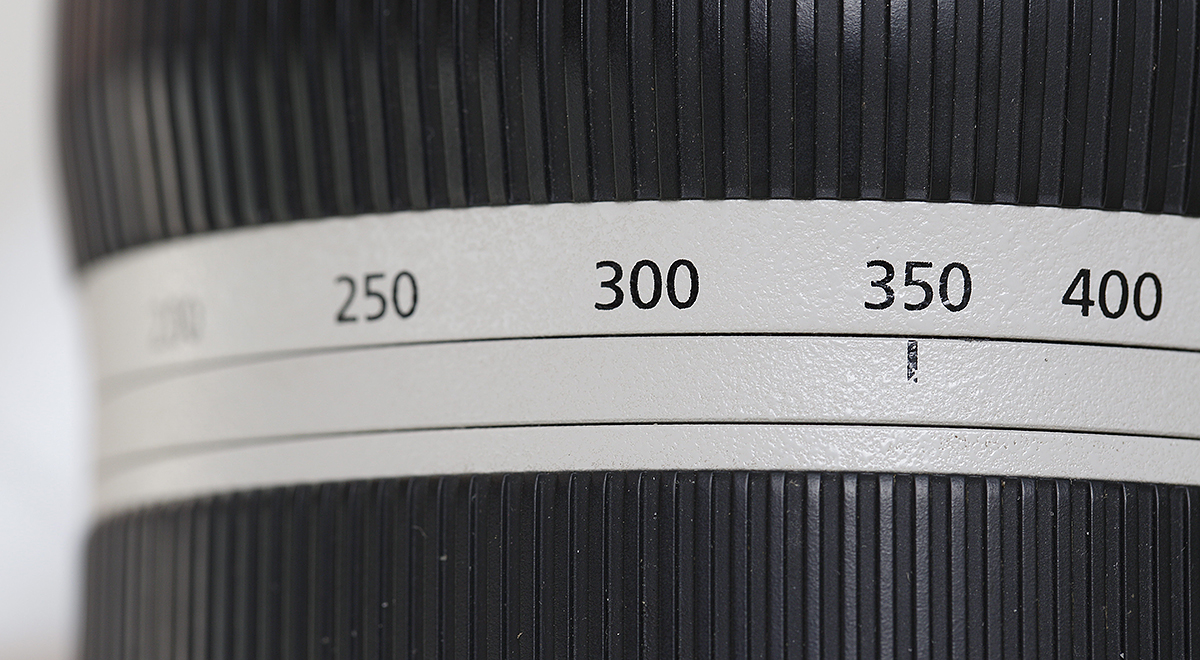
|
|
A close-up look at the zoom ring. As the wide depth of field that I chose for this image seems to indicate, it is a long way from 350mm to 200mm…. The image created with the hand held Canon EF 100mm f/2.8L Macro IS USM lens.
|
Zoom Ratio
In several early evaluations of the 200-400, I wrote, “While I initially wished for a faster zoom ratio speed (more zoom with less twist of the zoom ring), I quickly learned to a: place my left hand on the zoom ring and b: anticipate and zoom to the approximate focal length that I wanted as I raised the lens.” As I got more experienced using the lens for bird photography, I learned to set the zoom ring to about the 350 setting. This makes it fairly easy to zoom in to 400mm or to zoom out to 300mm (or to 560 mm or to 320mm respectively with the internal TC engaged).
Over time I came to realize that zooming in or out would be much faster and much more convenient if the lens offered a choice of zoom speed ratios. You would be able to choose the Power Zoom setting if you wanted to be able to zoom over the complete focal length range (200-400mm or 280-560mm with the internal TC engaged) or to choose Standard Zoom when you desired a finer degree of control when zooming.
There are times when a bird is flying directly at me that I simply cannot zoom wide enough fast enough. Having a Power Zoom setting available would solve this problem. Hey, a guy can dream can’t he?
About 7 years ago, I and several other Explorers of Light had suggested to a group of Canon lens designers and engineers that Canon add a 200-400 to their lens lineup. They do get credit for following through and for coming up with the amazing internal TC idea. In any case, I would have been thrilled to have had a chance to test a prototype of this lens for Canon but was never invited to that party.
While I realize that the chance of this lens being re-designed in my lifetime is unlikely at best, if it is ever done, I hope that this blog post will serve as food for thought. Or perhaps I might be invited to field test prototypes of whatever amazing new gear exists now only on the drawing boards of the Canon engineers and designers.
Your comments and questions on the 2-4 are of course welcome.
Selling Your Used Photo Gear Through BIRDS AS ART
Selling your used (or like-new) photo gear through the BAA Blog or via a BAA Online Bulletin is a great idea. We charge only a 5% commission. One of the more popular used gear for sale sites charges a minimum of 20% plus assorted fees! Yikes. The minimum item price here is $500 (or less for a $25 fee). If you are interested please e-mail with the words Items for Sale Info Request cut and pasted into the Subject line :). Stuff that is priced fairly–I offer free pricing advise, usually sells in no time flat.
In the past two weeks, practically everything on the shelves has been sold. I am still at a loss as to how Jim Bicket’s 800 has not sold. It is a great lens in perfect condition that is more than fairly priced. B&H is asking $11,999.90 for a used one in the same condition here. Buy Jim’s lens and save $3249.90 right now!
And be sure to check out the great Mongoose M3.6 package.
IAC, there are several great new listings including Carl Zanoni’s immaculate 500 II, another great 400 DO, and Michael Zajac’s Canon EOS-1D Mark III, Coming soon: a 500 f/4 L IS, a 300 f/28 L IS, and an EOS-5D Mark III/24-105 kit with extras. I share all of the current listings with you below.
Used Gear Caution
Though I am not in a position to post images of gear for sale here or elsewhere, prospective buyers are encouraged to request for photos of the gear that they are interested in purchasing via e-mail. Doing so will help to avoid any misunderstandings as to the condition of the gear.
Canon 500mm f/4L IS II USM Lens
Multiple IPT veteran and BAA friend Carl Zanoni is offering an immaculate Canon 500mm f/4L IS II USM lens in Like New condition for the ridiculously low price of $8,999. With lots of extras. The sale includes the Canon E-163B Lens Cap, a Canon Rear Lens Cap, the Canon ET-138W II Lens Hood, the Canon Hard Lens Trunk 500B, a Canon Drop-in 52mm Circular Polarizer, 2 Canon shoulder straps, a LensCoat(Realtree Max 4), a Kirk LP-55SG Quick Release Plate/Foot, the original Canon lens foot, and insured UPS Ground shipping to US addresses. The items will be shipped only after the buyer’s check clears.
Please contact Carl via e-mail or by phone at 860 349 3840. This is a dream lens for all bird and wildlife photographers who do not want to deal with the bulk and weight of a 600mm lens. Save a ton as the lens sells new for $10,499.00.
Canon 400 DO IS USM Lens
Joe Messina is offering a used Canon 400 DO IS USM lens in very good ++ condition for $4200. There are some minor cosmetic scratches to the finish. The lens hood is slightly out of round and is difficult to install. The sale includes an AquaTech flexible strap-on hood, a $150 value. The sale also includes the lens trunk (with key), the original leather hood, and a hard plastic lens cap. The seller will pay insured UPS shipping within continental US. The lens will ship after the check clears.
Please contact Joe via e-mail or by phone at 415-563-6577.
If you are looking for a fast, lightweight, hand holdable telephoto lens, this is the lens for you. Learn a ton more about the 400 DO here and see lots of 400 DO images by visiting the “The Canon 400mm f/4 IS DO Lens: Fourteen Images that Prove that the Internet Experts are (As Usual) Idiots” blog post here. The lens sells new at B&H for $6499.00.
Canon EOS-1D Mark III
Michael Zajac is offering a Canon EOS-1D Mark III professional digital camera body in Excellent condition for $1250. The sale includes the battery charger, one battery, the original paperwork, the camera strap, the original box, and shipping to the continental US.
Please contact Michael via e-mail or by phone at 732-979 -6644. Photos are available upon request.
Some EOS-1D Mark III bodies originally had AF problems. Michael’s did not. I have seen his great flight images made with this camera. This body features a 1.3X crop factor sensor and is a great step-up for someone who wants to take a big step up from a 7D. It’s powerful battery drives AF much faster than the pro-sumer bodies especially with either a 1.4X or 2X teleconverter in place.
Used Mongoose Package for Sale
Upgraded Mongoose M3.5 Package: $630
John Stuhlmuller is offering a used Mongoose M3.5 tripod head that has been upgraded to an M3.6 (approximate value $550). The only differences between a refurbished M3.5 and a new M3.6 is the internal finish of several parts. Otherwise, it functions as an M3.6, the head I have used and depended on for nearly a decade. The sale includes an installed Horizontal Low Mount Arm (sells new for $90), the Integrated Flash Arm (sells new for $110), a CR-X5 plate, the low foot for the four Series II Canon Super-Telephoto lenses and teh 200-400 (sells for $122 new), a CP16 lens plate for B-tripod ring lenses like the Canon 70-200mm f/2.8L IS (sells for $75 new).
There are some minor scratches on the top of the mounting clamp. Otherwise, there are no other signs of wear and the head works perfectly. John prefers his Wimberley V2 head.
The package is valued at approximately $947. The cost of insured ground shipping to US addresses is included. Sale price: $630. Save $300+.
Contact John via e-mail. Photos available upon request.
Used Canon 800mm f/5.6L IS Lens for Sale
Multiple IPT veteran, the too-kind Jim Bicket, is offering a Canon EF 800mm f/5.6L IS USM lens in excellent condition for $8750. The lens is like new except for some wear on the bottom of the lens hood near the forward edge when the hood is reversed. The sales includes the LensCoat that has protected the lens since day 1, the leather hood, the original hard case and key, and insured shipping via UPS Ground to US addresses only. Personal checks only; your new lens will be shipped only after your check clears.
This great lens, my favorite for 3 years, sells new at B&H for $13,999.00. B&H is asking $11,999.90 for a used one in the same condition as Jim’s here. Buy Jim’s lens and save $3249.90 right now! It will save you a ton of dough and you will have a super-sharp lens with lots of reach. And it works great with a 1.4X TC too.
Interested folks can contact Jim via e-mail or try him at 501-915-9336.
Support the BAA Blog. Support the BAA Bulletins: Shop B&H here!
We want and need to keep providing you with the latest free information, photography and Photoshop lessons, and all manner of related information. Show your appreciation by making your purchases immediately after clicking on any of our B&H or Amazon Affiliate links in this blog post. Remember, B&H ain’t just photography!
…..
Amazon Canada
Many kind folks from north of the border, ay, have e-mailed stating that they would love to help us out by using one of our affiliate links but that living in Canada and doing so presents numerous problems. Now, they can help us out by using our Amazon Canada affiliate link by starting their searches by clicking here. Many thanks to those who have written.
Typos
In all blog posts and Bulletins, feel free to e-mail or to leave a comment regarding any typos, wrong words, misspellings, omissions, or grammatical errors. Just be right. 🙂
June 21st, 2014 Nickerson Baby Beach-nesting Birds IPT: 3-Full Days/July 15-17, 2014: $1199. Introductory meet and greet: 8pm, Monday, July 14, 2014. Co-leaders Arthur Morris and Denise Ippolito. Limit 12/Openings 3.
There is lots of room on the Nickerson Beach IPT and time is running out. Please scroll down here for details.
The Palouse A Creative Adventure/BIRDS AS ART Instructional Photo-Tour (IPT)/Eastern Washington State. June 5-9, 2015/5 Full Days: $1699/Limit 12 photographers/Openings 5; this trip is a go.
The 2nd Palouse IPT Added By Popular Demand is Filling Up Fast
Please click here and then scroll down for details.
The Streak Continues: 203
It is now just after 8:20am here on a sunny day at Indian Lake Estates. This post took about 3 1/2 hours to prepare after several updates. Enjoy and learn.
This post marks 203 consecutive days with a new blog post. With so many folks getting in the habit of using our B&H links and our Amazon logo-links why quit now? April, May and June have been fantastic as lots of folks are getting the message; using my affiliate links does not cost you a penny and helps support my efforts here. To show your appreciation, I do ask that you use our the B&H and Amazon affiliate links on the right side of the blog for all of your purchases. Please check the availability of all photographic accessories in the BIRDS AS ART Online Store, especially Gitzo tripods, Wimberley tripod heads, and the like. We sell only what I have used and tested, and know that you can depend on. We will not sell you junk. We know the tools that you need to make creating great images easy and fun. And we are always glad to answer your gear questions via e-mail.
You can find the following items in the store: Gitzo tripods, Mongoose M3.6 and Wimberley heads, plates, low feet, and accessories, flash brackets, , Delkin e-film Pro Compact Flash Cards, LensCoat products, and our unique line-up of educational materials including ABP I & II, Digital Basics, Site and Set-up e-Guides, Canon and Nikon Camera Users and AF e-Guides, and MP-4 Photoshop video tutorials among others.
I would of course appreciate your using our B&H affiliate links for all of your major gear, video, and electronic purchases. For the photographic stuff mentioned in the paragraph above we, meaning BAA, would of course greatly appreciate your business. Here is a huge thank you to the many who have been using our links on a regular basis and visiting the BAA Online store as well.
|
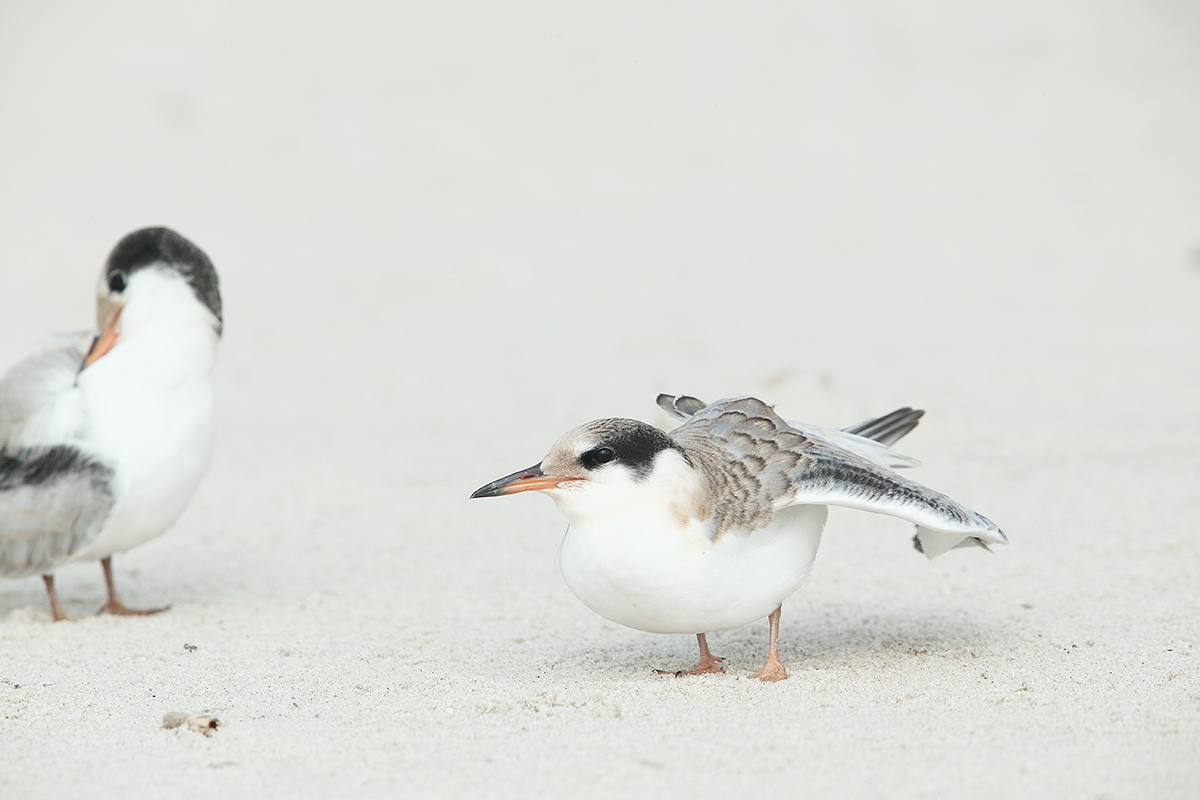
|
|
This Common Tern fledgling with friend image was created on July 22 on last July’s Nickerson Beach IPT while I was seated behind my lowered Gitzo 3532 LS carbon fiber tripod with a Mongoose M3.6 head on it, the Canon EF 600mm f/4L IS II USM lens, the Canon 2x EF Extender III (Teleconverter), and the Canon EOS-1D X. ISO 400. Evaluative metering +2 stops: 1/640 sec. at f/10 in Manual Mode.
Central sensor (by necessity)/AI Servo Expand/Rear Focus on the subject’s eye and re-compose. Click here if you missed the Rear Focus Tutorial. Click on the image to see a larger version.
This is the original capture.
|
Like Bagels?
After each morning of photography at Nickerson Beach, IPT or not, we head to Bagel Plaza in Merrick for some great coffee (decaf for me) and an early lunch. Part of being a diabetic with gliaden allergy tendencies is no bagels. But I have a good memory (for food at least!) The bagels are great. As good as the bagels from Howard Beach and as good as the bagels from the Bay Gull store in Broad Channel. But bagel plaza has lots of great stuff for me to eat and the boys and girls on IPTs always enjoy our visits.
They have a large seating area with a few electrical outlets scattered about and the management does not mind if we hang out to get some work done. One of the favorite learning experiences on all IPTs is to have folks see how I edit the images from a single session in BreezeBrowser. More important than my blue check-marks for keepers technique is that I explain my reasoning. “Which is better? A or B? Why?” We are able to discuss dozens of factors that influence the decision to keep one image and delete another: head angle, light angle, quality of light and other lighting considerations; sharpness, subject to film plane orientation; distracting elements; subject size; and dozens or other very fine points.
I have long planned to do an editing eGuide. Though I have saved many dozens of series of images for this potential publication I am not sure if I will get to it any time soon…. I am too busy having fun.
IAC, let’s take a look at the image above of two fledgling Common Terns. I wish that I had been well to the left to better parallel the subject but moving quickly while seated in never an option. And wing stretches are always cool.
|
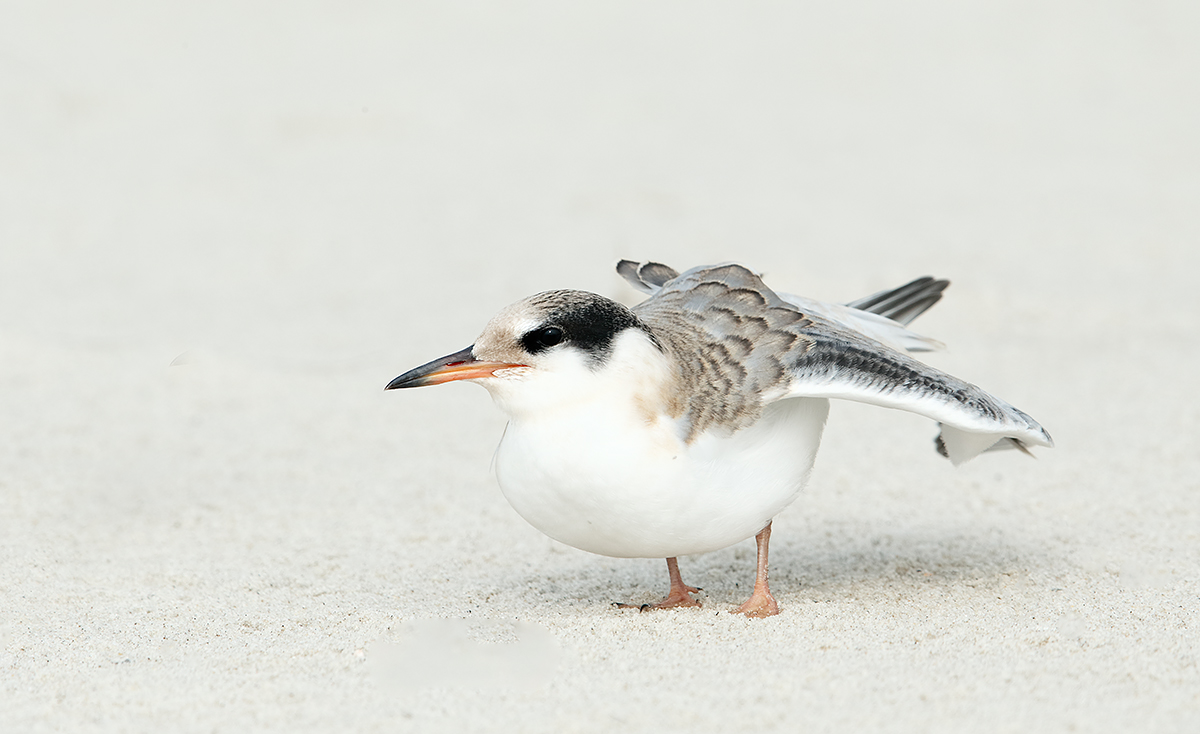
|
|
This was my first version of the image above.
|
My First Thought
My first thought was to get the image down to a single bird.You should only go with a relatively large crop as above when you are starting with a sharp, high quality image file. After converting the image in DPP I did some beach and bill clean-up and covered the second bird with a large Quick Mask. Then a small color correction. Next I ran Auto Contrast on a layer at 40% opacity to give the image some pop; that thanks to a tip from Denise Ippolito. Next I selected the face and crown with the Quick Selection Tool, applied a Contrast Mask for selective, non-destructive sharpening and lightened the selection by pulling up the curve (Control M). Lastly I darkened the pupil a bit using Digital Eye Doctor techniques.
|
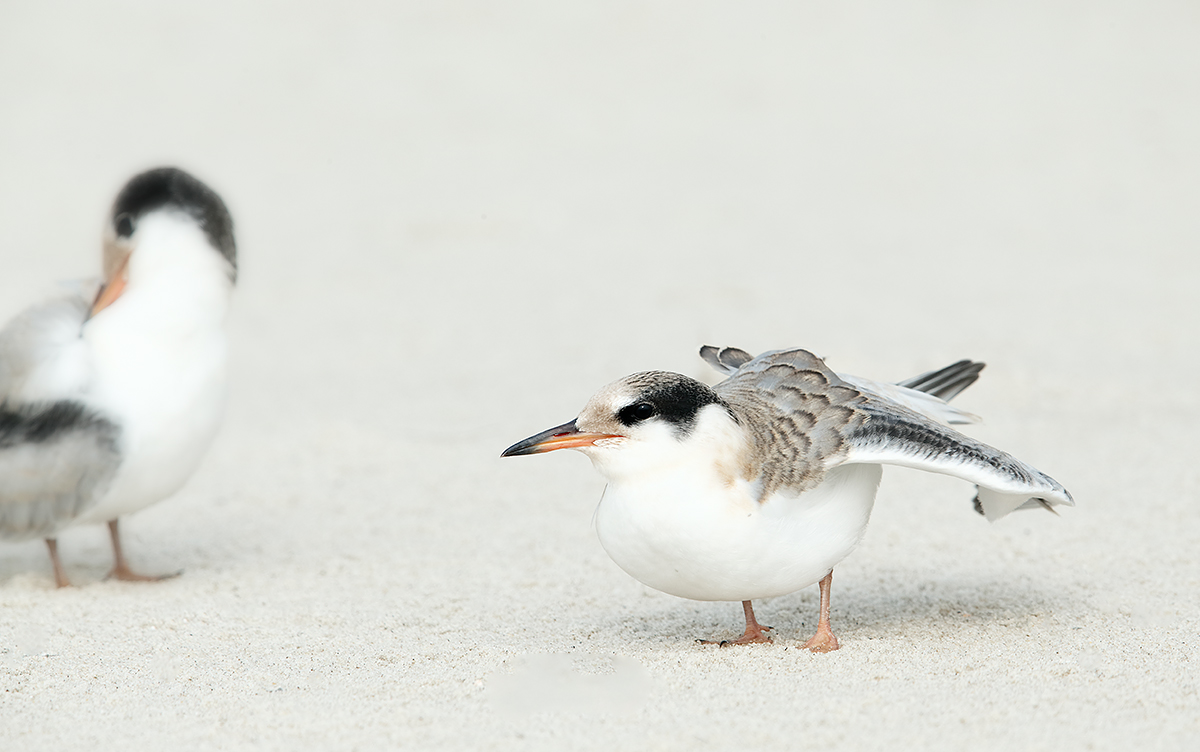
|
|
This was my second version.
|
On Second Thought…
Taking a second look at the original image that opened this blog post, I liked that I had followed the compositional principles for creating front-end verticals: be sure to include both legs with a small border behind them. So I created a second version that included both young terns, possible siblings. To make the second bird a bit less of a distraction, I selected it with a large Quick Mask, applied a fairly large Gaussian blur, and then reduced the effect to taste by reducing the opacity while viewing the whole image.
Please take a moment to leave a comment and let us know which version you like best, the 1st version (with just the 1 bird) or the 2nd version, with 2 birds).
ABP and ABP II
If you have no idea what I am talking about when I speak of a front-end vertical composition, check out the section on Advanced Composition and Image Design in The Art of Bird Photography II. ABP II, 916 pages with 900+ images on CD only, is the all-new continuation of The Art of Bird Photography, the classic how-to book on bird photography. Folks who are new here or new to bird photography are advised to purchase both and save $10 here. I can only wish that the comprehensive information contained in these two books was available when I started more than three decades ago….
The DPP RAW Conversion Guide
To learn why I use Canon’s Digital Photo Professional (DPP) to convert every image that I work on, click here.
DPP V4.0
Canon recently released a new version of DPP, V4.0. It can be downloaded here. You will need to enter your 1D X or 5D Mark III serial number to start the download. I downloaded 4.0 to my old computer and opened it yesterday. While early reports are that it is significantly better in many areas than any previous versions, I was totally baffled by the interface. It bears no resemblance to any current version of DPP. If I can figure it out, and I am sure that I will at some point, there will be an all-new DPP V4.0 eGuide that will require a separate purchase. V4.0 works only with 1D X, 5D III, 6D, and 1Dc (whatever that is) images. Folks with older bodies (both pro-sumer and professional) will need to continue using previous versions of DPP. I recently updated to V3.11 and have been very happy with it and was glad to note the addition of a Color Temperature slider.
Digital Basics
Everything that I did to optimize today’s image is detailed in the Digital Basics File–written in my easy-to-follow, easy-to-understand style. Are you tired of making your images look worse in Photoshop? Digital Basics File is an instructional PDF that is sent via e-mail. It includes my complete digital workflow, dozens of great Photoshop tips, the use of Contrast Masks, several different ways of expanding and filling in canvas, all of my time-saving Keyboard Shortcuts, Quick Masking, Layer Masking, and NIK Color Efex Pro basics, my killer image clean-up techniques, Digital Eye Doctor, creating time-saving actions, and lots more.
APTATS I & II
Learn the details of advanced Quick Masking techniques in APTATS I. Learn Advanced Layer Masking Techniques in APTATS I. Mention this blog post and apply a $5 discount to either with phone orders only. Buy both APTATS I and APTATS II and we will be glad to apply at $15 discount with phone orders only. Please call Jim or Jennifer weekdays at 863-221-2372 to take advantage of this special offer.
Nickerson Baby Beach-nesting Birds IPT: 3-Full Days/July 15-17, 2014: $1199. Introductory meet and greet: 8pm, Monday, July 14, 2014. Co-leaders Arthur Morris and Denise Ippolito. Limit 12/Openings 3.
With a small group pretty much guaranteed, do consider joining us on Long Island, NY this coming July to photograph Black Skimmers–it’s looking like a great year for skimmer nesting, Common Terns with chicks, American Oystercatcher families, and possibly some just-hatched Black Skimmer chicks. The opportunities will include chances to photograph a variety of breeding behaviors including courtship feeding, display flight and combat, and copulations. Car-pooling is recommended; if we opt to return to the beach before 5pm on cloudy days for example) there is a $30/vehicle parking fee that is not included so it is best to share that expense. Parking in the morning is free.
Because of the late date, your non-refundable payment in full is due when you register.
Please print, complete, and sign the form that is linked to here and shoot it to us along with your deposit check (made out to “Arthur Morris.”) Though we prefer a check, you can also leave your deposit with a credit card by calling the office at 863-692-0906. If you register by phone, please print, complete and sign the form as noted above and either mail it to us or e-mail the scan.
If you have any questions, please feel free to contact me via e-mail
Facebook
Be sure to like and follow BAA on Facebook by clicking on the logo link upper right. Tanks a stack!
Support the BAA Blog. Support the BAA Bulletins: Shop B&H here!
We want and need to keep providing you with the latest free information, photography and Photoshop lessons, and all manner of related information. Show your appreciation by making your purchases immediately after clicking on any of our B&H or Amazon Affiliate links in this blog post. Remember, B&H ain’t just photography!
…..
Amazon Canada
Many kind folks from north of the border, ay, have e-mailed stating that they would love to help us out by using one of our affiliate links but that living in Canada and doing so presents numerous problems. Now, they can help us out by using our Amazon Canada affiliate link by starting their searches by clicking here. Many thanks to those who have written.
Typos
In all blog posts and Bulletins, feel free to e-mail or to leave a comment regarding any typos, wrong words, misspellings, omissions, or grammatical errors. Just be right. 🙂
June 20th, 2014
|

|
|
Please note that there are two Palouse IPTs in place. The first is sold out. I hope that you can join us 🙂 Card and design by Arthur Morris/BIRDS AS ART.
|
The Palouse A Creative Adventure/BIRDS AS ART Instructional Photo-Tour (IPT)/Eastern Washington State. June 5-9, 2015/5 Full Days: $1699/Limit 12 photographers/Openings 6; this trip is a go.
The 2nd Palouse IPT Added By Popular Demand is Filling Up Fast
Please click here and then scroll down for details.
The Streak Continues: 202
It is now just after 8:20am here on a sunny day at Indian Lake Estates. This post took about 3 1/2 hours to prepare after several updates. Enjoy and learn.
This post marks 202 consecutive days with a new blog post. With so many folks getting in the habit of using our B&H links and our Amazon logo-links why quit now? April, May and June have been fantastic as lots of folks are getting the message; using my affiliate links does not cost you a penny and helps support my efforts here. To show your appreciation, I do ask that you use our the B&H and Amazon affiliate links on the right side of the blog for all of your purchases. Please check the availability of all photographic accessories in the BIRDS AS ART Online Store, especially Gitzo tripods, Wimberley tripod heads, and the like. We sell only what I have used and tested, and know that you can depend on. We will not sell you junk. We know the tools that you need to make creating great images easy and fun. And we are always glad to answer your gear questions via e-mail.
You can find the following items in the store: Gitzo tripods, Mongoose M3.6 and Wimberley heads, plates, low feet, and accessories, flash brackets, , Delkin e-film Pro Compact Flash Cards, LensCoat products, and our unique line-up of educational materials including ABP I & II, Digital Basics, Site and Set-up e-Guides, Canon and Nikon Camera Users and AF e-Guides, and MP-4 Photoshop video tutorials among others.
I would of course appreciate your using our B&H affiliate links for all of your major gear, video, and electronic purchases. For the photographic stuff mentioned in the paragraph above we, meaning BAA, would of course greatly appreciate your business. Here is a huge thank you to the many who have been using our links on a regular basis and visiting the BAA Online store as well.
|
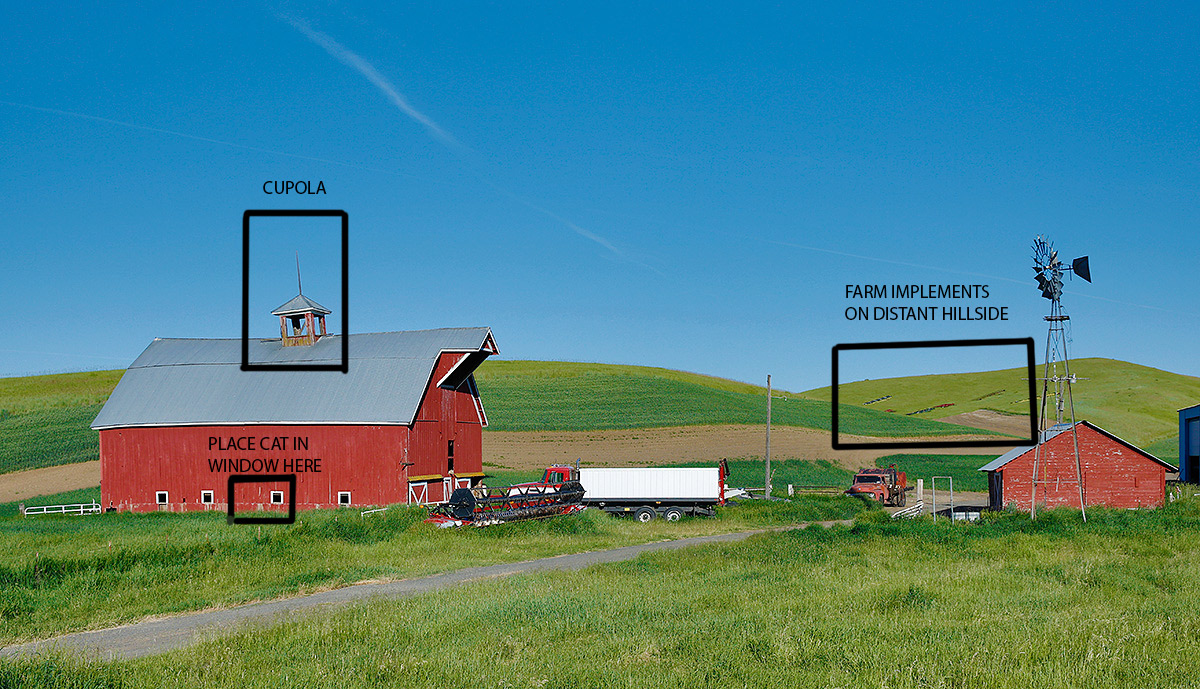
|
|
What I saw….
|
What I Saw on the Ranch/On Learning to Think and See Like a Pro
In the Learning to Think and See Like a Pro/The Second of a Series–Where Would You Put the Cat? blog post of June 18th here, I wrote:
OK, here is the challenge. Click on the image above to enlarge it. Examine it carefully. You have all focal lengths from 8mm to 784mm available. What catches your eyes? Which images would you extract from the scene? If you could place a black and white house cat anywhere in the scene where would you put it? For all of the above please leave a comment and please be specific. I will share several of my images with you in a not-too-distant blog post.
Lots more folks chimed in than on the similar previous post and that is a good thing. Several folks knew that I would photograph the cupola. Again. Aren’t they neat? Only Ar figured out where I would have put the cat :). Note the focal length on that one. And nobody saw the long shot of the farm implements on the hillside. We will do another one of these soon and hopefully even more folks will participate.
The Cat in the Barn Window
As we were getting our gear set up, I think that it was Lynn Fulton who called out, “There’s a cat in the barn window.” Pretty cool I thought. I knew that I would want my longest lens so I grabbed the 2-4 and mounted an external 1.4X TC. It was only natural to put the cat in the lower right portion of the frame. So that’s what i did.
I went with Natural HDR as I did not want the colors of the barn to go over the top in the early light. This is a small crop from the right and above. NIK Color Efex Pro Detail Extractor at 80% did wonders on the cat and the too-white-in-the-original window frame. Then I used a series of small Quick Masks along with the Transform Tool to open the cat’s right eye. After that work was done I put the opened eye on its own layer via a Quick Mask. I flopped and warped the now good eye and put it in place with the Move Tool (V).
Digital Basics
Pretty much everything discussed above plus tons more is detailed in our Digital Basics File–written in my easy-to-follow, easy-to-understand style. I am not sure if the perspective control bit is covered in Digital Basics, but no matter: it is detailed above :).
Are you tired of making your images look worse in Photoshop? My Digital Basics File is an is an instructional PDF that is sent via e-mail. It includes my complete digital workflow, dozens of great Photoshop tips, the use of Contrast Masks, several different ways of expanding and filling in canvas (including the John Heado Technique), lots of color balancing tips, Tim Grey Dodge and Burn, all of my time-saving Keyboard Shortcuts, Quick Masking, Layer Masking, and NIK Color Efex Pro basics, my killer image clean-up techniques, Digital Eye Doctor, creating time-saving actions, and lots more.
APTATS I & II
Learn the details of advanced Quick Masking techniques in APTATS I. Learn Advanced Layer Masking Techniques in APTATS I. Mention this blog post and apply a $5 discount to either with phone orders only. Buy both APTATS I and APTATS II and we will be glad to apply at $15 discount with phone orders only.
The Cupola
What can I say? I am a sucker for these old cupolas. Here I went with Natural and boosted the color via increases in Vibrance and Saturation. The look I got is very close to that of a subdued Art Vivid creation. See more on this topic in image next.
Farm Implements on Distant Hillside
I have long been blessed with what I call “super-tele-photographic vision.” the ability to see the world in small rectangular frames. It is a skill that takes some practice to develop. Begin by asking, “What do I see in the wide view that interests me?
Then ask yourself, “What lens do I have with me that can help me create the image that exists in my mind’s eye.”
When I first saw the arrangement of farm implements on the distant hillside the shapes and the pattern and the colors caught my eye. I looked once at creating a nice image but could not find a good perspective. When I followed up on that thought, I moved farther to my right. By going right of the windmill I was able to frame the image perfectly while eliminating the hillside that blocked the implements on our left, as you see in the opening image here. Telephoto extraction at its best.
For this one I went with Art Vivid at K4500 and then toned down the colors just a bit for a pretty natural look with bright colors.
This image is my favorite of the three. Which is yours?
Selling Your Used Photo Gear Through BIRDS AS ART
Selling your used (or like-new) photo gear through the BAA Blog or via a BAA Online Bulletin is a great idea. We charge only a 5% commission. One of the more popular used gear for sale sites charges a minimum of 20% plus assorted fees! Yikes. The minimum item price here is $500 (or less for a $25 fee). If you are interested please e-mail with the words Items for Sale Info Request cut and pasted into the Subject line :). Stuff that is priced fairly–I offer free pricing advise, usually sells in no time flat as did Dennis Cassidy’s 500 II recently on the blog. Larry Master’s 400 DO and his 800 f/5.6 sold within a week. From Larry via e-mail: Thanks for helping me sell the lenses so quickly!
A Creative Adventure/BIRDS AS ART friend Kitto Kono sold her Nikon 500 to a Blog subscriber in less than a week. Janet Horton’s 7D sold this week after a $100 price reduction. Denise Ippolito’s 100-400 and her 100 macro sold in one day. Peter Kes sold his 70-200 f/2.8L IS II and his 400 DO through BAA in ten days. In the past two months we have sold a Canon 800, a Canon 500 II, 3 400 DO lenses, a Nikon 500mm, and lots more. And the list goes on and on. There have been so many recent sales that it is impossible to keep track of them. If you are interested in using our services, please e-mail.
Used Gear Caution
Though I am not in a position to post images of gear for sale here or elsewhere, prospective buyers are encouraged to request for photos of the gear that they are interested in purchasing via e-mail. Doing so will help to avoid any misunderstandings as to the condition of the gear.
Used Photography Gear for Sale
In the past two weeks, practically everything on the shelves has been sold. I am still at a loss as to how Jim Bicket’s 800 has not sold. It is a great lens in perfect condition that is more than fairly priced. B&H is asking $11,999.90 for a used one in the same condition here. Buy Jim’s lens and save $3249.90 right now!
And be sure to check out the great Mongoose M3.6 package.
IAC, there are several great news listings including Carl Zanoni’s immaculate 500 II, another great 400 DO, and Michael Zajac’s Canon EOS-1D Mark III, Coming soon: a 500 f/4 L IS, a 300 f/28 L IS, and an EOS-5D Mark III/24-105 kit with extras. Click here to visit the Gear for Sale page for complete details.
Support the BAA Blog. Support the BAA Bulletins: Shop B&H here!
We want and need to keep providing you with the latest free information, photography and Photoshop lessons, and all manner of related information. Show your appreciation by making your purchases immediately after clicking on any of our B&H or Amazon Affiliate links in this blog post. Remember, B&H ain’t just photography!
…..
Amazon Canada
Many kind folks from north of the border, ay, have e-mailed stating that they would love to help us out by using one of our affiliate links but that living in Canada and doing so presents numerous problems. Now, they can help us out by using our Amazon Canada affiliate link by starting their searches by clicking here. Many thanks to those who have written.
Typos
In all blog posts and Bulletins, feel free to e-mail or to leave a comment regarding any typos, wrong words, misspellings, omissions, or grammatical errors. Just be right. 🙂
June 19th, 2014 2nd Palouse IPT Added By Popular Demand is Filling Up Fast
Please scroll down for details.
The Streak Continues: 201
It is just before 7:45am here in Indian Lake Estates, FL as I finish up today’s blog post. This post took less than 2 hours to assemble. Enjoy it.
This post marks 201 consecutive days with a new blog post. With so many folks getting in the habit of using our B&H links and our Amazon logo-links why quit now? April, May and June have been fantastic as lots of folks are getting the message; using my affiliate links does not cost you a penny and helps support my efforts here. To show your appreciation, I do ask that you use our the B&H and Amazon affiliate links on the right side of the blog for all of your purchases. Please check the availability of all photographic accessories in the BIRDS AS ART Online Store, especially Gitzo tripods, Wimberley tripod heads, and the like. We sell only what I have used and tested, and know that you can depend on. We will not sell you junk. We know the tools that you need to make creating great images easy and fun. And we are always glad to answer your gear questions via e-mail.
You can find the following items in the store: Gitzo tripods, Mongoose M3.6 and Wimberley heads, plates, low feet, and accessories, flash brackets, , Delkin e-film Pro Compact Flash Cards, LensCoat products, and our unique line-up of educational materials including ABP I & II, Digital Basics, Site and Set-up e-Guides, Canon and Nikon Camera Users and AF e-Guides, and MP-4 Photoshop video tutorials among others.
I would of course appreciate your using our B&H affiliate links for all of your major gear, video, and electronic purchases. For the photographic stuff mentioned in the paragraph above we, meaning BAA, would of course greatly appreciate your business. Here is a huge thank you to the many who have been using our links on a regular basis and visiting the BAA Online store as well.
Photographing Wildlife in the Palouse… You’ve Seen a Woodchuck?
When I first saw these creatures on the other side of the fence that keeps folks from the edge of the high cliffs around Palouse Falls I had no idea what they were. I asked another photographer what they were. His answer? “Rock Chuck.” While I have heard of Woodchucks I was a bit dubious. It looked like some type of large ground squirrel to me.
So while preparing this blog post I did a search for “large ground squirrel at Palouse Falls.” And up popped lots of links to Yellow-bellied Marmot, a large ground squirrel also known as a Rock Chuck. So it turns out that we were both right.
To create the image above with the hand held 70-200 with the 1.4X TC I supported my left forearm on the fence. This particular individual would hold a pose for several minutes before taking a step or two, and then pose again for a few minutes. They were quite used to people.
When the sun dropped below the canyon rim I noticed many Rock Chucks feeding on the grass but being on the people side of the fence they were not as tame as those on the other side of the fence. Next year I will have a longer lens just for them.
Today’s title is somewhat tongue in cheek; though we did see some Mule Deer in addition to the Rock Chucks nobody would confuse the Palouse with Yellowstone or Grand Teton National Parks. 🙂
|
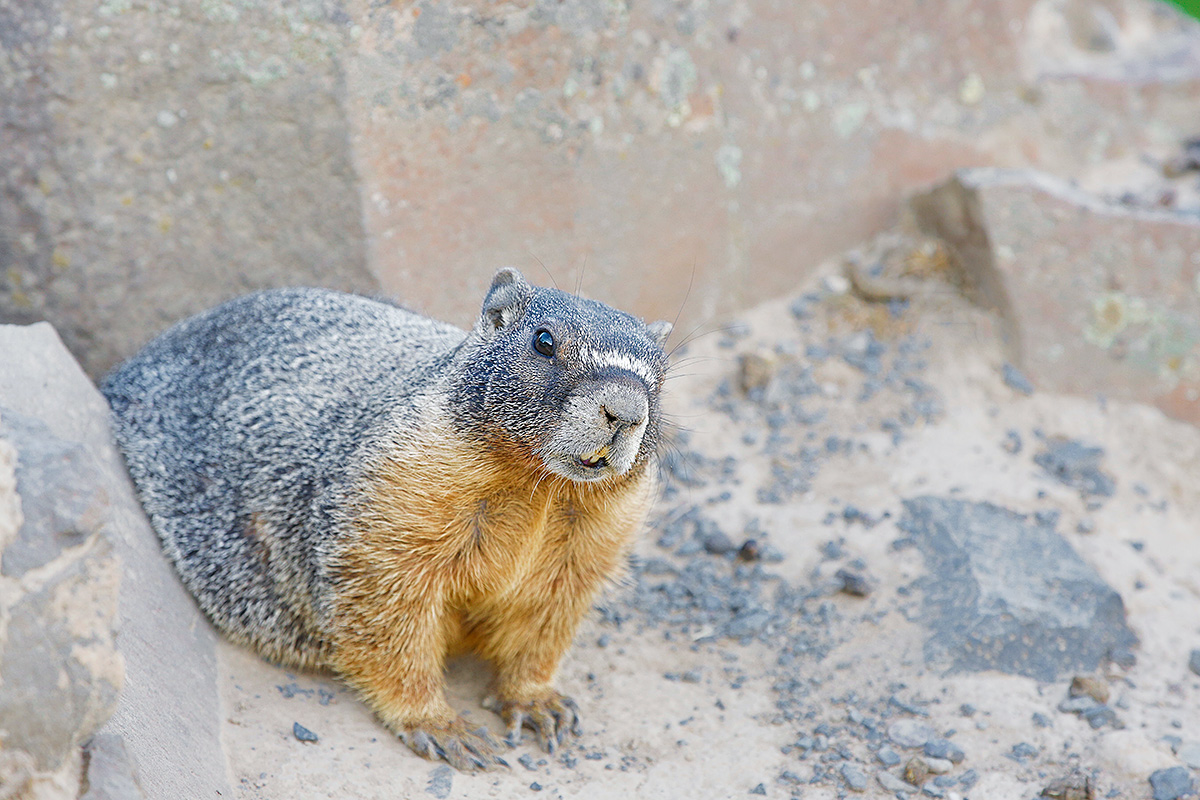
|
|
Gear was the same as above for this Art Vivid in-camera HDR image. Exposure was +1 1/3 stops +/- 2 stops around the base exposure of 1/1250 sec. at f/6.3 in Av Mode. AF was the same as well.
|
Art Vivid for Wildlife?
Opportunities to use in-camera HDR for wildlife are exceedingly rare unless the subject is sleeping. But this cute little guy would pose and pose for minutes at a time, barely glancing around so I decided to give it a try. Hand holding for in-camera HDRs is generally not a good plan as any camera movement will ruin the final JPEG with mis-alignment issues. And the same goes for the animal breathing. But what the heck, once you are out there digital is free so I tried a few.
There are a two lessons here. First off, I should have zoomed out a bit for the Art Vivid capture to achieve the same framing as in the version that opened this post; in-camera HDRs are always cropped about 3% around the edge. Second, Art Vivid HDRs need a lot more light than either straight captures or Natural HDRs. I should have been at least at +2 stops of EC.
Once I got the Art Vivid JPEG into Photoshop I needed to lighten the whole image. I did that by pulling up the curve. Then I toned down the CYANs, the BLUEs, and the Yellows. I did that by reducing the saturation of each of those channels about 10-20%. When you compare the two images however you can easily see that the colors are still far richer in the Art Vivid HDR immediately above.
Image clean-up for both images was the same. I used a warped Quick Mask to cover a small white rock in the background that merged with the animal’s lower back. Then just a few swipes with the Patch Tool and the Spot Healing Brush, again to eliminate some small but distracting light-toned rocks from the BKGR. I applied my NIK 50-50 preset to the animal only in both images with after painting a Quick Mask and then sharpened the face only with a Contrast Mask (15/65/0). I painted in selective sharpening on the face using a Hide-All (Black or Inverse) Layer Mask after having applied the sharpening to the whole image (and then hiding it).
Digital Basics
Pretty much everything discussed above plus tons more is detailed in our Digital Basics File–written in my easy-to-follow, easy-to-understand style. I am not sure if the perspective control bit is covered in Digital Basics, but no matter: it is detailed above :).
Are you tired of making your images look worse in Photoshop? My Digital Basics File is an is an instructional PDF that is sent via e-mail. It includes my complete digital workflow, dozens of great Photoshop tips, the use of Contrast Masks, several different ways of expanding and filling in canvas (including the John Heado Technique), lots of color balancing tips, Tim Grey Dodge and Burn, all of my time-saving Keyboard Shortcuts, Quick Masking, Layer Masking, and NIK Color Efex Pro basics, my killer image clean-up techniques, Digital Eye Doctor, creating time-saving actions, and lots more.
APTATS I & II
Learn the details of advanced Quick Masking techniques in APTATS I. Learn Advanced Layer Masking Techniques in APTATS I. Mention this blog post and apply a $5 discount to either with phone orders only. Buy both APTATS I and APTATS II and we will be glad to apply at $15 discount with phone orders only.
DPP Raw Conversion Guide
The RAW file for the opening image was converted in DPP as are all of my RAW files. To learn why I use DPP rather than ACR for my conversions, click here and check out our DPP Raw Conversion Guide.
Which Do You Prefer?
Which do you prefer, the straight shot from the converted RAW file or the subdued version of the HDR Art Vivid JPEG? Be sure to let us know why.
Why I Like Art Vivid In-camera HDR
First off, in-camera HDRs are great for lazy folks like me who are in a hurry…. I simply do not have the time to bring the three frames in an HDR series into Photomatix and do the work needed to create traditional HDRs. Denise Ippolio is quick to point out that if your histogram has room to the left of the dark tones and room to the right of the light tones, there is no need to go HDR. While I fully understand that principle I often use Art Vivid simply to boost the colors rather than to increase the tonal range. I should try comparing a few images where I convert a RAW file, boost the colors with a Vibrance adjusmtent, and compare the result with the HDR Art Vivid JPEG, Speaking of JPEGs, another plus for in-camera HDRs is that there is no need to do a RAW conversion. Simply open your HDR JPEG in Photoshop and be sure to save it as a TIF.
5D Mark III User’s Guide
Purchase a 5D III using one of our product specific links or the logo link below, sent us your B&H receipt, and we will send you a free copy of our 5D Mark III User’s Guide.
|

|
|
Hope that you can join us 🙂 Card and design by Arthur Morris/BIRDS AS ART
|
The Palouse A Creative Adventure/BIRDS AS ART Instructional Photo-Tour (IPT)/Eastern Washington State. May 29-June 2, 2015/5 Full Days: $1699/Limit 12 photographers/Sold Out
As the trip above is now sold out, we have decided–in response to popular demand, to run a second trip after giving ourselves 2 days to recover from the first one. We have already sold six slots for the 2nd Palouse trip so please do not tarry if you wish to join us. There will not be a third trip. 🙂 See the details immediately below.
The Palouse A Creative Adventure/BIRDS AS ART Instructional Photo-Tour (IPT)/Eastern Washington State. June 5-9, 2015/5 Full Days: $1699/Limit 12 photographers/Openings 6; this trip is a go.
Rolling farmlands provide a magical patchwork of textures and colors, especially when viewed from the top of Steptoe Butte where we will likely enjoy spectacular sunrises and possibly a nice sunset or two. We will photograph grand landscapes and mini-scenics of the rolling hills and farm fields. We will take you to some really neat old abandoned barns and farmhouses in idyllic settings. There is no better way to improve your compositional and image design skills and to develop your creativity than to join us for this trip. Two great leaders: Denise Ippolito and Arthur Morris. Photoshop and image sharing sessions when we have the time and energy…. We get up early and stay out late and the days are long.
After 6 days of back-breaking scouting work in early June 2014 we found all of the iconic locations and, in addition, lots of spectacular new old barns and breath-taking landforms and views. We will teach you what makes one situation prime and another seemingly similar one a waste of your time.
What’s included: In-the-field instruction, guidance, lessons, and inspiration, our newfound but very extensive knowledge of the area, all lunches, motel lobby breakfasts, and Photoshop and image sharing sessions when possible.
You will learn and hone both basic and advanced compositional and image design skills. You will learn to get the right exposure every time. You will learn to develop your creative eye. You will learn the basics of HDR (high dynamic range) photography. You will learn a variety of in-camera creative techniques; Canon 5D Mark III bodies are a plus. And most importantly you will learn to see the situation and to create a variety of top-notch images. Do see both of our blogs for lots more on that in the coming weeks. You will learn how the quality and direction of light combine to determine the success of your images. And–please don’t gasp–we will be working quite a bit with sidelight when creating landscapes. Lastly, we will be touching on infrared photography.
A non-refundable $699 deposit is due now. The balance will be due on January 29, 2015. With the unpredictable nature of the photography business, I have not said this often lately, but it seems quite likely that this one will fill up very quickly. Please let me know via e-mail that you will be joining us. Then you can either call Jim or Jennifer at 863-692-0906 during business hours or send us a check; the latter is preferred.
Please send your deposit check made out to “Arthur Morris” to us at Arthur Morris/BIRDS AS ART, PO Box 7245, Indian Lake Estates, FL, 33855. If you have any questions, please feel free to contact me via e-mail. You can also contact denise via e-mail here
|
|
|
Card and design by Denise Ippolito. Scroll down here to see lots more of Denise’s Palouse images. Note that the dates on Denise’s card are for the sold out first Palouse IPT. The dates for the 2nd IPT are June 5-9, 2015.
|
Support the BAA Blog. Support the BAA Bulletins: Shop B&H here!
We want and need to keep providing you with the latest free information, photography and Photoshop lessons, and all manner of related information. Show your appreciation by making your purchases immediately after clicking on any of our B&H or Amazon Affiliate links in this blog post. Remember, B&H ain’t just photography!
…..
Amazon Canada
Many kind folks from north of the border, ay, have e-mailed stating that they would love to help us out by using one of our affiliate links but that living in Canada and doing so presents numerous problems. Now, they can help us out by using our Amazon Canada affiliate link by starting their searches by clicking here. Many thanks to those who have written.
Typos
In all blog posts and Bulletins, feel free to e-mail or to leave a comment regarding any typos, wrong words, misspellings, omissions, or grammatical errors. Just be right. 🙂
June 18th, 2014
2nd Palouse IPT Added By Popular Demand
Please scroll down for details.
The Streak Continues: 200
It is just after 8:00am here in Indian Lake Estates, FL as I finish up today’s blog post. This post took less than 2 hours to assemble. Enjoy it.
This post marks 200 consecutive days with a new blog post. With so many folks getting in the habit of using our B&H links and our Amazon logo-links why quit now? April, May and June have been fantastic as lots of folks are getting the message; using my affiliate links does not cost you a penny and helps support my efforts here. To show your appreciation, I do ask that you use our the B&H and Amazon affiliate links on the right side of the blog for all of your purchases. Please check the availability of all photographic accessories in the BIRDS AS ART Online Store, especially Gitzo tripods, Wimberley tripod heads, and the like. We sell only what I have used and tested, and know that you can depend on. We will not sell you junk. We know the tools that you need to make creating great images easy and fun. And we are always glad to answer your gear questions via e-mail.
You can find the following items in the store: Gitzo tripods, Mongoose M3.6 and Wimberley heads, plates, low feet, and accessories, flash brackets, , Delkin e-film Pro Compact Flash Cards, LensCoat products, and our unique line-up of educational materials including ABP I & II, Digital Basics, Site and Set-up e-Guides, Canon and Nikon Camera Users and AF e-Guides, and MP-4 Photoshop video tutorials among others.
I would of course appreciate your using our B&H affiliate links for all of your major gear, video, and electronic purchases. For the photographic stuff mentioned in the paragraph above we, meaning BAA, would of course greatly appreciate your business. Here is a huge thank you to the many who have been using our links on a regular basis and visiting the BAA Online store as well.
|
|
|
This 3-frame in-camera Art Vivid HDR image was created just before 6:00am on June 11, 2014 on our Palouse scouting trip with the hand held Canon EF 24-70mm f/2.8L II USM lens (at 35mm), and the Canon EOS 5D Mark III . ISO 400. Evaluative metering +1 stop +/- two stops around the base exposure of 1/1250 sec. at f/9 in Av mode.
Two sensors down and 3 to the left of the central sensor/AI Servo Rear Focus AF on the corner of the large barn on the left was active at the moment of exposure. Click here if you missed the Rear Focus Tutorial. Going with AI Servo AF active at the moment of exposure when hand holding for HDRs is a good plan as it helps to keep the images aligned and assures accurate focus for all 3 frames.
|
The Challenge: Learning to Think and See Like a Pro
I made the image above as a teaching tool after we had spent about 30 minutes using longer lenses to extract various elements of the scene that we had found interesting.
OK, here is the challenge. Click on the image above to enlarge it. Examine it carefully. You have all focal lengths from 8mm to 784mm available. What catches your eyes? Which images would you extract from the scene?
If you could place a black and white house cat anywhere in the scene where would you put it?
For all of the above please leave a comment and please be specific. I will share several of my images with you in a not-too-distant blog post.
Image Question
Why would it be pretty much impossible to create a good image of the scene above with the circle lens at 8mm?
|
|
|
This is the original Vivid capture. Note that because I pointed a wide angle lens up towards the sky that the buildings are tilted inward. And note the too RED barn and the too rich GREENs….
|
Image Optimization and Perspective Control
The first thing that I do with most Art Vivid images is to reduce the saturation. Sometimes I need only to reduce the YELLOW saturation, and sometimes I opt to reduce the saturation across the board as I did here.
To correct the perspective problems, I duplicated the image (Control A, Control J), hit Control T for the Transform Tool, right-clicked inside the Transform box, chose Perspective from the drop-down menu, pulled out the upper corners until the walls of the big barn and the walls of the shadowed structure on the right frame edge were perpendicular, and I hit enter. Then I cropped tot he artistic proportions.
Digital Basics
Pretty much everything discussed above plus tons more is detailed in our Digital Basics File–written in my easy-to-follow, easy-to-understand style. I am not sure if the perspective control bit is covered in Digital Basics, but no matter: it is detailed above :).
Are you tired of making your images look worse in Photoshop? Digital Basics File is an instructional PDF that is sent via e-mail. It includes my complete digital workflow, dozens of great Photoshop tips, the use of Contrast Masks, several different ways of expanding and filling in canvas (including the John Heado Technique), lots of color balancing tips, Tim Grey Dodge and Burn, all of my time-saving Keyboard Shortcuts, Quick Masking, Layer Masking, and NIK Color Efex Pro basics, my killer image clean-up techniques, Digital Eye Doctor, creating time-saving actions, and lots more.
APTATS I & II
Learn the details of advanced Quick Masking techniques in APTATS I. Learn Advanced Layer Masking Techniques in APTATS I. Mention this blog post and apply a $5 discount to either with phone orders only. Buy both APTATS I and APTATS II and we will be glad to apply at $15 discount with phone orders only.
|

|
|
Hope that you can join us 🙂 Card and design by Arthur Morris/BIRDS AS ART
|
The Palouse A Creative Adventure/BIRDS AS ART Instructional Photo-Tour (IPT)/Eastern Washington State. May 29-June 2, 2015/5 Full Days: $1699/Limit 12 photographers/Sold Out
As the trip above is now sold out, we have decided–in response to popular demand, to run a second trip after giving ourselves 2 days to recover from the first one. We have already sold four slots for the 2nd trip so please do not tarry if you wish to join us. There will not be a third trip. 🙂 See the details immediately below.
The Palouse A Creative Adventure/BIRDS AS ART Instructional Photo-Tour (IPT)/Eastern Washington State. June 5-9, 2015/5 Full Days: $1699/Limit 12 photographers/Openings 8; this trip needs 6 to run–with only 2 to go, it seems like a certainty.
Rolling farmlands provide a magical patchwork of textures and colors, especially when viewed from the top of Steptoe Butte where we will likely enjoy spectacular sunrises and possibly a nice sunset or two. We will photograph grand landscapes and mini-scenics of the rolling hills and farm fields. We will take you to some really neat old abandoned barns and farmhouses in idyllic settings. There is no better way to improve your compositional and image design skills and to develop your creativity than to join us for this trip. Two great leaders: Denise Ippolito and Arthur Morris. Photoshop and image sharing sessions when we have the time and energy…. We get up early and stay out late and the days are long.
After 6 days of back-breaking scouting work in early June 2014 we found all of the iconic locations and, in addition, lots of spectacular new old barns and breath-taking landforms and views. We will teach you what makes one situation prime and another seemingly similar one a waste of your time.
What’s included: In-the-field instruction, guidance, lessons, and inspiration, our newfound but very extensive knowledge of the area, all lunches, motel lobby breakfasts, and Photoshop and image sharing sessions when possible.
You will learn and hone both basic and advanced compositional and image design skills. You will learn to get the right exposure every time. You will learn to develop your creative eye. You will learn the basics of HDR (high dynamic range) photography. You will learn a variety of in-camera creative techniques; Canon 5D Mark III bodies are a plus. And most importantly you will learn to see the situation and to create a variety of top-notch images. Do see both of our blogs for lots more on that in the coming weeks. You will learn how the quality and direction of light combine to determine the success of your images. And–please don’t gasp–we will be working quite a bit with sidelight when creating landscapes. Lastly, we will be touching on infrared photography.
A non-refundable $699 deposit is due now. The balance will be due on January 29, 2015. With the unpredictable nature of the photography business, I have not said this often lately, but it seems quite likely that this one will fill up very quickly. Please let me know via e-mail that you will be joining us. Then you can either call Jim or Jennifer at 863-692-0906 during business hours or send us a check; the latter is preferred.
Please send your deposit check made out to “Arthur Morris” to us at Arthur Morris/BIRDS AS ART, PO Box 7245, Indian Lake Estates, FL, 33855. If you have any questions, please feel free to contact me via e-mail. You can also contact denise via e-mail here
|

|
|
Card and design by Denise Ippolito. Scroll down here to see lots more of Denise’s Palouse images. Note that the dates on Denise’s card are for the sold out first Palouse IPT. The dates for the 2nd IPT are June 5-9, 2015.
|
Support the BAA Blog. Support the BAA Bulletins: Shop B&H here!
We want and need to keep providing you with the latest free information, photography and Photoshop lessons, and all manner of related information. Show your appreciation by making your purchases immediately after clicking on any of our B&H or Amazon Affiliate links in this blog post. Remember, B&H ain’t just photography!
…..
Amazon Canada
Many kind folks from north of the border, ay, have e-mailed stating that they would love to help us out by using one of our affiliate links but that living in Canada and doing so presents numerous problems. Now, they can help us out by using our Amazon Canada affiliate link by starting their searches by clicking here. Many thanks to those who have written.
Typos
In all blog posts and Bulletins, feel free to e-mail or to leave a comment regarding any typos, wrong words, misspellings, omissions, or grammatical errors. Just be right. 🙂
June 17th, 2014
2nd Palouse IPT Added By Popular Demand
Please scroll down for details.
The Streak Continues: 199
It is just before 10:00am here in Indian Lake Estates, FL as I finish up today’s blog post. Including the time that I spent on the 3 images in this post it took me about 2 1/2 hours to put this one together.
This post marks 199 consecutive days with a new blog post. With so many folks getting in the habit of using our B&H links and our Amazon logo-links why quit now? April, May and June have been fantastic as lots of folks are getting the message; using my affiliate links does not cost you a penny and helps support my efforts here. To show your appreciation, I do ask that you use our the B&H and Amazon affiliate links on the right side of the blog for all of your purchases. Please check the availability of all photographic accessories in the BIRDS AS ART Online Store, especially Gitzo tripods, Wimberley tripod heads, and the like. We sell only what I have used and tested, and know that you can depend on. We will not sell you junk. We know the tools that you need to make creating great images easy and fun. And we are always glad to answer your gear questions via e-mail.
You can find the following items in the store: Gitzo tripods, Mongoose M3.6 and Wimberley heads, plates, low feet, and accessories, flash brackets, , Delkin e-film Pro Compact Flash Cards, LensCoat products, and our unique line-up of educational materials including ABP I & II, Digital Basics, Site and Set-up e-Guides, Canon and Nikon Camera Users and AF e-Guides, and MP-4 Photoshop video tutorials among others.
I would of course appreciate your using our B&H affiliate links for all of your major gear, video, and electronic purchases. For the photographic stuff mentioned in the paragraph above we, meaning BAA, would of course greatly appreciate your business. Here is a huge thank you to the many who have been using our links on a regular basis and visiting the BAA Online store as well.
Lots of Stuff
On our Palouse scouting trip I enjoyed photographing detail extracted from the grand scene with relatively long lenses. What looks like some sort of pump was on the lawn of a working ranch. It caught my eye so I photographed it. The inscribed oval plate includes the words “Little Scratch” and “Old Scratch, Amarillo, TX.” A web search came up 100% empty. If you have a clue as to exactly what the object in the photograph is, please leave a comment.
If Dave Alexander (see more below) uses our link to buy his EOS-5D Mark III he will earn a free copy of my EOS-5D Mark III User’s Guide. And if he joins us on one of the Palouse IPTs next spring, he will learn a ton and have a chance to make images like the one above. And tons more exciting images like those you have been seeing here lately.
Image Question
You have been looking at images created with small to very small apertures of between f//11 and f/22 for a week now. Why did I choose to go wide open at f/5.6 for this one?
Much Appreciated
I received the following e-mail last night from blog subscriber Dave Alexander:
Artie, I’ve bought your books, camera guides, a Gitzo tripod and Mongoose M3.6 head, and several other items from your BAA store. I follow the blog religiously, and am a big fan. Now I want to buy an EOS-5D Mark III from B&H through BAA, but can’t find the combination of accessories that I want among those listed when I go to B&H from the BAA blog. On the B&H site they list B&H # CAE5D3K2, which they call “Canon EOS 5D Camera (Body Only) Deluxe Accessory Kit” for $3499. This item isn’t listed among the options when I go to B&H through the link on your blog. What can I do to make this purchase through you?
By the way, your blog lists a similar item, but with video accessories. I want the particular accessory set listed on the B&H site because it contains the grip and an extra battery, as well as an SD card , all for $100 more than the body only. I have the vertical grip on my 7D and definitely want to put one on the 5D. I’d like to show my appreciation for the work you do on the blog. Suggestions?
Dave Alexander
|
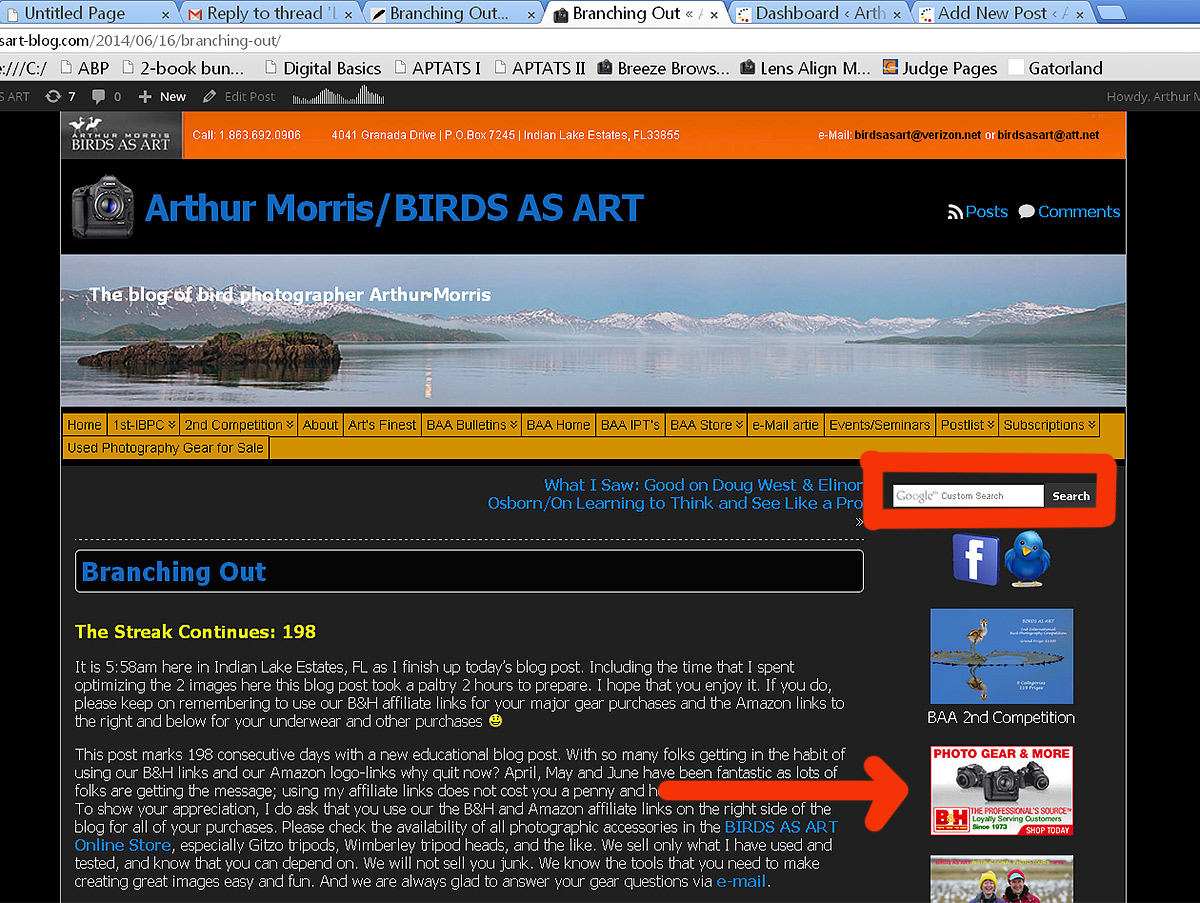
|
|
Though unrelated to the main thrust of today’s blog post, the white search box on each blog page (shown above inside the red rectangular box), can help folks to find what they’re looking for quickly and efficiently. Simply type a or or a short phrase into the white search box and then click on Search. In less than a few seconds a box with links will pop up. If you click on one of the links, the new page will open in a separate tab.
|
My Response to Dave
Hey Dave, Thanks a stack for your willingness to help support my efforts here on the blog. While I will freely admit that I love helping folks and love being the center of attention, the income derived from folks choosing to use our affiliate links is quite helpful and quite appreciated. As you well know, using our links will not cost folks one penny.
As far as BAA getting credit for each item, the solution is a simple one. If you click on the B&H logo link on the right side of all blog pages (you can see the logo link next to the right-facing arrow in the screen capture above), anything that you search for and purchase will be tracked to our affiliate account (even though you will NOT see our tracking code in the web address. See more below the next image to learn how I found the exact package you are looking for.
Thanks also for your purchases from the BAA Online Store. The B&H # CAE5D3K2 package is a great value. I love the battery grip on my 5D III. Be sure to send me your B&H receipt via e-mail so that we can get you your free copy of the 5D III User’s Guide.
|
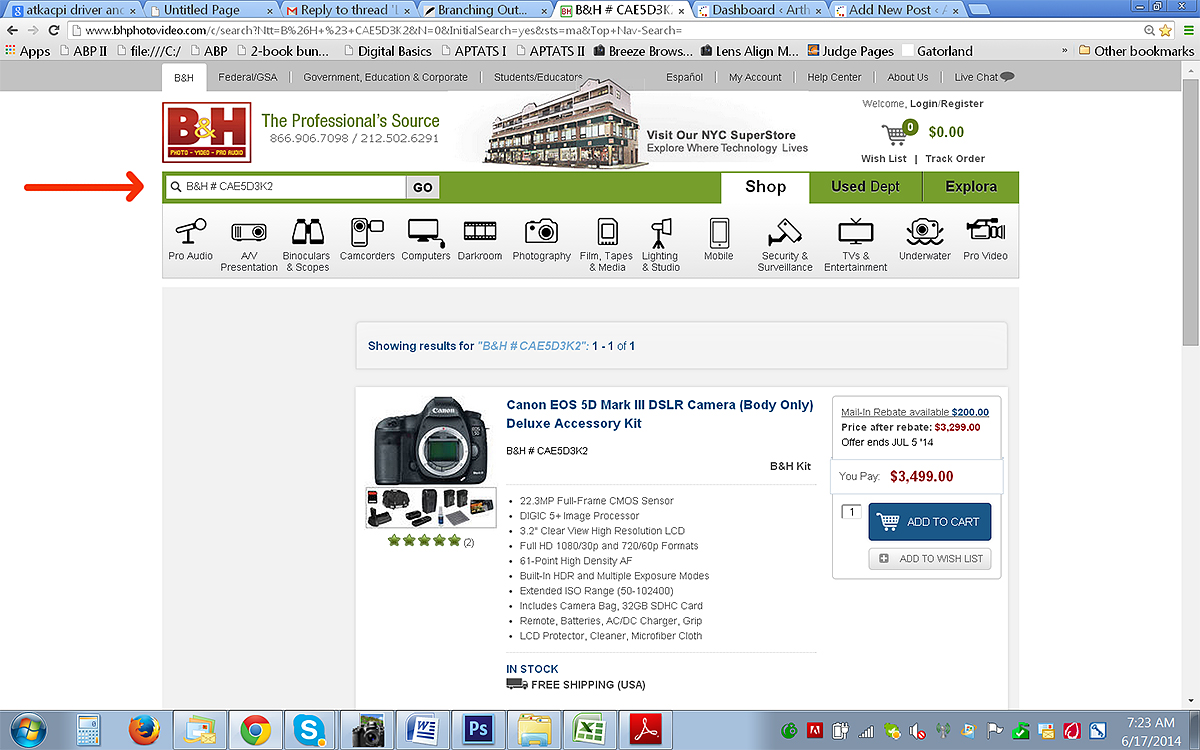
|
|
Use the B&H Search box to find what you are looking for. Be sure to access the B&H site with one of our affiliate links. Tanks!
|
Finding Exactly What You Want on the B&H Site
Once you click on our generic B&H logo link on the right side of the blog you will wind up on the B&H website as shown above. As you can see in the screen capture above, there is a convenient search box just below the B&H symbol. The red arrow is pointing to is. I simply cut and pasted “B&H # CAE5D3K2” into the B&H search box and hit go. Voila. The package that you were looking for popped right up. And if you wish to continue shopping once the item is in your shopping cart, all subsequent items will be tracked to our affiliate account. And will of course be greatly appreciated.
One fine point that many folks fail to realize: when folks purchase an item that we carry, a Gitzo tripod or a Wimberley head for example, from B&H, they are actually hurting us. We derive only 3.5% from all B&H sales. This pales in comparison to the standard 25% mark-up for most of the products that we buy from our valued suppliers. If folks are in the market for photographic accessories they need to remember to purchase the items that we carry in the BAA Online Store from us rather than from B&H :).
Again, thanks a stack for your more than kind words and for your past and continuing support.
later and love, artie
|

|
|
Hope that you can join us 🙂 Card and design by Arthur Morris/BIRDS AS ART
|
The Palouse A Creative Adventure/BIRDS AS ART Instructional Photo-Tour (IPT)/Eastern Washington State. May 29-June 2, 2015/5 Full Days: $1699/Limit 12 photographers/Sold Out
As the trip above is now sold out, we have decided–in response to popular demand, to run a second trip after giving ourselves 2 days to recover from the first one. We have already sold two slots for the 2nd trip so please do not tarry if you wish to join us. There will not be a third trip. 🙂 See the details immediately below.
The Palouse A Creative Adventure/BIRDS AS ART Instructional Photo-Tour (IPT)/Eastern Washington State. June 5-9, 2015/5 Full Days: $1699/Limit 12 photographers/Openings 10; this trip needs 6 to run. That is almost a certainty.
Rolling farmlands provide a magical patchwork of textures and colors, especially when viewed from the top of Steptoe Butte where we will likely enjoy spectacular sunrises and possibly a nice sunset or two. We will photograph grand landscapes and mini-scenics of the rolling hills and farm fields. We will take you to some really neat old abandoned barns and farmhouses in idyllic settings. There is no better way to improve your compositional and image design skills and to develop your creativity than to join us for this trip. Two great leaders: Denise Ippolito and Arthur Morris. Photoshop and image sharing sessions when we have the time and energy…. We get up early and stay out late and the days are long.
After 6 days of back-breaking scouting work in early June 2014 we found all of the iconic locations and, in addition, lots of spectacular new old barns and breath-taking landforms and views. We will teach you what makes one situation prime and another seemingly similar one a waste of your time.
What’s included: In-the-field instruction, guidance, lessons, and inspiration, our newfound but very extensive knowledge of the area, all lunches, motel lobby breakfasts, and Photoshop and image sharing sessions when possible.
You will learn and hone both basic and advanced compositional and image design skills. You will learn to get the right exposure every time. You will learn to develop your creative eye. You will learn the basics of HDR (high dynamic range) photography. You will learn a variety of in-camera creative techniques; Canon 5D Mark III bodies are a plus. And most importantly you will learn to see the situation and to create a variety of top-notch images. Do see both of our blogs for lots more on that in the coming weeks. You will learn how the quality and direction of light combine to determine the success of your images. And–please don’t gasp–we will be working quite a bit with sidelight when creating landscapes. Lastly, we will be touching on infrared photography.
A non-refundable $699 deposit is due now. The balance will be due on January 29, 2015. With the unpredictable nature of the photography business, I have not said this often lately, but it seems quite likely that this one will fill up very quickly. Please let me know via e-mail that you will be joining us. Then you can either call Jim or Jennifer at 863-692-0906 during business hours or send us a check; the latter is preferred.
Please send your deposit check made out to “Arthur Morris” to us at Arthur Morris/BIRDS AS ART, PO Box 7245, Indian Lake Estates, FL, 33855. If you have any questions, please feel free to contact me via e-mail. You can also contact denise via e-mail here
|

|
|
Card and design by Denise Ippolito. Scroll down here to see lots more of Denise’s Palouse images.
|
Support the BAA Blog. Support the BAA Bulletins: Shop B&H here!
We want and need to keep providing you with the latest free information, photography and Photoshop lessons, and all manner of related information. Show your appreciation by making your purchases immediately after clicking on any of our B&H or Amazon Affiliate links in this blog post. Remember, B&H ain’t just photography!
…..
Amazon Canada
Many kind folks from north of the border, ay, have e-mailed stating that they would love to help us out by using one of our affiliate links but that living in Canada and doing so presents numerous problems. Now, they can help us out by using our Amazon Canada affiliate link by starting their searches by clicking here. Many thanks to those who have written.
Typos
In all blog posts and Bulletins, feel free to e-mail or to leave a comment regarding any typos, wrong words, misspellings, omissions, or grammatical errors. Just be right. 🙂
June 16th, 2014
The Streak Continues: 198
It is 5:58am here in Indian Lake Estates, FL as I finish up today’s blog post. Including the time that I spent optimizing the 2 images here this blog post took a paltry 2 hours to prepare. I hope that you enjoy it. If you do, please keep on remembering to use our B&H affiliate links for your major gear purchases and the Amazon links to the right and below for your underwear and other purchases 🙂
This post marks 198 consecutive days with a new educational blog post. With so many folks getting in the habit of using our B&H links and our Amazon logo-links why quit now? April, May and June have been fantastic as lots of folks are getting the message; using my affiliate links does not cost you a penny and helps support my efforts here. To show your appreciation, I do ask that you use our the B&H and Amazon affiliate links on the right side of the blog for all of your purchases. Please check the availability of all photographic accessories in the BIRDS AS ART Online Store, especially Gitzo tripods, Wimberley tripod heads, and the like. We sell only what I have used and tested, and know that you can depend on. We will not sell you junk. We know the tools that you need to make creating great images easy and fun. And we are always glad to answer your gear questions via e-mail.
You can find the following items in the store: Gitzo tripods, Mongoose M3.6 and Wimberley heads, plates, low feet, and accessories, flash brackets, , Delkin e-film Pro Compact Flash Cards, LensCoat products, and our unique line-up of educational materials including ABP I & II, Digital Basics, Site and Set-up e-Guides, Canon and Nikon Camera Users and AF e-Guides, and MP-4 Photoshop video tutorials among others.
I would of course appreciate your using our B&H affiliate links for all of your major gear, video, and electronic purchases. For the photographic stuff mentioned in the paragraph above we, meaning BAA, would of course greatly appreciate your business. Here is a huge thank you to the many who have been using our links on a regular basis and visiting the BAA Online store as well.
|
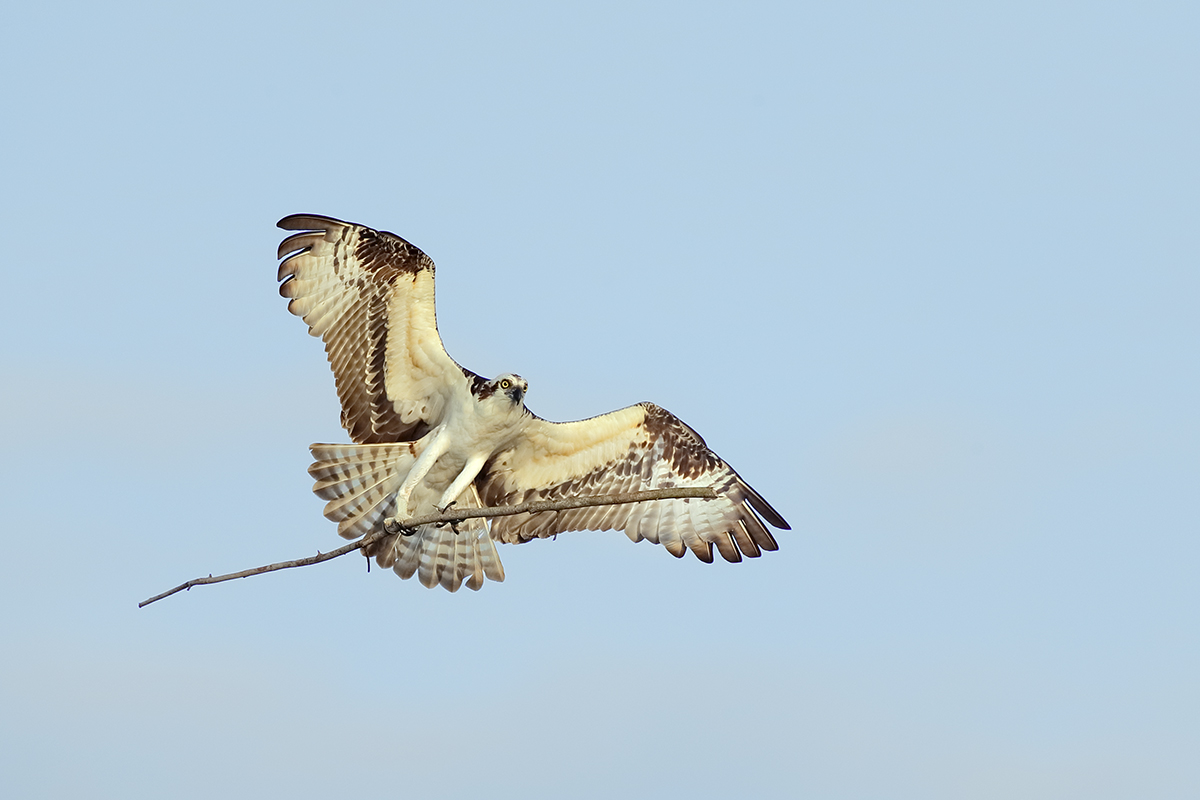
|
|
This image was created on Lake Blue Cypress with the hand held Canon EF 300mm f/2.8L IS II USM lens, the Canon Extender EF 2X III, and the Canon EOS-1D X. ISO 1250. Evaluative metering +2 stops off the early morning blue sky: 1/1250 sec. at f/5.6 in Manual mode. AWB.
Central Sensor/AI Servo-Surround/Rear Focus AF on the bend of the bird’s left wing active at the moment of exposure. Click here to see the latest version of the Rear Focus Tutorial. Click on the image to see a larger version.
Osprey with branch for nest
|
Branching Out
Yes. I still love photographing birds. Have for more than 30 years. Will till they nail the box shut.
For the past few years, actually probably closer to 5 years, I have spent more and more time branching out, photographing other-than-avian subjects: Coastal Brown Bear, flowers–especially dahlias and tulips, African and the large North American wildlife, buildings, Urbex, Japanese Snow Monkey, Galapagos Tortoise, both Marine and Land Iguanas, Sally Lightfoot Crab, fish both dead and caught, grand landscapes, mini-scenics, sky-scapes and clouds, the occasional snake, squirrel, scallop, and sea turtle, American Alligator, a variety of marine mammals, tropical frogs, ships, boats, trains, and aircraft, people–mostly family especially grandchildren, and nature photographers at work. And most recently, agricultural fields and old barns. Can you say Palouse?
In reality I have been photographing many of those subjects for close to three decades but recently, influenced and inspired by Denise Ippoltio, I have surely broadened my photographic horizons. Why? It’s all fun.
|
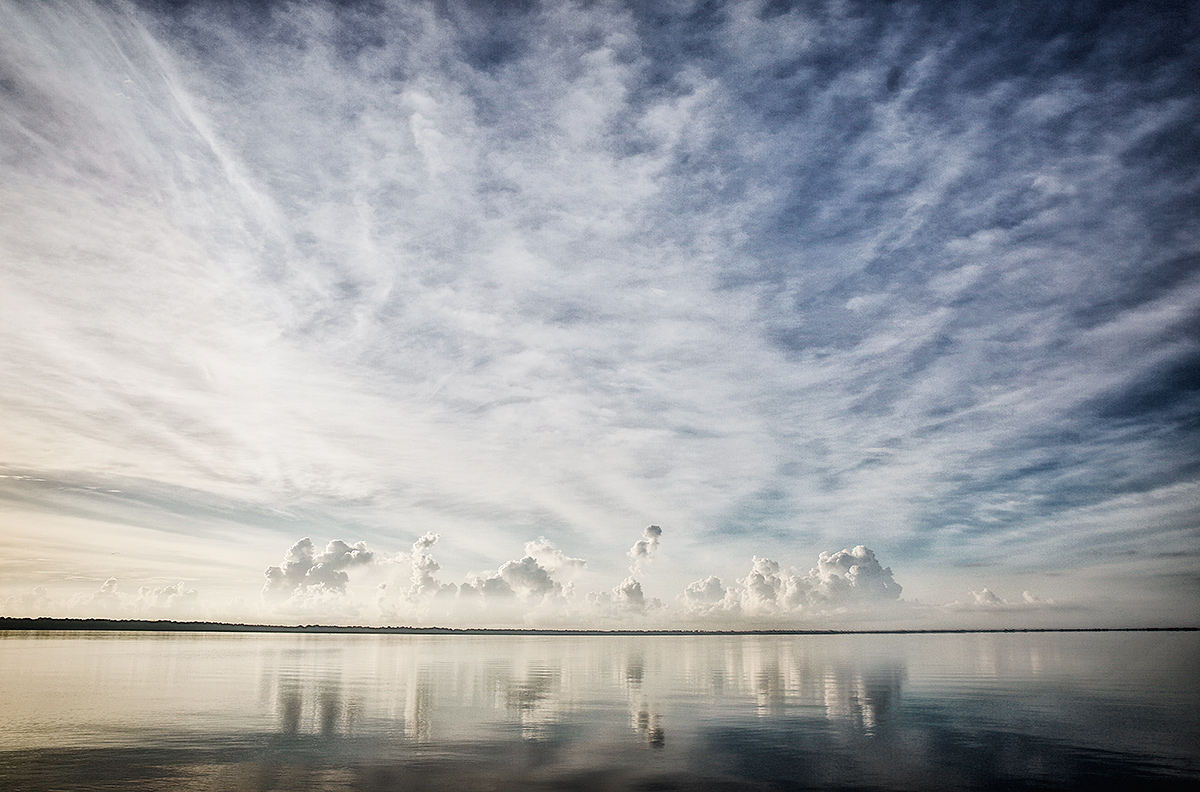
|
|
This in-camera HDR Art Vivid image was also created on the early morning of May 31, 2014. For this one I used the Canon EF 24-70mm f/2.8L II USM lens (hand held at 24mm) and the Canon EOS 5D Mark III. ISO 400. Evaluative metering +2 stops +/- 2 stops around the base exposure of 1/1000 sec. at f/7.1 in Av mode. Color temperature: AWB.
Central sensor/AI Servo/Surround Rear Focus AF on the horizon line and re-compose. Click here to see the latest version of the Rear Focus Tutorial. Click on the image to see a larger version.
Lake Blue Cypress Cloudscape
I’ve been creating images like this for three decades, just not a nice as this one.
|
The Lesson
It is important to realize that whatever the subject, the principles that help folks create great images are the same. You need to learn to see the best situations, to make sharp images when you want sharp, to create pleasing blurs, to understand the direction and quality of light, to get the right exposure (by exposing to the right), and to hone your compositional and image design skills.
The EOS-5D Mark III & In-camera HDR
Most folks who have been following our Palouse creative adventure have realized that more than 90% of the images that I created in Washington were in-camera HDRs, and about 90% of those were Art Vivids. To learn everything that I know about this great camera, get yourself a copy of my EOS-5D Mark III User’s Guide. You can learn everything that I know about the following important topics: the top LCD and all camera control buttons, the 5D Mark III drive modes, how to manually select an AF sensor, choosing an AF Area Selection Mode (how and why with extensive detail), Menu Item Access, coverage of almost all Menu Items and Custom Functions including the following: Image Quality, Auto Lighting Optimizer, Highlight Tone Priority, AF Configuration Tool (includes details on the custom setting that I use), Acceleration/deceleration tracking, Tracking sensitivity, Lens drive when AF impossible, Orientation linked AF point (I love this feature on the 5D III!), Highlight alert, Histogram display, Auto rotate, Custom Shooting Mode set-up, Safety shift, using the Q button, and setting up rear focus. And of course my Custom Case for photographing birds in flight. The guide is–of course–written in my informal, easy-to-follow style.
The Best News: Get a Free Copy of the 5D III User’s Guide
If you purchase an EOS-5D Mark III using one of our product specific B&H affiliate links for the camera like the one in the image above, or the logo link below and shoot me your B&H receipt via e-mail, I will send you a 100% free copy of the EOS-5D Mark III User’s Guide.
|

|
|
Hope that you can join us 🙂 Card and design by Arthur Morris/BIRDS AS ART
|
Announcing the Palouse A Creative Adventure/BIRDS AS ART Instructional Photo-Tour (IPT)/Eastern Washington State. May 29-June 2, 2015/5 Full Days: $1699/Limit 12 photographers
As I hinted at yesterday, this trip is–pending the arrival of promised checks–pretty much sold out. If you would like your name placed on the wait list or if you are interested in a potential follow-up trip, likely June 5-9, 2014, please get in touch via e-mail.
Rolling farmlands provide a magical patchwork of textures and colors, especially when viewed from the top of Steptoe Butte where we will likely enjoy spectacular sunrises and possibly a nice sunset or two. We will photograph grand landscapes and mini-scenics of the rolling hills and farm fields. We will take you to some really neat old abandoned barns and farmhouses in idyllic settings. There is no better way to improve your compositional and image design skills and to develop your creativity than to join us for this trip. Two great leaders: Denise Ippolito and Arthur Morris. Photoshop and image sharing sessions when we have the time and energy…. We get up early and stay out late and the days are long.
After 6 days of back-breaking scouting work in early June 2014 we found all of the iconic locations and, in addition, lots of spectacular new old barns and breath-taking landforms and views. We will teach you what makes one situation prime and another seemingly similar one a waste of your time.
What’s included: In-the-field instruction, guidance, lessons, and inspiration, our newfound but very extensive knowledge of the area, all lunches, motel lobby breakfasts, and Photoshop and image sharing sessions when possible.
You will learn and hone both basic and advanced compositional and image design skills. You will learn to get the right exposure every time. You will learn to develop your creative eye. You will learn the basics of HDR (high dynamic range) photography. You will learn a variety of in-camera creative techniques; Canon 5D Mark III bodies are a plus. And most importantly you will learn to see the situation and to create a variety of top-notch images. Do see both of our blogs for lots more on that in the coming weeks. You will learn how the quality and direction of light combine to determine the success of your images. And–please don’t gasp–we will be working quite a bit with sidelight when creating landscapes. Lastly, we will be touching on infrared photography.
A non-refundable $699 deposit is due now. The balance will be due on January 29, 2015. With the unpredictable nature of the photography business, I have not said this often lately, but it seems quite likely that this one will fill up very quickly. Please let me know via e-mail that you will be joining us. Then you can either call Jim or Jennifer at 863-692-0906 during business hours or send us a check; the latter is preferred.
Please send your deposit check made out to “Arthur Morris” to us at Arthur Morris/BIRDS AS ART, PO Box 7245, Indian Lake Estates, FL, 33855. If you have any questions, please feel free to contact me via e-mail. You can also contact denise via e-mail here
|

|
|
Card and design by Denise Ippolito. Scroll down here to see lots more of Denise’s Palouse images.
|
Support the BAA Blog. Support the BAA Bulletins: Shop B&H here!
We want and need to keep providing you with the latest free information, photography and Photoshop lessons, and all manner of related information. Show your appreciation by making your purchases immediately after clicking on any of our B&H or Amazon Affiliate links in this blog post. Remember, B&H ain’t just photography!
…..
Amazon Canada
Many kind folks from north of the border, ay, have e-mailed stating that they would love to help us out by using one of our affiliate links but that living in Canada and doing so presents numerous problems. Now, they can help us out by using our Amazon Canada affiliate link by starting their searches by clicking here. Many thanks to those who have written.
Typos
In all blog posts and Bulletins, feel free to e-mail or to leave a comment regarding any typos, wrong words, misspellings, omissions, or grammatical errors. Just be right. 🙂
June 15th, 2014
The Streak Continues: 197
It is 10:28am here in Indian Lake Estates, FL as I type. Including the time that I spent optimizing the 2 images here this blog post took 3 1/2 hours to prepare. I hope that you enjoy it. I was a bit jet-lagged last night, got to bed early, and slept until 6:45am–very late for me. Catching up on lost sleep is a good thing.
This post marks 197 consecutive days with a new educational blog post. With so many folks getting in the habit of using our B&H links and our Amazon logo-links why quit now? April, May and June have been fantastic as lots of folks are getting the message; using my affiliate links does not cost you a penny and helps support my efforts here. To show your appreciation, I do ask that you use our the B&H and Amazon affiliate links on the right side of the blog for all of your purchases. Please check the availability of all photographic accessories in the BIRDS AS ART Online Store, especially Gitzo tripods, Wimberley tripod heads, and the like. We sell only what I have used and tested, and know that you can depend on. We will not sell you junk. We know the tools that you need to make creating great images easy and fun. And we are always glad to answer your gear questions via e-mail.
You can find the following items in the store: Gitzo tripods, Mongoose M3.6 and Wimberley heads, plates, low feet, and accessories, flash brackets, , Delkin e-film Pro Compact Flash Cards, LensCoat products, and our unique line-up of educational materials including ABP I & II, Digital Basics, Site and Set-up e-Guides, Canon and Nikon Camera Users and AF e-Guides, and MP-4 Photoshop video tutorials among others.
I would of course appreciate your using our B&H affiliate links for all of your major gear, video, and electronic purchases. For the photographic stuff mentioned in the paragraph above we, meaning BAA, would of course greatly appreciate your business. Here is a huge thank you to the many who have been using our links on a regular basis and visiting the BAA Online store as well.
The Challenge: Learning to See Like a Pro
In last Thursday’s bog post (June 12, 2014) here, I posted:
OK, here is the big challenge. Take a close look at the barn; what additional images would you create? Do you see the shots? I see two great ones. But first I am giving everyone a chance to tell me what they see as interesting. Please be specific. And let us know which lens you would use to realize your vision. I will share my two with you in a not-to-distant blog post.
Only two folks rose to the challenge, Doug West and Elinor Osborn. Kudos to each of them; both did well. You can read their comments by scrolling down here. As I will be posting several more of these exercises I would encourage more of you to give it a go.
BTW, my favorite of the two images in the original post was the one that opened this post. Without the two black squares of course. The 3 folks who commented agreed with me. Leonard Malkin said it best when he wrote: I like the third photo because the longer focal length presents a more pleasing perspective. With the first two, the wide angle (i.e. camera closer to the subject) makes the barn seem a bit distorted, the way a wide angle portrait produces a large nose.
Cupola
In architecture, a cupola /ˈkjuːpələ/ is a small, most often dome-like, structure on top of a building. Often used to provide a lookout or to admit light and air, it usually crowns a larger roof or dome. The word derives, via Italian, from the lower Latin cupula (classical Latin cupella from the Greek κύπελλον–kupellon) “small cup.” (From Wikipedia here.)
What Attracted Me to the Cupola?
The color scheme: orange, grey, and blue, and the texture of both the slats and the roof drew my eye and inspired me to create this detail image. I moved closer to make sure that no leaves from the background tree crept over the roof line and went to a longer focal length to extract the cupola from the larger scene thus refining my photographic vision.
What Attracted Me to the Door?
The rich colors and textures of the wood and and that big X on the door drew my eye. Again I moved closer to extract this mini-scene from the larger image of the barn in order to refine my photographic vision.
|

|
|
Hope that you can join us 🙂 Card and design by Arthur Morris/BIRDS AS ART
|
Announcing the Palouse A Creative Adventure/BIRDS AS ART Instructional Photo-Tour (IPT)/Eastern Washington State. May 29-June 2, 2015/5 Full Days: $1699
Believe me now, or believe me later (do you remember hans and franz?), this IPT is filling very quickly as predicted: we have 7 folks signed up in less than a day with lots more expressing serious interest.
Rolling farmlands provide a magical patchwork of textures and colors, especially when viewed from the top of Steptoe Butte where we will likely enjoy spectacular sunrises and possibly a nice sunset or two. We will photograph grand landscapes and mini-scenics of the rolling hills and farm fields. We will take you to some really neat old abandoned barns and farmhouses in idyllic settings. There is no better way to improve your compositional and image design skills and to develop your creativity than to join us for this trip. Two great leaders: Denise Ippolito and Arthur Morris. Photoshop and image sharing sessions when we have the time and energy…. We get up early and stay out late and the days are long.
After 6 days of back-breaking scouting work in early June 2014 we found all of the iconic locations and, in addition, lots of spectacular new old barns and breath-taking landforms and views. We will teach you what makes one situation prime and another seemingly similar one a waste of your time.
What’s included: In-the-field instruction, guidance, lessons, and inspiration, our newfound but very extensive knowledge of the area, all lunches, motel lobby breakfasts, and Photoshop and image sharing sessions when possible.
You will learn and hone both basic and advanced compositional and image design skills. You will learn to get the right exposure every time. You will learn to develop your creative eye. You will learn the basics of HDR (high dynamic range) photography. You will learn a variety of in-camera creative techniques; Canon 5D Mark III bodies are a plus. And most importantly you will learn to see the situation and to create a variety of top-notch images. Do see both of our blogs for lots more on that in the coming weeks. You will learn how the quality and direction of light combine to determine the success of your images. And–please don’t gasp–we will be working quite a bit with sidelight when creating landscapes. Lastly, we will be touching on infrared photography.
A non-refundable $699 deposit is due now. The balance will be due on January 29, 2015. With the unpredictable nature of the photography business, I have not said this often lately, but it seems quite likely that this one will fill up very quickly. Please let me know via e-mail that you will be joining us. Then you can either call Jim or Jennifer at 863-692-0906 during business hours or send us a check; the latter is preferred.
Please send your deposit check made out to “Arthur Morris” to us at Arthur Morris/BIRDS AS ART, PO Box 7245, Indian Lake Estates, FL, 33855. If you have any questions, please feel free to contact me via e-mail. You can also contact denise via e-mail here
|

|
|
Card and design by Denise Ippolito. Scroll down here to see lots more of Denise’s Palouse images.
|
Support the BAA Blog. Support the BAA Bulletins: Shop B&H here!
We want and need to keep providing you with the latest free information, photography and Photoshop lessons, and all manner of related information. Show your appreciation by making your purchases immediately after clicking on any of our B&H or Amazon Affiliate links in this blog post. Remember, B&H ain’t just photography!
…..
Amazon Canada
Many kind folks from north of the border, ay, have e-mailed stating that they would love to help us out by using one of our affiliate links but that living in Canada and doing so presents numerous problems. Now, they can help us out by using our Amazon Canada affiliate link by starting their searches by clicking here. Many thanks to those who have written.
Typos
In all blog posts and Bulletins, feel free to e-mail or to leave a comment regarding any typos, wrong words, misspellings, omissions, or grammatical errors. Just be right. 🙂
|
|


