October 16th, 2011
|
|
|
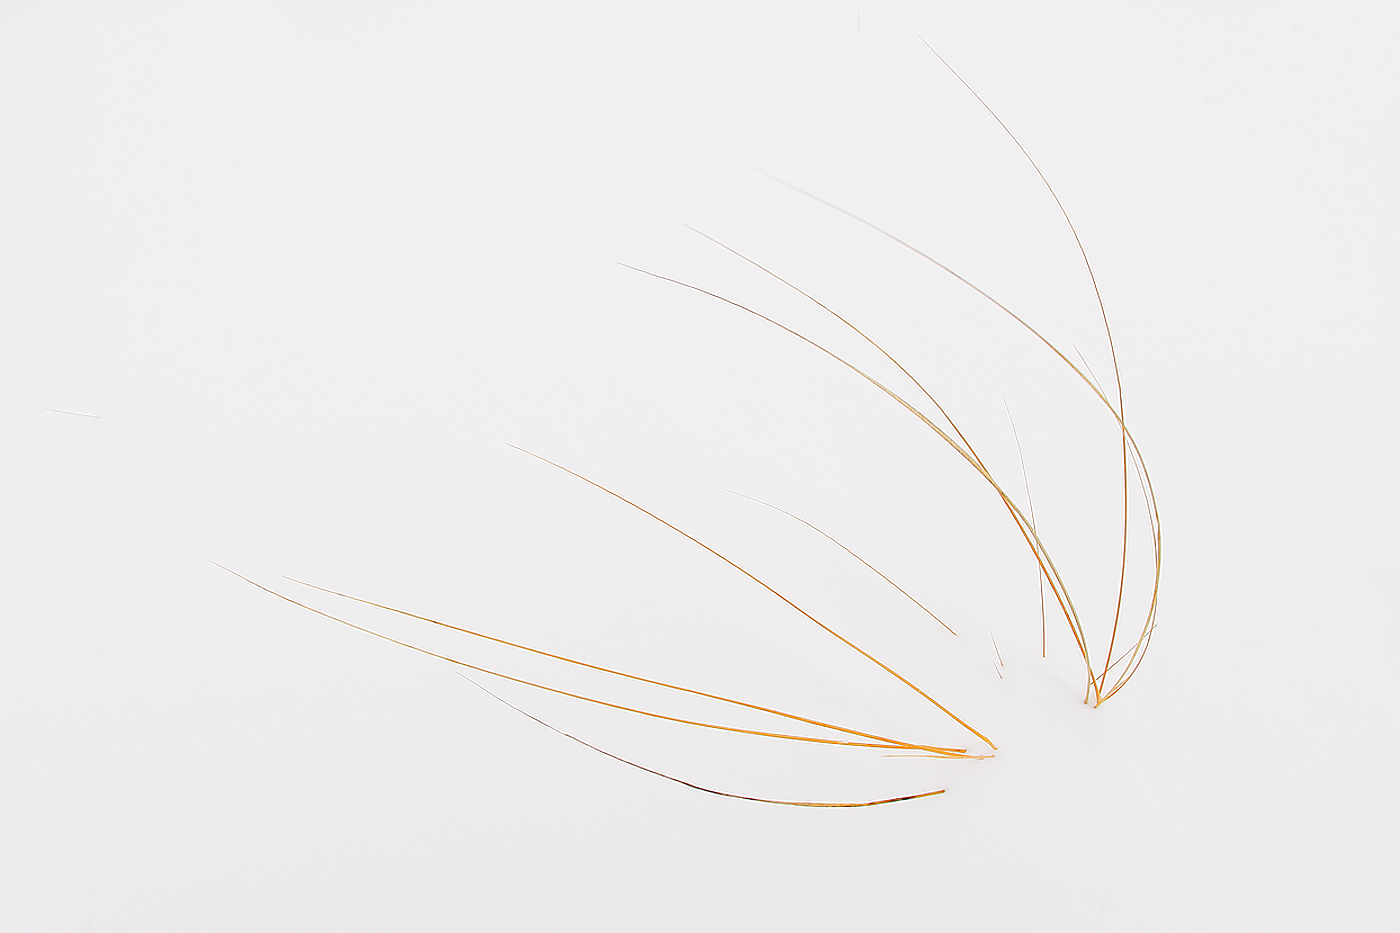
Beach Grass in Blizzard, Jones Beach Sate Park, Long Island, NY. (Note: the correct title should have been Beach Grass after Blizzard. Please see my comment on image titles and critiquing below :).) This image was created with the handheld Canon 15mm fish eye lens with the EOS-1D Mark III (replaced now by the EOS-1D Mark IV). ISO 400. Evaluative metering +2 2/3 stops: 1/200 sec. at f/9 set manually. One-Shot central sensor AF and recompose.
For a greater appreciation of the image, click on the photo. Then click on the enlarged version to close it.
|
For Your Critique: Image #12
The image above is presented for your critique; feel free to praise it or rip it to shreds. Would you keep it or delete it? Let us know why either way, what you like or what you hate. What would you have done differently?
Over the course of the next few weeks I will present eight additional images in this series for a total of twenty in all. The last will be followed by several revelations including two major ones.
Earn Free Contest Entries and Support both the Bulletins and the Blog by making all your B & H purchases here.
More and more folks are earning multiple contest entries with their B & H purchases. See here for details on that. Eleven great categories, 34 winning and honored images, and prize pools valued in excess of $20,000. Click here to visit the competition home page.
Shopper’s Guide
Below is a list of the gear used to create the images in today’s blog post. Thanks a stack to all who have used the Shopper’s Guide links to purchase their gear as a thank you for all the free information that we bring you on the Blog and in the Bulletins. Before you purchase anything be sure to check out the advice in our Shopper’s Guide.
Canon 15mm fish eye lens. It is difficult to learn to use this lens well but trying and learning is a ton of fun.
Canon EOS-1D Mark IV professional digital camera body. My two Mark IVs are my workhorse digital camera bodies.
October 15th, 2011
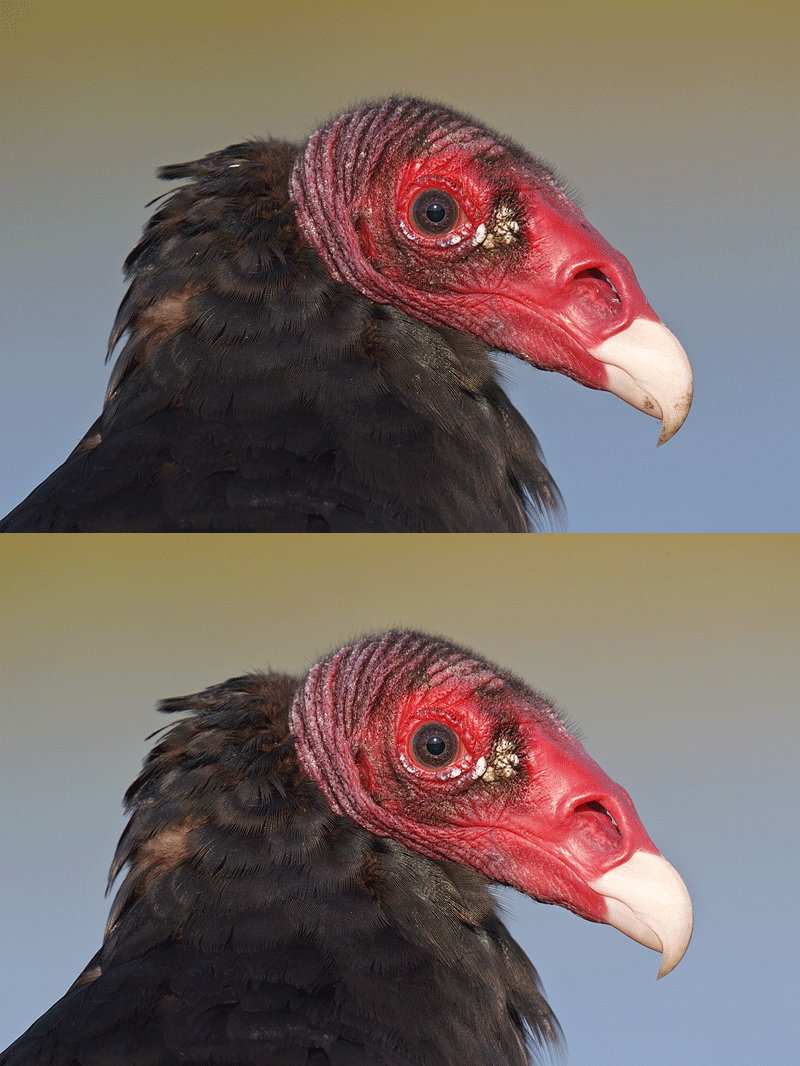
Take a minute to study the bill and plumage clean-up by giving the animated GIF a few moments to play. Do note that though the optimized image is a bit lighter than the original capture that the exposure of the original image was dead solid perfect: during conversion in ACR I could not move either the Exposure slider or the Black slider even a smidge to the right without getting either an over- (red) or under-exposure (blue) warning (respectively). Learn to convert your RAW files properly in Digital Basics.
|
Ugly Lessons I
Opportunities for bird photography here at Indian Lake Estates can be good on some days, excellent on a very few. The most dependable subjects are Sandhill Crane and the two vulture species, Turkey and Black. I wanted to do some more fairly tight, sweet light stuff (see Since It Quit Raining) with the cranes yesterday morning, Friday, October 15th but they simply kept walking and walking, never stopping to preen. And I could not will the Limpkin back into the new pond again. So I got in the car ready to give up when I noticed some vultures sitting on some posts by a small boat dock. (More on that in Ugly Lessons II coming soon.)
As you can see by viewing the animated GIF above, the one Turkey Vulture that let me let close had a bright red head with a hint of breeding plumage purple on the back of the head. But the tip of the bill was even uglier than vultures are thought to be. (I think that in the right light–as here–that they are both handsome and beautiful.) I used the Patch Tool and the Spot Healing Brush (along with the Clone Stamp Tool sparingly) to clean the ugly specks from both the bill and the plumage. But the end of the bill was such a mess, surely from the bird’s last meal, that I needed to created several warped Quick Masks to cover the dirty area on that lovely ivory beak. (Did you know that the bare, featherless heads of carrion eaters evolved to lessen the chance of their picking up diseases that might result from constantly having to deal with matted, bloody head feathers?)
Learn the basics of Quick Masking and how to use the Patch Tool, the Spot Healing Brush, and the Clone Stamp Tool in Digital Basics. This e-mailable PDF includes my complete Digital Workflow, my time-saving Keyboard Shortcuts, and dozens and dozens of great Photoshop tips. And Digital Basics includes free updates for as long as I continue to press the shutter button. Advanced Quick Masking Techniques are detailed in Robert O’Toole’s amazing APTATS I (Advanced Photoshop Tips and Techniques Simplified I). Heck, that’s where I learned Quick Masking.
no images were found |
|
Turkey Vulture head portrait. Indian Lake Estates, FL. This image was created with the Canon 800mm f/5.6L IS lens, the 1.4X III TC, and the EOS-1D Mark IV. ISO 400. Evaluative metering -1/3 stop (as framed): 1/500 sec. at f/11 set manually. I needed to underexpose to save the ivory white bill tip from over-exposure.
Central Sensor (by necessity) Rear Focus/AI Servo AF (active at the moment of exposure). Click here if you missed the Rear Focus Tutorial.
The lens was supported by the BAA-designed Big Lens Ultimate Beanbag (BLUBB) that was resting firmly on the mostly lowered window of my SUV. You can check out this bird’s running mate in my BPN post “The Young and The Ugly” here.
For a greater appreciation of the image, click on the photo. Then click on the enlarged version to close it.
|
Your Two Cents
Take a few seconds to leave a comment and let us know your thoughts on Turkey Vulture: ugly or beautiful. And why. And if you like, you can let us know whether you think that bill and plumage clean-up is right or wrong. And why on that too. 🙂
Do know that such clean-up is welcome in the BIRDS AS ART 1st International Bird Photography Competition.
Earn Free Contest Entries and Support both the Bulletins and the Blog by making all your B & H purchases here.
More and more folks are earning multiple contest entries with their B & H purchases. See here for details on that. Eleven great categories, 34 winning and honored images, and prize pools valued in excess of $20,000. Click here to visit the competition home page.
Shopper’s Guide
Below is a list of the gear used to create the images in today’s blog post. Thanks a stack to all who have used the Shopper’s Guide links to purchase their gear as a thank you for all the free information that we bring you on the Blog and in the Bulletins. Before you purchase anything be sure to check out the advice in our Shopper’s Guide.
Canon 800mm f/5.L IS lens. Right now this is my all time favorite super-telephoto lens.
Canon 1.4X III Teleconverter. The new 1.4X TC is designed to work best with the newer Series II super-telephoto lenses but it works just fine with the current lenses.
Canon EOS-1D Mark IV professional digital camera body. My two Mark IVs are my workhorse digital camera bodies.
And from the BAA On-line Store:
BLUBB I designed this one myself. Beware of cheap knock-offs; they cost half as much as the BLUBB but …
LensCoats. I have a LensCoat on each of my big lenses to protect them from nicks and thus increase their re-sales value. All my big lens LensCoat stuff is in Hardwood Snow pattern.
Double Bubble Level. You will find one in my camera’s hot shoe whenever I am not using flash.
Be sure to check out our camera body User’s Guides here.
The Lens Align Mark II. I use the Lens Align Mark II pretty much religiously to micro-adjust all of my gear an average of once a month and always before a major trip. Enjoy our free comprehensive tutorial here.
Canon EOS-1D Mark IV User’s Guide. Learn to use your Mark IV the way that I use mine. Also available for the 7D and the Mark III here.
October 13th, 2011
|
|
|
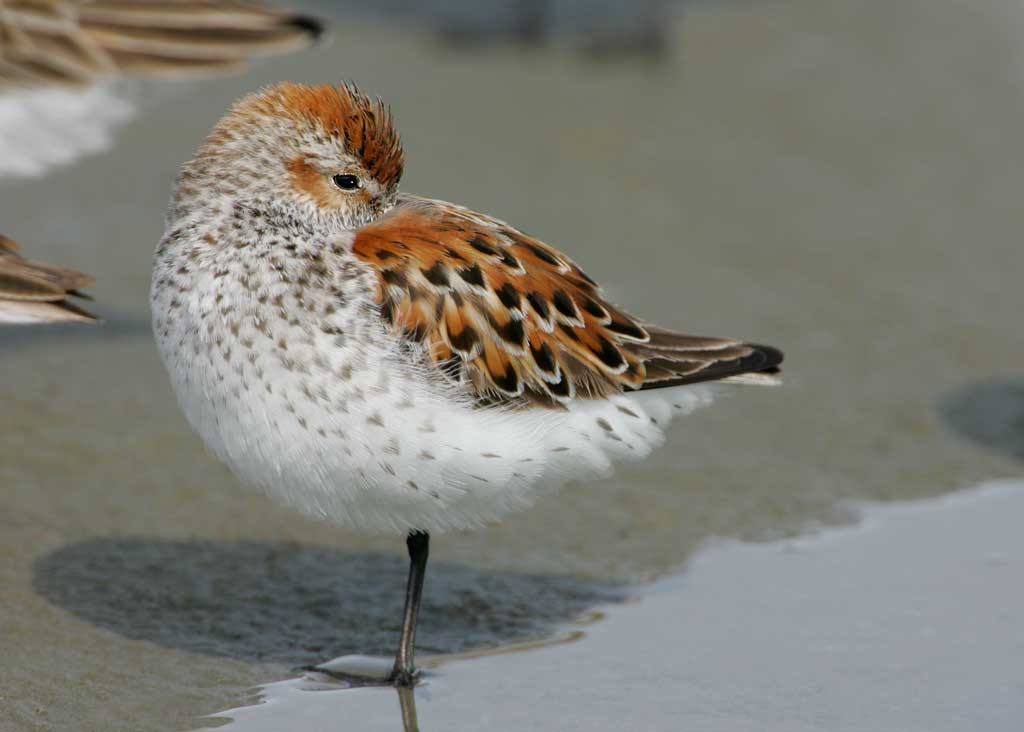
Western Sandpiper, breeding plumage, Cordova, AK. May 6, 2005. This image was created with the tripod mounted Canon 500mm f/4 L IS lens, the 2X II TC (now replaced by the 2X III teleconverter) and the Canon EOS-1D Mark II (now replaced by the EOS-1D Mark IV). ISO 400. Evaluative metering +1/3 stop: 1/500 sec. at 11. Central sensor One-Shot AF and recompose.
For a greater appreciation of the image, click on the photo. Then click on the enlarged version to close it.
|
Family Jewel Improvement
In the October 4th blog post, Capture and Beyond Workflow Lessons That You Cannot Afford to Miss, I wrote about the importance of saving and protecting your RAW files because as the years go by our image optimization skills get better and better and our image optimization software also gets better. While it is impossible for any serious photographer to go back every year or two and rework all of the images in their files, it can be fun to go back to a few old friends and make them better….
I visited Cordova to speak at the big shorebird festival there. After much research I planned my trip around the average peak numbers of Western Sandpiper: May 7. To be sure not to miss peak, I arrived on May 2nd and stayed until May 12. When I got off the plane my host and guide Milo Burcham’s first words were, “35,000 Western Sandpipers flew north last night.” He did find me a mat of several thousand birds that first afternoon roosting behind the AC Value Center, the local supermarket. My best image from that session was honored in a recent BBC Wildlife Photographer of the Year Competition. The next day, those birds were gone.
But a smattering of gorgeous breeding plumage Westerns remained. The image above shows how I first optimized the image more than six years ago. The subject was a gorgeous bird and I was able to get fairly close, but it was surrounded by others so I could not go any lower (or my subject would have been blocked). But I was never happy with the other tails in the frame, with the shadow on the right, and with the dark area at the top. But that was before I learned about Quick Masks from Robert O’Toole’s APTATS I. Do note that I created the eye highlight in the opening image. But did not do a very good job of it…. That was before I developed the Eye Doctor techniques detailed in Digital Basics.
|
|
|
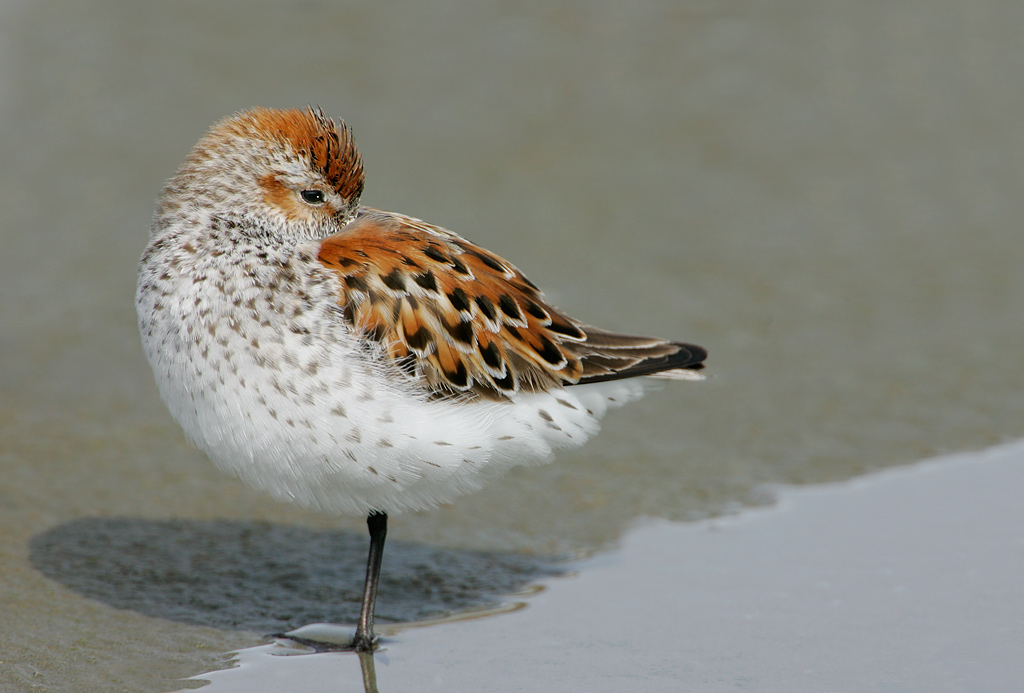
Here I started with the old optimized file and added canvas. Then I covered the two unwanted birds, the shadow on the right, and the dark area at the top using several Quick Masks. And kept the crummy eye highlight….
|
I was proud of my efforts and posted the reworked image here on BirdPhotographer’s.Net. The post was entitled, “Another Gem Found.” Folks like the image but there are many sharp eyes on BPN. BPN member Sidharth Kodikal, the first to comment, asked, “Was the catchlight added?” At this point I still did not realize what a poor job I had done so I promised to have a look for the RAW file…. This one I found :).
|
|
|
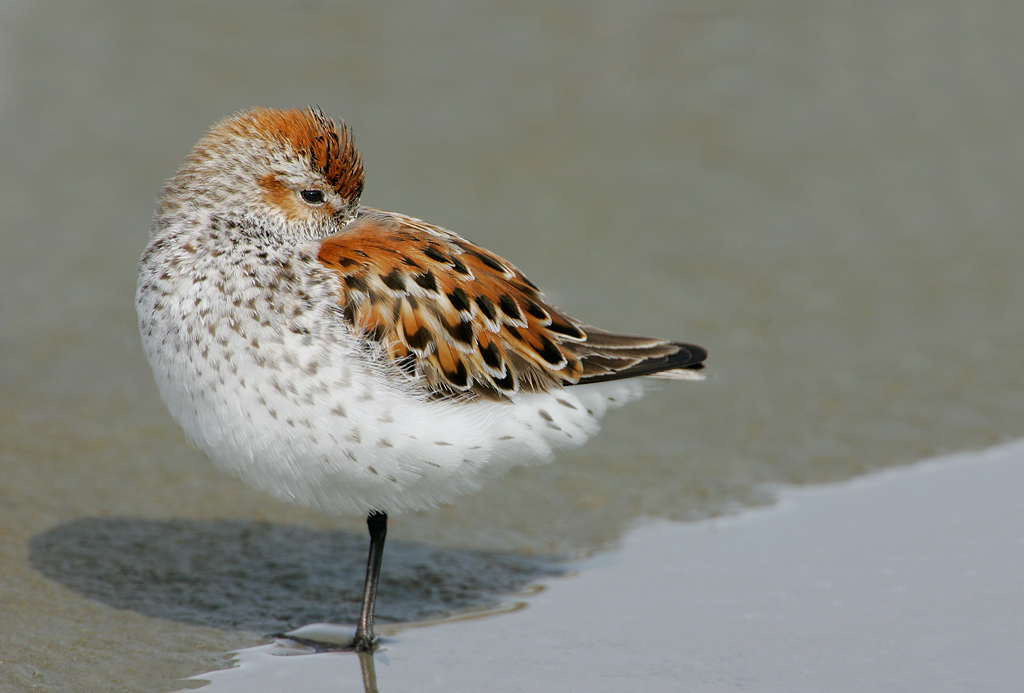
Here, with the help of Sidharth (and several others who mentioned the crummy catchlight), is the final optimized image, a far cry from the opening image in this blog post. And one that I can be truly proud of. It is amazing that such a tiny change can have a huge effect on the final result.
For a greater appreciation of the image, click on the photo. Then click on the enlarged version to close it.
|
Once I went back to the RAW file I saw that I had done an horrific job. Rather than start from scratch I re-converted the RAW file and changed it to 8-bit so that it would match the optimized file. Then I painted a quick Mask of the eye and brought it into the re-worked file. As I had added canvas I needed to resize it for a perfect match (Control T for the Transform Tool). I flatted the image and went to work on the original eye that now hid my botch job. This time I created a tiny, tiny irregularly-shaped catchlight using a 1 pixel Clone Stamp Tool brush and made sure to place the catchlight in the center of the naturally-occurring light area at the top of the eye. As the folks on BPN said, “Much Better.”
Earn Free Contest Entries and Support both the Bulletins and the Blog by making all your B & H purchases here.
More and more folks are earning multiple contest entries with their B & H purchases. See here for details on that. Eleven great categories, 34 winning and honored images, and prize pools valued in excess of $20,000. Click here to visit the competition home page.
Shopper’s Guide
Below is a list of the gear used to create the image in today’s blog post. Thanks a stack to all who have used the Shopper’s Guide links to purchase their gear as a thank you for all the free information that we bring you on the Blog and in the Bulletins. Before you purchase anything be sure to check out the advice in our Shopper’s Guide.
Canon 500mm f/4 L IS lens. Surely the world’s most popular super-telephoto lens. And for good reason. And the 500 f/4L IS II promises to be a lot better!
2X III teleconverter. This new 2X TC is considerably sharper than the 2X II model.
Canon EOS-1D Mark IV professional digital camera body. My two Mark IV bodies serve as my workhorse digital camera bodies.
And from the BAA On-line Store:
LensCoats. I have a LensCoat on each of my big lenses to protect them from nicks and thus increase their re-sales value. All my big lens LensCoat stuff is in Hardwood Snow pattern.
LegCoat Tripod Leg Covers. I have four tripods active and each has a Hardwood Snow LegCoat on it to help prevent further damage to my tender shoulders 🙂
Gitzo GT3530LS Tripod. This one will last you a lifetime.
In 2005 I was using the Wimberley V2 head full time. Today many folks still prefer the Wimberley head to the Mongoose M3.6 that I use. That’s why we carry both.
Wimberley P-40 Plate. We sell dozens of P-40 plates each year for a variety of 500mm lenses.
Double Bubble Level. You will find one in my camera’s hot shoe whenever I am not using flash.
Be sure to check out our camera body User’s Guides here.
The Lens Align Mark II. I use the Lens Align Mark II pretty much religiously to micro-adjust all of my gear an average of once a month and always before a major trip. I am borrowing a 500 f/4 for Bosque; the first that that I will do is micro-adjust it. Enjoy our free comprehensive tutorial here.
Canon EOS-1D Mark IV User’s Guide. Learn to use your Mark IV the way that I use mine. Also available for the 7D and the Mark III here.
October 12th, 2011
|
|
|
Tern Sunrise, Little St. Simon’s, GA. This image was created with the tripod mounted Canon 500mm f/4 L IS lens, the 2X II TC (now replaced by the 2X III teleconverter) and the Canon EOS-40D (now replaced by the Canon EOS-7D). ISO 800. Evaluative metering +2/3 stop: 1/500 sec. at 8. Focused manually by necessity.
Many folks who see this image congratulate me on creating this image in Photoshop. It is, however, straight out of camera :).
For a greater appreciation of the image, click on the photo. Then click on the enlarged version to close it.
|
For Your Critique: Image #11
The image above is presented for your critique; feel free to praise it or rip it to shreds. All suggestions are welcome. Would you keep it or delete it? Let us know why either way, what you like or what you hate. What would you have done differently?
Over the course of the next month or so, I will present nine additional images in this series for a total of twenty in all. The last will be followed by several revelations including two major ones.
Earn Free Contest Entries and Support both the Bulletins and the Blog by making all your B & H purchases here.
More and more folks are earning multiple contest entries with their B & H purchases. See here for details on that. Eleven great categories, 34 winning and honored images, and prize pools valued in excess of $20,000. Click here to visit the competition home page.
Shopper’s Guide
Below is a list of the gear used to create the image in today’s blog post. Thanks a stack to all who have used the Shopper’s Guide links to purchase their gear as a thank you for all the free information that we bring you on the Blog and in the Bulletins. Before you purchase anything be sure to check out the advice in our Shopper’s Guide.
Canon 500mm f/4 L IS lens. Surely the world’s most popular super-telephoto lens. And for good reason. And the 500 f/4L IS II promises to be a lot better!
2X III teleconverter. This new 2X TC is considerably sharper than the 2X II model.
Canon EOS-7D). Possibly the best value ever digital camera body….
And from the BAA On-line Store:
LensCoats. I have a LensCoat on each of my big lenses to protect them from nicks and thus increase their re-sales value. All my big lens LensCoat stuff is in Hardwood Snow pattern.
LegCoat Tripod Leg Covers. I have four tripods active and each has a Hardwood Snow LegCoat on it to help prevent further damage to my tender shoulders 🙂
Gitzo GT3530LS Tripod. This one will last you a lifetime.
Mongoose M3.6 Tripod Head. Right now this is the best tripod head around for use with lenses that weigh less than 9 pounds. For heavier lenses, check out the Wimberley V2 head.
CR-80 Replacement Foot for Canon 800. When using the 800 on a Mongoose as I do, replacing the lens foot with this accessory lets the lens sit like a dog whether pointed up or down and prevents wind-blown spinning of your lens on breezy days by centering the lens directly over the tripod.
Double Bubble Level. You will find one in my camera’s hot shoe whenever I am not using flash.
Be sure to check out our camera body User’s Guides here.
The Lens Align Mark II. I use the Lens Align Mark II pretty much religiously to micro-adjust all of my gear an average of once a month and always before a major trip. Enjoy our free comprehensive tutorial here.
Canon EOS-1D Mark IV User’s Guide. Learn to use your Mark IV the way that I use mine. Also available for the 7D and the Mark III here.
October 10th, 2011
|
|
|
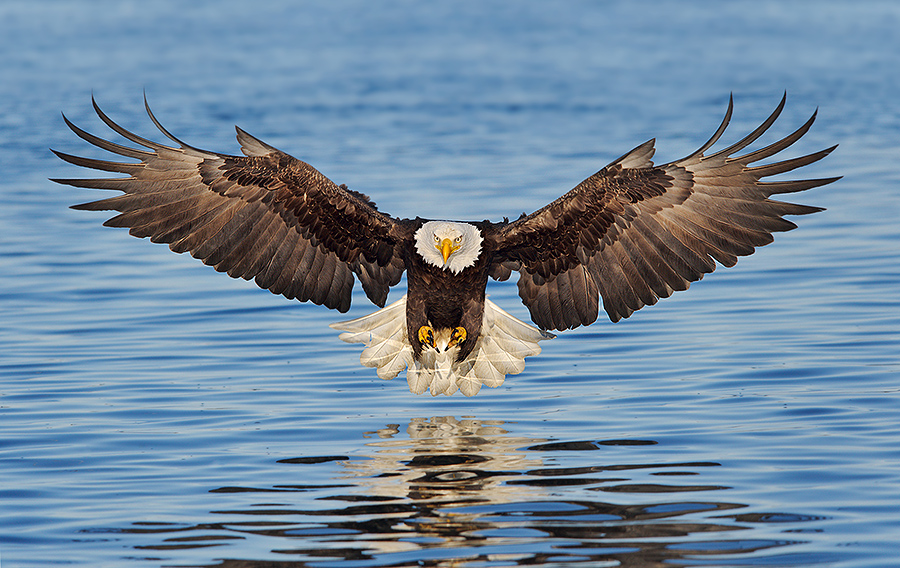
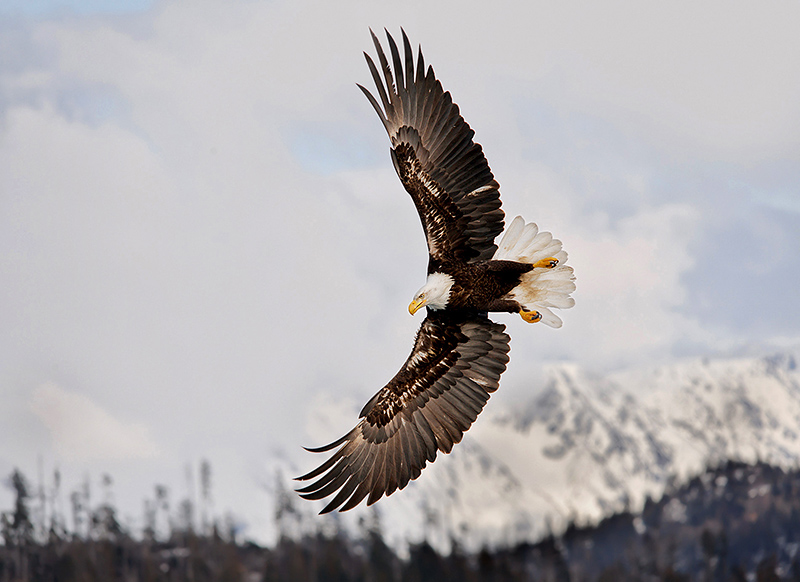
Bald Eagle Striking, near Homer, AK. Sigma 150-500mm f/5-6.3 DG OS HSM APO Autofocus Lens for Nikon handheld at 350mm with the Nikon D700. ISO 400. Evaluative metering at zero: 1/1600 sec. at f/8 in Manual mode.
Purchasing this Nikon DSLR User’s Guide will not guarantee that you will make images as good as the one above but you will learn how to get the most out of your gear for nature and action photography. (Sports photographers take note.)
|
Nikon DSLR User’s Guide for the D300s/D700/D3S/d3x
Well, it took long enough–at least two years from concept to the final PDF–but a masterpiece Nikon User’s Guide is here. I just had my first look at the finished document and all that I can say is “Wow! Many Nikon folks show up on IPTs knowing little about properly setting up their cameras. “How do you see the histogram?’ “Don’t know….” “Can you set your camera so that we see the RGB histogram and blinkies in the same frame? “I once saw it done but don’t know how….” For me, it has long seemed that operating a Nikon camera required degrees in Physics, Language, and Logic. With thiss new guide those days are over.
You will learn when, how, and why to work in Manual mode and when, why, and how to work in one of the auto-modes (by setting exposure compensation). You will learn the various camera control options and custom settings so that you can fine-tune your camera to suit your shooting style. You will learn how and why many top pros works at higher ISOs than the regular Joes. And you will learn how the author uses both Auto-ISO Control and Exposure Compensation while working in Manual Mode to routinely create perfectly exposed action photographs. He explains exactly how he sets the important camera controls. And why. Those include Release Mode, Focus Mode, and Rear Button Focus. You will learn how to set your camera and your flash to create flash blurs. You will learn which AF Mode to use 90% of the time for bird photography and how to set things up using Menu/Custom Settings Menu.
He will teach you how and why to set a variety of buttons and dials. How and why to use Live View. About the only metering mode he uses. How, why, and when to switch AF points with the Multi-Selector. How and why to use the often-overlooked Info Button and the often over-looked My Menu feature. Then he takes you through the Camera Menus while dealing with the hows and whys of how he sets up the important items.
If you use Nikon gear then you simply cannot live without this great E-guide. You owe it to yourself to make your life easier, to learn to make better images, and to learn exactly how a top professional does things. The Nikon DSLR User’s Guide is a comprehensive 45-page PDF that is sent by e-mail. There are dozens and dozens of diagrams and screen captures and even a few photos to illustrate key points. Your best bet is to save $2 by ordering your Nikon dSLR User’s Guide through the BAA On-line Store here for only $30. Or you can purchase your copy for $32 by calling BIRDS AS ART at 863-692-0906 with your credit card in hand, by sending a PayPal for $32 to us at birdsasart@att.net, or by sending a check for $32 made out to “Arthur Morris” to us at Arthur Morris/BIRDS AS ART, PO Box 7245, Indian Lake Estates, FL. If by check be sure to include your e-mail address. (Please remember: no sharing digital files please :))
|
|
|
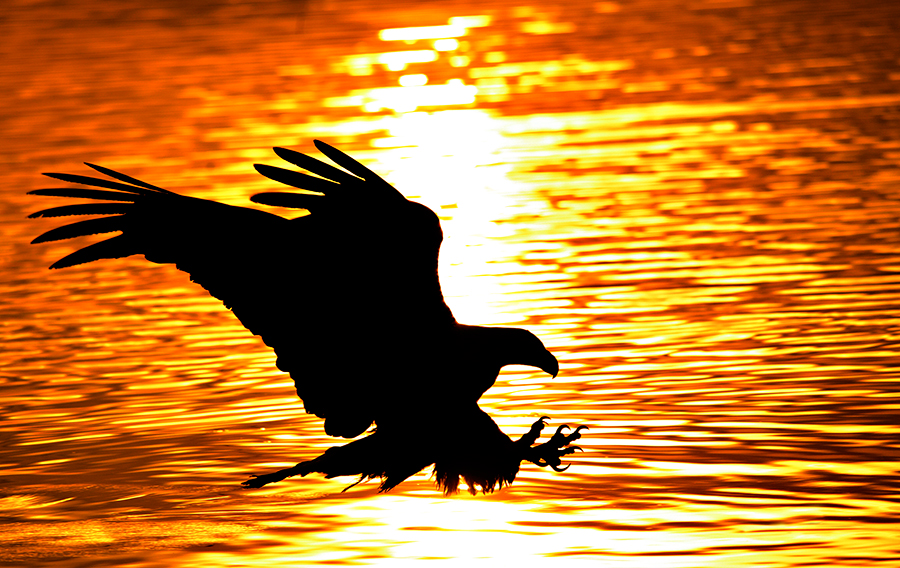
Bald Eagle at sunset, talons out, near Homer, AK. Image copyright 2010: Sigma 150-500mm f/5-6.3 DG OS HSM APO Autofocus Lens for Nikon handheld at 350mm with the Nikon D700. ISO 640. Evaluative metering at zero: 1/2000 sec. at f/8 in Manual mode.
In the Nikon DSLR User’s Guide for the D300s/D700/D3S/d3x he shares with you the AF and metering settings that he uses to create sharp, perfectly exposed images. In addition he details his entire camera set-up from soup to nuts. Learn to use your Nikon camera like a top professional.
|
Earn Free Contest Entries and Support both the Bulletins and the Blog by making all your B & H purchases here.
More and more folks are earning multiple contest entries with their B & H purchases. See here for details on that. Eleven great categories, 34 winning and honored images, and prize pools valued in excess of $20,000. Click here to visit the competition home page.
Shopper’s Guide
Below is a list of the gear used to create the images in today’s blog post. Thanks a stack to all who have used the Shopper’s Guide links to purchase their gear as a thank you for all the free information that we bring you on the Blog and in the Bulletins. Before you purchase anything be sure to check out the advice in our Shopper’s Guide.
Sigma 150-500mm f/5-6.3 DG OS HSM APO Autofocus Lens for Nikon. I’ve seen the great images that the author has created with this lens on his laptop at full resolution…. This lens is also available in Canon mount. See item next.
Sigma 150-500mm f/5-6.3 DG OS HSM APO Autofocus Lens for Canon. This is the Canon version of this Sigma lens.
Nikon D700. At the time of publication, this was the author’s favorite camera body. Most everything in the guide still applies to new versions of both Nikon professional and pr-sumer digital camera bodies.
October 8th, 2011
| [Not a valid template] |
|
Coastal Brown Bear Cub with salmon sliver, Geographic Harbor, Katmai National Park, AK. Image courtesy of and copyright 2011: Clemens van der Werf. This image was created with the tripod-mounted Canon 800mm f/5.6L IS lens and the EOS-1D Mark IV. ISO 1000. Evaluative metering +2/3 stop: 1/800 sec. at f/5.6 in Manual mode.
Critique 21/32. I love this one a ton. So sharp, the salmon scrap could not be better, and tons of detail in the fur. Perfect head angle. You could deal with two or three of the round white areas in front of the bear with a large 40% Opacity Clone Stamp Tool. The larger white area behind the hump will be harder to deal with as it merges with the fur…. I’d use the same tool and try to work very gently around the fur surely having to settle for losing a bit of detail in the fuzzy fur. One of these years I will learn to use Refine Mask from Tim Grey.
|
IPT Student Getting Too Good?
Many regular readers learned of Clemens van der Werf in this post: “Mystery Photographer & Experience Level Revealed!” The short story is that Clemens has been on virtually every IPT since attending the 2010 SW FLA IPT. He has been on the Homer IPT, the Bosque IPT, the San Diego IPT, the JBWR/Nickerson IPT, and most recently he attended the 2011 Bear Boat IPT. He is still so eager to learn that he will be returning to Bosque with us this year. (Hey, we still have a single opening….) Prior to his first IPT he had photographed only sailboats, his dogs, and his daughter. His skills have improved steadily.
The problem is that he has gotten too, too good.
His Coastal Brown Bear images from the last Bear Boat IPT (we have several openings for next July’s trip) relect continuing growth in all areas of his photography. His exposures are pretty much spot-on, he has perfected his sharpness techniques, and he makes all the obvious images. But his biggest area of improvement is in seeing and creating new and different images. See the first and third images here as prime examples.
You can now click here for IPT information.
| [Not a valid template] |
|
Coastal Brown Bear dreaming sweet dreams, Kukak Bay Katmai National Park, AK. Image courtesy of and copyright 2011: Clemens van der Werf. This image was created with the tripod-mounted Canon 800mm f/5.6L IS lens and the EOS-1D Mark IV. ISO 1250. Evaluative metering +2/3 stop: 1/500 sec. at f/5.6.
Critique 24/32. You outdid me by miles on this one with perfect image optimization and a killer pose. Your perspective was perfect allowing for the nice use of the grass in front of the bear and a sweet background. Just enough depth of field wide open to leave both sets of claws sharp enough.
|
| [Not a valid template] |
|
Coastal Brown Bear sipping, Geographic Harbor, Katmai National Park, AK. Image courtesy of and copyright 2011: Clemens van der Werf. This image was created with the tripod-mounted Canon 800mm f/5.6L IS lens, the 1.4X III TC, and the EOS-1D Mark IV. ISO 2000. Evaluative metering +2/3 stop: 1/500 sec. at f/9.
Critique 29/32. Another winner. Perfectly framed with great detail in the fur. Note that Clemens went to f/9 as he was a lot closer than he was in the two images above. By exposing to the right at ISO 2000 noise was minimized beautifully.
|
Part II with Image Critiques
To follow along on the next 13 image critiques first open a new window here. This will bring you to Clemens Coastal Brown Bear gallery. Clicking twice on the right-facing triangle will bring you to image 17/32. Return to this window to read the critique and then repeat the process for the next 12 images.
Critique 17/32. Sharp with a perfect exposure as expected. Nicely framed and I like the low perspective. Getting even lower if possible would have placed the bear’s head (and the clam) against a background of blue, o-o-f creek and the image would have been that much better.
Critique 18/32. Technically perfect as expected. Love your angle into the cub, the perspective you chose, and that momma is looking directly at the nursing cub.
Critique 19/32. You were in the right place at the right time! Timing exquisite as are the fish and the splashing water. Love the placement of the bear in the frame (with the animal looking just to your right) and even the careful framing to “give the rock (in the lower left corner) a border.”
Critique 20/32. Though the sharpness, EXP (you handled the somewhat harsh sidelight well), and framing are perfect and the pose rather powerful I am so jaded that this one does not get me terribly excited.
Critique 22/32. You handled a difficult exposure well. Based on the far shoreline, it looks as if it might need a bit of CW rotation. You might opt to create a version with a pure black silhouette. You must have been out of position when this guy was running after the salmon.
Critique 23/32. A wonderfully conceived and executed zoom blur with a nice sharp face on the bear. Love the strips of color and the degree of blurring. I’d evict the one dark stone just to our right of the bear’s snout as it is distracting.
Critique 25/32. A superbly executed portrait with a wonderful background. Simple but exquisite. Love, love, love the BKGR and your choice of perspective. Beautifully seen and executed. The direct stare and the open mouth are the icing on a great cake!
Critique 26/32. These shaking off the water images are very difficult to pull off. The face is pretty darned sharp and I love the drops. Framing is a bit tight on our left and the right eye looks weird; the eyes are almost always problematic in these….
Critique 27/32. This one has a very forlorn look about it. The image is nicely designed with the subject placed perfectly. From here it looks as if the dark fur could be opened up a bit.
Critique 28/32. The degree of blurring here is very nice and the head looks pretty good. When creating pleasing blurs the head is often a huge problem as they are often too blurred…. Zooming wider or panning slower to get the bear farther forward in the frame would have been better as it would have let us see more of the spray.
Critique 30/32. Nicely done. I like yours a bit better than mine because you included at least a bit of each rear paw. I had no idea that you were behind me and slightly to my left on this one! I thought that I was alone.
Critique 31/32. Great to go wide here. I love the action and the bears in the BKGR. Raising the lens a bit would have resulted in better framing. As presented I would crop 3/4 of the empty space on the bottom of the frame.
Critique 32/32. Sharp with yet another perfect exposure. Wonderful timing with the cub’s tongue out. Nice as it is it would have been better had you pointed the lens to our left so as to include all of momma’s near fore-leg with a small border.
You can learn more about Clemens here or check out his home-page slide program here. While doing so be sure to visit some of his other galleries. If you missed the first 16 image critiques you can find them here.
Earn Free Contest Entries and Support both the Bulletins and the Blog by making all your B & H purchases here.
More and more folks are earning multiple contest entries with their B & H purchases. See here for details on that. Eleven great categories, 34 winning and honored images, and prize pools valued in excess of $20,000. Click here to visit the competition home page.
Shopper’s Guide
Below is a list of the gear Clemens used to create the images in today’s blog post. Thanks a stack to all who have used the Shopper’s Guide links to purchase their gear as a thank you for all the free information that we bring you on the Blog and in the Bulletins. Before you purchase anything be sure to check out the advice in our Shopper’s Guide.
Canon 800mm f/5.L IS lens. Right now this is my all time favorite super-telephoto lens.
Canon 1.4X III Teleconverter. The new 1.4X TC is designed to work best with the newer Series II super-telephoto lenses but it works just fine with the current lenses.
Canon EOS-1D Mark IV professional digital camera body. Like me, Clemens travels with two Mark IV bodies that serve as his workhorse digital camera bodies.
And from the BAA On-line Store:
LensCoats. I have a LensCoat on each of my big lenses to protect them from nicks and thus increase their re-sale value and so does Clemens.
LegCoat Tripod Leg Covers. I have four tripods active and each has a set of LegCoats on it to help prevent further damage to my tender shoulders 🙂 And so does Clemens.
Gitzo GT3541XLS Carbon Fiber 6X Tripod At 6 foot, six inches Clemens uses the tripod that Todd Gustafson has popularized for the tall folks.
Mongoose M3.6 Tripod Head. Right now this is the best tripod head around for use with lenses that weigh less than 9 pounds. For heavier lenses, check out the Wimberley V2 head. (Note: Denise prefers the Wimberley head to the Mongoose.
CR-80 Replacement Foot for Canon 800. When using the 800 on a Mongoose as I do, replacing the lens foot with this accessory lets the lens sit like a dog whether pointed up or down and prevents wind-blown spinning of your lens on breezy days by centering the lens directly over the tripod.
Double Bubble Level. You will find one in my camera’s hot shoe whenever I am not using flash.
Be sure to check out our camera body User’s Guides here.
The Lens Align Mark II. I use the Lens Align Mark II pretty much religiously to micro-adjust all of my gear an average of once a month and always before a major trip. And yes, so does Clemens. In fact, he drove up here a few months ago and we worked together micro-adjusting everything in sight. Having a partner for this makes it easy to center the red circle in the target; one of us stayed a the laptop while the other adjusted the LensAlign Mark II sitting atop the Giotto’s tiny ballhead. Enjoy our free comprehensive tutorial here.
BIRDS AS ART Camera Body User’s Guides. Why spend $2-5 grand on a camera and not learn to use it properly and efficiently?
|