Arthur Morris/BIRDS AS ART
September 21st, 2011

Traveling With Your Photo Gear On Puddle Jumpers and Small Regional Jets

[Not a valid template]

This Bald Eagle was photographed at Lower Klamath NWR, CA when I traveled to the Winter Wings Festival in Klamath, OR. As often happens, I flew the last leg on a very small jet (into the Klamath Falls airport–LMT for those of you who are into three letter airport codes.) It is imperative that I get to my destination with my gear intact; see the feature below to learn just how I do that consistently.

I created this image from my rental vehicle with the Canon 800mm f/5.6L IS lens, the 1.4X III TC, and the EOS-1D Mark IV. ISO 400. Evaluative metering -1 stop: 1/1000 sec. at f/9 in Av mode. Central Sensor/Rear Focus AI Servo AF and re-compose. The big lens was of course resting on a BLUBB (the Big Lens Ultimate BeanBag).

Traveling With Your Photo Gear On Puddle Jumpers and Small Regional Jets

Here is a recent e-mail exchange with Justine Carson who will be joining Robert O’Toole and me (and 17 others in two groups) on the Homer Bald Eagle IPT in late October. See item two for more info including an increased late registration discount.

AM: Hi Justine, re:

JC: Do you have any advice regarding the best way to transport gear on flights in and out of Homer.

AM: Yes.

JC: My flight from San Francisco gets to Homer via Seattle and then Anchorage.

AM: Easy trip. πŸ™‚

JC: I’m assuming that the Anchorage to Homer segment is on a smaller aircraft and am wondering about how much carry-on they are likely to allow. (I guess I could contact the airline — Era Aviation — and ask, and I will do that if you don’t have any advice to offer.)

AM: I am fairly sure that all the flights to Homer are 737s…. Oops. Wrong again. Mine flight will be on a Beechcraft B100 Series. But you may be able to get a flight on a 737. I am pretty sure that some of the flights are on 737s but I might be wrong there too….

I am not sure if you can get any rolling bag in the overhead. Here is the strategy that I use:

First I ask at the gate if the flight is full. If they say, β€œNo,” I will get either stand at the bottom of the boarding steps orβ€”if I do not see the flight attendant, get on the plane with my rolling bag (even if they have given me a gate check tag). Then I say, β€œI need your help. I have $25,000 worth of delicate photographic gear in my rolling bag. I understand that this is not a full flight Is there any chance that I see if I can get it under the seat in front of an empty seat? If they say β€œyes,” you might be half way there. Sometimes that works and sometimes I can get it under the seat in front of me and sit with my feet up on the bag. I use the big Think Tank Bag, the Airport Security. Learn more here. To see how how pack my bagβ€”there are lots of great tips no matter which bag you have, click here.

If they say β€œno”, you might try asking, β€œIs there any chance that I could get this into the crew locker?” Sometimes they say “Yes.” Once I had a flight attendant who was so nice that she took her rolling bag out of the crew locker and gate checked it so that I could put my photo gear safely in the crew locker. I got her name and address and sent her a nice print as a thank you.

On the other hand I once had a male flight attendant who let me get on the plane (which was practically empty) and put my bag under the last two seats in the back on the left side of the plane. I took my seat thinking that all was fine. A minute later he tapped me on the shoulder and said, β€œCome with me please.” We went to the back of the plane past four empty rows of seats and he pointed to my bag which protruded perhaps 1/2 inch past the back of the seat. He said, β€œYou will need to gate check that as it it blocking the aisle.” I said, β€œThis is not an emergency row and there is nobody seated in the back of the plane. And the bag is maybe sticking out a half inch.” He said, β€œYou will need to gate check that as it it blocking the aisle.”

I responded, β€œI understand. You have a uniform on and I do not. You are having a bad day and are taking it out on me. I am not sure why God sometimes puts bitter, unhappy people in my path but I can deal with it.” It was a no-win situation for me so I simply gate-checked the bag, confident that with my sturdy Think Tank bag with the gear packed as described here that it would arrive safely at my destination.

The reality of today’s air travel is that photographers must on occasion be prepared to gate-check their roll aboards. That is why I stow my gear in various LensCoat Travel Coats, Covers, Body Bags, Pouches and Bags. Then I rely on the sturdy construction of my Think Tank Airport Security bag to protect my valuable gear. Try if at all possible to make sure that you will be able to grab your bag plane-side when you get to your destination. I had one airline lie to me about thatβ€”Kodiak to Anchorage, I believe. My bag was put on the rack with all of the checked bags. My old 500 was slightly damaged. I have never had any gear damaged when my rolling bag was gate checked and picked up plane-side after the flight. That is the standard procedure.

JC: I have a Think Tank Airport Antidote which is supposed to be allowable carry-on for even smaller regional jets.

AM: Though I do not know that bag, many of the puddle jumpers have tiny overheads. Some are so small that you would be lucky to get your wallet in them….

JC: I can fit my 200-400 and a 70-200 or 70-300, plus camera bodies into that, but it will not accommodate my 600. I was originally thinking of leaving it at home, but since your e-mail saying to “bring your longest lens” I’ve been reconsidering that. I have been contemplating buying a Guru Kiboko bag, which I think would accommodate both long lenses and bodies, plus a smaller lens or two.

AM: I strongly suggest that you leave the 200-400 at home and bring the 600 and one or both of the smaller tele-zooms. Plus your two camera bodies. The 600 plus TCs is great for the perched eagles. I am 99% sure that the Think Tank International will hold all of that gear easily. I do not know the Kiboko bag at all.

JC: The other alternative is to use the Think Tank backpack plus a Think Tank roller bag which will hold the 600. The roller bag would almost certainly not go as carry-on for the smaller aircraft. But not sure that the fully loaded Kiboko would make it as carry-on either.

AM: I am sure that it would not. I do not like having anything on my back. Furthermore, where would your laptop go? I always bring my rolling bag and my laptop bag as my two carry-ons.

JC: Any advice on the best and safest way to get this amount of gear to Homer?

AM: See above. Let me know if you have any more questions. If you do purchase any additional Think Tank product, please do so after clicking here so that you get a free gift and I earn a small commission. Later and love, artie

(Note: the info above was adapted and expanded from a free excerpt from The Art of Bird Photography II (916 pages, 900+ images) that appeared at the end of the blog post here.

Homer Bald Eagle IPT Late Registration Discount Increased to $500!

Robert O’Toole and I have 2 slots open on our first Homer Fall Bald Eagle IPT and due to a cancellation, one on the second trip. We are glad to offer blog folks a $500 late registration discount. If you like to photograph eagles you have not lived until you have been to Homer. Robert and I have photographed Homer both before and after the Jean Keene era. Few if any (aside from us) have mastered the latter….
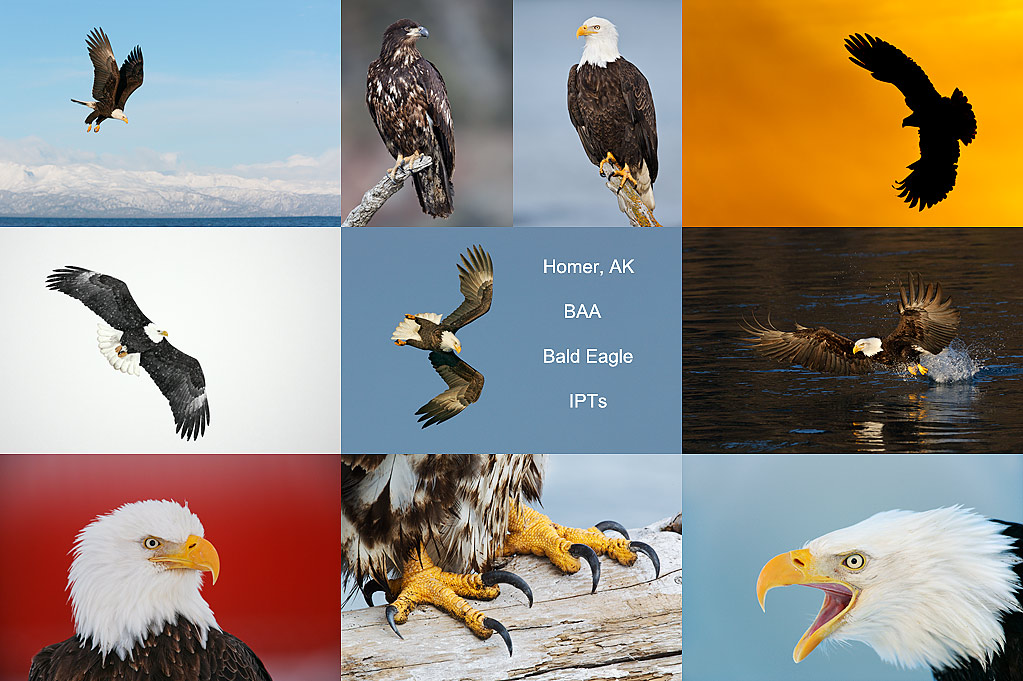
All of the images in this collage were created on BIRDS AS ART Homer, AK Instructional Photo-Tours, many of them last fall.

To see a 1024 pixels wide version, click on the photo above. Then click on the enlarged version to close it.

THE OCT/NOV 2011 HOMER-BASED BALD EAGLE IPTs with Arthur Morris and Robert O’Toole

OCT 25-29, 2011. Limit 10 (six photographers per boat)/Openings: 2). 5-FULL DAYS: $3399.

You will need to be in Homer no later than the evening of October 24.

OCT 30, 2011. Add-on day: $550. (Limit 10/Openings: 1). If you are on the second trip and are doing the add-on day, you will need to be in Homer no later than the evening of October 29.

OCT 31-NOV 4, 2011. Limit 10 (six photographers per boat)/Openings: 1). 5-FULL DAYS: $3399.

You will need to be in Homer no later than the evening of October 30.

These trips are based in Homer, AK. We will enjoy virtually unlimited photographic action. Each year, most folks opted to miss at least one boat trip due to photographic exhaustion. Two great leaders provide both in-the-field and in-classroom instruction that will include at least two Photoshop sessions. For more info on this trip, please click here. Please call me at 863-692-2806 or e-mail immediately. artie

Shopper’s Guide

Below is a list of the gear used to create the image in today’s blog post. Thanks a stack to all who have used the Shopper’s Guide links to purchase their gear as a thank you for all the free information that we bring you on the Blog and in the Bulletins. Before you purchase anything be sure to check out the advice in our Shopper’s Guide.

Support both the Bulletins and the Blog by making all your B & H purchases here.

Remember: you can earn free contest entries with your B & H purchases. Eleven great categories, 34 winning and honored images, and prize pools valued in excess of $20,000. Click here for details.

Canon 800mm f/5.L IS lens. Right now this is my all time favorite super-telephoto lens.
Canon 1.4X III Teleconverter. Designed to work best with the new Series II super-telephoto lenses.
Canon EOS-1D Mark IV professional digital camera body. My two Mark IVs are my workhorse digital camera bodies.

And from the BAA On-line Store:

LensCoats. I have a LensCoat on each of my big lenses to protect them from nicks and thus increase their re-sales value. All my big lens LensCoat stuff is in Hardwood Snow pattern.
LegCoat Tripod Leg Covers. I have four tripods active and each has a Hardwood Snow LegCoat on it to help prevent further damage to my tender shoulders πŸ™‚
BLUBB I designed the Big Lens Ultimate BeanBag out of necessity. It supports my big glass perfectly and allows me to create sharp images at slow shutter speeds from the car window and with the lens on top of the roof or the hood (with the BLUBB turned upside down). Beware of cheap imitations that cost half the price. They are all junk.
Double Bubble Level. You will find one in my camera’s hot shoe whenever I am not using flash.
Be sure to check out our camera body User’s Guides here.
The Lens Align Mark II. I use the Lens Align Mark II pretty much religiously to micro-adjust all of my gear an average of once a month and always before a major trip. Enjoy our free comprehensive tutorial here.
Canon EOS-1D Mark IV User’s Guide. Learn to use your Mark IV the way that I use mine.
September 20th, 2011

Need A Haircut? & Canon 300 f/2.8L IS II Alert

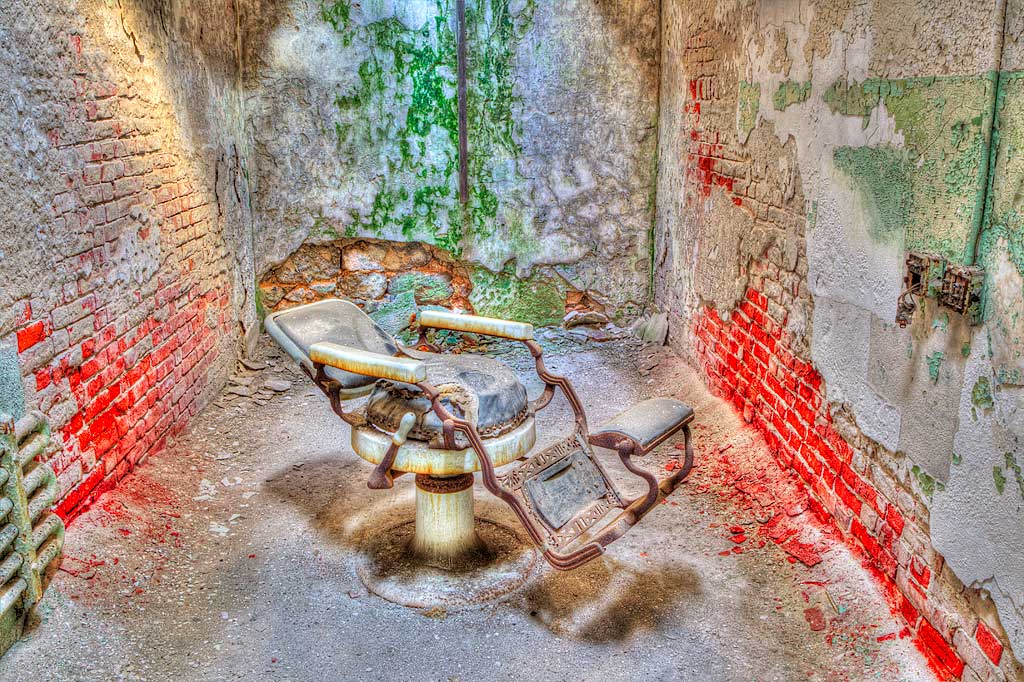
This image was created on Denise Ippolito’s Creative Photography workshop at the now derelict Eastern State Penitentiary in Philadelphia, PA with the Canon 24-105mm L IS lens at 24mm and the EOS-1D Mark IV. ISO 200. Evaluative metering: 7-frame AEB +/- 1 stop around -1 stop: 1.6 seconds at f/16. 2 sec. self timer. Live View (for Mirror Lock).

Gitzo 3530 LS CF tripod, Giottos MH 1302-655 BallHead, Wimberley P-5 camera body plate.

For a greater appreciation of the image, click on the photo. Then click on the enlarged version to close it. Learn about Denise’s next ESP workshop (October 15, 2011) here.

Need A Haircut?

This was one of several “barbershop” cells where inmates went for haircuts. The quasi-HDR Grunge was created in Photomatix. To purchase Photomatix and save 15% click here and be sure to enter birdsasart as the coupon code. You can download and use a trial copy of Photomatix before you buy. (It is fully operational; the processed images will have a visible watermark on them.) I was intimidated by both HDR and HDR Grunge for several years but once I tried each I quickly got the hang of it. And it is great fun. If I ever finish my 2010 taxes I will get to work on the HDR Grunge Guide that Denise and I are writing.

Like It or Hate It?

Like it or hate it? Either way, be sure to let us know why.

Canon 300 f/2.8L IS II B&H Alert, and More

The release of the eagerly-awaited Canon 300mm f/2.8L IS Version II lens was delayed by the earthquake tragedy in Japan. If you are looking for one, be advised that B&H just received a small shipment. To purchase, please use this link: Canon 300mm f/2.8L IS II lens and earn three free entries into the BIRDS AS ART 1st International Bird Photography Competition.

COOLPIX P7100 Digital Camera. Just arrived: in stock and ready to ship at B&H’s always low prices.

Coolpix AW100 Waterproof Digital Camera. Just arrived: all colors in stock and ready to ship at B&H’s always low prices.

Shopper’s Guide

Below is a list of the gear used to create the image in today’s blog post. Thanks a stack to all who have used the Shopper’s Guide links to purchase their gear as a thank you for all the free information that we bring you on the Blog and in the Bulletins. Before you purchase anything be sure to check out the advice in our Shopper’s Guide.

Support both the Bulletins and the Blog by making all your B & H purchases here.

Remember: you can earn free contest entries with your B & H purchases. Eleven great categories, 34 winning and honored images, and prize pools valued in excess of $20,000. Click here for details.

Canon 24-105mm L IS lens. I never head into the field without this versatile B-roll lens in my X-trahand vest.
Canon EOS-1D Mark IV professional digital camera body. My two Mark IVs are my workhorse digital camera bodies.

And from the BAA On-line Store:

LegCoat Tripod Leg Covers. I have four tripods active and each has a Hardwood Snow LegCoat on it to help prevent further damage to my tender shoulders πŸ™‚
Gitzo GT3530LS Tripod. This one will last you a lifetime.
Giottos MH 1302-655 BallHead. This lightweight “tiny” ballhead is ideal for both Wimberley and Mongoose users who, on occasion, need to get their cameras on the tripod.
Double Bubble Level. You will find one in my camera’s hot shoe whenever I am not using flash.
Be sure to check out our camera body User’s Guides here.
The Lens Align Mark II. I use the Lens Align Mark II pretty much religiously to micro-adjust all of my gear an average of once a month and always before a major trip. Enjoy our free comprehensive tutorial here.
Canon EOS-1D Mark IV User’s Guide. Learn to use your Mark IV the way that I use mine.
September 19th, 2011

Mark IV Alert

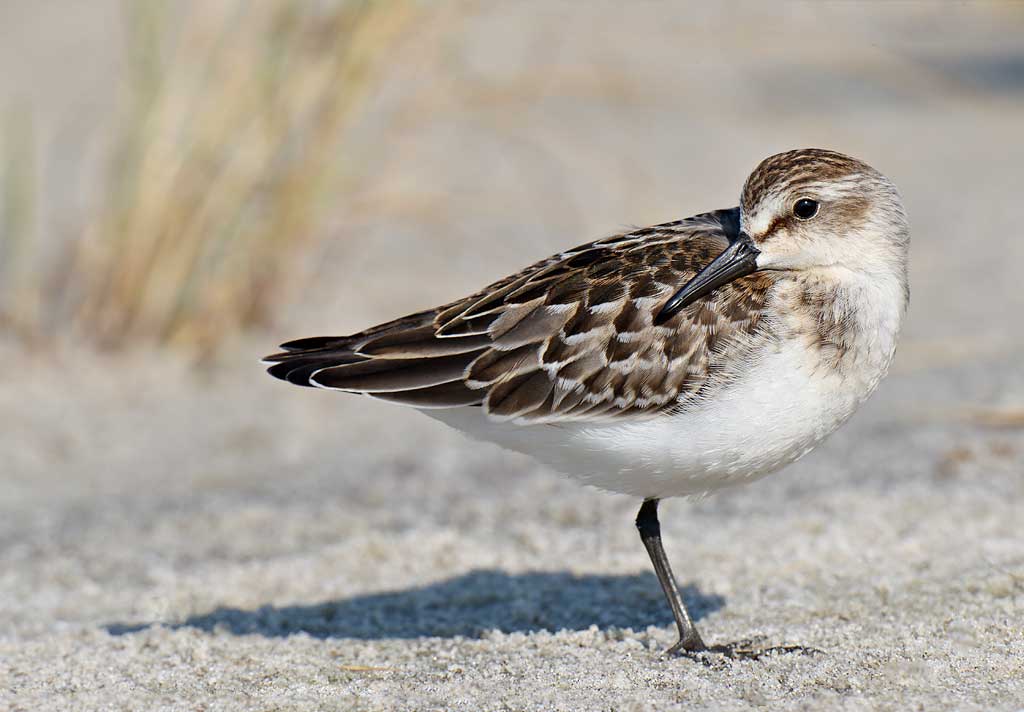
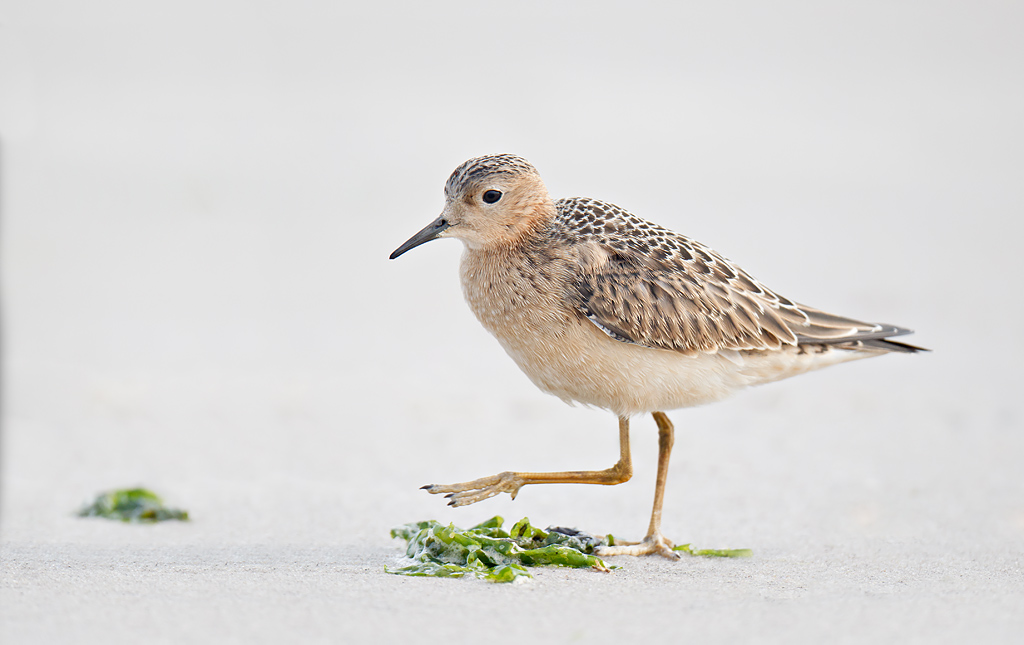
This image was created at Nickerson Beach, Long Island, NY with the tripod-mounted (I was kneeling) Canon 800mm f/5.6L IS lens, a 25mm Extension tube, and the EOS-1D Mark IV. ISO 400. Evaluative metering +2/3 stop: 1/1000 sec. at f/13.

Lens micro-adjustment: -4. Central sensor/AI Servo/Rear Focus AF and re-compose.

The extension tube allowed me to focus closer than the minimum focusing distance of the prime lens alone. This young Semipalmated Sandpiper was sleeping but woke up just for a second to throw this lovely pose. Note that by working very close to sun angle that the negative effects of the harsh light (9:20am) on the image have been minimized.

For a greater appreciation of the image, click on the photo. Then click on the enlarged version to close it.

September 20, 2011 Update: B&H is once again back-ordered on Mark IV bodies.

Please enjoy the image above. πŸ™‚ One blog subscriber was lucky enough to grab one.

Mark IV Alert

Mark IV bodies have been in short supply ever since the earthquake tragedy in Japan. If you are looking for one, be advised that B&H just received a small shipment. To purchase, please use this link: Canon EOS-1D Mark IV. I have been using Mark IV bodies exclusively for almost two years. Get yours right now to avoid disappointment and you can earn three free entries into the BIRDS AS ART 1st International Bird Photography Competition.

Shopper’s Guide

Below is a list of the gear used to create the image in today’s blog post. Thanks a stack to all who have used the Shopper’s Guide links to purchase their gear as a thank you for all the free information that we bring you on the Blog and in the Bulletins. Before you purchase anything be sure to check out the advice in our Shopper’s Guide.

Support both the Bulletins and the Blog by making all your B & H purchases here.

Remember: you can earn free contest entries with your B & H purchases. Eleven great categories, 34 winning and honored images, and prize pools valued in excess of $20,000. Click here for details.

Canon 800mm f/5.L IS lens. Right now this is my all time favorite super-telephoto lens.
Canon EF 25mm Extension tube. I am never out without one of these in my vest; it allows for closer focus in a variety of situations.
Canon EOS-1D Mark IV professional digital camera body. My two Mark IVs are my workhorse digital camera bodies.

And from the BAA On-line Store:

LensCoats. I have a LensCoat on each of my big lenses to protect them from nicks and thus increase their re-sales value. All my big lens LensCoat stuff is in Hardwood Snow pattern.
LegCoat Tripod Leg Covers. I have four tripods active and each has a Hardwood Snow LegCoat on it to help prevent further damage to my tender shoulders πŸ™‚
Gitzo GT3530LS Tripod. This one will last you a lifetime.
Mongoose M3.6 Tripod Head. Right now this is the best tripod head around for use with lenses that weigh less than 9 pounds. For heavier lenses, check out the Wimberley V2 head.
CR-80 Replacement Foot for Canon 800. When using the 800 on a Mongoose as I do, replacing the lens foot with this accessory lets the lens sit like a dog whether pointed up or down and prevents wind-blown spinning of your lens on breezy days by centering the lens directly over the tripod.
Double Bubble Level. You will find one in my camera’s hot shoe whenever I am not using flash.
Be sure to check out our camera body User’s Guides here.
The Lens Align Mark II. I use the Lens Align Mark II pretty much religiously to micro-adjust all of my gear an average of once a month and always before a major trip. Enjoy our free comprehensive tutorial here.
Canon EOS-1D Mark IV User’s Guide. Learn to use your Mark IV the way that I use mine.
September 18th, 2011

Preparing JPEGs for the Web & More Photoshop Tips

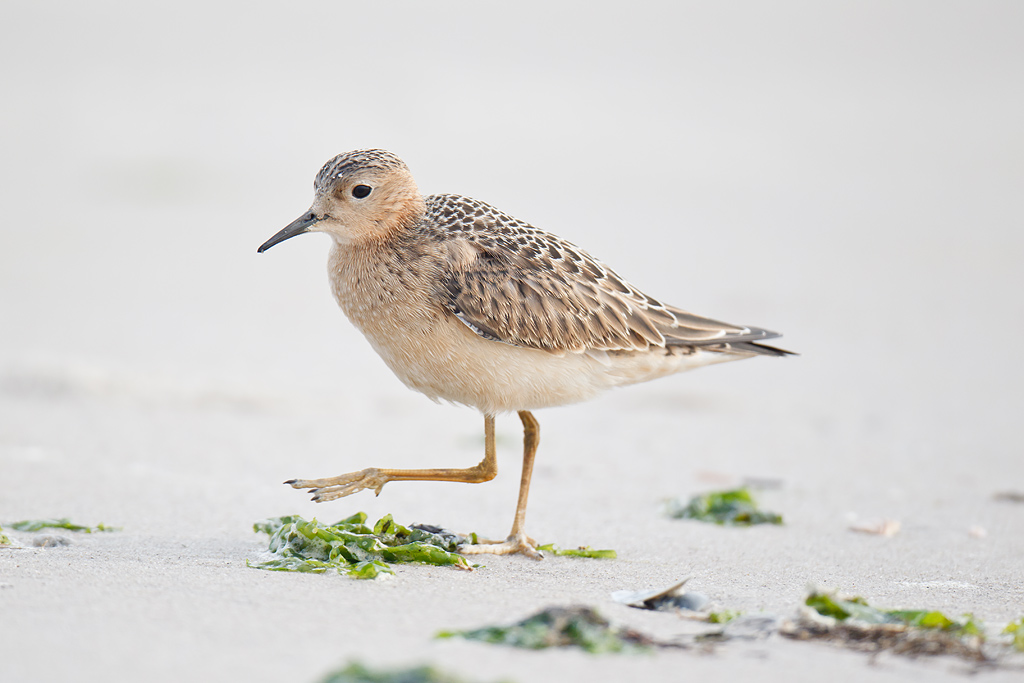
This image was created at Nickerson Beach, Long Island, NY with the tripod-mounted (I was kneeling) Canon 800mm f/5.6L IS lens, a 25mm Extension tube, and the EOS-1D Mark IV. ISO 800. Evaluative metering +2 stops: 1/1000 sec. at f/5.6

Lens micro-adjustment: -4. Central sensor/AI Servo/Rear Focus AF (with AF active at the moment of exposure).

The extension tube increased magnification about 3% and allowed me–if need be–to focus about 2 1/2 feet closer than with the prime lens alone. Lots of beach clean-up and seaweed re-arrangement. See the original below.

For a greater appreciation of the image, click on the photo. Then click on the enlarged version to close it.

Preparing JPEGs for the WEB

When questioned about poor image quality more than a few folks on Bird Photographers.Net complain about the 200kb file size limit. I am always baffled by these comments and I never have a clue as to what folks are doing that causes their image quality problems.

Here is what I am am currently doing: I start with my master file and crop horizontals 1024 px wide at 96 dpi. I know that that the word on the street is to save web JPEGs at 72dpi but I have been saving at 96 dpi since forever: if it ain’t broke, done’t fix it. (With most of my avian images I selectively sharpen the bird only in my master files using a contrast mask and a hide-all mask.) I sharpen my JPEGs to taste using Unsharp Mask with the Amount between 130 and 225 (to taste) and the Radius always at .3. The average Amount would be about 180. Then I Save for Web with the image optimized to <195 kb. If you convert to sRGB you need to make sure that the Embed Color Profile box is checked when you save for web. If you are not right on the money with all of the above you can find everything detailed in our Digital Basics File, an easy-to-follow PDF that is sent via e-mail. DB includes my complete Digital Workflow, dozens of great Photoshop tips, and free updates for as long as I am still pushing the shutter button.

I have been preparing my JPEGs for web presentation this way (albeit with smaller sized images and smaller KB allowances) for more than ten years and all that I have ever heard is “Your JPEGs look great!” I have never once had image quality problems by having to save at <200kb and never even in the old days when saving at 800 or 600 pixles wide and <80 kbs. Ever. So when I see comments like those above I am always mystified.... Do note that many of the images posted to the web are not optimized to less than 200kb but if I downsize them for BPN they look just as good!

This is the original image from which the image above was created.

Note: the image above is unsharpened. Here’s what I did to get from A to B (my master file saved as a TIFF at 300 dpi): Leveled the image with the Ruler Tool based on the foot. Expanded canvas with the Crop Tool Added beach with a flopped Quick Mask. Filled in open spots with the Clone Stamp Tool. Cleaned up the seaweed with a series of Quick Masks and moved a small pile of the green stuff from behind the bird to in front of it. Additional beach clean-up with the Patch Tool, the Clone Stamp Tool, and the Spot Healing Brush. Used those same tools to clean the large sands specks from the birds head. Eliminated the dark area behind the leg with the raised foot using Denise Ippolito’s great new Improved Protect and Defend Cloning on a Layer. Click here for more info or to get the free tutorial. Selectively sharpened the bird only using a contrast mask and a hide-all mask. Lightened the iris. The usual contrast and Selective Color work. Flattened, converted to 8-bit, and saved at full resolution as a TIF.

Editing Your Comments

Many folks have noticed that it is no longer possible to edit a comment using traditional methods. We are aware of the problem; it was caused by the recent update to the latest version of Word Press. Do note however that you can correct your errors by using the backspace key to navigate. Peter Kes is working diligently to find a solution.

Shopper’s Guide

Below is a list of the gear used to create the image in today’s blog post. Thanks a stack to all who have used the Shopper’s Guide links to purchase their gear as a thank you for all the free information that we bring you on the Blog and in the Bulletins. Before you purchase anything be sure to check out the advice in our Shopper’s Guide.

Support both the Bulletins and the Blog by making all your B & H purchases here.

Remember: you can earn free contest entries with your B & H purchases. Eleven great categories, 34 winning and honored images, and prize pools valued in excess of $20,000. Click here for details.

Canon 800mm f/5.L IS lens. Right now this is my all time favorite super-telephoto lens.
Canon EF 25mm Extension tube. I am never out without one of these in my vest; it allows for closer focus in a variety of situations.
Canon EOS-1D Mark IV professional digital camera body. My two Mark IVs are my workhorse digital camera bodies.

And from the BAA On-line Store:

LensCoats. I have a LensCoat on each of my big lenses to protect them from nicks and thus increase their re-sales value. All my big lens LensCoat stuff is in Hardwood Snow pattern.
LegCoat Tripod Leg Covers. I have four tripods active and each has a Hardwood Snow LegCoat on it to help prevent further damage to my tender shoulders πŸ™‚
Gitzo GT3530LS Tripod. This one will last you a lifetime.
Mongoose M3.6 Tripod Head. Right now this is the best tripod head around for use with lenses that weigh less than 9 pounds. For heavier lenses, check out the Wimberley V2 head.
CR-80 Replacement Foot for Canon 800. When using the 800 on a Mongoose as I do, replacing the lens foot with this accessory lets the lens sit like a dog whether pointed up or down and prevents wind-blown spinning of your lens on breezy days by centering the lens directly over the tripod.
Double Bubble Level. You will find one in my camera’s hot shoe whenever I am not using flash.
Be sure to check out our camera body User’s Guides here.
The Lens Align Mark II. I use the Lens Align Mark II pretty much religiously to micro-adjust all of my gear an average of once a month and always before a major trip. Enjoy our free comprehensive tutorial here.
Canon EOS-1D Mark IV User’s Guide. Learn to use your Mark IV the way that I use mine.
September 16th, 2011

The Trap: Lousy Light, Boring Birds

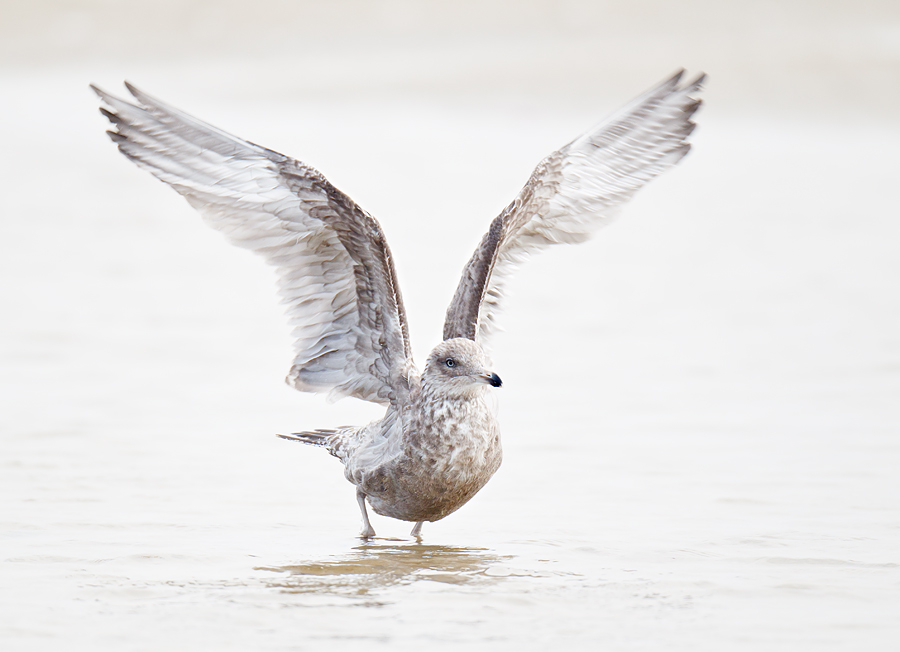
This image was created at Nickerson Beach, NY with the tripod-mounted Canon 800mm f/5.6L IS lens and the EOS-1D Mark IV. ISO 400. Evaluative metering +1 1/3 stops was a big underexposure but I knew that I need some shutter speed: 1/1600 sec. at f/5.6

Lens micro-adjustment: -4. Two sensors below the center AI Servo/Rear Focus AF (with AF active at the moment of exposure).

For a greater appreciation of the image, click on the photo. Then click on the enlarged version to close it.

The Trap: Lousy Light, Boring Birds

You put your head on the pillow and dream of nice sunrise and gorgeous light. The alarm rings all too soon. You leave in the dark and make the one hour drive to the beach. You notice that there are no stars…. You arrive, get your gear, and head out. There are few birds and no light. So you find the last flock of skimmers–most have left the area, and created some pleasing blurs. You walk up and down the beach and there is nothing but gulls. Herring Gulls. And most of them are the very plain worn juveniles and one year old birds.

At such times its easy to just quit. But determined photographers never quit. They may think blurs or they may think high key, but they do not quit. They walk up and back looking for a good situation. They chat with others to garner information. And then they take even longer walks. On the morning of September 3 Denise Ippolito and I had just such a morning. We both made some great blurs. Denise took one of those walks. She met an older man. He told her of a tame Buff-breasted Sandpiper. I stayed behind and found this young Herring Gull taking a bath. When he flapped, I made six images. All were sharp but this was the best by far. To see what others had to say about this image, click here.

Seeing that Denise had found something to photograph I headed after her and found her with a shorebird treasure. I made about 200 images of the bird. It was a pain in the butt bird. It never left the beach wrack. Seaweed and plastic. Cups and seaweed. Rope and plastic. You gotta love it. Denise actually worked ten times harder than I did that morning. My lower back was killing me from kneeling and getting up. Kneeling and getting up. Check out tomorrow’s blog post to see how I did with the buff-breasted.

The next time that you head out and find conditions less than ideal, don’t quit. Keep on plugging; most days you will be nicely rewarded.

Editing Your Comments

Many folks have noticed that it is no longer possible to edit a comment using traditional methods. We are aware of the problem; it was caused by the recent update to the latest version of Word Press. Do note however that you can correct your errors by using the backspace key to navigate. Peter Kes is working diligently to find a solution.

Shopper’s Guide

Below is a list of the gear used to create the image in today’s blog post. Thanks a stack to all who have used the Shopper’s Guide links to purchase their gear as a thank you for all the free information that we bring you on the Blog and in the Bulletins. Before you purchase anything be sure to check out the advice in our Shopper’s Guide.

Support both the Bulletins and the Blog by making all your B & H purchases here.

Remember: you can earn free contest entries with your B & H purchases. Eleven great categories, 34 winning and honored images, and prize pools valued in excess of $20,000. Click here for details.

Canon 800mm f/5.L IS lens. Right now this is my all time favorite super-telephoto lens.
Canon EOS-1D Mark IV professional digital camera body. My two Mark IVs are my workhorse digital camera bodies.

And from the BAA On-line Store:

LensCoats. I have a LensCoat on each of my big lenses to protect them from nicks and thus increase their re-sales value. All my big lens LensCoat stuff is in Hardwood Snow pattern.
LegCoat Tripod Leg Covers. I have four tripods active and each has a Hardwood Snow LegCoat on it to help prevent further damage to my tender shoulders πŸ™‚
Gitzo GT3530LS Tripod. This one will last you a lifetime.
Mongoose M3.6 Tripod Head. Right now this is the best tripod head around for use with lenses that weigh less than 9 pounds. For heavier lenses, check out the Wimberley V2 head.
CR-80 Replacement Foot for Canon 800. When using the 800 on a Mongoose as I do, replacing the lens foot with this accessory lets the lens sit like a dog whether pointed up or down and prevents wind-blown spinning of your lens on breezy days by centering the lens directly over the tripod.
Double Bubble Level. You will find one in my camera’s hot shoe whenever I am not using flash.
Be sure to check out our camera body User’s Guides here.
The Lens Align Mark II. I use the Lens Align Mark II pretty much religiously to micro-adjust all of my gear an average of once a month and always before a major trip. Enjoy our free comprehensive tutorial here.
Canon EOS-1D Mark IV User’s Guide. Learn to use your Mark IV the way that I use mine.
September 15th, 2011

Bosque Thanksgiving Buffet Invite & More

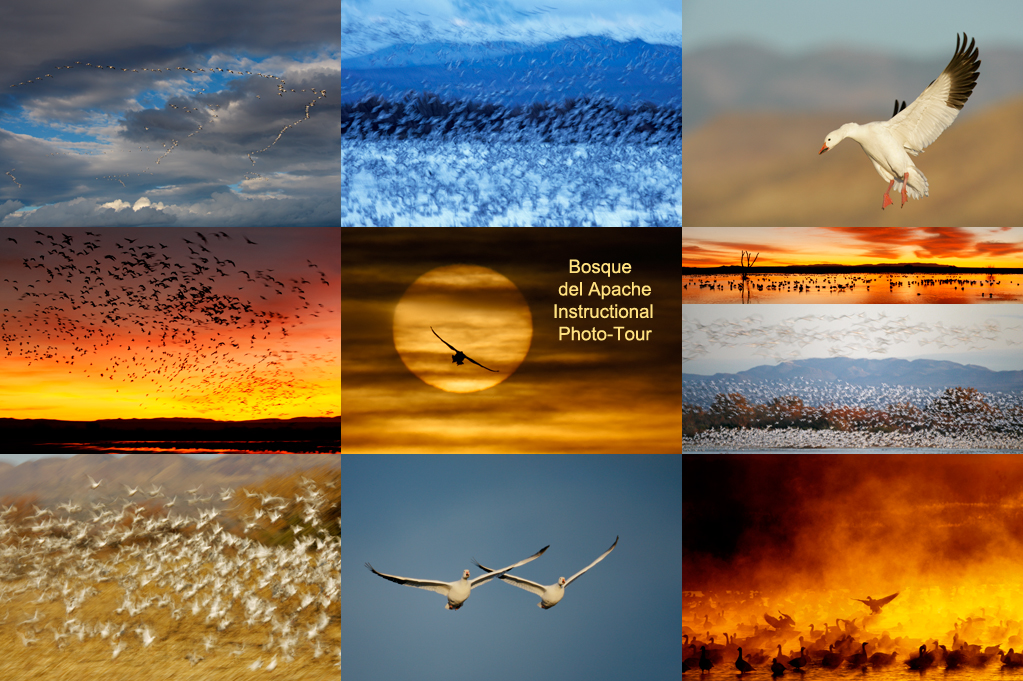
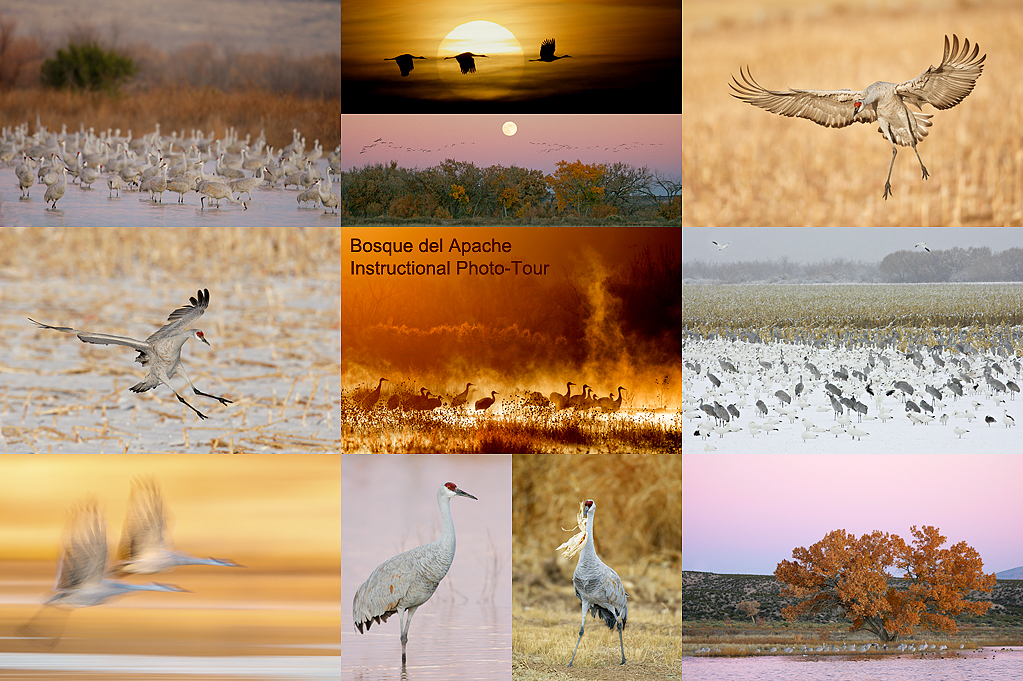
For a greater appreciation of the composite image, click on the photo. Click on the enlarged version to close it.

Bosque Thanksgiving Buffet Invite

For the past ten years or so I have hosted a Thanksgiving Day midday meal, in part to honor the memory of my late-wife, Elaine Belsky Morris, and in part because I love meeting others who love Bosque as I do. At first it was held at the wonderful and relatively elegant Val Verde Steak House in Socorro, now defunct. Then it was held at the lovely and historic Luna Mansion. Luna Mansion closed a few years ago and recently re-opened but will no longer serves Thanksgiving Day. In 2009 we had fun and a fine meal at the Stage Door Grill but that wonderful little joint recently bit the dust also. Socorro is a tough place for businesses to survive. In 2010 we went a bit upscale and dined in the New Mexico Ballroom at the Hilton Albuquerque hotel. There was tons of food and it was all delicious.

The Hilton is now a Crowne Plaza and the good news is that they are having the buffet again this year. I will be picking up the tab for the IPT group, but as always, all visiting birders and photographers are invited to join us. If you would like to take part in the fun and camaraderie this year please send a check for $40.00 per person made out to Β“”Arthur Morris”Β” to cover the cost of the buffet that will include all the traditional items plus lots more as well as tax and tip. Drinks are on you. Please mark “Β“Thanksgiving Buffet” on your check and mail it to; BIRDS AS ART, PO Box 4041, Indian Lake Estates, FL 33855. Be sure to include your e-mail address on your check and in a short note. Sorry, no PayPals or credit cards. I do hope that you can join us.

I have group reservations for Thanksgiving Day (of course). Those joining us will need to be at the hotel at 11:30 am sharp. It is located at 1901 University Blvd NE, Albuquerque, NM 87102, about an hour up I-25 from the Super 8 Motel in Socorro where I have stayed happily with my groups for well more than a decade. I do hope that you can join us.

For a greater appreciation of the composite image, click on the photo. Click on the enlarged version to close it.

Bosque IPT Late Registration Discount Offer

With two recent cancellations, there is now a single spot available on the 2011 Bosque IPT. If you would like to join us, a $300 discount will be applied to your balance. Here are the basics:

BOSQUE del APACHE 2011 IPT: β€œThe Complete Bosque Experience.” NOV 19-25, 2011.

Slide program on the evening of Friday, NOV 18. 7-FULL DAYS: $3299. (Non-refundable deposit: $500; see details below.) Limit: 10/Openings: 1. Co-leaders: Robert O’Toole & Jim Heupel. Geese, cranes, ducks, sunrises, sunsets, and blast-offs. Live, eat, and breathe photography with one of (if not the) world’s premier photographic educators at one of his very favorite locations on the planet. Plus great co-leaders and top-notch Photoshop instruction. Please see terms and deposit info below.

This will make 17 consecutive Novembers at Bosque for me. Nobody knows the place better than I do. Join us to learn to think like a pro, to recognize situations and to anticipate them based on the weather, especially the light and the wind direction. Every time we make a move we will let you know why. When you head home applying what you learned will prove to be invaluable.

With my ever-shrinking teaching schedule and all the specialty trips sold out, this trip may well represent a rare opportunity to learn from the best so do not wait too long before sending your deposit. Clemens van der Werf who was on last year’s Bosque trip is already registered for this year’s. If you missed the Photographer Experience Quiz and the Mystery Photographer & Experience Level Revealed! posts on the blog, you will surely want to check them out to see what Clemens accomplished in less than a single year of bird photography. And how!

The Bosque Site Guide

If you cannot make the IPT for whatever reason but are heading to Bosque this year it would be foolish to make the trip without our Bosque Site Guide whether this will be your first trip or your tenth. Everything that I’ve learn over the past sixteen years is revealed in detail: where to be on what wing and what weather and when to be there. Exactly what to do each morning depending on the wind direction and cloud cover (if any). I’ve seen leaders keep their groups on the Flight Deck for two to three hours wasting their time while we have moved six times during the same time span with fabulous results. In the Site Guide we teach you where to be when. And why.

Learn more and order your copy by scrolling down here.

Shopper’s Guide

Thanks a stack to all who have used the Shopper’s Guide links to purchase their gear as a thank you for all the free information that we bring you on the Blog and in the Bulletins. Before you purchase anything be sure to check out the advice in our Shopper’s Guide.

Support both the Bulletins and the Blog by making all your B & H purchases here.

Remember: you can earn free contest entries with your B & H purchases! Eleven great categories, 34 winning and honored images, and prize pools valued in excess of $20,000. Click here for details.

September 14th, 2011

For Your Critique: Image #7

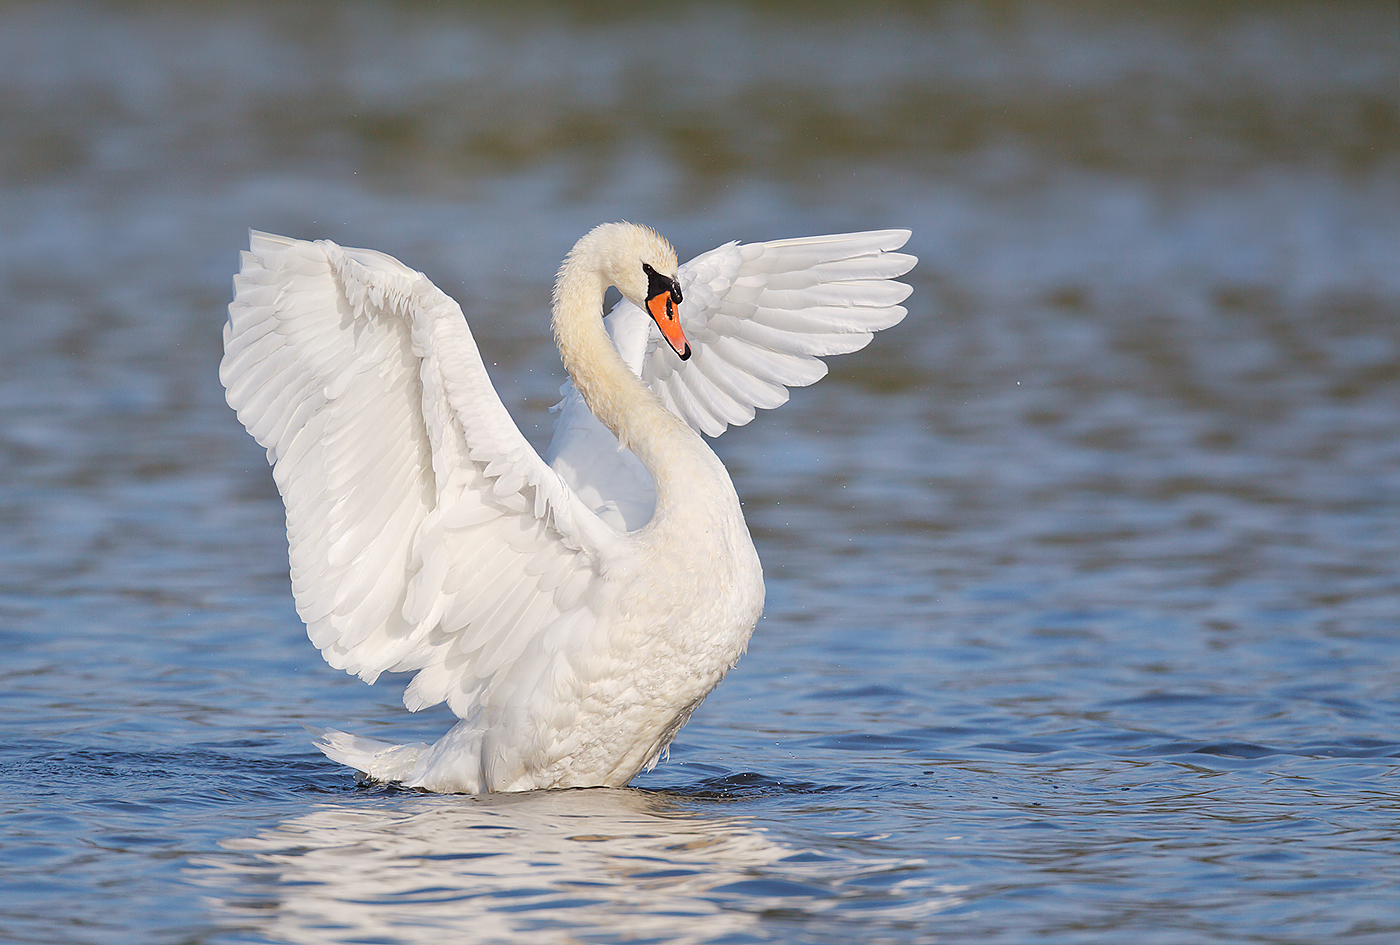
This image of a Mute Swan flapping after a bath was created at the East Pond, Jamaica Bay Wildlife Refuge, Queens, NY with the tripod-mounted Canon 800mm f/5.6L IS lens and the EOS-1D Mark IV. ISO 400. Evaluative metering +2/3 stop: 1/2000 sec. at f/6.3.

Both Canada Goose and Mute Swan are often ignored as potential photographic subjects. Though I am not a fan of introduced species like Mute Swan, I do not hesitate to both photograph them and use them as teaching aids. When you see either species dipping their breasts in the water, get ready to create some dramatic images as they will almost always rise up out of the water and flap for all they are worth. The same goes for most bird families especially shorebirds and ducks.

For a greater appreciation of the image above, click on the photo to view a larger version. Click on the enlarged version to close it.

For Your Critique: Image #7

The image above is presented for your critique; feel free to praise it or tear it to shreds. All suggestions are welcome. Would you keep it or delete it? Let us know why either way, what you like or what you hate. What would you have done differently?

Over the course of the next two months or so, I will present thirteen additional images in this series for a total of twenty in all. The last will be followed by several revelations including two major ones.

Shopper’s Guide

Below is a list of the gear used to create the image in today’s blog post. Thanks a stack to all who have used the Shopper’s Guide links to purchase their gear as a thank you for all the free information that we bring you on the Blog and in the Bulletins. Before you purchase anything be sure to check out the advice in our Shopper’s Guide.

Support both the Bulletins and the Blog by making all your B & H purchases here.

Remember: you can earn free contest entries with your B & H purchases. Eleven great categories, 34 winning and honored images, and prize pools valued in excess of $20,000. Click here for details.

Canon 800mm f/5.L IS lens. Right now this is my all time favorite super-telephoto lens.
Canon EOS-1D Mark IV professional digital camera body. My two Mark IVs are my workhorse digital camera bodies.

And from the BAA On-line Store:

LensCoats. I have a LensCoat on each of my big lenses to protect them from nicks and thus increase their re-sales value. All my big lens LensCoat stuff is in Hardwood Snow pattern.
LegCoat Tripod Leg Covers. I have four tripods active and each has a Hardwood Snow LegCoat on it to help prevent further damage to my tender shoulders πŸ™‚
Gitzo GT3530LS Tripod. This one will last you a lifetime.
Mongoose M3.6 Tripod Head. Right now this is the best tripod head around for use with lenses that weigh less than 9 pounds. For heavier lenses, check out the Wimberley V2 head.
CR-80 Replacement Foot for Canon 800. When using the 800 on a Mongoose as I do, replacing the lens foot with this accessory lets the lens sit like a dog whether pointed up or down and prevents wind-blown spinning of your lens on breezy days by centering the lens directly over the tripod.
Double Bubble Level. You will find one in my camera’s hot shoe whenever I am not using flash.
Be sure to check out our camera body User’s Guides here.
The Lens Align Mark II. I use the Lens Align Mark II pretty much religiously to micro-adjust all of my gear an average of once a month and always before a major trip. Enjoy our free comprehensive tutorial here.
Canon EOS-1D Mark IV User’s Guide. Learn to use your Mark IV the way that I use mine.
September 13th, 2011

Rear Focus Tutorial