|
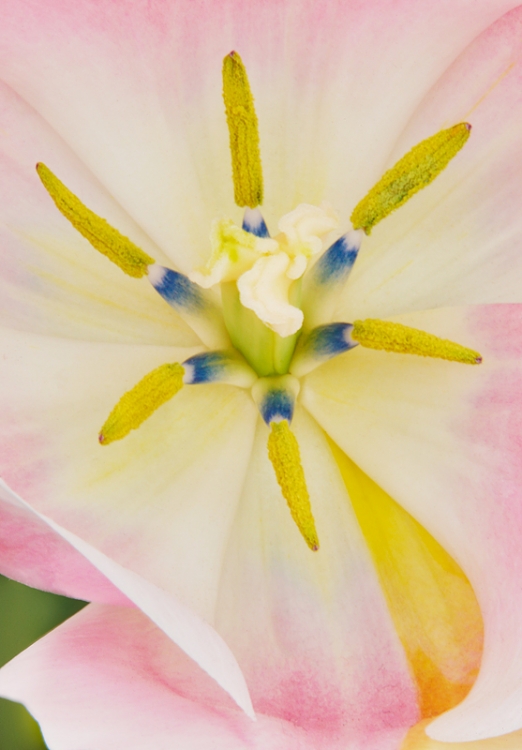
This Art Vivid HDR image was created at the Willem-Alexander Pavilion at Keukenhof, Lisse, Holland on the recently concluded Tulip IPT with the tripod-mounted Canon Telephoto EF 180mm f/3.5L macro lens, Canon 1.4x EF tele-extender III, and the Canon EOS 5D Mark III Digital camera body. ISO 400. For the base exposure I went with Evaluative metering +1 1/3 stops: 1/2 sec. at f/45 in Av mode. Manual focus on the distal end of the pistil (which I just learned is actually called the stigma, the part of the pistil that receives the pollen during fertilization). Click on the image to enjoy a larger size. |
Who’d a Thunk It?
I was captivated by the blue at the base of the stamens on this Tulip “Tropical Lady.” First I created a series of images at various apertures as described in Tulip/Flower Lesson II in BAA Bulletin #438 here. Note: Tulip/Flower Lesson II is reprinted below for your convenience; you will need to click on the Bulletin link and scroll down to read Tulip/Flower Lesson I.
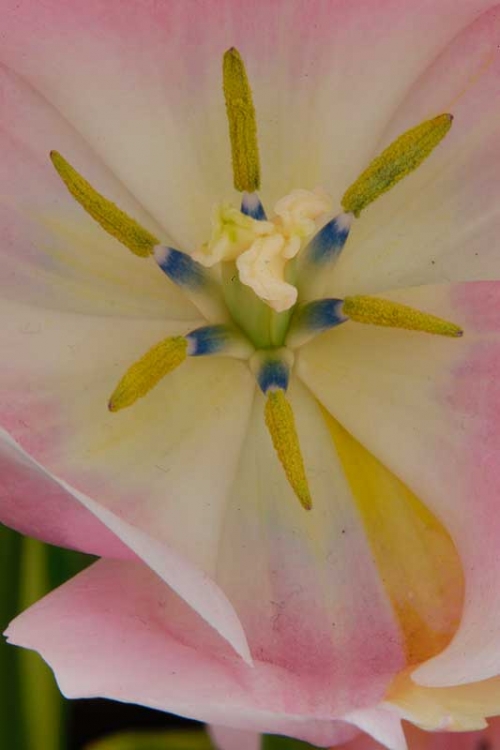
Next, for reasons unknown to me, I decided to create some Art Vivid in-camera HDRs of the same motif. The late/great German nature photographer Fritz Pölking used the word motif as a synonym for photograph or image. When I saw the 61mb 5D Mark III JPEGs on my laptop I was totally amazed at how much better they looked than the straight images I have made. The out of camera JPEG appears immediately below.
|
This is the original Art Vivid HDR JPEG as it came out of the camera. |
What a Mess!
As you can see the image that came out of the camera needed lots of work. As is typical of Art Vivid HDRs, this one was definitely under-exposed. In retrospect a base exposure at +2 1/3 stops or even more would have yielded a better exposed JPEG. In addition, the flower itself was a mess with many specks of dirt and many fine hairs of unknown origin; the latter did not come from the flower. And at f/45, sensor dust ruled the roost. The extensive clean-up took about 15 minutes. I used the Spot Healing Brush (my Keyboard shortcut J), the Patch Tool (my Keyboard shortcut M), and Content Aware Fill (Shift f/5) after making my selection with the Patch Tool. Two Curves Adjustment Layers were used to lighten the image and a 15% layer of NIK Color Efex Pro’s Tonal Contrast completed the image optimization (but for the work on the lower left corner of the image).
|
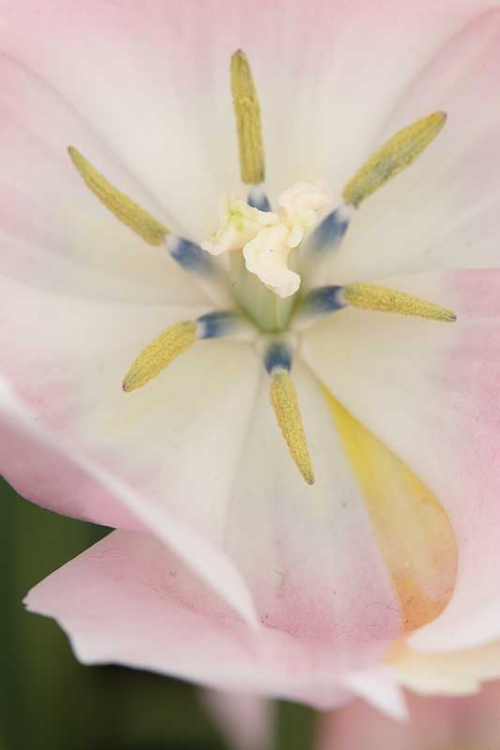
This is a straight image of the same flower center that I created at f/5. |
Improving the Lower Left Corner
When I shared the original HDR (created at f/45) with Denise Ippolito she was impressed with the richness of the colors but suggested that the small aperture had darkened and brought up the detail in the lower left corner of the image too much, so much so that the lower left corner became a distraction. At her suggestion I grabbed the lower left corner from the f/5 image, brought it onto the HDR image, transformed it so that it matched perfectly, and that added a layer mask so that I could fine-tune the selection. Last was a small crop from the left and the bottom to tighten things up. Voila!
Digital Basics
All of the steps in the image optimization process mentioned above (and tons more) are described in detail in our in Digital Basics File, an instructional PDF that is sent via e-mail. It includes my complete digital workflow, dozens of great Photoshop tips, all of my time-saving Keyboard Shortcuts, and Quick Masking, Layer Masking, and NIK Color Efex Pro basics.
EOS-5D Mark III
For more on this great camera check out “It Ain’t Just Birds; Why I Love My EOS-5D Mark III.” To learn how I set up my 5D Mark III for in-camera HDR check out the 5D Mark III User’s Guide. Learn more about this great camera in “A Dozen Fun and Funky Reasons.”
Tulip/Flower Lesson II
Once I see an image, choose my perspective, carefully frame the image, fine-tune the exposure, and focus, I begin making images. For my style of flower photography I use the 2-second timer and Live View (for mirror lock and the live histogram) and work in Av mode. Once everything is perfect I make 2 images wide open, 2 at f/8, and 2 at f/13. If I am photographing flower centers I will usually start at f/13, and then make 2 at f/22 and 2 at f/32. It is amazing that when you have a choice of apertures (and thereby depth of field of course), how a given depth of field clearly stands out as best. See the images above and below for examples.
BIRDS AS ART Bulletin #438
BIRDS AS ART Bulletin #438 is online now and can be viewed here. Four more really good tulip images are featured in this Bulletin along with a killer Least Tern chick image.
- Holland Tulip IPT Report
- Tulip/Flower Lesson I
- Tulip/Flower Lesson II
- Affiliate Links
- Canon EOS-5D Mark III User’s Guide
- Your Favorite
- Used Camera Gear
- IPT Highlights
- IPT Info
Next Year In Holland
Despite a 100-year record cold spring with very few tulip fields in bloom this trip has been a spectacular success. The colors and variety of tulips at Keukenhof simply stun the mind and the senses. Denise and I are planning our Holland trip for next year: the Keukenhof Creative Tulip Photography IPT with a Touch of Holland. If you are a Happy Camper who is interested in joining us, please shoot me an e-mail.
Typos
On all blog posts, feel free to e-mail or leave a comment regarding any typos, wrong words, misspellings, omissions, or grammatical errors. Just be right. 🙂
Support the BAA Blog. Support the BAA Bulletins: Shop B&H here!
We want and need to keep providing you with the latest free information, photography and Photoshop lessons, and all manner of related information. Show your appreciation by making your purchases immediately after clicking on any of our B&H or Amazon Affiliate links in this blog post. Remember, B&H ain’t just photography!


And from the BAA On-line Store:
LensCoats. I have a LensCoat on each of my big lenses to protect them from nicks and thus increase their re-sales value. All my big lens LensCoat stuff is in Hardwood Snow pattern.
LegCoat Tripod Leg Covers. I have four tripods active and each has a Hardwood Snow LegCoat on it to help prevent further damage to my tender shoulders 🙂 And you will love them in mega-cold weather….
Gitzo GT3532 LS CF Tripod. This one replaces the GT3530LS Tripod and will last you a lifetime. Learn more about this great tripod here.
Mongoose M3.6 Tripod Head. Right now this is the best tripod head around for use with lenses that weigh less than 9 pounds. For heavier lenses, check out the Wimberley V2 head.
Double Bubble Level. You will find one in my camera’s hot shoe whenever I am not using flash.
The Lens Align Mark II. I use the Lens Align Mark II pretty much religiously to micro-adjust all of my gear an average of once a month and always before a major trip. Enjoy our free comprehensive tutorial here.
BreezeBrowser. I do not see how any digital photographer can exist without this program.
Delkin Flash Cards. I use and depend on Delkin compact Flash Cards and card readers most every day. Learn more about their great 700X and 1000X cards here or about my favorite Delkin card here.


Artie
I have the Digital Basics PDF and I am wondering if I have all the updates? I have up to page 89. thanks and I really enjoy all you give to us.
HI Joan, You are most welcome. Please shoot Jim an e-mail and he will make sure that you have the latest update.
I too have been using my 5D3 for HDR. I participated in an Adobe education program and learned it is better to use the different exposures in the Photoshop HDR program rather than the in-camera result. The trick is to run the Photoshop program in 32-bit and then save it as a 32 bit TIFF w/o further editing in the HDR window. You can then open that 32 bit TIFF in ACR and use that powerful tool to edit the HDR. Just make sure you set the Preference to edit TIFFs in ACR. Using a 32 bit image gives you a ton of info to work with.
You are surely correct, but the main reason that I love the in-camera HDR feature so much is that I am lazy. I have a zillion HDR series that will never be processed. The immediacy of the process and the rich colors that I get from Art Vivid thrill me. I have even gotten Denise Ippolito to like Art Vivid on occasion.