Guest Blog Post
Check out my guest blog post, “Which telephoto lenses do I bring? Traveling with big glass and more” on the Canon Digital Learning Center here.
|
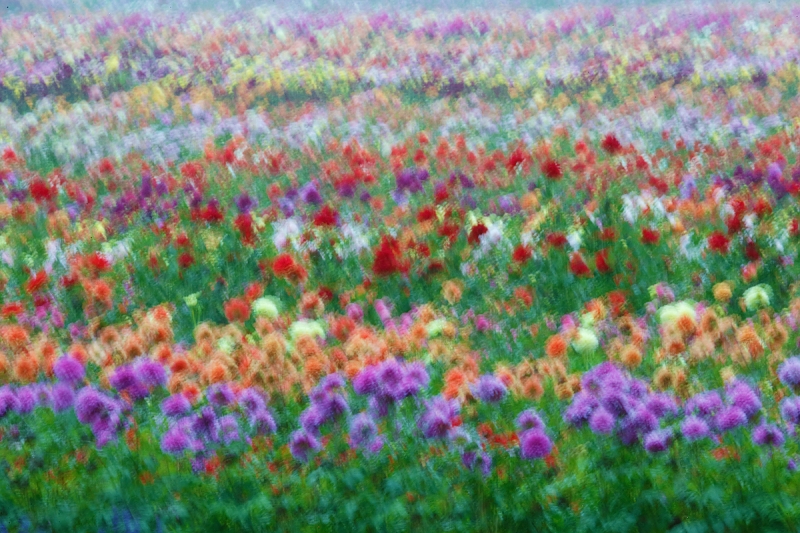
This image was created with the tripod-mounted Canon EF 200-400mm f/4L IS USM Lens with Internal 1.4x Extender (with the internal TC in place at 467mm) and the Canon EOS 5D Mark III. ISO 400. Evaluative metering +1/3 stop as framed in Manual Mode. Central sensor/AI Servo/Rear Focus on the purple flowers and re-compose. Click here if you missed the Rear Focus Tutorial. Click on the image to see a larger version. |
Windblown
This image was created at 6:48am on a dark, cloudy morning on the recently-concluded (that being yesterday) Swan Island Dahlia Farm Creative Adventure/BIRDS AS ART IPT. I worked from the office porch to get a bit of elevation. I used Live View for the live RGB histogram that reflects the RAW file. Note: the histogram that you can see on the rear LCD after you create an image reflects the embedded JPEG and is thus more contrasty. Let us know in what way the differences in the two histograms would influence flower photography. Please be specific.
There was a nice breeze when I made the image. Not a strong wind, just a nice breeze.
Exposure Data?
What was the shutter speed? What was the aperture.
Whaddya Think?
Do you like the dahila blur image above? Voice your opinion. Either way, be sure to let us know why or why not. What is your favorite part of the image? Is there anything that you do not like about it? Be sure to view the larger image.
Canon 200-400mm with Internal 1.4X Extender
The reach and versatility of the 200-400 allowed me to frame this image precisely as I wanted to. I used the 200-400 for about 40% of my work at the Dahlia Farm. Lots more images and learning coming soon.
|
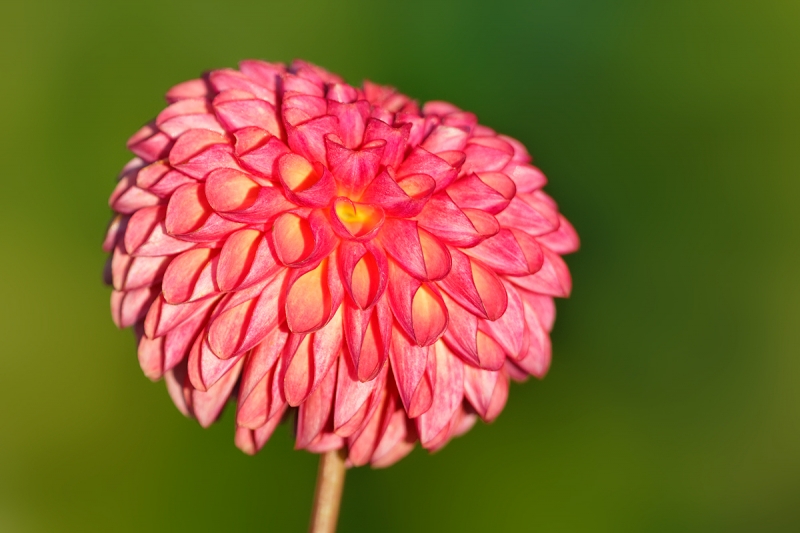
The image above was created with the tripod-mounted Canon EF 200-400mm f/4L IS USM Lens with Internal 1.4x Extender (with the internal TC in place), the Canon 1.4x EF Extender III (Teleconverter) (at 784mm), and the Canon EOS 5D Mark III. ISO 400. Evaluative metering +2/3 stop: 1/320 sec. at f/9. Central sensor/AI Servo-Expand (by neccesity)/Rear Focus just to our left of the flower center and re-compose. Click here if you missed the Rear Focus Tutorial. Click on the image to see a larger version. |
|
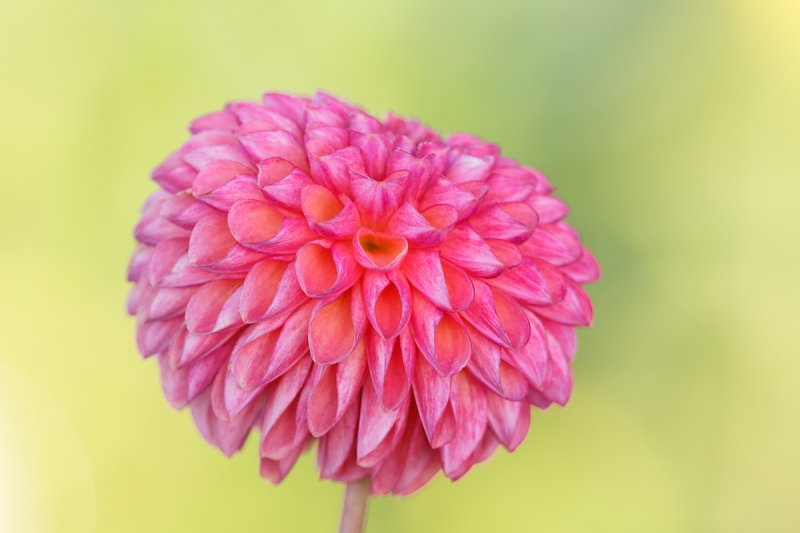
This image was created with the tripod-mounted Canon EF 200-400mm f/4L IS USM Lens with Internal 1.4x Extender (with the internal TC in place), the Canon 1.4x EF Extender III (Teleconverter) (at 784mm), and the and the Canon EOS 5D Mark III Digital Camera (Body Only). ISO 400. Evaluative metering +2 1/3 stops: 1/40 sec. at f/9. Central sensor/AI Servo-Expand (by neccesity)/Rear Focus just to our left of the flower center and re-compose. Click here if you missed the Rear Focus Tutorial. Click on the image to see a larger version. |
Poor Teaching Technique By Me
In the September 12, 2013 blog post, “The Color of Light” here, I posted, referring to the two images immediately above:
The Two Exposures
For the image made in early morning sunshine, I added 2/3 stop of light to the exposure. This yielded a perfect histogram. For the second image, made in the shade of the large diffuser, I needed to add 2 1/3 stops of light to achieve a perfect histogram.
Why did I add 2/3 stops of light to the image made in early morning light?
Why did I need to add 2 1/3 stops of light when I shaded the flower?
How many stops different were the resulting exposures?
Several folks easily calculated the 3-stop difference in exposure (1/40, 1/80. 1/160, 1/320). As far as the two exposure compensations were concerned, several folks gave the stock answers: to get a good histogram. They did their best.
Shame on me for not asking the questions that I wanted to ask, ones that might have elicited the answers I was looking for. So here is a second chance:
In the sunlit image, how did I know before I pressed the shutter button to add 2/3 stop of light to the exposure?
Why did I need to add 2 1/3 stops of light when I shaded the flower?
|
Card design by & all images courtesy of and copyright 2013: Denise Ippolito. |
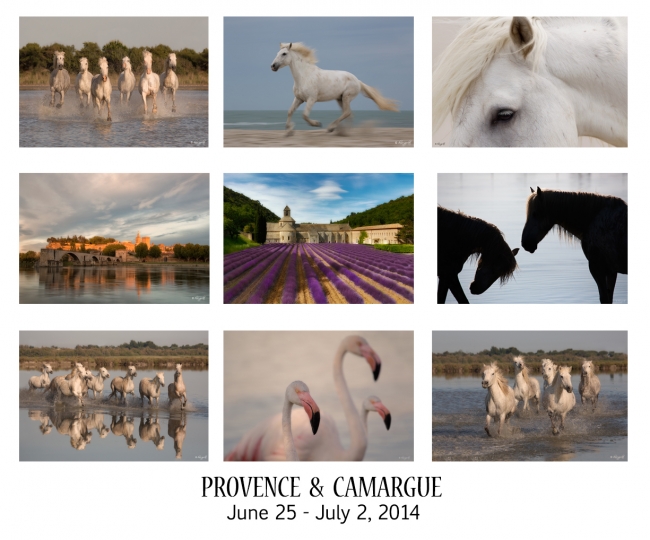
Camargue & Provence France IPT: June 25- July 2nd, 2014/6 1/2 days of photography: $6995 (Limit: 10 photographers)
Co-leaders: Arthur Morris & Denise Ippolito. Though it is expected to fill quickly, this workshop needs a minimum of 6 to run.
The centerpiece of this workshop will be four sessions photographing the beautiful Camargue horses mostly running in the water or on the beach. There is a wonderful natural bird park in Camargue where we will photograph flamingos and other birds for four evenings in the usually gorgeous light. The flamingos fly in to feed each evening and we should have multiple opportunities to capture images of them in flight.
After our first four magical days we will visit several different and interesting locations sites during the trip and will spend part of a day at the market in Arles. An evening shoot in Avignon to photograph the bridge and the magical blue sky should be exciting! In addition, the lavender fields should be at peak bloom during our stay with fields of poppies everywhere as we make our way to the lavender fields. This is a wonderful opportunity to combine travel photography with stallions, birds, flowers, and lots more.
Click here for complete details and schedule.
Photographic Society of Chattanooga Seminar
Scroll down here for details on the Saturday seminar that Denise Ippolito and yours truly are doing in Chattanooga on October 12, 2013 and the follow-up Old Car City In-the-Field Workshop. Blog folks who sign up for both are invited to join us at a secret Urbex location in Atlanta on Friday morning October 11. Feel free to e-mail me for details after you are registered for both.
|
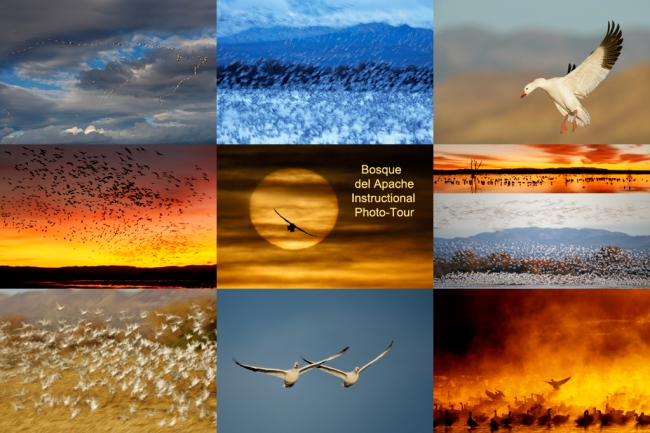
Snow Goose composite, Bosque del Apache NWR, San Antonio, NM. Click on the image for a larger version. |
Bosque del Apache 2013 IPT: “The Complete Bosque Experience.” NOV 26-DEC 2, 2013. 7-FULL DAYS: $3399. Co-leader: Denise Ippolito. Introductory Slide program: 6:30 pm on 11/25. Limit: 12.
Tens of thousand of Snow Geese, 10,000 Sandhill Cranes, ducks including point-blank American Wigeon and Wood Duck, amazing sunrises, sunsets, and blast-offs. Live, eat, and breathe photography with one of (if not the) world’s premier photographic educators at one of his very favorite locations on the planet. Top-notch Photoshop instruction. This will make 19 consecutive Novembers at Bosque for me. Nobody knows the place better than I do. Join us to learn to think like a pro, to recognize situations and to anticipate them based on the weather, especially the sky conditions, the light, and the wind direction. Every time we make a move we will let you know why. When you head home applying what you learned will prove to be invaluable. Includes all lunches and the Thanksgiving Buffet at the Crowne Plaza in Albuquerque. I hope that you can join me for what will be an unparalleled learning experience.
A $500 non-refundable deposit is required to hold your slot for this IPT. Your balance is due 4 months before the date of the IPT and is also non-refundable. If the trip fills, we will be glad to apply a credit applicable to a future IPT for the full amount less a $100 processing fee. If we do not receive your check for the balance on or before the due date we will try to fill your spot from the waiting list. If your spot is filled, you will lose your deposit. If not, you can secure your spot by paying your balance.
Please print, complete, and sign the form that is linked to here and shoot it to us along with your deposit check (made out to “Arthur Morris.”) You can also leave your deposit with a credit card by calling the office at 863-692-0906. If you register by phone, please print, complete and sign the form as noted above and either mail it to us or e-mail the scan. If you have any questions, please feel free to contact me via e-mail.
|
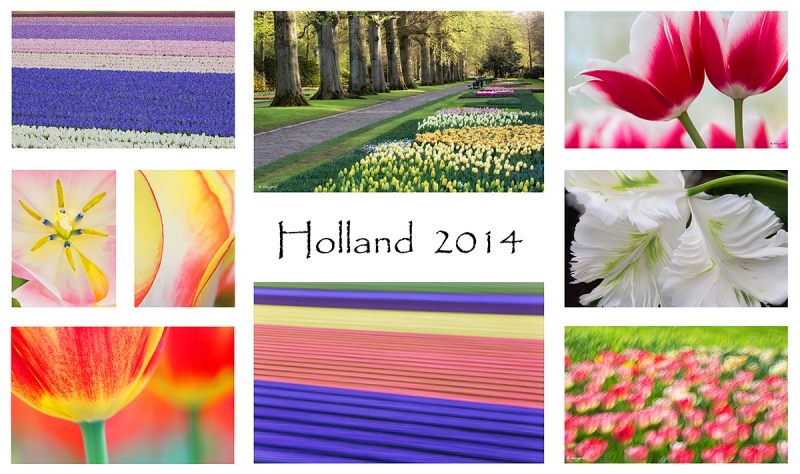
Images copyright 2012: Denise Ippoltio & Arthur Morris. Card design by Denise Ippolito. Click on the image to enjoy a spectacular larger version. |
Holland 2014 7 1/2-Day/8-Night: A Creative Adventure/BIRDS AS ART/Tulips & A Touch of Holland IPT. April 17-April 24, 2014 :$4995 Limit: 12 photographers/Openings 9
This trip needs 8 registrants to run so please do not purchase your plane tickets until you hear from us; right now we need 5 more folks.
Join Denise Ippolito, Flower Queen and the author of “Bloomin’ Ideas,” and Arthur Morris, Canon Explorer of Light Emeritus and one of the planet’s premier photographic educators for a great trip to Holland in mid-April 2014. Day 1 of the IPT will be April 17, 2014. We will have a short afternoon get-together and then our first photographic session at the justly-famed Keukenhof. Most days we will return to the hotel for lunch, image sharing and a break. On Day 8, April 24, we will enjoy both morning and afternoon photography sessions.
The primary subjects will be tulips and orchids at Keukenhof and the spectacularly amazing tulip, hyacinth, and daffodil bulb fields around Lisse. In addition we will spend one full day in Amsterdam. There will be optional visits the Van Gogh Museum in the morning and the Anne Frank House in the afternoon; there will be plenty of time for street photography as well. And some great food. On another day we will have a wonderful early dinner at Kinderdijk and then head out with our gear to photograph the windmills and possibly some birds for those who bring their longs lenses. We will spend an afternoon in the lovely Dutch town of Edam where we will do some street photography and enjoy a superb dinner. All lodging, ground transportation, entry fees, and meals (from dinner on Day 1 through dinner on Day 8) are included.
For those who will be bringing a big lens we will likely have an optional bird photography afternoon or two. If we get lucky, the big attraction should be gorgeous Purple Herons in flight at a breeding marsh. We would be photographing them from the roadside. And we might be able to find a few Great-crested Grebes at a location near Keukenhof.
Click here for complete details and some previously unpublished images. And/or click here and see item one for lots more tulip photos and complete trip details.
Click here for complete details and some previously unpublished images. And/or click here and see item one for lots more tulip photos and complete trip details.
|
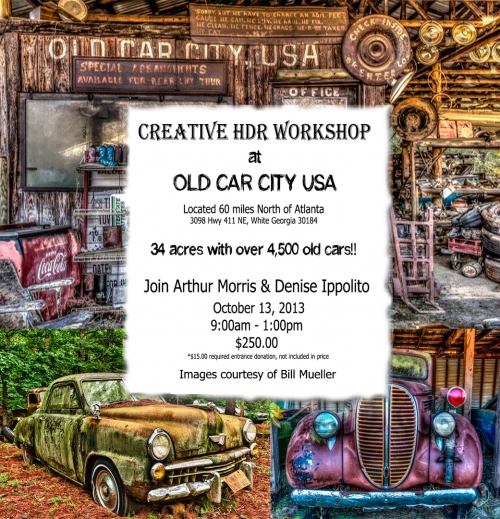
Images courtesy of and copyright 2012: Bill Mueller. Card design by Denise Ippolito. |
Old Car City Creative Photography In-the-Field HDR Workshop: Sunday, October 13, 2013/ 9am till 1pm.
White, Georgia: $250 plus a $15 entrance fee donation (cash only on the day of the event) that will go to charity. Limit: 16 photographers.
On October 13, 2013, Arthur Morris/BIRDS AS ART and Denise Ippolito/A Creative Adventure will be conducting an In-the-Field HDR Workshop at Old Car City in White, Georgia. Old Car City is about an hour north of Atlanta, GA and an hour south of Chattanooga, TN where they will, as noted above, be doing a full day seminar for the Photographic Society of Chattanooga on Saturday, October 12th. Click here for complete details.
Typos
On all blog posts, feel free to e-mail or leave a comment regarding any typos, wrong words, misspellings, omissions, or grammatical errors. Just be right. 🙂
Support the BAA Blog. Support the BAA Bulletins: Shop B&H here!
We want and need to keep providing you with the latest free information, photography and Photoshop lessons, and all manner of related information. Show your appreciation by making your purchases immediately after clicking on any of our B&H or Amazon Affiliate links in this blog post. Remember, B&H ain’t just photography!


Support the Blog


Amazon
Everyone buys something from Amazon, be it a big lens or deodorant. Support the blog by starting your search by starting your search by clicking on the logo-link below. No purchase is too small to be appreciated; they all add up. Why make it a habit? Because I make it a habit of bringing you new images and information on an almost daily basis.
And from the BAA On-line Store:
LensCoats. I have a LensCoat on each of my big lenses to protect them from nicks and thus increase their re-sales value. All my big lens LensCoat stuff is in Hardwood Snow pattern.
LegCoat Tripod Leg Covers. I have four tripods active and each has a Hardwood Snow LegCoat on it to help prevent further damage to my tender shoulders 🙂 And you will love them in mega-cold weather….
Gitzo GT3532 LS CF Tripod. This one replaces the GT3530LS Tripod and will last you a lifetime. Learn more about this great tripod here.
Mongoose M3.6 Tripod Head. Right now this is the best tripod head around for use with lenses that weigh less than 9 pounds. For heavier lenses, check out the Wimberley V2 head.
Double Bubble Level. You will find one in my camera’s hot shoe whenever I am not using flash.
The Lens Align Mark II. I use the Lens Align Mark II pretty much religiously to micro-adjust all of my gear an average of once a month and always before a major trip. Enjoy our free comprehensive tutorial here.
BreezeBrowser. I do not see how any digital photographer can exist without this program.
Delkin Flash Cards. I use and depend on Delkin compact Flash Cards and card readers most every day. Learn more about their great 700X and 1000X cards here or about my favorite Delkin card here.



Why rely on the RAW RGB histogram rather than that for the JPEG? Because you are using the RGB histogram to make sure that no color channel is blown (usually yellow or red). Since the jpeg is more contrasty than the actual data available in the corresponding RAW file, the jpeg histogram will indicate a clipped channel before the RAW file actually has one. This could result in exposure decisions on the part of the photographer that are not as far “to the right” as intended and, therefore, less detail/more noise in shadow areas. That is, a cleaner image can be extracted from a RAW file exposed to the right based on the RAW histogram than one based on the jpeg histogram provided competent use of the conversion software. Thanks for the ongoing learning experience that is Birds As Art/Birds As Art Blog/BPN.
Well done Mitch. Over the course of dealing with the REDs during the workshop we did learn several important things. First, when converting the same image in DPP and ACR the TIFF converted with DPP showed no problem with the REDs while the TIFF converted in ACR showed blown REDs especially in the YELLOWs….
Additionaly, unless you push the RED channel in the live RGB histogram to or over the edge the resulting image was overall too dark and muddy.
I seem to remember that with the 200-400 with 1.4 extender, that compensation for the
extender does not occur automatically, but must be dialed in. If this is so, then maybe
this explains why you knew beforehand to dial in extra light. Only 1/3stop and not a full
stop, so possibly you actually intended to effectively reduce the light by 1/3 stop.
Also, if so, 2 1/3 stops with the second image would effectively add only 1 1/3 stops,
explained by the brighter overall lighting.
That is not correct. With all Canon gear the loss of light due to the addition of TCs or extension tubes comes out in the wash, that is, the camera does read the loss of light. You simply compensate as you would without any of those accessories in place.
My guess…1/15 sec at f/18
I love the windblown image. The colors are so awesome and look like a painting. But when I enlarged it, I picked out what seems like a very, very tiny dark speck in the upper left hand corner, and maybe another one toward the right hand corner. Do you see that or do I have spot on my eyes 🙂
Doug
Good eyes and thanks! Dust spots, and lot more of them. They are a clue as to the aperture. I have re-worked the original. I forgot my own workflow and certainly should have known better.
In the first image the flower was fairly bright and took up a lot of the frame so you knew the meter would try to average it out to 18% gray leaving the flower too dark. To compensate for that you added 2/3 stop of light.
In the second photo now the flower has less light but your diffuser is only affecting the flower and not the background. As a result now the background has become brighter relative to the flower. This makes the meter over correct on exposure even more than the first. So you have to add even more light to get the flower to come out correctly.
Since the background was not affected by the diffuser it comes out much brighter in the second photo.
Good on the second image, not so good on the first image (but not bad either). In both instances, you did not factor in the early morning light. See the Thursday evening blog post that explains the concept of soft light affecting the camera’s meter. artie
Well, Did the meter read too much of the scene with flower and background, thus the JPEG compression issues with contrast and thus the need to adjust the aperture?
Shutter 1/8th
Aperture f8
Thank you.
Hello. the RAW file histogram provides more information than the JPEG compressed histogram. The JPEG histogram may influence the selection on shutter speed/aperture to balance the “more contrasty” reading.
Shutter speed 1/30 th second. aperture 5.6. Thank you.
Close on the JPEG but no cigar. SS and f/stop NG 🙂
Hello. The additional stops of light are added to use a faster shutter speed to help achieve a sharper focus. And/or to use a wider aperture to keep the depth of field shallow to highlight the flower and also a faster shutter speed to diminish any blurring. However the flower is sharp as can be. Thank you.
Nope.