Diving Osprey Addiction
If you live in Florida or are visiting, understand that conditions at Sebastian, after weeks and weeks of NW and west winds in the mornings, are finally looking excellent for tomorrow, Saturday 29 November, and for Sunday as well. Saturday morning is looking to be the better of the two as they are calling for mixed clouds and sun with 13mph east/northeast winds. Though this is pretty much perfect, there are never any guarantees when it comes to Ospreys diving for and catching fish in the inlet. If you would like to join me for an In-the-Field Session either day ($450.00) and learn a ton, please contact me via e-mail text me at 863-221-2372.
What’s Up?
I was quite proud of myself after the main meal at daughter Alissa’s home on Thanksgiving Day. I had small portions of all the usual fare, enjoyed everything tremendously, and did not go back for seconds. Then, I tried a piece of daughter Jennifer’s Cranberry-Cookie Butter Cheesecake made from scratch. With a bit of Trader Joe’s Ultra Chocolate Ice Cream. And a bit of Trader Joe’s Coffee Bean Blast Ice Cream, It was so good that I went for seconds. And then for thirds. Yikes!
Today is Black Friday, 28 November 2025. My 7:00am flight back to Orlando was delayed only slightly and was blessedly uneventful. After hanging out at Sebastian for two full months, I am, as noted immediately above, headed back there this weekend (leaving soon after I get home and get a nap) because they are finally predicting some wind from the right direction. With lots of it on Saturday. Whatever you opt to do, I hope that you too choose to have a wonderful and productive day.
If an item — a Delkin flash card or reader, a Levered-clamp FlexShooter Pro, or a Wimberley lens plate or low foot — for example, that is available from B&H and/or Bedfords, is also available in the BAA Online Store, it would be great, and greatly appreciated, if you would opt to purchase from us. We will match or beat any price. Please remember also to use my B&H affiliate links or to earn 3% cash back at Bedford by using the BIRDSASART discount code at checkout for your major gear purchases. Doing either often earns you free guides and/or discounts. And always earns my great appreciation.
Gear Questions and Advice
Too many folks attending BAA IPTs and dozens of photographers whom I see in the field and on BirdPhotographer’s.Net, are — out of ignorance — using the wrong gear, especially when it comes to tripods and more especially, tripod heads. And the same is true in spades when ordering new camera bodies or lenses. My advice will often save you some serious money and may help you avoid making a seriously bad choice. Please know that I am always glad to answer your gear questions via e-mail. If you are desperate, you can try me on my cell at 863-221-2372. Please leave a message and shoot me a text if I do not pick up.
B&H Simplified
To ensure that I get credit for your B&H purchases, you can always click here. The tracking is invisible but using my affiliate links is greatly appreciated. And, with B&H, you can use your PayBoo card. You must use the website to order. You cannot get your free guides if you make a phone order. Once you have an item in your cart, you must complete the order within two hours. Huge thanks!
B&H
Many folks have written recently stating that they purchased a Sony a1 from B&H and would like their free membership in the Sony 1 Info and Updates Group, a $150.00 value. But when I check my affiliate account, their orders have not been there. When I let them know that they get credit for B&H purchases only if they use one of the many B&H affiliate links on the blog or begin their searches with this link, they are always disappointed. If in doubt, please contact me via e-mail and request a BH link. I am always glad to help and to guide you to the right gear.
Bedfords Simplified
Click here to start your search. Choose standard shipping, and when you get to the payment page, enter BIRDSASART in the discount code box and hit apply. You will be upgraded to free second day air Fed-Ex and receive 3% cash back on your credit card once your stuff ships. Using either my affiliate links is greatly appreciated and will often earn you free guides or discounts. To receive a free guide or free entry into a Sony Set-up and Info Notes e-Mail group, you need to shoot me your receipt via e-mail. The B&H receipts need to include the order number.
Bedfords Amazing BAA Discount Policy
Folks who have fallen in love with Bedfords can always use the BIRDSASART coupon code at checkout to enjoy a post-purchase, 3% off-statement credit (excluding taxes and shipping charges) on orders paid with a credit card. The 3% credit will be refunded to the card you used for your purchase when your product ships. Be sure, also, to check the box for free shipping to enjoy free Second Day Air Fed-Ex. This offer does not apply to purchases of Classes, Gift Cards, or prior purchases.
You can visit the Bedfords website here, shoot Steve Elkins an e-mail, or text him on his cell phone at (479) 381-2592.
|
|
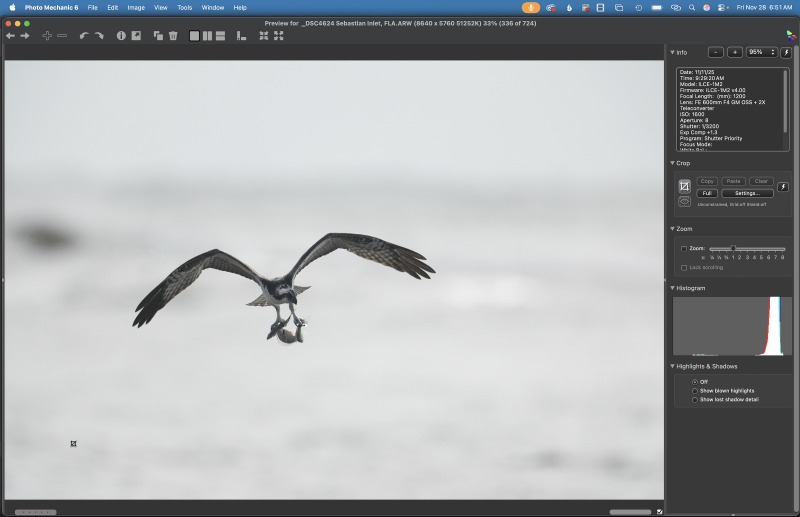
Image #1: The Photo Mechanic Screen Capture for the Osprey with three fish in its talons image
|
The Photo Mechanic Screen Capture
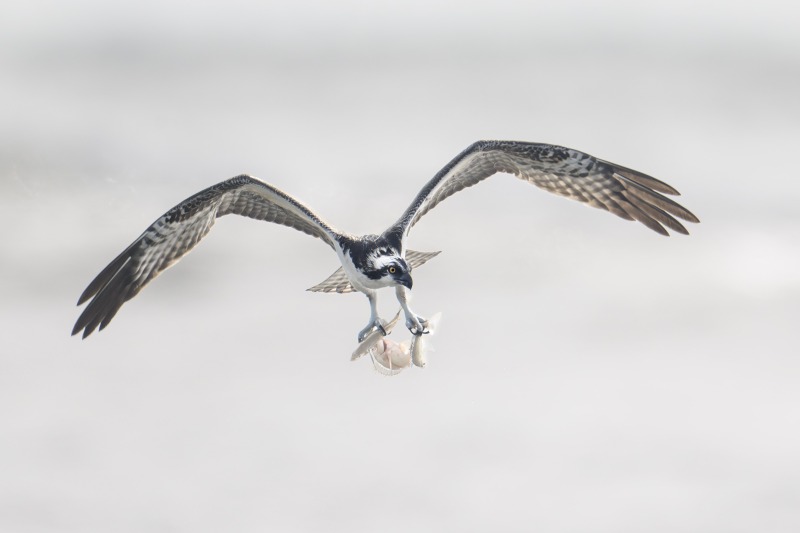
As a general rule for bird photography, you will do best with the wind behind you. If it is sunny and the wind is in your face, you need to think silhouettes early on and then rather strong backlight. If it is cloudy enough so that there are no shadows, you have a chance to create some softy backlit images that can be processed to reveal all of the detail and color on the birds. Note that despite a dead-solid perfect exposure that the subject in the raw file looks hopelessly dark. All, however, is not lost for those who learn to ue ACR masks either in Photoshop or Lightroom.
On November 11th the wind was blowing hard from the NW in the morning we were blessed with lots of clouds. The sun broke through only on rare occasion. The Ospreys were catching lots of fish in the Inlet, closer to the South Jetty than to the North Jetty. The successful birds took flight into the strong NW wind and as a result, many flew pretty much right at us. As I wanted to try to get the birds at a distance diving and lifting off, I went with the 2X TC on the 600mm f/4. The trick is to add lots of light to the exposure suggested by your camera. This can be done in Shutter Priority mode by dialing in positive EC or in Manual mode by paying attention to the analogue exposure scale in the viewfinder.
As always, I recommend studying the section on exposure theory in the original soft cover The Art of Bird Photography even for those who are using Sony gear with Zebra technology properly set up and understood. For Nikon, Canon, Olympus, and others, understanding exposure theory is even more of an absolute must.
Exposure Fine Point
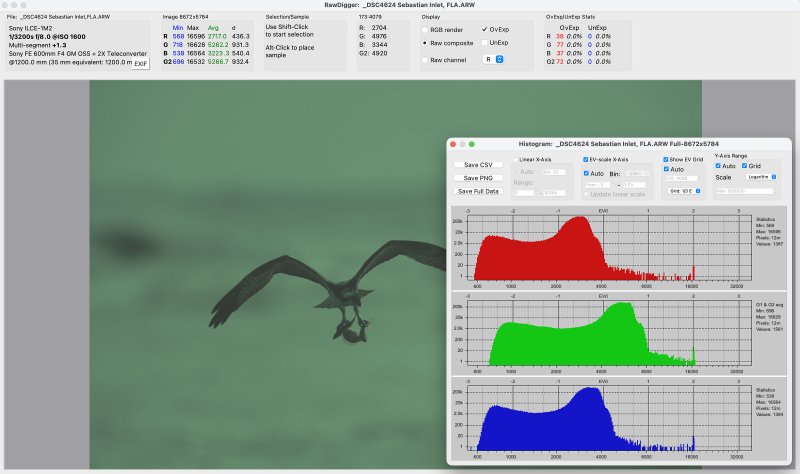
Regular readers know that on completely cloudy days I usually go with an EC of +2, +2.3, or even more. When Image #1 was created however, Zebras warned me that the sun was peeking through and lighting up small areas of the bird so I cut back to +1.3 stops. The Raw Digger item below (1C) reveals that the result was a dead-solid perfect exposure.
|
|
|
This image was created on 11 November 2025 by yours on a Sebastian Inlet Ospreys and More Extended IPT. Standing at full height on the North Jetty I used the Robus RC-5570 Vantage Series 3 Carbon Fiber Tripod/Levered-Clamp FlexShooter Pro-mounted Sony FE 600mm f/4 GM OSS lens with the Sony FE 2x Teleconverter and the Latest Greatest Sony Flagship Body, the a1 II Mirrorless Camera. The exposure was determined by Zebras with Exposure Compensation (EC) on the thumb wheel. Multi Metering +1.3 stops. AUTO ISO set ISO 1600: 1/3200 second at f/8 (wide open) in Shutter Priority mode. RawDigger showed that the exposure was dead-solid perfect. AWB at 9:29:20 am on a very cloudy morning. Wide/AF-C with Bird Eye/Face Detection enabled performed perfectly. Click on the image to enjoy the larger, inexplicably sharper high-res version. Image #1B: Osprey with three fish in its talons |
Seven ACR Masks!
During the raw conversion in Adobe Camera Raw I created seven masks that were responsible for bringing the bird in this somewhat backlit image to life. In Volume III of the Digital Basics IV Video Series I introduced and discussed a variety of ACR mask selection options including Subject, Background, Sky, Brush, and Linear Gradient. I the last two volumes I will cover Radial Grandient, Object (beyond amazing!), and both Color Range and Luminance Range.
|
|
|
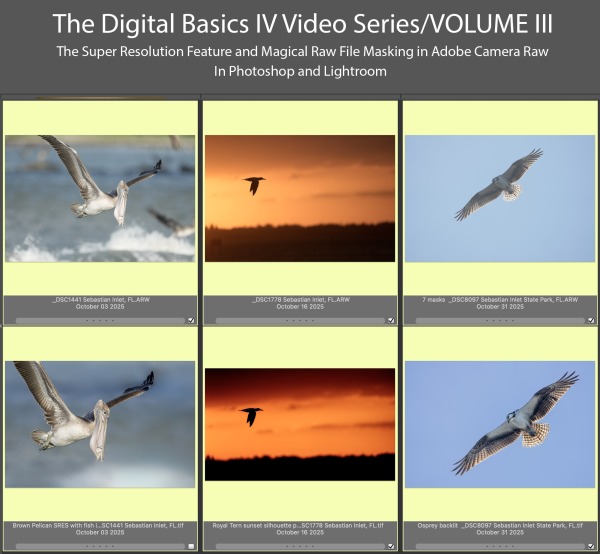
Learn how and when to utilize the new, quite tricky Super Resolution feature in the latest versions of Photoshop and Lightroom. And learn how to use the masking features while converting an image in Adobe Camera Raw. This one hour video features six complete image optimizations. The Digital Basics IV Video Series/Volume III by Arthur Morris/BIRDS AS ARTYou can purchase Volume III alone (59 minutes, 13 seconds) for $49.00 by clicking here. Or save $50.00 by purchasing the entire 5 volumes series by clicking here. |
Digital Basics IV Video Series/Volume III
The two main thrusts of Volume III of the Digital Basics IV Video Series explains in detail how to handle when and how to use the new Super Resolution feature in Adobe Camera Raw to upsize your cropped .TIF files and how to use a variety of masks in ACR. Those include the automatic selections like Sky, Subject, and Background as well as Linear and Radial Gradients and how to create your own masked area using the Brush Tool. This feature has transformed my workflow and I am now routinely using as many as six or seven masks on a single raw file. I am even using painted masks to effectively do my Eye Doctor work.
Each of the six image optimizations takes you through my complete basic workflow that remains much the same as is detailed in both DB II and in the DB III Video Series. The steps include:
1- Setting the Color Temperature (when and if needed).
2- Setting the White and Black Points and adjusting the Highlights and Shadows sliders.
3- Setting the Clarity and Dehaze sliders.
4- Fine-tuning color using the Hue/Saturation/Luminance Targeted Adjustment Tool, a huge step up from the Color Mixer Tool.
5- My 2-step noise reduction technique (now only with higher ISO images).
Once I have the .TIF file in Photoshop, I still use my usual cadre of clean-up tools and techniques including the Remove Tool, the Clone Stamp (only rarely), Divide and Conquer, Quick Masking, Layer Masking, Gaussian Blurs, an expanded array of personalized keyboard shortcuts, and tons of other image optimization strategies and methods adapted from previous versions of Digital Basics. I also demonstrate the selective use of Topaz Sharpen AI utilizing the masking feature. And last but not least, I share my JPEG creation methodology.
You can purchase Volume III alone (59 minutes, 41 seconds) for $49.00 by clicking here. Or save $50.00 by purchasing the entire 5 volumes series by clicking here.
Volume IV, coming in early December, will detail the use of the use of the much improved Remove Tool for an amazing variety of tasks and will follow up on previously introduced techniques.
|
|
|
The RawDigger Screen Capture for the Osprey with three fish in its talons image |
Ho Hum, Another Perfect Exposure
What can I say? The combination of Zebras live in the viewfinder (with your camera set up properly) and post-capture study of the raw files in RawDigger makes it pretty much child’s play to come up with perfect exposure after perfect exposure. And as implied above, for folks not using Sony Zebra technology RawDigger study is that much more valuable. It would be impossible to overstate how much I have learned by studying RawDigger and how much better my exposures have become since I started with the program almost five years ago. With the G channel coming right up to the 16000 line, the raw file brightness for today’s featured image is dead solid perfect.
RawDigger — not for the faint of heart …
Nothing has ever helped me learn to create perfect exposures to the degree that RawDigger has. I think that many folks are reluctant to learn that most of their images are underexposed by one or more full stops and that highlight warnings in Photoshop, Lightroom, Capture One, and your in-camera histogram are bogus as they are based on the embedded JPEGs. Only your raw files tell the truth all the time. Heck, I resisted RawDigger for several years … Once you get over that feeling, RawDigger can become your very best exposure friend no matter what system you are using. On the recent IPTs and In-the-Field sessions, we have demonstrated that fact over and over again. Convincingly.
The RawDigger Adapted (pink) Histogram
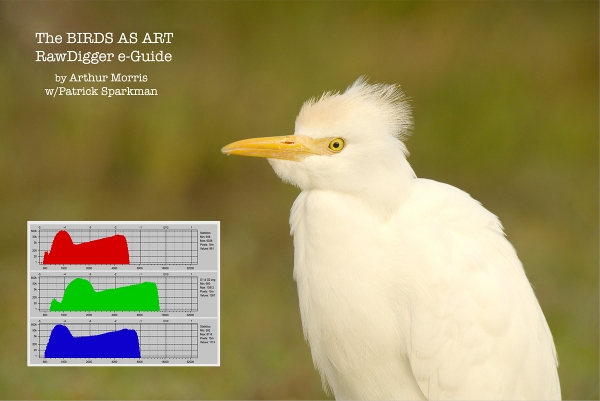
In the RawDigger e-Guide, you will learn exactly how to set up the Adapted “pink” RawDigger Histogram and how to use it to quickly and easily evaluate the exposure or raw file brightness of images from all digital cameras currently in use. RawDigger was especially helpful to me as I have struggled with R5 exposures and learned my new camera body, the Sony Alpha a1.
|
|
RawDigger e-Guide with Two Videos |
The RawDigger e-Guide with Two Videos
by Arthur Morris with Patrick Sparkman
The RawDigger e-Guide was created only for serious photographers who wish to get the absolute most out of their raw files.
Patrick and I began work on the guide in July 2020. At first, we struggled. We asked questions. We learned about Max-G values. We puzzled as to why the Max G values for different cameras were different. IPT veteran Bart Deamer asked lots of questions that we could not answer. We got help from RawDigger creator Iliah Borg. We learned. In December, Patrick came up with an Adapted Histogram that allows us to evaluate the exposures and raw file brightness for all images created with all digital camera bodies from the last two decades. What we learned each time prompted three complete beginning to end re-writes.
The point of the guide is to teach you to truly expose to the mega-Expose-to-the-Right so that you will minimize noise, maximize image quality, best utilize your camera’s dynamic range, and attain the highest possible level of shadow detail in your RAW files in every situation. In addition, your properly exposed RAW files will contain more tonal information and feature the smoothest possible transitions between tones. And your optimized images will feature rich, accurate color.
We teach you why the GREEN channel is almost always the first to over-expose. We save you money by advising you which version of RawDigger you need. We teach you how to interpret the Max G values for your Canon, Nikon, and SONY camera bodies. It is very likely that the Shock-your-World section will shock you. And lastly — thanks to the technical and practical brilliance of Patrick Sparkman — we teach you a simple way to evaluate your exposures and the raw file brightness quickly and easily the Adapted RawDigger histogram.
The flower video takes you through a session where artie edits a folder of images in Capture One while checking the exposures and Max-G values in RawDigger. The Adapted Histogram video examines a series of recent images with the pink histograms and covers lots of fine points including and especially how to deal with specular highlights. The directions for setting up the Adapted Histogram are in the text.
If we priced this guide based on how much effort we put into it, it would sell it for $999.00. We have, however, priced it at only $51.00. You can order yours here in the BAA Online Store.
Typos
With all blog posts, feel free to e-mail or to leave a comment regarding any typos or errors.






Artie great capture of a masterful osprey.
I’m trying to figure out how that osprey is going to go about holding onto and eating three fish!
Amazing capture of an amazingly talented Osprey!
Happy Thanksgiving, Artie. As for the image, wow. I’ve photographed an osprey with two fish in one talon and one with one fish in each talon but never one with three fish. Great image.