
“The Sun Will Never Settle” by Kingfishr
As I’m now walking 10,000 to 12,000 steps most days, I’ve been keeping my iPhone tucked into the upper left pocket of one of my long-sleeved ExOfficio shirts — gear I received years ago while hosting several episodes of the Canon Photo Safari TV show. With Instagram playing, I listen to a mix of music and history as I get my steps in.
Pretty much every day, one particular track comes up: “The Sun Will Never Settle” by the Irish indie-folk band Kingfishr. Aside from the rich Irish vocals, one line stops me in my tracks every time:
“If you want to know what life’s about, you have to feel the sting.”
Wow. That about sums it up.
When I was younger, I naively thought that a few very lucky folks might navigate life without ever feeling the sting of deep loss. Then, in 1994, Elaine Belsky Morris—my second wife and the love of my life—died of breast cancer.
That song, and the unforgettable line, was written by the three members of Kingfishr: Edmond Keogh (lead vocals, guitar), Eoghan McGrath (mandolin), and Eoin Fitzgibbon (bass). Give it a listen—and enjoy the music. Enjoy the music.
Summary
Selecting the right lens for current wind direction and sky conditions is a vital skill — unless you own only a single telephoto or a long zoom lens.
On a heavily overcast, windy morning, reaching for the 300mm f/2.8 GM was the obvious play for low-light performance. But when I grabbed the 400-800mm on a bright, sunny morning days later, it proved to be a mistake. Read on to see my thought process in the field, what went wrong, and how I should have handled the situation.
Be sure to let me know in the comments whether you prefer the stark white sky of Image #1 or the light blue background created in Photoshop for Image #2.
Note: General information, copy editing, re-crafting, technical refinement, and formatting for this blog post were assisted by Gemini AI.
Your Call
Rank all three of today’s featured images with the strongest first and the weakest last. I think that this task is a no-brainer so it will be interesting to see if others agree … Be sure also to let us know if you prefer the white sky look in Image #1 or the light blue sky in Image #2.
In the Last Blog Post
In the last blog post, everyone went with the spectacular backlit Anhinga head portrait. I agreed. The light coming through the bill, the gular pouch, and even the bird’s neck is sublime.
BIRDS AS ART and YouTube
Inspired by the 6,500 views on my An Old Man’s Take on the Sony 100-400mm f/4.5–5.6 GM Lens video, I’ve decided to expand my footprint on YouTube while remaining fully committed to publishing a new, educational BAA blog post roughly every third day. Many of these short videos (like the one immediately below) will offer a deep dive, walk-through look at previously published blog posts. Most will enjoy seeing the raw file for the backlit Anhinga image.
Click here to subscribe to the BAA YouTube Channel.
An Old Man’s Take on Teaching Bird Photography
The very first BIRDS AS ART blog post went live on March 12, 2009. Since then, I’ve published 4,596 more — an average of 260 posts a year. These days, I write a new post roughly every third day. Each one comes packed with high-caliber images and free bird photography lessons, along with the occasional dash of good music and a few personal health tips.
In the 11-minute video above, I take a deep dive into two of my recent blog offerings:
The YT video above takes a deep dive into two recent posts:
Lessons from the ILE Freshwater Pier Avian Studio focused on working on sun angle, refining image design, and making the most of APS-C crop mode.
1120mm Backlit on the Pier with the 400-800. With Tips! details the techniques I’ve used and developed for creating strong, striking backlit images in challenging lighting conditions.
Time will tell if this video-to-blog cross-pollination approach proves to be a winner. Right now, we have 1,610 blog subscribers and 3.08K followers on YouTube. My goal is to keep building momentum and grow both communities.
What’s Up?
It has been cloudy dark for the past two days and the forecast for the next few days is the same. Great for long walks but very challenging for bird photography. And it is supposed to rain all day on Tuesday.
Life it too short and the new 600mm f/6.3 is so ridiculously small and light that I broke down yesterday and pre-ordered the Sony FE 600mm f/6.3 GM OSS Lens (Sony E) yesterday.
I will absolutely be creating a BAA lens guide for the new 600mm f/6.3 but it will likely take me a month after receiving the lens. It is supposed to ship 15 October. Several folks have already pre-ordered their copy by using one of my two affiliate links — B&H or Bedfords. They, and everyone else who purchases this amazing new lens will earn a free copy of the coming BAA lens guide. If you have any questions or are confused about using either of my links, please contact me via e-mail.
Today is 3 October 2026. Despite the gloomy forecast, I will be headed down to the lake at about 7:30am. Whatever you opt to do, I hope that you choose to have fun and enjoy life. Please remember that happiness is a choice — Byron Katie – The Work.Com
If an item — a Delkin flash card or reader, a Levered-clamp FlexShooter Pro, or a Wimberley lens plate or low foot — for example, that is available from B&H and/or Bedfords, is also available in the BAA Online Store, it would be great, and greatly appreciated, if you would opt to purchase from us. We will match or beat any price. Please remember also to use my B&H affiliate links or to earn 3% cash back at Bedford by using the BIRDSASART discount code at checkout for your major gear purchases. Doing either often earns you free guides and/or discounts. And always earns my great appreciation.
Gear Questions and Advice
Too many folks attending BAA IPTs and dozens of photographers whom I see in the field and on BirdPhotographer’s.Net, are — out of ignorance — using the wrong gear, especially when it comes to tripods and more especially, tripod heads. And the same is true in spades when ordering new camera bodies or lenses. My advice will often save you some serious money and may help you avoid making a seriously bad choice. Please know that I am always glad to answer your gear questions via e-mail. If you are desperate, you can try me on my cell at 863-221-2372. Please leave a message and shoot me a text if I do not pick up.
|
|
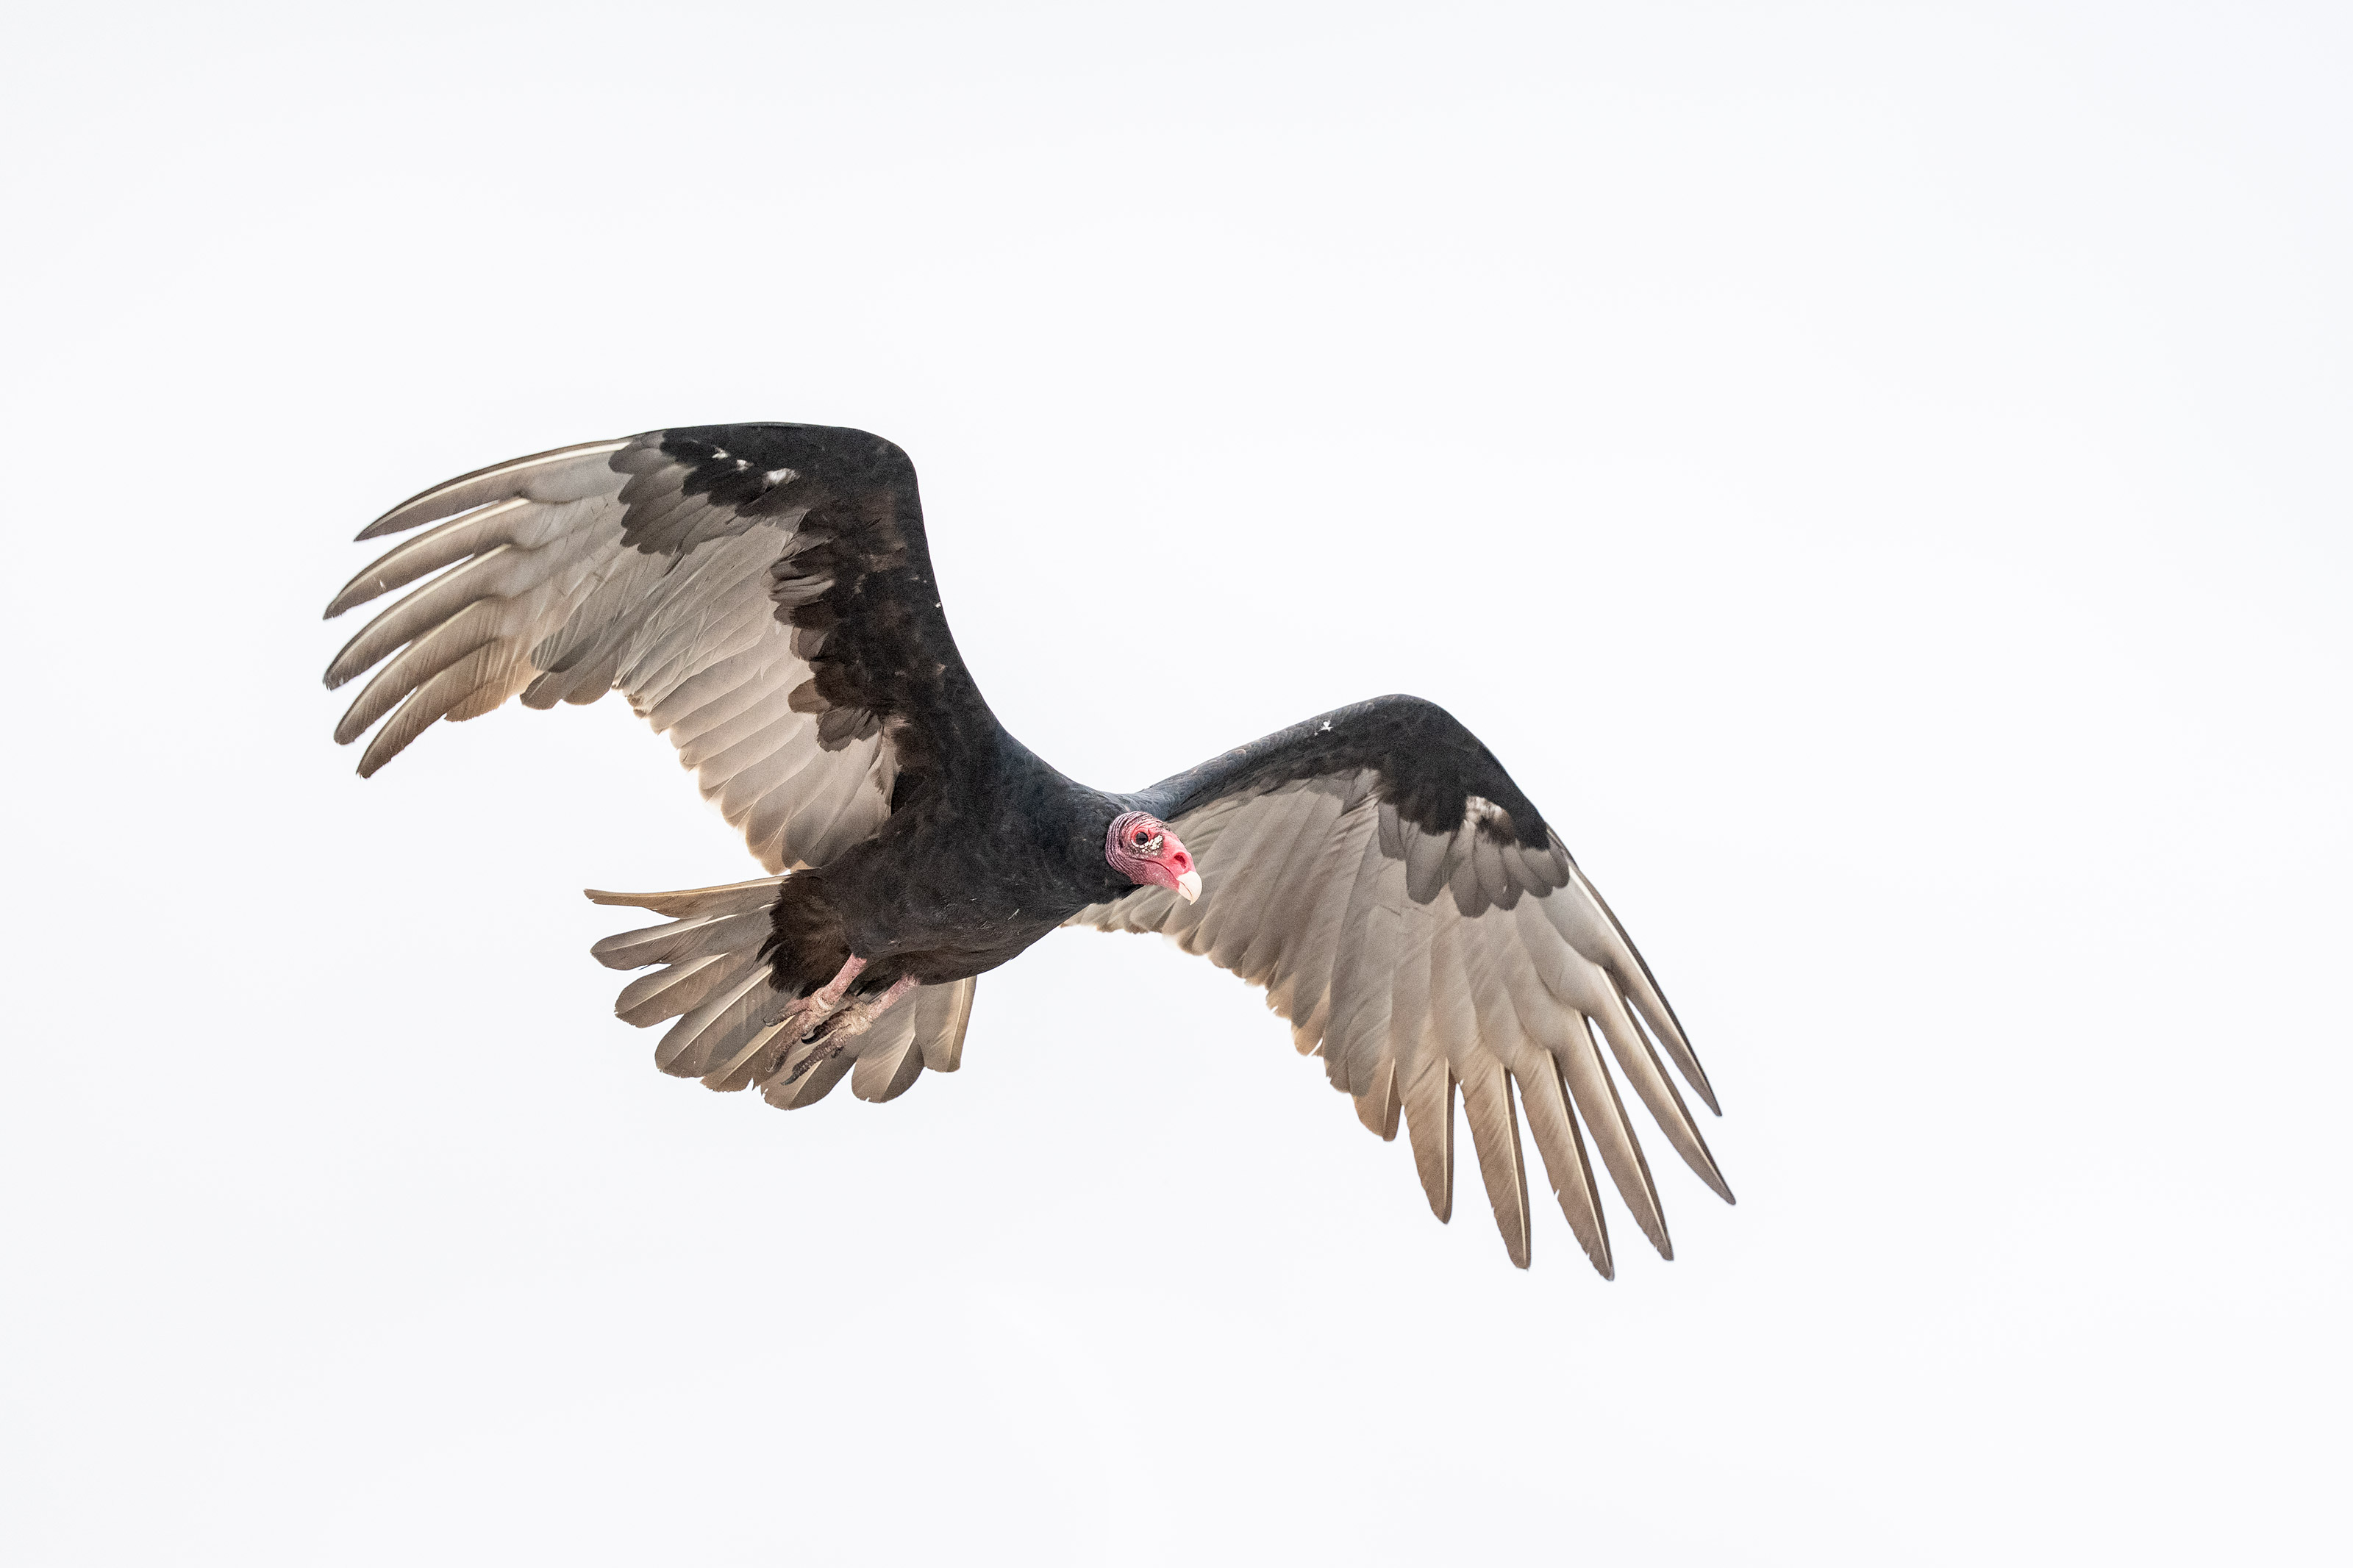
This image was created on 25 September 2026 down by the lake near my home. I used the hand held Sony FE 300mm f/2.8 GM OSS Lens (Sony E) and The Latest Greatest Sony Flagship Body, the a1 II Mirrorless Camera. The exposure was determined via Zebras with ISO on the Thumb Wheel. ISO 2500. 1/3200 sec. at f/2.8 (wide open) in Manual mode. AWB at 8:24:59am on a very cloudy morning. Wide/AF-C with Bird Eye/Face Detection enabled performed perfectly. Image #1: Turkey Vulture — adult in flight on white sky day |
The Right Lens
The morning of Friday, September 25 dawned dark and heavily overcast, with a stiff north wind blowing at more than 20 mph. As I arrived at the parking circle near the pier, I noticed a crowd of vultures perched on the pier railings and atop the pavilion roof. These conditions screamed flight photography. I immediately reached for the fast, lightweight Sony FE 300mm f/2.8 GM OSS, hoping to maintain a high shutter speed while keeping my ISO at or below 2500.
I was pleasantly surprised: at ISO 2500, I was able to expose to the right (+2 1/3 stops above the overcast white sky!) while maintaining a fast-enough shutter speed of 1/3200 sec. Had I chosen an f/4 or f/4.5 lens, I would have been forced to double the ISO or compromise on shutter speed. I had picked the absolute right lens for the conditions. (And yes, as always, I consider myself blessed to have access to such an incredible array of big Sony glass.)
Working the Wind and Approach Technique
The fundamental rule on high-wind, cloudy days is simple: keep the wind at your back.
When you position yourself this way, birds must launch into the wind — directly toward you. They will, however, often turn away quickly to either side, so you have to be locked on the moment they lift off.
I decided to target the birds on the pavilion roof first, knowing that once flushed north, some would likely relocate to the pier railings — giving me a second shot at the same individuals if I played my cards right. I walked up the incline behind the restrooms, knowing that a slow approach would encourage the vultures (mostly Turkey Vultures) to launch straight toward my position.
Field Tip: The Eye to the Viewfinder Approach
If you walk toward birds with your camera hanging at your side, they will often take off and turn away before you can raise the lens, frame the shot, and acquire focus.
So, this time, I tried a new approach: I walked very slowly and deliberately toward the pavilion with my eye glued to the viewfinder. The technique worked on the very first try. I was locked on this Turkey Vulture the moment its feet left the roof, and capturing a clean, dynamic flight frame as it launched and turned to its left.
|
|
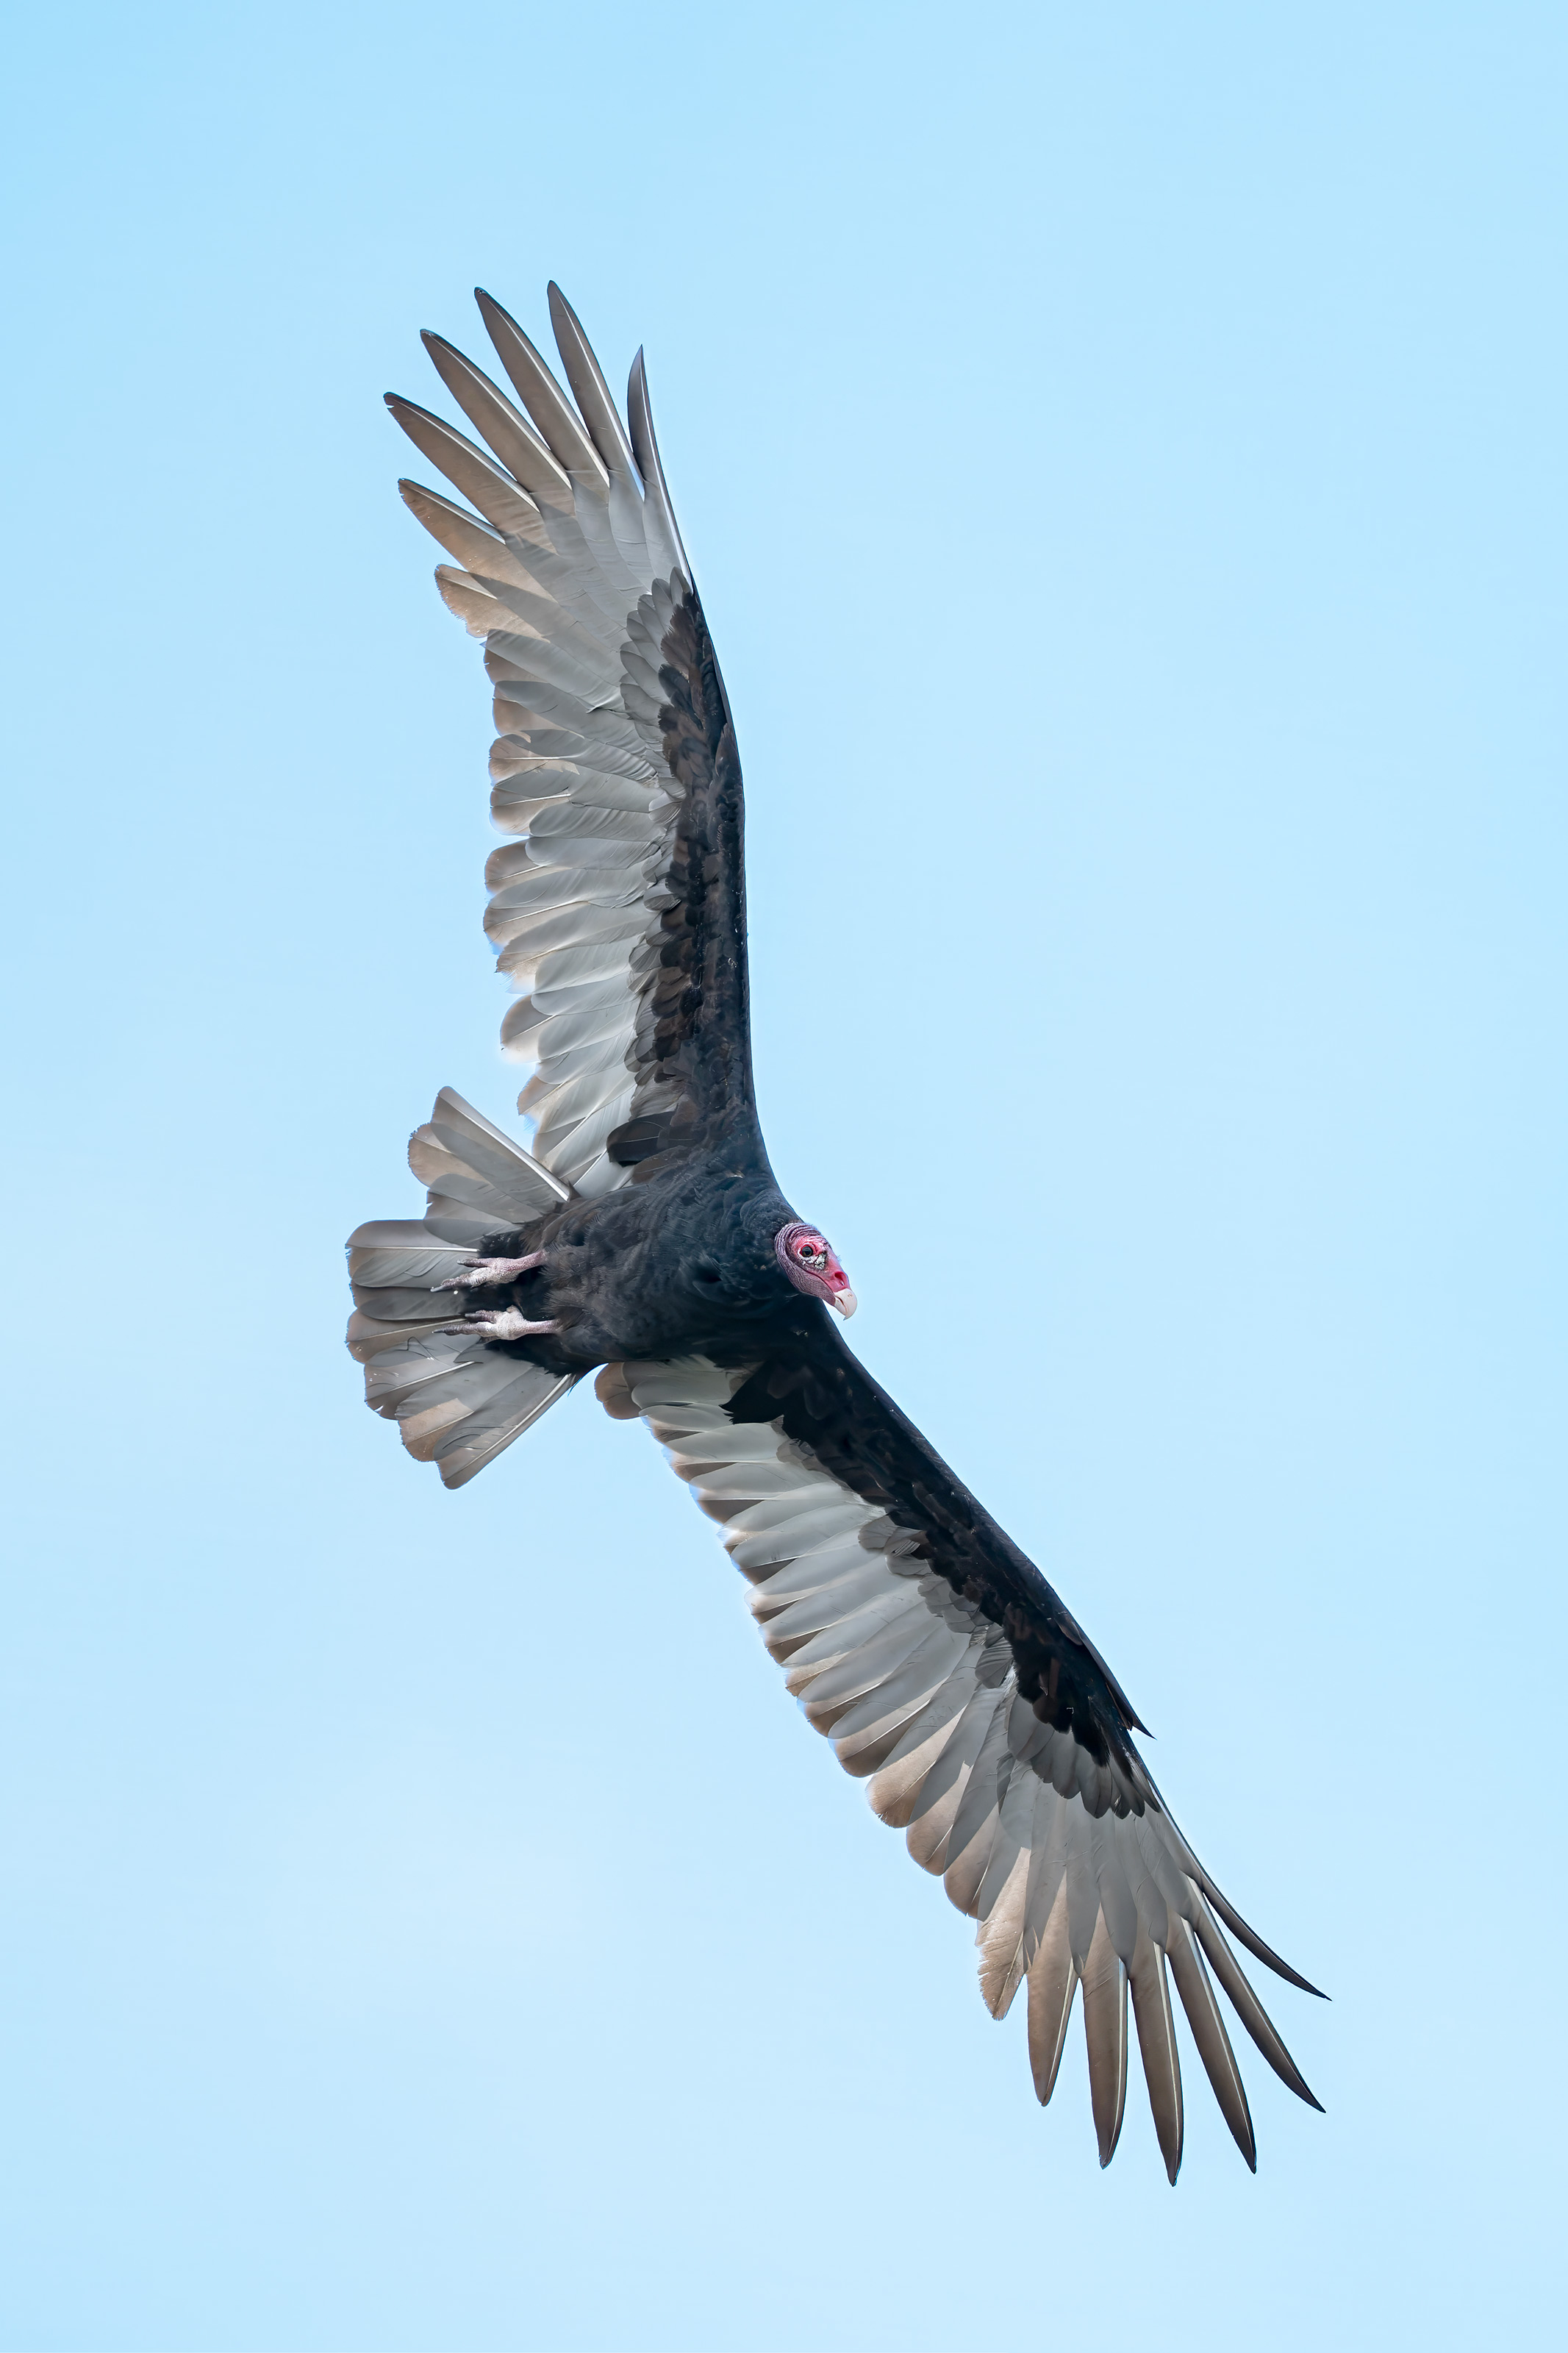
This image was also created on 25 September 2026 down by the lake near my home. Again, I used the hand held Sony FE 300mm f/2.8 GM OSS Lens (Sony E) and The Latest Greatest Sony Flagship Body, the a1 II Mirrorless Camera. The exposure was determined via Zebras with ISO on the Thumb Wheel. ISO 2500. 1/3200 sec. at f/2.8 (wide open) in Manual mode. AWB at 8:28:45am on a very cloudy morning. Wide/AF-C with Bird Eye/Face Detection enabled performed perfectly. Image #2: Turkey Vulture — adult in flight on white sky day with the sky blued up |
White Sky Flight Advantages
The single biggest advantage of photographing birds in flight on heavily overcast, white-sky days is the complete absence of harsh underwing shadows.
In fact, the light on cloudy days is remarkably soft and even across the entire subject. To get the most detail out of these low-contrast conditions, be sure to expose well to the right (ETTR) — pushing your histogram as far right as possible without clipping highlights — to minimize shadow noise and preserve subtle feather texture.
The Big Question: White Sky vs. Light Blue Sky
For Image #1, my standard optimization routine produced a classic white-sky flight shot that closely matched the RAW capture — aside from setting precise White and Black points in Photoshop to establish clean, rich contrast.
For Image #2, after completing the same foundational adjustments, I took a different creative route: I generated an Adobe Camera Raw mask of the sky and used subtle tweaks to the Exposure, Color Temperature, Saturation, and Hue sliders to create a soft, natural-looking (?) light blue sky background.
So, the huge big question is, which sky color do you prefer, the white sky in Image #1 or the bluer sky in Image #2? Please leave a comment below and let us know why one works better for you than the other!
(Note: This vertical presentation was cropped from a horizontal original frame.)
|
|
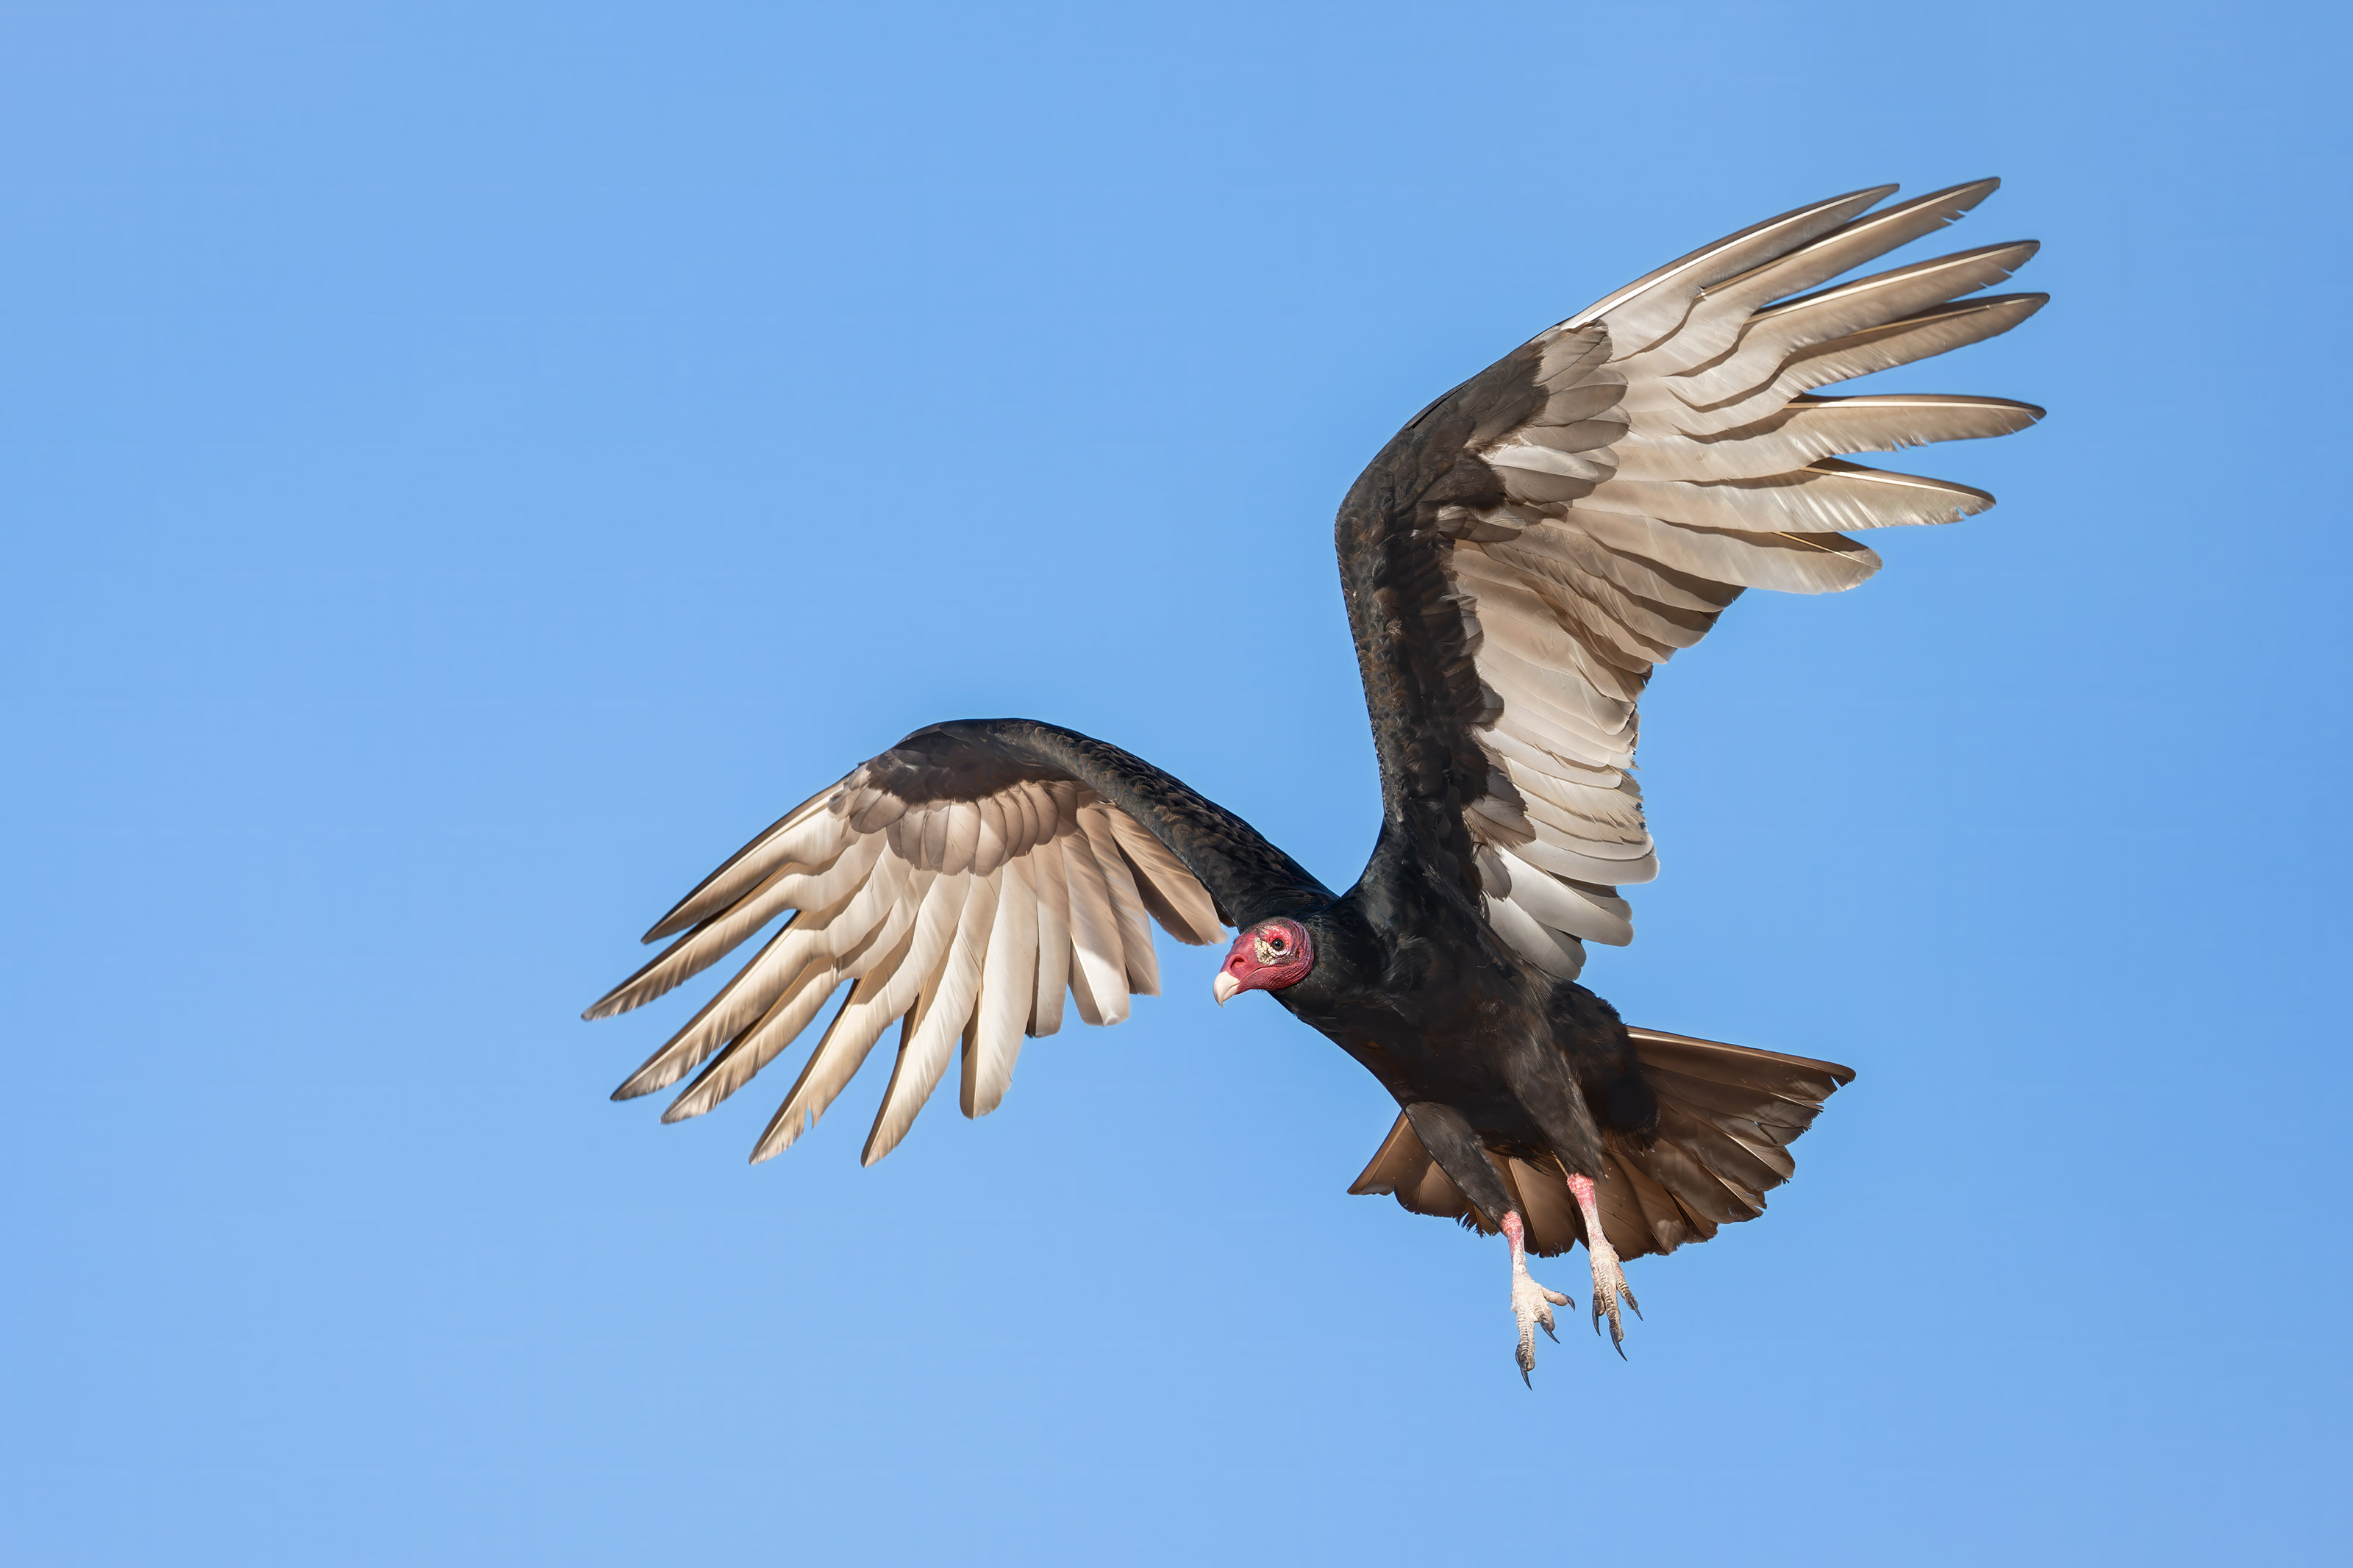
This image was created by yours truly on 1 October 2026 down by the lake near my home. I used the handheld Sony FE 400-800mm f/6.3-8 G OSS lens (Sony E) (at 400mm) and The Latest Greatest Sony Flagship Body, the a1 II Mirrorless Camera. The exposure was determined by Zebras with ISO on the rear wheel. ISO 2000: 1/4000 second at f/8 (wide open) in Manual mode. AWB at 9:04:30am on a clear and sunny morning. Wide/AF-C with Bird-Eye/Face Detection performed perfectly. Click on the image to enjoy the larger high-res version. Image #3: Turkey Vulture adult in flight on sunny day |
The Wrong Lens But I Got Lucky with One Frame
On Thursday morning past, I walked the pier carrying the Sony FE 400-800mm f/6.3–8 G — almost always my first choice on bright, sunny mornings. Activity was slow, so as I left the pier, I scanned the pavilion roof and spotted about a dozen vultures — a mix of turkeys and blacks. With a strong east wind blowing, I walked southeast to get into proper position without flushing the birds off the roof prematurely.
Because the sun was out, I had plenty of light to shoot at a fast shutter speed with a low ISO, even though the 400-800 is relatively slow at f/8 on the long end.
High Winds and the Eye to the Viewfinder Approach
I approached slowly using my new field technique: walking deliberately toward the subjects with my eye held right to the viewfinder. Because the wind was even stronger than the week before, the vultures would raise their wings and teeter-totter on the crest of the roof for several seconds before launching into the air. The action and light were fabulous — but I quickly realized I had grabbed the wrong tool for the job.
Field Lesson: Large Birds Need Shorter Focal Lengths. Duh!
Vultures are big birds with wide wingspans. Even with the 400-800 zoomed out to 400mm, I was simply too tight for the distance — I clipped wings on frame after frame and missed several spectacular flight poses as the birds lifted off.
Had I grabbed the new Sony 100-400mm f/4.5, I would have been much better off even if I had added the 1.4X TC. I could have zoomed well out to avoid all the clipped wings and gone with 2/3-stop less ISO. Heck, the new 100-400 alone might have been the best choice — super wide at f/4.5 with plenty of breathing room to keep full wingspans in frame without clipping. Lesson learned.
It was a classic lesson: always match your lens not only to the lighting conditions, but to the size of the subject and your working distance as well.
|
|
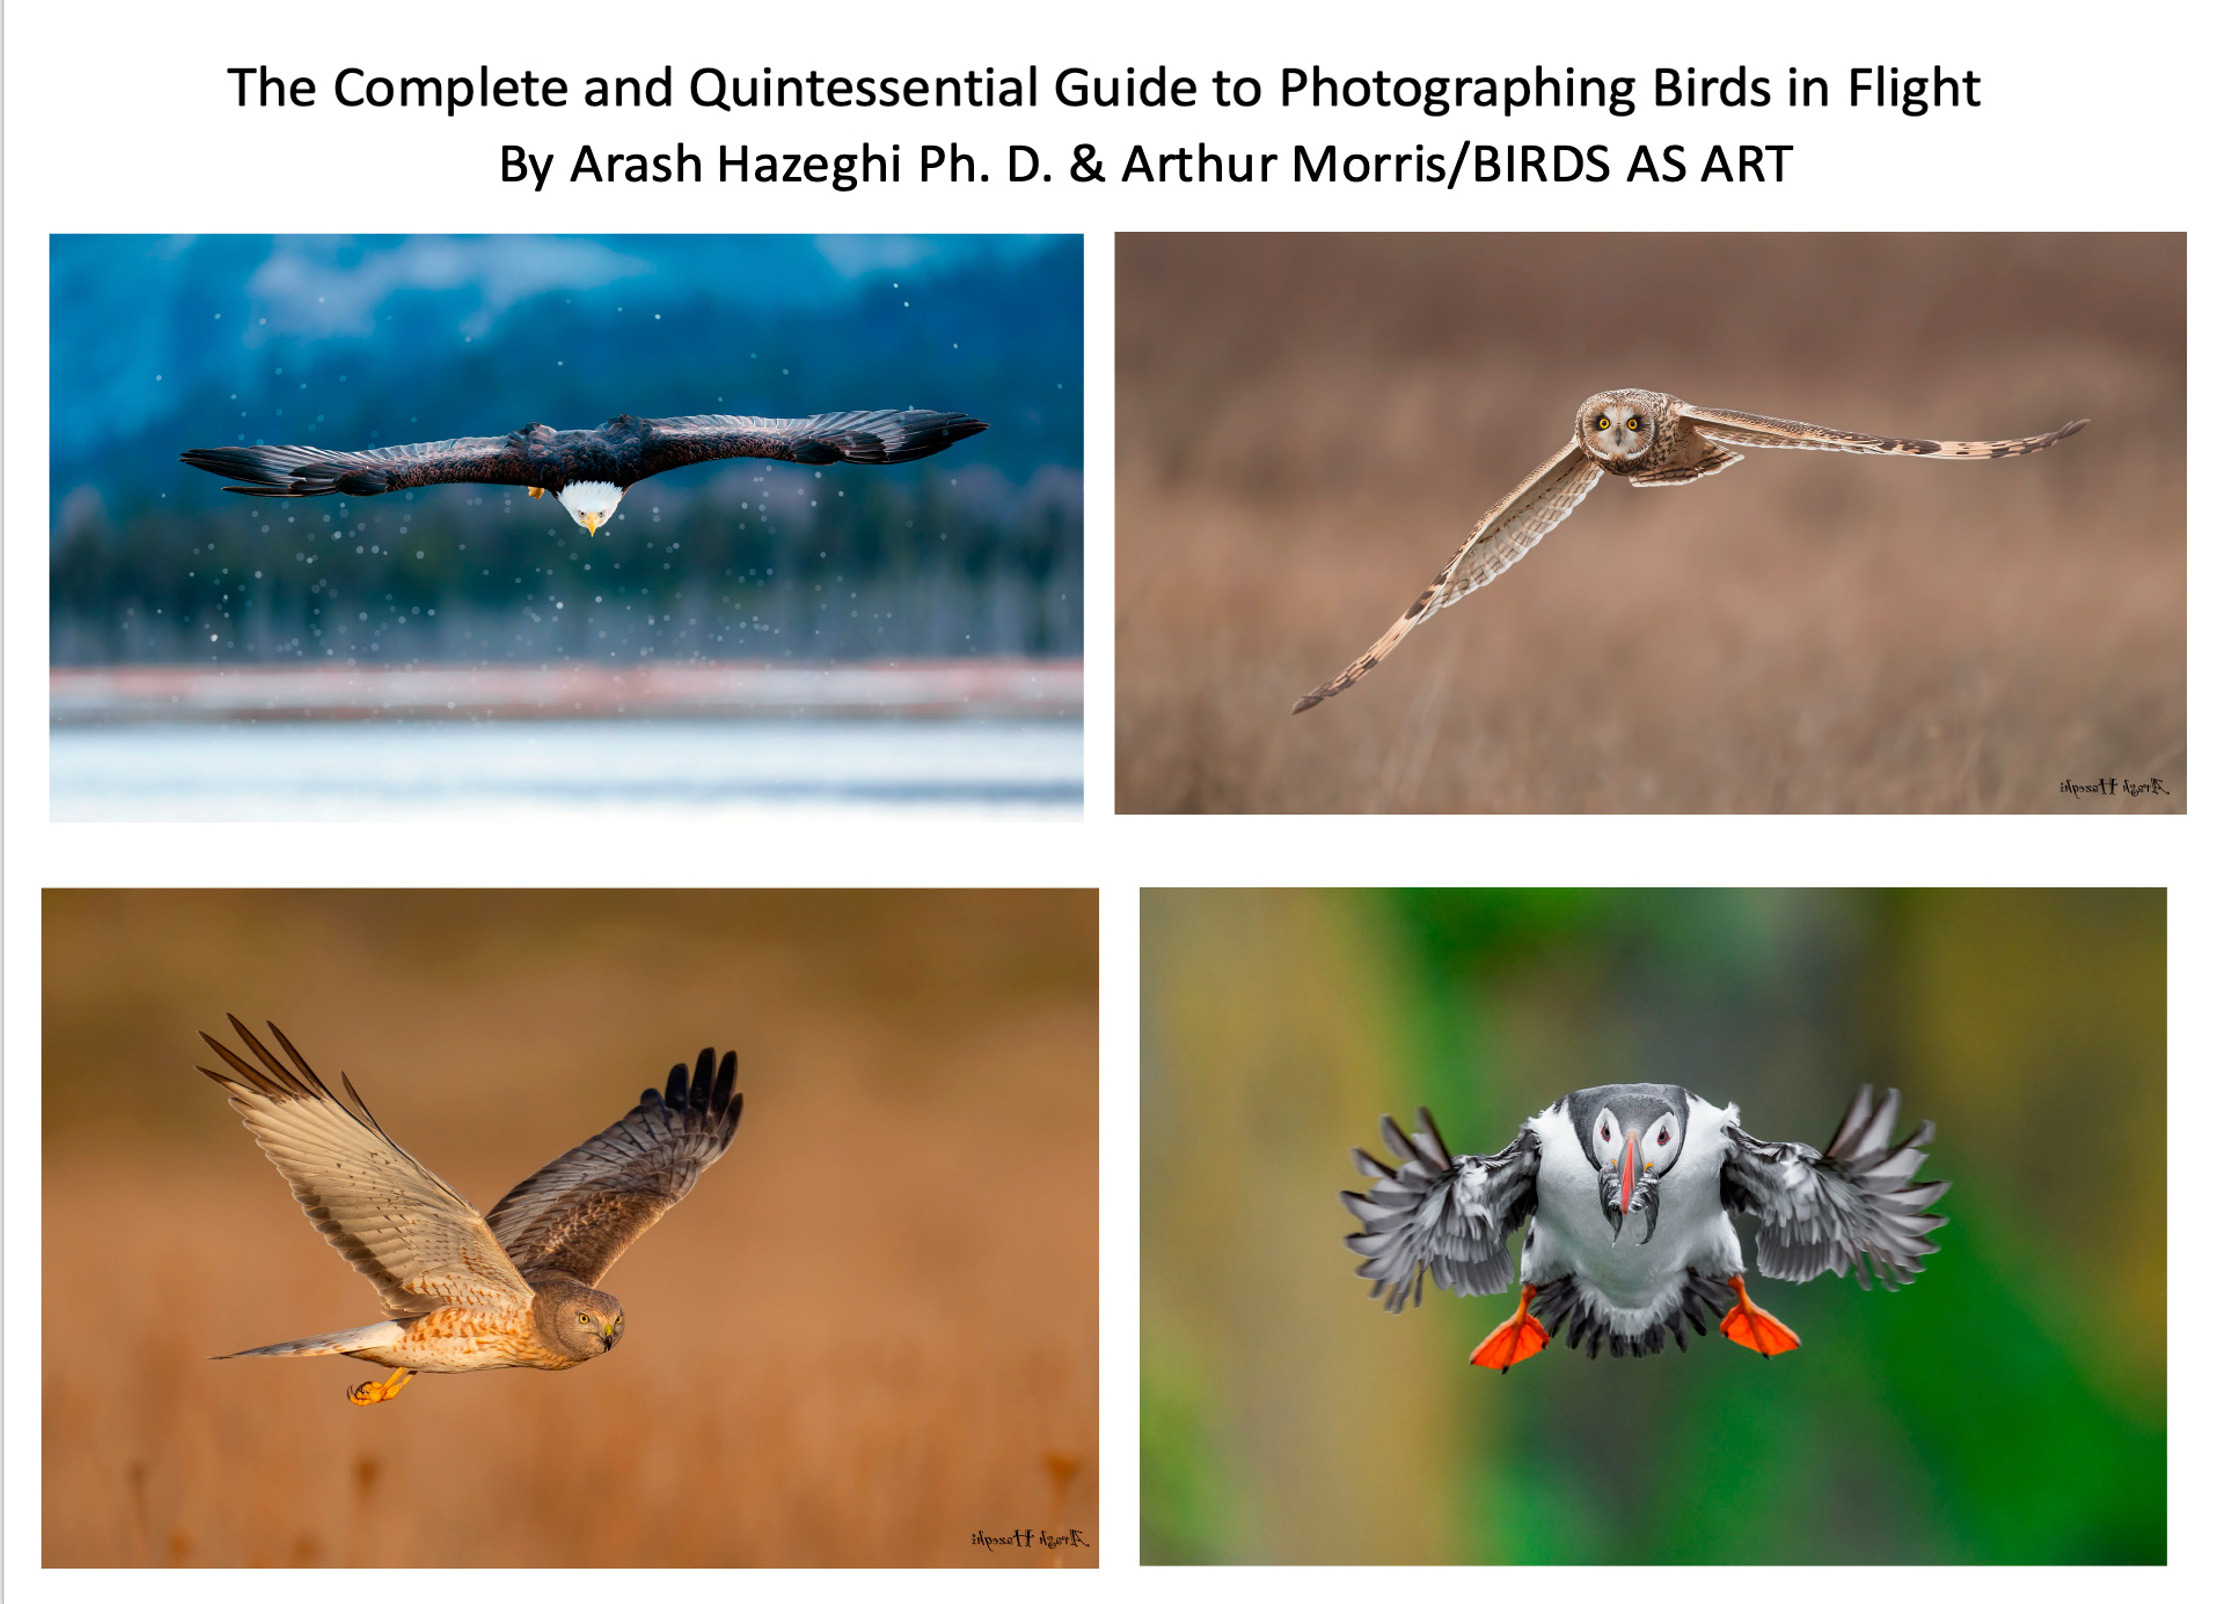
The title says it all. Purchase your copy here. The Complete and Quintessential Guide to Photographing Birds in Flight
|
The Complete and Quintessential Guide to Photographing Birds in Flight: $99.00
I had long dreamed of becoming a great flight photographer. When using dSLR gear, making sharp images was a huge problem. Most of the time, the camera bodies simply were not up to snuff. Things have changed dramatically with mirrorless technology. The high-end mirrorless camera bodies now feature science fiction-like autofocus systems and frame rates of 30, 40, and even 125 fps. Nowadays, getting the eye sharp is no longer a problem. The problem more often involves selecting the strongest image from a long series of sharp images.
The truth, however, is that there is a lot more than owning a Canon EOS R1, a Nikon Z9, or a Sony a-1 ii to consistently creating great photographs of birds in flight. Some of the biggest factors to success include gear choice, shooting strategies, and understanding the importance of sky conditions and wind speed and direction. Once you have the techniques and technical aspects down pat and can routinely create sharp images, learning the importance of flight poses, wing positions, backgrounds, and subject placement and image design enable you to create and then select superb flight images. And you guessed it, each of those topics and tons more are covered in detail in The Complete and Quintessential Guide to Photographing Birds in Flight.
The guide consists of 267 pages and 21,013 words. There are 82 illustrative photos scattered throughout the text, two screen captures, and a 112-image gallery that includes examples created by Canon, Nikon, and mostly Sony gear. As seen above, each of the 194 inspirational photos is labeled with an educational caption.
You can purchase your copy here for $99.00.
Arash Hazeghi
Arash Hazeghi, Ph.D. is a principal electron device engineer. He received his Ph.D. degree in Electrical Engineering in 2011, from Stanford University, Stanford, California. His pioneering research on Carbon Nanotubes has been cited many times. In the past decade, Arash Hazeghi has been a major contributor to the research and the development of some of the most cutting-edge technologies introduced by Silicon Valley’s most reputable names including SanDisk, Intel and Apple.
More relevant here is that he is widely recognized as one of the world’s best birds in flight photographers. He specializes in raptors and the technical aspects of bird photography.
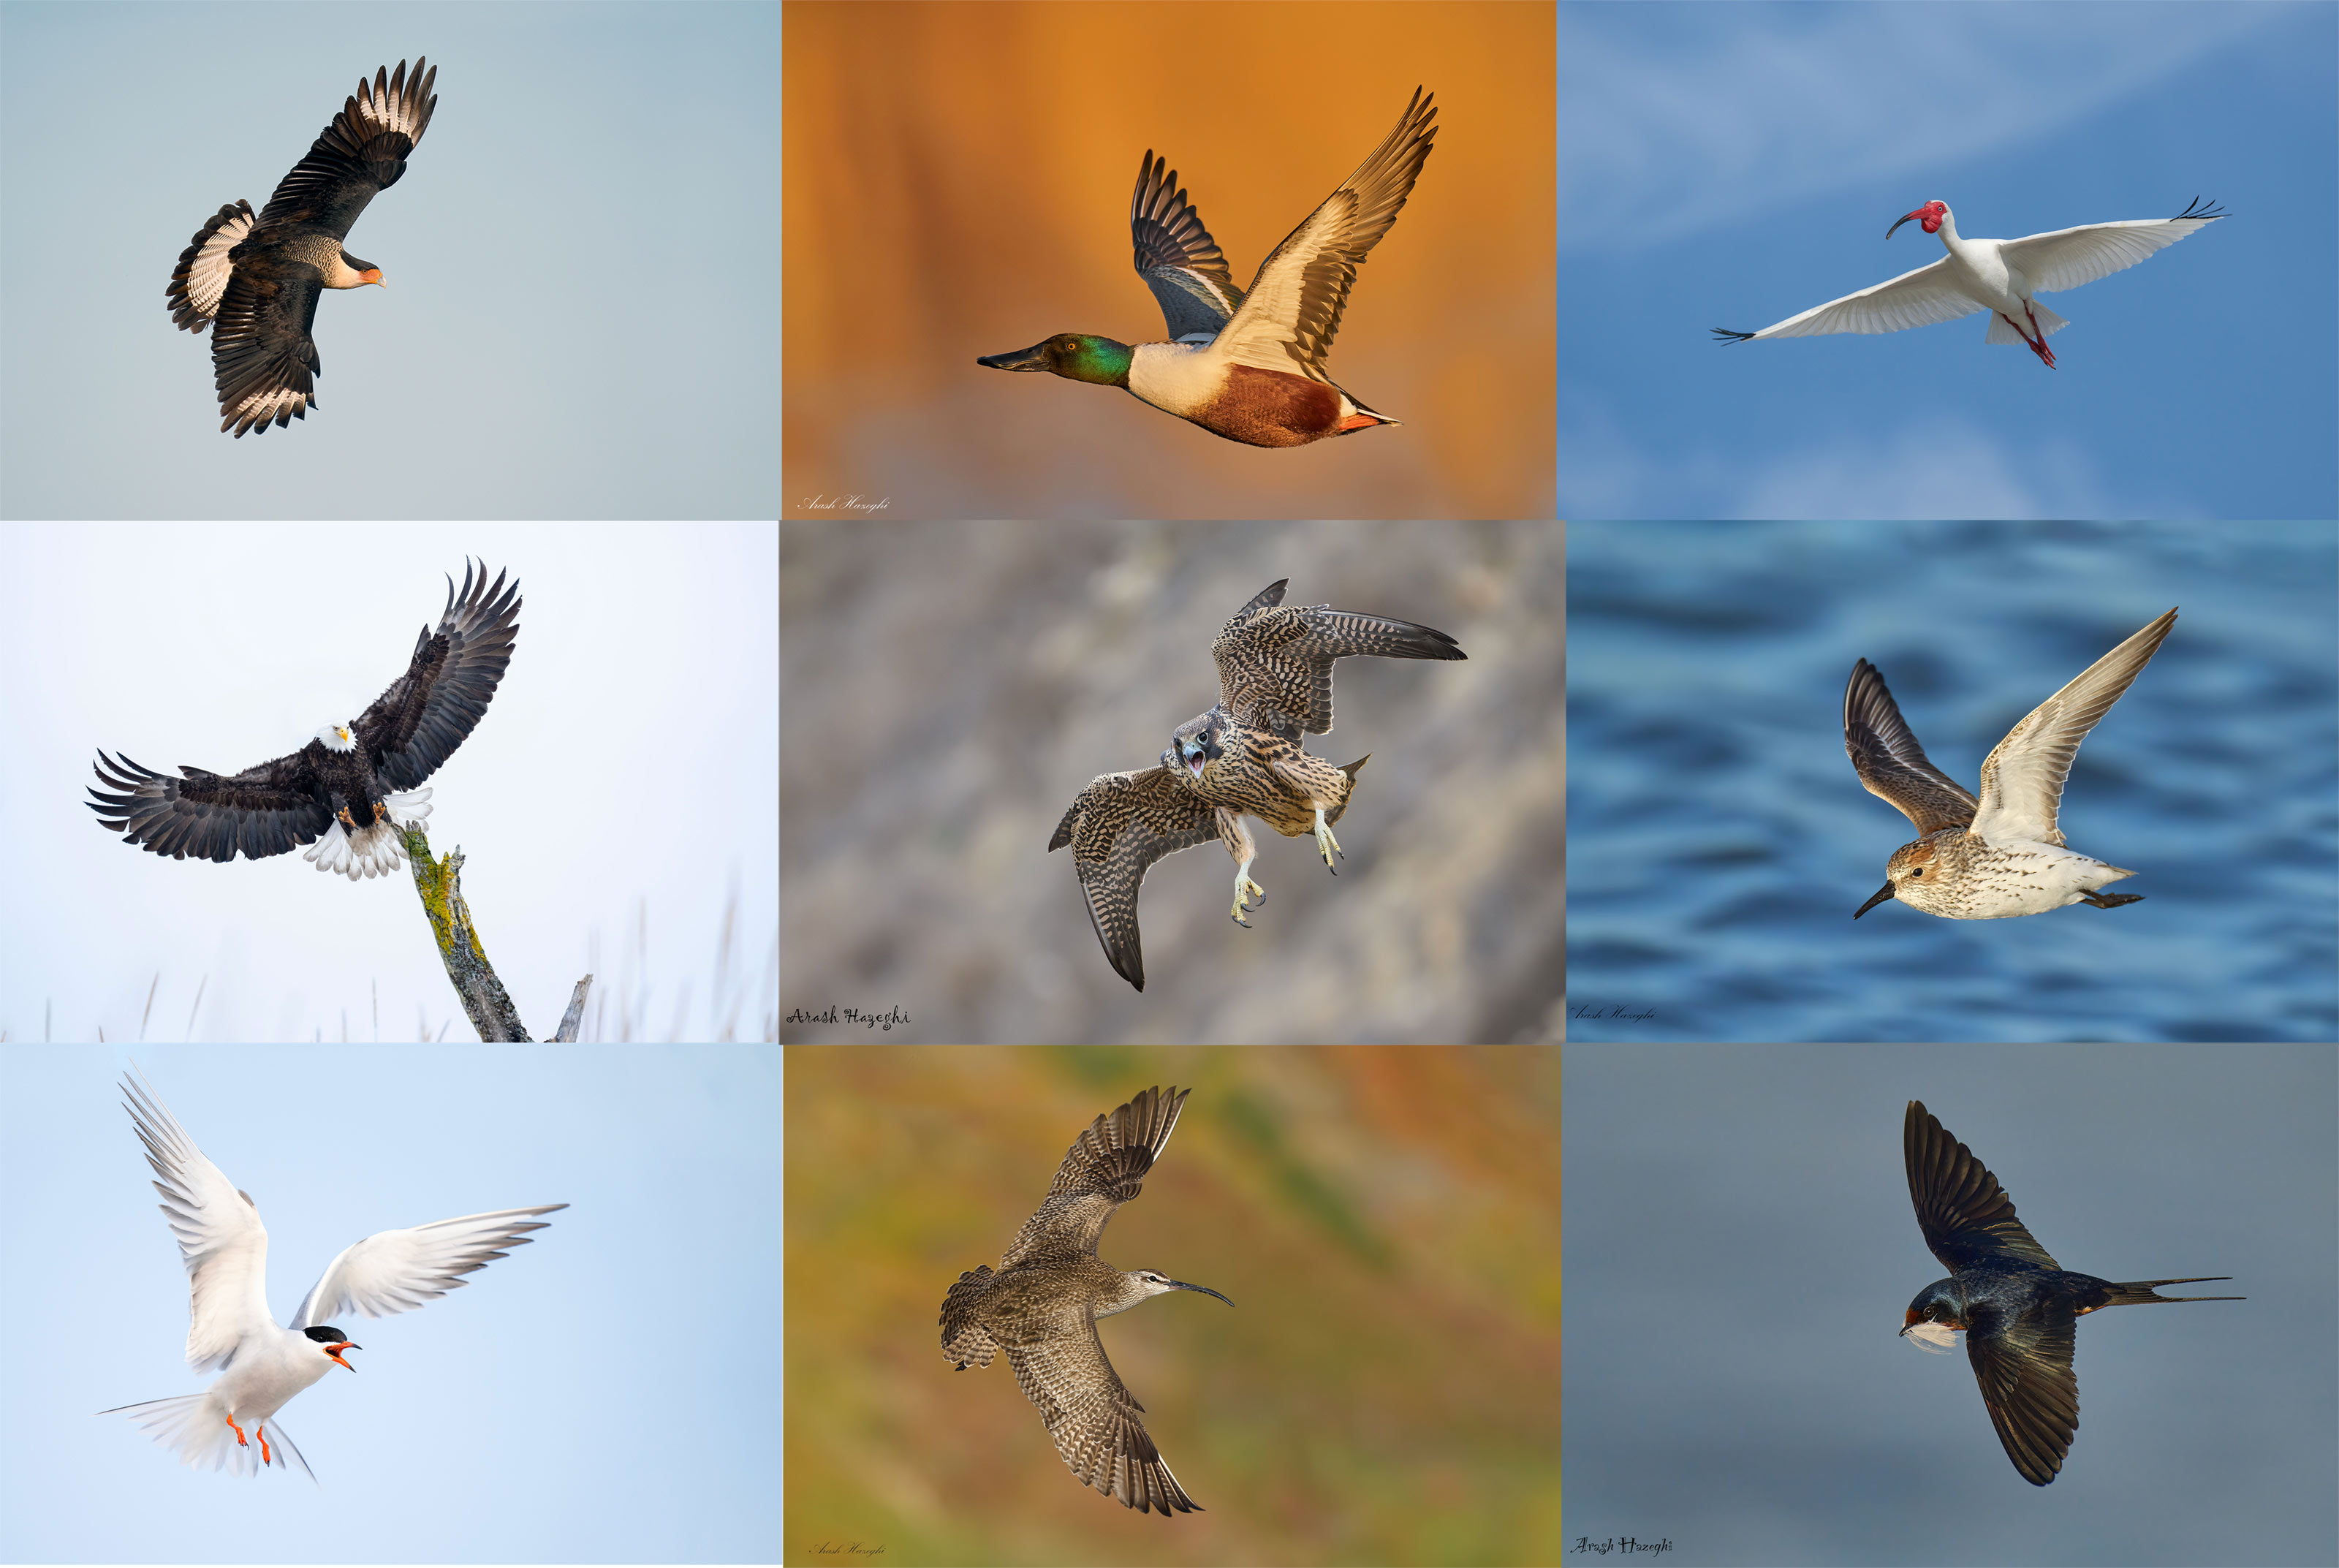
|
|
Flight photography is a skill that can be studied, practiced, and learned. Learn to get better in The Complete and Quintessential Guide to Photographing Birds in Flight |
The Complete and Quintessential Guide to Photographing Birds in Flight
By Arash Hazeghi Ph.D., and Arthur Morris/BIRDS AS ART
What you will learn (about):
-
1- Weight and handholding super-telephoto lenses.
2- Weight and handholding intermediate telephoto and telephotos zoom lenses.
3- Choosing the right flight photography lens or lenses for you.
4- The importance of focal length for flight photography.
5- The importance of lens speed (the maximum aperture for flight photography.
6- Choosing between fixed focal lengths and zoom lenses for flight photography.
7- The importance of AF speed and performance for flight photography.
8- Handholding tips and techniques.
9- Shooting flight off a tripod with the Levered-clamp FlexShooter Pro.
10- Flight poses and wing positions.
11- Why artie changed his mind about the 400mm f/2.8 lenses for flight and more.
12- The advantages and disadvantages of using teleconverters for flight photography.
13- Why to stay away from off-brand lenses.
14- Understanding the importance of wind direction and speed for flight photography.
15- The relationship between sky conditions and wind direction and how it affects flight photography.
16- Creating flight silhouettes in wind-against-sun conditions.
17- The importance of being on sun angle for flight photography (and avoiding harsh shadows).
18- Tips on doing flight photography in cloudy, foggy, or overcast conditions.
19- About the direction of light in cloudy, foggy, or overcast conditions and how it affects flight photography.
20- How your understanding of bird behavior can dramatically improve your flight photography.
21- Tips on attracting birds for flight photography.
22- What to do when your camera’s AF system is temporarily blind.
23- The vital importance of pre-focusing.
24- How Direct Manual Focus can help you with flight photography.
25- The importance of shooting aggressively when doing flight photography.
26- Everything that you need to know with regards to rest positions for flight photography.
27- The importance of getting low when doing flight in many situations.
28- Getting the right exposure when doing flight photography.
29_ Why to use Manual mode 95% of the time for flight.
30- Tips on finding the bird in the frame, acquiring focus, and tracking the bird in flight.
31- How to set and best utilize your lens’s image stabilization feature (and why).
32- Setting the focus range limiter switch on your flight lens or lenses.
33- To choose the best shutter speed for photographing birds in flight.
34- The vital importance of pre-focusing. And yes, this is so important that it is on the list twice.
You can purchase your copy here.
|
|
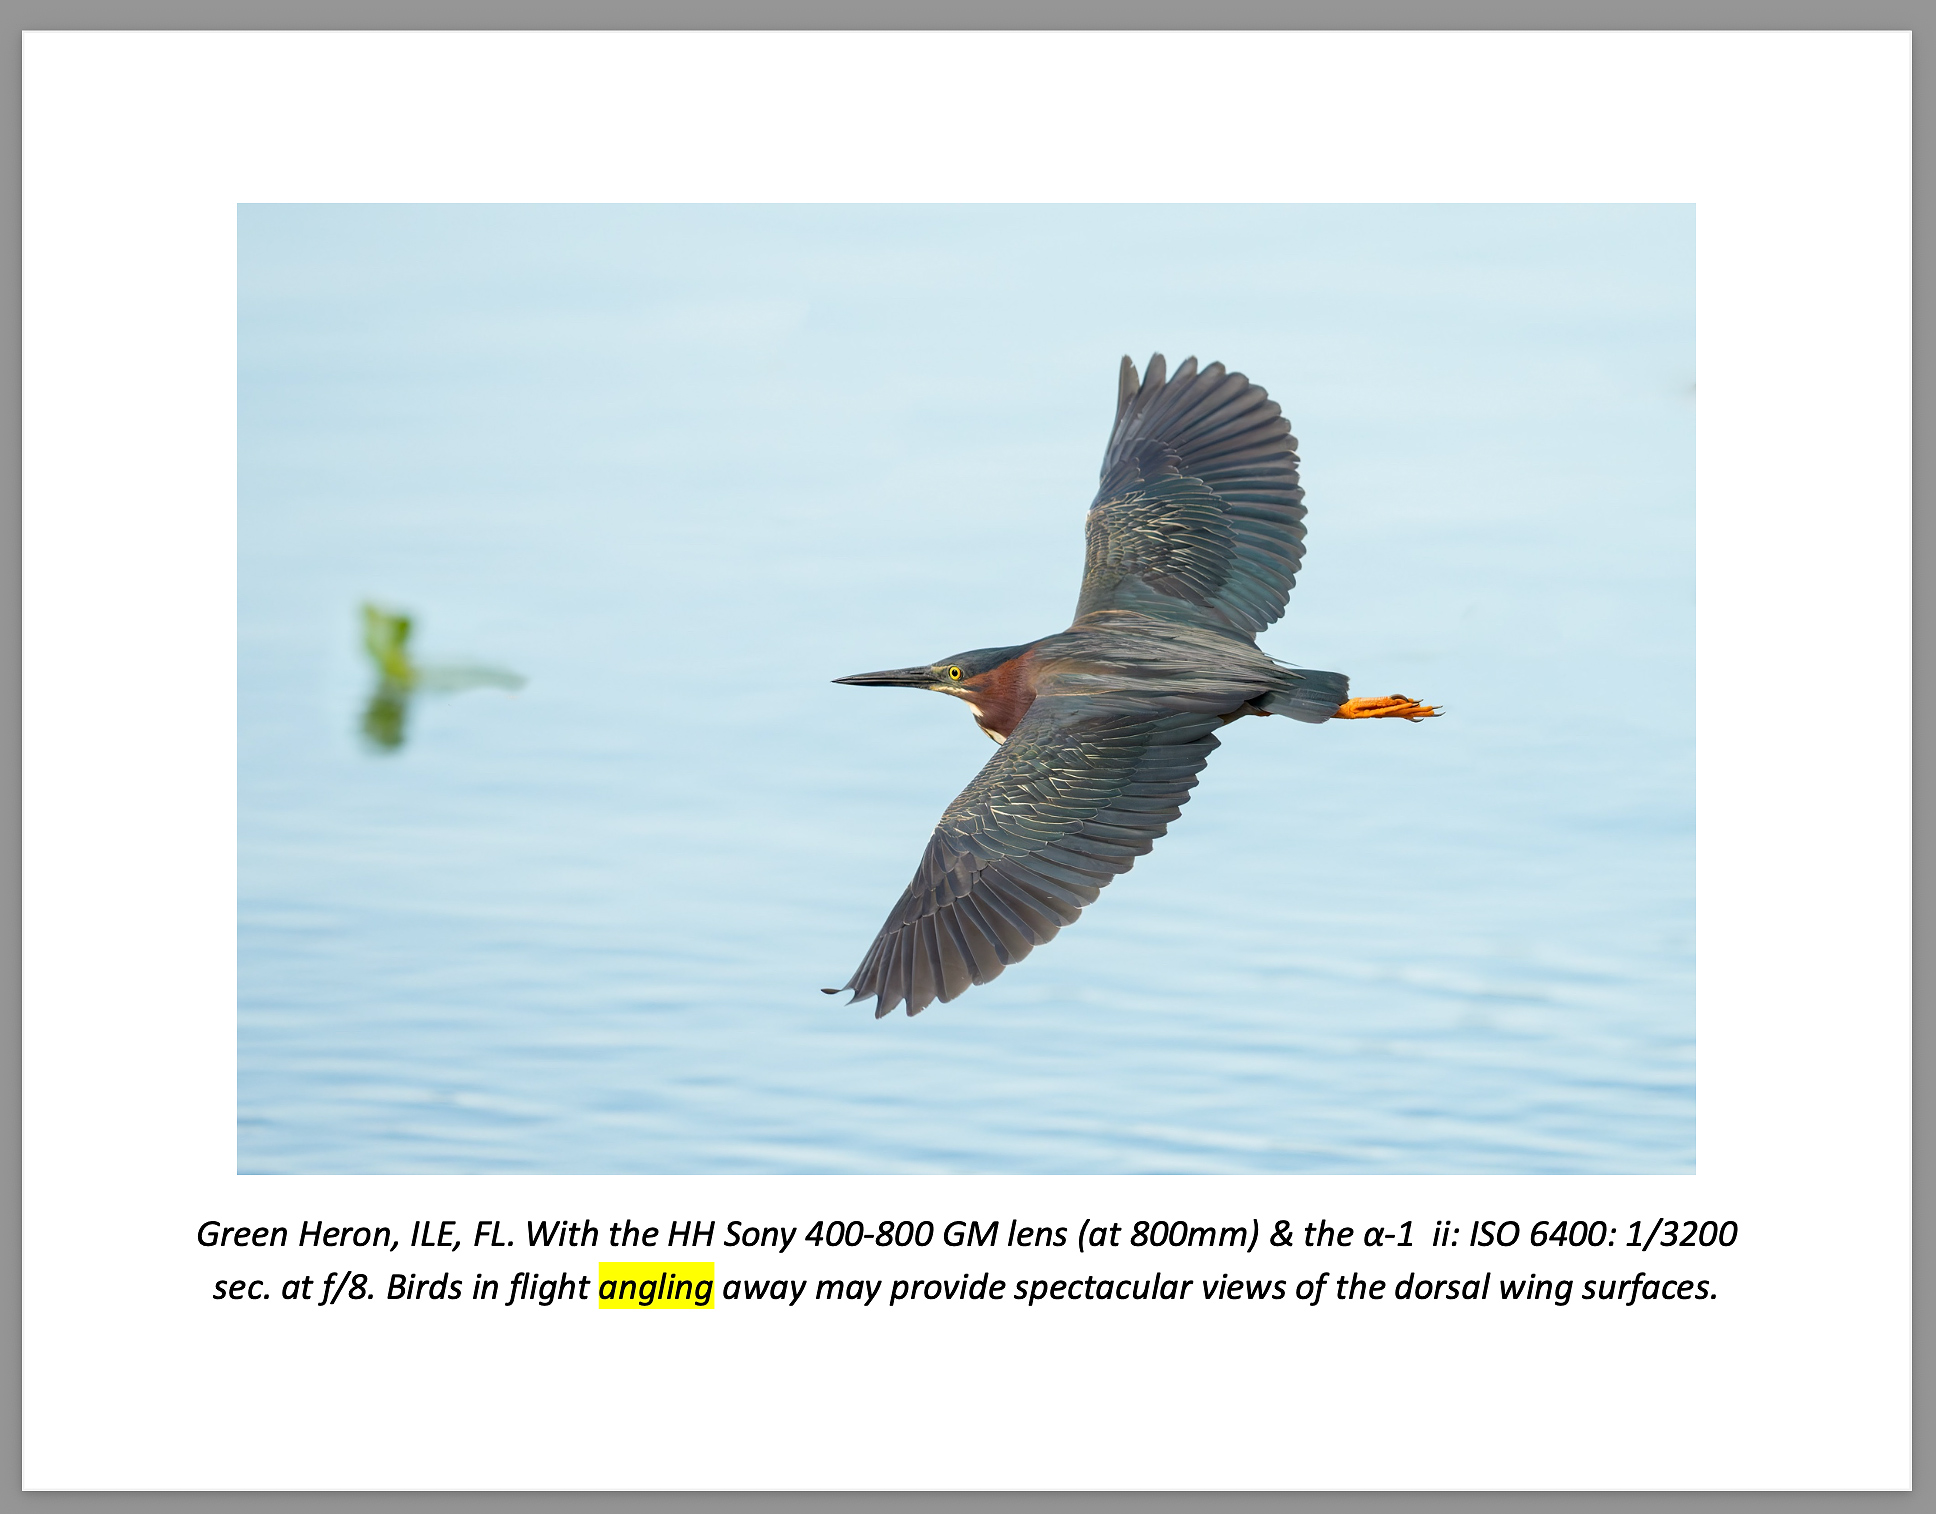
Sample Page #1. Image copyright 2024: Arthur Morris/BIRDS AS ART, the senior author. Page 254 of The Complete and Quintessential Guide to Photographing Birds in Flight |
Sample Page #1
Birds in flight that are flying away from you may at times provide spectacular views of the dorsal wing surfaces.
|
|
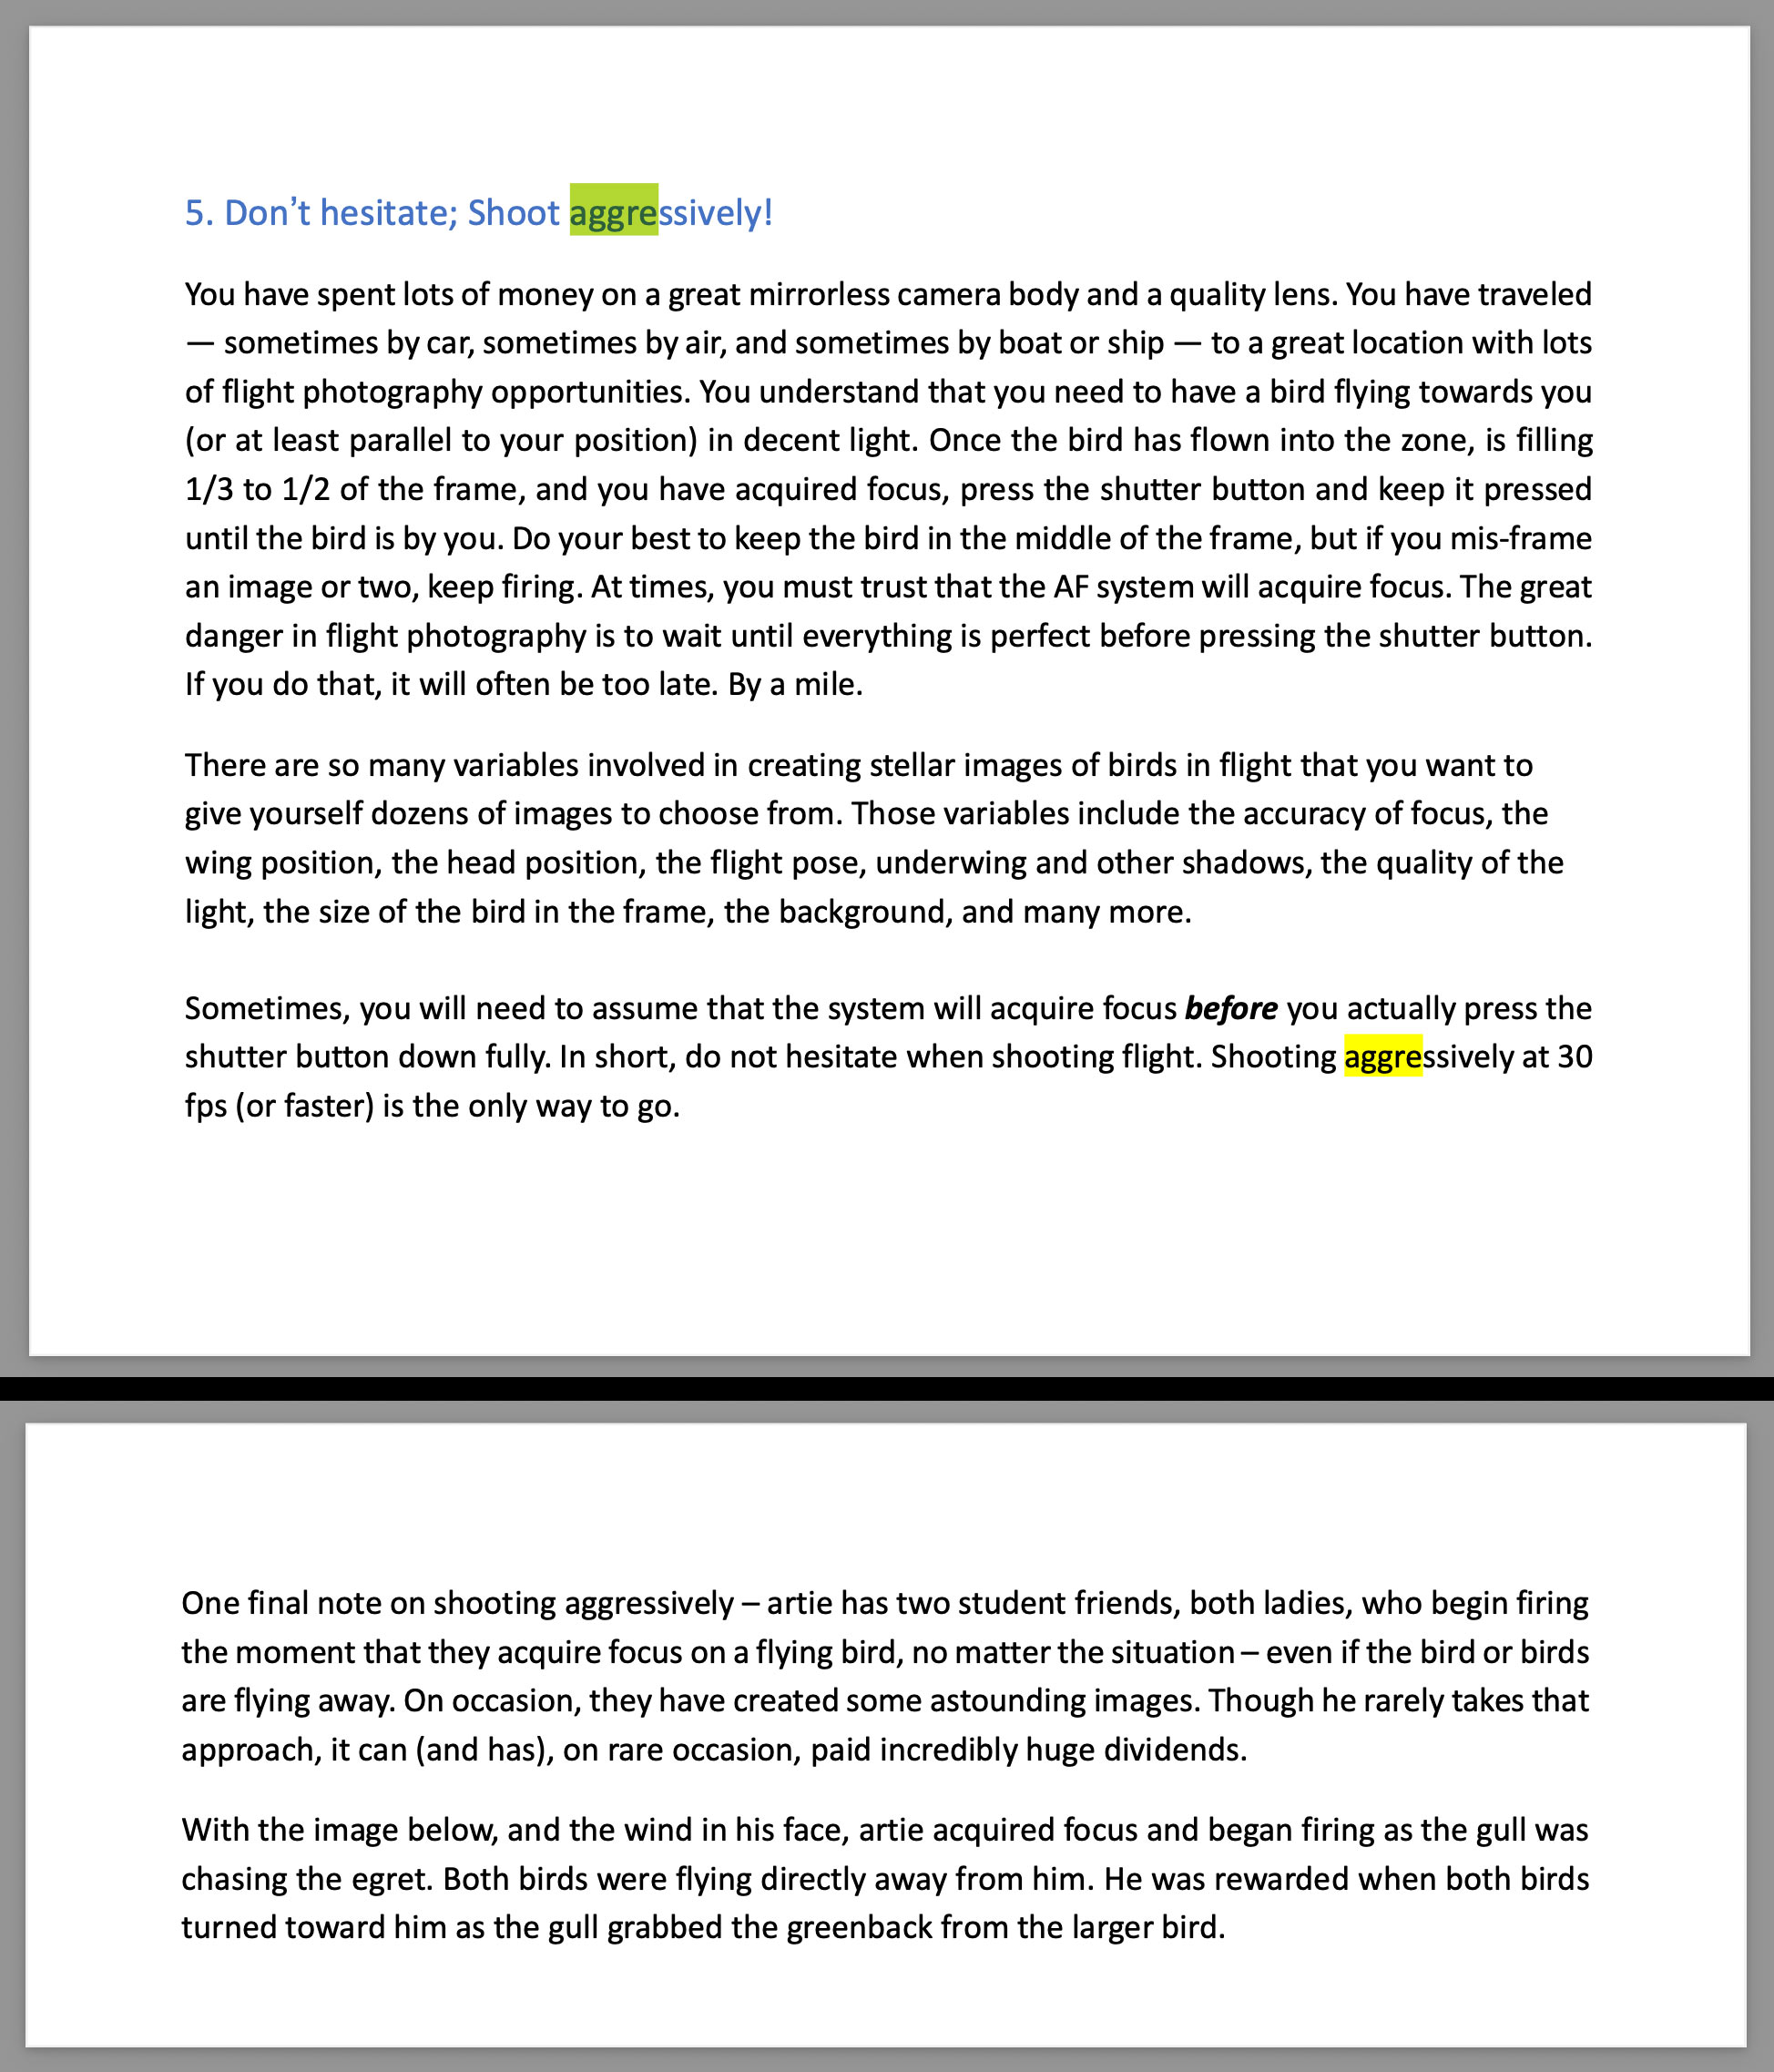
Image copyright 2024: Arthur Morris/BIRDS AS ART, the senior author. Sample pages #2 & 3. Pages 106 & 107 of The Complete and Quintessential Guide to Photographing Birds in Flight |
Sample pages #2 & 3
It is — for many reasons, imperative that you shoot aggressively when doing flight photography. If you wait for it to be perfect, you will usually wind up with nothing. That said, most of my flight sequences rarely consist or more than seven or eight frames; I do not blast away at specks and once the bird is past the light and flying away from me I quit shooting.
|
|
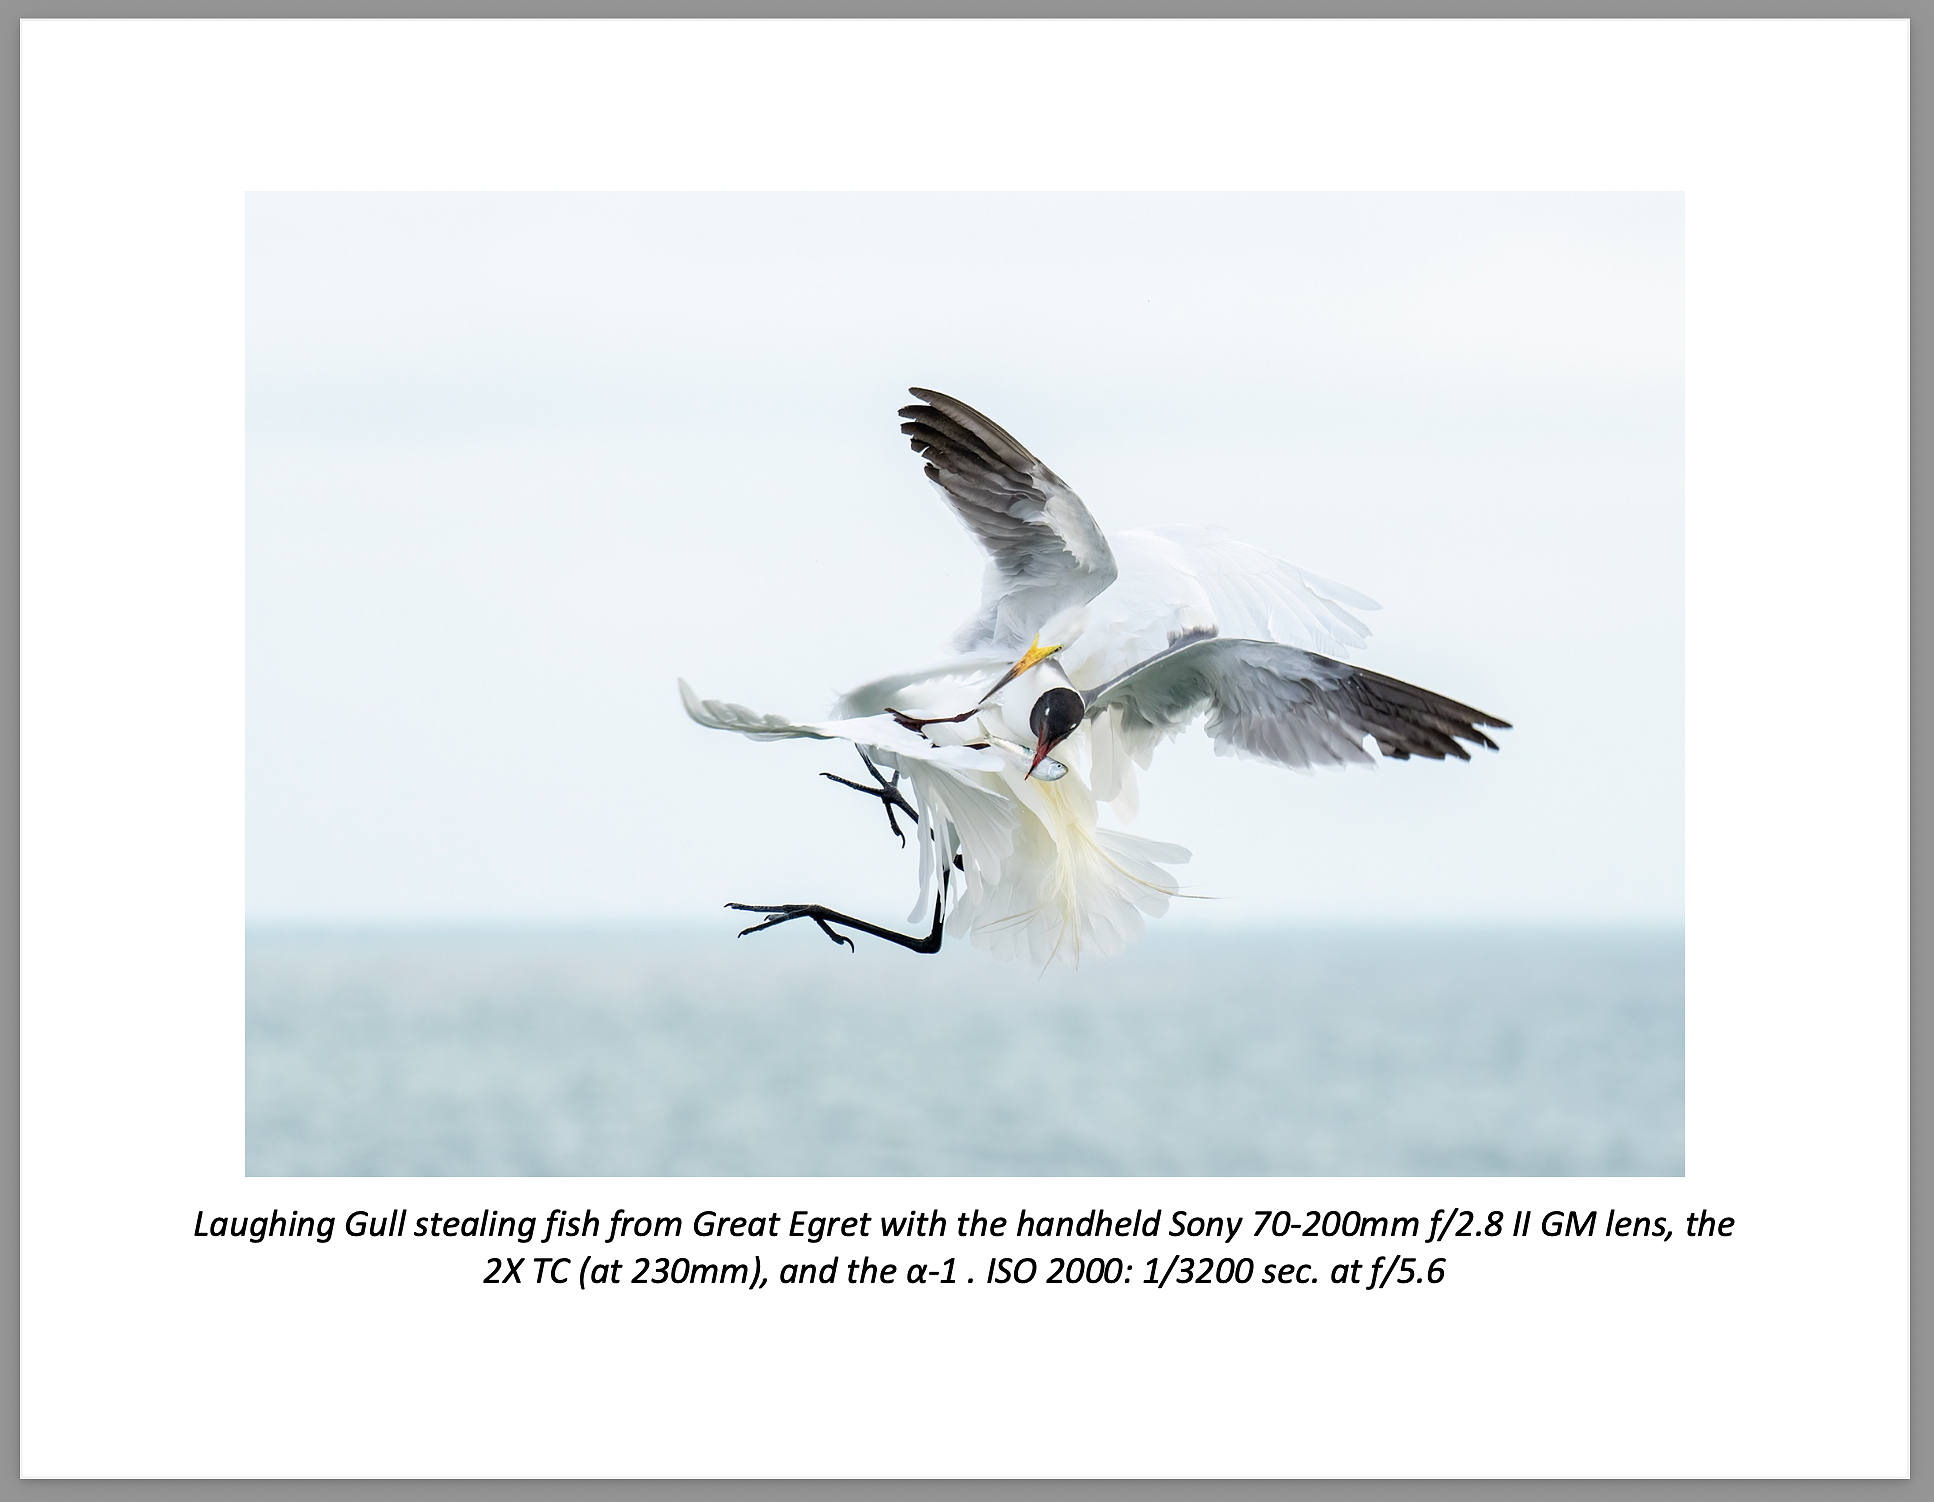
Image copyright 2024: Arthur Morris/BIRDS AS ART, the senior author. Sample page #4 Page 108 of The Complete and Quintessential Guide to Photographing Birds in Flight |
Sample page #4
Sometimes you need to press the shutter button and hold it down just in case the bird or birds turn back to look at you. The Great Egret above was flying directly away from me but turned abruptly when the gull grabbed the fish. Having learned from two lady photographer friends, I was right on this one!
Shooting flight aggressively can enable you to make images that on the surface, would seem impossible.
Typos
With all blog posts, feel free to e-mail or to leave a comment regarding any typos or errors.








I’ve almost always preferred some blue on shots like these. White is just too harsh and appears a bit unnatural.
Thanks, Bill, Nice to see you commenting. Which of the three is your top pick?
a
I do like the suble blue sky better. Just my preference
Much appreciated AA. Which of the three is your top favorite?
a