July 8th, 2012 Gatorland Photo Contest
Gatorland Photo Contest
You don’t have to be a pro photographer with expensive equipment to get a great picture at Gatorland, and they are giving you a chance to prove it. Gatorland is proud to announce the Gatorland 2012 Photo Contest. It will run from Friday July 1, 2012 through Friday, November 30, 2012. The contest is open to all photographers ages 18 and over except for those individuals affiliated with Gatorland, including stockholders, directors, employees, interns, volunteers, and their immediate families (children, siblings and spouses). All photographs submitted must have been taken at Gatorland by the entrant within the past year (after July 1, 2011).
Entry Fee:
There is an entry fee of $5 per image. There is no limit to the number of images that may be submitted. The entry fee must be may be paid online at the Gatorland Web Store here.
Prizes:
The prizes for each of the three (3) Gatorland 2012 Photo Contest categories are:
1st Place – $200 + 2 Annual Passes ($287.98 value)
2nd Place – $100 + Annual Pass ($143.99 value)
3rd Place – $50 + Single Day Pass ($72.99 value)
Categories:
The three (3) Gatorland 2012 Photo Contest categories are detailed below:
Birds
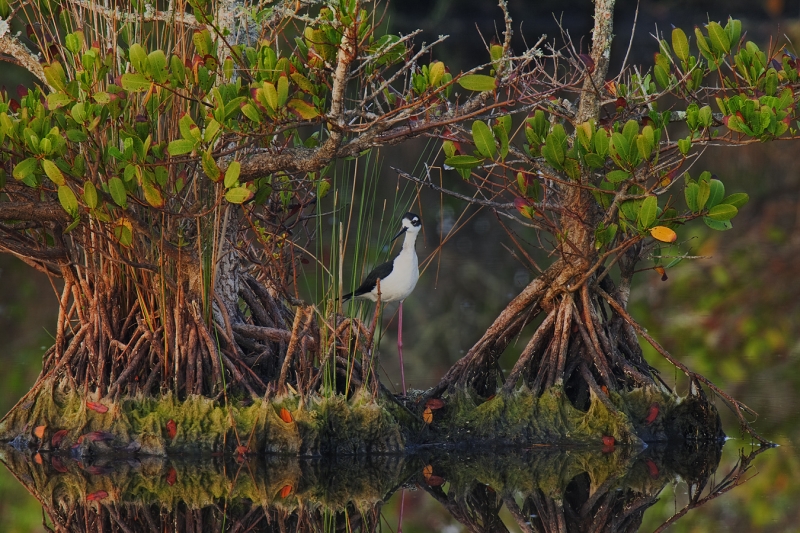
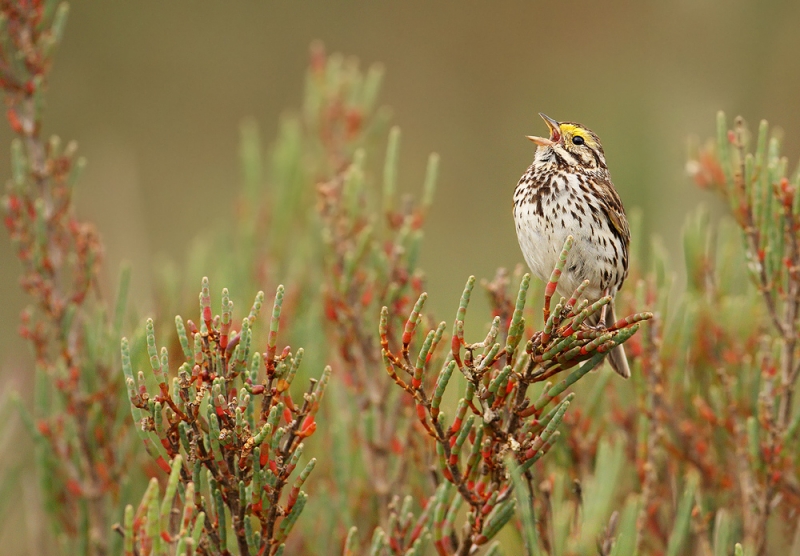
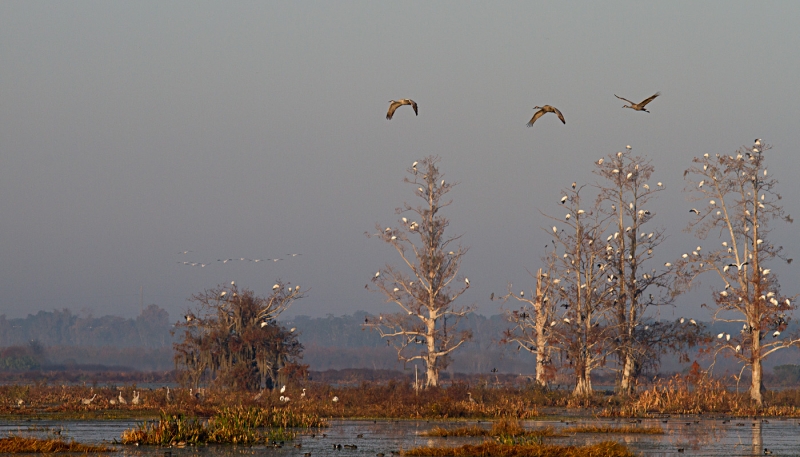
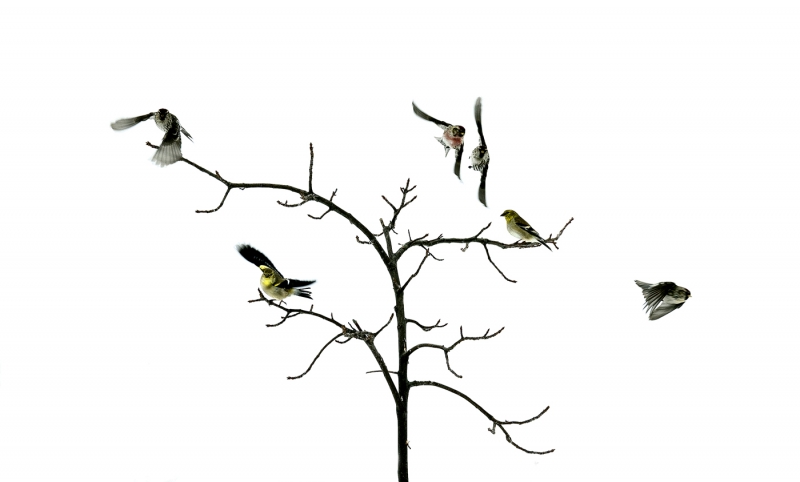
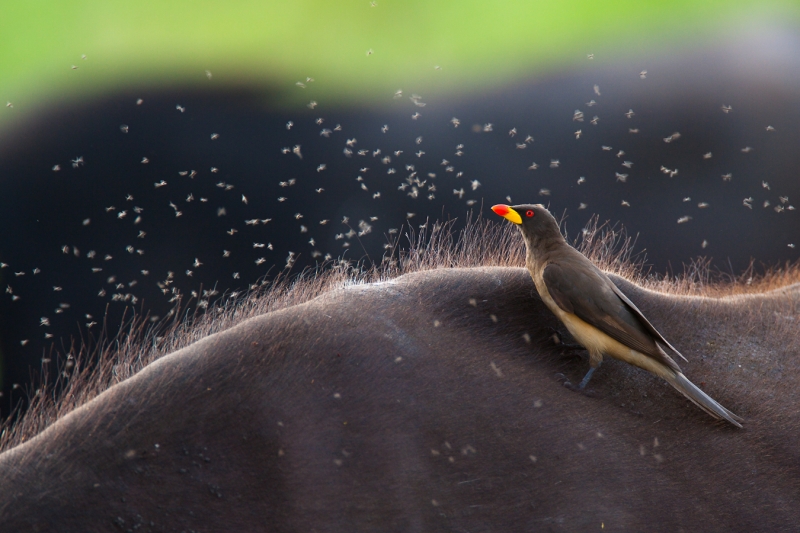
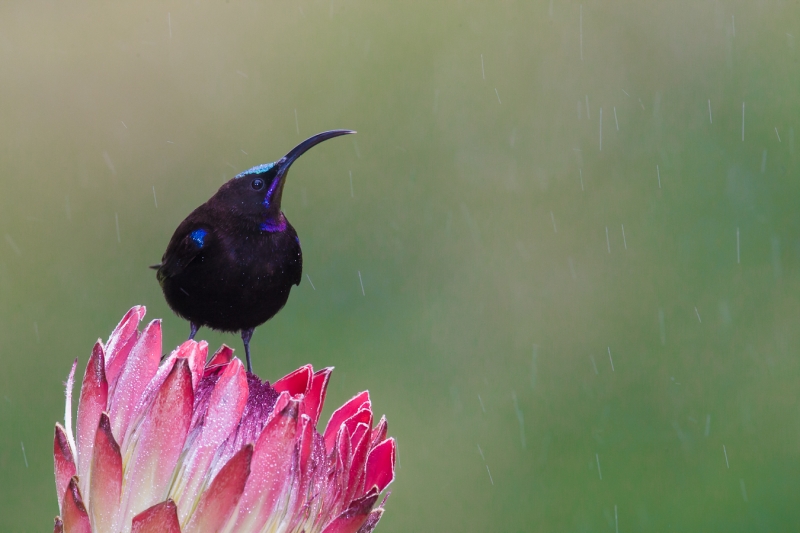
This category is reserved for images of our feathered friends, both native and exotic. Gatorland is home to over 22 different species of wild Florida birds, as well as exotic species such as Emus, Macaws, Parrots, Peacocks, and Flamingos. Whether it’s one bird or a whole flock… if it has feathers it belongs here!
Reptiles
What would a Gatorland Photo Contest be without gators? This category is not just for Gatorland’s namesake alligators, but all reptiles found within the park including crocodiles, caimen, lizards, snakes, and turtles.
| [Not a valid template] |
|
This image of a yawning American Alligator was created at Gatorland at 4:38 pm on 7-7-2012 with the Canon 800mm f/5.L IS lens and the Canon EOS-5D Mark III. ISO 400. Evaluative metering at zero: 1/1000 sec. at f/8 in Av mode.
Sensor two to the left of center and one down–Expand AF area/AI Servo Rear Focus active at the moment of exposure. Click here if you missed the Rear Focus Tutorial. Click on the image for a larger version.
I was standing in the shade of the big tower chatting with Denise Ippolito and her Out-of-the-Box co-Moderator Cheryl Slechta when I noticed this gator’s mouth begin to open imperceptibly. “Get ready” I shouted. With the animal in the sun I knew that I had enough shutter speed to go to f/8. After two frames I realized that I had been at +2/3. Without bothering to check the histogram or check for blinkies I went to zero. As it turned out, -1/3 would have been best as I need to move the Recovery Slider to 40 to eliminate the red warning blinkies in ACR.
|
Gatorland
This general category includes everything found at Gatorland except for birds and reptiles. Whether its animals, insects, plants, landscapes, architecture, or shows… this is the place for it!
Image Requirements:
All photographs submitted must have been taken at Gatorland by the entrant within the past year (after July 1, 2011). For a photo in which a person is prominent and recognizable, you must secure a model release from the subject or, in the case of a minor, the subject’s parent, and provide it to Gatorland upon request. The only exceptions to this requirement are those images that feature Gatorland employees. Photographs submitted that contain Gatorland employees do not require a model release for the employee.
All entries must be submitted in digital high quality JPG format. File size for each image must be less than 10 MB. Scanned slides or prints are acceptable.
Minor digital enhancement for cropping, red-eye removal, sharpening, brightness, contrast, and slight color adjustment are permitted, but images that have been excessively manipulated will be disqualified. Image entries may be submitted in color or black and white, and in either a landscape or portrait format. No watermarks, signatures, copyright info, borders or frames are permitted on images.
How to enter:
For your convenience, photographs may be submitted by email at publicrelations@gatorland.com. We will also accept digital images on CD submitted through the mail.
Please be sure to include the following information with all submissions:
Photographer Name, Address, Contact Phone, Email Address, and Entry Fee Order Confirmation
Please include the file name(s) for each image you will be submitting as well as the Category (Birds, Reptiles, Gatorland) for each. Please send all mail entries to: Gatorland Photo Contest 14501 South Orange Blossom Trail Orlando, FL. 32837. Gatorland is not responsible for any entries not received or lost in transit. CD’s received will not be returned. Only digital images will be accepted, sorry no prints or slides!
By entering the contest, winning entrants grant Gatorland the non-exclusive right to display, distribute, reproduce, and create derivative works of their photographs,, in whole or in part, in any media now existing or subsequently developed, for the purpose of advertising and promoting Gatorland and future contests. Any photograph reproduced will include (whenever possible) a photographer credit. Gatorland will not be required to pay any additional consideration or seek any additional approval in connection with such uses as described above.
Judging:
Submissions will be judged on content, clarity, composition and that special quality that makes an image a winner! Finalists will be notified of their status by Friday January 4, 2013, and the winners will be announced on the Gatorland Web Site. (www.gatorland.com)
July 7th, 2012 You Be the Judge: Small in the Frame
Voting in the Small in the Frame category is still open. It is looking like a closely contested category. If you would like to chime in click here.
New York City Weekend Nature Photography Seminar December 8-9, 2012
Details for this great weekend seminar are available here. Do consider joining Denise Ippolito and me for a great learning experience. Do click on the link to see many of Denise’s incredible tree and flower images. Camera club discounts available; see the details at the link.
5D Mark III Guide Pre-publication Version Still Discounted
Click here for details. When the guide is complete it will sell for $50. Folks who purchase now will receive the final version and any updates for no additional charge so ordering now is a win-win proposition. If you click on the link above you will see that the list of items not yet covered is continues to shrink….
I spent the better part of Tuesday and today working on the 5D III UG; when I am done, the price goes to $50. Buy now to save! The more I study this camera the more I learn how complex it is. Rudy Winston at Canon has been a huge help and so as Denise who helped me with the section on Multiple Exposures today. I still have some work to do.
Nickerson Beach/JBWR Photo-Tour August 15-17, 2012: Only 1 slot left!
Nickerson Beach/JBWR Photo-Tour August 15-17, 2012: $999. Co-leader: Denise Ippolito. Introductory slide program: Tuesday August 14 at 7pm. Limit 8/Openings:1.
This photo-tour is almost sold out. But with two great leaders each tons of experience at this site and the promise to learn a ton of great Photoshop stuff it does make a lot of sense.
For more info and a collection of images click here.
For info on Denise Ippolito’s July 14-15 Nickerson Beach trip–featuring lots of Common Tern chicks and fledglings, click here.
|
|
|
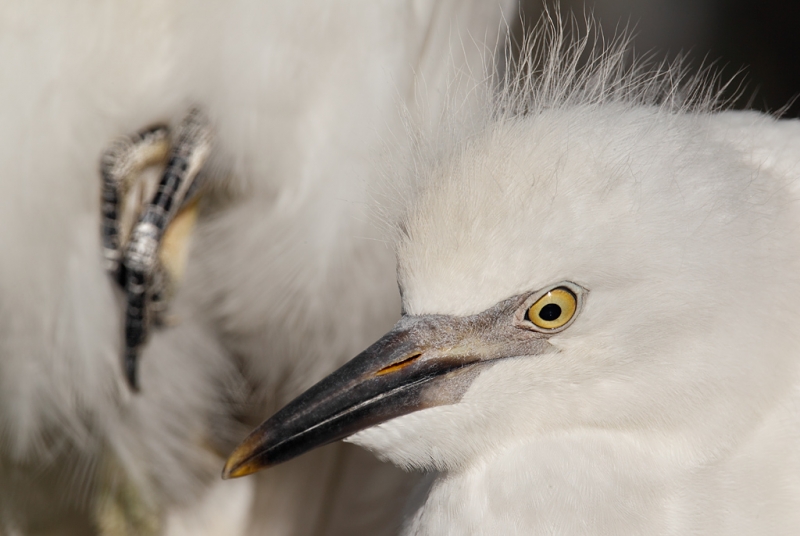
This image of Cattle Egret chicks in the nest was created this morning at Gatorland in Kissimmee, FL with the tripod-mounted Canon 800mm f/5.L IS lens, the 2X III TC, and the Canon EOS-1D Mark IV. ISO 400. Evaluative metering +2/3 stop: 1/320 sec. at f/16 in Manual mode.
Live View/Live Mode AF Rear Focus AF as described in the Mark IV User’s Guide. Click here if you missed the Rear Focus Tutorial. Click on the image for a larger version.
|
Gatorland Hot Times Two
Denise Ippolito and I traveled to Gatorland this morning. Many folks believe that it is too hot in Florida in July and that there is no good bird photography to be had. Well, it was hot–we left at 10am, but there was lots of good bird photography including lots of good flight photography. We will be back there this afternoon and then again Sunday morning. We are meeting BPN Out-of-the-ox moderator Cheryl Slechta and BPN member Maureen Allen today, Saturday, at 4pm. Right now I gotta nap but wanted to get this invite out.
I love working tight so the Live View/Live Mode AF trick is one that I use often as I cannot see well enough to focus perfectly all the time.
Like the Foot?
Do you think that the foot in the backgrounds adds to or detracts in this image?
Shopper’s Guide.
Support both the Bulletins and the Blog by making all your B & H purchases here.
Below is a list of the gear talked about in this blog post. Thanks a stack to all who have used the Shopper’s Guide links to purchase their gear as a thank you for all the free information that we bring you on the Blog and in the Bulletins. Before you purchase anything be sure to check out the advice in our Shopper’s Guide.
Canon 800mm f/5.6L IS lens. Right now this is my all time favorite super-telephoto lens.
Canon 2X III TC Sharper than the last version designed to work best with the new Series II Super-telephoto lenses.
Canon EOS-1D Mark IV professional digital camera body. The very best professional digital camera body that I have ever used.
And from the BAA On-line Store:
LensCoats. I have a LensCoat on each of my big lenses to protect them from nicks and thus increase their re-sales value. All my big lens LensCoat stuff is in Hardwood Snow pattern.
LegCoat Tripod Leg Covers. I have four tripods active and each has a Hardwood Snow LegCoat on it to help prevent further damage to my tender shoulders 🙂 And you will love them in mega-cold weather….
GT3532 LS. This one replaces the GT3530LS Tripod and will last you a lifetime. I’ll be commenting on this new model soon. In short, I like it.
Mongoose M3.6 Tripod Head. Right now this is the best tripod head around for use with lenses that weigh less than 9 pounds. For heavier lenses, check out the Wimberley V2 head.
CR-80 Replacement Foot for Canon 800. When using the 800 on a Mongoose as I do, replacing the lens foot with this accessory lets the lens sit like a dog whether pointed up or down and prevents wind-blown spinning of your lens on breezy days by centering the lens directly over the tripod.
Double Bubble Level. You will find one in my camera’s hot shoe whenever I am not using flash.
The Lens Align Mark II. I use the Lens Align Mark II pretty much religiously to micro-adjust all of my gear an average of once a month and always before a major trip. Enjoy our free comprehensive tutorial here.
BreezeBrowser. I do not see how any digital photographer can exist without this program.
July 6th, 2012 You Be the Judge: Small in the Frame
As regular readers know, the judging for the BIRDS AS ART 1st International Bird Photography Competition has been complete for some time. All of the judges including me were stunned by the quality of the images. We have been and will continue to be posting all of the images that were sent to the judges category by category. Each of you will have a chance to judge each category. Please read the directions below carefully. Your votes will not determine the winning images but it has been and will continue to be fun to see how everyone’s votes compare to the votes of the judges. So far the top pick of the public vote has matched the top pick of the judge’s panel in three of the six categories. I am betting that they match up perfectly in Small in the Frame.
With 422 images, this was a popular category. The 19 images sent to the five judges showed the strength of the category. Here is yet another big time thank you to Darrell, Chris, Julie, and Tim. And a big time thanks also to Peter Kes and Denise Ippolito for pitching in during the first rounds of image selection. We worked very hard for nearly three full days to get from more than 5500 images down to the final 163.
From the rules: Small in the Frame/Environmental category: images of a bird or flocks of birds in their natural habitat.
Before you vote, please sure to click on each image so that you can view it at full size. Then pick your five favorites and vote them 5, 4, 3, 2, and 1 with 5 being your very favorite. Like this:
Roseate Spoonbills squabbling: 5
Siskins fighting: 4
Snowy Egrets midair combat: 3
Great Crested Grebe displaying: 2
Common Tern feeding chick: 1
The “Sample Vote” above is for illustrative purposes only. Please do not let the sample vote, the votes of others, or the names assigned to the images influence your vote. Please put each of your five favorites on its own line by hitting “enter” after each one. No ties; please assign a single digit, 5, 4, 3, 2 or 1 to each of your five favorites. As you will see there are a great many dramatic images here.
Please Note
If you wish to comment on any or all of the images, please do so below your five voting lines; this will make tallying the votes easier. Votes cast by those who fail to follow the formatting directions will be relegated to the Trash Bin.
The voting will be closed in about two days and the actual winning images for this category will be posted soon thereafter. A tally of the public vote along with my analysis and comments will follow.
Thanks for voting and please remember to breathe deeply and have fun.
.
.
|
|
|
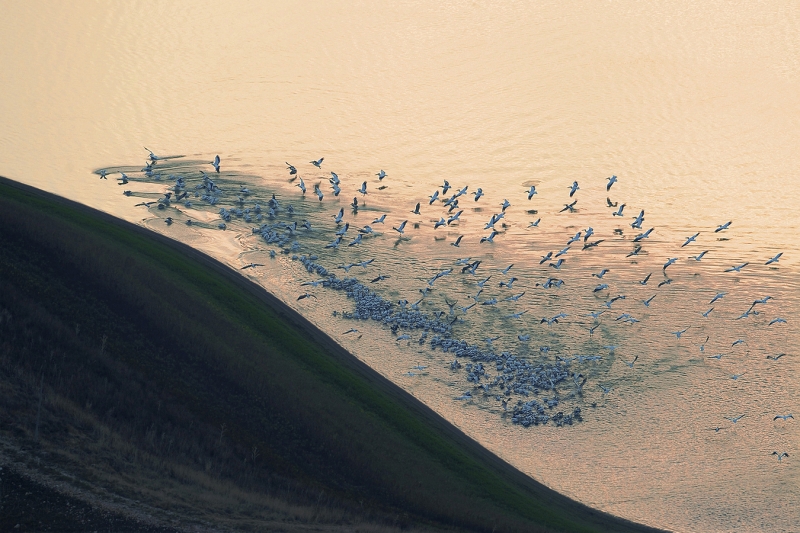
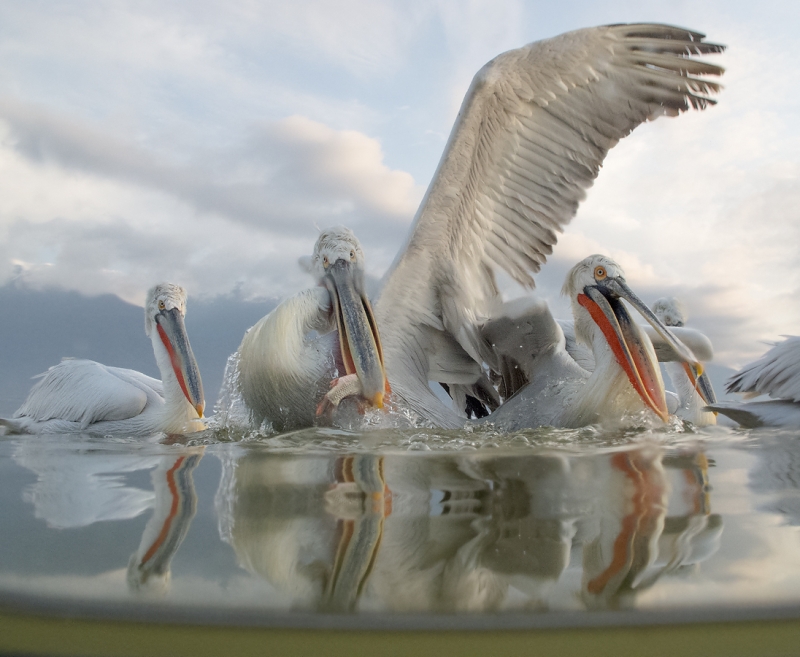
African White Pelicans Fishing
|
.
.
.
.
.
.
.
.
.
.
.
.
.
.
.
.
July 5th, 2012 And the Winners in the Blur Category Are!
|
|
|
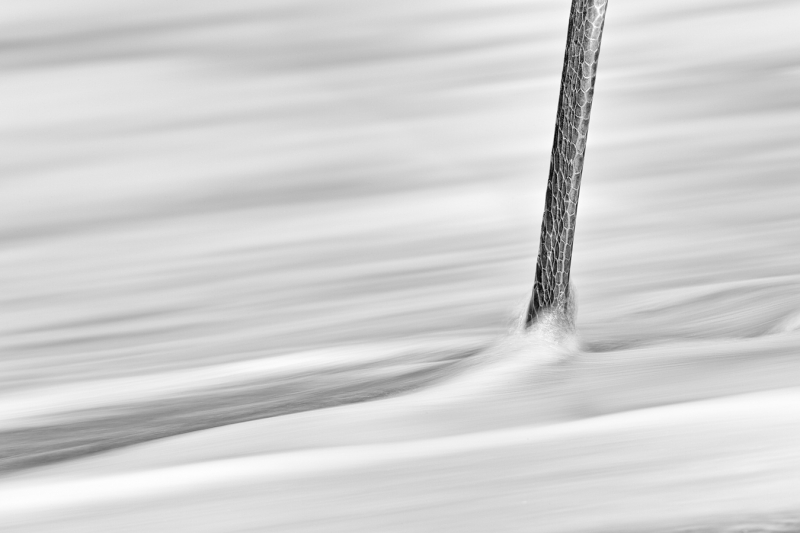
Congratulations to Clemens van der Werf, Fort Lauderdale, Florida, USA (website), His image, Great Blue Heron leg, Blind Pass, Captiva Island, Florida, was awarded first place in the Blur category of the BIRDS AS ART 1st Annual Bird Photography Competition. Click on the image to see a larger, even more spectacular version. Tripod-mounted Canon 800mm f/5.6L IS lens with the EOS-1DMIV on a Gitzo 3541XLS tripod and Mongoose M3.6 action head. ISO 50. Evaluative metering +1 2/3 stops: 1/15 sec. at f/22 set manually.
|
Great Blue Heron leg, Clemens van der Werf
From Clemens:
This image was created just before 10am on a partly cloudy morning. The Great Blue Heron was standing near the shore line waiting patiently for one of the local fishermen to toss something its way. I noticed the water flowing past the bird’s leg on its way back to the Gulf as each wave receded. I envisioned an image that revealed the texture of the bird’s leg in sharp contrast with the blurred water. I chose a shutter speed slow enough to blur the water but fast enough to yield a sharp image of the leg. The image was converted to black and white using Nik SilverEfex Pro.
All of the judges loved the creative use of a slow shutter speed, the implied motion of the water, the clean look, the diagonal lines, the pattern of the scutes—the external scales on the leg, the black and white presentation, and the beautiful image design.
|
|
|
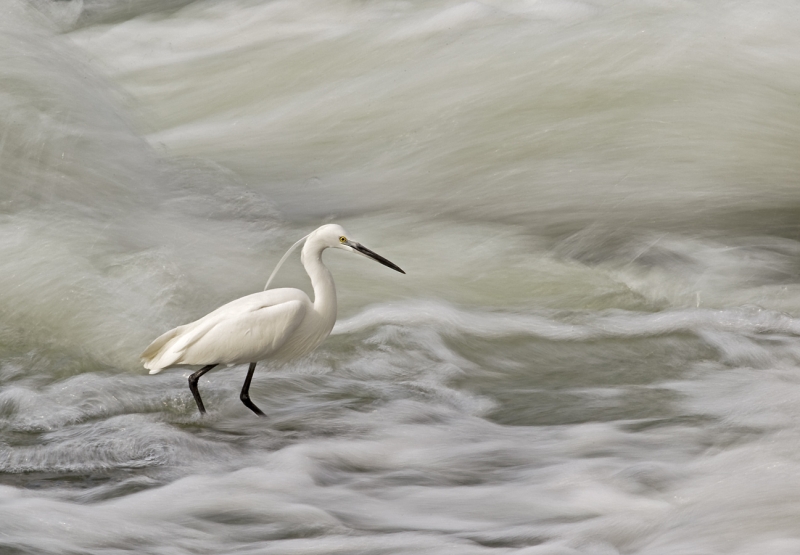
Congratulations to Andre Nel of South Africa. His image, Little Egret blur, was awarded second place in the Blur category of the BIRDS AS ART 1st Annual Bird Photography Competition. Click on the image to see a larger, even more spectacular version. Canon 100-400mm lens with the Canon EOS-1D Mk IV on a bean-bag. ISO 200: 1/10 sec. at f/40.
|
Little Egret in the rapids, Andre Nel
From Andre
Although the small game reserve of Borakalalo is close to Johanneburg (South Africa) it is not a popular destination because it does not host the “big five” African mammals. I love it because it is quiet. Late one afternoon, I saw this Little Egret fishing in the rapids downstream from a small weir. I was struck by the bird’s statue-stillness especially as compared to the rushing water. To capture this contrast I put the lens on a bean bag on my car window. As the bird was very much aware of my presence I stayed in my vehicle. While the bird entertained me for a full ten minutes before flying off I tried a variety of shutter speed settings. The 1/10 sec. gave me just the effect I was looking for.
The soft light, the movement of the rushing water, the sharpness of the subject, the bird’s breeding plume, and the lovely rule-of-thirds image design combined to make this a powerful image.
|
|
|
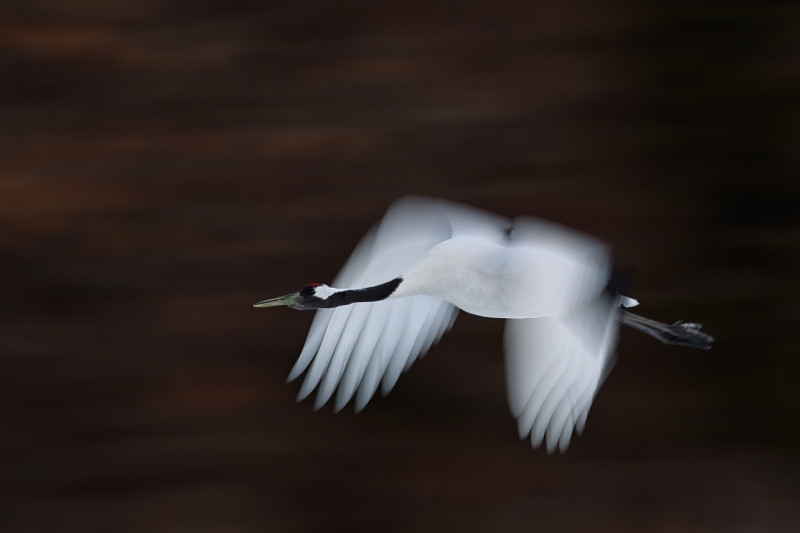
Congratulations to Paul Mckenzie of Hong Kong. His image, Red-crowned Crane flight blur, was third place in the Blur category of the BIRDS AS ART 1st Annual Bird Photography Competition. Click on the image to see a larger, even more spectacular version. Canon EF600mm f4 IS USM lens with the EOS-1D MIV on a Gitzo GT3530LS tripod with a Wimberley gimbal head: 1/30 sec.
|
Red-crowned Crane flight blur, Paul Mckenzie
From Paul:
Blurs are very much a personal preference and my own preference is for the head and eyes of the subject to be reasonably sharp but for the wings (in the case of birds) to show motion. I have taken thousands of standard flight shots of Red-Crowned Cranes entering and leaving this wood-surrounded, snow-covered field over the last three years but much prefer my blurred images. I was attracted to a dark patch of woods with brown leaves and knew that this would make a nice background for the white-winged bird. I waited for a crane to fly by and panned relatively smoothly with the flying birds. I had three chances over a 30 minute period. This was the best effort.
The perfect exposure, the sharp face, and the pleasingly blurred white wings set against the dark cranberry-colored background helped to create this delight to the eye.
Congrats!
Congrats to the three winning photographers and to those who created the 9 other spectacular images that made it to the final round of judging. Getting a single image to the final round is a momentous accomplishment.
This was not a hugely popular category with only 146 images submitted. 12 images were sent to the five judges. Here is another big time thank you to Darrell, Chris, Julie, and Tim. And a big time thanks also to Peter Kes and Denise Ippolito for pitching in during the first rounds of image selection. We worked very hard for nearly three full days to get from more than 5500 images down to the final 163.
The Pleasing Blurs category was defined as follows: for pleasingly blurred images of a bird or a flock of birds; images in this category must be created in-camera.
The prizes (see at the end of this post) will be shipped once all the winners are announced as several folks had more than one top three image. Be sure to patronize our sponsors; without them, this contest would not exist. There will be more educational stuff from this category coming soon.
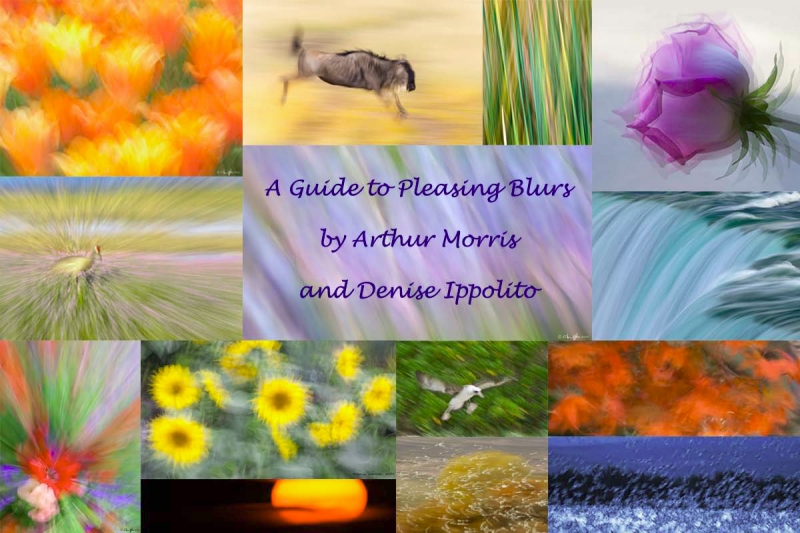
A Guide to Pleasing Blurs
Contrary to popular belief, pleasing blurs are not unfocused accidents. Nearly all are the result of careful planning, a great deal of knowledge, and impeccable techniques. More and more recently pleasing blurs are seen walking away with top prizes in a variety of high prestige contests and competitions. And they are my favorite type of image. I love the freedom that digital gives us to play and experiment. You can learn a ton about creating pleasing blurs in “A Guide to Pleasing Blurs” by Denise Ippolito and yours truly. Learn more or purchase here.
| First Prize |
Runner Up |
Highly Commended |
Sponsor |
| $100 Gift Certificate |
$50 Gift Certificate |
$25 Gift Certificate |
B&H PHOTO VIDEO |
| choice of lens plate |
P-5 camera body plate |
Plamp |
Wimberley |
| 16 GB 450 X UDMA Compact Flash Card |
Sensor Scope |
Universal Memory Card Reader |
Delkin Devices |
| Level 3 Gift Subscription |
Level 2 Gift Subscription |
Level 1 Gift Subscription |
Nature Photographer Magazine |
| $30 Discount Certificate |
$25 Discount Certificate |
$20 Discount Certificate |
Canvas On Demand |
| Laptop Bag or Pixel Sunscreen |
Pixel Pocket Rocket |
AA Battery Holder |
Think Tank |
| $250 Gift Certificate |
$25 Gift Certificate |
$10 Gift Certificate |
Lens Coat |
| Canon/Nikon Lens Plate |
Canon/Nikon Camera Body Plate |
. |
4th Generation Design |
| . |
Better Beamer |
Better Beamer Replacement Fresnel |
Visual Echoes |
| TriKlear Kit |
TriKlear Kit |
TriKlear Kit |
Lens Pen |
| ABP II |
. |
. |
BIRDS AS ART |
| . |
Double Bubble |
. |
HP Marketing |
| BreezeBrowser Pro/Downloader Pro Combo |
BreezeBrowser Pro |
Downloader Pro |
Breeze Systems |
| Sito HD Version Gold Web Site |
|
|
Sito HD |
July 4th, 2012 You Be the Judge: Blur Voting
Voting on the Blur category will be closed at 4pm on Thursday, July 5. If you would like to pick your 5 favorites, click here.
|
|
|
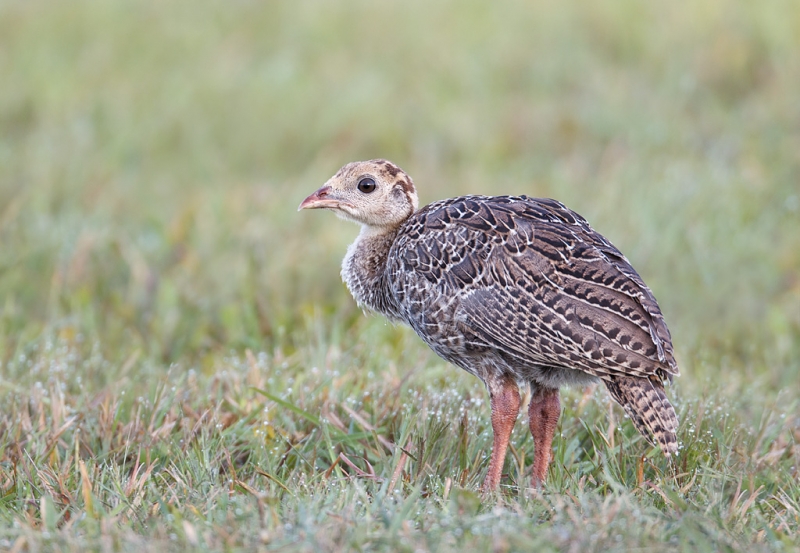
This image of a Wild Turkey poult was created this morning down by the lake at my home in Indian Lake Estates, FL (using my SUV as blind) with the Canon 800mm f/5.L IS lens, the 1.4X III TC, and the Canon EOS-1D Mark IV. ISO 400. Evaluative metering +1 stop: 1/125 sec. at f/8 in Av mode. The lens was supported by the BAA-designed Big Lens Ultimate Beanbag (BLUBB)on the lowered car window with a Double Bubble Level. in the hot shoe.
Central sensor (by necessity)/AI Servo/Rear Focus AF on the bird’s neck and recompose. Click here if you missed the Rear Focus Tutorial. Click on the image for a larger version.
|
Poult
poult (noun) pōlt: a young fowl; especially, a young turkey
Image Processing
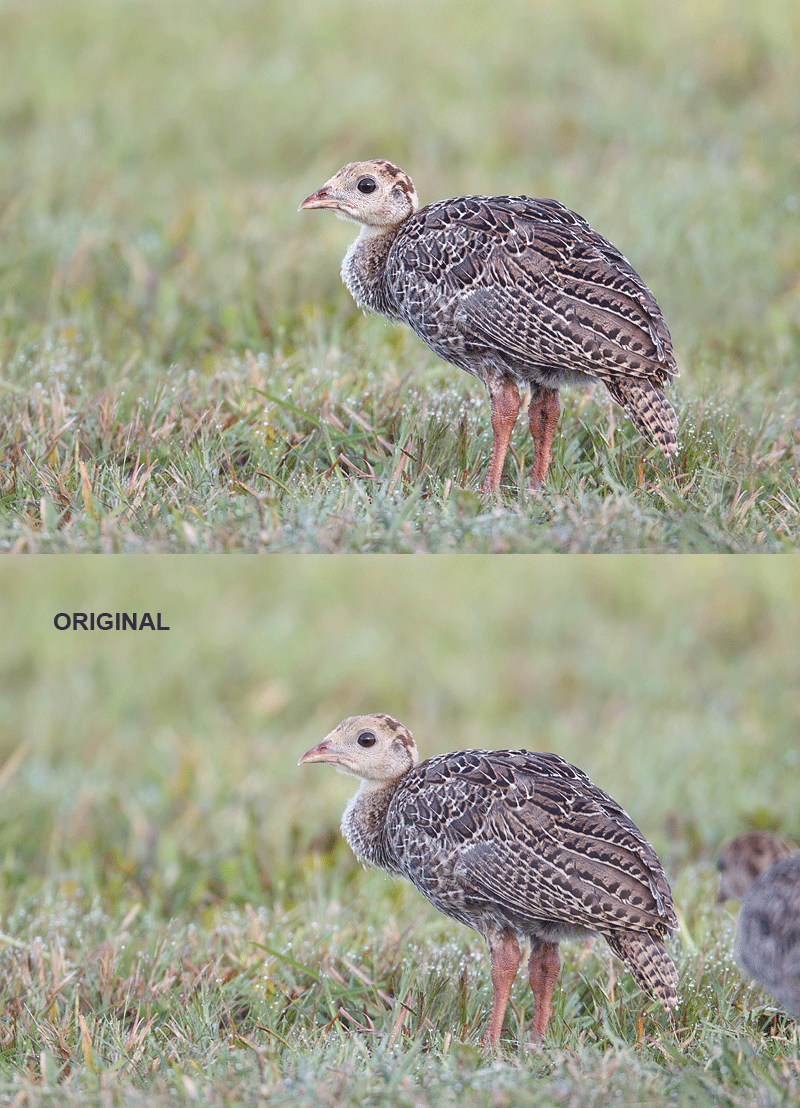
The RAW file was converted in ACR as usual. Image clean-up also as usual with a large Quick Mask to cover the bird in the lower right corner, lots of 40% Clone Stamp Tool work, some Patch Tooling, and a bit of Protect and Defend Cloning on a layer. With NIK Color Efex Pro I painted in a 40% Detail Extractor layer on the bird’s face and ran a 75% Tonal Contrast layer on the bird only (via the Quick Selection Tool). That was followed by some Eye Doctor work and selective sharpening of the bird’s face. All but the NIK stuff is covered in detail in Digital Basics. The NIK stuff will be covered in the next update of Digital Basics. All updates are free.
Canon EOS-7D On Sale: $1349 at B&H
I am not sure when this offer expires but I know that it expires quite soon so if you are in the market for a 7D click here. Purchase includes your choice of a free accessory.
New York City Weekend Nature Photography Seminar December 8-9, 2012
Detail for this great weekend seminar are available here. Do consider joining Denise Ippolito and me for a great learning experience. Do click on the link to see many of Denise’s incredible tree and flower images. Camera club discounts available; see the details at the link.
5D Mark III Guide Pre-publication Version Still Discounted
Click here for details. When the guide is complete it will sell for $50. Folks who purchase now will receive the final version and any updates for no additional charge so ordering now is a win-win proposition. If you click on the link above you will see that the list of items not yet covered is continues to shrink….
I spent the better part of Tuesday and today working on the 5D III UG; when I am done, the price goes to $50. Buy now to save! The more I study this camera the more I learn how complex it is. Rudy Winston at Canon has been a huge help and so as Denise who helped me with the section on Multiple Exposures today. I still have some work to do.
Nickerson Beach/JBWR Photo-Tour August 15-17, 2012: Only 1 slot left!
Nickerson Beach/JBWR Photo-Tour August 15-17, 2012: $999. Co-leader: Denise Ippolito. Introductory slide program: Tuesday August 14 at 7pm. Limit 8/Openings:1.
This photo-tour is almost sold out. But with two great leaders each tons of experience at this site and the promise to learn a ton of great Photoshop stuff it does make a lot of sense.
For more info and a collection of images click here.
For info on Denise Ippolito’s July 14-15 Nickerson Beach trip–featuring lots of Common Tern chicks and fledglings, click here.
Shopper’s Guide
Below is a list of the gear used to create the images in today’s blog post. Thanks a stack to all who have used the Shopper’s Guide links to purchase their gear as a thank you for all the free information that we bring you on the Blog and in the Bulletins. Before you purchase anything be sure to check out the advice in our Shopper’s Guide.
Canon 800mm f/5.L IS lens. Right now this is my all time favorite super-telephoto lens.
Canon 1.4X III Teleconverter. Designed to work best with the new Series II super-telephoto lenses.
Canon EOS-1D Mark IV professional digital camera body. My two Mark IVs are my workhorse digital camera bodies.
And from the BAA On-line Store:
LensCoats. I have a LensCoat on each of my big lenses to protect them from nicks and thus increase their re-sales value. All my big lens LensCoat stuff is in Hardwood Snow pattern.
LegCoat Tripod Leg Covers. I have four tripods active and each has a Hardwood Snow LegCoat on it to help prevent further damage to my tender shoulders 🙂
GT3532 LS. This one replaces the GT3530LS Tripod and will last you a lifetime. I’ll be commenting on this new model soon. In short, I like it, and it will last you more than a lifetime.
Mongoose M3.6 Tripod Head. Right now this is the best tripod head around for use with lenses that weigh less than 9 pounds. For heavier lenses, check out the Wimberley V2 head.
CR-80 Replacement Foot for Canon 800. When using the 800 on a Mongoose as I do, replacing the lens foot with this accessory lets the lens sit like a dog whether pointed up or down and prevents wind-blown spinning of your lens on breezy days by centering the lens directly over the tripod.
Double Bubble Level. You will find one in my camera’s hot shoe whenever I am not using flash.
Be sure to check out our camera body User’s Guides here.
The Lens Align Mark II. I use the Lens Align Mark II pretty much religiously to micro-adjust all of my gear an average of once a month and always before a major trip. Enjoy our free comprehensive tutorial here.
Canon EOS-1D Mark IV User’s Guide. Learn to use your Mark IV the way that I use mine. Also available for the 7D and the Mark III here.
July 3rd, 2012 You Be The Judge: Blur/Voting Still Open
If you have not yet voted on the images in the Blur category you can do so here.
Action Category Voting Analysis and Related Comments
Totals of the Judges’ Votes (each of 5 judges awarded each image 1-5 points):
1-Siskins Fighting, David Pattyn: 21
2-Common Tern feeding chick, Vladimir Kogan: 20
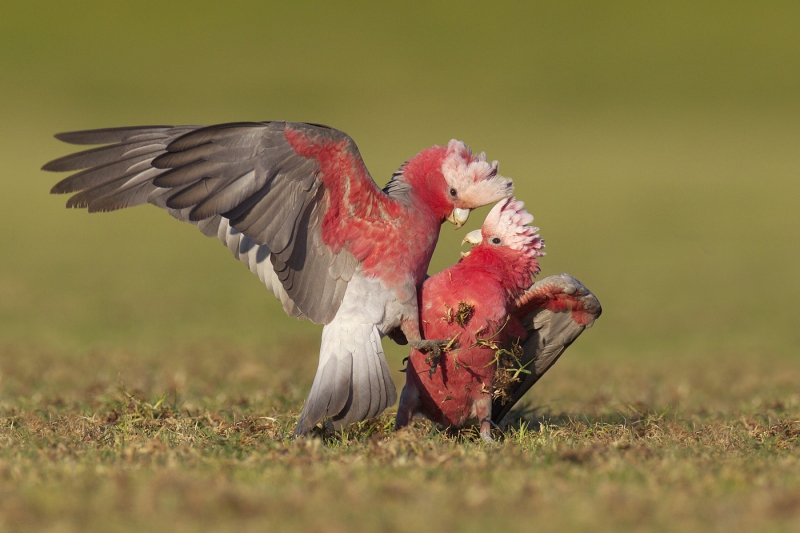
3-Galahs battling, Jan Wegener: 19
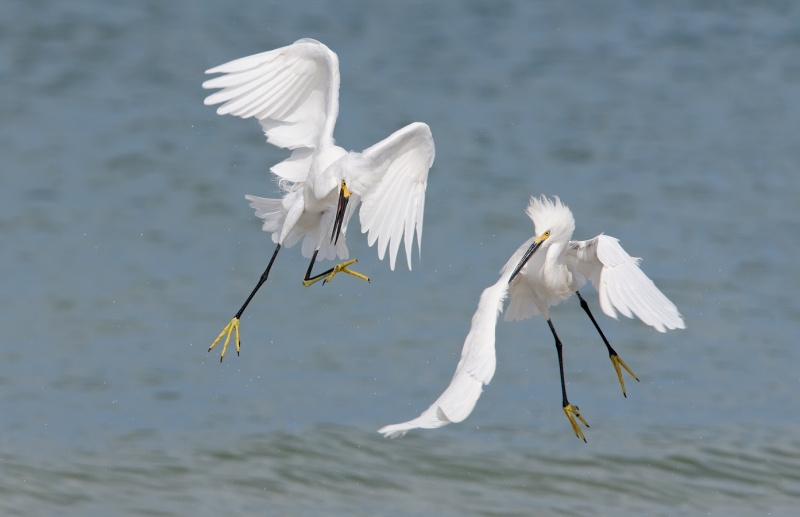
T4-Snowy Egrets midair combat, Cheryl Molennor: 18
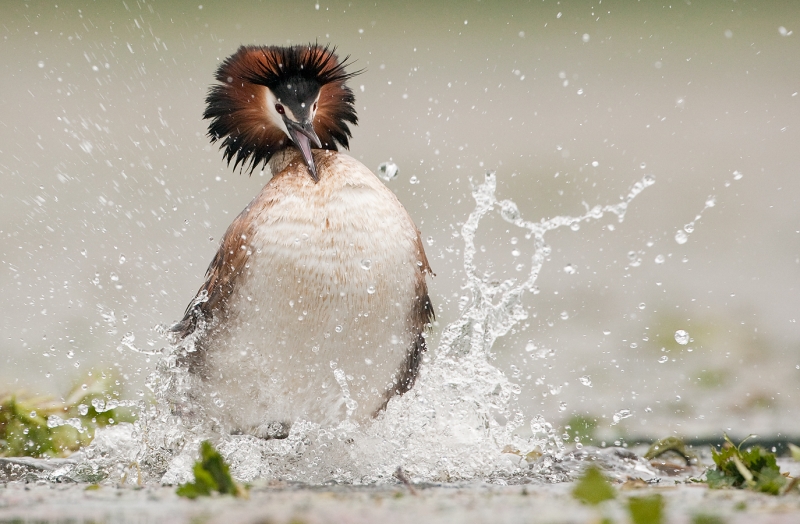
T4-Great-Crested Grebe displaying, David Pattyn: 18
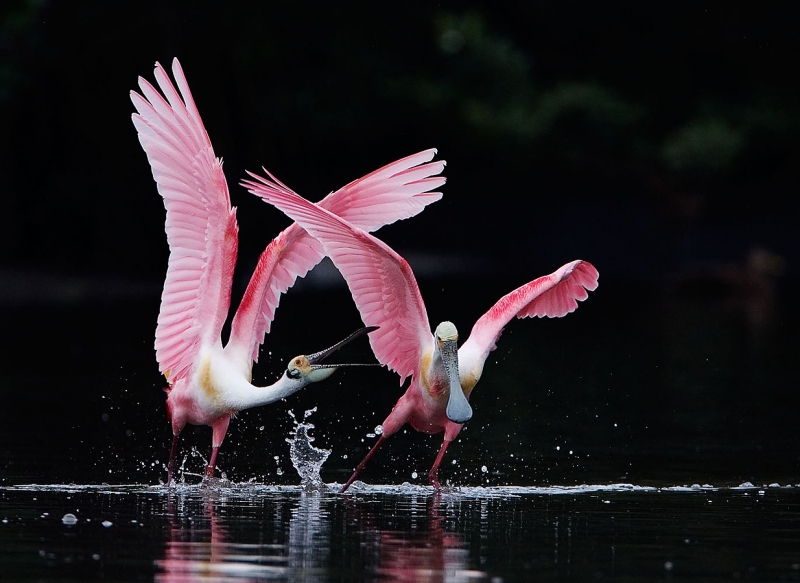
T6-Roseate Spoonbills squabbling, Richard Bohnet-: 17
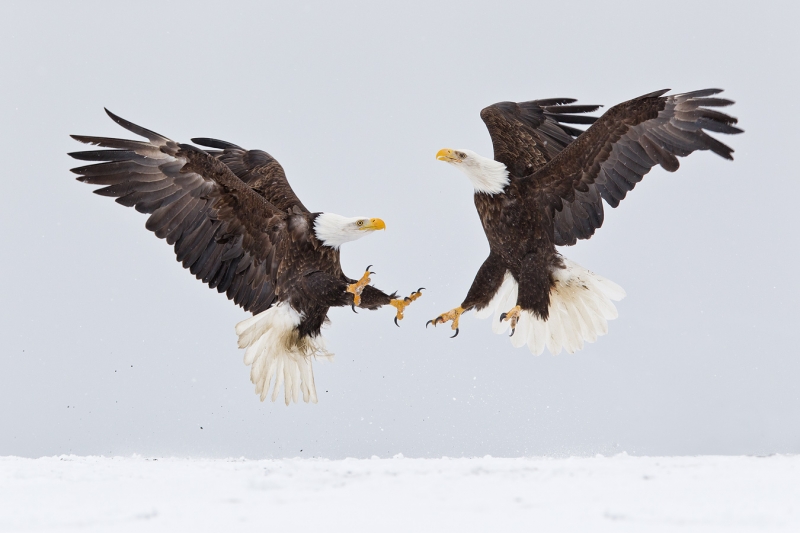
T6-Bald Eagle face off, Clemens van der Werf: 17
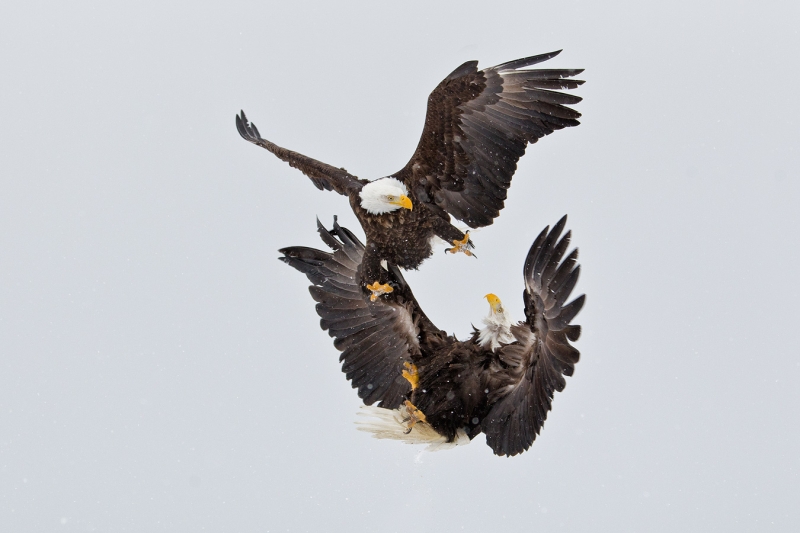
T6-Upside down Bald Eagle fight, Clemens van der Werf: 17
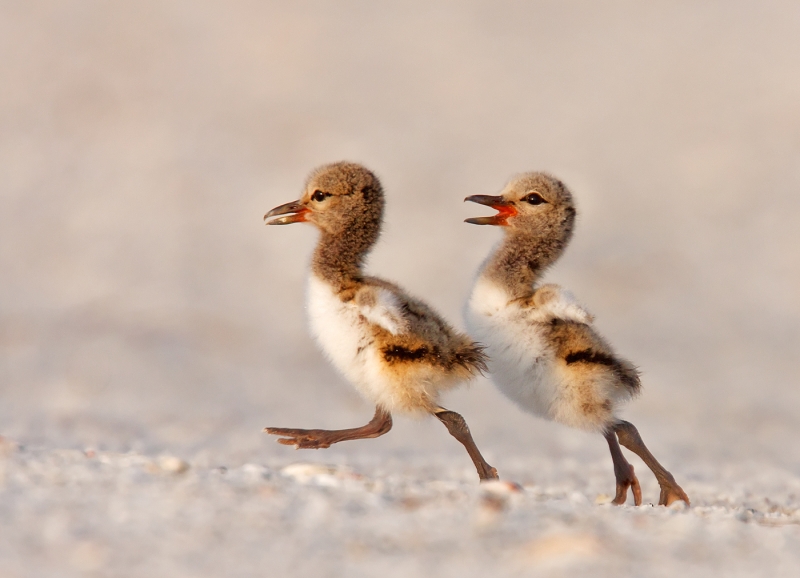
9-American Oystercather chicks chasing, Marina Scarr: 16
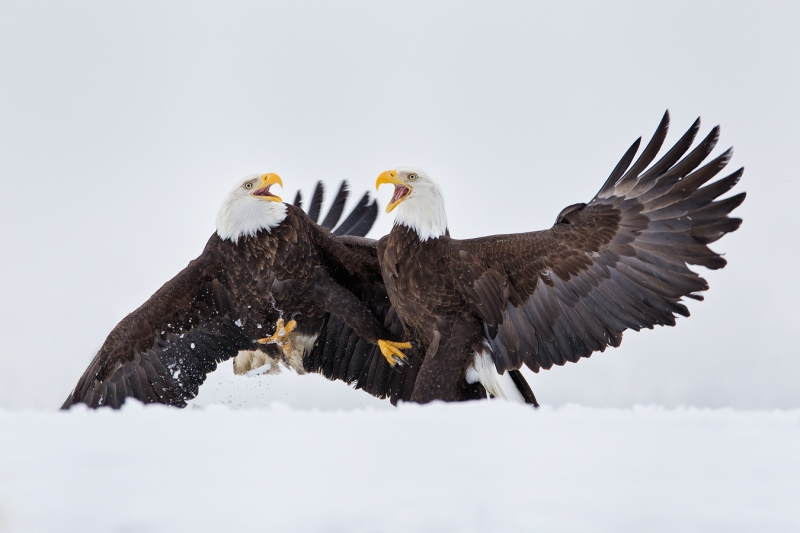
10-Bald Eagle ground warfare, Clemens van der Werf: 14
11-Dalmatian Pelican fish grab, David Pattyn: 13
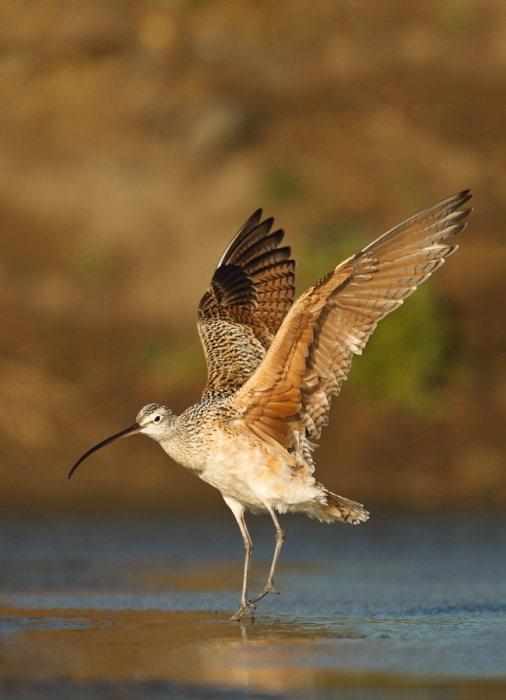
12-Long Billed Curlew flapping after bath, Gaurav Mittal: 12
Public Voting Totals (each of you was asked to vote your five favorite images 1-5 points with 5 being your favorite):
1-Roseate Spoonbills squabbling: Richard Bohnet: 143
2-Siskins Fighting, David Pattyn 140
3-Common Tern feeding chick, Vladimir Kogan: 137
4-Great-Crested Grebe displaying, David Pattyn: 98
5-American Oystercather chicks chasing, Marina Scarr: 75
6-Bald Eagle face off, Clemens van der Werf: 64
7-Upside down Bald Eagle fight, Clemens van der Werf: 56
8-Snowy Egrets midair combat, Cheryl Molennor: 45
T9-Galahs battling, Jan Wegener: 39
T9-Dalmatian Pelican fish grab, David Pattyn: 39
T9-Bald Eagle ground warfare, Clemens van der Werf: 39
12-Long Billed Curlew flapping after bath, Gaurav Mittal: 10
Analysis of the Voting
Action was another popular category with 445 images submitted. 15 images were sent to the five judges. Three images were disqualified after we received the RAW files, 2 of those for cropping more than 75%, that is, more than 50% of the length and the width.
Thanks as always to Darrell, Chris, Julie, and Tim. And a big time thanks also to Peter Kes and Denise Ippolito for pitching in during the first rounds of image selection. We worked very hard for nearly three full days to get from more than 5500 images down to the final 163.
Correlation between the judges panel and the public vote was relatively high with Siskins Fighting coming in 1/2 and Common Tern feeding chick finishing up 2/3. Probably the biggest mismatches were the Galahs battling at 3/9 and the Roseate Spoonbills squabbling at 6/1. Kudos to David Pattyn who placed 3 images in the top 11 and to Clemens van der Werf who had three eagle images in the top 10.
|
|
|
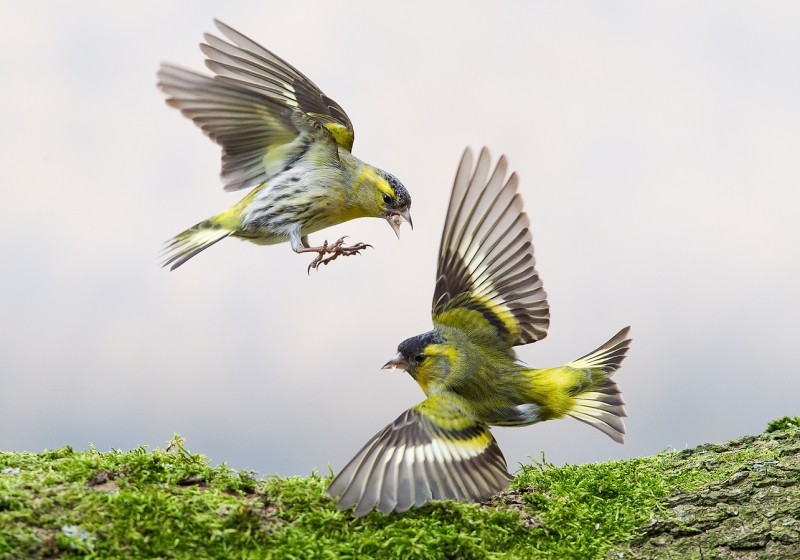
Congratulations David Pattyn of The Netherlands. His image, Siskins Fighting” was awarded first prize in the Action category of the BIRDS AS ART 1st Annual Bird Photography Competition. Click on the image to see a larger, even more spectacular version. Tripod-mounted Canon 300mm f/2.8L IS lens with the EOS-1D Mark IV. ISO 1600: 1/1600 sec. at f/5.6 in Manual mode.
|
Siskins Fighting, David Pattyn
Photographing songbirds in flight or in action is a huge, huge challenge. Here, the fabulous interaction between the two birds, the spectacular pose of the lower bird, the feet and claws of the upper bird, and the remarkable sharpness made this image a winner. Amazingly, it is only a small crop from the RAW file. Spectacular as this one is, had the bird on the left raised its wings fully this image would have been ever stronger.
|
|
|
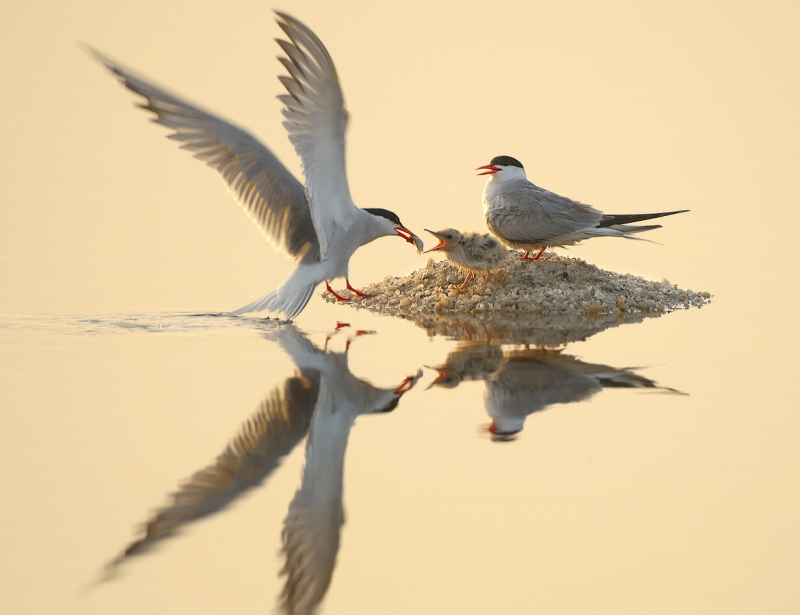
Congratulations Vladimir Kogan of Israel. His image, Common Tern feeding chick, was awarded second place in the Action category of the BIRDS AS ART 1st Annual Bird Photography Competition. Click on the image to see a larger, even more spectacular version. Nikon D3, AF Nikkor 200-400 mm f4 G VR (at 400mm) + AF-S Teleconverter TC-17E II, 1/320; f7.1; ISO 500, GT5541LS Systematic 6X Carbon Fiber Tripod Legs; Arca-Swiss Monoball Z1 dp.
|
Common Tern feeding chick, Vladimir Kogan
What’s to like? Soft yellow light, a beautiful arrangement of the three birds, the chick and the guarding parent razor sharp, a perfect exposure, killer reflections, still, still water, and the shutter button pushed at the exact right instant. In other words, a lot! Note, however, that with the incomplete reflection a nice crop from the bottom might have moved this fine image up one spot.
|
|
|
Congratulations to Jan Wegener of Melbourne, Australia. His image, Galahs battling, was awarded third place in the Action category of the BIRDS AS ART 1st Annual Bird Photography Competition. Click on the image to see a larger, even more spectacular version. Canon EOS-1D Mark IV, 600 f/4L IS, ISO 800. 1/2500 sec. at f/7.1
|
Galahs battling, Jan Wegener
Start with a nice low angle, add in two attractive red birds with raised pink crests, and throw in two perfect head angles and a killer face to face fighting pose. Have one birds talons grabbing he breast of the other as the victim screams in protest. What to you wind up with? One very fine action image.
|
|
|
Snowy Egrets midair combat, Cheryl Molennor
|
A strong image with a good exposure and two sharp birds battling it out. The wing position and the hanging feet of the bird on our left are quite appealing.
|
|
|
Great-Crested Grebe displaying, David Pattyn.
|
The sharpness, the raised crest, the open bill, and the flying spray all contribute to the success of this very strong image.
|
|
|
Bald Eagle face off, Clemens van der Werf
|
Part of the problem for Clemens here was that he had three excellent images competing against each other. During the initial rounds of judging there were many,many excellent eagle images. We picked the three strongest. I for one never imagined that they were all made by the same photographer. With two good head angles and both birds with their wings swept back this was an obvious selection for the final round.
|
|
|
Upside down Bald Eagle fight, Clemens van der Werf
|
With one bird on its back and the upper bird reaching down with out-stretched talons this one was the strongest of the three eagle images for me.
|
|
|
Roseate Spoonbills squabbling, Richard Bohnet
|
Excellent exposure control in a difficult situation, excellent sharpness, a killer interaction with the rear bird on the attack with its wings raised, and a great splash make this one special. Had the bird on our right had it’s wings raised fully this one would surely have placed higher. The bill of the bird on our left is slightly lost in the black background.
|
|
|
American Oystercather chicks chasing, Marina Scarr
|
Cuter than cute with great action. And everybody loves chicks. The two poses and the interaction are superb. Problems here include the head of the front chick turned away, a bit of motion blur, and the rear foot of the lead bird being hidden behind a small pebble. Kudos to marina for achieving sharp focus and firing the shutter at just the right moment.
|
|
|
Bald Eagle ground warfare, Clemens van der Werf
|
A spectacular image in its own right with one wing buried in the snow, the right hand bird screaming with the underwing detail in the near wing revealed beautifully, and the left hand bird on the attack with talons at the ready.
|
|
|
Dalmatian Pelican fish grab, David Pattyn
|
Dramatic action and skies and some nice reflections make this one special. The clipped tail of the left-most bird and the two birds in the background on the right are both problematic. Eliminating those two birds would have been both relatively easy and permitted under the rules.
|
|
|
Long Billed Curlew flapping after bath, Gaurav Mittal
|
Despite the gentleman who commented that this image was not sharp, its extreme sharpness is quite remarkable. The raised wings, the one raised foot, the lovely framing, and the complementary background colors make this a very strong last place/last place image.
B&H Rebates
Click here to enjoy double rebates of up to $550 by selecting one of four Canon dSLR camera bodies (including the killer EOS-5D Mark III) and then adding a lens from a large selection. The lenses included many of the intermediate telephoto lenses that I use and recommend. This offer has been extended until July 28, 2012.
Or click here for some great deals on 7D/60D starter kits.
July 2nd, 2012 New York City Weekend Nature Photography Seminar December 8-9, 2012
Detail for this great weekend seminar are available here. Do consider joining Denise Ippolito and me for a great learning experience. Do click on the link to see many of Denise’s incredible tree and flower images. Camera club discounts available; see the details at the link.
5D Mark III Guide Pre-publication Version Still Discounted
Click here for details. When the guide is complete it will sell for $50. Folks who purchase now will receive the final version and any updates for no additional charge so ordering now is a win-win proposition. If you click on the link above you will see that the list of items not yet covered is continues to shrink….
I spent the better part of Tuesday and today working on the 5D III UG; when I am done, the price goes to $50. Buy now to save! The more I study this camera the more I learn how complex it is. Rudy Winston at Canon has been a huge help and so as Denise who helped me with the section on Multiple Exposures today. I still have some work to do.
Nickerson Beach/JBWR Photo-Tour August 15-17, 2012: Only 1 slot left!
Nickerson Beach/JBWR Photo-Tour August 15-17, 2012: $999. Co-leader: Denise Ippolito. Introductory slide program: Tuesday August 14 at 7pm. Limit 8/Openings:1.
This photo-tour is almost sold out. But with two great leaders each tons of experience at this site and the promise to learn a ton of great Photoshop stuff it does make a lot of sense.
For more info and a collection of images click here.
For info on Denise Ippolito’s July 14-15 Nickerson Beach trip–featuring lots of Common Tern chicks and fledglings, click here.
You Be the Judge: Pleasing Blurs
The judging for the BIRDS AS ART 1st International Bird Photography Competition has been complete for some time. All of the judges including me were stunned by the quality of the images. We have been and will continue to be posting all of the images that were sent to the judges category by category. Each of you will have a chance to judge each category. Please read the directions below carefully. Your votes will not determine the winning images but it has been and will continue to be fun to see how everyone’s votes compare to the votes of the judges. So far the top pick of the public vote has matched the top pick of the judge’s panel in three of the five categories. I am not sure what might happen in Action….
Though creating pleasing blurs is one of my very favorite things in photography, this was not a hugely popular category with only 146 images submitted. That despite that pleasingly blurred images have fared very well in the BBC Wildlife Photographer of the Year Competition in recent years. A dozen images were sent to the five judges. Here is another big time thank you to Darrell, Chris, Julie, and Tim. And a big time thanks also to Peter Kes and Denise Ippolito for pitching in during the first rounds of image selection. We worked very hard for nearly three full days to get from more than 5500 images down to the final 163.
The Pleasing Blurs category was defined as follows: for pleasingly blurred images of a bird or a flock of birds; images in this category must be created in-camera.
Before you vote, please sure to click on each image so that you can view it at full size. Then pick your five favorites and vote them 5, 4, 3, 2, and 1 with 5 being your very favorite. Like this:
Roseate Spoonbills squabbling: 5
Siskins fighting: 4
Snowy Egrets midair combat: 3
Great Crested Grebe displaying: 2
Common Tern feeding chick: 1
The “Sample Vote” above is for illustrative purposes only. Please do not let the sample vote, the votes of others, or the names assigned to the images influence your vote. Please put each of your five favorites on its own line by hitting “enter” after each one. No ties; please assign a single digit, 5, 4, 3, 2 or 1 to each of your five favorites. As you will see there are a great many dramatic images here.
Please Note
If you wish to comment on any or all of the images, please do so below your five voting lines; this will make tallying the votes easier. Votes cast by those who fail to follow the formatting directions will be relegated to the Trash Bin.
The voting will be closed in about two days and the actual winning images for this category will be posted soon thereafter. A tally of the public vote along with my analysis and comments will follow.
Thanks for voting and please remember to breathe deeply and have fun.
|
|
|
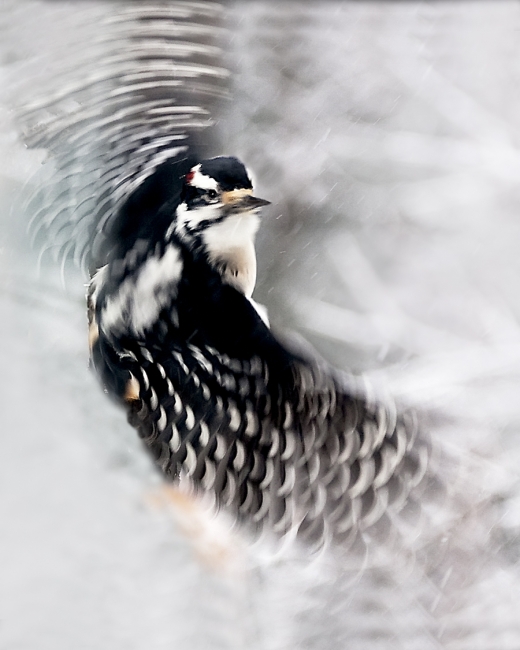
Woodpecker vertical wing blur
|
.
.
|
|
|
Red-crowned Crane flight blur
|
.
.
|
|
|
Little Egret in the rapids
|
.
.
|
|
|
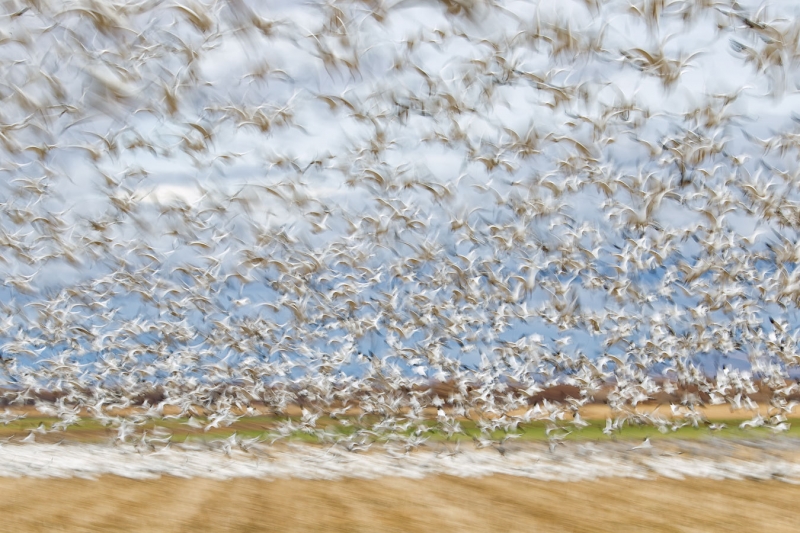
Snow Geese blast-off blur
|
.
.
.
|
|
|
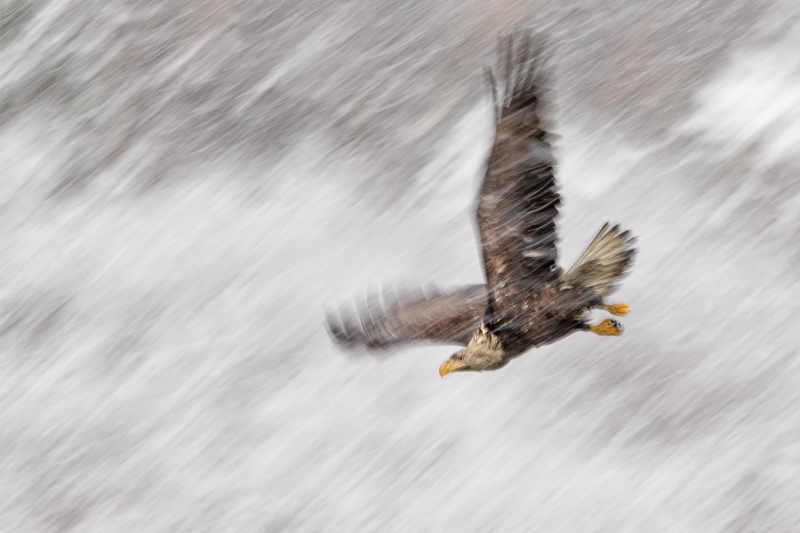
Sub-adult Bald Eagle pan blur
|
.
|
|
|
Snow Geese leaving the field blur
|
.
July 1st, 2012 And the Winners in the Action Category Are!
|
|
|
Congratulations David Pattyn of The Netherlands. His image, Siskins Fighting” was awarded first prize in the Action category of the BIRDS AS ART 1st Annual Bird Photography Competition. Click on the image to see a larger, even more spectacular version. Tripod-mounted Canon 300mm f/2.8L IS lens with the EOS-1D Mark IV. ISO 1600: 1/1600 sec. at f/5.6 in Manual mode.
|
Siskins Fighting, David Pattyn
From David:
Near winter’s end, when food becomes more difficult to find, more and more birds visit our garden feeders. In some years—for no obvious reasons—we have lots of Siskins; in others we have none. In March 2011 there were lots of Siskins around and thus they were very aggressive toward each other in competition for food. I placed seed in a crack in the log and focused manually on the spot where I hoped the action would occur. Autofocus simply does not work in situations like this; the action is over before you have a chance to frame the image and acquire focus. While working from inside my home office I would look directly at the log rather than through the viewfinder. Whenever there was any action I would release the shutter with the remote cord in my hand. It took lots of trial and error and many hundreds of images to get everything just right but getting one superb image made it all worthwhile.
Photographing songbirds in flight or in action is a huge, huge challenge. Here, the fabulous interaction between the two birds, the spectacular pose of the lower bird, the feet and claws of the upper bird, and the remarkable sharpness made this image a winner. Amazingly, it is only a small crop from the RAW file.
|
|
|
Congratulations Vladimir Kogan of Israel. His image, Common Tern feeding chick, was awarded second place in the Action category of the BIRDS AS ART 1st Annual Bird Photography Competition. Click on the image to see a larger, even more spectacular version. Nikon D3, AF Nikkor 200-400 mm f4 G VR (at 400mm) + AF-S Teleconverter TC-17E II, 1/320; f7.1; ISO 500, GT5541LS Systematic 6X Carbon Fiber Tripod Legs; Arca-Swiss Monoball Z1 dp.
|
Common Tern feeding chick, Vladimir Kogan
From Vladimir:
Every spring the Common Terns arrive from Africa. When they do, I start photographing them and continue to do so throughout the breeding season. I observed the terns their feeding chicks for long periods. But to create an artistic frame with a sharp reflection you need the following conditions: very early morning, the first rays of the sun on a clear day, soft lighting, and a complete lack of a wind. From many early morning photo sessions I had this combination of the required parameters only on rare occasion.
What’s to like? Soft yellow light, a beautiful arrangement of the three birds, the chick and the guarding parent razor sharp, a perfect exposure, killer reflections, still, still water, and the shutter button pushed at the exact right instant. In other words, a lot!
|
|
|
Congratulations to Jan Wegener of Melbourne, Australia. His image, Galahs battling, was awarded third place in the Action category of the BIRDS AS ART 1st Annual Bird Photography Competition. Click on the image to see a larger, even more spectacular version. Canon EOS-1D Mark IV, 600 f/4L IS, ISO 800. 1/2500 sec. at f/7.1
|
Galahs battling, Jan Wegener
From Jan:
Galahs are often found in big groups. They are very playful birds. I spotted this group on a soccer field in Melbourne, Australia and was amused by their humorous displays and fights. These squabbles are of a playful nature; the birds do not cause any serious harm to each other. This behavior usually takes place before the breeding season and the fights only last a couple of seconds. Galahs in the cities are usually not overly skittish and when you approach them carefully they allow you to get quite close. Watching a flock of these colorful avian clowns never gets boring and always offers some unique photo opportunities.
Start with a nice low angle, add in two attractive red birds with raised pink crests, and throw in two perfect head angles and a killer face to face fighting pose. Have one birds talons grabbing he breast of the other as the victim screams in protest. What to you wind up with? One very fine action image.
Congrats!
Congrats to the three winning photographers and to those who created the other 9 spectacular images that made it to the final round of judging. Getting a single image to the final round is a momentous accomplishment.
This was a popular category with 445 images submitted. 15 images were sent to the five judges. Three images were disqualified after we received the RAW files, 2 of those for cropping more than 75%, more than 50% of the length and width. Here is another big time thank you to Darrell, Chris, Julie, and Tim. And a big time thanks also to Peter Kes and Denise Ippolito for pitching in during the first rounds of image selection. We worked very hard for nearly three full days to get from more than 5500 images down to the final 163.
The Action category was designed for images that feature a bird or birds in action. Pretty straightforward. But spectacular.
The prizes (see below) will be shipped once all the winners are announced as several folks had more than one top three image. Be sure to patronize our sponsors; without them, this contest would not exist. There will be more educational stuff from this category coming soon.
| First Prize |
Runner Up |
Highly Commended |
Sponsor |
| $100 Gift Certificate |
$50 Gift Certificate |
$25 Gift Certificate |
B&H PHOTO VIDEO |
| Wimberley V2 Head |
P-5 camera body plate |
Plamp |
Wimberley |
| 16 GB 450 X UDMA Compact Flash Card |
Sensor Scope |
Universal Memory Card Reader |
Delkin Devices |
| Level 3 Gift Subscription |
Level 2 Gift Subscription |
Level 1 Gift Subscription |
Nature Photographer Magazine |
| $30 Discount Certificate |
$25 Discount Certificate |
$20 Discount Certificate |
Canvas On Demand |
| Laptop Bag or Pixel Sunscreen |
Pixel Pocket Rocket |
AA Battery Holder |
Think Tank |
| $50 Gift Certificate |
$25 Gift Certificate |
$10 Gift Certificate |
Lens Coat |
| Canon/Nikon Lens Plate |
Canon/Nikon Camera Body Plate |
. |
4th Generation Design |
| . |
Better Beamer |
Better Beamer Replacement Fresnel |
Visual Echoes |
| TriKlear Kit |
TriKlear Kit |
TriKlear Kit |
Lens Pen |
| ABP II |
. |
. |
BIRDS AS ART |
| . |
Double Bubble |
. |
HP Marketing |
| BreezeBrowser Pro/Downloader Pro Combo |
BreezeBrowser Pro |
Downloader Pro |
Breeze Systems |
| Sito HD Version Gold Web Site |
|
|
Sito HD |
July 1st, 2012
|
|
|
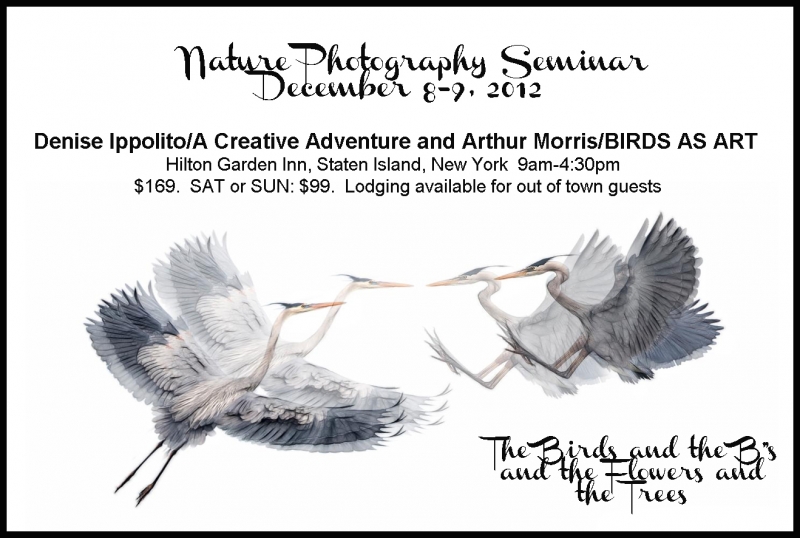
“The Birds and the B’s and the Flowers and the Trees”
The B’s: Become a better nature photographer. Best ways to optimize your images. Bone up on lenses and what to do with them. Bring forth your creativity. Brush up on your field techniques.
|
NYC Weekend Nature Photography Seminar: December 8-9, 2012
Presented by Denise Ippolito/A Creative Adventure and Arthur Morris/BIRDS AS ART
Hilton Garden Inn, Staten Island, New York. 9am-4:30pm
Weekend: $169. SAT or SUN: $99. Lodging available for out of town guests.
|
|
|
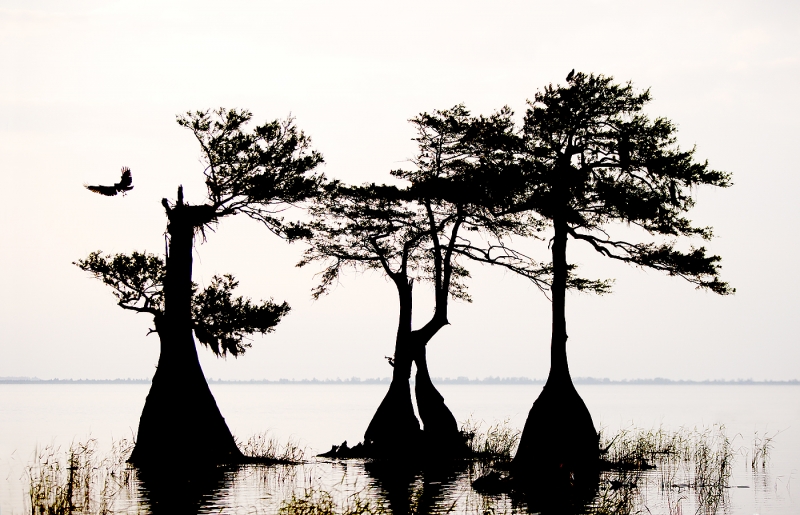
Osprey cypress-scape. Image Copyright Arthur Morris/click on the image to enjoy a larger version
|
Registration Incentives
A Free copy of Digital Basics and a discount on a choice of Educational Materials
All weekend Seminar Registrants will receive a copy of Digital Basics (a $20 value) that will include the free updates. In addition, all weekend Seminar Registrants are invited to apply a $20 discount on one of the following items:
The Art of Bird Photography. The original soft-cover How-to classic.
The Art of Bird Photography II. The all-new follow-up: 916 pages on CD only.
The Two-Book Bundle. One of each of the above.
A Guide to Pleasing Blurs. By Arthur Morris & Denise Ippolito. Learn everything that you need to know about creating the eye-catching pleasingly blurred images that are doing so well in all major photography contests.
A Guide to Creative Filters and Effects. By Denise Ippolito. Denise shares dozens of her best creative techniques.
Any of our Camera User’s Guides. Learn to set up and use your Canon or Nikon camera like a pro.
Phone orders only. Folks who have already registered qualify for the benefits above and will hear from us via e-mail.
Note: folks who take advantage of the Sponsoring Club or Small Group discount offers are eligible for the Registration Incentives above.
For Small Groups
Get together with a group of four (or more) friends–five (or more) folks in all and apply a $40 discount to each registration fee. Here’s how: put five checks in an envelope and be sure to include an e-mail address for each registrant. Then mail the envelope to us. Or, send an e-mail to Jim with a list of the names and e-mail addresses for each registrant. Then call Jim at 863-692-0906 with your credit card in hand and then collect from each of your friends.
|
|
|
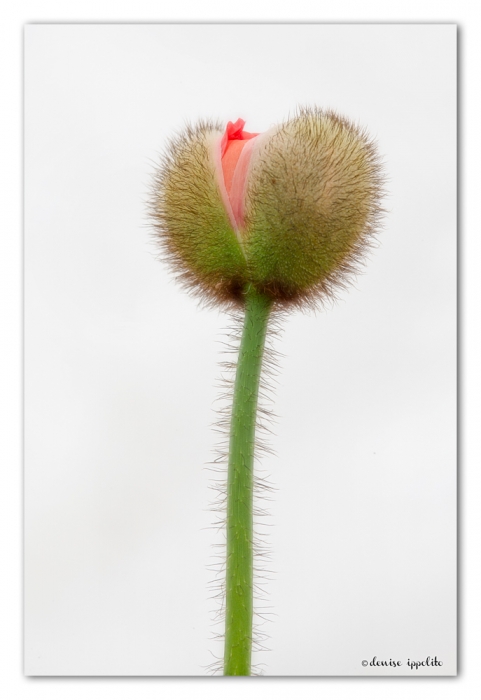
Poppy bud popping. Image Copyright Denise Ippolito/click on the image to enjoy a larger version
|
Camera Club Discounts
We are offering a $20 discount to members of camera clubs or natural history organizations that promote the seminar on their websites or via an e-mail blast to their membership list. Have your club president or webmaster e-mail us at e-mail.
|
|
|
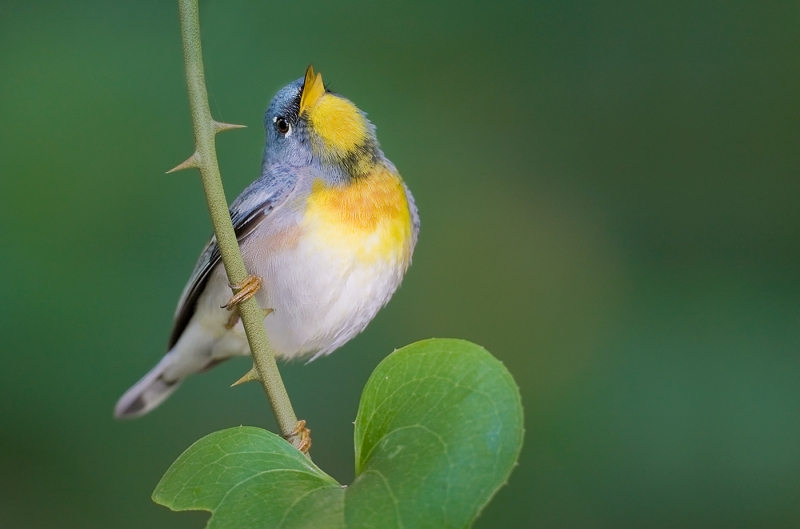
Northern Parula singing. Image Copyright Arthur Morris/click on the image to enjoy a larger version
|
A Fraction of What You Will Learn at the NYC Seminar:
- 1-How to become a better nature photographer.
- 2-How to create technically perfect, artistically designed images in the field.
- 3-How to make your images look better during the image optimization process: RAW conversions, image clean-up, Quick Masking, Layer Masking, saving the WHITEs, and lots more.
- 4-New ways to photograph flowers and trees.
- 5-How to get the right exposure every time in ten seconds or less.
- 6-How to create the truly pleasing blurs that are so popular today in many prestigious contests.
- 7-Why the longest lens in your bag is often not the best lens for bird photography.
- 8-How to use NIK Color Efex Pro to revamp your digital workflow and dramatically improve the look of your images.
- 9-How to evaluate your images; each registrant will be asked to submit two 1400 X 1050 jpegs via e-mail before December 7; a selection of the submitted images will be chosen for critiquing at the seminar.
- 10-flight photography tips.
|
|
|
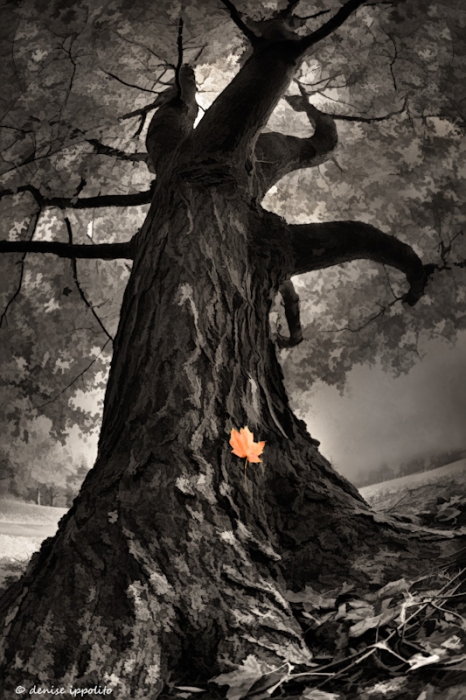
Tree with orange leaf. Image Copyright Denise Ippolito/click on the image to enjoy a larger version
|
To Register
To register for the seminar you can call Jim or Jennifer between 9am and 5pm weekdays or call artie on weekends or evenings at 863-692-0906 with your credit card in hand. You can send a PayPal to us at birdsasart@verizon.net or to birdsasart@att.net. Or you can send a check made out to “Arthur Morris” for the full amount in US dollars to us here: Arthur Morris/BIRDS AS ART, PO Box 7245, Indian Lake Estates, FL 33855; be sure to include a note with your clearly written e-mail address and phone number on it and print the words “NYC Seminar” on your check. You will receive a confirmation letter approximately 3 weeks before the seminar. Please e-mail for lodging options.
Seminar Schedule
Saturday: Image Capture–Doors open: 8am
9:00am: denise/slides: Blooming Ideas/Creating new and different images of flowers and trees
10:00am: artie/slides: Tools of the Trade/Choosing and using lenses for bird and wildlife photography
11:00am: Break
11:15am: artie/slides: Beautiful Image Basics/Learning to create pleasing image designs
12:00noon: Lunch break
1:30pm: artie and denise: Refining your photographic vision. Learning to extract the image from the larger scene
2:15pm: denise & artie: Pro Gear Handling Tips: Live demos/tripod and lens handling in the field. Includes flight photography tips.
2:45pm: artie: It’s easier than you think: How to clean your sensor without fear or trepidation/Live Demo
3:00: Break
3:15: denise & artie/slides: Creating Pleasing Blurs/Using slow shutter speeds, panning, camera movement, and more. More and more prestigious contests are awarding prizes to creatively blurred images. Learn how at the seminar and follow up by getting a copy of “A Guide to Pleasing Blurs.”
4:00: artie/slides or chalkboard? Getting the Right Exposure with Digital: It’s as easy as pie. If you have ten seconds with the subject there is no excuse for not getting the right exposure every time with digital.
4:30: The End
|
|
|
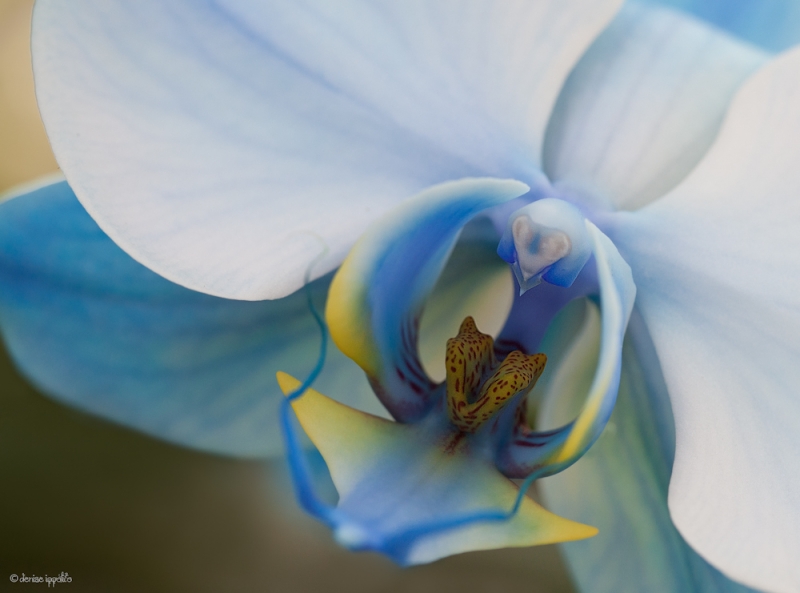
Seductive blue diamond orchid. Image Copyright Denise Ippolito/click on the image to enjoy a larger version
|
Sunday: Image Evaluation & Processing–Doors open: 8am
9:00am: artie’s Digital Workflow: RAW conversion in ACR, recovering and saving the WHITEs, NIK Color Efex Pro basics.
9:45am: artie: Image clean-up with the Clone Stamp Tool, leveling images, the Spot Healing Brush, and Quick Masks.
10:20am: break
10:40am: denise’s Digital Workflow: RAW conversion in Lightroom, Working with Layers and Masks.
11:30am: denise’s Personal NIK favorites: She discusses the less commonly used Color Efex Pro filters and shares tips on creating her modern vintage look. (Yeah, it’s a bit oxymoronic.) Also: an amazing Photoshop Brush Size tip. (Sorry for the pun.)
12:00 noon: Lunch break
1:30pm: denise/slides: Creative Filters and Effects/Working with Photoshop plug-ins and filters
2:30pm: break
2:45: Image Critiques: artie & denise: Only 1400 X 1050 jpegs submitted via e-mail before November 25 will be considered. A selection of the submitted images will be chosen for critiquing.
3:45: Door prizes
4:30: The End
|
|
|
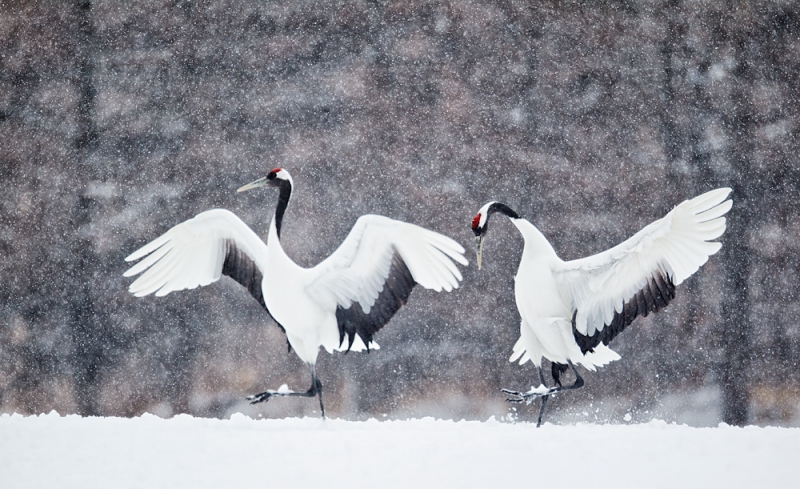
Red-crowned Cranes displaying in snow. Image Copyright Arthur Morris/click on the image to enjoy a larger version
|
In-the-Field Seminar Follow-up Workshop
Put your newly-learned skills to use by joining denise and artie in the field at a nearby Queens, NY location on the Monday following the seminar. The subjects will—for the most part—be routine: gulls and Canada Geese. But we will be close to the birds and should have some flight photography opportunities. And we just might have some good chances with Brant and who knows what as well. Most important, the opportunities for learning will be pretty much unlimited.
In-the-Field Seminar Follow-up Workshop: Queens, NY. Monday, December 10th, 2012. Two sessions: 5:45-10:30am and 2:30-4:30pm. Two great leaders: Limit: 16 photographers: $350 per person. Morning only: $250 includes lunch.
Due to the small number of spots for the In-the-Field Workshop payment in full is due at sign-up. To register, please call Jim or Jennifer between 9am and 5pm weekdays or artie on weekends and evenings at 863-692-0906 with your credit card in hand. Or send a PayPal to us at birdsasart@verizon.net or to birdsasart@att.net. Or send a check made out to “Arthur Morris” for the full amount in US dollars to us here: Arthur Morris/BIRDS AS ART, PO Box 7245, Indian Lake Estates, FL 33855. Be sure to include a note with your clearly written e-mail address and phone number on it and print the words “In-the-Field Follow-up Workshop” on your check. You will receive a confirmation letter approximately 4 weeks before the workshop.
Which Are Your Favorites and Why?
Take a moment to leave a comment and let us know which of the images presented here are your favorites, and why.
Would you like to learn to make images like those below?
Join artie and denise at this great seminar.
|
|
|
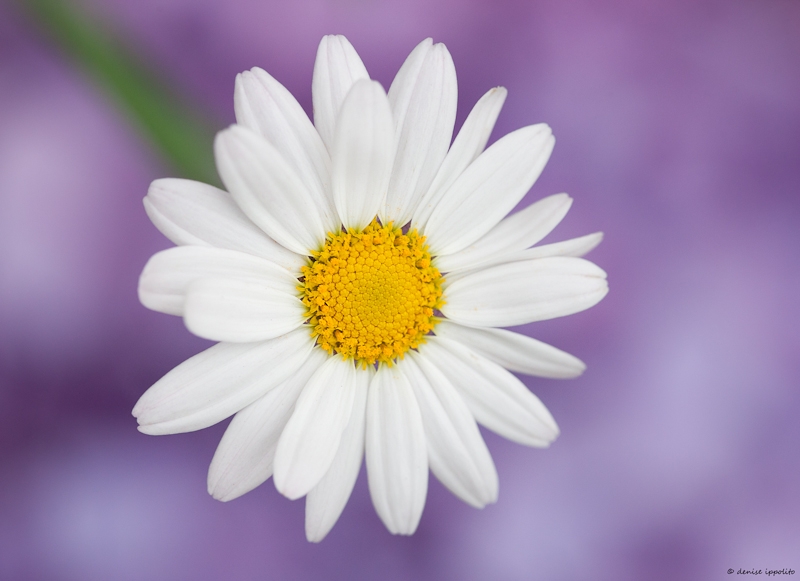
Soft-look daisy on purple. Image Copyright Denise Ippolito/click on the image to enjoy a larger version
|
|
|
|
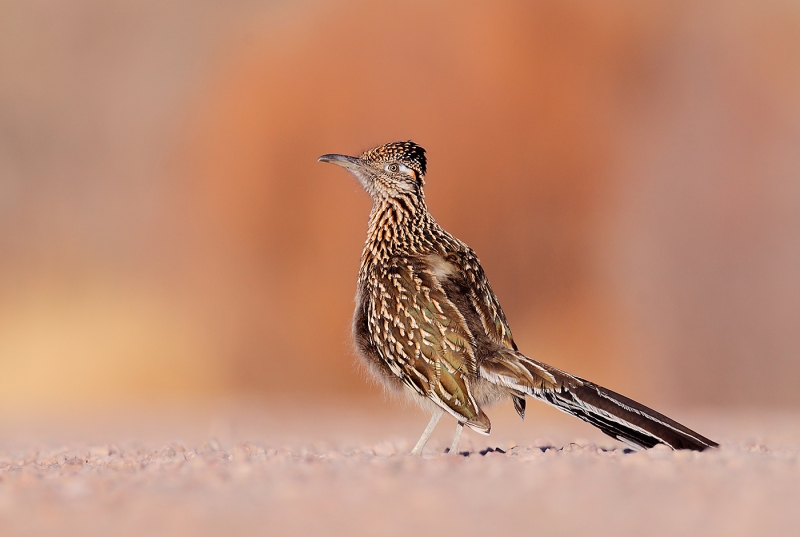
Greater Roadrunner on road. Image Copyright Arthur Morris/click on the image to enjoy a larger version
|
|
|
|
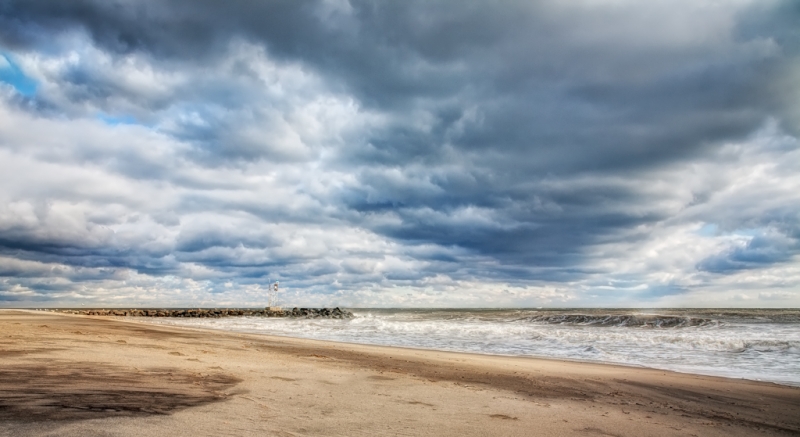
Jetty and stormy skies. Image Copyright Denise Ippolito/click on the image to enjoy a larger version
|
|
|
|
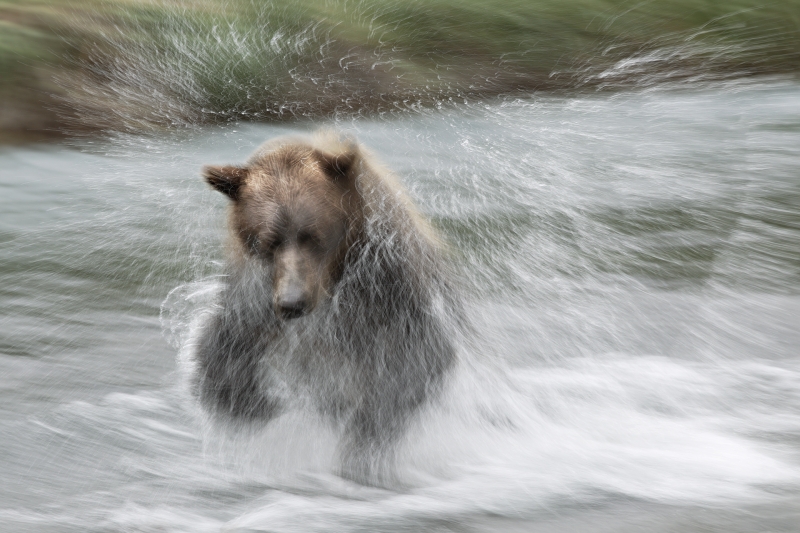
Brown Bear blur. Image Copyright Arthur Morris/click on the image to enjoy a larger version
|
|
|
|
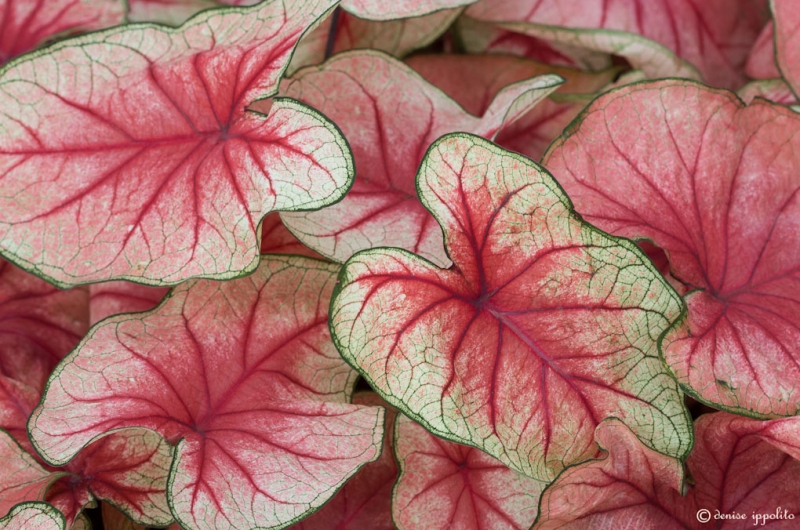
Caladium spread. Image Copyright Denise Ippolito/click on the image to enjoy a larger version
|
|
|
|
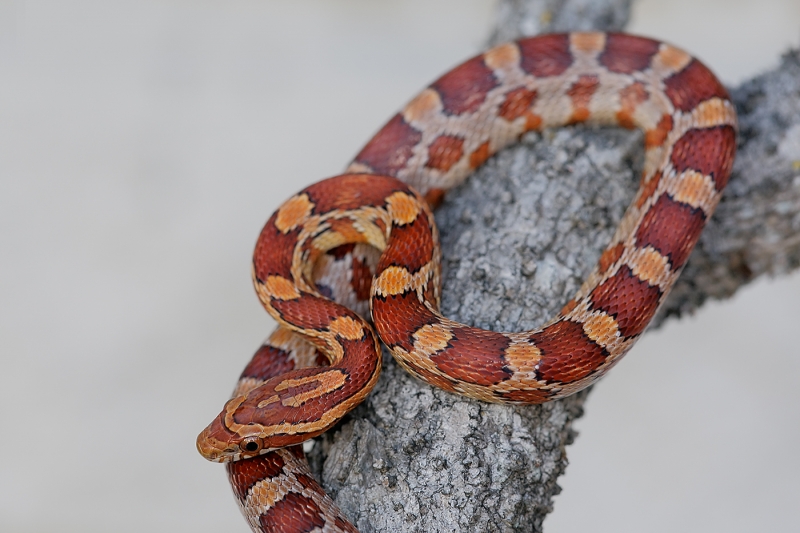
Young Corn Snake. Image Copyright Arthur Morris/click on the image to enjoy a larger version
|
|
|
|
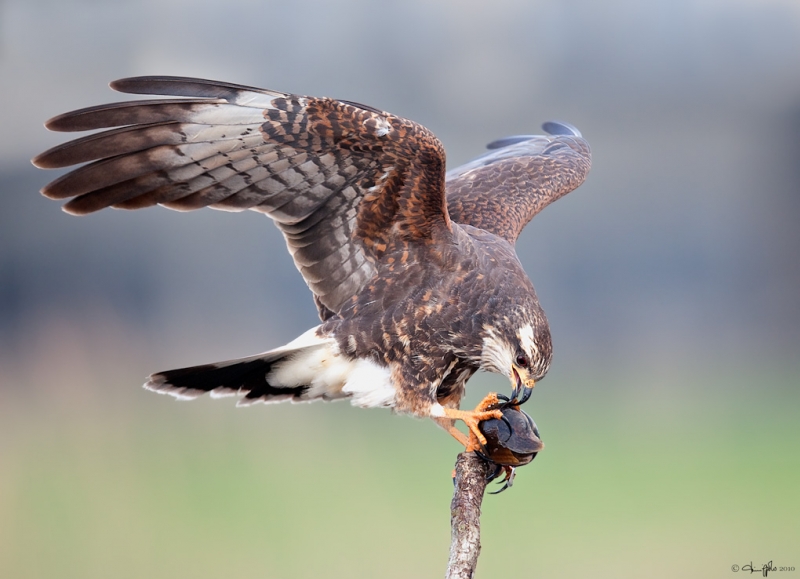
Snail Kite with snail. Image Copyright Denise Ippolito/click on the image to enjoy a larger version
|
|
|
|
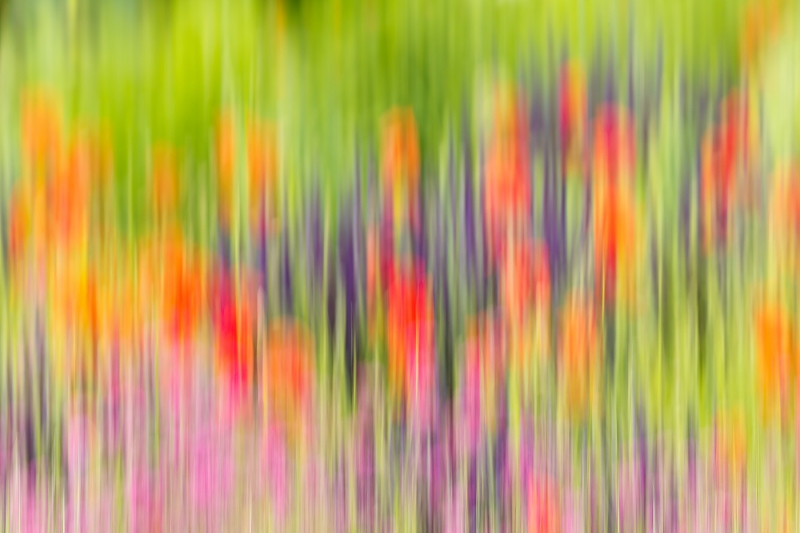
Flower bed, vertical pan blur. Image Copyright Arthur Morris/click on the image to enjoy a larger version
|
|
|
|
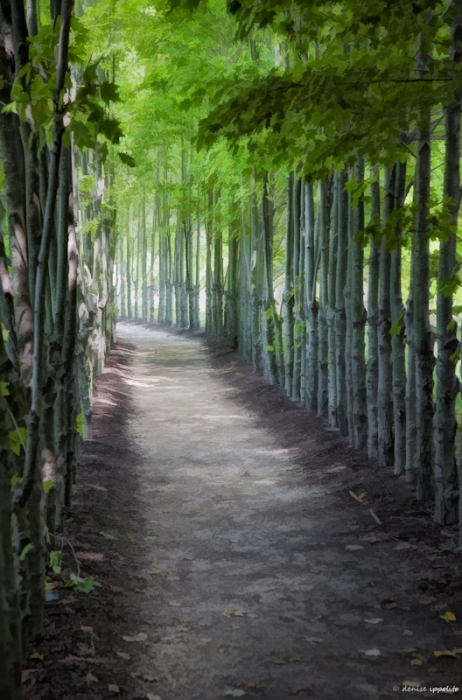
Woodsy path. Image Copyright Denise Ippolito/click on the image to enjoy a larger version
|
|
|
|
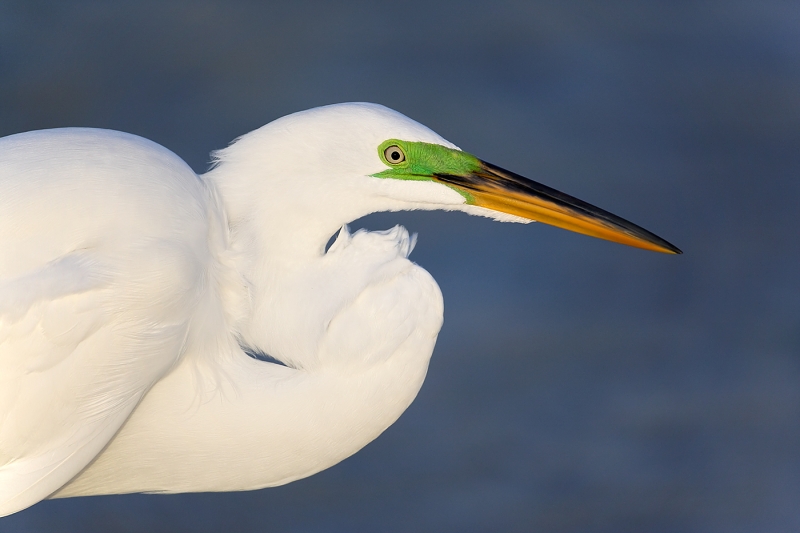
Great Egret, mega-breeding colors. Image Copyright Arthur Morris/click on the image to enjoy a larger version
|
|
|
|
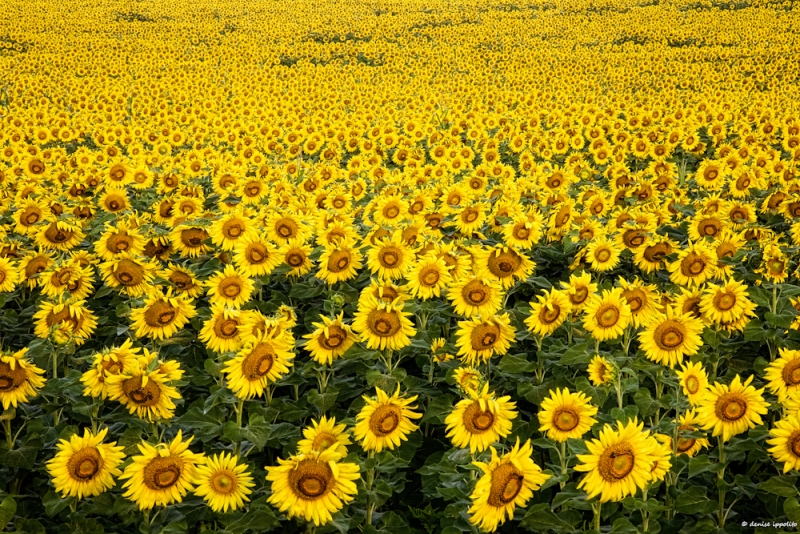
Endless sunflowers. Image Copyright Denise Ippolito/click on the image to enjoy a larger version
|
|
|
|
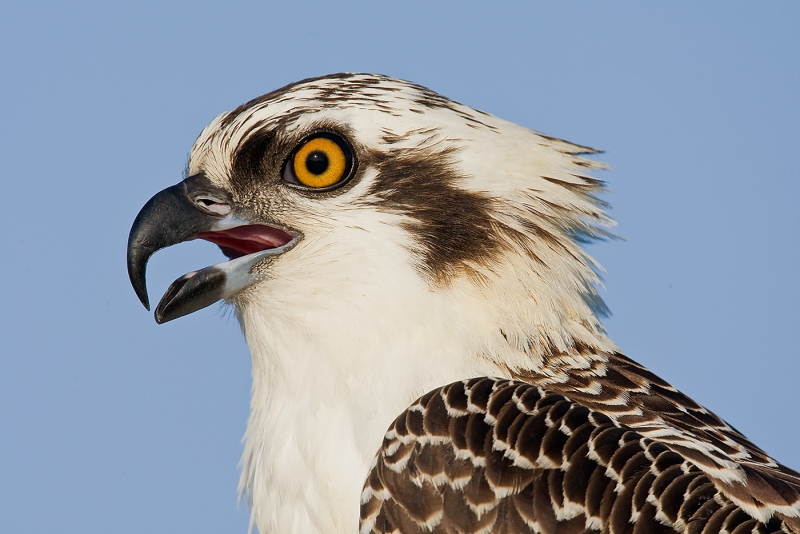
Osprey fledgling head portrait. Image Copyright Arthur Morris/click on the image to enjoy a larger version
|
|
|
|
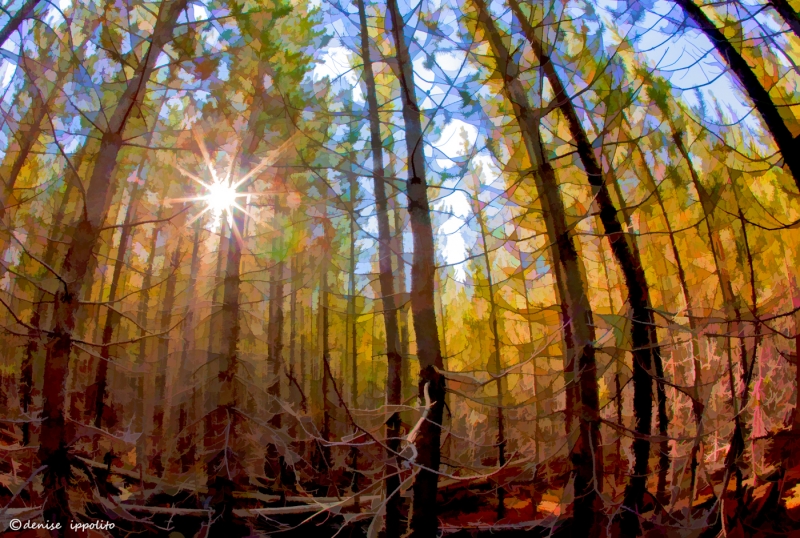
Stained glass woodland. Image Copyright Denise Ippolito/click on the image to enjoy a larger version
|
|
|
|
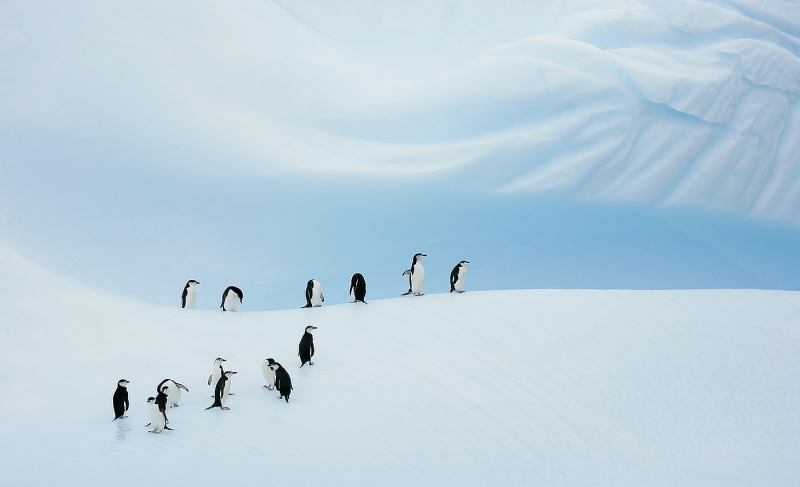
Chinstrap Penguins on blue iceberg. Image Copyright Arthur Morris/click on the image to enjoy a larger version
|
|
|
|
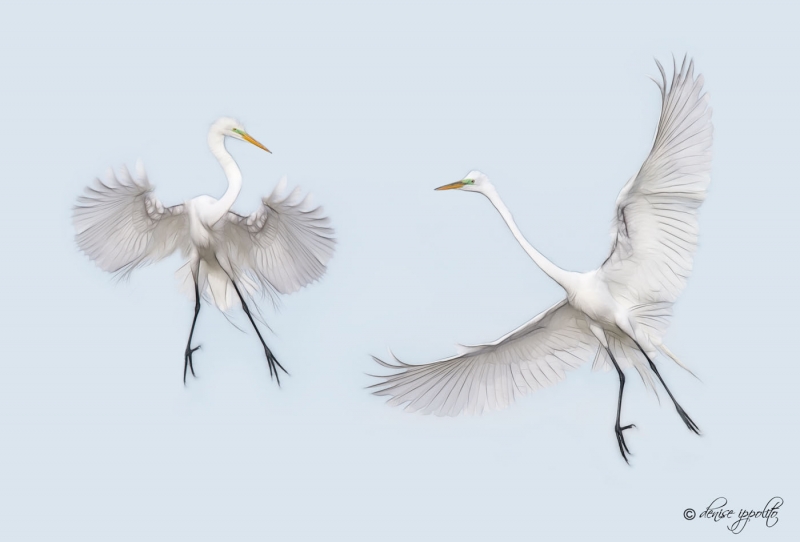
Great Egret aerial battle sketch-look. Image Copyright Denise Ippolito/click on the image to enjoy a larger version
|
|
|
|
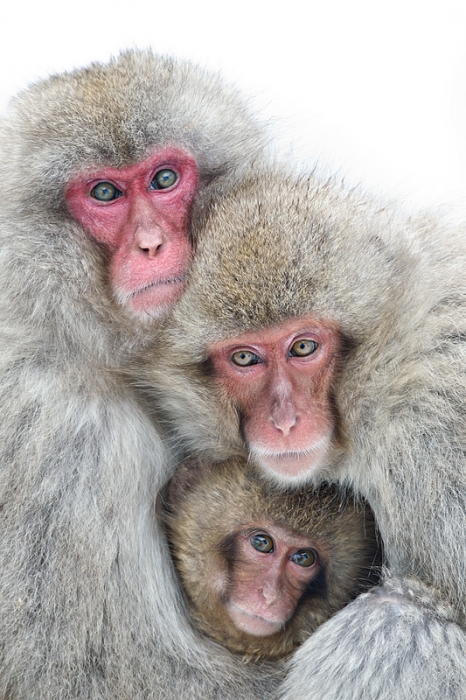
Snow Monkey family portrait. Image Copyright Arthur Morris/click on the image to enjoy a larger version
|
|
|
|
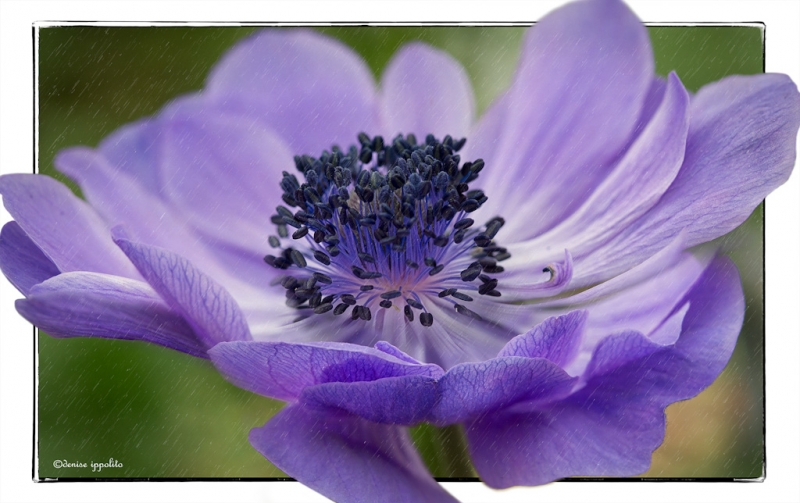
Purple anenome. Image Copyright Denise Ippolito/click on the image to enjoy a larger version
|
June 29th, 2012 You Be the Judge: Action
It’s not too late to vote on the great images in the Action category of the BAA 1ST International Bird Photography Competition. Click here to take part in the fun and learning.
New York City Weekend Nature Photography Seminar December 8-9, 2012
Details for this great weekend seminar are available here. Do consider joining Denise Ippolito and me for a great learning experience. Do click on the link to see many of Denise’s incredible tree and flower images. Camera club discounts available; see the details at the link.
5D Mark III Guide Pre-publication Version Still Discounted
Click here for details. When the guide is complete it will sell for $50. Folks who purchase now will receive the final version and any updates for no additional charge so ordering now is a win-win proposition. If you click on the link above you will see that the list of items not yet covered continues to shrink….
I spent the better part of Tuesday and today working on the 5D III UG; when I am done, the price goes to $50. Buy now to save! The more I study this camera the more I learn how complex it is. Rudy Winston at Canon has been a huge help as has Denise Ippolito who helped me with the section on Multiple Exposures. I still have some work to do.
Nickerson Beach/JBWR Photo-Tour August 15-17, 2012: Only 1 slot left!
Nickerson Beach/JBWR Photo-Tour August 15-17, 2012: $999. Co-leader: Denise Ippolito. Introductory slide program: Tuesday August 14 at 7pm. Limit 8/Openings:1.
This photo-tour is almost sold out. But with two great leaders each with tons of experience at this site and the promise to learn a ton of great Photoshop stuff it does make a lot of sense.
For more info and a collection of images click here.
|
|
|
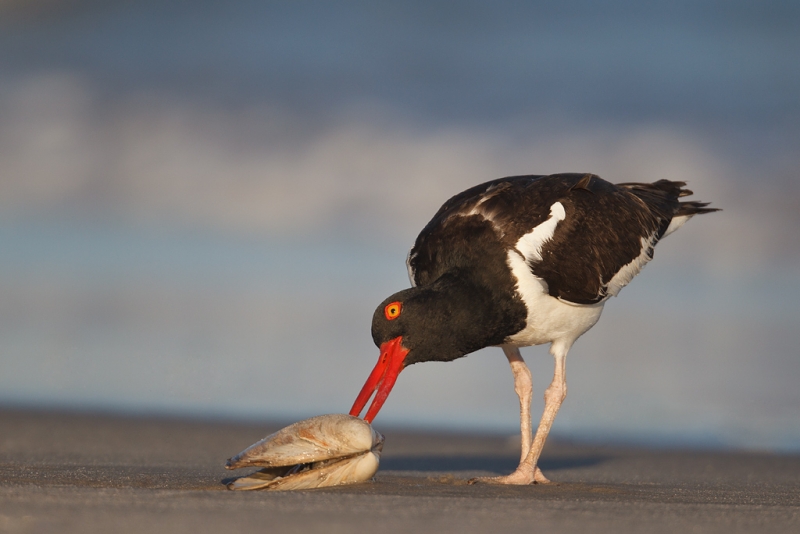
This image of an adult American Oystercatcher cutting one of the surf clam’s two adductor muscles was created at Nickerson Beach, Long Island, NY with the tripod-mounted Canon 800mm f/5.L IS lens, the 1.4X III TC, and the Canon EOS-1D Mark IV. ISO 400. Evaluative metering +1/3 stop: 1/1000 sec. at f/8 in Manual mode.
Central sensor (by necessity) on the bird’s neck/AI Servo/Rear Focus AF active at the moment of exposure. Click here if you missed the Rear Focus Tutorial. Click on the image for a larger version.
With the long effective focal length being seated behind my lowered tripod made it seem as if I were right on the ground. This image was created precisely at 7:14:04pm. Let’s call this one “Opening the Clam.”
|
When the Stars Line Up; What You Can Do in 22 Seconds
When I posted the last image that appears below in a recent blog post here, I promised to post the other three keepers from that series. Regular readers have heard me say often, “I don’t–as a general rule–make a lot of images, but when everything lines up just right I will hold the shutter button down or at least take a lengthy sequence of images. The four images here were selected as keepers in BreezeBrowswer from a 16 frame sequence that was created in twenty-two seconds. Note that at some point in the sequence I had time to change the shutter speed from 1/1000 sec. to 1/800 sec.
|
|
|
This image of an adult American Oystercatcher was created at Nickerson Beach, Long Island, NY with the tripod-mounted Canon 800mm f/5.L IS lens, the 1.4X III TC, and the Canon EOS-1D Mark IV. ISO 400. Evaluative metering +1/3 stop: 1/1000 sec. at f/8 in Manual mode.
Central sensor (by necessity) on the bird’s neck/AI Servo/Rear Focus AF active at the moment of exposure. Click here if you missed the Rear Focus Tutorial. Click on the image for a larger version.
This image was created precisely at 7:14:08pm, just four one hundredths of a second after the preceding image. Let’s call this one “Wave Washes Over the Clam.”
|
Note that in the 22 seconds that it took to create the 4 images presented here that the subject-to-imaging-sensor orientation changed quite a bit from frame to frame.
|
|
|
This image of an adult American Oystercatcher was created at Nickerson Beach, Long Island, NY with the tripod-mounted Canon 800mm f/5.L IS lens, the 1.4X III TC, and the Canon EOS-1D Mark IV. ISO 400. Evaluative metering +1/3 stop: 1/800 sec. at f/8 in Manual mode.
Central sensor (by necessity) on the bird’s neck/AI Servo/Rear Focus AF active at the moment of exposure. Click here if you missed the Rear Focus Tutorial. Click on the image for a larger version.
This image was created precisely at 7:14:18pm. Let’s refer to this one as “Proud of My Accomplishment.”
|
Note in the image immediately above that the breaking wave has covered the narrow wedge of sand that we see in images 2 and 4.
|
|
|
This image of an adult American Oystercatcher dining on a surf clam was created at Nickerson Beach, Long Island, NY with the tripod-mounted Canon 800mm f/5.L IS lens, the 1.4X III TC, and the Canon EOS-1D Mark IV. ISO 400. Evaluative metering +1/3 stop: 1/800 sec. at f/8 in Manual mode.
Central sensor (by necessity) on the bird’s neck/AI Servo/Rear Focus AF active at the moment of exposure. Click here if you missed the Rear Focus Tutorial. Click on the image for a larger version.
This image was created precisely at 7:14:26pm. Let’s go with “Just Dessert” for this image.
|
Note that the patterns and colors in the background are different in each image, a function of the relatively distant breaking waves.
Which Do You Like Best?
Take a moment to leave a comment and let us know which of the four images you like best and why. Or, let us know if you prefer the whole sequence to any one image. And why for that too.
Math Question
From the information presented here can anyone know for sure if I was holding the shutter button down or if I was being selective?
Shopper’s Guide.
Support both the Bulletins and the Blog by making all your B & H purchases here.
Below is a list of the gear talked about in this blog post. Thanks a stack to all who have used the Shopper’s Guide links to purchase their gear as a thank you for all the free information that we bring you on the Blog and in the Bulletins. Before you purchase anything be sure to check out the advice in our Shopper’s Guide.
Canon 800mm f/5.6L IS lens. Right now this is my all time favorite super-telephoto lens.
Canon EF 1.4X III TC. This new TC is designed to work best with the new Series II super-telephoto lenses.
Canon EOS-1D Mark IV professional digital camera body. The very best professional digital camera body that I have ever used.
And from the BAA On-line Store:
LensCoats. I have a LensCoat on each of my big lenses to protect them from nicks and thus increase their re-sales value. All my big lens LensCoat stuff is in Hardwood Snow pattern.
LegCoat Tripod Leg Covers. I have four tripods active and each has a Hardwood Snow LegCoat on it to help prevent further damage to my tender shoulders 🙂 And you will love them in mega-cold weather….
GT3532 LS. This one replaces the GT3530LS Tripod and will last you a lifetime. I’ll be commenting on this new model soon. In short, I like it.
Mongoose M3.6 Tripod Head. Right now this is the best tripod head around for use with lenses that weigh less than 9 pounds. For heavier lenses, check out the Wimberley V2 head.
CR-80 Replacement Foot for Canon 800. When using the 800 on a Mongoose as I do, replacing the lens foot with this accessory lets the lens sit like a dog whether pointed up or down and prevents wind-blown spinning of your lens on breezy days by centering the lens directly over the tripod.
Double Bubble Level. You will find one in my camera’s hot shoe whenever I am not using flash.
The Lens Align Mark II. I use the Lens Align Mark II pretty much religiously to micro-adjust all of my gear an average of once a month and always before a major trip. Enjoy our free comprehensive tutorial here.
BreezeBrowser. I do not see how any digital photographer can exist without this program.
June 28th, 2012 New York City Weekend Nature Photography Seminar December 8-9, 2012
Detail for this great weekend seminar are available here. Do consider joining Denise Ippolito and me for a great learning experience. Do click on the link to see many of Denise’s incredible tree and flower images. Camera club discounts available; see the details at the link.
5D Mark III Guide Pre-publication Version Still Discounted
Click here for details. When the guide is complete it will sell for $50. Folks who purchase now will receive the final version and any updates for no additional charge so ordering now is a win-win proposition. If you click on the link above you will see that the list of items not yet covered is continues to shrink….
I spent the better part of Tuesday and today working on the 5D III UG; when I am done, the price goes to $50. Buy now to save! The more I study this camera the more I learn how complex it is. Rudy Winston at Canon has been a huge help and so as Denise who helped me with the section on Multiple Exposures today. I still have some work to do.
Nickerson Beach/JBWR Photo-Tour August 15-17, 2012: Only 1 slot left!
Nickerson Beach/JBWR Photo-Tour August 15-17, 2012: $999. Co-leader: Denise Ippolito. Introductory slide program: Tuesday August 14 at 7pm. Limit 8/Openings:1.
This photo-tour is almost sold out. But with two great leaders each tons of experience at this site and the promise to learn a ton of great Photoshop stuff it does make a lot of sense.
For more info and a collection of images click here.
You Be the Judge: Action
The judging for the BIRDS AS ART 1st International Bird Photography Competition has been complete for some time. All of the judges including me were stunned by the quality of the images. We have been and will continue to be posting all of the images that were sent to the judges category by category. Each of you will have a chance to judge each category. Please read the directions below carefully. Your votes will not determine the winning images but it has been and will continue to be fun to see how everyone’s votes compare to the votes of the judges. So far the top pick of the public vote has matched the top pick of the judge’s panel in three of the five categories. I am not sure what might happen in Action….
This was a popular category with 445 images submitted. 15 images were sent to the five judges. Three images were disqualified after we received the RAW files, 2 of those for cropping more than 25%. Here is another big time thank you to Darrell, Chris, Julie, and Tim. And a big time thanks also to Peter Kes and Denise Ippolito for pitching in during the first rounds of image selection. We worked very hard for nearly three full days to get from more than 5500 images down to the final 163.
The Action category was designed for images that feature a bird or birds in action. Pretty straightforward. But spectacular.
Before you vote, please sure to click on each image so that you can view it at full size. Then pick your five favorites and vote them 5, 4, 3, 2, and 1 with 5 being your very favorite. Like this:
Roseate Spoonbills squabbling: 5
Siskins fighting: 4
Snowy Egrets midair combat: 3
Great Crested Grebe displaying: 2
Common Tern feeding chick: 1
The “Sample Vote” above is for illustrative purposes only. Please do not let the sample vote, the votes of others, or the names assigned to the images influence your vote. Please put each of your five favorites on its own line by hitting “enter” after each one. No ties; please assign a single digit, 5, 4, 3, 2 or 1 to each of your five favorites. As you will see there are a great many dramatic images here.
Please Note
If you wish to comment on any or all of the images, please do so below your five voting lines; this will make tallying the votes easier. Votes cast by those who fail to follow the formatting directions will be relegated to the Trash Bin.
The voting will be closed in about two days and the actual winning images for this category will be posted soon thereafter. A tally of the public vote along with my analysis and comments will follow.
Thanks for voting and please remember to breathe deeply and have fun.
|
|
|
Great Crested Grebe displaying
|
.
.
.
|
|
|
Long Billed Curlew flapping after bath
|
.
|
|
|
Snowy Egrets midair combat
|
.
|
|
|
Upside down Bald Eagle fight
|
.
.
|
|
|
Bald Eagle ground warfare
|
.
|
|
|
Roseate Spoonbills squabbling
|
.
|
|
|
American Oystercather chicks chasing
|
.
|
|
|
Common Tern feeding chick
|
.
|
|
|
Dalmatian Pelican fish grab
|
June 27th, 2012 Behavior Category Voting Analysis and Related Comments
Totals of the Judges’ Votes (each of 5 judges awarded each image 1-5 points):
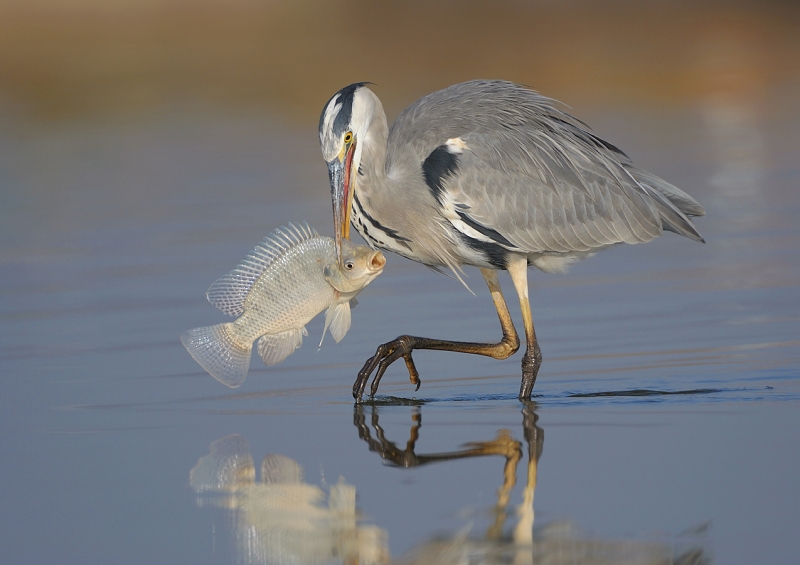
1-Grey Heron with fish, Vladimir Kogan: 20
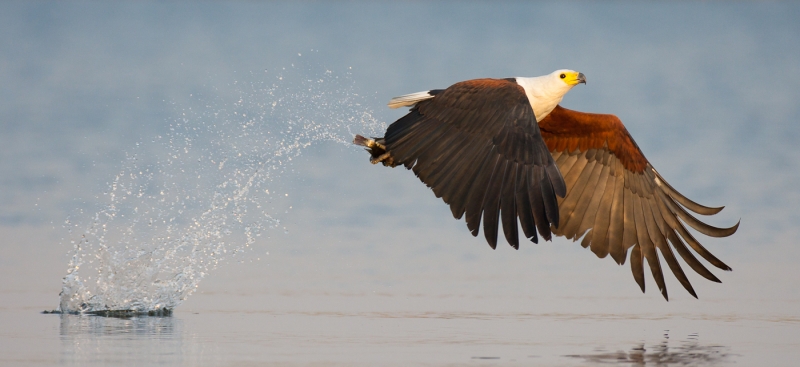
2-African Fish-Eagle capture, Isak Pretorius: 19
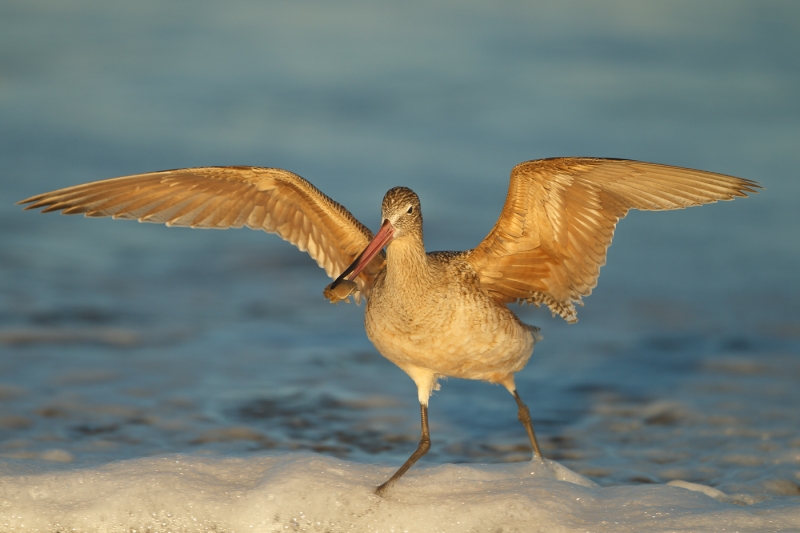
3-Marbled Godwit with sand crab, Gaurav Mittal: 18
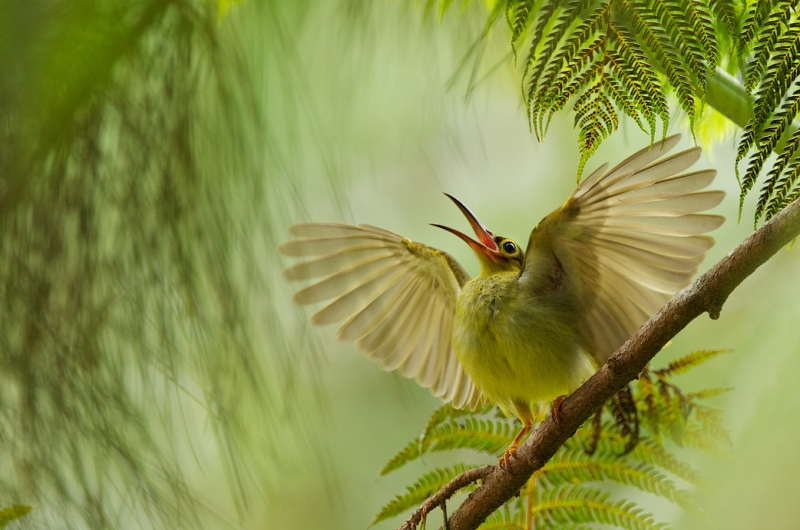
T4-Spectacled Spider-hunter displaying, Bjorn Olesen: 17
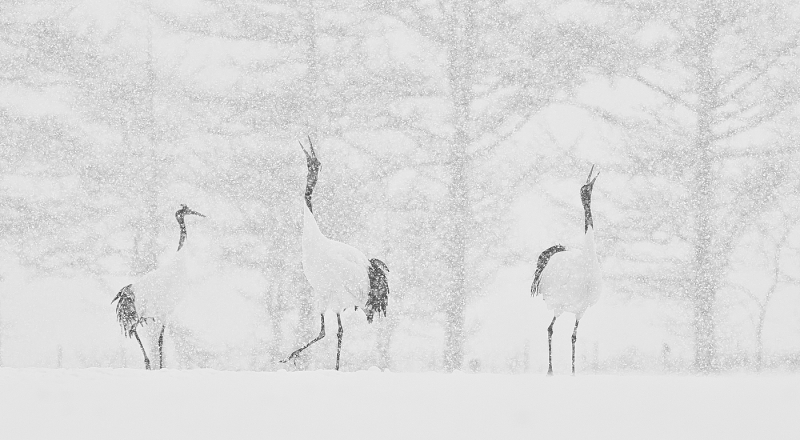
T4-Red-crowned Cranes calling in snow, Paul Mckenzie: 17
T4-African Jacana on the run with chicks, Lou Coetzer: 17
T4-Gymnogene (African Harrier-Hawk), Tommy Savage: 17
T4-Black-necked (Eared) Grebes mating, David Pattyn: 17
T9-Prairie Chicken displaying, David R. Neilson: 16
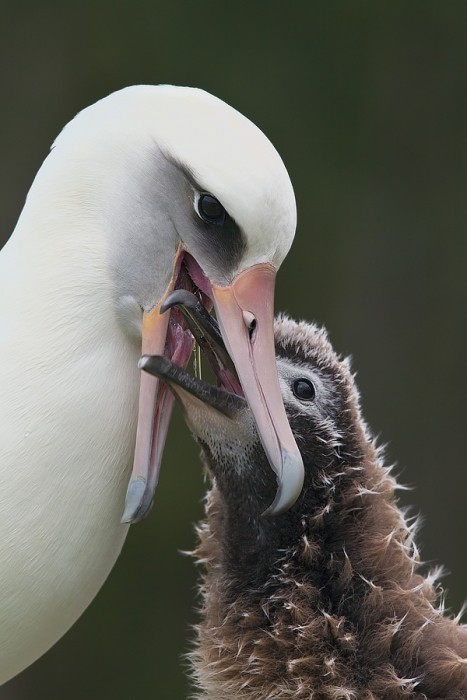
T9-Laysan Albatross feeding chick, Paul Mckenzie: 16
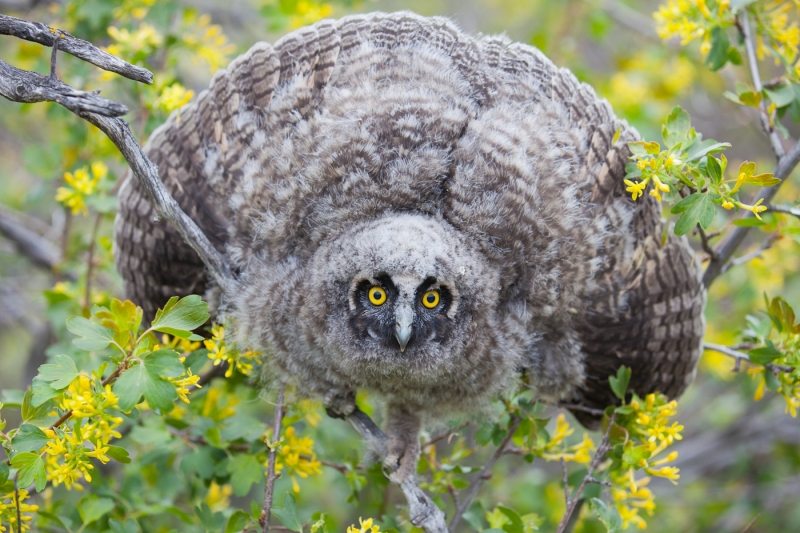
T9-Long-eared Owl threat display, Paul Bannick: 16
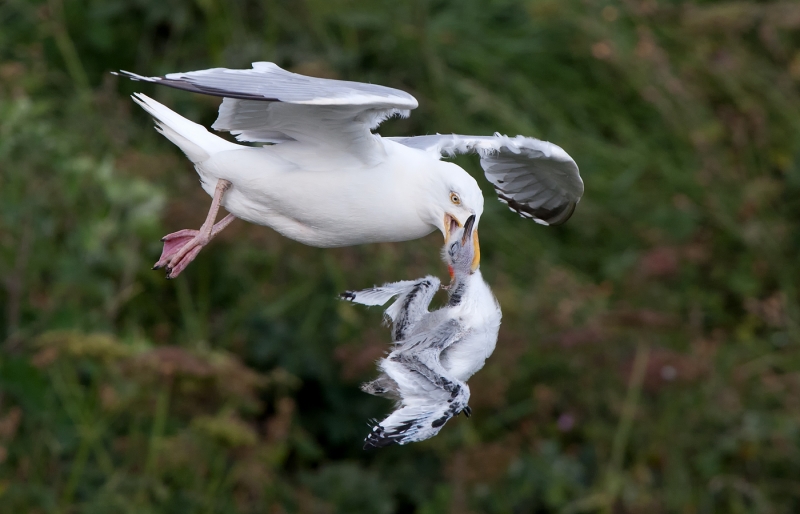
T9-Gull with stolen chick, Richard Pittam: 16
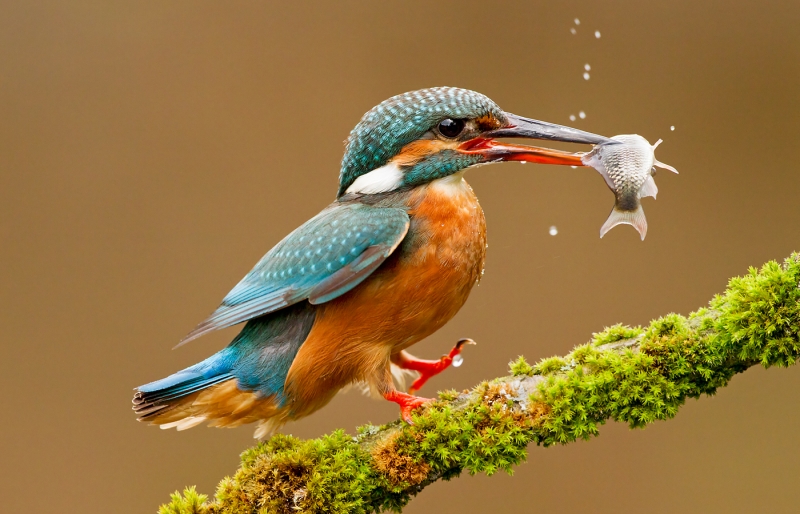
T9-Common Kingfisher with fish, Kevin Elsby: 16
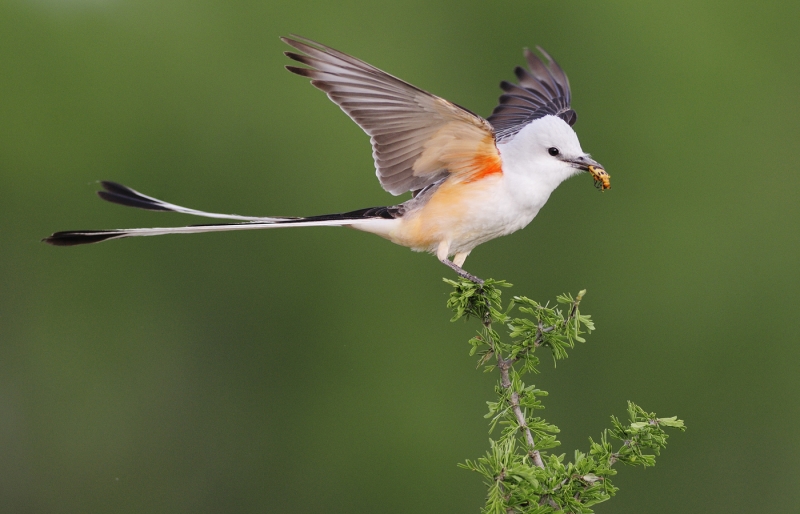
T14-Scissor-tailed Flycatcher with beetle, Rolf Nussbaumer: 15
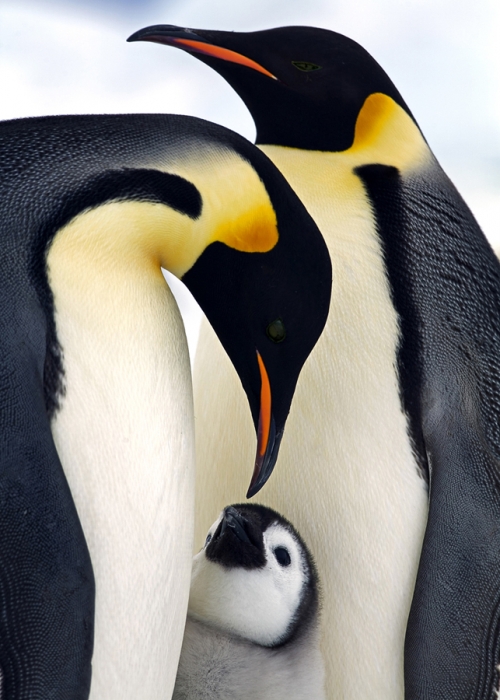
T14-Emperor Penguin Family, Marcello Libra: 15
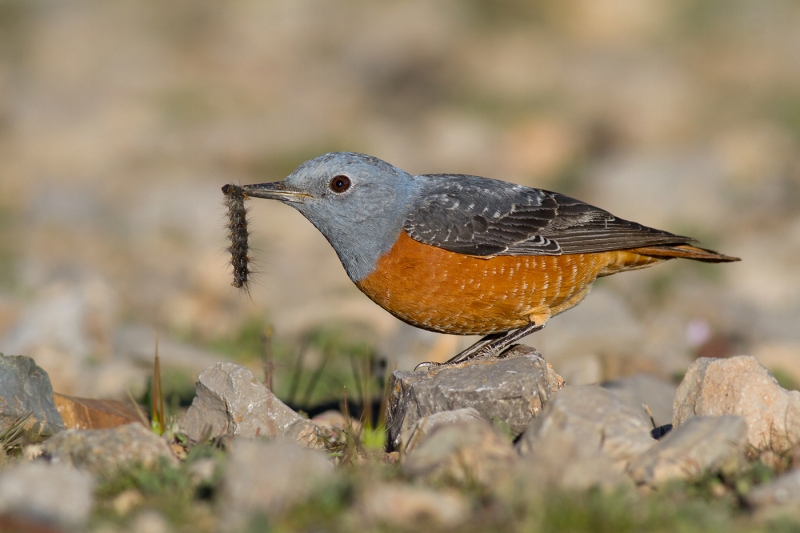
T16-Thrush with caterpillar, Morteza Nemati
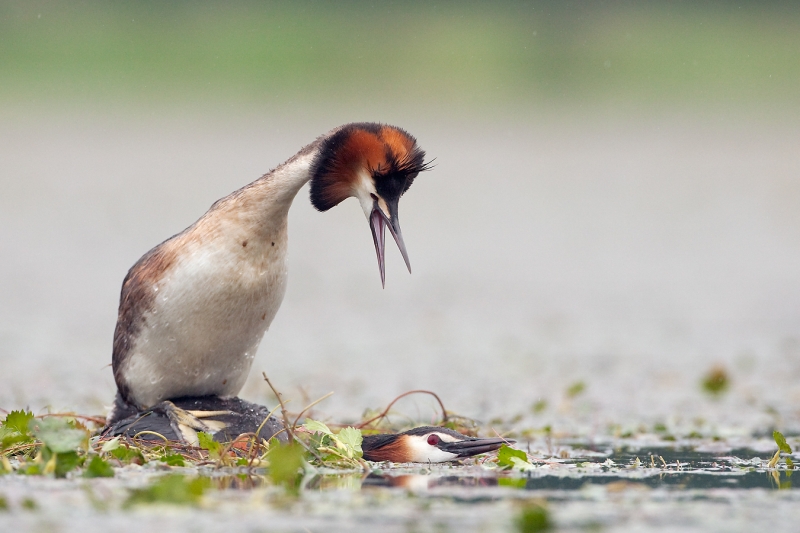
T16-Great-crested Grebes mating, David Pattyn
T16-Great Egret chicks, Cheryl Molennor
Public Voting Totals (each of you was asked to vote your five favorite images 1-5 points with 5 being your favorite):
1-Spectacled Spider-hunter displaying, Bjorn Olesen: 155
2-Grey Heron with fish, Vladimir Kogan: 117
3-African Jacana on the run with chicks, Lou Coetzer: 60
4-Red-crowned Cranes calling in snow, Paul Mckenzie: 59
5-Common Kingfisher with fish, Kevin Elsby: 55
T6-Gymnogene (African Harrier-Hawk), Tommy Savage: 48
T6-Laysan Albatross feeding chick, Paul Mckenzie: 48
8-Long-eared Owl threat display, Paul Bannick: 44
9-African Fish-Eagle capture, Isak Pretorius: 42
10-Emperor Penguin Family, Marcello Libra: 41
11-Black-necked (Eared) Grebes mating, David Pattyn: 34
12-Scissor-tailed Flycatcher with beetle, Rolf Nussbaumer: 30
13-Prairie Chicken displaying, David R. Neilson: 24
14-Great Egret chicks, Cheryl Molennor: 23
15-Great-crested Grebes mating, David Pattyn: 15
16-Gull with stolen chick, Richard Pittam: 14
17-Thrush with caterpillar, Morteza Nemati; 11
18-Marbled Godwit with sand crab, Gaurav Mittal: 5
Analysis of the Voting
First off, even though this is the strongest category so far by a wide margin, fewed folks voted. By a large margin. Having to click on each image to enlarge it and then carefully considering your favorites take time. Perhaps some folks may begin to understand the amount of work that it took to get from more than 5,500 images down to 163. Judging is work. Hard work. Thanks to all who continue to put in the time to join us here.
When I posted the 18 images for the public voting in the Behavior Category here I suggested that the results of the judges votes as compared to the public vote might be quite different due to the large number of very strong images here. To some degree that was the case though Grey Heron with fish did very well with both groups. The biggest mystery to me was the Marbled Godwit with sand crab image which finished 3rd with the judges and last in the public vote. Why? I have no clue.
It would seem the individual geographical bias might have played a role in the judge’s voting. Peter Kes who helped with the initial culling has spent a ton of time in Africa; he was quite keen on the upside down African Harrier-Hawk. Mr. Morris, shorebird lover that he is, felt strongly about the Marbled Godwit. On a personal note, every time that I looked at the Spectacled Spider-hunter image I liked it a bit more than the previous time. I felt that David Pattyn’s Great-crested Grebes mating was the stronger of his two finals images, yet it wound up tied for last in the public vote. I wonder which of the two David fancies. Paul Mckenzie placed two images in the top 9 in the judges vote, and was even stronger in the public vote with 2 of the top 5 images.
I will sum up by saying that the judge’s panel seemed to favor images with the sweetest golden light.
Kudos to all whose images appear below and thanks to all who entered photographs in this hotly contested category. The images below are presented in the order of the judges’ placement along with my comments. I am sure that many of you will find my comments both interesting and educational.
|
|
|
Grey Heron with fish, Vladimir Kogan.
|
The judges were thrilled by the sweet early evening light, the superb sharpness, the heron’s raised foot, the perfect view of the fish with its dorsal fin raised and open mouth, the absolutely perfect head angle, and by the pleasing image design with the bird framed nicely by the gold reflections at the top of the photograph.
|
|
|
African Fish-Eagle capture, Isak Pretorius
|
This image features beautiful control of a difficult exposure with detail in both the dark tones and the whites, nice detail in the far underwing, the perfect wing position–the full downstroke, a perfect head angle, a de-focused background, a killer splash with the complete hole in the water included, a suitable pano crop, and very sweet light.
|
|
|
Marbled Godwit with sand crab, Gaurav Mittal
|
I love shorebirds. I love this one for the golden early morning light and the raised wings with killer underwing detail. For its sharpness. The combination of blues and golds is too sweet, as is the white foam from a breaking wave. The sand crab in the bird’s beak is the icing on this third place cake. I felt that this one would have been even better with the placed a bit more to our right in the frame.
|
|
|
Spectacled Spider-hunter displaying, Bjorn Olesen
|
This obviously spectacular image features an incredibly sharp face, beautiful soft light coming through the raised wing feathers, and some lovely foliage especially the sharp stuff in the upper right. Had the bird not been well above the photographer this surely would have placed higher with the judges.
|
|
|
Red-crowned Cranes calling in snow, Paul Mckenzie
|
Mood, mood, mood. Falling snow, beautiful birds, mystical trees in the background and a lovely image design came together pretty much in perfection.
|
|
|
African Jacana on the run with chicks, Lou Coetzer
|
Spectacularly sharp with a perfect exposure. If only the feet of the chicks had not merged with the adult’s body and been more visible….
|
|
|
Gymnogene (African Harrier-Hawk), Tommy Savage
|
The somewhat mixed lighting was handled beautifully in post-processing. Getting a good look at the face when these birds are foraging upside down along a large branch is near-impossible. Only a view of the talons could have made this stronger.
|
|
|
Black-necked (Eared) Grebes mating, David Pattyn
|
Intimate behavior, soft light, razor sharpness, and a water level perspective are the strengths of this image. Under contest rules, cleaning up the vegetation in the water was allowed. For me doing so would have improved the artistic merits of an already very strong image.
|
|
|
Prairie Chicken displaying, David Neilson
|
David submitted several very strong images across several categories; it was difficult to choose the best one to move along. This one is pretty close to perfect: soft light, bowing pose, inflated purple sac, killer low angle, soft light, drooped wings, puffy white undertail coverts, raised tail and eyebrows, and a simply gorgeous bird displaying.
|
|
|
Laysan Albatross feeding chick, Paul Mckenzie
|
This outstanding image features soft light, interesting behavior, a clean background, and two perfect head angles.
|
|
|
Long-eared Owl threat display, Paul Bannick
|
A spectacular young bird in exhibiting a spectacular threat posture in a lovely setting make for a very strong image. Not clipping the feet in situations like this is to be commended.
|
|
|
Gull with stolen chick, Richard Pittam
|
Spectacular action and timing. Two perfect head angles with the hapless chick’s wings hanging down. Sharp as could be. Had the gull’s wings been raised this would have placed very high.
|
|
|
Common Kingfisher with fish, Kevin Elsby
|
This image features spectacular action and timing, flying water droplets, the nicely raised foot, and a beautiful bird and perch. A slight head turn towards us and a better look at the fish would have put this one over the top.
|
|
|
Scissor-tailed Flycatcher with beetle, Rolf Nussbaumer
|
Strong points here include the soft light, the perfect head angle, the raised wings revealing beautiful underwing details, the namesake long tail, and what looks like a milkweed beetle snack.
|
|
|
Emperor Penguin Family, Marcello Libra
|
Getting to Snow Hill: about $15,000. Making a beautiful and intimate image: priceless. A bit more space all around and a better look at the chick’s face would have improved this one.
|
|
|
Thrush with caterpillar, Morteza Nemati
|
Sharp as a razor. Perfect subject to sensor juxtaposition. And a fuzzy caterpillar are all pluses here. The out-of-focus foreground rocks are a distraction. Ideally the bird would have been standing on the highest point of the rock its on giving us a better view of the feet.
|
|
|
Great-crested Grebes mating, David Pattyn
|
There are lots of positives with this image: the male’s raised crest and open bill, the position of the female’s head, the soft light, and the low perspective. The stringy vegetation above and to the left of the female’s head are distracting (and could have been removed). As could the dark spots on the male’s breast. Lastly, a bit more light on the male’s head would have been ideal.
|
|
|
Great Egret chicks, Cheryl Molennor
|
This is superbly done. The huge challenge with this type of image is getting two perfect head angles with a nice juxtaposition. Check. Check. Two sharp eyes and sufficient depth-of-field add. The slightly uneven light/dark portions of the background above the chicks is mildly distracting.
Congrats
Congratulations to all above for sharing their excellent images with us.
5D Mark III Guide Pre-publication Version Still Discounted
Click here for details. When the guide is complete it will sell for $50. Folks who purchase now will receive the final version and any updates for no additional charge so ordering now is a win-win proposition.
I spent the better part of today working on the 5D III UG; when I am done, the price goes to $50. Buy now to save! The more I study this camera the more I learn how complex it is.
New York City Weekend Nature Photography Seminar December 8-9, 2012
Detail for this great weekend seminar are available here. Do consider joining Denise Ippolito and me for a great learning experience. Do click on the link to see many of Denise’s incredible tree and flower images. Camera club discounts available; see the details at the link.
Nickerson Beach/JBWR Photo-Tour August 15-17, 2012: Only 2 slots left!
Nickerson Beach/JBWR Photo-Tour August 15-17, 2012: $999. Co-leader: Denise Ippolito. Introductory slide program: Tuesday August 14 at 7pm. Limit 8/Openings:2.
This photo-tour is filling faster than anticipated. But with two great leaders with tons of experience at this site and the promise to learn a ton of great Photoshop stuff it does make a lot of sense.
For more info and a collection of images click here.
June 26th, 2012 5D Mark III Guide Pre-publication Version Still Discounted
Click here for details. When the guide is complete it will sell for $50. Folks who purchase now will receive the final version and any updates for no additional charge so ordering now is a win-win proposition.
I spent the better part of today working on the 5D III UG; when I am done, the price goes to $50. Buy now to save! The more I study this camera the more I learn how complex it is.
New York City Weekend Nature Photography Seminar December 8-9, 2012
Detail for this great weekend seminar are available here. Do consider joining Denise Ippolito and me for a great learning experience. Do click on the link to see many of Denise’s incredible tree and flower images. Camera club discounts available; see the details at the link.
Nickerson Beach/JBWR Photo-Tour August 15-17, 2012: Only 2 slots left!
Nickerson Beach/JBWR Photo-Tour August 15-17, 2012: $999. Co-leader: Denise Ippolito. Introductory slide program: Tuesday August 14 at 7pm. Limit 8/Openings:2.
This photo-tour is filling faster than anticipated. But with two great leaders with tons of experience at this site and the promise to learn a ton of great Photoshop stuff it does make a lot of sense.
For more info and a collection of images click here.
|
|
|
This image of an adult American Oystercatcher dining on a surf clam was created at Nickerson Beach, Long Island, NY with the tripod-mounted Canon 800mm f/5.L IS lens, the 1.4X III TC, and the Canon EOS-1D Mark IV. ISO 400. Evaluative metering +1/3 stop: 1/800 sec. at f/8 in Manual mode.
Central sensor (by necessity) on the bird’s neck/AI Servo/Rear Focus AF active at the moment of exposure. Click here if you missed the Rear Focus Tutorial. Click on the image for a larger version.
With the long effective focal length being seated behind my lowered tripod made it seem as if I were right on the ground.
|
Same Old Same Old…
I’d never seen an Oystercatcher open a live surf clam until I witnessed this bird do just that. There main food on the open beaches are sand crabs. See the animated GIF below for the before and after comparison.
As the afternoon light was gorgeous and the situation was an excellent one I wound up creating a series of about 25 images. The challenge was watching the breaking waves and timing the shutter release so that they would not detract from the image. I wound up keeping only the four best from the series. I plan on sharing the other three with you here at some point.
This could be used to teach the Image Clean-up 101 class. Patch Tool, Spot Healing Brush, Clone Stamp Tool, and several small Quick Masks all as detailed in Digital Basics. Even with something as seemingly simple as the Clone Stamp Tool there are lots of tricks and tips for refining your technique and improving you results. Digital Basics includes my complete digital workflow, dozens and dozens of great Photoshop tips, and free updates. I need to get to work on the next update….
Shopper’s Guide.
Support both the Bulletins and the Blog by making all your B & H purchases here.
Below is a list of the gear talked about in this blog post. Thanks a stack to all who have used the Shopper’s Guide links to purchase their gear as a thank you for all the free information that we bring you on the Blog and in the Bulletins. Before you purchase anything be sure to check out the advice in our Shopper’s Guide.
Canon 800mm f/5.6L IS lens. Right now this is my all time favorite super-telephoto lens.
Canon EF 1.4X III TC. This new TC is designed to work best with the new Series II super-telephoto lenses.
Canon EOS-1D Mark IV professional digital camera body. The very best professional digital camera body that I have ever used.
And from the BAA On-line Store:
LensCoats. I have a LensCoat on each of my big lenses to protect them from nicks and thus increase their re-sales value. All my big lens LensCoat stuff is in Hardwood Snow pattern.
LegCoat Tripod Leg Covers. I have four tripods active and each has a Hardwood Snow LegCoat on it to help prevent further damage to my tender shoulders 🙂 And you will love them in mega-cold weather….
GT3532 LS. This one replaces the GT3530LS Tripod and will last you a lifetime. I’ll be commenting on this new model soon. In short, I like it.
Mongoose M3.6 Tripod Head. Right now this is the best tripod head around for use with lenses that weigh less than 9 pounds. For heavier lenses, check out the Wimberley V2 head.
CR-80 Replacement Foot for Canon 800. When using the 800 on a Mongoose as I do, replacing the lens foot with this accessory lets the lens sit like a dog whether pointed up or down and prevents wind-blown spinning of your lens on breezy days by centering the lens directly over the tripod.
Double Bubble Level. You will find one in my camera’s hot shoe whenever I am not using flash.
The Lens Align Mark II. I use the Lens Align Mark II pretty much religiously to micro-adjust all of my gear an average of once a month and always before a major trip. Enjoy our free comprehensive tutorial here.
BreezeBrowser. I do not see how any digital photographer can exist without this program.
June 25th, 2012 5D Mark III Guide Pre-publication Version Still Discounted
Click here for details. When the guide is complete it will sell for $50. Folks who purchase now will receive the final version and any updates for no additional charge so ordering now is a win-win proposition.
New York City Weekend Nature Photography Seminar December 8-9, 2012
Detail for this great weekend seminar are available here. Do consider joining Denise Ippolito and me for a great learning experience. Do click on the link to see many of Denise’s incredible tree and flower images. Camera club discounts available; see the details at the link.
Nickerson Beach/JBWR Photo-Tour August 15-17, 2012: Only 2 slots left!
Nickerson Beach/JBWR Photo-Tour August 15-17, 2012: $999. Co-leader: Denise Ippolito. Introductory slide program: Tuesday August 14 at 7pm. Limit 8/Openings:2.
For more info and a collection of images click here.
And the Winners in the Behavior Category Are!
|
|
|
Congratulations Vladimir Kogan of Israel. His image, Grey Heron with fish, was awarded first prize in the Behavior category of the BIRDS AS ART 1st Annual Bird Photography Competition. Click on the image to see a larger, even more spectacular version. AF Nikkor 200-400 mm f4 G VR lens, the AF-S Teleconverter TC-17E II, and the Nikon D3. ISO 400: 1/1250 sec. at f/7.1. Skimmer Ground Pod II with the Arca-Swiss Monoball Z1.
|
Grey Heron with fish, Vladimir Kogan.
From Vladimir:
Grey Heron is a very cautious bird; as a rule it will not approach closer than 80-100 meters to even a well-disguised blind. Once this heron caught a large Tilapia it began moving slowly but steadily in my direction without the slightest sign of fear, eventually approaching within 20 meters of my hiding place. This was the rare moment in my 3 years of photographing this species. The fish was very large for the bird; after many attempts to swallow it the bird threw it on the shore of the lake where it became prey to a mongoose.
The judges were thrilled by the sweet early evening light, the superb sharpness, the heron’s raised foot, the perfect view of the fish with its dorsal fin raised and open mouth, the absolutely perfect head angle, and by the pleasing image design with the bird framed nicely by the gold reflections at the top of the photograph.
|
|
|
Congratulations to Isak Pretorius of Johannesburg, South Africa. His image, African Fish-Eagle capture, was awarded second prize in the Behavior category of the BIRDS AS ART 1st Annual Bird Photography Competition. Chobe river, Botswana. Canon 600mmf/4L IS USM with the EOS-1D Mark III (handheld!). ISO 800: 1/2000 sec. at f/5 in Manual mode. Click on the image to see a larger, even more powerful version.
|
African Fish-Eagle capture, Isak Pretorius
From Isak:
This photo was created on the Chobe river during a photographic boat safari. Fish-eagles catching fish is the order of the day. I’ve photographed fish eagles before, but what made this place stunning was the quality of light. During the late-winter months the morning sun is diffused by the smoke and dust in the sky over Botswana. With the still waters of the Chobe river reflecting this soft light, the lighting conditions are almost studio-like. The wide river also makes for soft subtle backgrounds that accentuate the bird. I was fortunate in this photo that all the variables outside of my control came together perfectly.
This image features Beautiful control of a difficult exposure with detail in both the dark tones and the whites, nice detail in the far underwing, the perfect wing position–the full downstroke, a perfect head angle, a de-focused background, a killer splash with the complete hole in the water included, a suitable pano crop, and very sweet light.
|
|
|
Congratulations to Gaurav Mittal of India. His image, Marbled Godwit with sand crab, was awarded third prize in the Behavior category of the BIRDS AS ART 1st Annual Bird Photography Competition. Morro Bay, CA. Canon 500mm f/4L IS lens with the 1.4X TC and the EOS-1 Mark IV (hand held!). ISO 400. Evaluative metering +1 stop: 1/1000 sec. at f/5.6. Click on the image to see a larger, even more beautiful version.
|
Marbled Godwit with sand crab, Gaurav Mittal
From Gaurav:
Photographing birds makes me feel closer to life, I feel as if I am one with the birds. At every opportunity I dance when I see them. Morro Bay was an amazing experience: People made me feel welcome: The sunlight was golden; It was windy but beautiful; The Marbled Godwits were simply gorgeous. I was awe as I made an effort to photograph its behavior. I was nervous as I pressed the shutter and captured this beautiful moment. The godwit splashed its feet in the water and grabbed the soft-shelled crab. After this entire event I felt in the presence of God. Having witnessed an amazing moment through my camera, priceless. I lowered my camera closed my eyes and took in the moment, my imagination at work.
I love shorebirds. I love this one for the golden early morning light and the raised wings with killer underwing detail. For its sharpness. The combination of blues and golds is too sweet, as is the white foam from a breaking wave. The sand crab in the bird’s beak is the icing on this third place cake.
Congrats!
Congrats to the three winning photographers and to those who created the 15 other spectacular images that made it to the final round of judging. Getting a single image to the final round is a momentous accomplishment. Pretty much every image would have made a suitable first place winner. As you will see when the voting results and analysis are published things were very tight in Behavior.
It was a hugely popular category. We began with 754 images. Getting down to the 18 images that were sent to the five judges was a difficult and excruciating task that took many hours. Here is another big time thank you to Darrell, Chris, Julie, and Tim. And a big time thanks also to Peter Kes and Denise Ippolito for pitching in during the first rounds of image selection. We worked very hard for nearly three full days to get from more than 5500 images down to the final 163. The Behavior category was designed for images that exhibited interesting avian behavior. The entrants outdid themselves by a wide margin.
Prizes (see below) will be shipped once all the winners are announced as several folks had more than one top three image. Be sure to patronize our sponsors; without them, this contest would not exist. There will be more educational stuff from this category coming soon.
| First Prize |
Runner Up |
Highly Commended |
Sponsor |
| $100 Gift Certificate |
$50 Gift Certificate |
$25 Gift Certificate |
B&H PHOTO VIDEO |
| choice of lens plate |
P-5 camera body plate |
Plamp |
Wimberley |
| 16 GB 450 X UDMA Compact Flash Card |
Sensor Scope |
Universal Memory Card Reader |
Delkin Devices |
| Level 3 Gift Subscription |
Level 2 Gift Subscription |
Level 1 Gift Subscription |
Nature Photographer Magazine |
| $30 Discount Certificate |
$25 Discount Certificate |
$20 Discount Certificate |
Canvas On Demand |
| Laptop Bag or Pixel Sunscreen |
Pixel Pocket Rocket |
AA Battery Holder |
Think Tank |
| $50 Gift Certificate |
$25 Gift Certificate |
$10 Gift Certificate |
Lens Coat |
| Canon/Nikon Lens Plate |
Canon/Nikon Camera Body Plate |
. |
4th Generation Design |
| . |
Better Beamer |
Better Beamer Replacement Fresnel |
Visual Echoes |
| TriKlear Kit |
TriKlear Kit |
TriKlear Kit |
Lens Pen |
| Kwik Camo Blind-Regular |
. |
. |
Essential Photo Gear |
| ABP II |
. |
. |
BIRDS AS ART |
| . |
Double Bubble |
. |
HP Marketing |
| BreezeBrowser Pro/Downloader Pro Combo |
BreezeBrowser Pro |
Downloader Pro |
Breeze Systems |
| Sito HD Version Gold Web Site |
|
|
Sito HD |
.
B&H Rebates
Click here to enjoy double rebates of up to $550 by selecting one of four Canon dSLR camera bodies (including the killer EOS-5D Mark III) and then adding a lens from a large selection. The lenses included many of the intermediate telephoto lenses that I use and recommend. This offer expires in less than ten days on June 30, 2012.
June 23rd, 2012 5D Mark III Guide Pre-publication Version Still Discounted
Click here for details. When the guide is complete it will sell for $50. Folks who purchase now will receive the final version and any updates for no additional charge so ordering now is a win-win proposition.
New York City Weekend Nature Photography Seminar December 8-9, 2012
Detail for this great weekend seminar are available here. Do consider joining Denise Ippolito and me for a great learning experience. Do click on the link to see many of Denise’s incredible tree and flower images. Camera club discounts available; see the details at the link.
Nickerson Beach/JBWR Photo-Tour August 15-17, 2012: Only 2 slots left!
Nickerson Beach/JBWR Photo-Tour August 15-17, 2012: $999. Co-leader: Denise Ippolito. Introductory slide program: Tuesday August 14 at 7pm. Limit 8/Openings:2.
For more info and a collection of images click here.
You Be the Judge: Behavior
Voting in the Behavior category of the BIRDS AS ART 1st International Bird Photography Competition will be closed at 8am on Monday morning, June 25 so you still have time to pick your five favorites from a field of 20 incredibly strong images. You can partake here.
|
|
|
This rain bathing immature male White-necked Jacobin was photographed off the veranda at Asa Wright Nature Center with the tripod-mounted Canon 800mm f/5.L IS lens, the 1.4X III TC, and the Canon EOS-1D Mark IV. ISO 1600. Evaluative metering at +1/3 stop: 1/50 sec. at f/8 in Manual mode. Fill-flash at -2 stops with the Canon Speedlite 600EX-RT with the Better Beamer.
Central sensor (by necessity) AI Servo/Rear Focus AF and recompose. Click here if you missed the Rear Focus Tutorial. Click on the image for a larger version.
|
Rain Bathing Gem
We enjoyed ideal cloudy bright conditions for much of our Trinidad visit but when it rained, the porch provided much-needed shelter. And the hummingbirds kept coming. Several White-necked Jacobins perched to enjoy a quick shower. I counseled management on setting up more pleasing perches in the vicinity of the feeders and they were all ears. Though I mentioned that the staff, the rooms, and particularly, the food at Asa Wright were all superb it bears repeating. And they were eager to help with my protein and veggie diet by preparing my food without sugar or flour but with delicious Trinidadian spices. And I got to enjoy eggplant in one form or another at most every meal.
To see more Trinidad images see the manakin post here and the Caroni Swamp adventure here.
Image Optimization
With a significant amount of noise as expected in the background I found that Denise Ippolito’s Filter/Blur Surface Blur trick out-performed Photoshop’s Noise Reduction by miles. Details of her settings are just one of many dozens of great Photoshop tips in our Digital Basics File. I ran a 50% layer of the Tonal Contrast Filter from NIK Color Efex Pro on the bird only and a 40% layer of Detail Extractor on the white tail only.
NIK
Though I am no Control Point expert I used Viveza to successfully lighten the dark upper right corner of the hummingbird image above.
As regular readers know NIK’s Color Efex Pro 4 is now an integral part of my workflow; I use it on 85% of my images. You can save 15% on all NIK products by clicking here and entering BAA in the Promo Code box at check-out. Then hit Apply to see your savings. You can download a trial copy that will work for 15 days and allow you to create full sized images.
Caligo Ventures
If you would like to stay at the avian-rich Asa Wright Nature Centre or visit Trinidad and Tobago you need to get in touch with the great folks at Caligo Ventures. They handle all North American bookings for the charming and legendary lodge located on a 2,000 acre tract of rainforest high in the Arima Valley of the Trinidad’s Northern Range. You can contact them here.
B&H Rebates
Click here to enjoy double rebates of up to $550 by selecting one of four Canon dSLR camera bodies (including the killer EOS-5D Mark III) and then adding a lens from a large selection. The lenses included many of the intermediate telephoto lenses that I use and recommend. This offer expires in less than ten days on June 30, 2012.
Shopper’s Guide.
Support both the Bulletins and the Blog by making all your B & H purchases here.
Below is a list of the gear talked about in this blog post. Thanks a stack to all who have used the Shopper’s Guide links to purchase their gear as a thank you for all the free information that we bring you on the Blog and in the Bulletins. Before you purchase anything be sure to check out the advice in our Shopper’s Guide.
Canon 800mm f/5.6L IS lens. Right now this is my all time favorite super-telephoto lens.
Canon EF 1.4X III TC. This new TC is designed to work best with the new Series II super-telephoto lenses.
Canon EOS-1D Mark IV professional digital camera body. The very best professional digital camera body that I have ever used.
Canon Speedlite 600EX-RT Canon’s latest/greatest most powerful-ever professional flash.
And from the BAA On-line Store:
LensCoats. I have a LensCoat on each of my big lenses to protect them from nicks and thus increase their re-sales value. All my big lens LensCoat stuff is in Hardwood Snow pattern.
LegCoat Tripod Leg Covers. I have four tripods active and each has a Hardwood Snow LegCoat on it to help prevent further damage to my tender shoulders 🙂 And you will love them in mega-cold weather….
GT3532 LS. This one replaces the GT3530LS Tripod and will last you a lifetime. I’ll be commenting on this new model soon. In short, I like it.
Mongoose M3.6 Tripod Head. Right now this is the best tripod head around for use with lenses that weigh less than 9 pounds. For heavier lenses, check out the Wimberley V2 head.
CR-80 Replacement Foot for Canon 800. When using the 800 on a Mongoose as I do, replacing the lens foot with this accessory lets the lens sit like a dog whether pointed up or down and prevents wind-blown spinning of your lens on breezy days by centering the lens directly over the tripod.
Double Bubble Level. You will find one in my camera’s hot shoe whenever I am not using flash.
The Lens Align Mark II. I use the Lens Align Mark II pretty much religiously to micro-adjust all of my gear an average of once a month and always before a major trip. Enjoy our free comprehensive tutorial here.
BreezeBrowser. I do not see how any digital photographer can exist without this program.
June 22nd, 2012 You Be the Judge: Behavior
The judging for the BIRDS AS ART 1st International Bird Photography Competition has been complete for some time. All of the judges including me were stunned by the quality of the images. We have been and will continue to be posting all of the images that were sent to the judges category by category. Each of you will have a chance to judge each category. Please read the directions below carefully. Your votes will not determine the winning images but it has been and will continue to be fun to see how everyone’s votes compare to the votes of the judges. So far the top pick of the public vote has matched the top pick of the judge’s panel in three of four categories. The images in the Behavior category are so incredibly strong overall that I suspect that that will not be the case here…. In retrospect there are a dozen or more images here that would have been worthy first place choices.
This was a hugely popular category. We began with 754 images. Getting down to the 18 images that were sent to the five judges was a difficult and excruciating task that took many hours. Here is another big time thank you to Darrell, Chris, Julie, and Tim. And a big time thanks also to Peter Kes and Denise Ippolito for pitching in during the first rounds of image selection. We worked very hard for nearly three full days to get from more than 5500 images down to the final 163.
The Behavior category was designed for images that exhibited interesting avian behavior. The entrants outdid themselves by a wide margin.
Before you vote, please sure to click on each image so that you can view it at full size. Then pick your five favorites and vote them 5, 4, 3, 2, and 1 with 5 being your very favorite. Like this:
Red-crowned Cranes calling in snow: 5
Prairie Chicken displaying: 4
Black-necked (Eared) Grebes mating: 3
Great-crested Grebes mating: 2
Grey Heron with fish: 1
The “Sample Vote” above is for illustrative purposes only. Please do not let the sample vote, the votes of others, or the names assigned to the images influence your vote. Please put each of your five favorites on its own line by hitting “enter” after each one. No ties; please assign a single digit, 5, 4, 3, 2 or 1 to each of your five favorites. As you will see there are a great many beautiful, interesting, and even thought-provoking images here.
If you wish to comment on any or all of the images, please do so below your five voting lines; this will make tallying the votes easier. Votes cast by those who fail to follow the formatting directions will be relegated to the Trash Bin.
The voting will be closed at 8am eastern time on Monday, June The actual winning images for this category will be posted on Monday, June 25. A tally of the public vote along with my analysis and comments will follow soon thereafter.
Thanks for voting and please remember to breathe deeply and have fun.
.
|
|
|
African Jacana on the run with chicks
|
.
.
|
|
|
Laysan Albatross feeding chick
|
.
|
|
|
Red-crowned Cranes calling in snow
|
.
|
|
|
Prairie Chicken displaying
|
.
|
|
|
Black-necked (Eared) Grebes mating
|
.
|
|
|
Great-crested Grebes mating
|
.
.
|
|
|
Gymnogene (African Harrier-Hawk)
|
.
|
|
|
Common Kingfisher with fish
|
.
|
|
|
Scissor-tailed Flycatcher with beetle
|
.
.
.
|
|
|
Long Eared Owl threat display
|
.
|
|
|
Spectacled Spider-hunter displaying
|
.
|
|
|
Marbled Godwit with sand crab
|
.
|
|
|
African Fish-Eagle capture
|
Nickerson Beach/JBWR Photo-Tour August 15-17, 2012
If you missed the announcement for this exciting trip click here for details (along with 25 pretty nice images). And click here to see a great collection of co-leader Denise Ippolito’s “Blasts from the Past” Nickerson Beach images.
June 21st, 2012
|
|
|
This Peregrine Falcon image was created with the hand held Canon 300mm f/2.8 L IS II lens, the 1.4X III TC, and the Canon EOS-5D Mark III. ISO 400. Evaluative metering +2/3 stop: 1/3200 sec. at f/5.6 in Manual mode.
Central sensor/Surround/AI Servo Rear Focus active at the moment of exposure. Click here if you missed the Rear Focus Tutorial. Click on the image to enjoy a larger version.
|
Canon EOS-5D Mark III User’s Guide Pre-Publication Version Available Now!
Save $10
Regular readers here know that I have been loving my 5D Mark III ever since I got my hands on it. I love the light weight, image files and especially the killer new AF system. Right now, the 5D III’s AF system is the best by far on any Canon camera body and that includes the vaunted EOS-1D Mark IV. Don’t get me wrong, I love my two MIV bodies and use then every time I am in the field, but for birds in flight and in action I go with my 5D MIII.
I have been working on the 5D Mark III User’s Guide for more than three months. While the end is in sight, lots of folks have been clamoring to hear what I have to say about setting up the camera and to learn about my autofocus settings and my thoughts on the various AF Selection Area Modes. I have, therefore, decided to offer a pre-publication version of this User’s Guide. When it is complete, the guide will sell for $50. It will be our most expensive camera user’s guide yet because the 5D Mark III is pretty much all-new and the menu is the most extensive ever in a Canon camera. I have put in a ton of work already and still have lots more important stuff to work on.
The pre-publication version is available now for only $40.
Here’s the best news: You will automatically receive the final version at no additional cost when it becomes available. (On the off chance that you do not, please e-mail Jim and he will rectify the situation.
Though this pre-publication copy is incomplete, it will help you set up your camera exactly as I have mine set up right now. Almost all of the stuff dealing with autofocus and the various AF Selection Area Modes is included. Even in its present form, this guide is quite extensive. You can learn everything that I know about the following important topics:
- 5D III exposure fine points
- Handling the WHITEs
- The top LCD and all camera control buttons
- 5D Mark III drive modes
- How to manually select an AF sensor
- Choosing an AF Area Selection Mode; how and why (includes extensive detail)
- Menu Item Access
- Setting a Custom White Balance
- Using Live View
- HDR Mode
Coverage of almost all Menu Items and Custom Functions including the following: Image Quality, Auto Lighting Optimizer, Highlight Tone Priority, AF Configuration Tool (includes details on the custom setting that I use), Acceleration/deceleration tracking, Tracking sensitivity, Lens drive when AF impossible, Orientation linked AF point (I love this feature on the 5D III!), Highlight alert, Histogram display, Auto rotate, Custom Shooting Mode set-up, Safety shift, using the Q button, and setting up rear focus.
The guide is–of course–written in my informal, easy-to-follow style.
Important items that are not included in the pre-publication version (but will of course be included in the final version) include:
Please note: Some Menu items will not be mentioned in this guide either because they deal only with video (which is not covered in this guide) or they are irrelevant to nature photography. Each should be left at the default setting.
To Order
To order your copy of the pre-publication version of the Canon EOS-5D Mark III User’s Guide call Jim or Jennifer at 863-692-0906 with your credit card in hand, find it quickly in the BIRDS AS ART Online Store by clicking here, or send a Paypal for $40 to us by e-mail. Overseas folks might do better with this e-mail address.
|
|
|
This Long-billed Curlew image was created with the tripod-mounted Canon 800mm f/5.L IS lens and the Canon EOS-5D Mark III. ISO 400. Evaluative metering +2/3 stop: 1/1250 sec. at f/5.6 in Manual mode.
Central Sensor–far right side Expand AF area/AI Servo Rear Focus active at the moment of exposure. Click here if you missed the Rear Focus Tutorial. Click on the image for a larger version.
|
Shopper’s Guide
Below is a list of the gear used to create the images in today’s post. Thanks a stack to all who have used the Shopper’s Guide links to purchase their gear as a thank you for all the free information that we bring you on the Blog and in the Bulletins. Before you purchase anything be sure to check out the advice in our Shopper’s Guide.
Canon 300mm f/2.8 L IS II lensI finally broke down and purchased my own copy of this great flight photography and general purpose lens.
Canon 800mm f/5.6L IS lens. Right now this is my all time favorite super-telephoto lens.
1.4X III TC The latest version of the 1.4X TC is designed to work best with the Series II Super-telephoto lenses.
Canon EOS-5D Mark III. Man, I am in love with this camera body. Both the files and the AF system are superb.
And from the BAA On-line Store:
LensCoats. I have a LensCoat on each of my big lenses to protect them from nicks and thus increase their re-sales value. All my big lens LensCoat stuff is in Hardwood Snow pattern.
LegCoat Tripod Leg Covers. I have four tripods active and each has a Hardwood Snow LegCoat on it to help prevent further damage to my tender shoulders 🙂 And you will love them in mega-cold weather….
Gizo GT3532 LS CF Tripod. This one replaces the GT3530LS Tripod and will last you a lifetime. I’ll be commenting on this new model soon. In short, I like it.
Mongoose M3.6 Tripod Head. Right now this is the best tripod head around for use with lenses that weigh less than 9 pounds. For heavier lenses, check out the Wimberley V2 head.
Double Bubble Level. You will find one in my camera’s hot shoe whenever I am not using flash.
The Lens Align Mark II. I use the Lens Align Mark II pretty much religiously to micro-adjust all of my gear an average of once a month and always before a major trip. Enjoy our free comprehensive tutorial here.
BreezeBrowser. I do not see how any digital photographer can exist without this program.
June 20th, 2012 Hand of Man Category Voting Analysis and Related Comments
Totals of the Judges’ Votes (each of 5 judges awarded each image 1-5 points):
1-Great Egret on spillway by Ron Henderson: 23
2-Parrot in box by Charles Bergman: 21
3-Duckling and Lincoln Memorial by Matt Hansen: 18
4-Starling on broken lamp cover, David Bell: 17
5-Short-eared owl and wind turbines, Arni Stinnissen: 16
6-Burrowing Owl on wooden cross, Judd Patterson: 15
7-Bird on the fence, Blake Shaw: 14
T8-Black-tailed Godwit, Kevin Elsby: 13
T8-Jay on tombstone, Richard Cox: 13
T8-Penguins and ship, Christopher Marsham: 13
T11-Ring-billed Gull and plastic bottle cap, Rodney Flowers: 11
T11-Vultures on structure: Michael Leonard: 14
13-Kingfisher on barbed wire, Girish Vaze: 10
Public Voting Totals (each of you was asked to vote your five favorite images 1-5 points with 5 being your favorite):
1-Great Egret on spillway by Ron Henderson: 183
2-Duckling and Lincoln Memorial by Matt Hansen: 165
3-Burrowing Owl on wooden cross, Judd Patterson: 101
T4-Parrot in box by Charles Bergman: 76
T4-Black-tailed Godwit, Kevin Elsby: 76
6-Kingfisher on barbed wire, Girish Vaze: 75
7-Penguins and ship, Christopher Marsham: 62
8-Jay on tombstone, Richard Cox: 54
9-Short-eared owl and wind turbines: Arni Stinnissen: 47
10-Bird on the fence, Blake Shaw:: 38
11-Starling on broken lamp cover, David Bell: 18
12-Vultures on structure, Michael Leonard: 16
13-Ring-billed Gull and plastic bottle cap: Rodney Flowers 5
Analysis of the Voting
When I posted the thirteen images for the public voting here I wrote, “So far the top pick of the public vote has matched the top pick of the judge’s panel in two of the three categories that have been posted; I suspect that the same will be true here despite that fact that there are again so many fine images.” As it turns out that I was right on the button. Great Egret on spillway was the pick of the litter and 3 of the four top vote-getters in each category were a match as well. What does that prove: a good image is a good image no matter who is looking at it.
Kudos to all whose images appear below and thanks to all who entered photographs in this hotly contested category. The images below are presented in the order of the judges’ placement along with my comments. I am sure that you will find my comments both interesting and educational, especially my constructive criticism of the first and second place images as voted by the judges’ panel.
|
|
|
Congratulations to Hand of Man Category Winner Ron Henderson of Dallas, TX. His “Great Egret on spillway” image was created at White Rock Lake in Dallas with the
Canon 70-200 mm f/2.8L IS lens (at 170mm) with the Canon EOS-5D Mark II rested on railing. ISO 100. Evaluative metering -1 1/3 stops: 1/10 sec. at f/32.
|
Great Egret on spillway by Ron Henderson
The strengths of this image include the graphic look created by the repeating pattern of the steps, the rich blue and gold tones, and the movement of the water. The Great Egret provided the perfect accent. Many great images might have been improved at capture; had Ron moved about three inches to his right he would have avoided the merge of the tip of the bird’s bill and the edge of the step….
|
|
|
Congratulations to Charles Bergman. His image, “Parrot in box” was awarded second prize in the Hand of Man Category in the BIRDS AS ART 1st Annual Bird Photography Competition. The bird in the box, a Blue-headed parrot chick (Pionus menstruus) was photographed on a small river in the Amazon Basin in eastern Ecuador. 24-120mm lens (at 42mm) with the Nikon D200. ISO 100: 1/40 sec. at f/11.
|
Parrot in box by Charles Bergman
The helpless, wet, disheveled parrot chick placed in the battered, equally bedraggled cardboard box combined to make this a powerful, story-telling image. The jungle setting and the young boatmen complete the story. Note that the perfect head angle strengthens our connection to the baby parrot. Again there was room for improvement at capture; had Charles moved a few feet to his left he could have placed the two men more on the right side of the frame to better balance the bird in the box. I believe that the resulting composition, which would have shown less of the boat, would have been even more powerful.
|
|
|
Congrats to Matt Hansen. His “Duckling and Lincoln Memorial ” image was awarded third place in the Hand of Man category. The Mallard duckling was photographed on May 23, 2010 as it emerged from the Reflecting Pool in front of the Lincoln Memorial in Washington D.C.
|
Duckling and Lincoln Memorial by Matt Hansen
We are all fans of the underdog struggling to survive. Each of the many compositional elements from the crack in the sidewalk to seemingly interested folks to the huge marble structure in the background are perfectly positioned. Those, combined with the perfect timing that captured the splash, made this one a winner. Note that Matt chose to break a basic compositional guideline by having the subject look out of (rather than in to) the frame. With good reason!
I loved this one from the get-go. It was my second pick.
|
|
|
Starling on broken lamp cover, David Bell.
|
This unique image is nicely designed. Running a contrast mask on the broken glass would likely have improved this one.
|
|
|
Short-eared owl and wind turbines, Arni Stinnissen.
|
This beautifully conceived and designed image carries with it a powerful environmental message: wind turbines kill too many birds each year. The placement of the bird relative to the blades of the two turbines and beautiful dorsal view both added to the success of this image.
|
|
|
Burrowing Owl on wooden cross, Judd Patterson.
|
Burrowing Owls rarely land on natural perches. The bird’s raised wings and haughty attitude and Judd’s careful choice of perspective (that minimized the wooden cross) made this image a popular choice with all voters.
|
|
|
Bird on the fence, Blake Shaw.
|
Simplicity rules in this beautifully designed and elegant silhouette. And the pano crop was a perfect choice. I love the slight upward angle of the fence and the singing pose. It it were mine, I would have removed the pin needle (???) on the fence behind the bird.
|
|
|
Black-tailed Godwit, Kevin Elsby.
|
A gorgeous species (heck, I am a shorebird lover) set against a lovely soft background with swatches of color are the strengths of this image. Much of the time we strive to eliminate as much “hand of man” as possible from an image. In this case, for this category, including more of the fence post would have been a winning move.
|
|
|
Jay on tombstone, Richard Cox.
|
A beautiful bird in golden light set against a pleasing background are the big pluses here. The problem here for me is the exact opposite of the problem with the godwit image: too much hand of man. Had Richard pointed the lens up or executed a pano crop I am fairly sure that the resulting image would have been stronger. Not to mention some tombstone clean-up.
|
|
,
Penguins and ship, Christopher Marsham.
|
Christopher’s well composed image which features the juxtaposition of a group of Emperor Penguins with the ship in the background is quite interesting. The crossed flags are perfectly positioned in the frame. I feel that this image needed a bit more room all around.
|
|
|
Ring-billed Gull and plastic bottle cap, Rodney Flowers.
|
I really like the simplicity of this image. The bright sun was well handled, the raised wings added interest, and the bright blue plastic bottle cap with a bit of sand icing was the perfect hand of man touch.
|
|
|
Vultures on structure, Michael Leonard. 14
|
Here I love all the huge elements of the structure, especially the diagonal ones. The image is beautifully framed and designed, and Micheal did a great job of image processing as he dealt with mixed lighting. Though most of the birds are in the sun and some in the shade the image has a nice even (low contrast) look to it.
|
|
|
Kingfisher on barbed wire, Girish Vaze.
|
Barbed wire, a lovely bird, and a sweet background are the strengths of this image. A small crop from the left and below would have strengthened it as would a bit more head turn towards us. This image was much more popular with the public than with the panel of judges.
Questions and Comments Welcome
As always, your questions and comments are welcome. Lastly and as always, I would be glad to learn of any typos.
June 19th, 2012

How would I deal with the large light area directly behind the bird? Read on for the solution.
|
The Image Optimization Process
The bird in this image was sitting in the shade. We were not working at a set-up; the bird was sitting in a tree waiting to come into the feeder. We had put some perches up but the grosbeaks preferred landing in the tree. As you can see in the before image above, the light-toned leaves directly behind the bird were lit by the sun. In the past I have simply deleted similar images with large light areas behind the subject. But I had nothing on this species and wanted to do my best so I put my thinking cap on.
I used Select/Color Range to select the lightest tones and placed them on on their own layer. The I ran a Linear Burn at 50% on that layer and added a Layer Mask. I used a 30% Opacity brush to erase the darker outer edges of the selection. Then I decreased the Opacity of the Linear Burn until I was happy with the somewhat darker, less distracting light-toned area behind the bird. Additional clean up was as usual with the Patch Tool, the Clone Stamp Tool, the Spot Healing Brush, and several Quick Masks (with Layer Masks added for fine tuning). I lightened the bird’s face with a Tim Grey Dodge and Burn layer. I selected the bird only with the Quick Selection Tool and put the bird on its own layer. Then I applied a 40% Tonal Contrast filter from NIK Color Efex Pro. I followed that with a 70% Detail Extractor filter applied to the whole image. I added a Hide-All Mask and then painted away the white of the wing to restore detail and removed some BLUE from the WHITEs by hitting Control U, Hue-Saturation on a layer, selecting the BLUE channel only, and reducing the saturation by 20 points. Finally I sharpened the bird’s face only with a Contrast Mask.
Select/Color Range, Linear Burns, Layer Masks, the Patch Tool, the Clone Stamp Tool, the Spot Healing Brush, several Quick Masking, Tim Grey Dodge and Burn, Contrast Masks, and pretty much everything else mentioned above except for the NIK stuff is covered in detail in our Digital Basics File, an e-mailable PDF.
|
|
The Optimized Image
This adult male Evening Grosbeak was photographed at a feeder in a private backyard in Sherwood, OR with the tripod-mounted Canon 800mm f/5.L IS lens and the Canon EOS-1D Mark IV. ISO 400. Evaluative metering at +1/3 stop: 1/250 sec. at f/7. in Manual mode. Fill flash at -1 stop with the Canon Speedlite 600EX-RT and a Better Beamer.
Two sensors above the Central sensor AI Servo/Rear Focus AF active at the moment of exposure. Click here if you missed the Rear Focus Tutorial. Click on the image for a larger version.
|
Thinking it Through…
The point here is that you need to learn to use the Photoshop skills and tools that you already have mastered to create new solutions to problems old or new. The concept of using a Linear Burn to darken the large light area and then soft erasing the edges was a new one for me. The next time that you face a difficult situation in post processing simply put your thinking cap on and consider ways to use what you already know to solve the problem.
Support both the Bulletins and the Blog by making all your B & H purchases here.
Below is a list of the gear talked about in this blog post. Thanks a stack to all who have used the Shopper’s Guide links to purchase their gear as a thank you for all the free information that we bring you on the Blog and in the Bulletins. Before you purchase anything be sure to check out the advice in our Shopper’s Guide.
Shopper’s Guide
Below is a list of the gear used to create the images in today’s post. Thanks a stack to all who have used the Shopper’s Guide links to purchase their gear as a thank you for all the free information that we bring you on the Blog and in the Bulletins. Before you purchase anything be sure to check out the advice in our Shopper’s Guide.
Canon 800mm f/5.6L IS lens. Right now this is my all time favorite super-telephoto lens.
Canon EOS-1D Mark IV professional digital camera body. The very best professional digital camera body that I have ever used.
Canon Speedlite 600EX-RT Canon’s latest/greatest most powerful-ever professional flash.
And from the BAA On-line Store:
LensCoats. I have a LensCoat on each of my big lenses to protect them from nicks and thus increase their re-sales value. All my big lens LensCoat stuff is in Hardwood Snow pattern.
LegCoat Tripod Leg Covers. I have four tripods active and each has a Hardwood Snow LegCoat on it to help prevent further damage to my tender shoulders 🙂 And you will love them in mega-cold weather….
GT3532 LS. This one replaces the GT3530LS Tripod and will last you a lifetime. I’ll be commenting on this new model soon. In short, I like it.
Mongoose M3.6 Tripod Head. Right now this is the best tripod head around for use with lenses that weigh less than 9 pounds. For heavier lenses, check out the Wimberley V2 head.
CR-80 Replacement Foot for Canon 800. When using the 800 on a Mongoose as I do, replacing the lens foot with this accessory lets the lens sit like a dog whether pointed up or down and prevents wind-blown spinning of your lens on breezy days by centering the lens directly over the tripod.
Double Bubble Level. You will find one in my camera’s hot shoe whenever I am not using flash.
The Lens Align Mark II. I use the Lens Align Mark II pretty much religiously to micro-adjust all of my gear an average of once a month and always before a major trip. Enjoy our free comprehensive tutorial here.
BreezeBrowser. I do not see how any digital photographer can exist without this program.
June 18th, 2012
|
|
|
Congratulations to Hand of Man Category Winner Ron Henderson of Dallas, TX. His “Great Egret on spillway” image was created at White Rock Lake in Dallas with the
Canon 70-200 mm f/2.8L IS lens (at 170mm) with the Canon EOS-5D Mark II rested on railing. ISO 100. Evaluative metering -1 1/3 stops: 1/10 sec. at f/32.
|
Great Egret on spillway by Ron Henderson
The strengths of this image include the graphic look created by the repeating pattern of the steps, the rich blue and gold tones, and the movement of the water. The Great Egret provided the perfect accent.
From Ron:
This picture was made while I was on a walk by the lake with my daughter Emily, age 13 on a late afternoon near the end of February, 2012 . I used a slow shutter speed to blur the rushing water.
|
|
|
Congratulations to Charles Bergman. His image, “Parrot in box” was awarded second prize in the Hand of Man Category in the BIRDS AS ART 1st Annual Bird Photography Competition. The bird in the box, a Blue-headed parrot chick (Pionus menstruus) was photographed on a small river in the Amazon Basin in eastern Ecuador. 24-120mm lens (at 42mm) with the Nikon D200. ISO 100: 1/40 sec. at f/11.
|
Parrot in box by Charles Bergman
The helpless, wet, disheveled parrot chick placed in the battered, equally bedraggled cardboard box combined to make this a powerful, story-telling image. The jungle setting and the young boatmen complete the story. Note that the perfect head angle strengthens our connection to the baby parrot.
From Charles:
I was traveling in a remote part of the Amazon, staying with the people in indigenous communities. This chick had recently been removed from a nest in a hollow tree and placed in a ragged cardboard box; it would be transported into the wild bird trade. It is legal for indigenous people to capture parrots and other creatures for pets; it is not legal for them to sell them. The trade in the back country is an open secret.
|
|
|
Congrats to Matt Hansen. His “Duckling and Lincoln Memorial ” image was awarded third place in the Hand of Man category. The Mallard duckling was photographed on May 23, 2010 as it emerged from the Reflecting Pool in front of the Lincoln Memorial in Washington D.C. .
|
Duckling and Lincoln Memorial by Matt Hansen
We are all fans of the underdog struggling to survive. Each of the many compositional elements from the crack in the sidewalk to seemingly interested folks to the huge marble structure in the background are perfectly positioned. Those, combined with the perfect timing that captured the splash, made this one a winner. Note that Matt chose to break a basic compositional guideline by having the subject look out of (rather than in to) the frame. With good reason!
From Matt:
This image is part of the ongoing “Uniquely D.C.” project that I’m working on, portraying the monuments and memorials in unique ways. A Mallard family was heading toward the edge of the Reflecting Pool and I knew that a possible moment was about to happen. This duckling, the runt, had some problems jumping high enough to get out but finally was able to summon enough strength to make it over the ledge.
This iot a photo I would usually submit to competitions, but in the guidelines you mentioned that Photoshop was ok, so I figured, “Why not?” If you compare the raw and optimized images you will see that a man in the background was removed as I felt he distracted from the Memorial. I do have an optimized version with him included if you prefer.
Congrats!
Congrats to the three winners above. One hundred sixty four images survived the first cut in this category. You can see the thirteen images that were sent to the judges here. Getting to the final round is quite an accomplishment. Prizes (see below) will be shipped once all the winners are announced as several folks had more than one top three images. Be sure to patronize our sponsors; without them, this contest would not exist. There will be more educational stuff from this category coming soon.
| First Prize |
Runner Up |
Highly Commended |
Sponsor |
| $100 Gift Certificate |
$50 Gift Certificate |
$25 Gift Certificate |
B&H PHOTO VIDEO |
| choice of lens plate |
P-5 camera body plate |
Plamp |
Wimberley |
| 16 GB 450 X UDMA Compact Flash Card |
Sensor Scope |
Universal Memory Card Reader |
Delkin Devices |
| Level 3 Gift Subscription |
Level 2 Gift Subscription |
Level 1 Gift Subscription |
Nature Photographer Magazine |
| $30 Discount Certificate |
$25 Discount Certificate |
$20 Discount Certificate |
Canvas On Demand |
| Laptop Bag or Pixel Sunscreen |
Pixel Pocket Rocket |
AA Battery Holder |
Think Tank |
| $50 Gift Certificate |
$25 Gift Certificate |
$10 Gift Certificate |
Lens Coat |
| Canon/Nikon Lens Plate |
Canon/Nikon Camera Body Plate |
. |
4th Generation Design |
| . |
Better Beamer |
Better Beamer Replacement Fresnel |
Visual Echoes |
| TriKlear Kit |
TriKlear Kit |
TriKlear Kit |
Lens Pen |
| LA MkII |
. |
. |
RAW Workflow |
| ABP II |
. |
. |
BIRDS AS ART |
| . |
Double Bubble |
. |
HP Marketing |
| BreezeBrowser Pro/Downloader Pro Combo |
BreezeBrowser Pro |
Downloader Pro |
Breeze Systems |
| Sito HD Version Gold Web Site |
|
|
Sito HD |
|
|

